¡Que gusto saludarlos, amigos!
What a pleasure to greet you, friends!
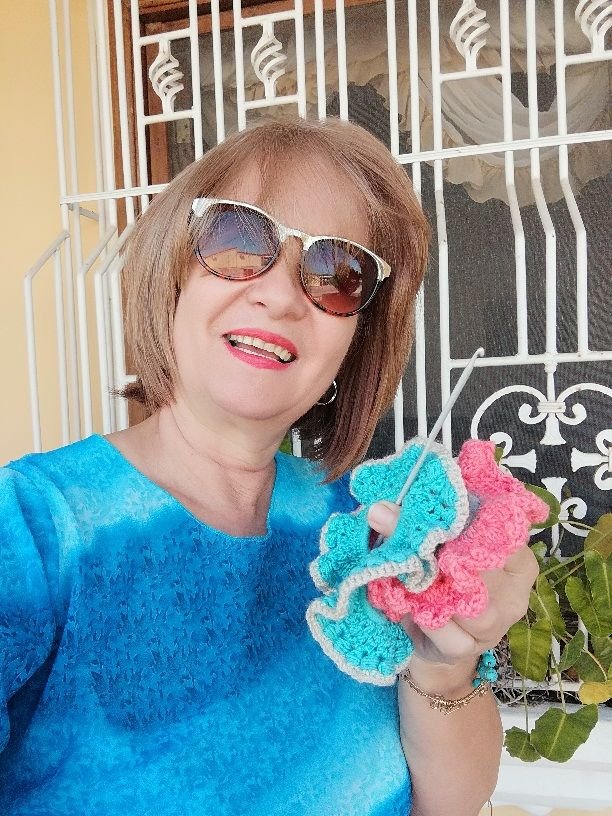
Hoy les compartiré dos bellos y funcionales "coleros" tejidos a crochet, o como le decimos en Venezuela: "moñeras" o "colas de caballo".
Today I will share with you two beautiful and functional "coleros" crocheted, or as we say in Venezuela: "moñeras" or "ponytails".
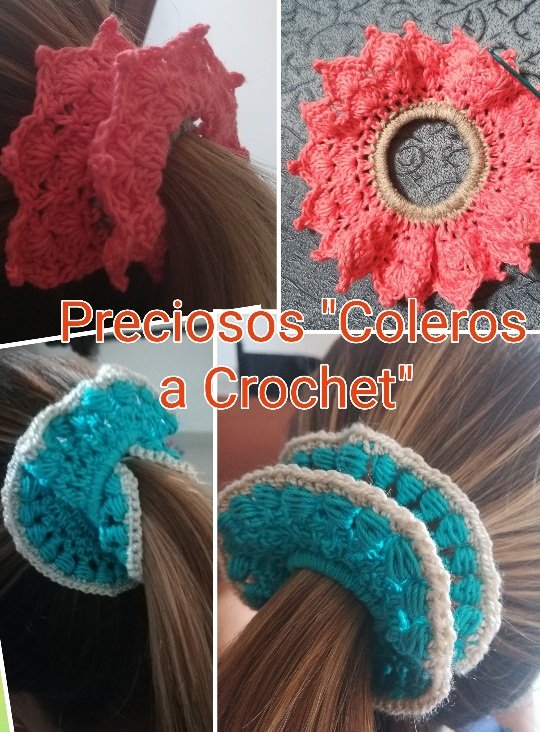
Los coleros con unas elásticas que sirven para sujetar el cabello y mantenerlo elegantemente recogido. Actualmente están de moda porque motivado a la pandemia muchas mujeres no pueden visitar los salones de belleza. Aquí te muestro como tejer estos prácticos y útiles coleros.
The coleros with elastic bands that serve to hold the hair and keep it elegantly collected. They are currently in fashion because, motivated by the pandemic, many women cannot visit beauty salons. Here I show you how to weave these practical and useful coleros.
Materiales / Materials
- Hilos para tejer de color: anaranjado, azul y beige
- Aguja para tejer a crochet N°2
- Gomas para recoger el cabello o elástica
- Tijera
- Aguja lanera (no es indispensable)
- Color knitting threads: orange, blue and beige
- Crochet needle N ° 2
- Rubber bands to collect hair
- Scissor
- Wool needle (not essential)

Paso a paso para tejer el Colero Azul y Beige // Step by step to knit the Blue and Beige Colero
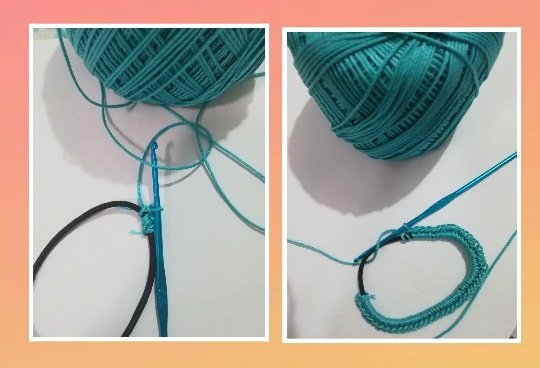
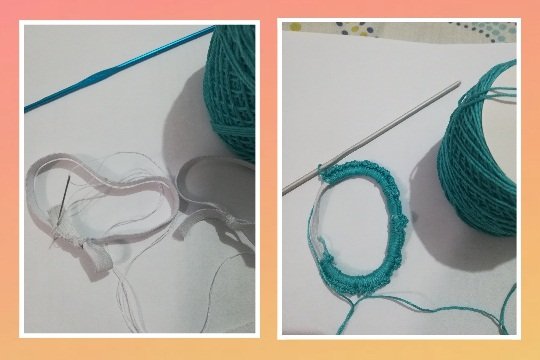
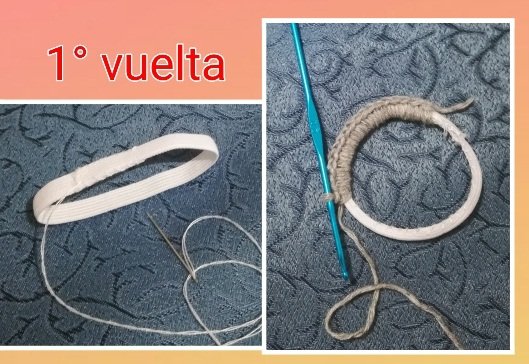
1° Vuelta: Recubrí toda la elástica con el hilo azul realizando puntos bajos y cerré con un punto deslizado.
1st round: I covered the entire elastic with the blue thread making single crochets and closed with a slip stitch.
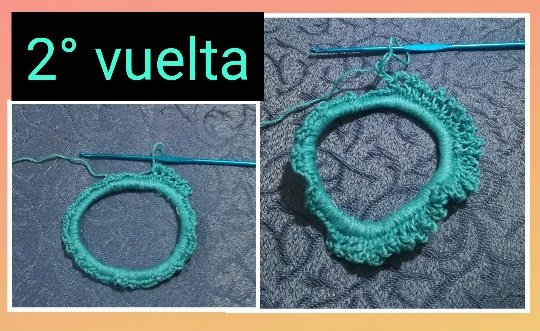
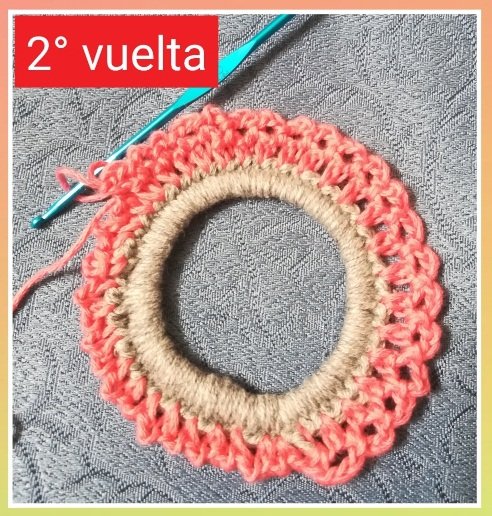
2° Vuelta: Tejí 3 cadenetas y me posicioné en la 3° cadena enganchando con un punto bajo, se deja una cadena por el medio sin trabajar, se repite esa misma secuencia hasta finalizar la vuelta.
2nd round: I worked 3 chains and I positioned myself in the 3rd chain hooking with a single crochet, a chain is left in the middle without working, that same sequence is repeated until the end of the round.
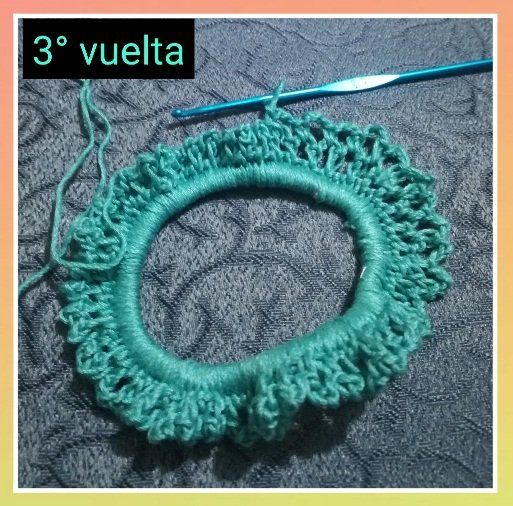
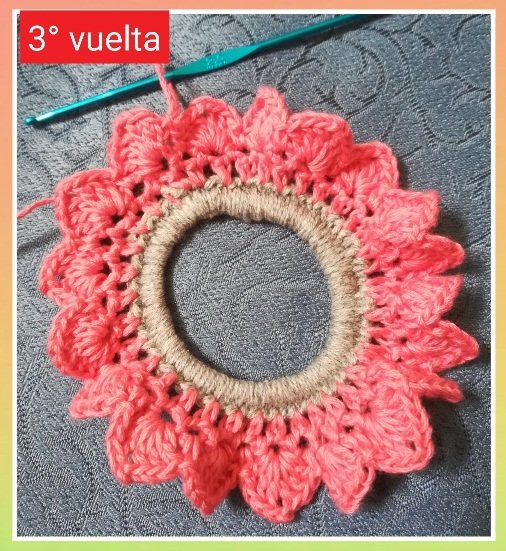
3° Vuelta: Levantar 5 cadenetas, introducir el ganchillo en el centro de los 3 puntos de la vuelta anterior y efectuar un punto bajo. Repita este procedimiento hasta alcanzar el final de la vuelta.
3rd round: Pick up 5 chains, insert the hook in the center of the 3 stitches from the previous round and make a single crochet. Repeat this procedure until you reach the end of the round.
Punto Abalorio // Bead Point.
4° Vuelta: Levantamos 3 cadenetas y giramos la labor, agarramos hebra e insertamos en la 3° cadena de la vuelta anterior y realizamos un punto alto, luego enlazamos y traemos la aguja rodeando el punto alto, sacamos hilo, lo estiramos y lo dejamos allí pendiente (en total haremos 3 lazadas a medio terminar dentro del agujero que hay entre las primeras 3 cadenetas y la lazada) y luego se saca el ganchillo con cuidado por las tres lazadas y aseguramos con un punto deslizado. Seguidamente enlazamos dejamos libre un punto y vamos al siguiente para tejer un punto alto y repetir otro punto abalorio y así sucesivamente hasta cerrar la ronda con un punto alto.
4th round: We pick up 3 chains and turn the piece, we grab the yarn and insert in the 3rd chain of the previous round and make a double crochet, then we link and bring the needle around the point high, we draw yarn, stretch it and leave it there pending (in total we will make 3 half-finished loops inside the hole between the first 3 chains and the loop) and then the crochet is carefully removed through the three loops and secured with a slip point. Then we link, leave one point free and go to the next to knit a double crochet and repeat another bead stitch and so on until the round is closed with a double crochet.

Para culminar empaté hilo beige y bordee todo el tejido con puntos bajos para realzar el colero.
To finish, tie beige thread and border the entire fabric with single crochets to enhance the colero.
Paso a paso para tejer el colero Anaranjado y Beige // Step by step to knit the Orange and Beige colero
1° Vuelta: Coger el elástico y pasar el hilo beige hacia el centro, agarrar el ganchillo y anudar el hilo. Recubrir toda la elástica realizando puntos bajos (la cantidad de puntos bajos dependerá del diámetro que obtenemos al unir los extremos de la elástica) y finalizar la vuelta con un punto deslizado.
1st round: Take the elastic and pass the beige thread towards the center, grab the hook and knot the thread. Cover the entire elastic by making single crochets (the number of single crochets will depend on the diameter obtained when joining the ends of the elastic) and finish the round with a slip stitch.
2° Vuelta: Anudar el hilo color naranja e iniciar con 3 cadenetas, luego saltar una cadena y realizar un punto bajo . Seguidamente tejer 3 cadenetas, saltar una cadeneta para hacer luego un punto bajo y continuar así hasta finalizar con una cadena y un punto alto ensartado justo donde se dio inicio a esta 2° vuelta.
2nd round: Knot the orange thread and start with chain 3, then skip a chain and make a single crochet. Then chain 3, skip a chain to then make a single crochet and continue like this until finishing with a chain and a double crochet strung right where this 2nd round started.
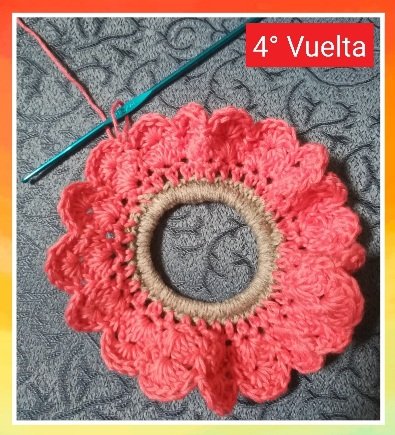
3° Vuelta: Levantar 3 cadenetas y realizar dos puntos altos en ese mismo arco, enseguida se tejen 2 cadenas y se repiten tres puntos altos en el mismo arco. Luego se efectúa un punto bajo en el arco siguiente y se avanza al otro arco para repetir 3 puntos altos, 2 cadenetas y 3 puntos altos en el mismo arco, alternando con un punto bajo en el arco siguiente, seguidos por 3 puntos altos, 2 cadenetas y 3 puntos altos en el mismo arco y así hasta cerrar la vuelta.
3rd Round: Pick up 3 chains and make two double crochets in the same space, then 2 chains are knitted and three double crochets are repeated in the same space. Then a single crochet is made in the next space-space and you advance to the other space to repeat 3 double crochets, 2 chains and 3 double crochets in the same space, alternating with a single crochet in the next space, followed by 3 double crochets, 2 chain stitches and 3 treble crochets in the same chain space and so on until the round is closed.
4° Vuelta: Realizar tres puntos rasos encima de los 3 primeros puntos altos de la 3° vuelta y tejer 6 puntos altos en el espacio de las 2 cadenas de la vuelta anterior, luego trabajar un punto bajo encima del punto bajo de la 3° vuelta e inmediatamente repetir 6 puntos altos en el centro de las 2 cadenetas, repetir la misma secuencia hasta finalizar la vuelta.
4th Round: Work three slip stitches over the first 3 treble crochets of the 3rd round and knit 6 treble crochets in the space of the 2 chains from the previous round, then work a single crochet above the single crochet of the 3rd round and immediately repeat 6 treble crochets in the center of the 2 chains, repeat the same sequence until the end of the round.
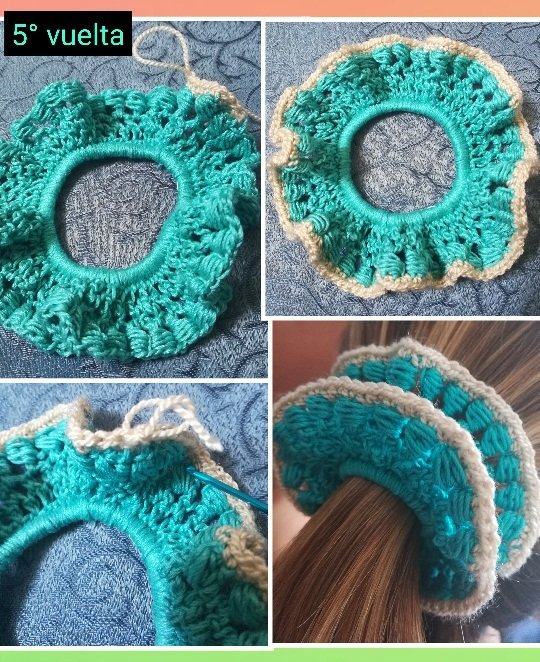
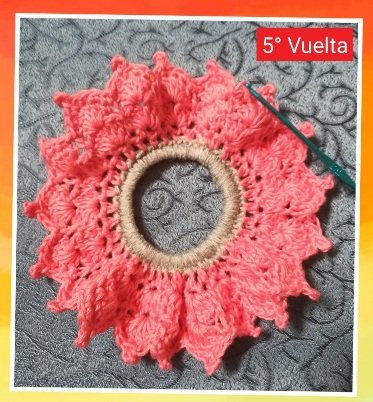
5° Vuelta: Se tejen puntos rasos en todos los puntos de la vuelta anterior excepto entre el 3° y 4° punto alto en donde haremos un picot. Los picot se logran tejiendo tres cadenetas y cerrándolas en la 1 cadeneta del mismo picot.
5th round: Slip stitches are worked in all the stitches of the previous round except between the 3rd and 4th treble crochet where we will picot. The picot are achieved by knitting three chains and closing them in the 1 chain of the same picot.
Se concluye cortando el hilo, anudándolo por el medio de la última cadeneta, se enhebra el hilo en la aguja lanera y se inserta en el tejido hasta perder la hebra.
It is concluded by cutting the thread, knotting it through the middle of the last chain, the thread is threaded on the yarn needle and inserted into the fabric until the thread is lost.
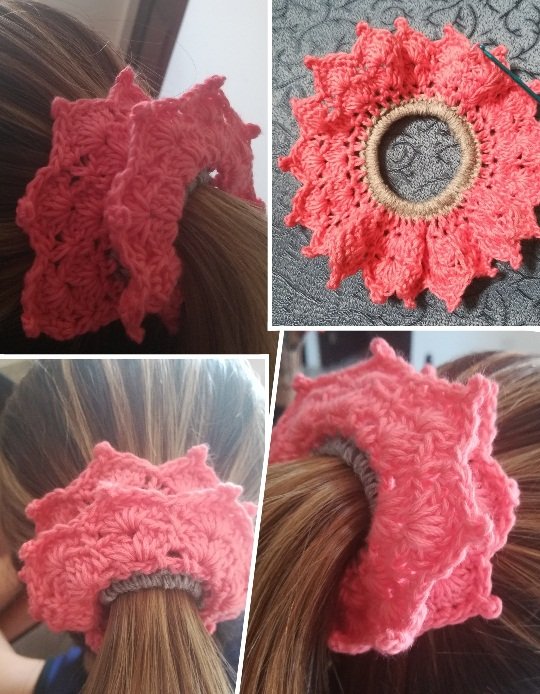
Anímate, estos son proyectos muy fáciles y no requieren de mucho tiempo.
Cheer up, these are very easy projects and don't require much time.
¡Muchas gracias por leer, se les quiere!
Thank you very much for reading, you are loved!
¡HASTA UNA PRÓXIMA ENTREGA!
Fotos propias. Imágenes editadas por mí en YouCollage.
Own photos. Images edited by me in FotoCollage.

te quedaron muy lindos, siempre usaba de esos porque mi hermana los tejía. gracias por compartir.
Son muy fáciles de tejer y de mucha utilidad. Especiales para los días de intenso calor. Gracias por leer.
Te quedaron muy bellos, bendiciones...