Hola queridos creativos de Hive.!
Hello dear Hive creatives!
![186486136_345178877043044_4461499311785239756_n.jpg](https://images.hive.blog/DQmZFo7RfqCAbbLYpkpgTLSkzP1thR8KwCoaMubLxUJiHM8/186486136_345178877043044_4461499311785239756_n.jpg)
Bienvenidos a mi blog.
Welcome to my blog.
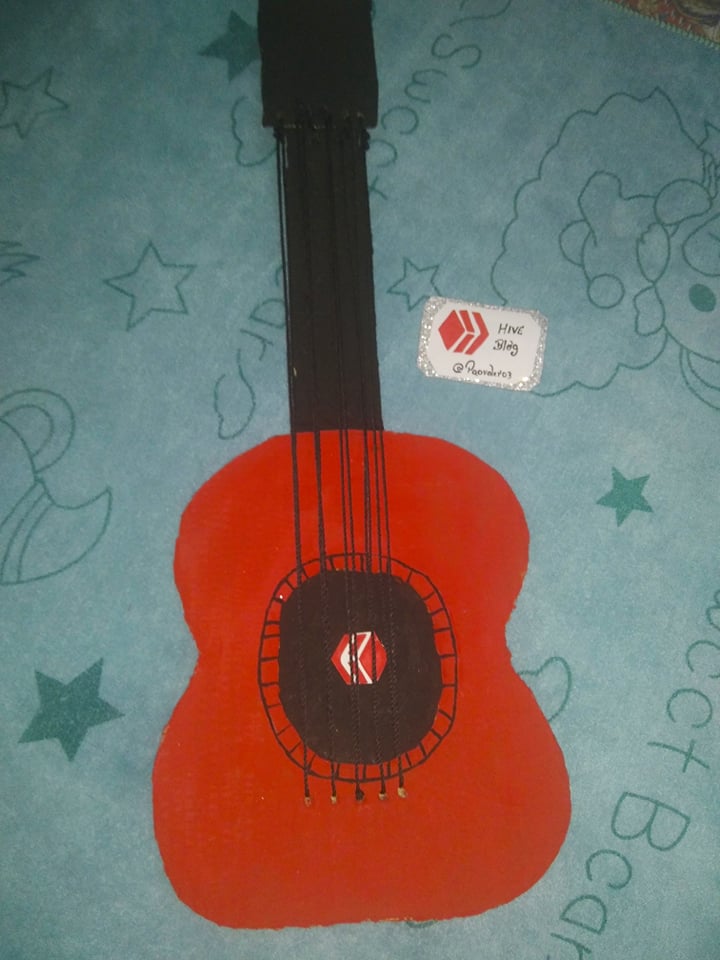
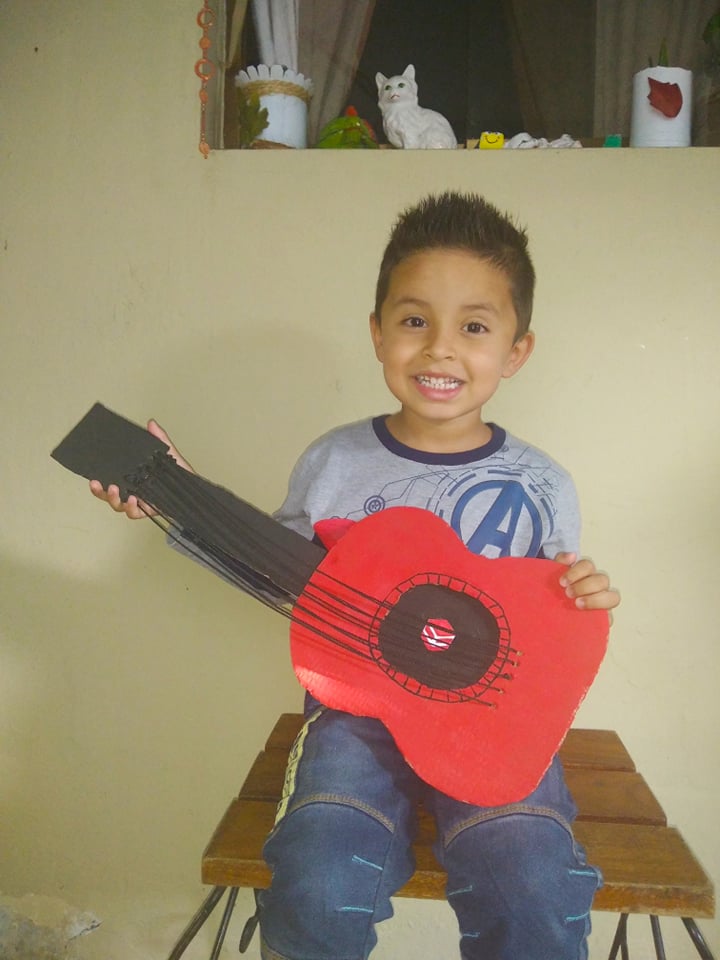
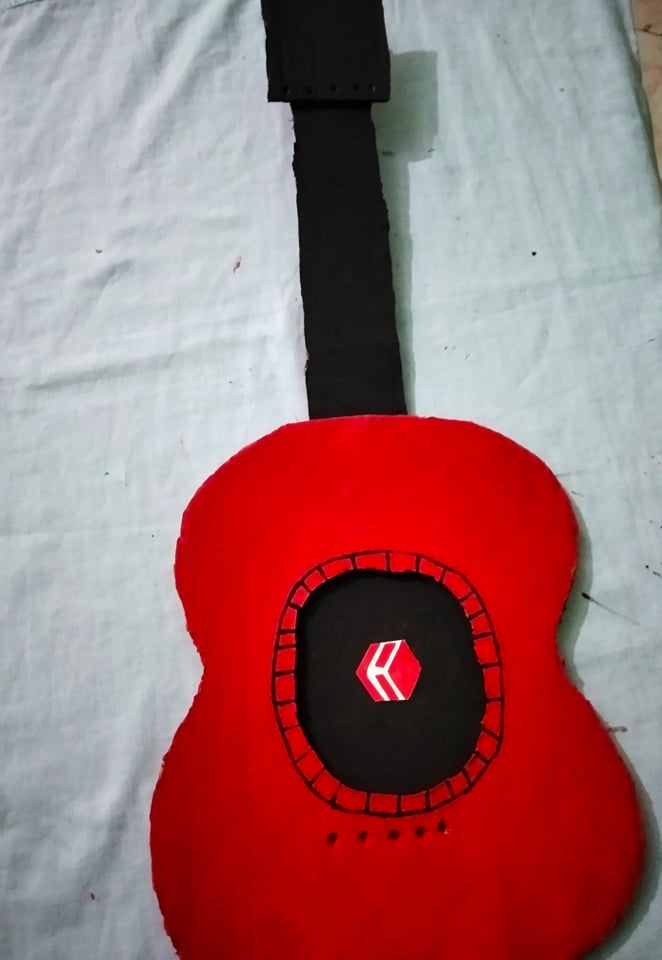
Hoy les traigo una linda guitarra que hice reciclando una caja de cartón, y fascinada con todo lo que podemos hacer con materiales que no se usaban.
Today I bring you a beautiful guitar that I made recycling a cardboard box, and fascinated with all that we can do with materials that were not used.
Y no podía faltar una creatividad en honor a la música.
And a creativity in honor of music could not be missing.
![185548082_3026735627547646_460498442552034682_n.jpg](https://images.hive.blog/DQmZm23B8Kx1vH8sEgLskG78iTNrBhLtyJ3k3NmytoSGD8s/185548082_3026735627547646_460498442552034682_n.jpg)
Para realizarla utilice:
- Caja de cartón.
- Silicon caliente.
- Pinturas.
- Cuchillo.
- Hilo de naylon.
To do it use:
- Carton box.
- Hot silicon.
- Paintings.
- Knife.
- Nylon thread.
![184825254_1411466592553686_6524804675592106977_n.jpg](https://images.hive.blog/DQmSThAf97Wsh7cUUPpQKCyuS7R3sCCmtsH81nnRCXvKSrv/184825254_1411466592553686_6524804675592106977_n.jpg)
Pasos:
Steps:
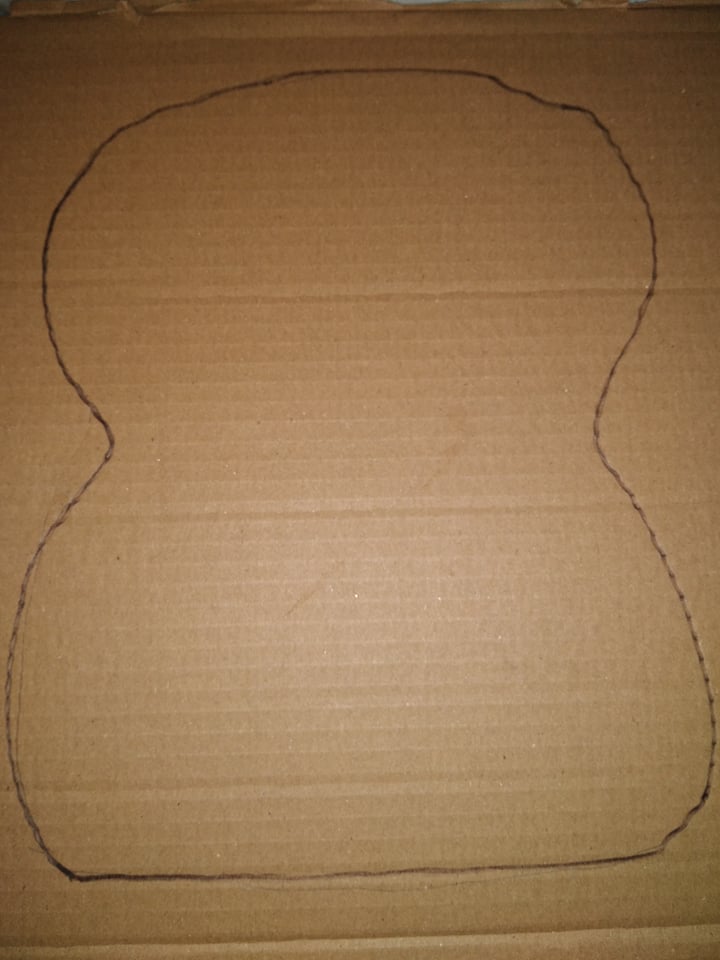
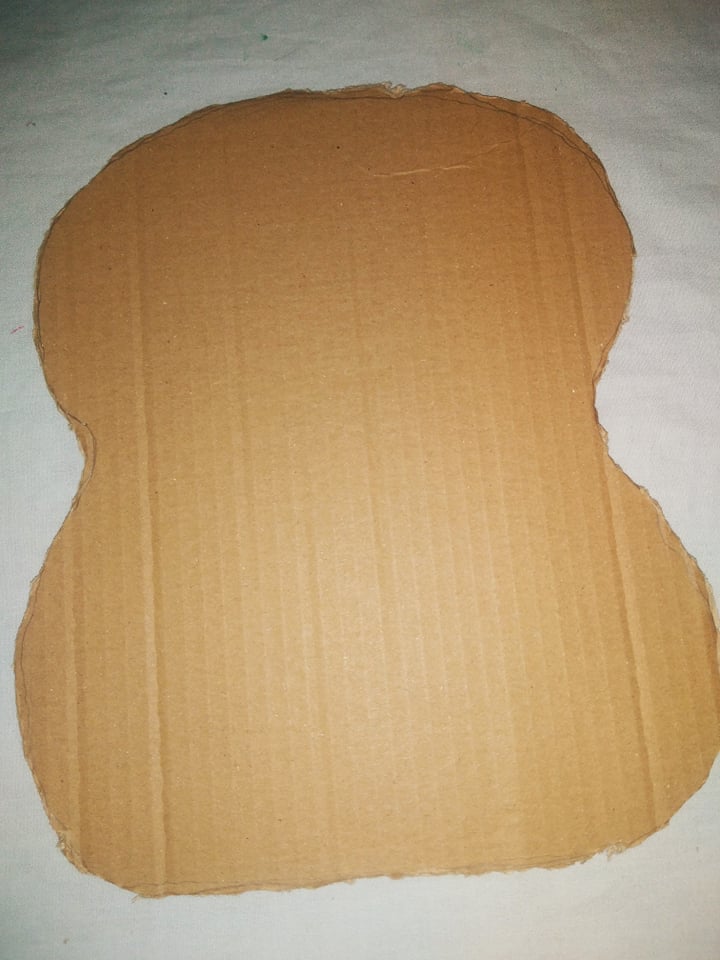
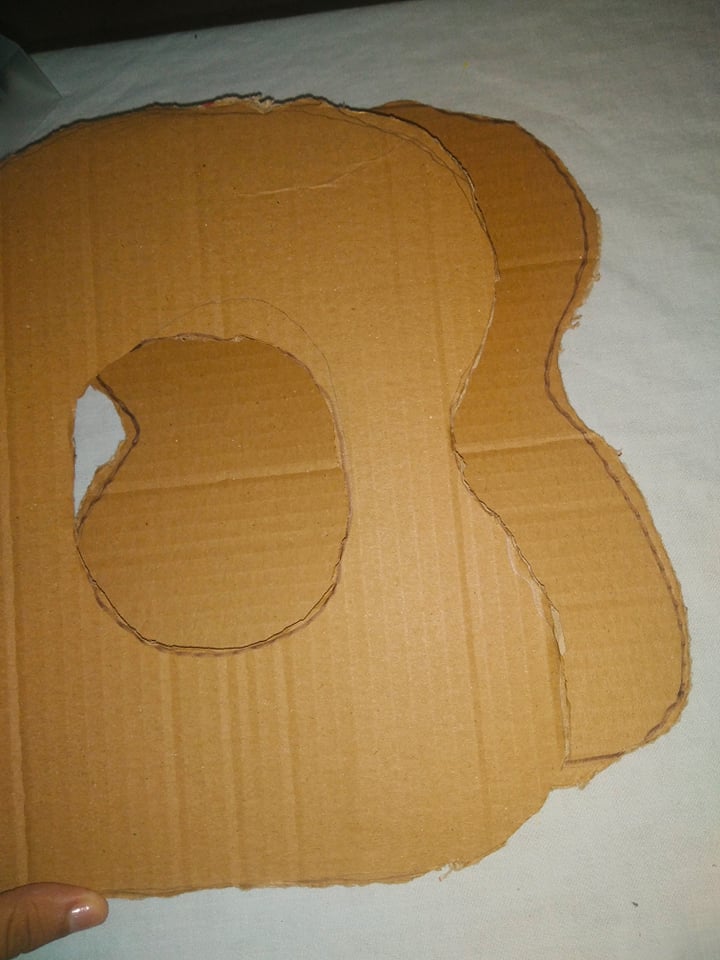
- Agarre la caja marque y recorte la figura de la guitarra 2 veces.
- Grab the box mark and cut out the guitar figure 2 times
![186484488_217464326849663_662165119014658228_n.jpg](https://images.hive.blog/DQme7s3FC8BEKpNoYCN6j4ctgrzm2hBoaQfDDyttLkgaphM/186484488_217464326849663_662165119014658228_n.jpg)
![186486535_789792345236640_8596104283381681484_n.jpg](https://images.hive.blog/DQmYQPf18hrSCqWiGuAwpYeu36zN1gPEjNRKJz7VCBZsmFu/186486535_789792345236640_8596104283381681484_n.jpg)
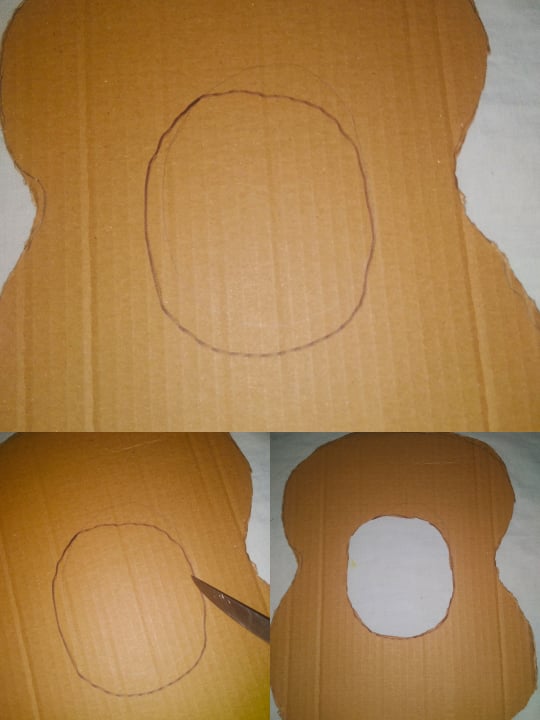
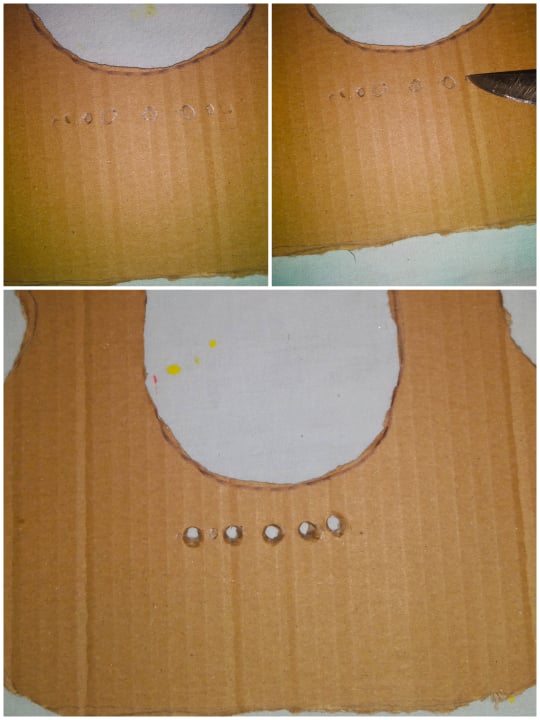
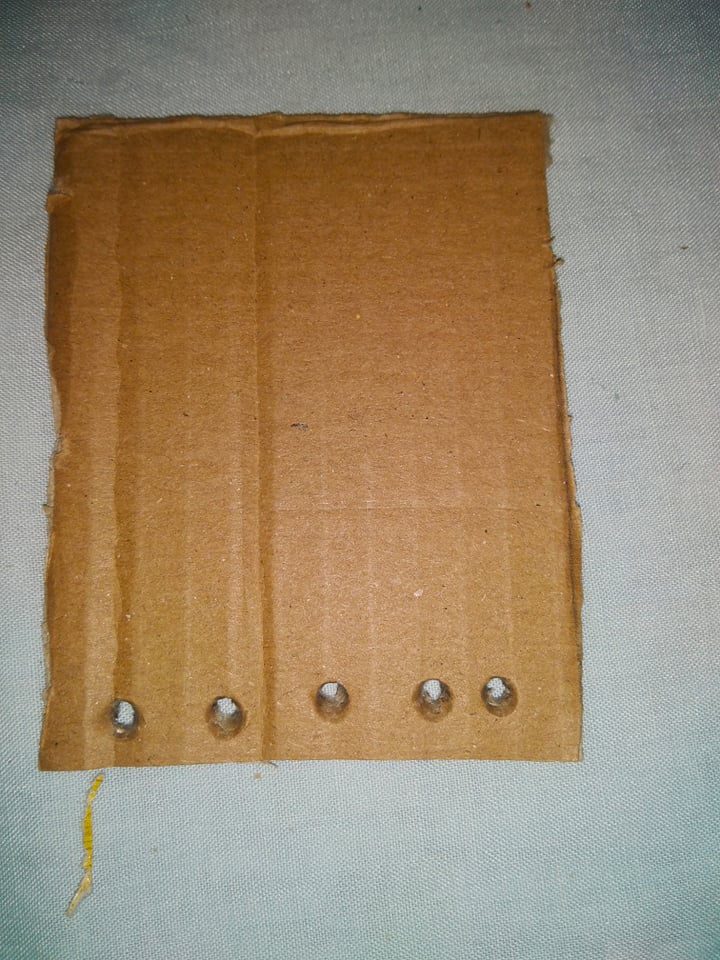
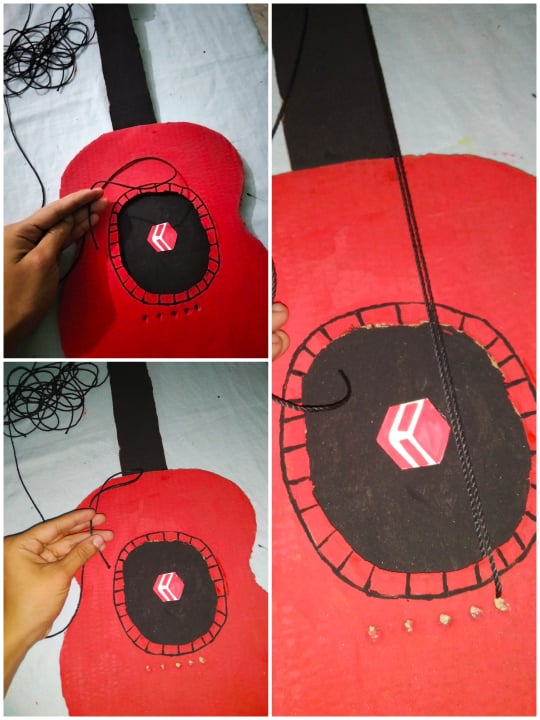
- En una de las figura, le dibuje un circulo en centro y lo corte que sera la boca de la guitarra . Debajo del circulo abrí 5 orificios que serian el puente donde van las cuerdas.
- In one of the figures, draw a circle in the center and cut the sound hole of the guitar. Under the circle I opened 5 holes that would be the bridge where the strings go.
![183517608_749861159034244_2940421662260208025_n.jpg](https://images.hive.blog/DQmctG9vR9Y9ECL7p1ztZQUo3D3fhu8HcVY5pJ9DYd8uuBH/183517608_749861159034244_2940421662260208025_n.jpg)
![187184135_806312686978101_7567119217237711434_n.jpg](https://images.hive.blog/DQmdgpNdiWgMwM9CmjDAVkqLCHZ4wWconR7SPhkQ3zVRtu2/187184135_806312686978101_7567119217237711434_n.jpg)
![185441576_2935805330079704_1154369152290139488_n.jpg](https://images.hive.blog/DQmNuURK18oKKzLvyXw3VfzzupxjWyFr3J7vA6eVydsiz3C/185441576_2935805330079704_1154369152290139488_n.jpg)
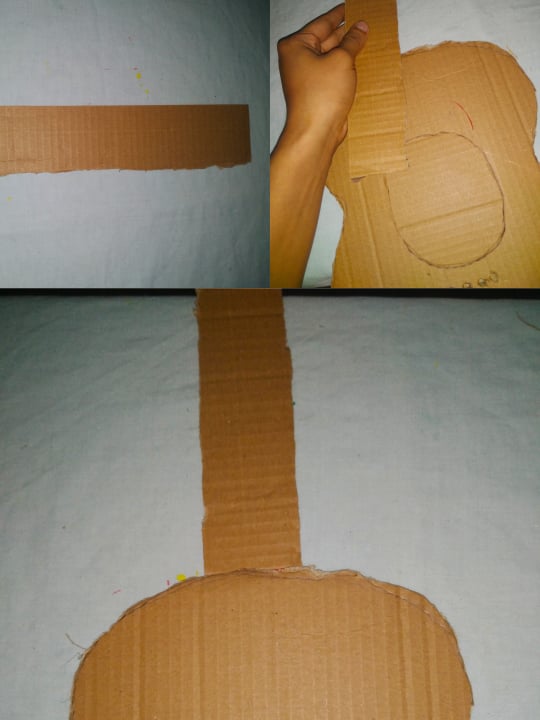
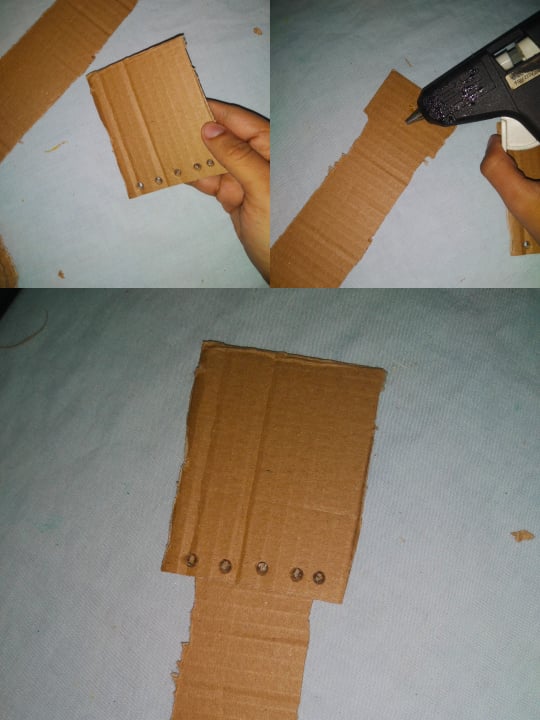
- Agarre una tira de cartón larga y la pegue en la parte superior para hacer el mástil de la guitarra.
- Take a long cardboard strip and glue it on top to make the neck of the guitar.
![186494968_374777913937803_4906723460521025050_n.jpg](https://images.hive.blog/DQmdmsottii1WA8jyxua9P9vCLbWGEqqx7JSAXj7aRYiEbb/186494968_374777913937803_4906723460521025050_n.jpg)
- Corte un cuadrado, le abrí 5 orificios para hacer la pala de la guitarra y lo pegue en el extremo del mástil.
- Cut a square, I cut 5 holes to make the headstock of the guitar and glue it to the end of the neck.
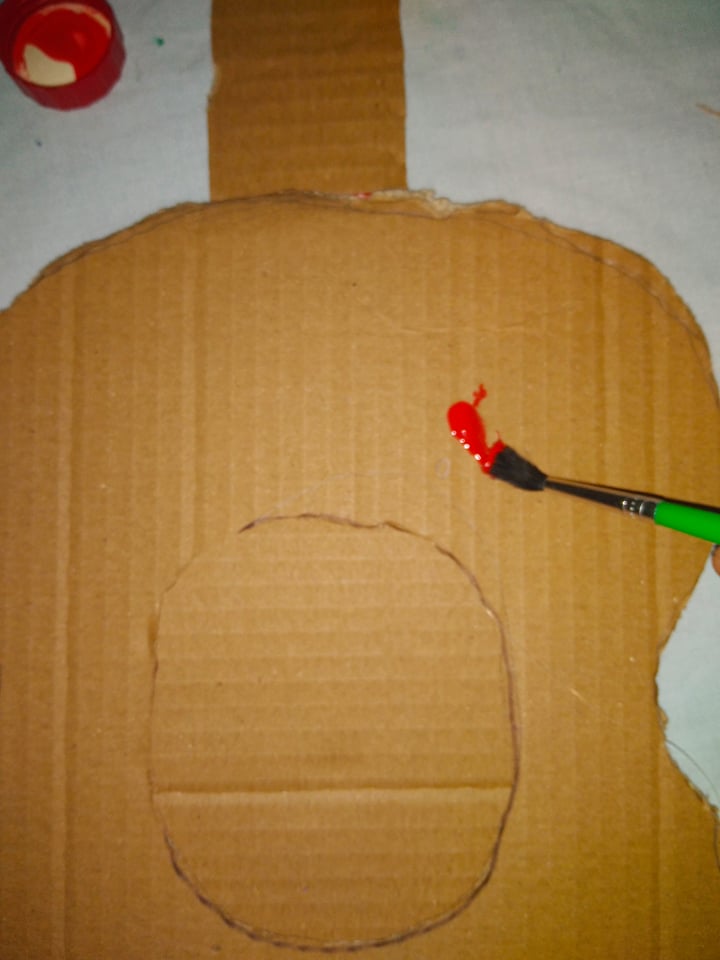
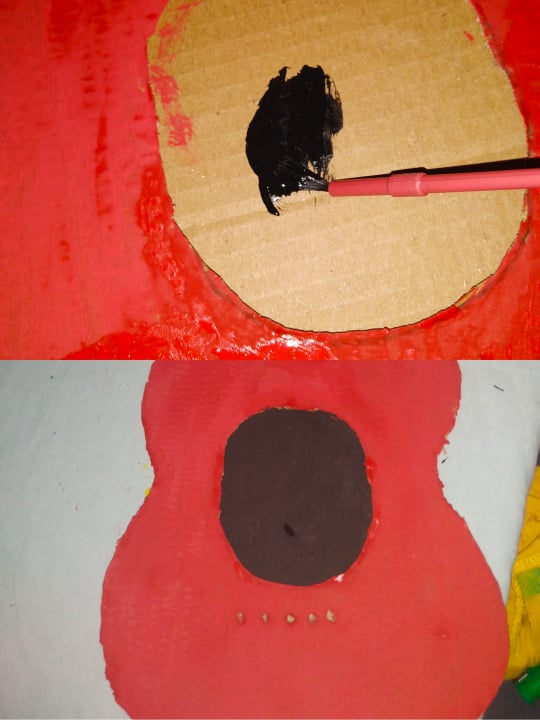
![186518994_810133299628012_3562888124238910755_n.jpg](https://images.hive.blog/DQmehMdorwmYdeeeZbJmKbRz9pSs4hcXAvV7EYVyArerLn9/186518994_810133299628012_3562888124238910755_n.jpg)
![185286354_425558205299930_8195267372463495928_n.jpg](https://images.hive.blog/DQmPiNrkTFZujewrMVaHqiV2UVQ4GLhbeKUcKjSKaqsVqBi/185286354_425558205299930_8195267372463495928_n.jpg)
- Pinte y deje secar.
- Paint and let dry.
![186178309_161916415876834_9185750998225921207_n.jpg](https://images.hive.blog/DQmSeSXGXGDyMt3VA3zZn2mb4uY8BGzyeFhoUD1b28peNhz/186178309_161916415876834_9185750998225921207_n.jpg)
![184946288_2998904640392945_1797416985915354364_n.jpg](https://images.hive.blog/DQmfQ76VaQz6bgeiG3J4cFNSWRbih7pHAR7nEdzvRunj6EY/184946288_2998904640392945_1797416985915354364_n.jpg)
![186459689_499682521228612_4132886661498449820_n.jpg](https://images.hive.blog/DQmNV2HofMbZkD9xX1MUqWPM6yHfKkAR6TG9wGFwph9rbet/186459689_499682521228612_4132886661498449820_n.jpg)
- Luego le coloque las cuerdas.
- Then attach the strings.
![186484346_1520236641652690_224261575722309384_n.jpg](https://images.hive.blog/DQmduyGx8sHXDzuiaveQZcFemnM1u1VwDa5hTiX2Vp2xdEC/186484346_1520236641652690_224261575722309384_n.jpg)
![186474332_828682247738588_6831536996508094564_n.jpg](https://images.hive.blog/DQmNmZqdFupf6ojnZ5wyteW7JiLosLX2ppHJVwP1uoLSEtJ/186474332_828682247738588_6831536996508094564_n.jpg)
![183951504_2855308758071027_1626362328474246997_n.jpg](https://images.hive.blog/DQmVnX7y22CV1Dkth7pB2p79ehwkPApRkiHar3EWfGhQ5LB/183951504_2855308758071027_1626362328474246997_n.jpg)
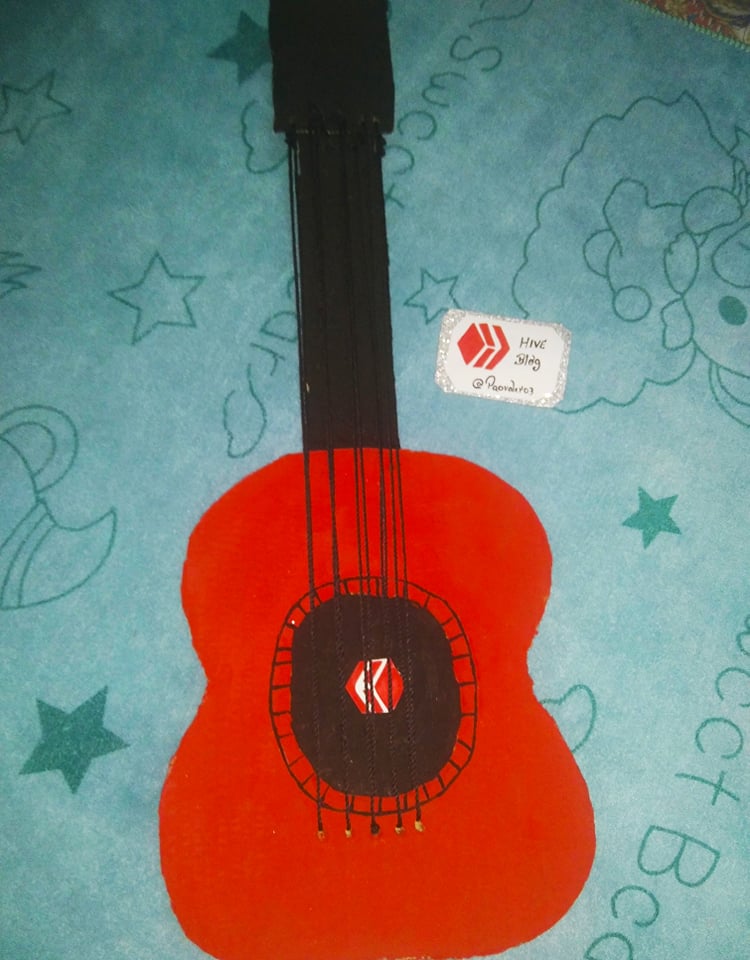
Feliz con el resultado... Espero les guste.!
Happy with the result ... I hope you like it!
Hasta la próxima...
Until next time...