Hola saludos a todos los miembros de Hive espero se encuentren muy bien hoy les traigo la un tutorial de cómo elaborar una bella Mariquita con Cilindro de papel higiénico.
Hello greetings to all the members of Hive I hope you are very well today I bring you a tutorial on how to make a beautiful Ladybug with a toilet paper cylinder.
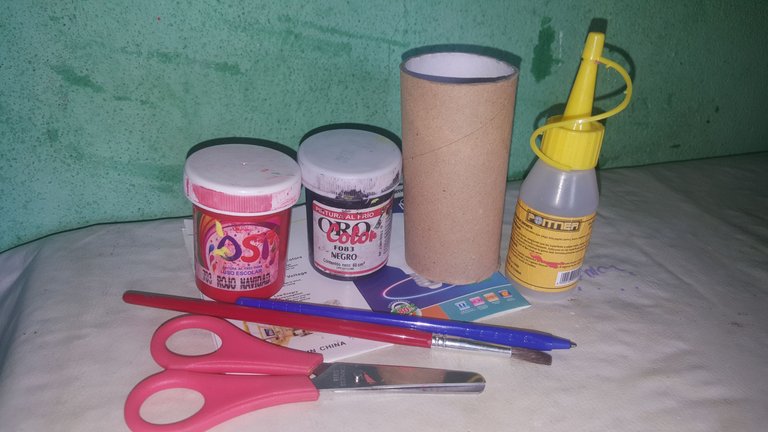
Materiales
Cilindro de papel higiénico
Cartón delgado
Pintura negra y roja
Pincel
Lápiz
Tijera.
Materials
Toilet paper cylinder
Thin cardboard
Black and red paint
Brush
Pencil
Scissor.
Cómo lo Hice
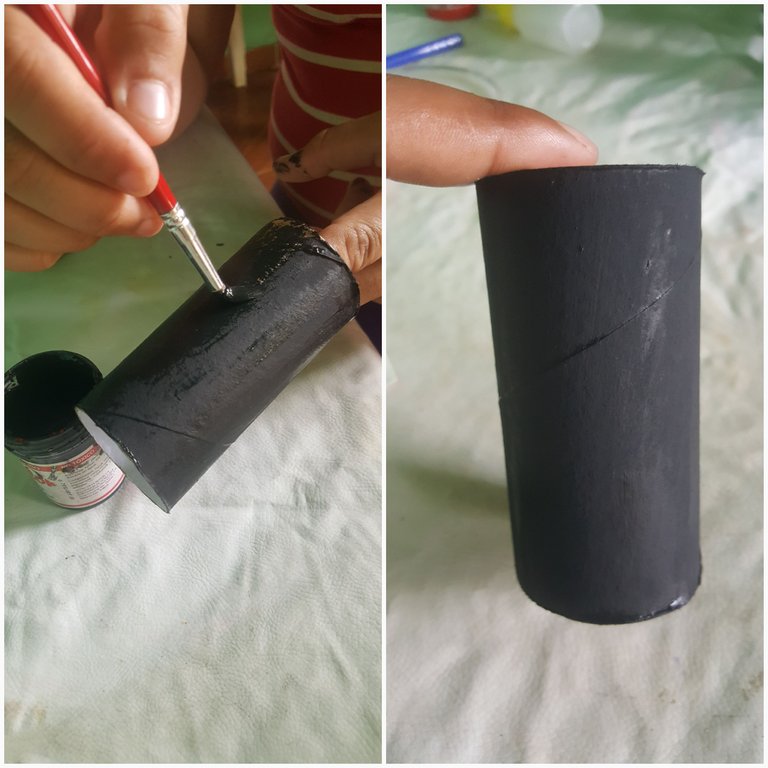
Lo primero que hice fue pintar el cilindro de papel higiénico con la pintura negra.
As I did
The first thing I did was paint the toilet paper cylinder with the black paint.
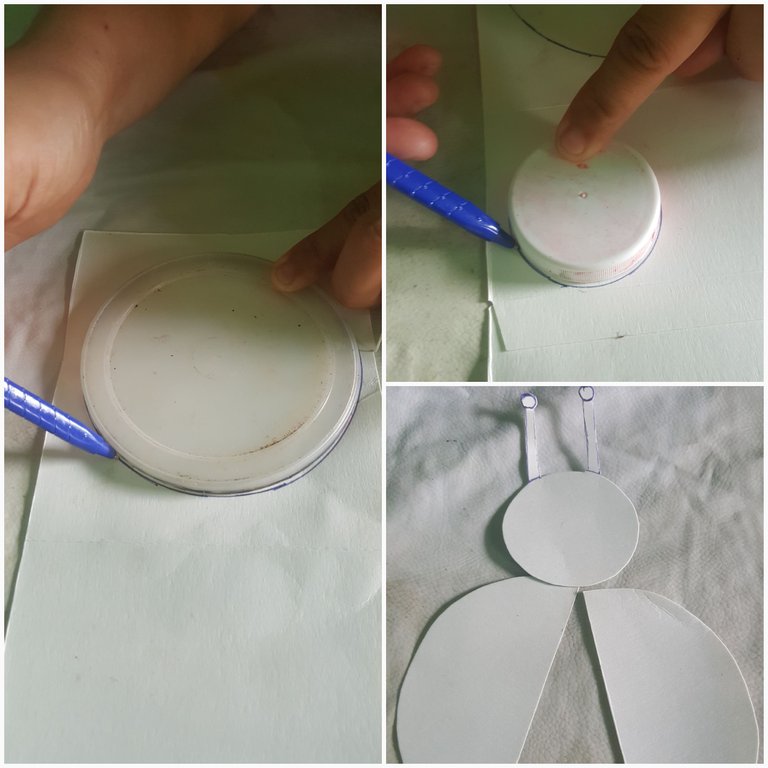
Luego con el lápiz marque un círculo mediano el cual será las alas del la mariquita, además también hice un círculo más pequeño para la cabeza de la mariquita a la cual le agregamos dos antenas para así dar forma a la mariquita como lo muestra la imagen.
Then with the pencil mark a medium circle which will be the ladybug's wings, I also made a smaller circle for the ladybug's head to which we added two antennae to shape the ladybug as shown in the image.
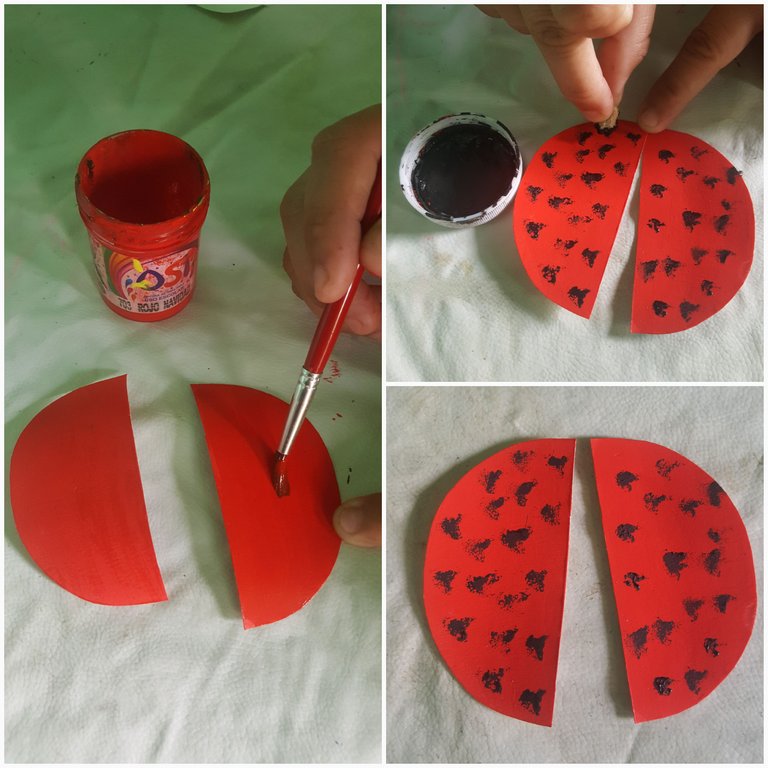
Luego nos toca pintar las alas de la mariquita la pintamos de color rojo y con un pedacito de esponja le hacemos pequeñas pintas negras.
Then we have to paint the ladybug's wings, we paint it red and with a piece of sponge we make small black spots.
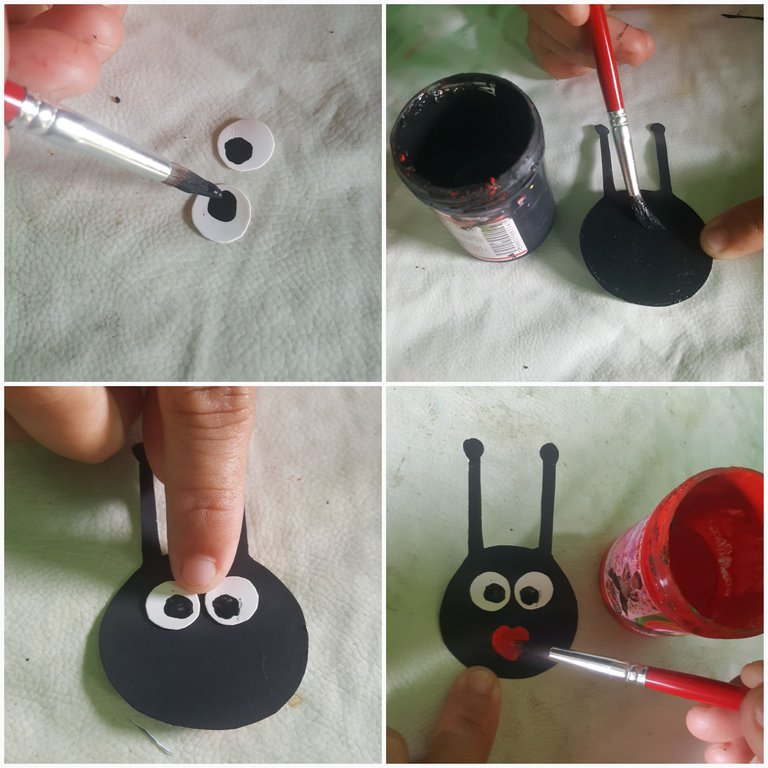
Después le damos forma a la cara de la mariquita recortamos dos pequeños círculos con el cartón delgado y con la pintura negra le damos forma de ojos, luego lo pegamos con un poco de silicón en la cabeza de la mariquita y por último con la pintura roja le hacemos la boca a la mariquita como lo muestra la imagen.
After we shape the face of the ladybug, we cut out two small circles with the thin cardboard and with the black paint we shape eyes, then we glue it with a little silicone on the head of the ladybug and finally with the red paint We make the ladybug's mouth as the picture shows.
Comenzamos a armar la mariquita lo primero que pegamos son las alas en la parte del frente del cilindro separada una de la otra y después en la parte de arriba pegamos la cabeza de la mariquita.
We begin to assemble the ladybug, the first thing we glue are the wings on the front of the cylinder separated from each other and then on the top we glue the head of the ladybug.
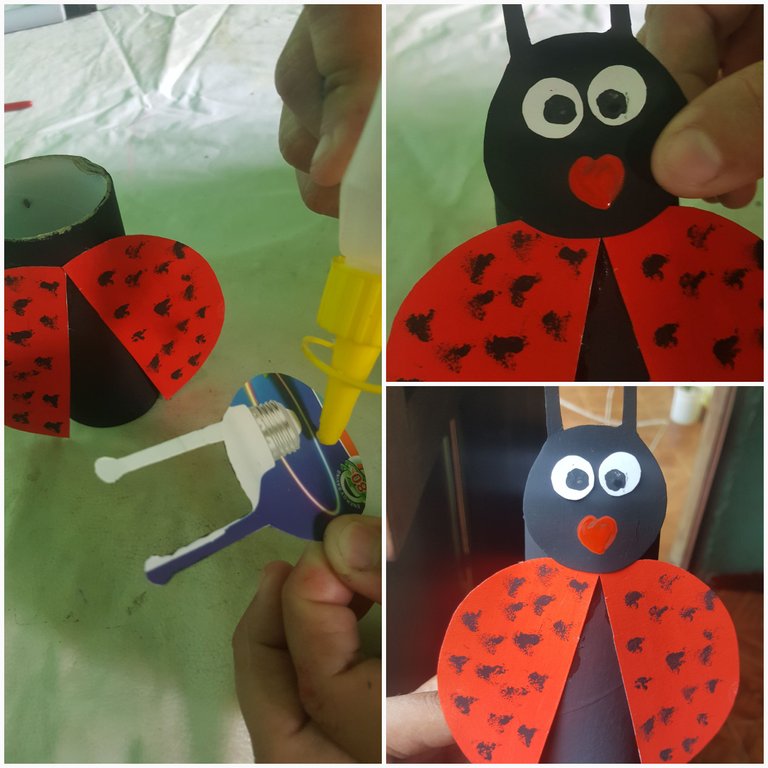
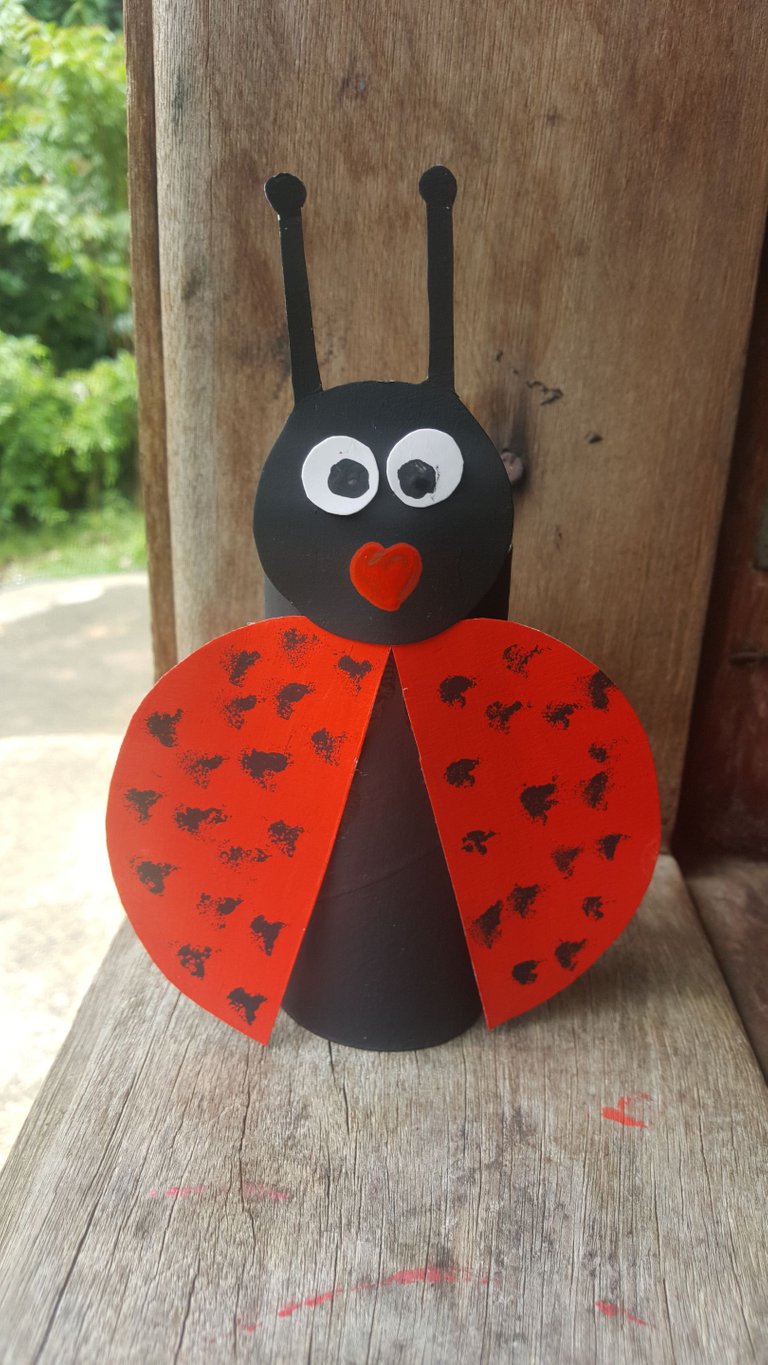
Así es como queda esta bella y sencilla mariquita.
This is how this beautiful and simple ladybug looks.
Congratulations @raied59! You have completed the following achievement on the Hive blockchain and have been rewarded with new badge(s) :
Your next target is to reach 20 posts.
You can view your badges on your board and compare yourself to others in the Ranking
If you no longer want to receive notifications, reply to this comment with the word
STOPCheck out the last post from @hivebuzz: