Hola a toda la comunidad Hive, por acá les traigo hoy una forma de cultivar tomates en casa, en botellas plásticas de refresco o envases pet. Claro que en estos envases se pueden hacer otros cultivos como ají o chile, pepinos, lechuga, zanahorias entre otros. Además con esta técnica podemos cultivar aunque no tengamos un patio a la vez que reciclamos estos envases que, por lo general, tiramos al cesto de la basura.
Hello to all the Hive community, here I bring you today a way to grow tomatoes at home, in plastic soda bottles or pet containers. Of course in these containers you can grow other crops such as chili peppers, cucumbers, lettuce, carrots and others. In addition, with this technique we can grow crops even if we do not have a yard and at the same time we recycle these containers that we usually throw in the trash can.
Siempre es una buena idea cultivar en casa, aunque no tengamos patio está es una buena técnica para obtener algunos rubros por muy bajos costos, aprovechando materiales que siempre desechamos, sin uso de agroquímicos que tanto daño le hacen a nuestra salud y al ambiente. Con esta sencilla técnica podemos dejar de comprar en el mercado algunos productos vegetales y consumirlos con mayor seguridad.
It is always a good idea to grow at home, even if we do not have a yard, this is a good technique to obtain some items for very low costs, taking advantage of materials that we always discard, without the use of agrochemicals that do so much damage to our health and the environment. With this simple technique we can stop buying some vegetable products in the market and consume them more safely.
Existe diferentes envases plásticos que siempre desechamos cuando el contenido del mismo se acaba, hay envases de 2 litros, de 4 litros, de 5 litros como también envases más pequeños. Por lo general a todos podemos darle un uso en el cultivo de algunos rubros, en esta publicación nos vamos a concentrar en los envases pet de refrescos, que son de consumo masivo y hoy representan un problema importante de contaminación a nivel mundial. Vamos a explicar cómo podemos aprovechar estos envases para el cultivo en casa.
There are different plastic containers that we always throw away when the content of the same is finished, there are containers of 2 liters, 4 liters, 5 liters as well as smaller containers. In general we can use all of them in the cultivation of some items, in this publication we are going to concentrate on the pet containers of soft drinks, which are of massive consumption and today represent an important problem of contamination worldwide. We are going to explain how we can take advantage of these containers for home cultivation.
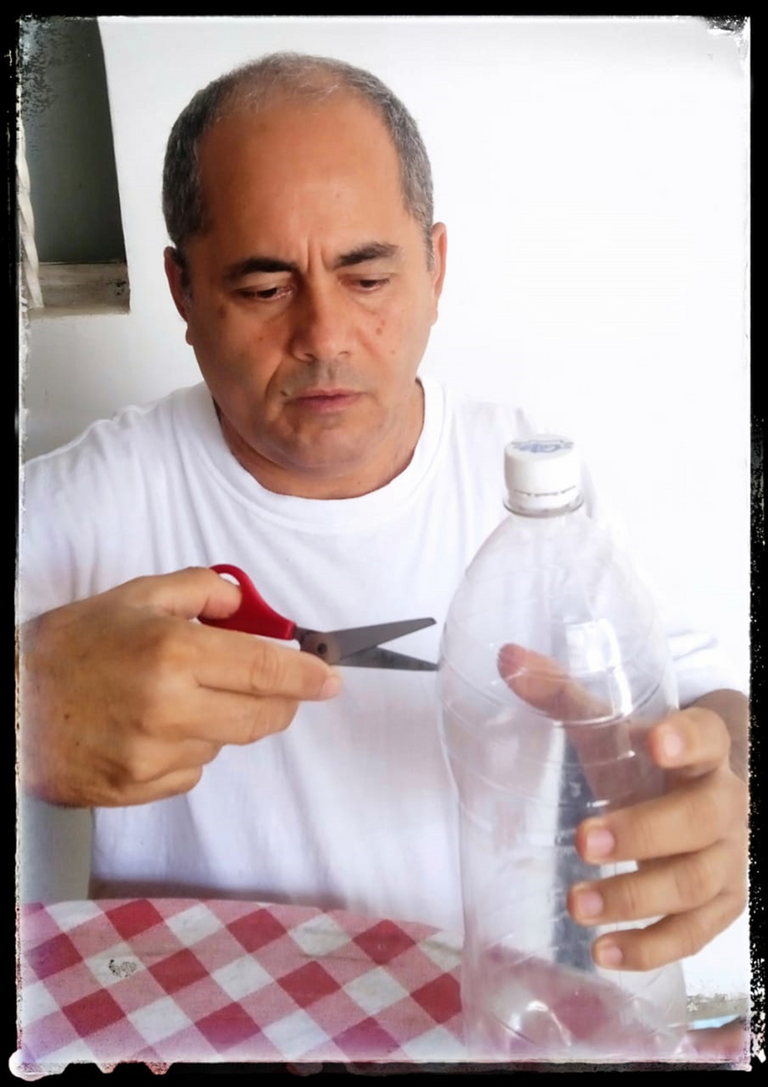
Lo primero es que debemos seleccionar tantos envases para el cultivo que nos proponemos a realizar. Una vez seleccionados estos procedemos a lavarlos bien, para eliminar alguna sustancia tóxica que puedan contener, después retiramos sus etiquetas o rotulaciones; seguidamente a cada envase, con su tapa, le hacemos unas perforaciones o cortes en la parte superior (yo les hago tres perforaciones). Estás perforaciones van a servir, en primer lugar, para agregar el sustrato y también para hacer el riego periódico de las semillas y posteriormente, de las plantas.
The first thing is that we must select as many containers for the cultivation that we propose to carry out. Once selected, we proceed to wash them well, to eliminate any toxic substance they may contain, then we remove their labels or labels; then each container, with its lid, we make some holes or cuts in the top (I make three holes). These perforations are going to serve, in the first place, to add the substrate and also to make the periodic irrigation of the seeds and later, of the plants.

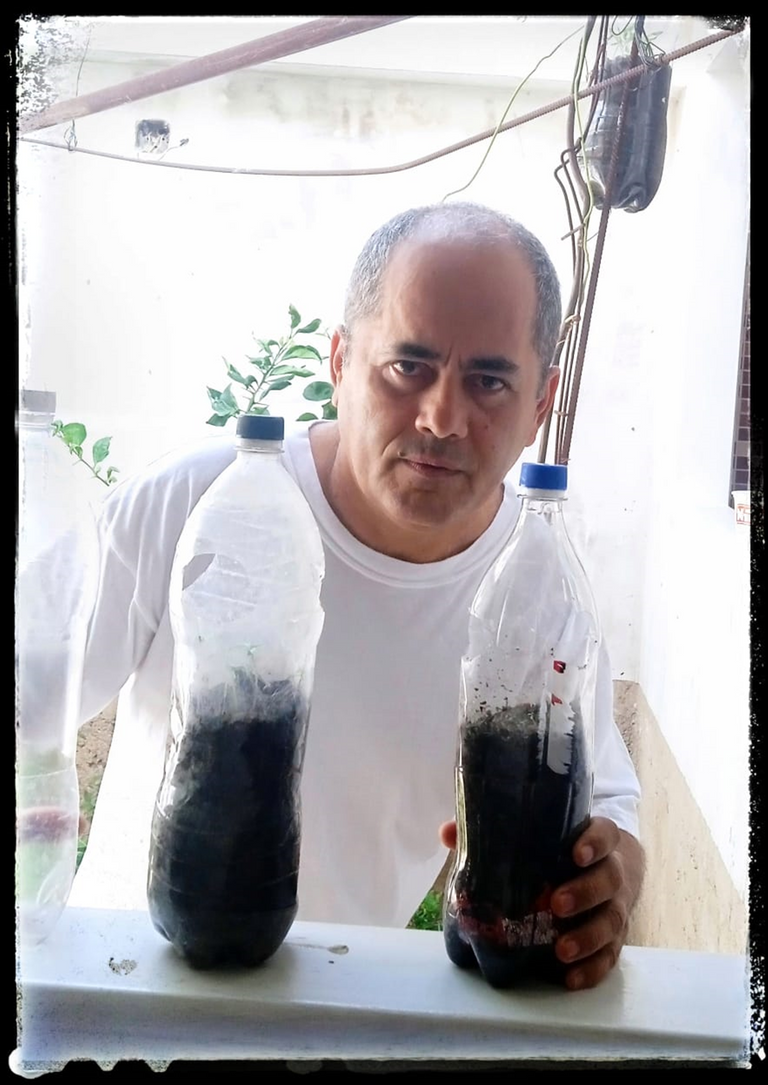
Realizadas las perforaciones, comenzamos a llenar, con un buen sustrato de tierra negra y abono, cada uno de los envases a utilizar. Previamente colocamos en el fondo del envase grava o pequeñas piedras que le darán un mejor drenaje a nuestros cultivos.
Once the perforations have been made, we begin to fill each of the containers to be used with a good substrate of black soil and compost. Previously we place gravel or small stones at the bottom of the container that will give a better drainage to our crops.
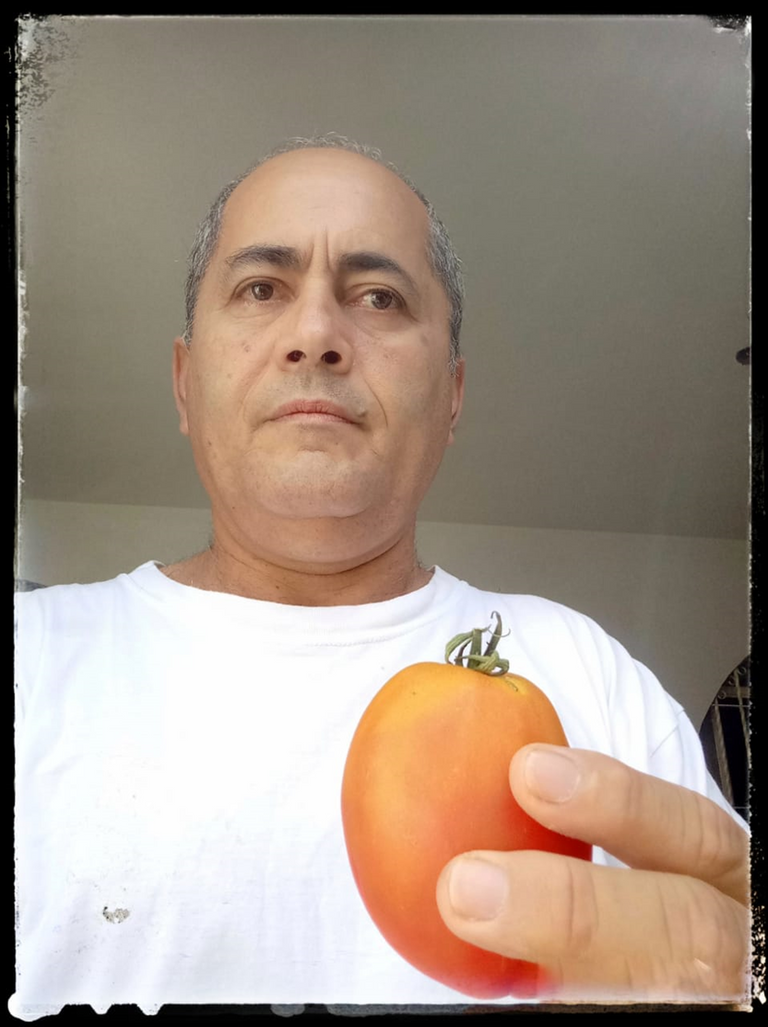
Los envases deben ser llenados a 3/4 de su capacidad y a 10 centímetros de las perforaciones que les hicimos. Una vez que tengamos este avance debemos tener a la mano nuestras semillas, en este caso de tomates, las cuales tomaremos de algún fruto comprado en el mercado. Siempre debemos elegir un fruto grande, maduro, saludable y de calidad, para que nos aporte buena semilla. Las semillas se colocan dentro del envase a una profundidad de 1 centímetro de la tierra, por las perforaciones que ya le realizamos a los envases. En este caso lo estamos haciendo utilizando los envases de manera vertical.
The containers should be filled to 3/4 of their capacity and 10 centimeters from the perforations we made. Once we have this advance we must have at hand our seeds, in this case of tomatoes, which we will take from some fruit bought in the market. We must always choose a large, ripe, healthy and quality fruit, so that it provides us with good seeds. The seeds are placed inside the container at a depth of 1 centimeter from the soil, through the perforations that we have already made in the containers. In this case we are doing it using the containers in a vertical way.
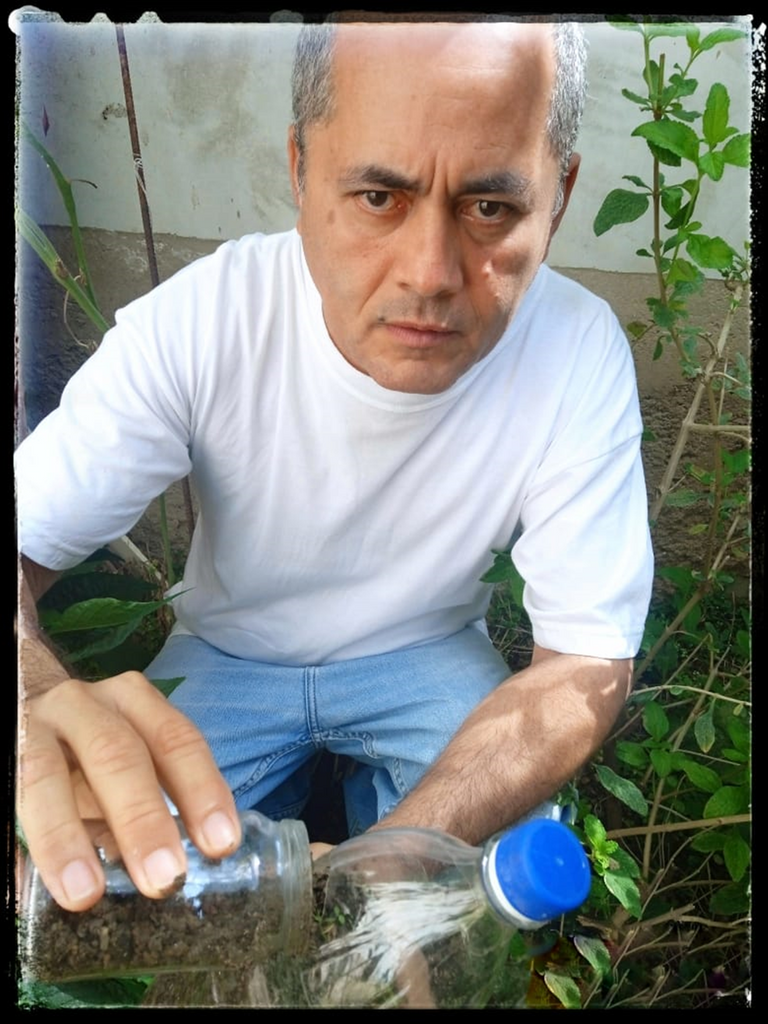
Después de colocar las semillas (al menos dos semillas por perforación), en la tierra o sustrato, las cubrimos con el mismo y las regamos con agua. De esta manera debemos colocar nuestros envases en un sitio de la casa donde reciban abundante luz solar en la mañana y suficiente sombra en la tarde. Así en 8 días ya tendremos los brotes de germinación de nuestros tomates, que debemos regar a diario para que tengamos éxito y cosechemos buenos frutos.
After placing the seeds (at least two seeds per perforation) in the soil or substrate, we cover them with the same and water them with water. In this way we must place our containers in a place in the house where they receive abundant sunlight in the morning and enough shade in the afternoon. Thus in 8 days we will already have the germination sprouts of our tomatoes, which we must water daily for us to be successful and harvest good fruits.
Congratulations @simajo2022! You have completed the following achievement on the Hive blockchain and have been rewarded with new badge(s):
Your next target is to reach 1000 upvotes.
You can view your badges on your board and compare yourself to others in the Ranking
If you no longer want to receive notifications, reply to this comment with the word
STOPCheck out the last post from @hivebuzz:
Support the HiveBuzz project. Vote for our proposal!
🍅🍅🍅🍅🍅Hola @simajo2022 excelente publicación muy compreta la información, seguro sera una hermosa cosecha de tomates
Te encontré por el tac de nuestra Comunidad Vida Verde te invito a conocerla, seguro tendrás mucha mas pasión por la naturaleza para compartir con nosotros.
Gracias @cvnuitter, ademas este es un metodo muy sencillo para producir tomates en casa. Cuando estén listos los frutos plublicaré un post con muchas fotos de esos tomates. Voy a explorar Vida Verde te lo prometo.
Será maravilloso verlos en cada proceso, hay muchos que aprender en cada cultivo Bienvenido 😊😉