Hello everyone!
How I came about the shots and some of the challenges I had with the make-up while editing — that, I'd be talking about here.
It's really exciting to share one of my photographs. I have discovered some ingredients at which one can make a picture look good. Though editing pictures is a process, and it has different phases and stages. It takes a lot of hard work and passion to enter into Photography.
One of my friends (a female) asked me to do a Photoshoot for her which I was obliged to do.
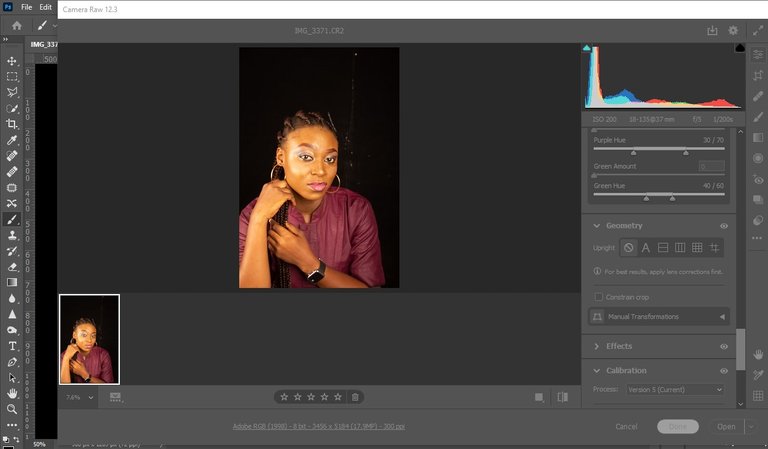
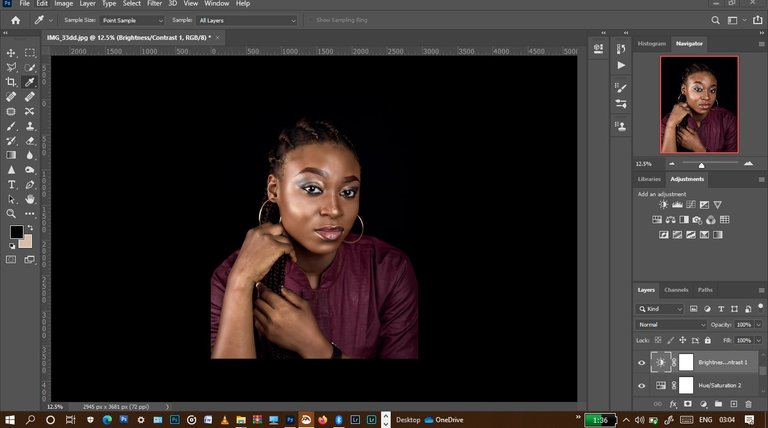
I shot this image on Canon EOS 60D, the first thing I noticed was the over saturation of the image, especially on the subject and the image as a whole (the yellowish colour on the subject is too much). As you can see the image above. I had to play around the Camera Raw Filter which has diverse of colour tools and settings. I used that channel to get rid of over saturation on the Image.
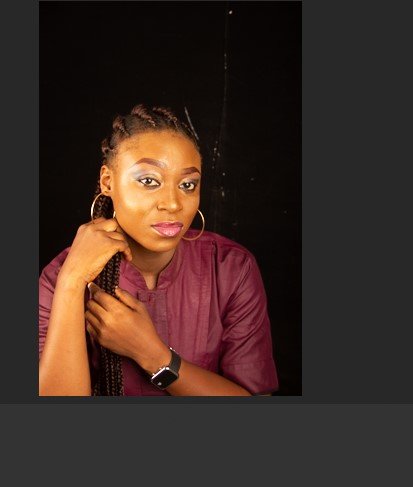
Here in this image I spent quality time editing the image in order to get the best out of them; in terms of crispiness, sharpness and colour-balancing. Though, it may not be the most perfect image or catchy enough to Photography Lovers, but mere looking at the picture closely, it has this amazing look that is captivating. This person fits the role of a model. This person played the role of a MODEL here. But the most challenging part is the work of the Makeup Artist, the person that made her up didn't really blend the eyebrows; there is one misshaped eyebrow-line which doesn't equally rhyme with the second one. It's not too obvious though, until you take a look closely. In additional, her skin-colour didn't rhyme with her face (where the make-up is done) — I had to work that out myself, in blending and re-adjusting the skin-colour with her face — so it won't look so odd


As aforementioned above, I edited this image on Camera Raw Filter before further Retouch. Truly, it wasn't that easy at first, especially at the finally stage, but I was able to work it out well. I added a tinge of photo-filter, selective colours, contrast, brightness and gradient maps to colour grade this image, and then I crop the image, as well as the other ones showing an half face. As you can see that the same image has different looks
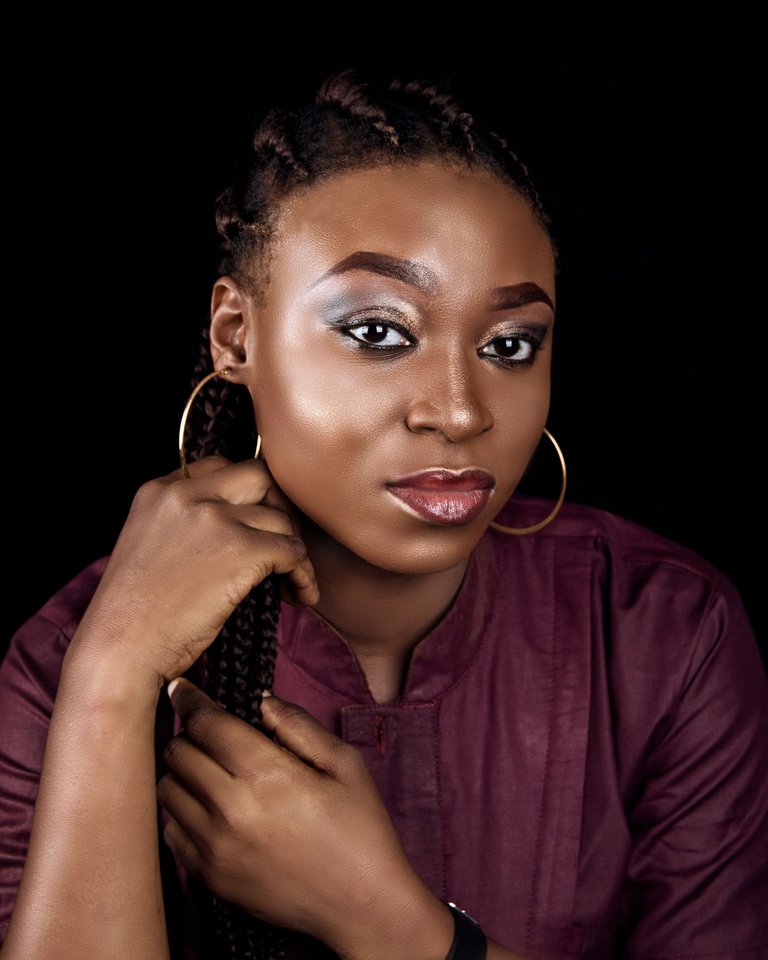
Half-face Images

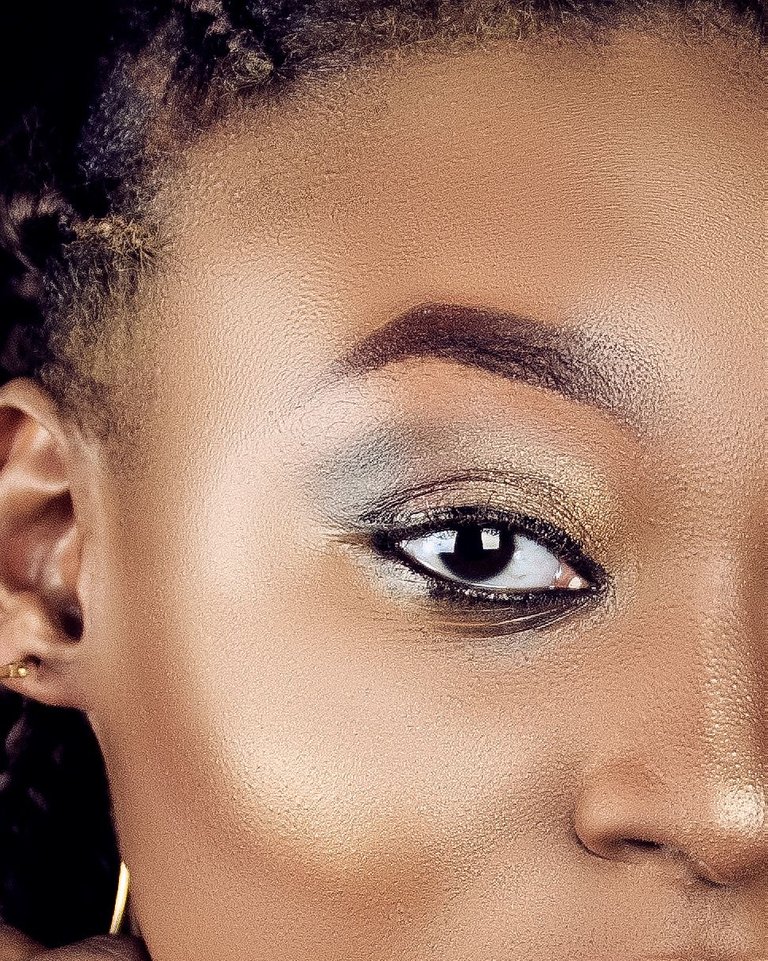
In this half-face Shot, I sharpened the image to make the skin-textures pop up a bit more. The half-face Images look good to me. And as you can see, I have different colour skin tones which are a bit different from each other.
These pictures have different effect on the skin colour: the light and dark light-skin colour effects. If you take a close look at the skin, you'd notice that there are differences in terms of ‘skin colour-looks'
Thanks for reading my Post
This post is totally plagiarism free & all the photographs were shot & Edited by me @martinstomisin (26/08/2021)
Interested in some of my write-ups?
Accreditation of Poetic Convention and License Exhibition by Poets
One Of The Best Catfish Pepper Soup Outdoors, Prepared And Served In A Clay Pot
Music — A Natural Therapy For Upliftment Of Mood And Alleviation Of Stress
Happiness — An Effigy of Wellness
An Overview of a Song “The Sound of Silence” covered by Disturbed
Some Reasons Why most People Shy Away from Poetry which Led to the Fall of Demand [for Poetry] in the Market
The Flawlessness of your Body(Poetry)

Nice one.
Glad you love it.
Thanks a lot @newman42
Stay blessed
You did a great job with the picture
Glad you love it...
Thanks a lot for the great comment — I really appreciate @funshee
Stay blessed!
Nice one.
Thanks man. I really appreciate @newman42
Nice one
Thanks a lot — I really appreciateGlad you love it. @ochedi
Stay blessed