Refracto... What?
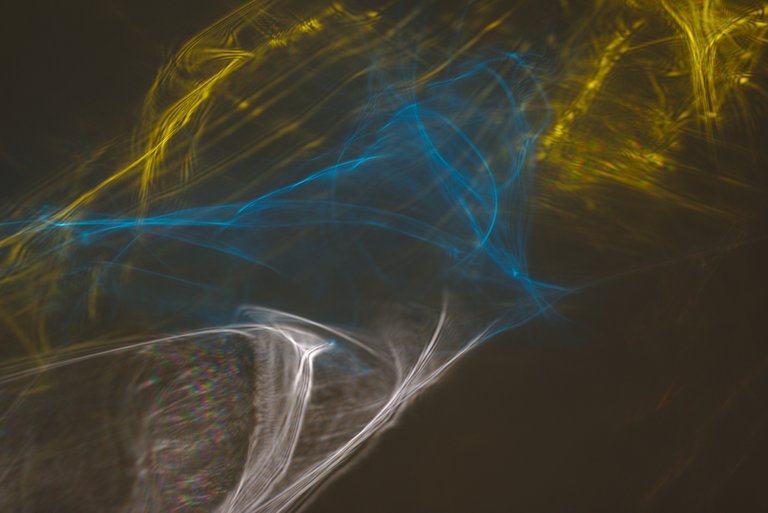
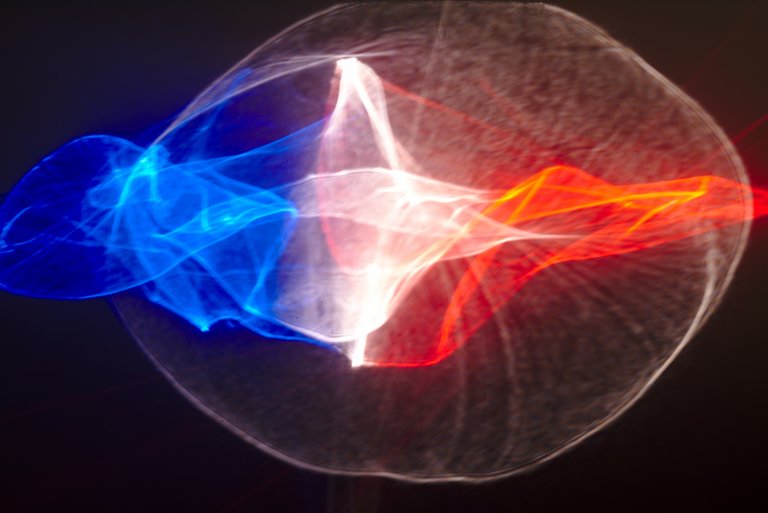
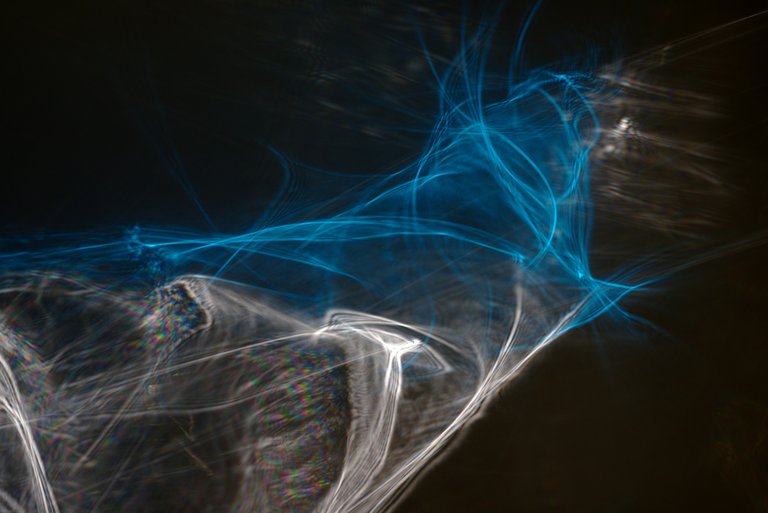
In this photographic technique, an object that can refract light is placed in front of the camera and illuminated with a thin, bright beam of light. The camera's sensor then records this light refraction. In this case, the camera is used without a lens. Depending on the material used, the most diverse shapes result. Moving the object in front of the camera changes its shape, size and brightness.

Bei dieser fotografischen Technik wird ein Objekt, welches Licht brechen kann, vor der Kamera platziert und mit einem dünnen, hellen Lichtstrahl angeleuchtet. Der Sensor der Kamera nimmt dann diese Lichtbrechung auf. Hierbei wird die Kamera ohne Objektiv verwendet. Je nach verwendetem Material ergeben sich die unterschiedlichsten Formen. Durch Bewegung des Objektes vor der Kamera verändern sich Form, Größe und Helligkeit.

What do you need
First of all, a camera with an interchangeable lens system. The lens is removed for this type of photography. The camera must be able to release the shutter without a lens. With some cameras, the shutter release is blocked when no lens is attached. I use either my Nikon D750 or D300s for these pictures.
The camera should have a stable stand, so a tripod would be a good idea. Next you need a torch. For the pictures in this post I used a torch with about 800 lumens. Then you need a small piece of cardboard the size of the torch head and some gaffa tape.
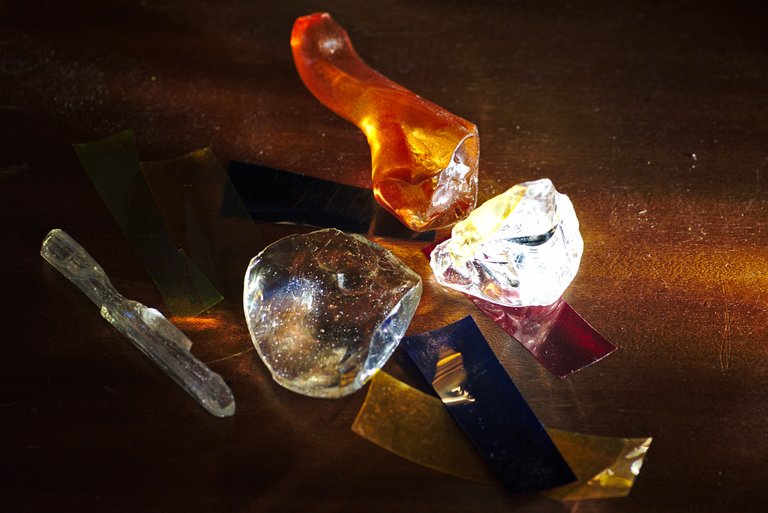
And then you need an object made of glass or plastic that can refract light. Wine or champagne glasses are good for first attempts.
Zuerst einmal eine Kamera mit Wechselobjektivsystem. Das Objektiv wird für diese Art der Fotografie entfernt. Die Kamera muss in der Lage sein auch ohne Objektiv auszulösen. Bei einigen Kameras ist der Auslöser blockiert wenn kein Objektiv angeschlossen ist. Ich verwende für diese Bilder entweder meine Nikon D750 oder D300s.
Die Kamera sollte einen stabilen Stand haben, ein Stativ wäre also eine gute Idee. Als nächstes brauchst Du eine Taschenlampe. Für die Bilder in diesem Beitrag habe ich eine Taschenlampe mit ca. 800 Lumen benutzt. Dann brauchst du ein kleines Stück Pappe in der Größe des Lampenkopfes und etwas Gaffa-Tape.
Und dann brauchst Du ein Objekt aus Glas oder Kunststoff welches Licht brechen kann. Für erste Versuche eignen sich Wein- oder Sektgläser gut.
How it's done
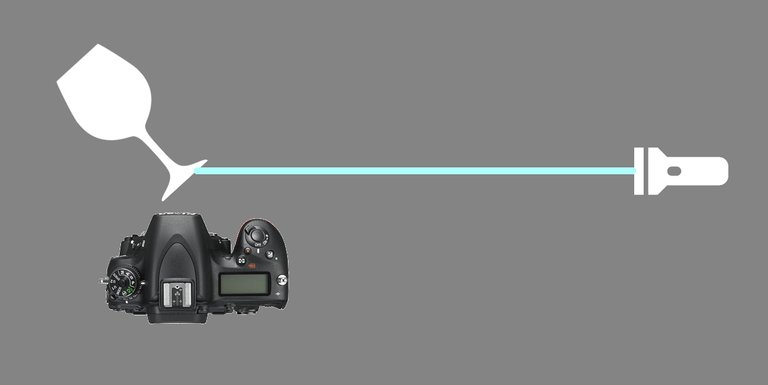
Set the camera to your working height with the tripod and align it reasonably straight. Attach your glass object in front of the camera, preferably so that it can be moved easily. Alternatively, you can simply lay everything on the table.
Poke a small hole in the small piece of cardboard, about 2 to 3mm in size. Use the gaffa tape to attach the cardboard to the torch head. Attach the torch exactly parallel to the camera, so that the light shines past the front of the camera and hits the glass object exactly. The distance between the torch and the glass should be between 2 and 5 metres, depending on the brightness of the torch.
Die Kamera stellst Du mit dem Stativ auf deine Arbeitshöhe ein und richtest sie halbwegs gerade aus. Vor der Kamera befestigst Du dein Objekt aus Glas, am besten so, dass es sich leicht bewegen lässt. Alternativ kannst Du alles aber auch einfach auf den Tisch legen.
In das kleine Stück Pappe stichst Du ein kleines Loch, so ca. 2 bis 3mm groß. Mit dem Gaffatape befestigst Du die Pappe am Lampenkopf. Die Lampe befestigst Du genau parallel zur Kamera, das Licht leuchtet also vorne an der Kamera vorbei und trifft genau auf das Objekt aus Glas. Der Abstand zwischen Lampe und Glas sollte je nach Helligkeit der Lampe zwischen 2 und 5 Metern liegen.
In no case should the whole glass shine brightly, because we only want to record the refraction traces of the light and not the actual object. You should not get the idea of using a laser. The light is much too bright and there is a risk of damaging the sensor of your camera.
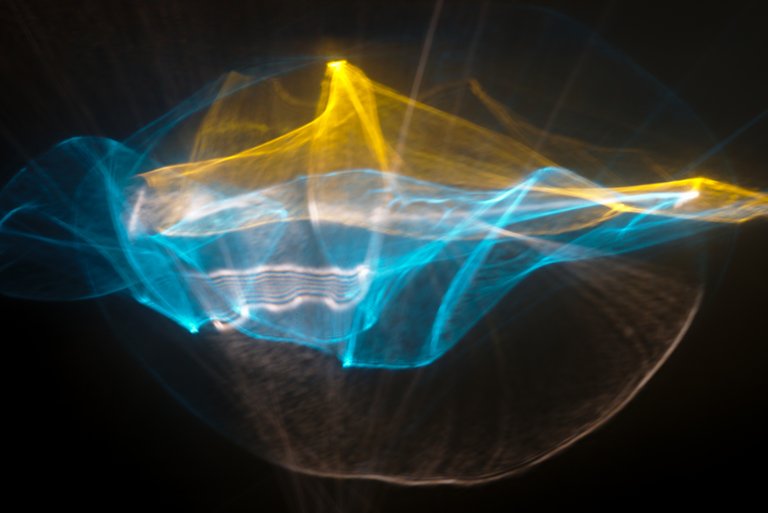
Now switch on the camera's Live View and move the object slowly and in small steps in front of the camera. When you like the shape, take the picture. The ISO value should be between 100 and 200. With the 800 lumen troch at a distance of 3 metres, the exposure time is about 1 second. However, only test shots can help here. As long as you do not move the glass or the torch, the image remains the same. The time varies quite a bit because the properties of the different types of glass paint different bright patterns on the sensor.
To get some colour into the picture, you cut narrow strips of colour filter foil. You then hold these either between the light and the glass or between the glass and the camera. This also requires a bit of intuition, at the latest if you want to use several colours in one picture.
Auf keinen Fall sollte das ganze Glas hell leuchten, wir wollen ja ausschließlich die Brechungsspuren des Lichtes aufnehmen und nicht das eigentliche Objekt. Du solltest nicht auf die Idee kommen einen Laser zu verwenden. Das Licht ist viel zu hell und es besteht die Gefahr, dass der Sensor Deiner Kamera dadurch Schaden nimmt.
Jetzt schaltest Du den Live View der Kamera ein und bewegst das Objekt langsam und in kleinen Schritten vor der Kamera. Wenn Dir die Form gefällt machst Du die Aufnahme. Der ISO-Wert sollte zwischen 100 und 200 liegen. Mit der 800 Lumen Lampe aus 3 Metern Abstand liegt die Belichtungszeit dann bei ca. 1 Sekunde. Hier helfen aber eigentlich nur Probeaufnahmen. Solange man das Glas oder die Lampe nicht bewegt bleibt das Bild gleich. Die Zeit variiert zueilen recht stark weil die Eigenschaften der verschiedenen Gläser unterschiedliche helle Muster auf den Sensor malen.
Um etwas Farbe ins Bild zu bekommen scheidest Du schmale Streifen Farbfilterfolie zurecht. Diese hältst Du dann wahlweise zwischen Licht und Glas oder zwischen Glas und Kamera. Auch das erfordert etwas Fingerspitzengefühl, spätestens wenn man mehrere Farben in einem Bild verwenden will.
WHAT IS LIGHT PAINTING?
Light painting is a unique form of art. The artist illuminates the scene with diverse light sources and paints light traces into the picture with various light tools. In addition, we use various other techniques, such as camera rotation or other movements of the camera during the exposure. The creative possibilities are almost unlimited.
All our pictures were taken during one single exposure. Apart from denoising, sharpening, cutting and possibly adjusting the white balance, our pictures are not processed on the computer.
LICHTKUNSTFOTO
If you like my art visit www.lichtkunstfoto.de for more Light Art Photography and informations about Light Painting. Join me on Flickr Facebook Twitter
For more great Light Art Photography, Light Painting and inspiration check these light painters: @fadetoblack @fastchrisuk @dawnoner @oddballgraphics @martbarras @stepko @rod.evans.visual @yo-hoho @maxpateau @gunnarheilmann @neilru75

WE ARE LIGHT PAINTERS
To help and support the LightPainters community here on Hive I would appreciate your delegation of HivePower. Any amount is appreciated. It does not require much to get started, we are happy for any gesture.
How to delegate?
Delegate 50HivePower, [50HP]
Delegate 250HivePower, [250HP]
Delegate 500HivePower, [500HP]
Delegate 1000HivePower, [1000HP]
All the Hive Power will help to upvote the artist's contribution as part of the LightPainters community.
The rewards earned on this comment will go directly to the person sharing the post on Twitter as long as they are registered with @poshtoken. Sign up at https://hiveposh.com.
Congratulations @lichtkunstfoto! You have completed the following achievement on the Hive blockchain and have been rewarded with new badge(s):
Your next target is to reach 300 replies.
You can view your badges on your board and compare yourself to others in the Ranking
If you no longer want to receive notifications, reply to this comment with the word
STOPSupport the HiveBuzz project. Vote for our proposal!
Yay! 🤗
Your content has been boosted with Ecency Points
Use Ecency daily to boost your growth on platform!
Support Ecency
Vote for new Proposal
Delegate HP and earn more, by @lichtkunstfoto.