Hello There!😊
It's #creative-sunday time, and I'm super excited to share with you my newest beaded project.
One of my beading goals so far, aside from beading for my clients, is to create as many as possible educational items for my son. And so I came across a beaded mushroom 🍄 on the internet a while ago, which prompted me to give it a try and then share it with you.
I'm so fond of this project because it brought back a lot of my childhood memories. I have this particular mushroom I love very much; it is sweet, healthy, nutritious, and delicious; when I saw that beaded mushroom, the memories of me hunting for it in the forest while I was much younger came to mind.

So come with me and take part in revisiting this beautiful memory of mine.
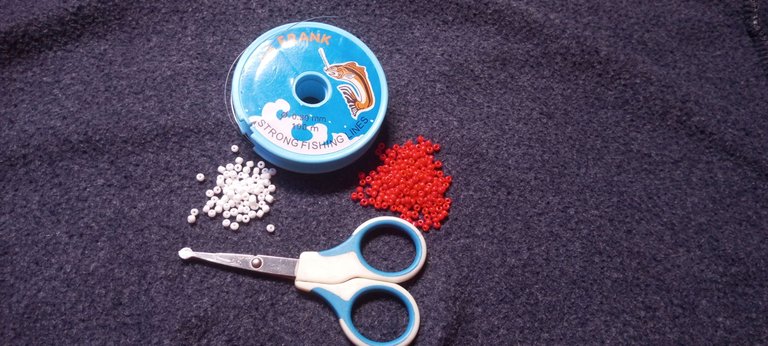
Materials used
I used white seed beads, red seed beads, scissors, and 0.30 fish line.
Steps involved:
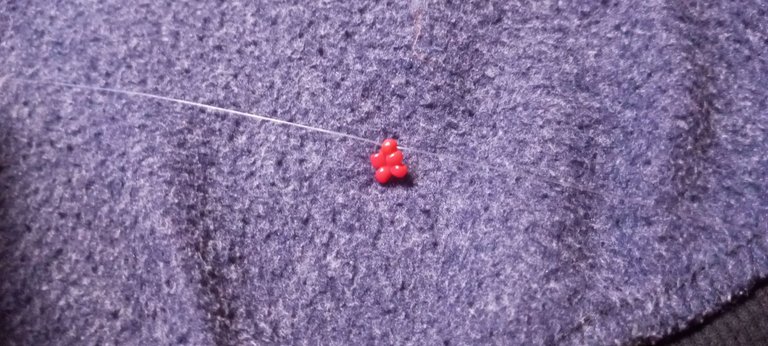
Step 1:
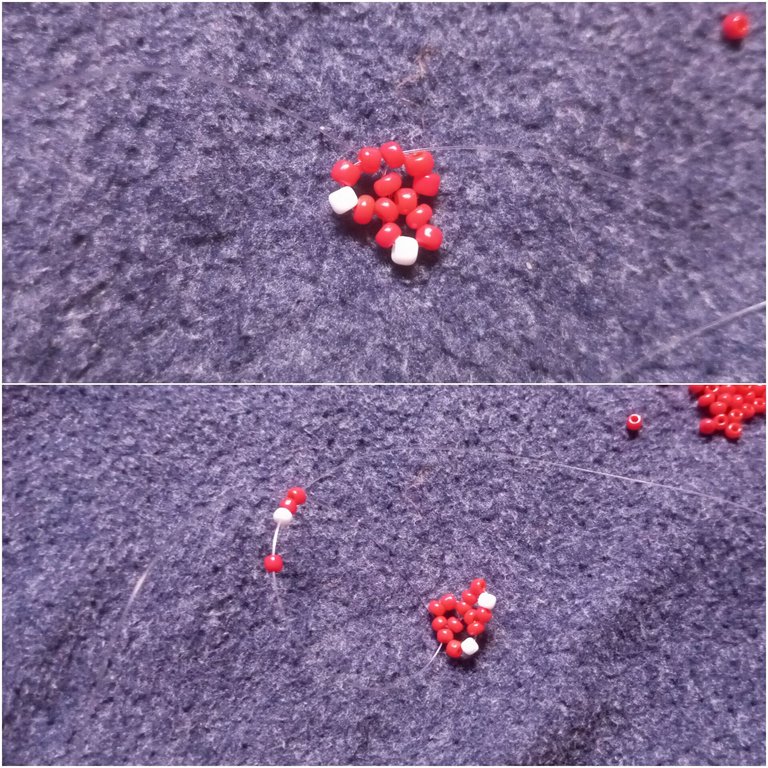
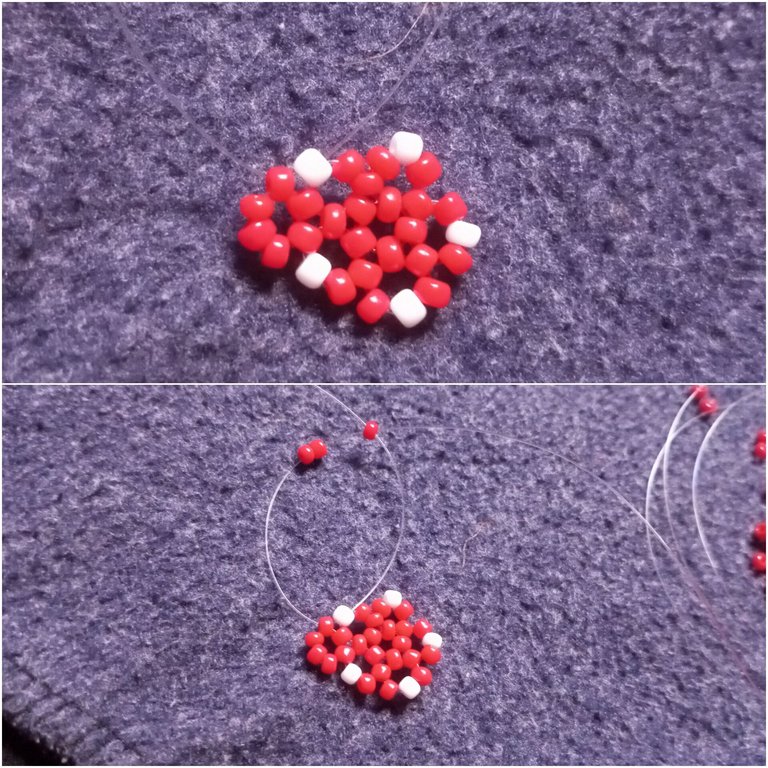
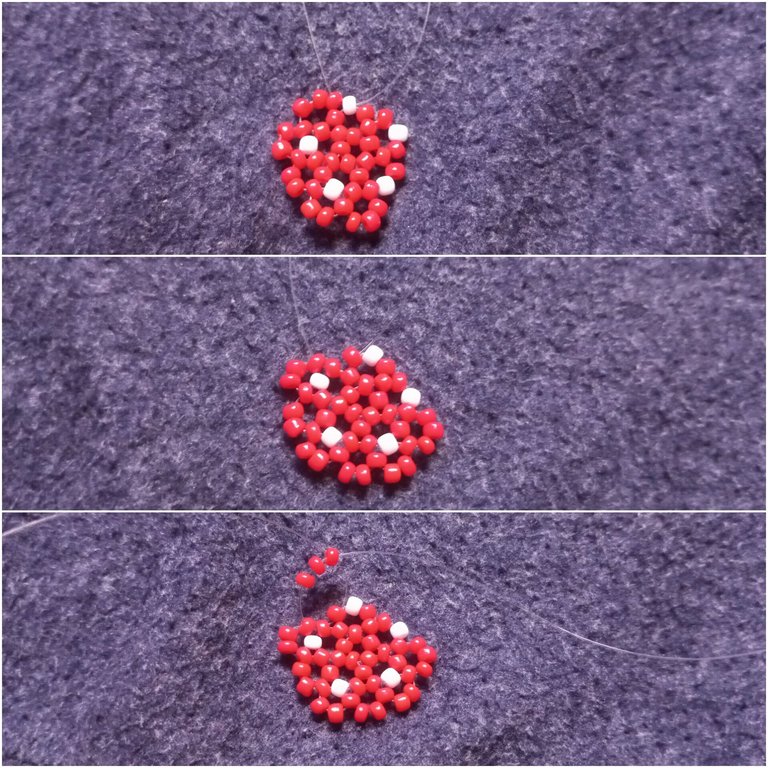
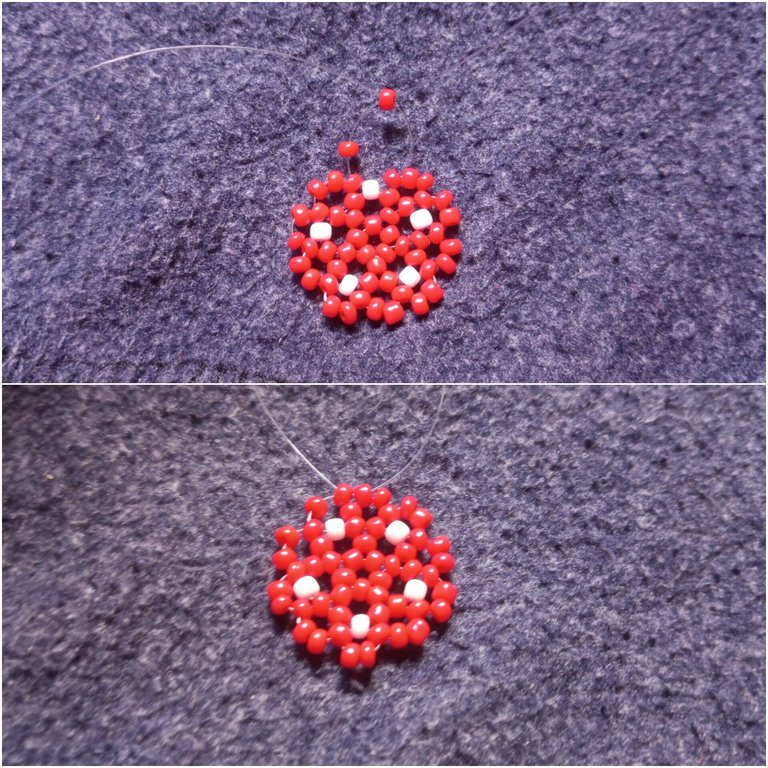
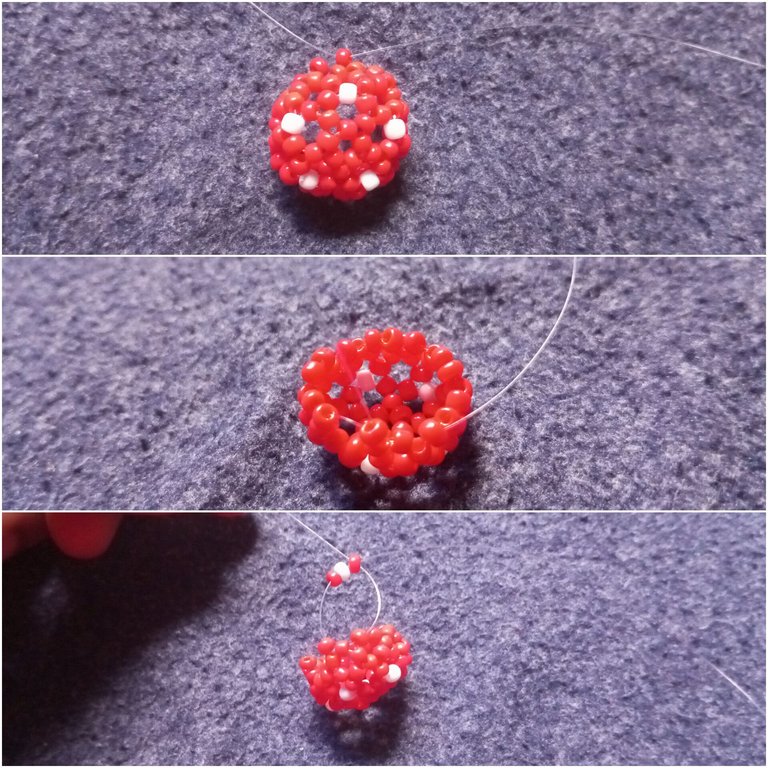
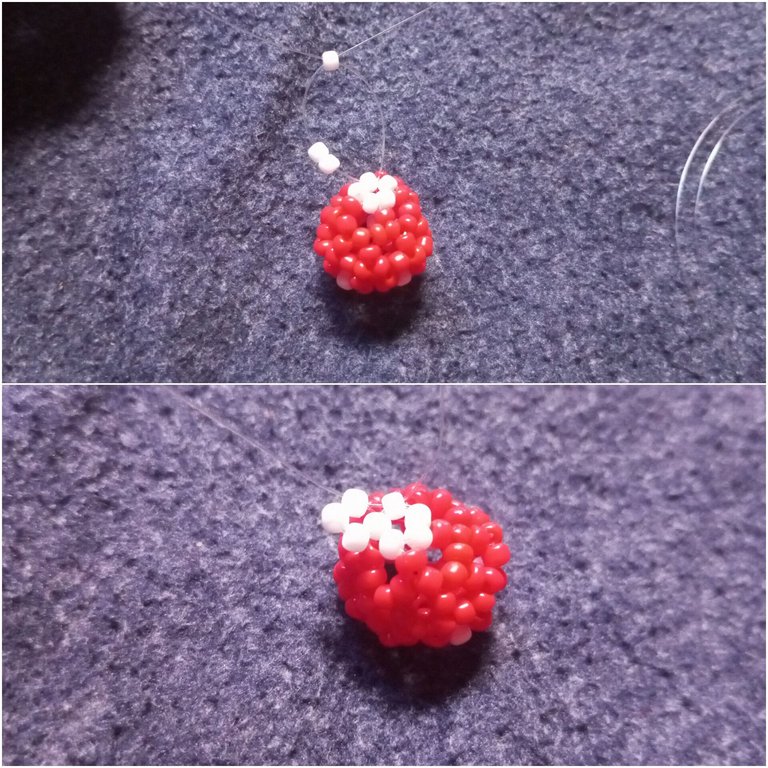
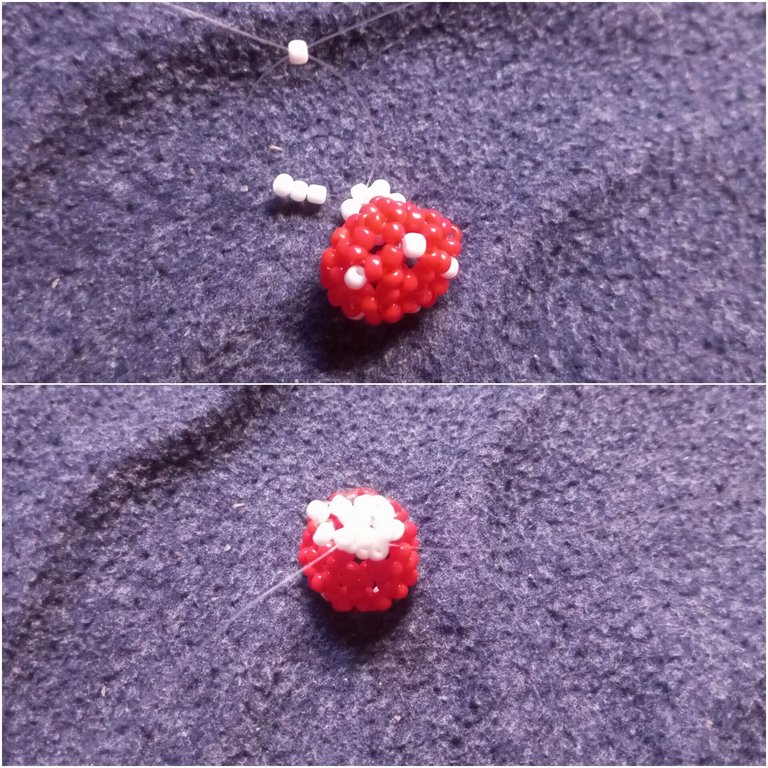
I started by beading the head of the mushroom by putting five red beads on a 90 cm fish line and crossing both fishlines with the fifth bead.
Step 2:
I put two red, one white, and two red beads on my left fishline and crossed both fishlines with the fifth bead.
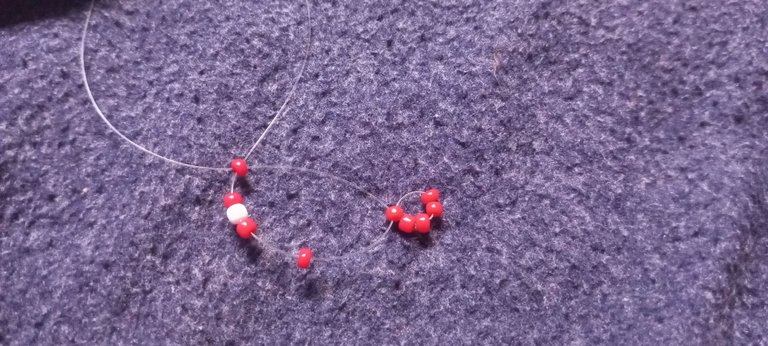
Step 3
Here I put my right fishline through the next bead and put one red, one white, and two red beads on my left fishline and crossed both fishlines with the third bead
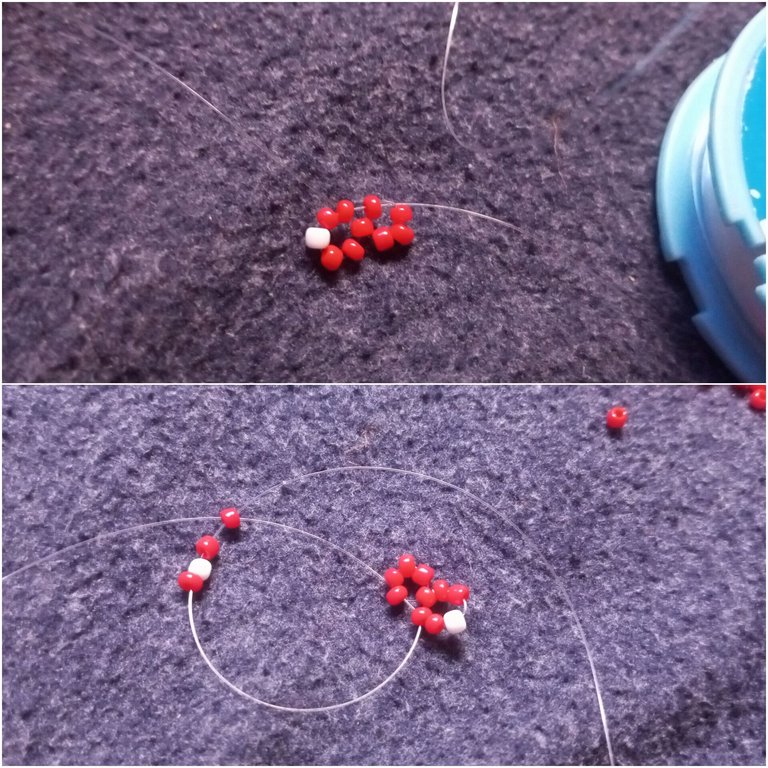
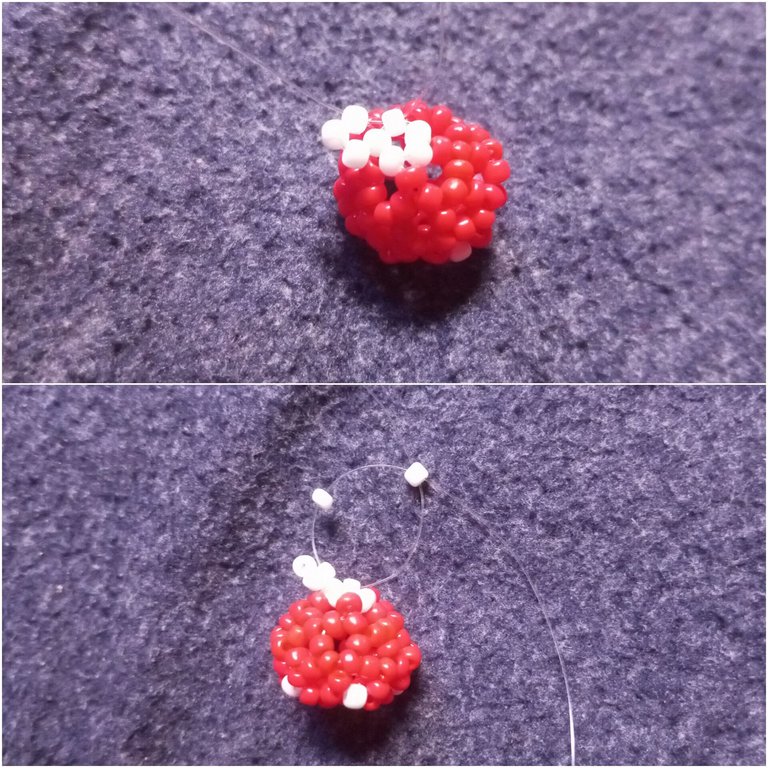
Step 4
I passed my right fishline through the next bead and put one red, one white two red beads on my left fishline and crossed both fishlines with the third bead.
Step 5
I passed my right fishline through the next bead and put one red, one white two red beads on my left fishline and crossed both fishlines with the third bead.
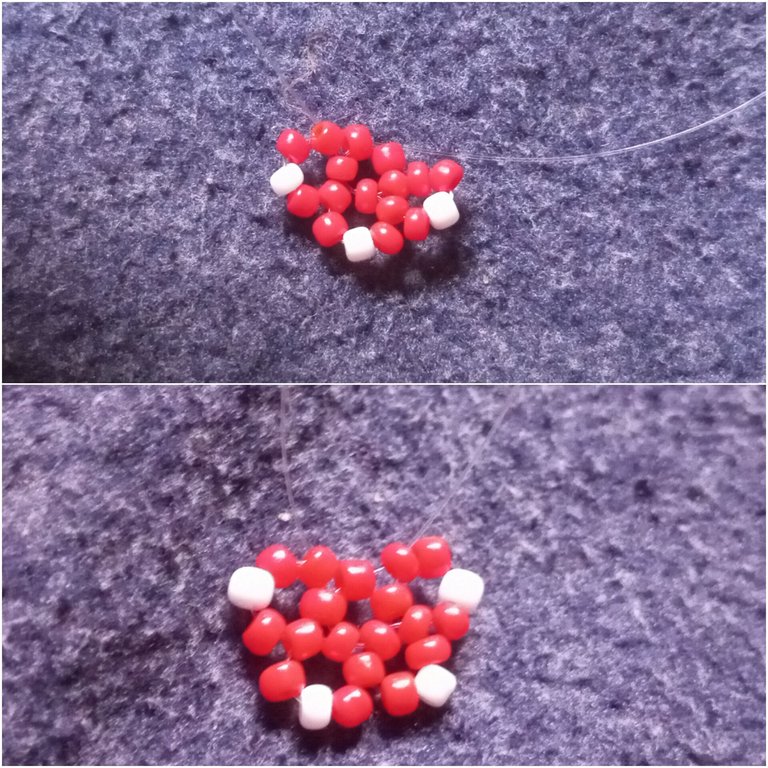
Step 6
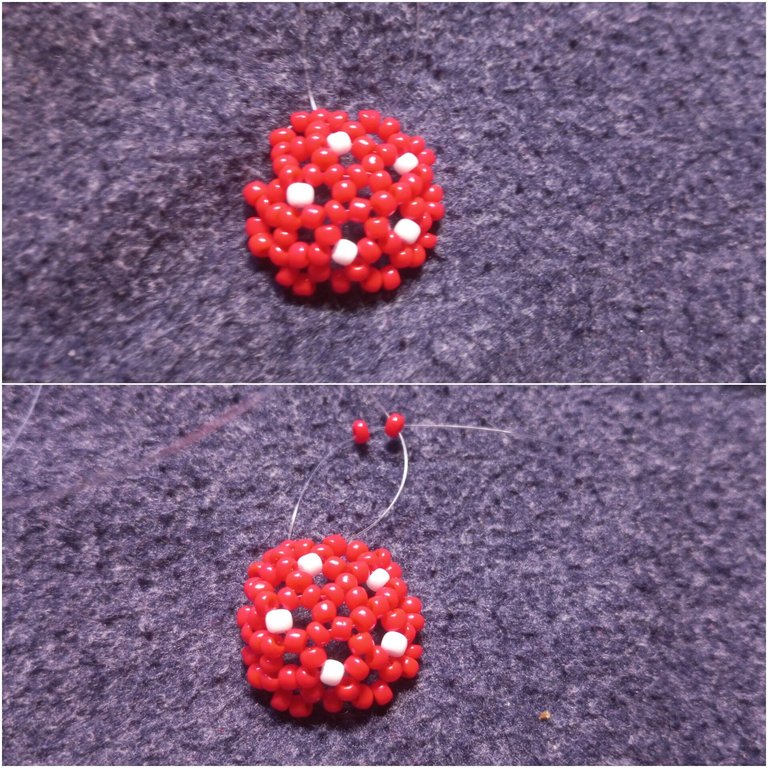
I passed my right fishline through the next two beads, put one red, one white, and one red bead on my left fishline, and crossed both fishlines with the third bead.
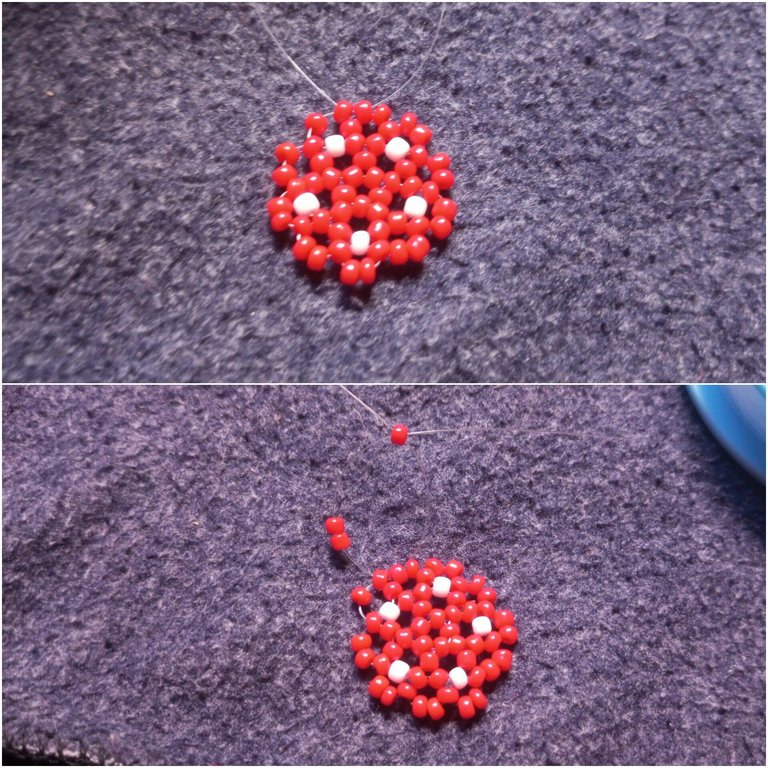
Step 7
I passed my right fishline through the next bead, put four beads on my left fishline, and crossed both fishlines with the fourth bead.
Step 8
I passed my right fishline through the next bead and put three red beads to the left fishline then crossed both fishlines with the third bead
Step 9
I passed my right fishline through the next two beads and put three red beads to the left fishline then crossed both fishlines with the third bead
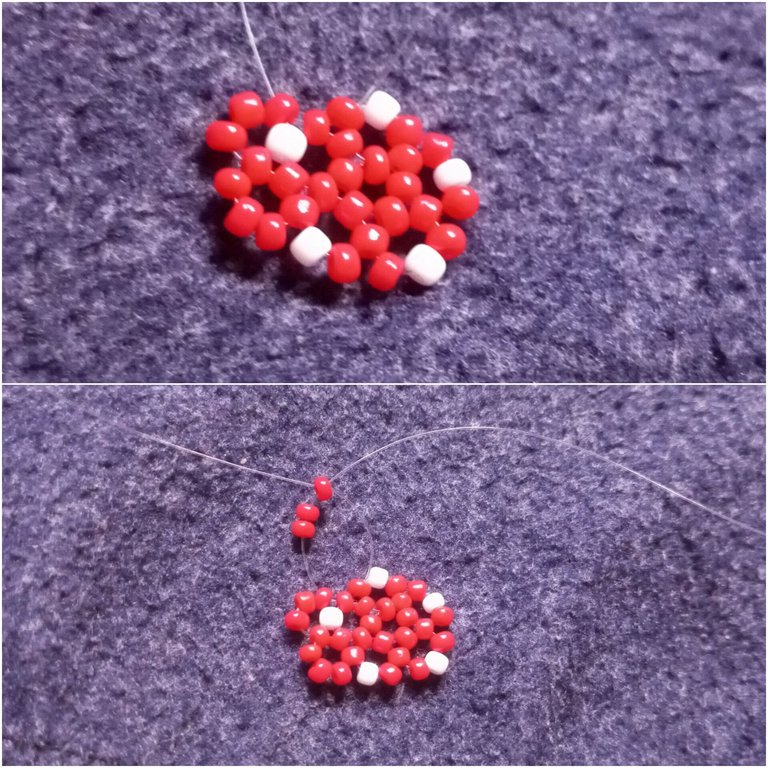
Step 10
I passed my right fishline through the next bead and put three red beads to the left fishline then crossed both fishlines with the third bead
Step 11
I passed my right fishline through the next two beads and put three red beads to the left fishline then crossed both fishlines with the third bead
Step 12
I passed my right fishline through the next two beads and put three red beads to the left fishline then crossed both fishlines with the third bead
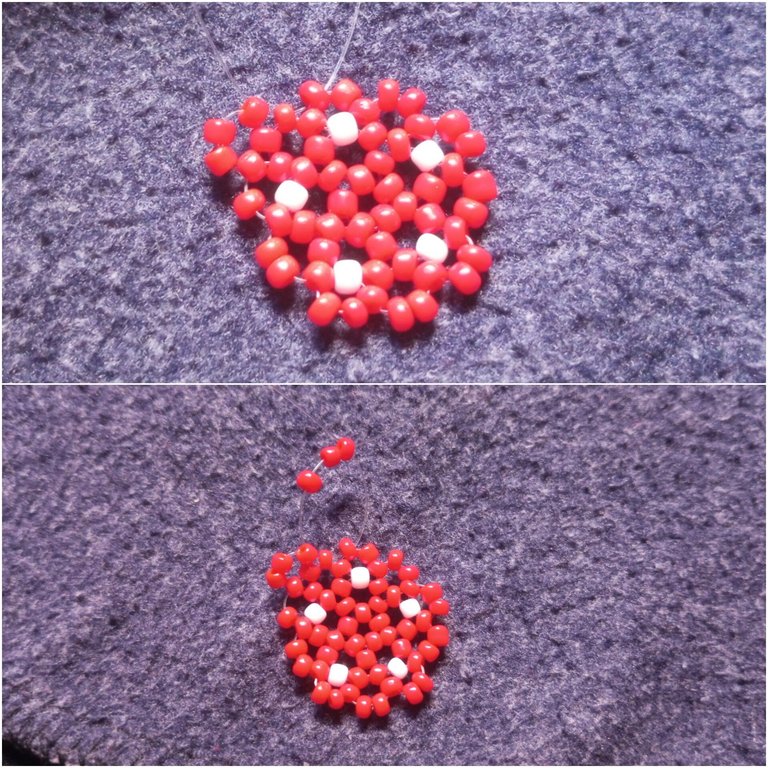
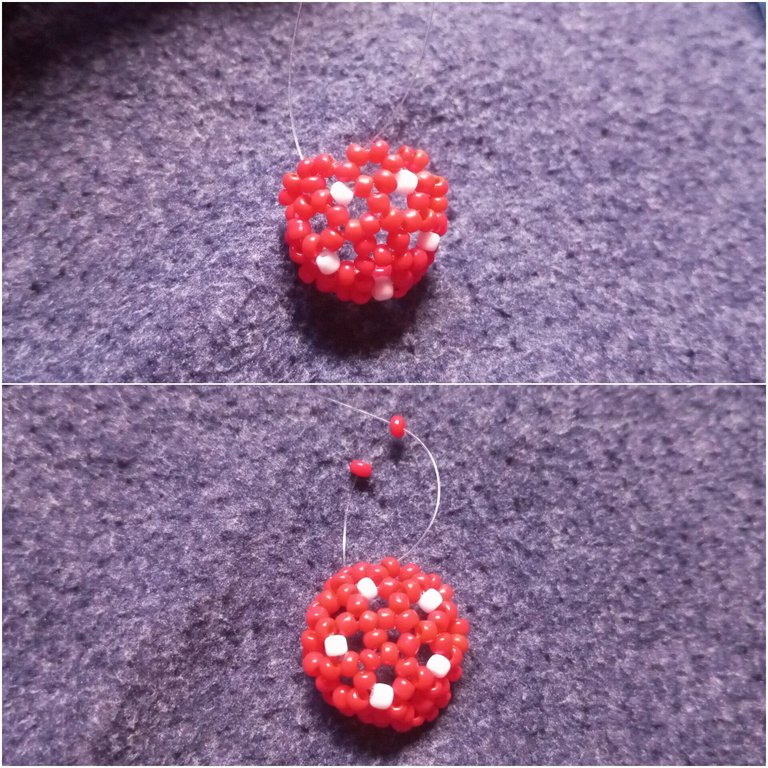
Step 13
I passed my right fishline through the next bead and put three red beads to the left fishline then crossed both fishlines with the third bead
Step 14
I passed my right fishline through the next two beads and put three red beads to the left fishline then crossed both fishlines with the third bead
Step 15
I passed my right fishline through the next two beads and put three red beads to the left fishline then crossed both fishlines with the third bead
Step 16
I passed my right fishline through the next two beads and put three red beads to the left fishline then crossed both fishlines with the third bead
Step 17
I passed my right fishline through the next bead, put three beads on my left fishline, and crossed both fishlines with the third bead.
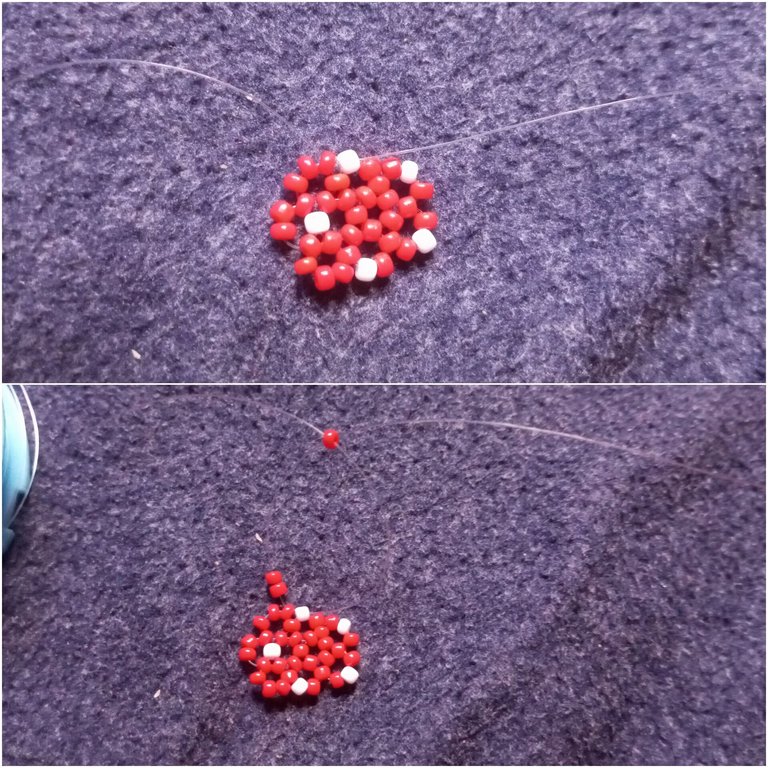
Step 18
I passed my right fishline through the next two beads and put three red beads to the left fishline then crossed both fishlines with the third bead
Step 19
I passed my right fishline through the next two beads and put two red beads to the left fishline then crossed both fishlines with the second bead

Step 20
I passed my right fishline through the next two beads and put three red beads to the left fishline then crossed both fishlines with the third bead
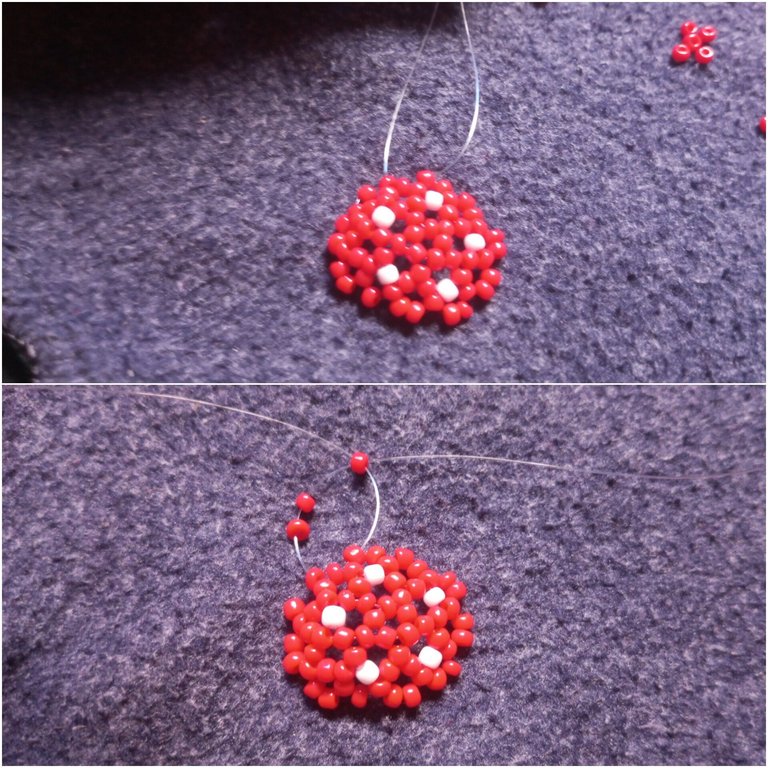
Step 21
I passed my right fishline through the next two beads and put two red beads to the left fishline then crossed both fishlines with the second bead
Step 22
I passed my right fishline through the next two beads and put two red beads to the left fishline then crossed both fishlines with the second bead
Step 23
I passed my right fishline through the next two beads and put two red beads to the left fishline then crossed both fishlines with the second bead
Step 24
I passed my right fishline through the next two beads and put two red beads to the left fishline then crossed both fishlines with the second bead
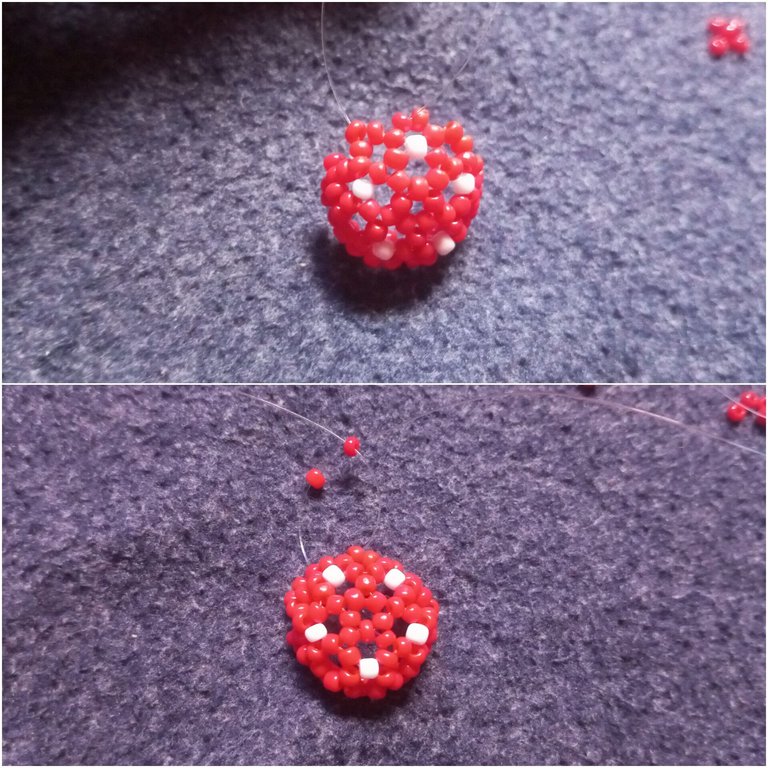
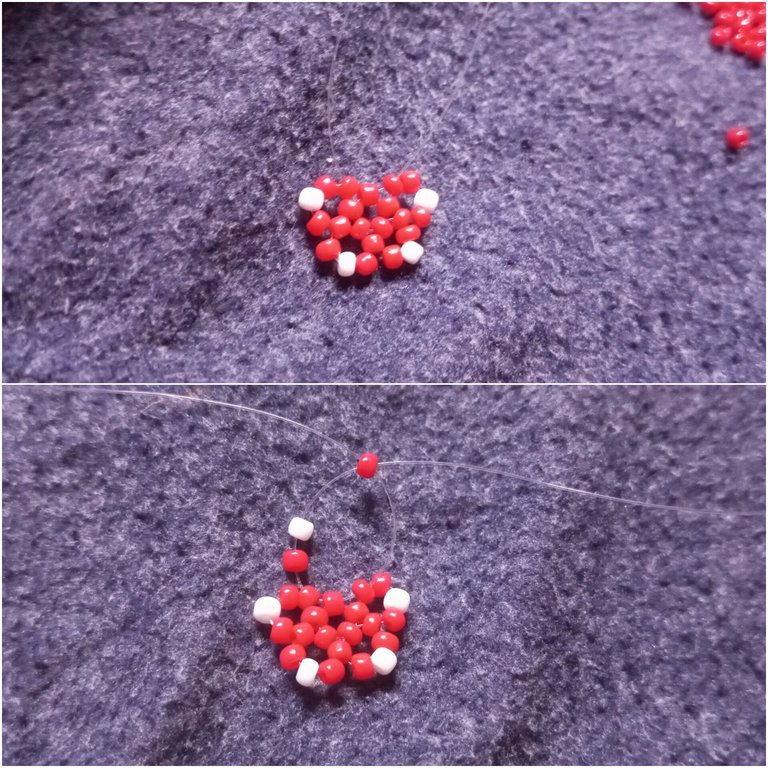
Step 25
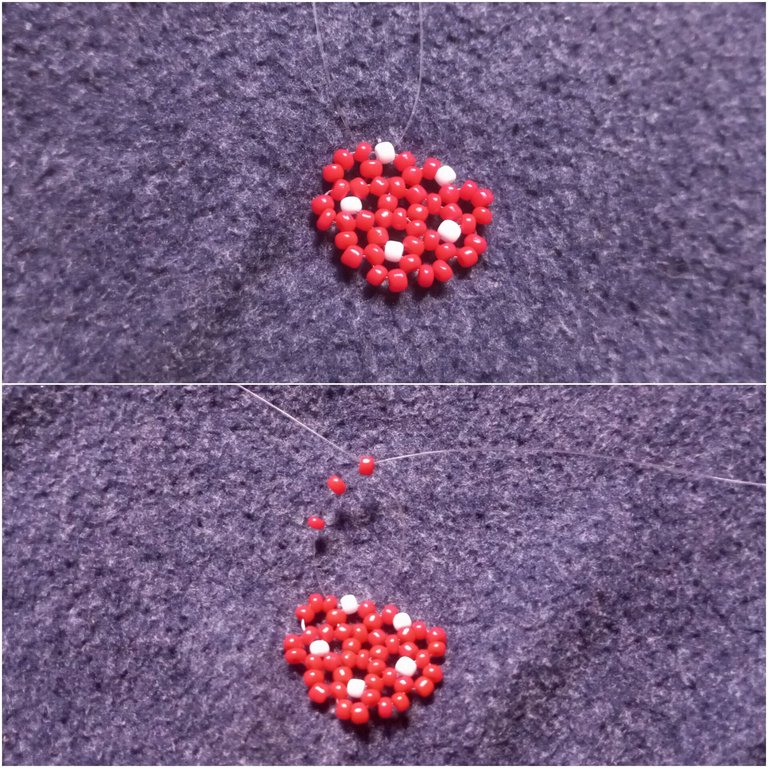
I passed my right fishline through the next three beads and put two red beads to the left fishline then crossed both fishlines with the second bead
Step 26
I passed my right fishline through the next two beads and put one red bead, one white, and one red bead on the left fishline, then crossed both fishlines with the third bead.
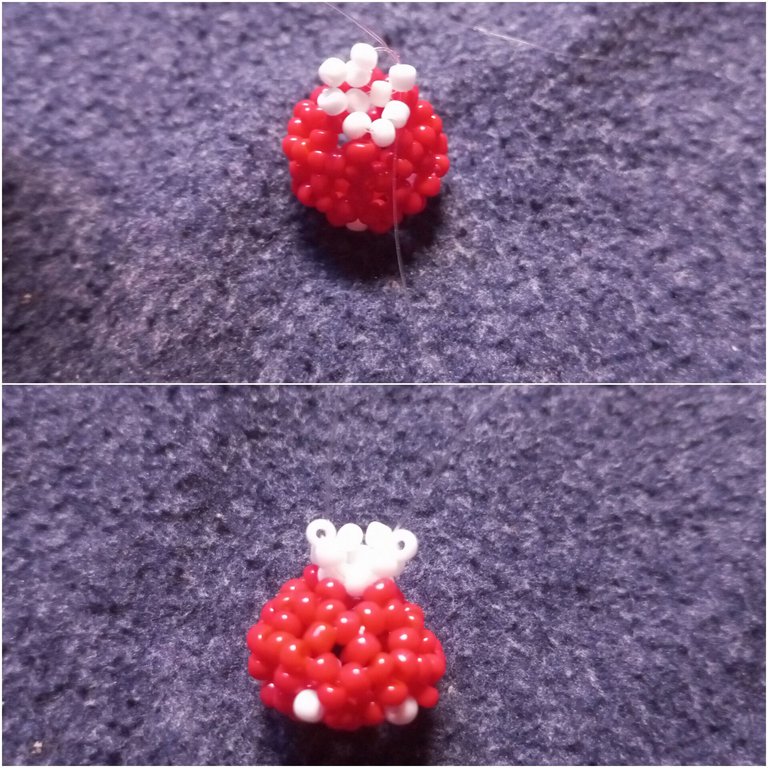
Step 27
I passed my right fishline through the next two beads and put one red bead, one white, and one red bead on the left fishline, then crossed both fishlines with the third bead.

Step 28
I passed my right fishline through the next two beads and put one red bead, one white, and one red bead on the left fishline, then crossed both fishlines with the third bead.
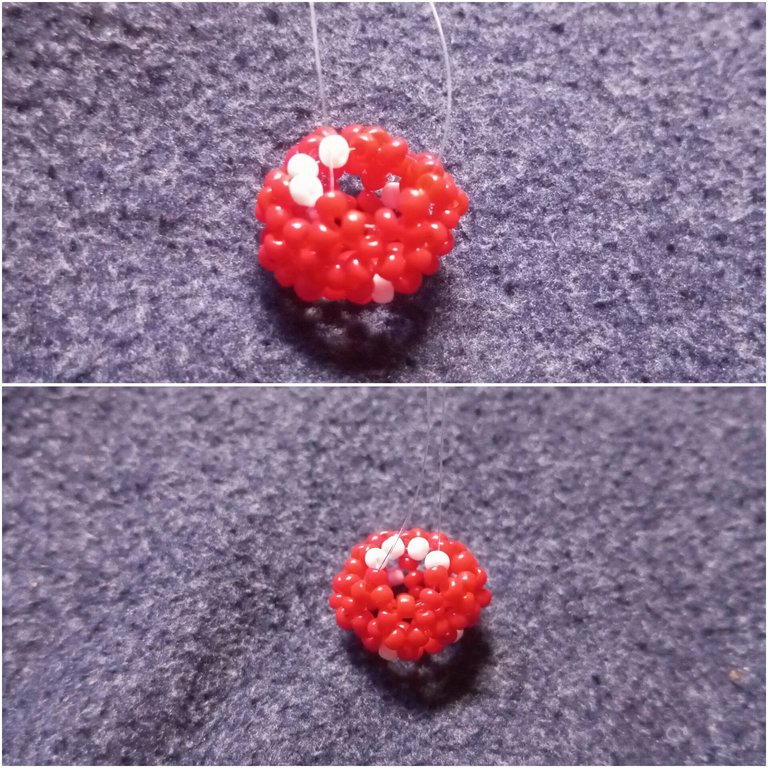
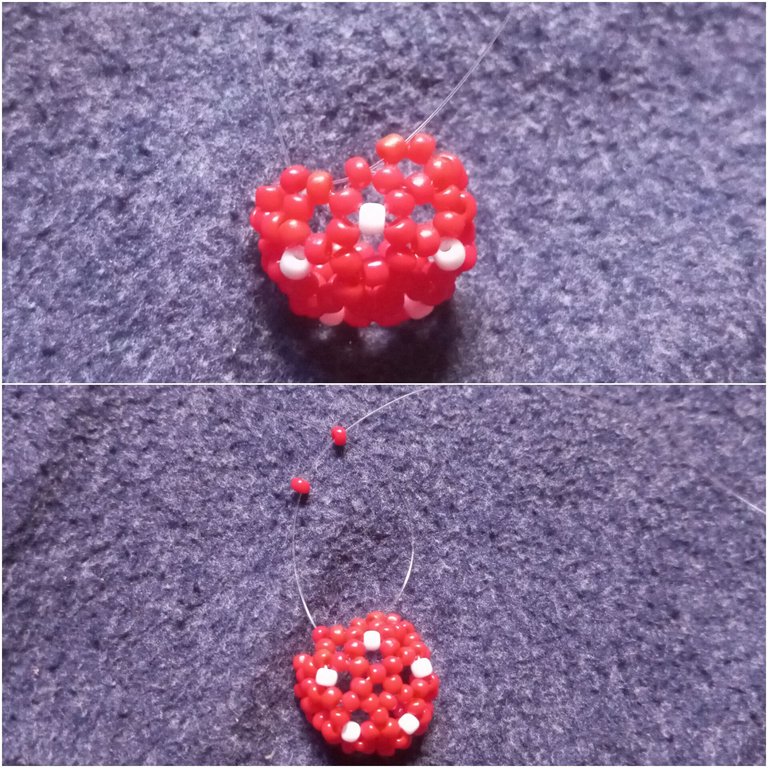
Step 29
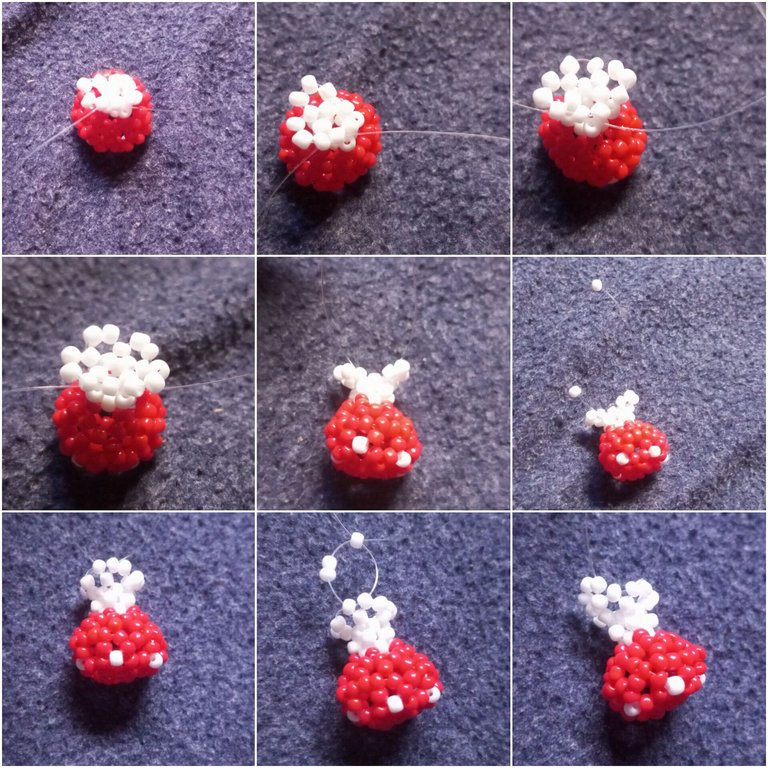
I passed my right fishline through the next three beads then crossed both fishlines with one white bead.
This gave the upper part of the mushroom.
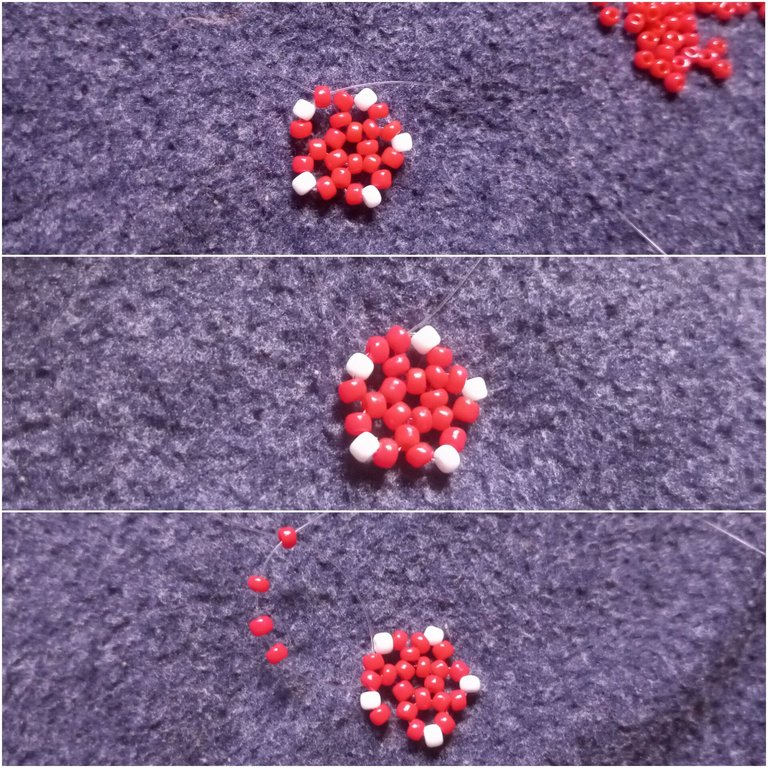
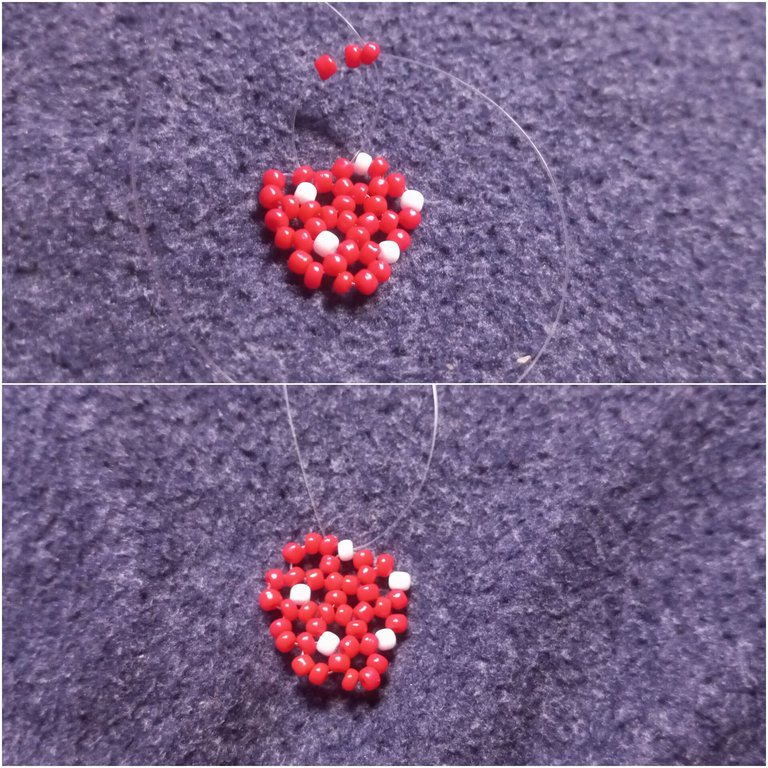
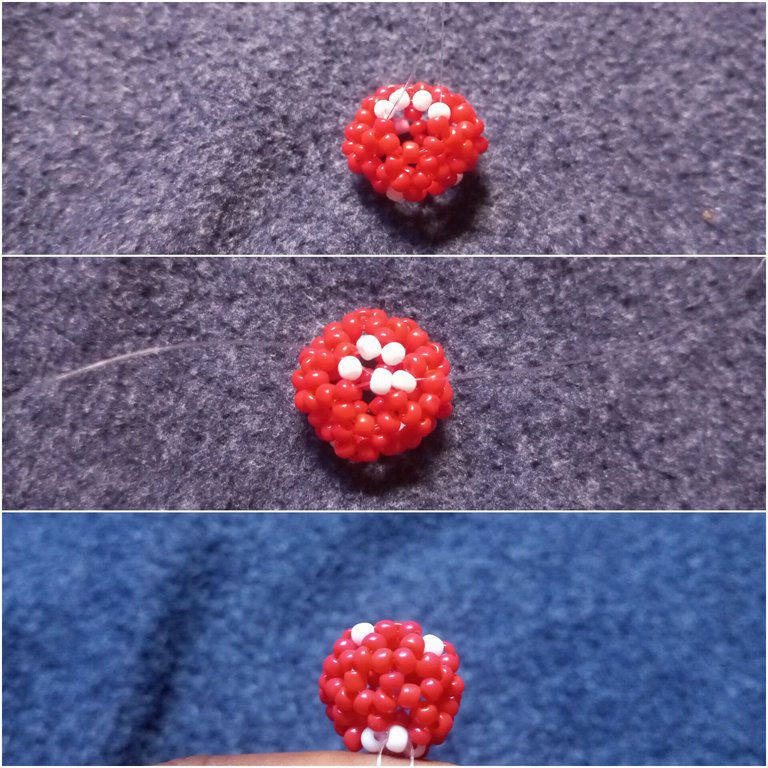
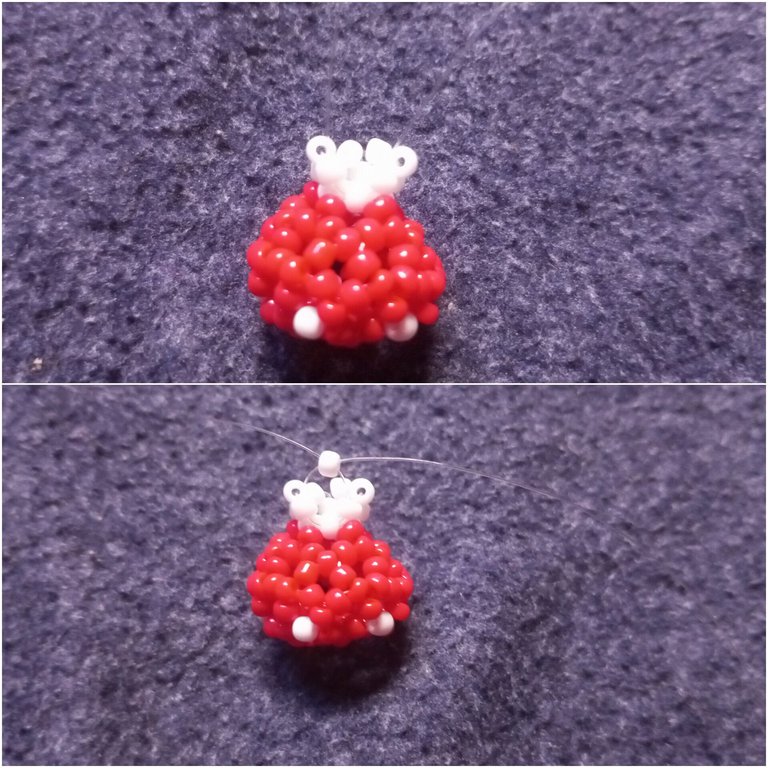
Step 30
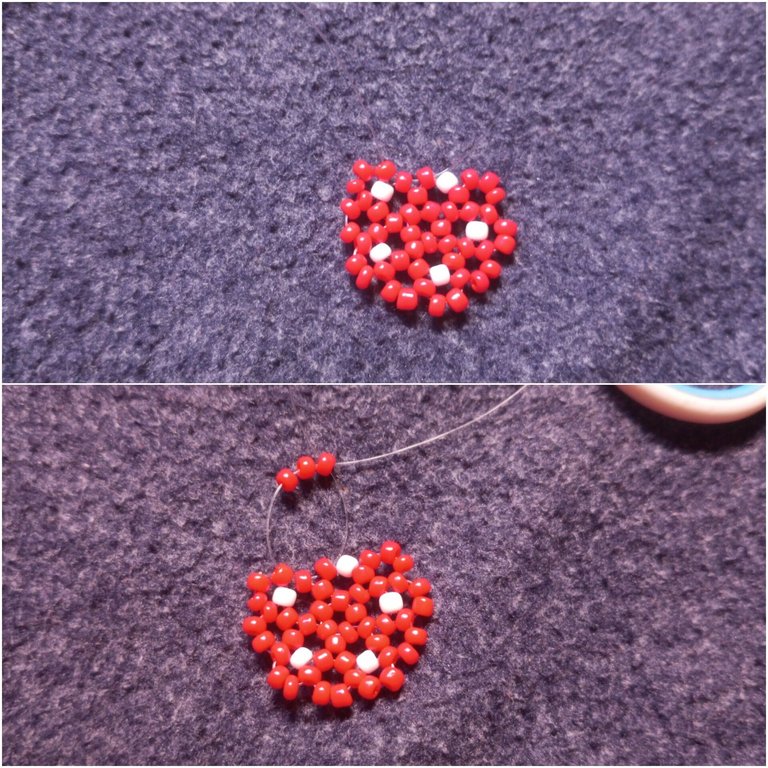
I went ahead to start making the leg, but putting three white beads on my left fishline and then crossed both fishlines with the third bead
Step 31
Here, I passed my right fishline through the next bead, put two white beads on the left fishline, and then crossed both fishlines with the second bead.
Step 32
Here I passed my right fishline through the next bead, put two white beads on the left fishline, and then crossed both fishlines with the second bead
Step 33
I passed my right fishline through the next two beads and crossed both fishlines with one white bead.
Step 34
To expand the leg of the mushroom, I put four beads on the left fishline and then crossed both fishlines with one bead. I would pass my left fishline through the next bead, put three beads on the left fishline, and cross both fishlines with the third bead. I repeated this three more times to complete this cycle.
Step 35
I repeated step 34 above to continue to build the leg of the mushroom
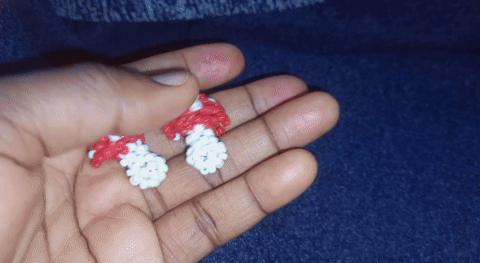
Step 36
Here I completed building the leg.

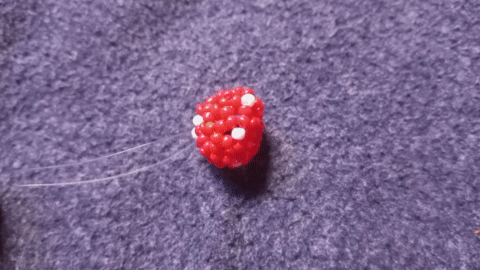
Step 37
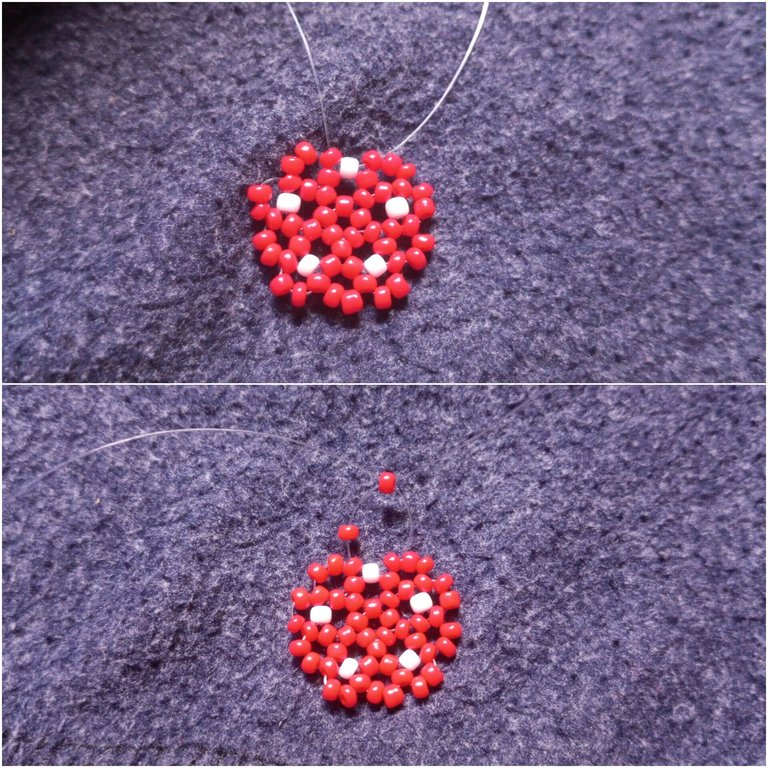
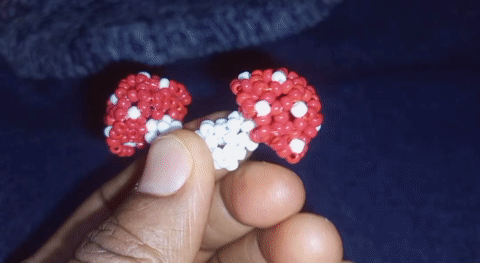
I inserted a 75 cm fishline into two beads at the second ring of the round shape of the mushroom, then I put three red beads on the left fishline and crossed both fishlines with one white bead. I then passed my left fishline through the next two red beads, put three beads on the left fishline, and crossed both fishlines with the third bead. I continue this process until round the mushroom; I would use three red beads and then two red beads with one white bead to give the mushroom a touch of white, as you can see below.
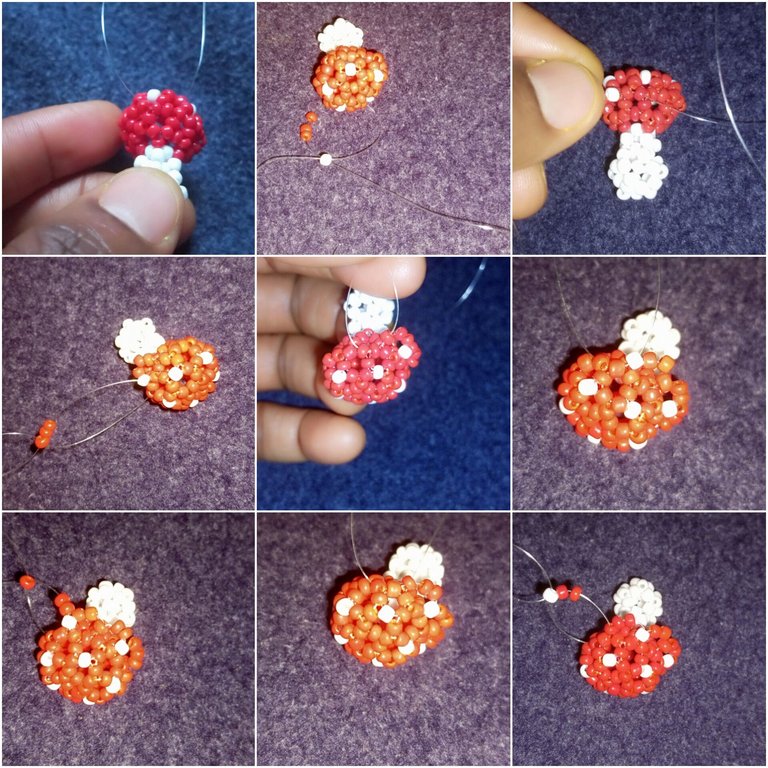
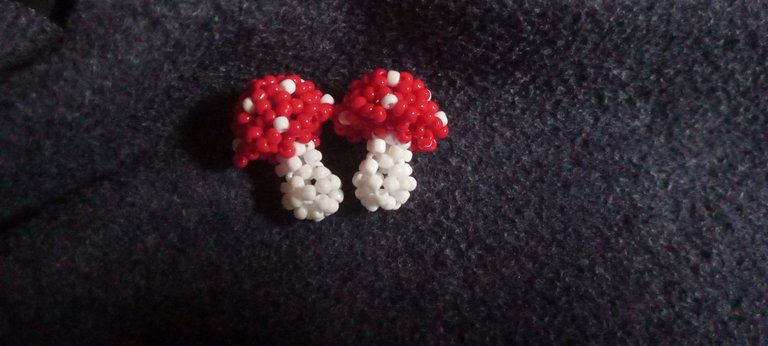
Now we have a mushroom
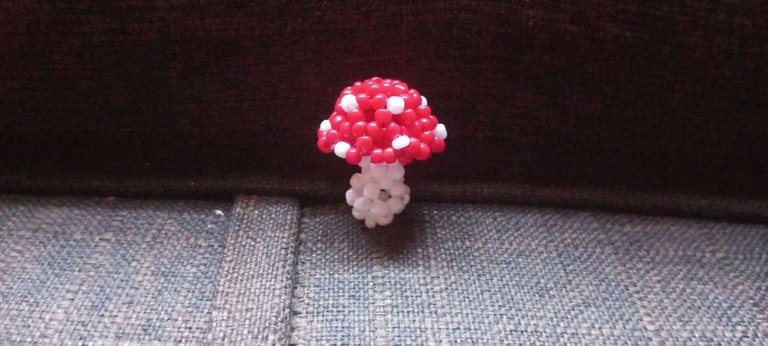
And I beaded two lovely mushrooms, what do you think? For me, it's so satisfying and relaxing to watch; well I guess that is what Sundays are meant for.
Then end
Thank you so much for your time and support, I wish you a blissful Sunday.
All images are mine 😊🤗🍄
Thank you very much for the support.
This is so beautiful, it could work as a key chain too 😍
Yeah, that's right it will make a cool keychain.
Thank you very much !LUV
(4/5) sent you LUV. | tools | discord | community | HiveWiki | <>< daily@rayoo, @funshee
Yeah, that's right it will make a cool keychain.
Thank you very much !LUV
(5/5) sent you LUV. | tools | discord | community | HiveWiki | <>< daily@rayoo, @funshee
Always getting better and I love your work. This beaded mushrooms are amazing and it's a well done job 👏 👌
Thank you very much, dear Princess ❣️🙏; I wish you a great evening.
you are very creative, not many people can make toy mushrooms from beads, thank you for sharing with us
Thank you very much, @yuliadi; it was fun to make it.
Thank you very much for your support🙏
This is so creative. Well done
Thank you very much 🙏🥰 dear !LUV
The beaded mushroom 🍄 looks very beautiful, I don't think there's any of your bead work that I don't admire. I can imagine the excitement on your son's face when you present another beautiful beaded gift to him
Thank you 😊😍 always; he is always happy to see any new items I bead, and that inspired me to bead more stuff for him.
The mushroom 🍄 look so beautiful. This is creativity at its peak. I love all your bead work
Thank you so much, for always supporting my work. !LUV
(3/5) sent you LUV. | tools | discord | community | HiveWiki | <>< daily@lecia89, @funshee
What a beautiful design! It looks like the real mushroom. It looks amazing. Good to see how you made it. Well done!
Yeah, it looks so real.
Thank you very much for your support😊🙏
The making process is so detailed and easy to grasp. It came out beautifully.
Yes, the process is quite easy.
Thank you very much.
You're welcome
@funshee, I paid out 0.120 HIVE and 0.030 HBD to reward 10 comments in this discussion thread.