¡Hola a todos! 💞 | Hello everyone! 💞
En fin, aquí los recursos y pasos:
Today I bring you a mini tutorial on how we can make our custom banner or background image by adding an animation, or a gif to make it look more beautiful and decorate your blog🤗.
Anyway, here are the resources and steps:

💻RECURSOS💻
Necesitaremos estas estrellitas tipo gif en movimiento y además una imagen de nosotros (Si quieres, si no, lo decoras sin eso).
We will need these moving gif type stars and also an image of us (If you want, if not, you can decorate it without that).

💻PASO A PASO💻
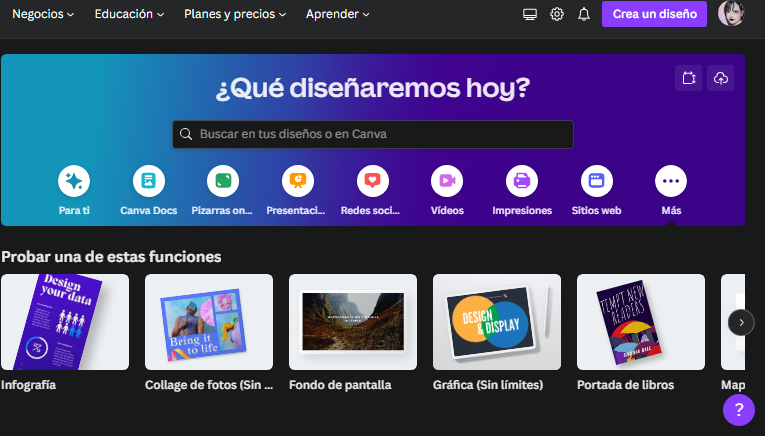
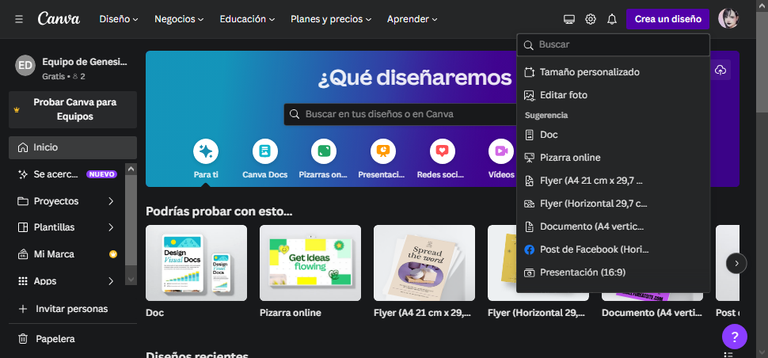
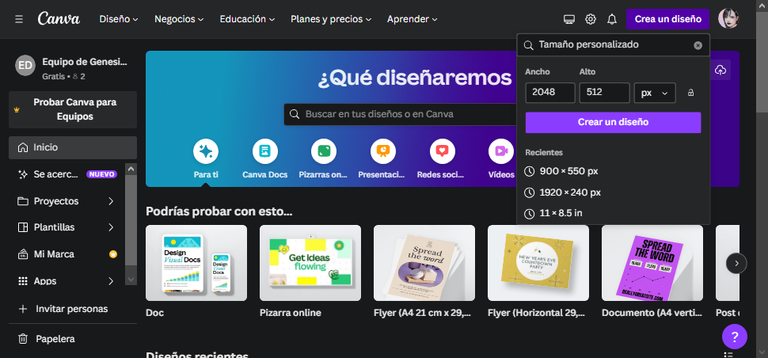
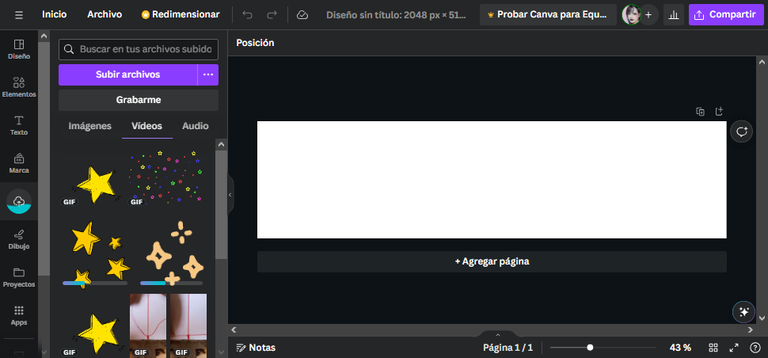
💻PASO N°1: Abrimos la página de CANVA: CANVA. Vamos a dirigimos al recuadro morado que dice CREAR DISEÑO y le damos clic donde dice “TAMAÑO PERSONALIZADO”. Saldrá unos recuadros donde dirán: “ANCHO y ALTO”. En el ancho pondremos esta medida: 2048 cm y en el alto colocaremos: 512 cm. Donde se lee “px” cámbienlo por “cm” entonces saldrán varias opciones. Para que nos de nuestras medidas personalizadas solamente le damos en “CREAR UN DISEÑO” que es ese cuadrito morado que se encuentra debajo de las medidas redirigiéndonos a nuestra plantilla vacía con esas medidas.
STEP N°1: Open the CANVA page: CANVA. We go to the purple box that says CREATE DESIGN and click where it says "CUSTOM SIZE". You will see some boxes that say: "WIDTH and HEIGHT". In the width we will put this measurement: 2048 cm and in the height we will put: 512 cm. Where it says "px" change it to "cm" and you will see several options. To give us our custom measures just click on "CREATE A DESIGN" which is that little purple box that is below the measures redirecting us to our empty template with those measures.
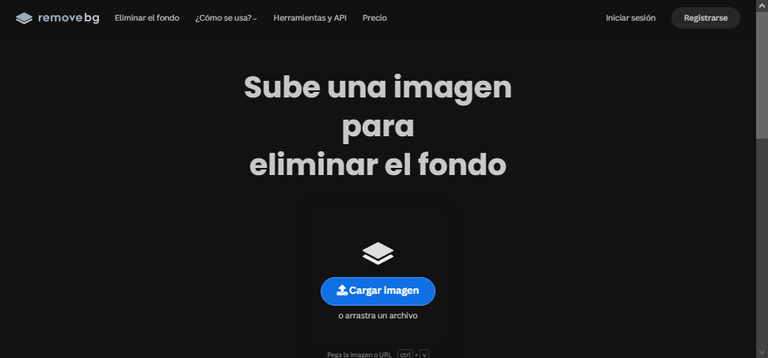
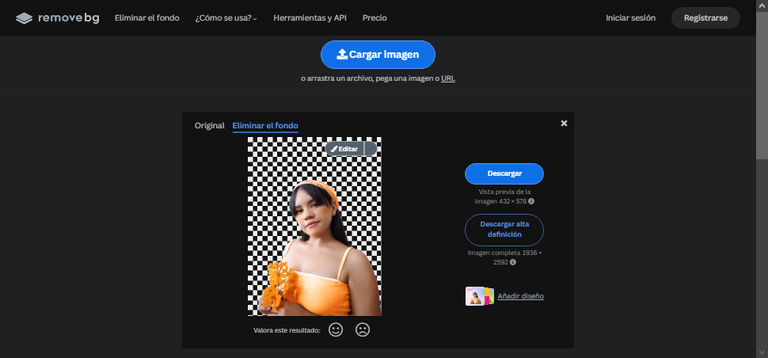
💻PASO N°2: Antes de hacer lo que realizamos en el post anterior nos dirigiremos a esta página llamada REMOVE sirve para quitarle el fondo a personas u objetos y aquí lo haremos para quitarle el fondo a nuestra imagen. Esta es una manera más sencilla y rápida para aquellas personas que no sepan manipular Photoshop y quieran quitarles el fondo a sus fotos o a otras cosas. Después de realizar este paso, nos dirigimos a la sección que dice SUBIDOS y le damos clic a SUBIR ARCHIVOS, seleccionaremos la plantilla que les adjunte anteriormente más la imagen a la cual le quitamos el fondo y esperamos a que carguen.
💻STEP N°2: Before doing what we did in the previous post we will go to this page called REMOVE it is used to remove the background of people or objects and here we will do it to remove the background of our image. This is a simpler and faster way for those people who don't know how to manipulate Photoshop and want to remove the background of their photos or other things. After making this step, we go to the section that says UPLOADS and we click on UPLOAD FILES, we will select the template that I attached previously plus the image to which we remove the background and we wait for it to load.
PASO 3 | STEP 3
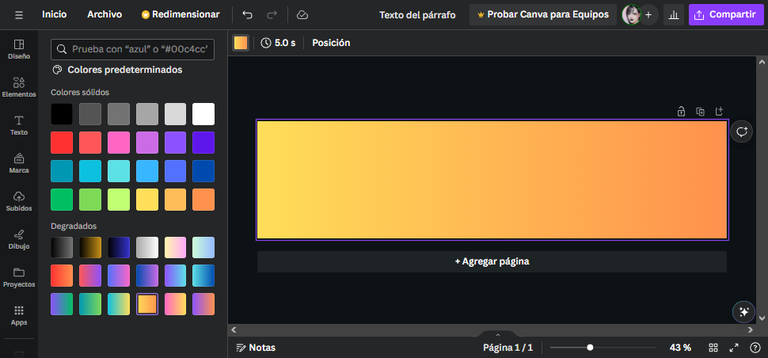
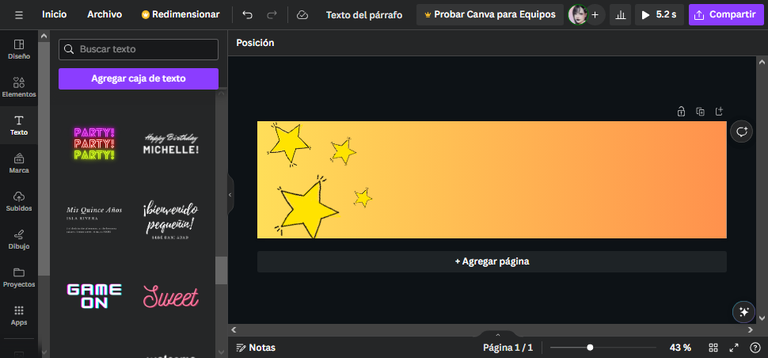
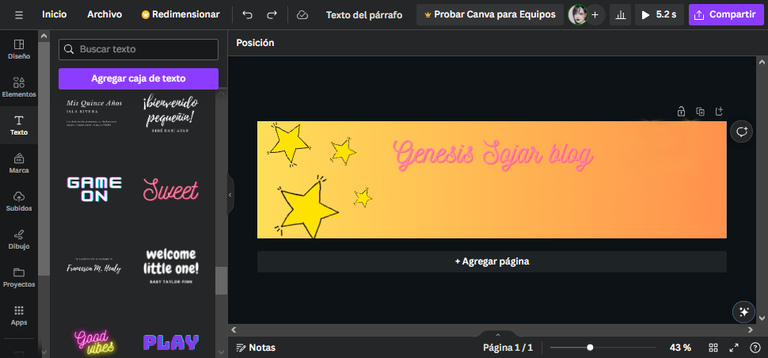
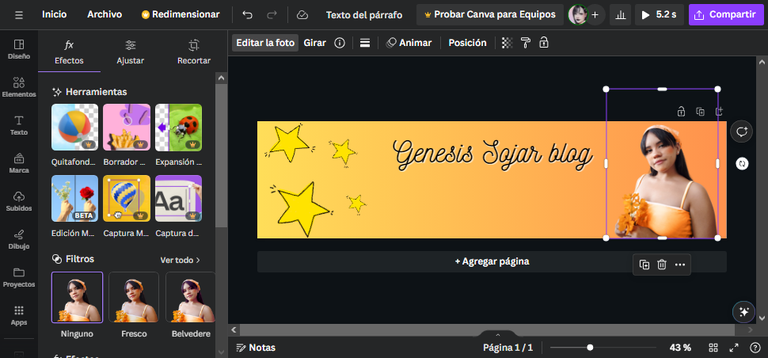
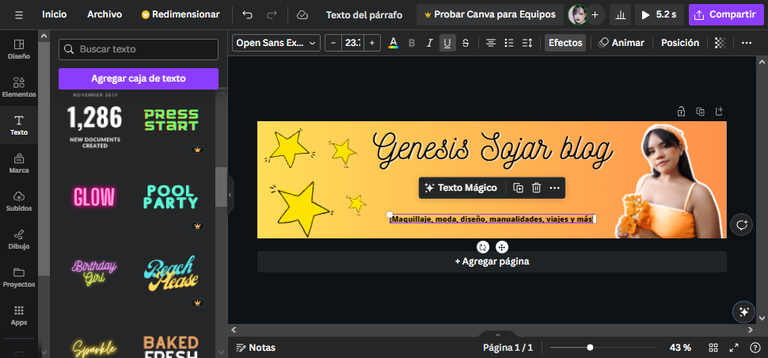
💻PASO N°3: Ya cuando este la plantilla de estrellitas cargada, le damos clic y la colocamos en el lado que más les parezca, en este caso, yo lo puse al lado izquierdo. Antes de eso le cambiamos el color al banner por uno degradado ya sea naranja y amarillo (como se observa en la imagen). Si no les gusta esta combinación de colores ahí mismo lo pueden cambiar por otros dos. Por otra parte, le agregamos el texto y le damos clic en "SWEET". Esta fuente me gusta mucho, en realidad.
💻STEP N°3: Once the star template is loaded, click on it and place it on the side you prefer, in this case, I placed it on the left side. Before that we change the color of the banner for a gradient color either orange and yellow (as shown in the image). If you don't like this color combination you can change it for another two colors. On the other hand, we add the text and click on "SWEET". I really like this font, actually.
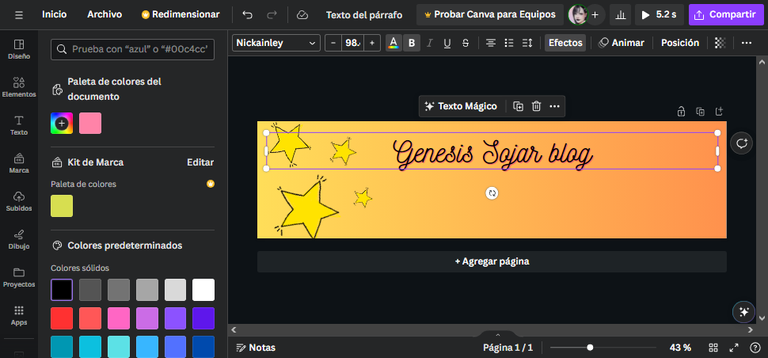
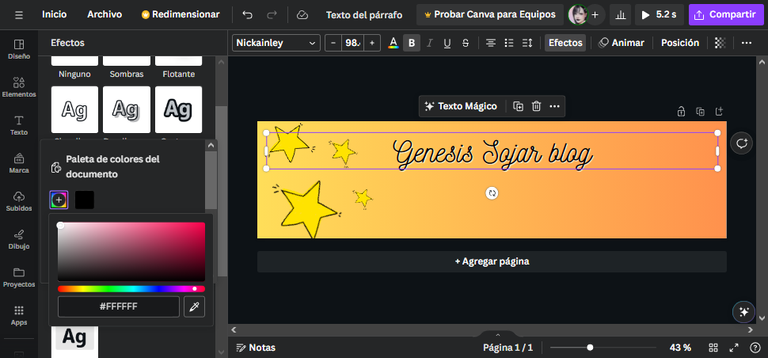

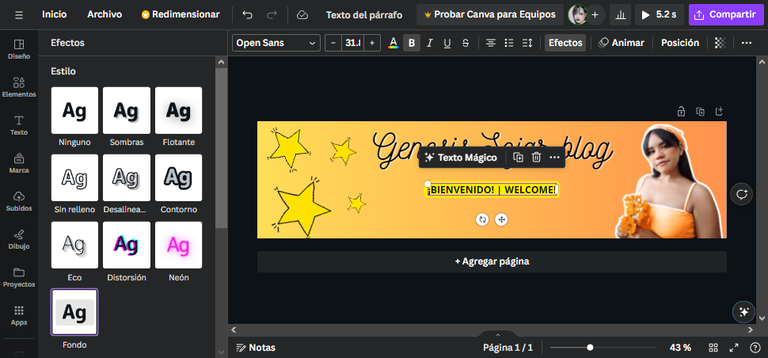
💻PASO N°4: En esta parte, le cambiaremos el color al texto a negro y le colocaremos un contorno en blanco ya que si pudieron observar anteriormente, no se leía bien lo que decía. Luego, terminamos añadiendo la imagen a la cual le quitamos el fondo. Ajustándola como bien nos parezca.
💻STEP N°4: In this part, we will change the color of the text to black and we will place a white outline because if you could see before, you could not read well what it said. Then, we finish adding the image to which we remove the background. Adjusting it as we see fit.
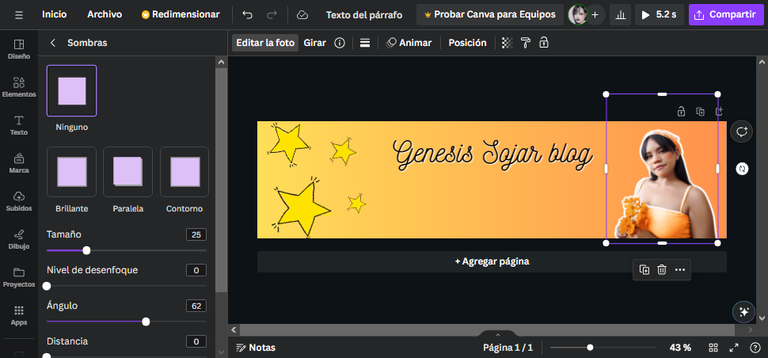
💻PASO N°5: Ya que colocamos la imagen, pasaremos a colocarle contorno. Nos dirigimos a "EDITAR LA FOTO" segunda opción "SOMBRAS" y le damos a "CONTORNO" lo pueden dejar en blanco o cambiarle el color.
💻STEP N°5: Now that we have placed the image, we will place the outline. We go to "EDIT PHOTO" second option "SHADOWS" and click on "OUTLINE" you can leave it blank or change the color.
PASO 6 | STEP 6
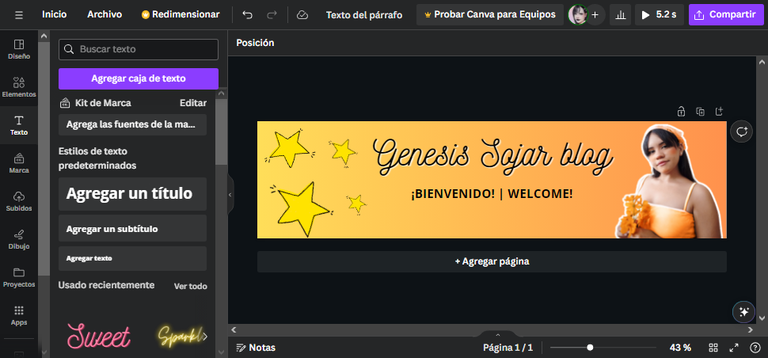

💻PASO N°6: Como noté que el banner iba a quedar muy sencillo le agregué más texto, dando la bienvenida a mi blog y de que iba a tratar mi blog, esto es para aquellas personas que entren y más o menos vean cual es mi nicho. Sin embargo, aun siento que no tengo uno definido y es por ello que diversifico mi contenido en el blog. Para finalizar, lo suben a su blog de Hive, en donde dice: "CONFIGURACIÓN" Te saldrá un segundo recuadro que dice: "LINK PARA LA IMAGEN DE FONDO" y le darás "UPLOAD AN IMAGE" para así mejorar la apariencia de nuestro blog.
💻STEP 6: As I noticed that the banner was going to be very simple I added more text, giving the welcome to my blog and what my blog was going to be about, this is for those people who enter and more or less see what my niche is. However, I still feel that I don't have a defined one and that's why I diversify my content on the blog. Finally, upload it to your Hive blog, where it says: "CONFIGURATION" You will get a second box that says: "LINK FOR THE BACKGROUND IMAGE" and you will give "UPLOAD AN IMAGE" to improve the appearance of our blog.
Con este resultado me despido. Espero que esta idea te motive a mejorar la apariencia de tu blog, a mí nada más me falta cambiar la imagen de perfil para que combine con el banner. En fin, no te olvides de comentar, ¡nos vemos en otra próxima oportunidad!
With this result I say goodbye. I hope this idea motivates you to improve the look of your blog, I just need to change the profile image to match the banner. Anyway, don't forget to comment, see you next time!
.gif)
📲Utilice el programa de CANVA
💻Programa Inshot para tomar las capturas de mi pantalla.
✍️Programa para quitar fondo REMOVE
📲Use the CANVA program
💻Inshot program to take screenshots of my screen.
✍️ REMOVE background removal program
📷 ALL PHOTOS ARE MY PROPERTY
📷 TODAS LAS FOTOS SON DE MI PROPIEDAD
Congratulations @genesis.sojar! You have completed the following achievement on the Hive blockchain And have been rewarded with New badge(s)
Your next target is to reach 300 upvotes.
You can view your badges on your board and compare yourself to others in the Ranking
If you no longer want to receive notifications, reply to this comment with the word
STOPTo support your work, I also upvoted your post!
Check out our last posts:
Thanks youu hivebuzz🥰🥰🥰
Excelente trabajo amiga, me gustan mucho tus post de allí se aprende, gracias por confiar en nuestra comunidad para construir web 3.
Muchas gracias Mayii 🥰🌻
últimamente todo me recuerda que tengo que actualizar mi blog... Gracias por darme ideas jajaja, esta muy bonito tu post, y el resultado final quedo estupendo, gracias por compartir tu contenido con nosotros. Saludos.
Jajaja claro! Inténtalo, es una idea que puedes recrear🥰. Muchas gracias 🫂🥰
Congratulations, your post has been upvoted by @dsc-r2cornell, which is the curating account for @R2cornell's Discord Community. Enhorabuena, su "post" ha sido "up-voted" por @dsc-r2cornell, que es la "cuenta curating" de la Comunidad de la Discordia de @R2cornell.
thank you💞
Siempre está el meme de diseñadores sobre canva, pero la verdad es un facilitador muy grande al momento de diseñar cualquier post, banner etc. Muy buen tutorial, saludos
Jajaja si! Estoy de acuerdo contigo, es una herramienta que ayuda muchísimo al momento de no tener conocimiento con Photoshop o Illustrator. Saca mucho de apuros🤭