bienvenidos❤️||welcome❤️
The best friend of a work starts with a pencil, in this case I recommend a number H and 4B (the H are thinner and less greasy than the B).
El mejor amigo de un una obra empieza por un lapiz en este caso recomiendo un numero H y 4B (los H son mas fino y menos grasos que los B)
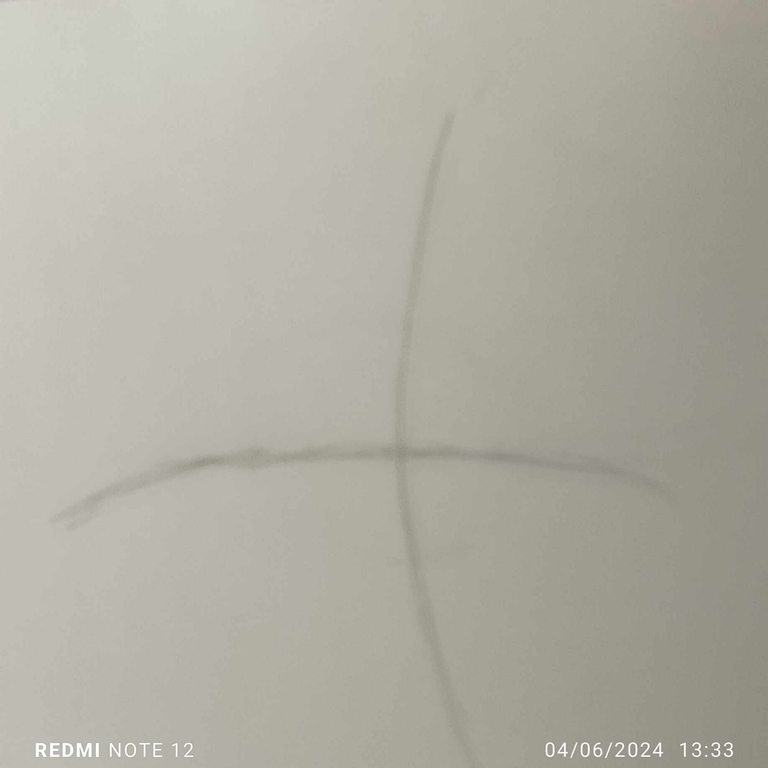
To start with a curved line and in the middle draw a straight line. From there, we mark a point where the two lines meet and then we make a circle of the size of your choice. From it we start on the left side begins what is called ‘tear trough’, with a slope upwards goes to the top of the eye but at the time of making the lower line of the eye we do it with a curve upwards, finally we will join the part of the tear trough.
Para empezar hacemos un linea curva y en medio trazamos una recta. De ahí, Marcamos un punto donde se encuentra la unión de las dos líneas lo que hacemos despues es hacer un circulo del tamaño de su preferencia. A partir de ella partimos en la parte izquierda comienza lo que se llama "lagrimal", con una pendiente hacia arriba va para la parte superior del ojo pero al momento de hacer la linea inferior del ojo lo realizamos con una curva dirija hacia arriba, por ultimo uniremos la parte del lagrimal.
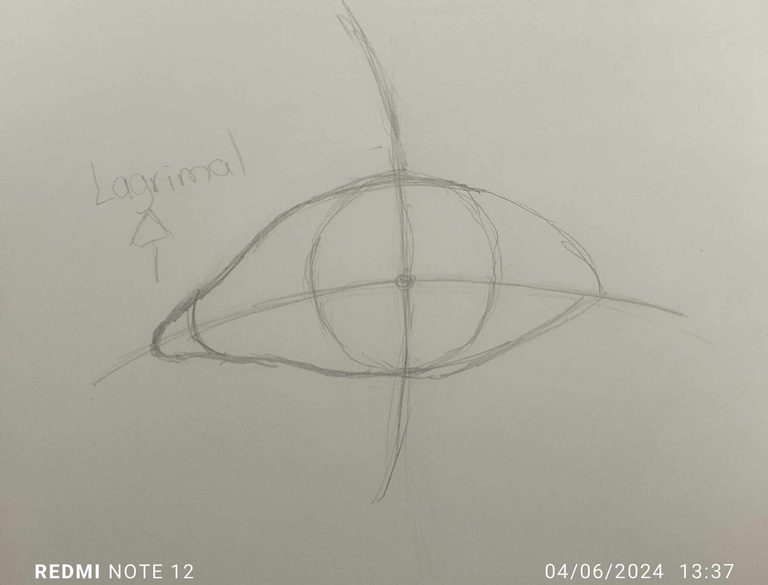
Later we will trace the upper crease of the eyelid that will surround the upper part of the eyelid and then we will trace the lower wrinkles of the eye. At the same time we will trace the edges of the eyelids since they are not totally straight from my perspective I will give a little bit of shadow to mark them a little bit more.
Mas tarde vamos a trazar el pliegue superior del parpado que rodeara toda la parte de arriba posteriormente trazaremos las arrugas inferiores del ojo. A su vez trazaremos los bordes de los parpados ya que estos no son totalmente rectos desde mi perspectiva le daré un poco de sombra para marcarlos un poco mas

With little pressure we will give shade to the whole drawing, be it the tear, the folds, the sclera which is all the white and the pupil which we will calculate with the dimension of the eye. Remember to move the pencil diagonally so that the shading is smoother.
Con poca presión daremos sombra a todo el dibujo ya sea en el lagrima, los pliegues, la esclerótica que es todo lo blanco y la pupila que la calcularemos con la dimensión del ojo. Recuerda mover el lápiz de forma diagonal para que de esa forma el sombreado te salga mas liso.
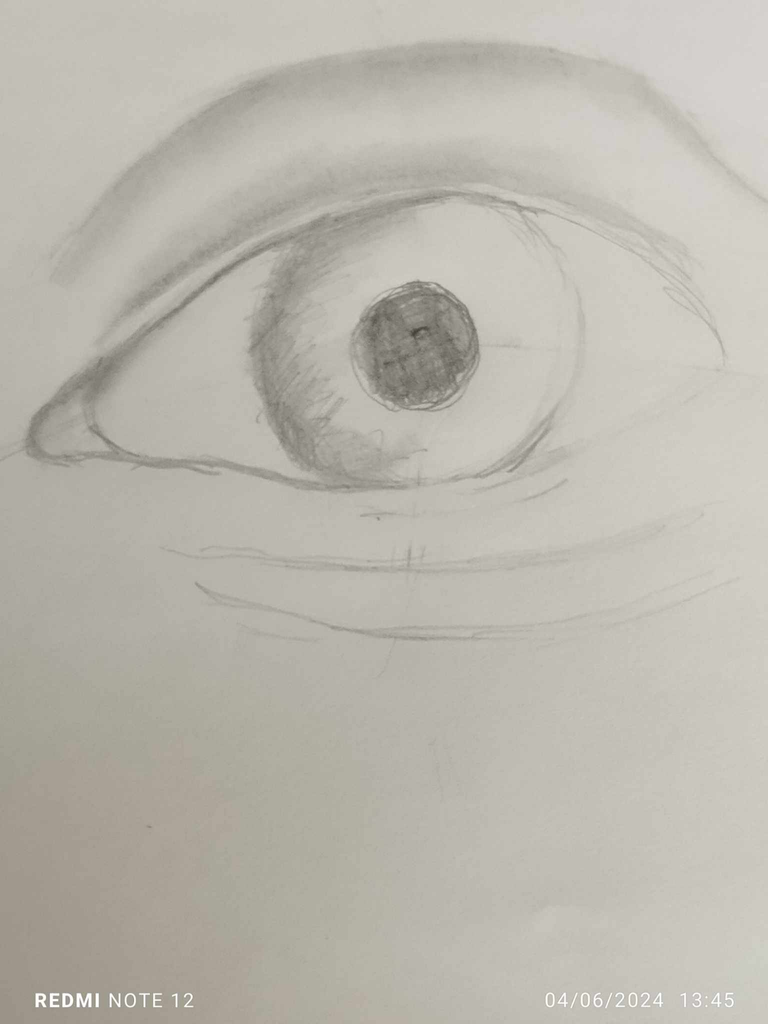
On the other hand we will draw lines from the iris to the pupil. We will do this process several times so that you can see how the eye looks more realistically.
Por otra parte vamos a trazar líneas del iris a la pupila. Haremos este proceso varias veces para que asi se de cuenta de como se pone el ojo mas realista.
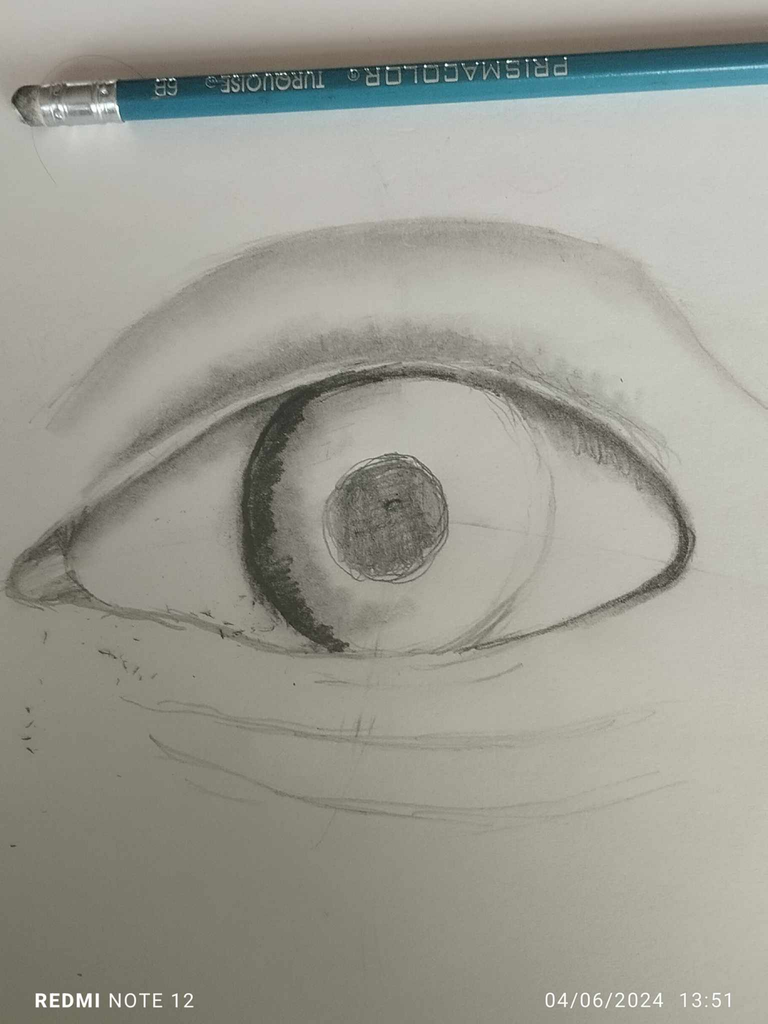
I highly recommend doing this with the B pencils as the others can hurt the sheet creating furrows. From there we go on to shade a little the upper crease of the eye diagonally. for those who do not know how to shade well I recommend using an isopic pencil that we have at home and the correct way to do it is to gently circle the strokes made.
recomiendo mucho hacer esto con los lápices B ya que los otros pueden lastimar la hoja creando surcos, De ahí pasamos a sombrear un poco el pliegue superior del ojo en forma diagonal. para aquellas personas que no saben bien sombrear recomiendo usar un isopo de aquello que tenemos en casa y la manera correcta de hacerlo es en círculos suavemente los trazos realizados.
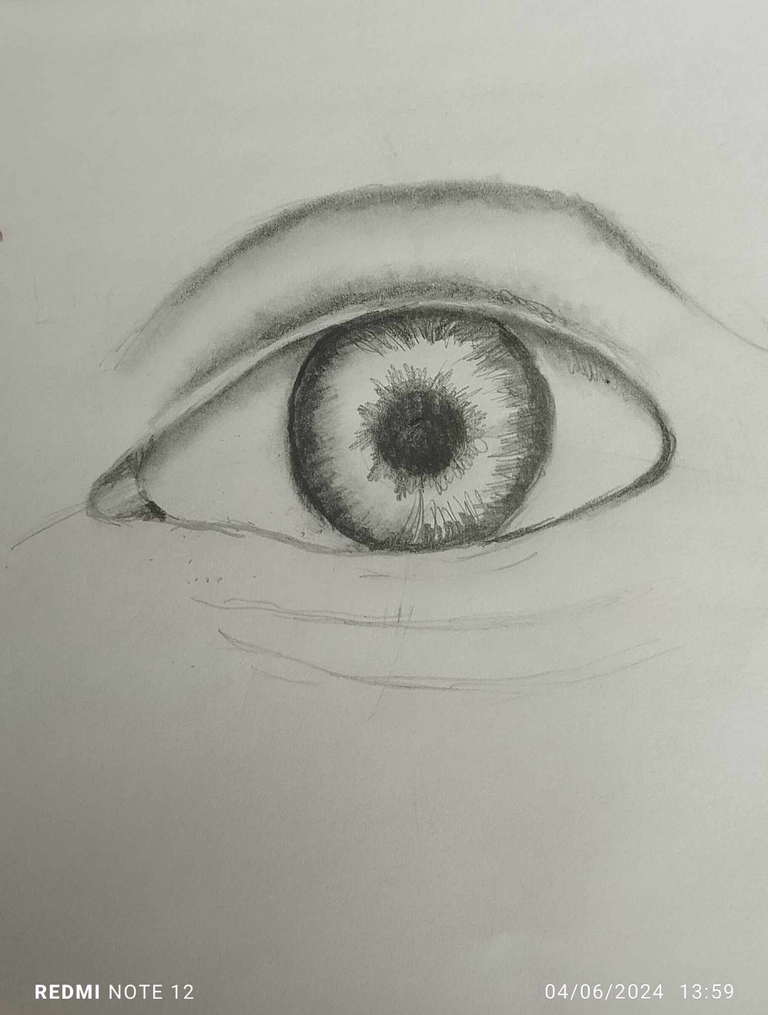
Our next step is to go over it with a pencil so as not to lose the shapes made before, from then on I used my pencil B to give darkness in the parts where it should be. At the moment of creating shadows I will mark again with my pencil B on the upper crease, on the pupil and around these two generating lines. With respect to the iris little by little we generate more marks that go to the pupil of the eye and with the same pencil we darken more the upper and lower folds.
Nuestro siguiente paso es repasar un lápiz para no perder la formas realizadas anteriormente, de ahí en adelante use mi lapiz B para dar oscuridad en las partes donde debería estar. Al momento de crear sombras marcare otra vez con mi lapiz B en el pliegue superior, en la pupila y al rededor de estas dos generando lineas. Con respecto al iris poco a poco generamos mas marcas que se dirijan a la pupila del ojo y con ese mismo lápiz oscurecemos mas los pliegues tanto superiores como inferiores.
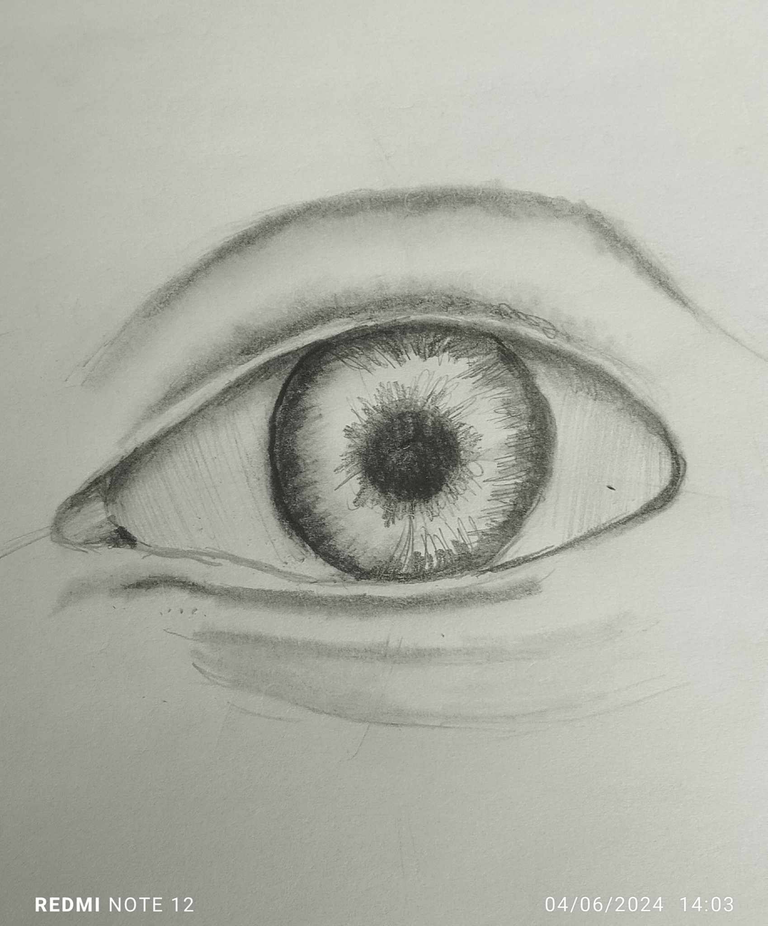
That's more or less what it should look like with the eye contour then. To brighten the eye we will take the sharp part of an eraser where we will touch twice on the iris and pupil and so that the sclera is not flat we will make a line with the same eraser.
Mas o menos así debería estar viéndose con el contorno de los ojos entonces. Para darle brillo al ojo tomaremos la parte filosa de una borra donde tocar dos veces en el iris y la pupila y para que la esclerótica no es plana haremos una linea con el mismo borrador
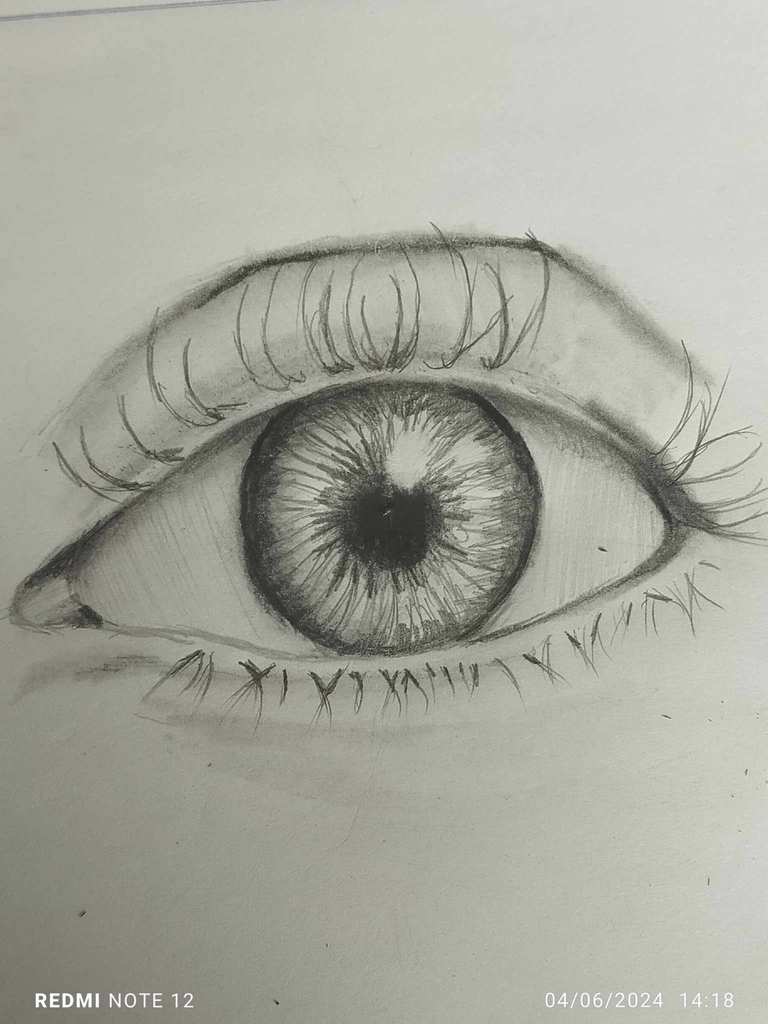
To create both upper and lower eyelashes we must have our pencil sharpened and we will draw them a little below the edge of the eye and our lines will not be directed to give that more natural effect. For this last step we have to take into account that we do not have as many eyelashes at the bottom and that they are also shorter but at the top it is the opposite. Taking this into account, the ones above will be a little thicker and when they start they have a curve. Now we have the icing on the cake to give light or shine with a white marker. In my case, erase it both above and below since our eye is moist.
Para crear pestañas tanta superiores como inferiores debemos tener nuestro lápiz afilado ya las dibujaremos un poco abajo del borde del ojo y nuestras líneas no serán direccionadas para dar ese efecto mas natural. Para este ultimo paso tenemos que tener en cuenta que nosotros no tenemos tanta pestañas en la parte inferior y que tambien son mas cortas pero en la superior es lo contrario. Teniendo esto en cuenta las de arriba serán un poco mas gruesa y cuando empiezan tienen una curva ahora tenemos como cereza del pastel dar luz o brillo con un marcador blanco en mi caso una borra tanto arriba como abajo ya que nuestro ojo se encuentra humedad
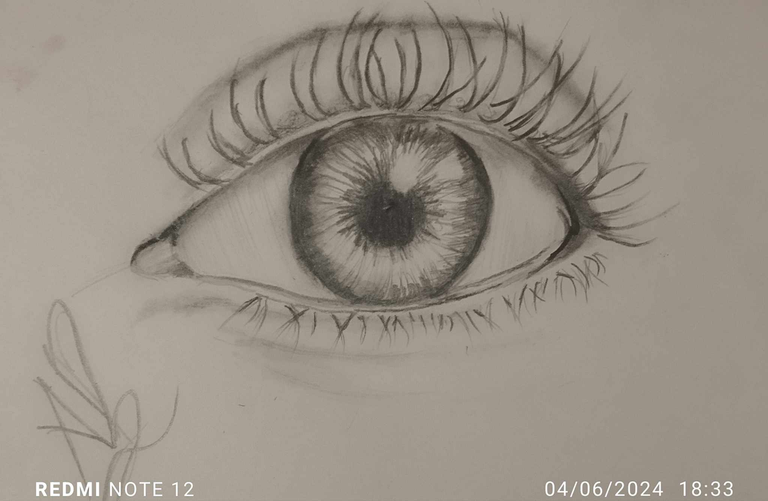
With this small tutorial I say goodbye and comment that I will continue giving posts on anatomical figures and the first is how to develop an eye that is as realistic as possible. Well now if I say goodbye I hope you enjoyed this process as much as I did. Greetings from Caracas, Venezuela
Con este pequeño tutorial me despido y comento que seguire dando post de figuras anatomicas y el primero es como desarrolar un ojo lo mas realista posible. Bueno ahora si me despido espero que disfrutaran este proceso tanto como yo un saludo desde Caracas, Venezuela
redes sociales - social media
Facebook: Andrea Pinzón
Instagram: @andeapinchon
Twitter: @LaKeNoSePeina
Instagram: @andeapinchon
Twitter: @LaKeNoSePeina
Los ojos son una de las cosas que más disfruto dibujar, por eso tu post me pareció genial porque explicas muy bien los tips para hacer un buen dibujo.
Saludos 🖤
Muchas gracias quería ser muy explícita lo máximo que se pueda para que logren un resultado más grande ♥️
Maravilloso, gracias, lo intentaré.
Muchas gracias y si lo haces pon el link para verlo, saludos
Seguro!
Epa hermano, ésto está realmente genial, me agrada como explicas todo el proceso, es un increíble dibujo a lápiz, gracias por tu post, saludos...
Gracias de verdad me llena mucho como persona poder enviar algo de conocimiento un saludo