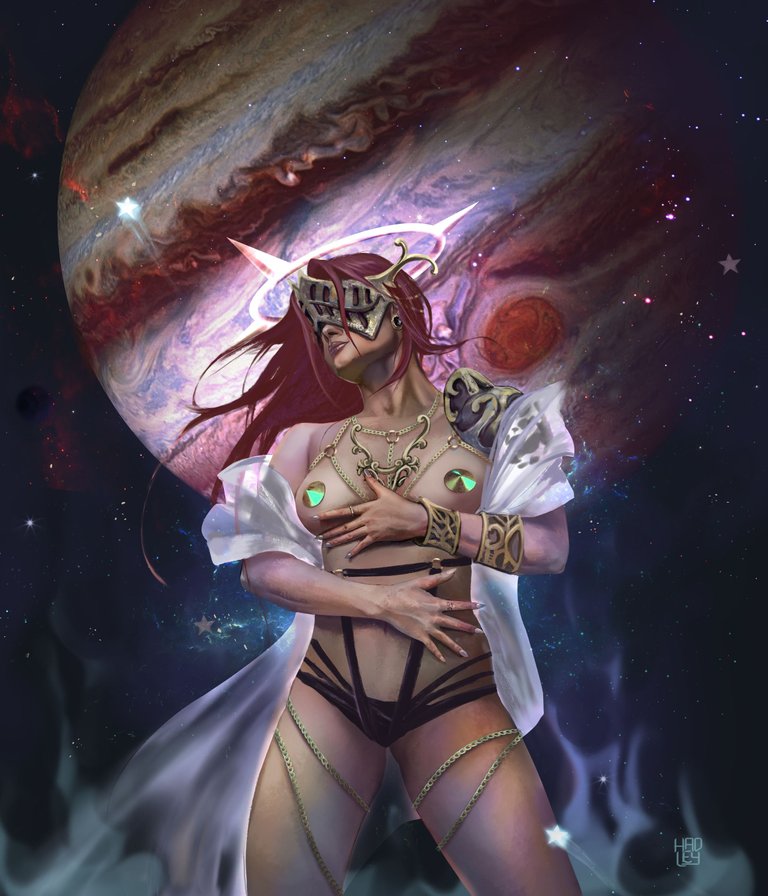
The great, immense and powerful Jupiter, her attraction is irresistible, crowning herself as the largest planet in our system and the protector of her neighborhood.
Were you waiting for Jupiter? Well, stop biting your nails because the wait is over! The gas giant is here. After some sleepless nights, I have finally finished the fifth piece of the planetary collection, I hope you like it.
Details
| Name : | Jupiter |
|---|---|
| Marketplace: | Ghostmarket |
| Pieces : | 2/2 |
| Direct Link : | https://ghostmarket.io/asset/pha/GHOST/60224514251885857100826697322913629867991357748579645191174249344521808584238/ |

Tools:
- Gaomon S620
- Photoshop
- Brushes courtesy of Imad Awan: Download here

-Step 1:
I started with the skeleton of the illustration, the basis of everything that would happen next, the sketch. As you can see, this time I have proposed to make a well done outline, also I have left in the image the blue silhouette of one of the previous sketches, which I polished until I reached the final sketch.


-Step 2:
Immediately and under the outline layer I went to work each shape in grays, this in order to achieve better volume from the beginning of the illustration. Here I polished every single detail of Jupiter's body, since there were some things that were wrong from the sketch. There are two to highlight, the right hand that was horrible and the crotch ornaments, that didn't fit in that area of his body, look how they have changed from one image to the other.
 |  |
|---|

-Step 3:
It's time to color. To have a clear reference of the color palette I would use, I added an image of the planet Jupiter in the background. Then, in a new layer configured in the "color" blend mode and with the airbrush, I gently saturated the girl's skin, I didn't want to stay in the typical pink that is normally used to define the skin, but I tried to use a wider spectrum of color, so I used violet, pink, green and yellow tones.


-Step 4:
To enhance the skin tones, but still without altering the gray work, use a higher contrast layer, followed by an overlay and a soft light layer with which to increase the brightness and maximize the uniformity of the colors on the skin.
By the way, the fabric, the halo and the metal parts, each one was in a separate layer, so it was much easier to work with them without messing up the rest.


-Step 5:
At this point, the most remarkable thing I can tell you about is the chains that surround Jupiter's body. At first I planned to make them with a chain brush that I have, but it only gives me the shape, so I would have to detail link by link and that would take me forever. So I took the png of a nice chain with good volume and I joined it until it was long enough to properly cover each surface. I also added the respective shadows I cast on the skin to make them more realistic.
 |  |
|---|

I will leave you a GIF with the whole process on it, so you can better appreciate the illustration process.

Tell me in the comments that you imagine when you see this illustration.

See you in a future post!
Thank You for Supporting My Artwork
TWITTER | RARIBLE | GHOSTMARKET | FOUNDATION |TERRA VIRTUA |NFT SHOWROOM | INSTAGRAM | FACEBOOK
⬆️ Follow ⬆️


🌟
amazing ARTWORK!!!!! BEAUTIFUL
!PIZZA
PIZZA Holders sent $PIZZA tips in this post's comments:
(10/10) @gwajnberg tipped @hadley4 (x1)
Learn more at https://hive.pizza.
Great piece.
beautiful art 😍
It left me speechless, it's majestic! Love your work, the concept and the coloring.
Amazing ART!!!
Congratulations @hadley4! You have completed the following achievement on the Hive blockchain and have been rewarded with new badge(s):
Your next target is to reach 68000 upvotes.
You can view your badges on your board and compare yourself to others in the Ranking
If you no longer want to receive notifications, reply to this comment with the word
STOPCheck out the last post from @hivebuzz:
Support the HiveBuzz project. Vote for our proposal!