Today I will be showing you how to make a really neat isometric text effect. This technique is used all the time and quite versatile in mixture with other effects. This technique was taught to me by a YouTuber known as Nobu Designs but I do things a little bit differently. So if you get confused, or interested in checking out his other tutorials, make sure to do so!
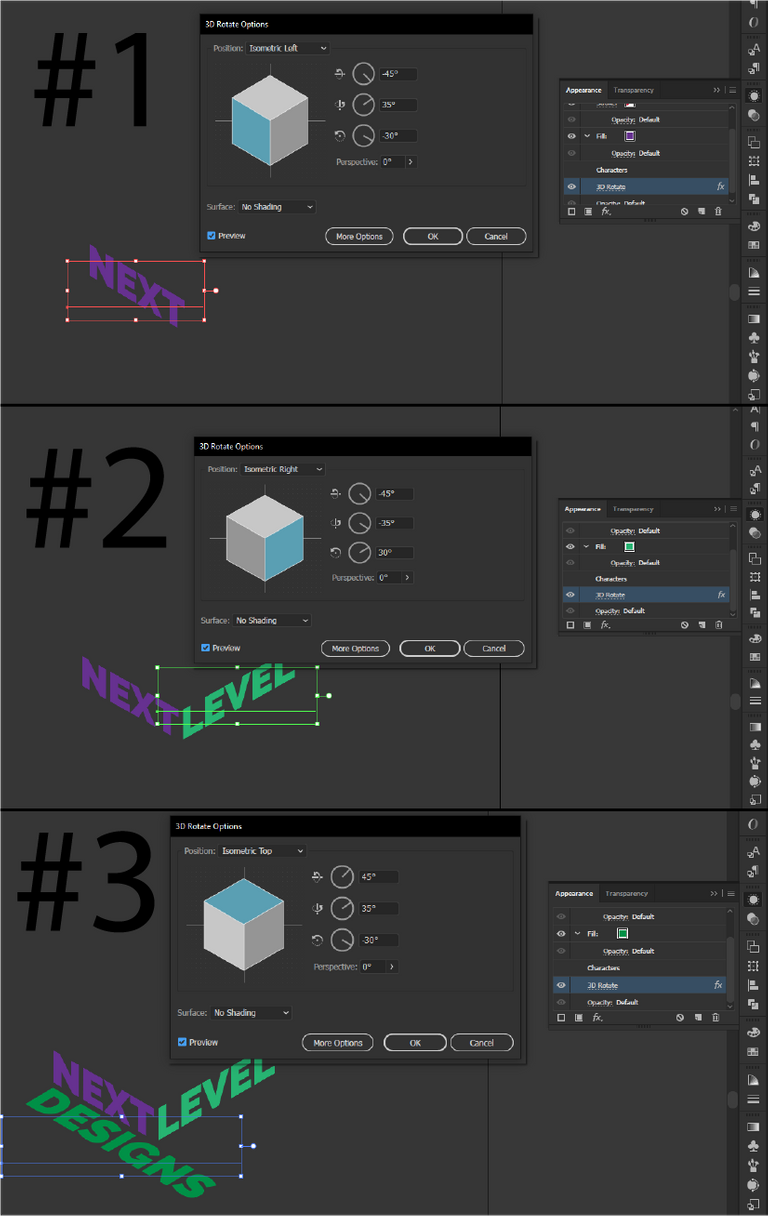
We will be doing this part 3 times, but a little bit differently each time so make sure to check out the settings and don't forget to click on the photo if it is hard to read. Now that's done, we can begin by using the text tool to write whatever words you would like in Raleway Black. I then went into the appearance panel on the right and added a color, then clicked on the dropdown on the bottom with the "FX" icon. In the "FX" dropdown, I chose 3D on the top and clicked rotate.
Small tip - all settings are default, so you can pick on the top and choose isometric top/right/left
After making the first one, we can alt-drag to duplicate the text. In addition, we left the font "live" so we can just double click on the text to change what is shown. With the new text, go into the appearance panel and click on the 3D rotate effect shown, this will edit the current rotation so we can change it to a different "perspective".
Placement of the text does not matter, we will cover that later. In my photos, they are already in place as I had a ton of trial and error.
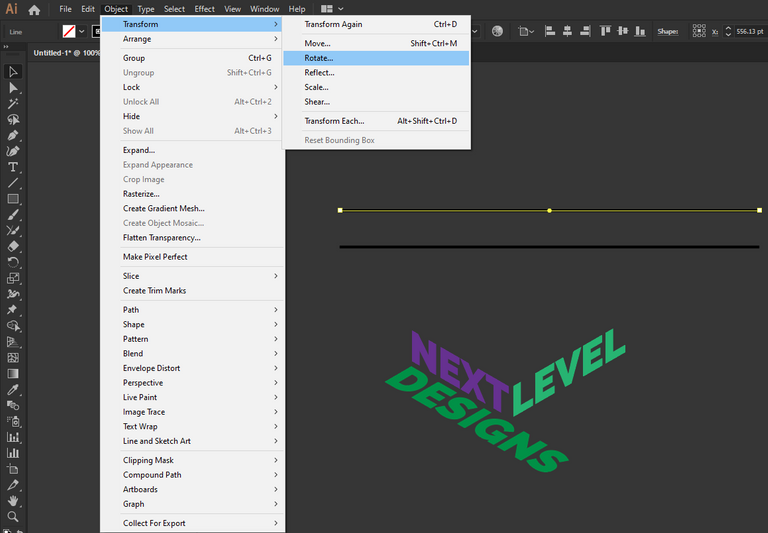
For sake of being able to see it, I made two horizontal lines and added 4PT stroke. I then rotated the two lines by the angle given from the previous step. In my case, one will be 30° and the other -30°. Depending on where you want to put it, the degree will be different, but just follow the bottom angle in the panel and you will be all set to go!
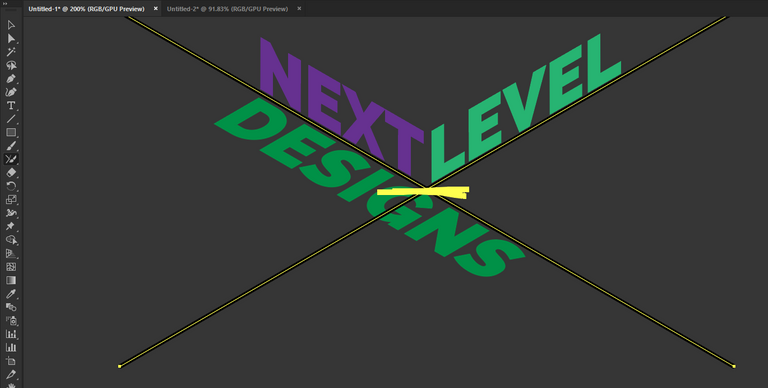
For the cross, I selected both lines and centered both vertically and horizontally. I then selected the Join tool which is hidden behind the shaper tool shown in the picture. Try to join them to only show the top or bottom half. Getting the bottom half is fine, but you will need to rotate 180°
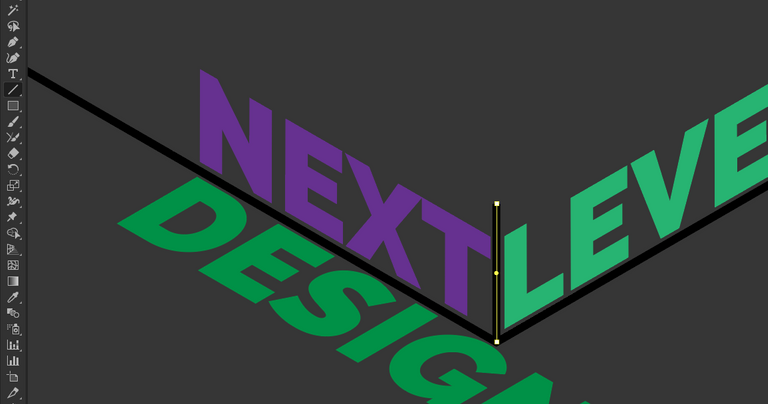
After selecting the pen tool, I connected a line from the middle point of the "V" and shift clicked it up vertically. The length does not matter but I chose a smaller line to feel a little more stream-lined.
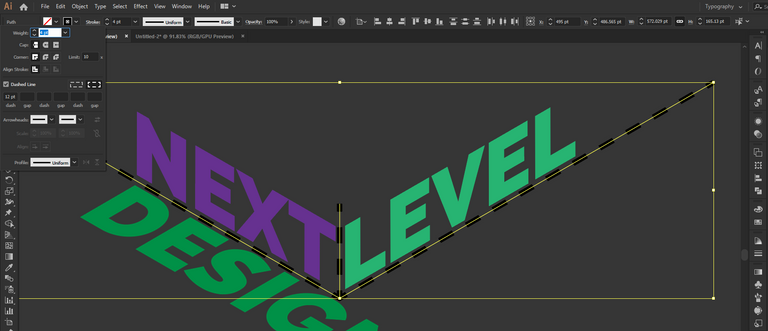
Now that the lines are basically done, I opened the stroke panel and reduced the stroke size and checked the dash-line box. An important thing to note is on the other side of the check, there are two options and we want the second one saying "align dashes to corners and edges . . .". If your vertical line is intersecting with the "V", then just move that up until it is where you like it.
We are at the home stretch!
We can now try to align all of the parts together, there is no special way of doing this. First move the dashed lines together to where you would like it, then move the text. I generally take the edges and try to align them to look like a right angle with the dashes in between. Once it looks up to par, the basic design is finished!

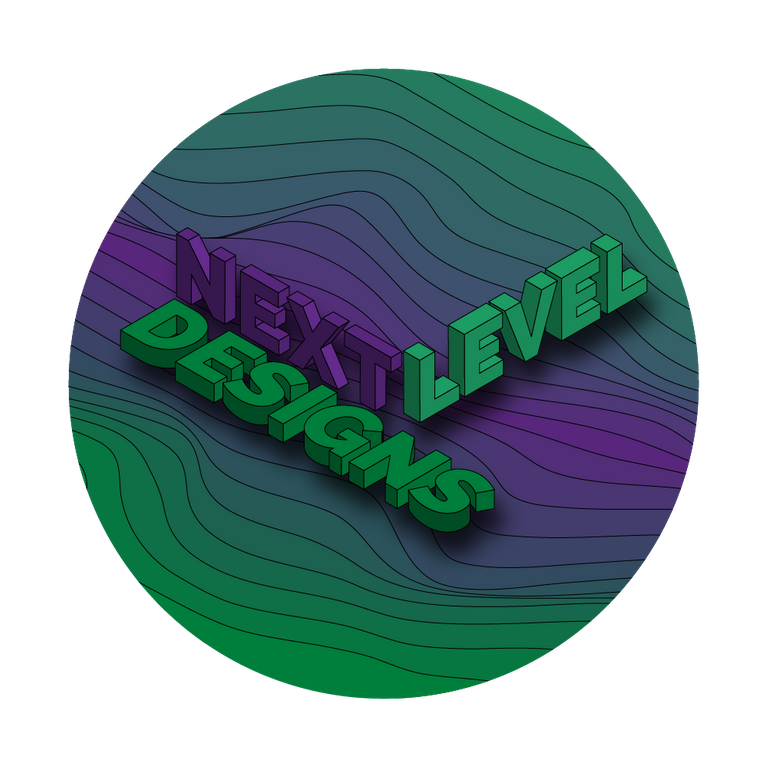
Thank you for checking out my post!

Oh yeah, I like that last example, it looks really cool. Nice work. I think the colors seem to work really well together too. Great tutorial. I hope some users find this useful!
Thank you! Honestly I didn't spend too much on the color, I just kind of set something that may have worked and ran with it. In the end I liked enough to not change it.
I hope these are found useful as well.. I try so hard to make it easy to comprehend, but I'm the one to write the instructions so re-reading can only do so much.
Congratulations @iikrypticsii! You have completed the following achievement on the Hive blockchain and have been rewarded with new badge(s) :
Your next target is to reach 40 posts.
Your next payout target is 500 HP.
The unit is Hive Power equivalent because your rewards can be split into HP and HBD
You can view your badges on your board and compare yourself to others in the Ranking
If you no longer want to receive notifications, reply to this comment with the word
STOPCheck out the last post from @hivebuzz:
Support the HiveBuzz project. Vote for our proposal!