.jpeg)

Español
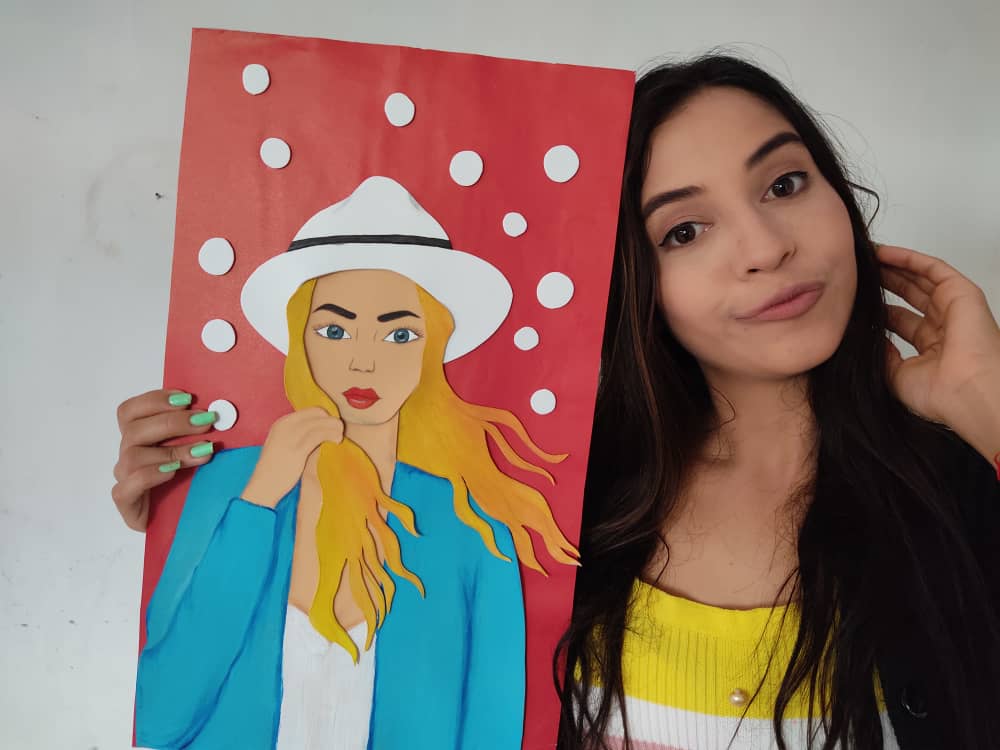
Hola queridos Hivers ❤️ Este lindo Martes les traigo otro nuevo y divertido tutorial donde aprenderemos como realizar un hermoso cuadro de una preciosa chica rubia, perfecto para decorar nuestras paredes favoritas dando ese toque creativo y personal, y lo mejor de todo es que esta hecho de materiales súper económicos y muy fáciles de conseguir. Así que, los invito a seguir disfrutando de este divertido trayecto, perfecto para el desarrollo de la creatividad de todos, especialmente de nuestros niños.
English
Hello, dear Hivers ❤️ This nice Tuesday I bring you another new and fun tutorial where we will learn how to make a beautiful painting of a beautiful blonde girl, perfect to decorate our favorite walls giving that creative and personal touch, and the best of all is that it is made of super cheap materials and very easy to get. So, I invite you to continue enjoying this fun journey, perfect for developing everyone's creativity, especially our children.
¿Qué están esperando?
Gracias a esta técnica podemos crear nuestro propio cuadro de chica rubia, además, una hermosa obra hecha en casa es una manera creativa y muy económica de darle un toque de alegría a nuestro entorno. Antes de comenzar no olvidemos lavarnos nuestras manos.
What are they waiting for?
Thanks to this technique we can create our own painting of a blonde girl, in addition, a beautiful work done at home is a creative and very inexpensive way to give a touch of joy to our surroundings. Before we start, let's not forget to wash our hands.
[Materiales | Materials]
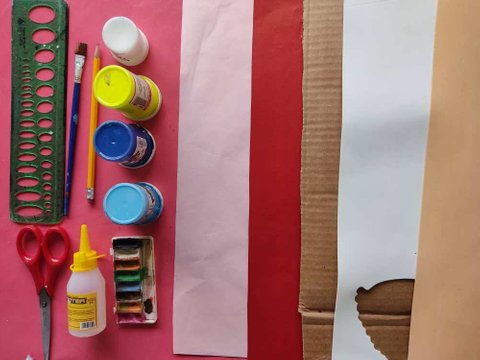
Para realizar esta linda rubia necesitaremos:
- Moldes.
- Foamy o goma eva.
- Papel vegetal o calco.
- Lamina de cartón.
- Regla.
- Lápiz.
- Marcador.
- Tijera.
- Cúter.
- Pincel o brocha.
- Pinturas.
- Silicón liquido o pegamento.
To make this cute blonde we will need:
- Molds.
- Foamy or eva foam.
- Vegetable paper or tracing.
- Cardboard sheet.
- Rule.
- Pencil.
- Bookmark.
- Scissors.
- Cutter.
- Brush or brush.
- Paintings.
- Liquid silicone or glue.
Procedimiento (paso a paso)
Process (step by step)
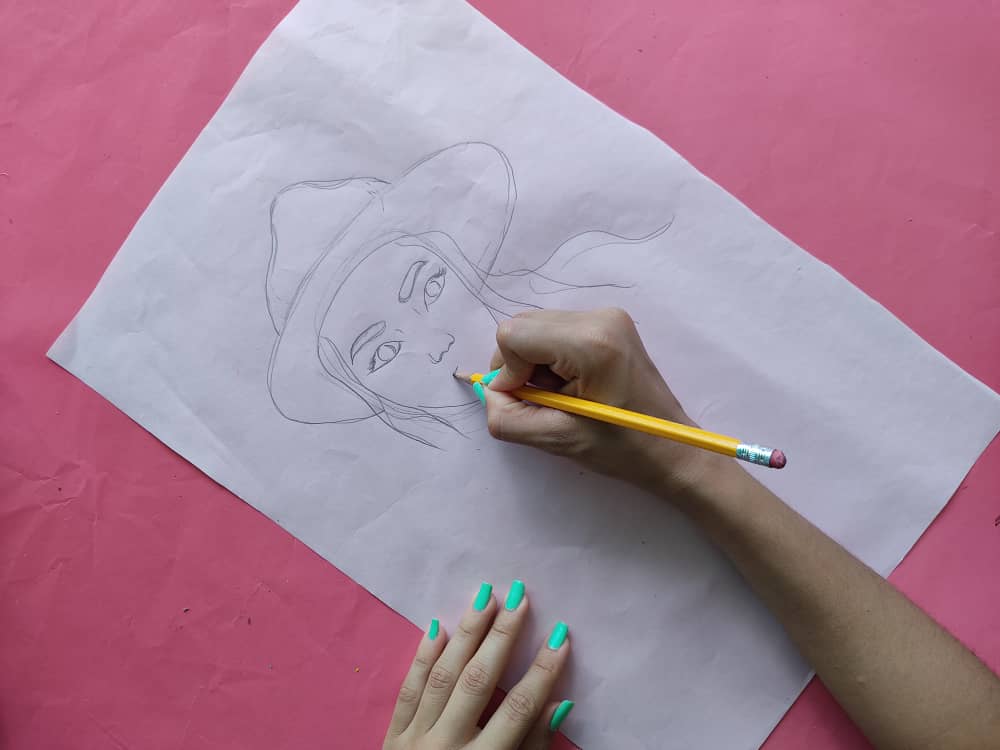
Primero que todo, elaboramos un dibujo de una linda chica con sombrero y su cabello moviendose con la brisa fría.
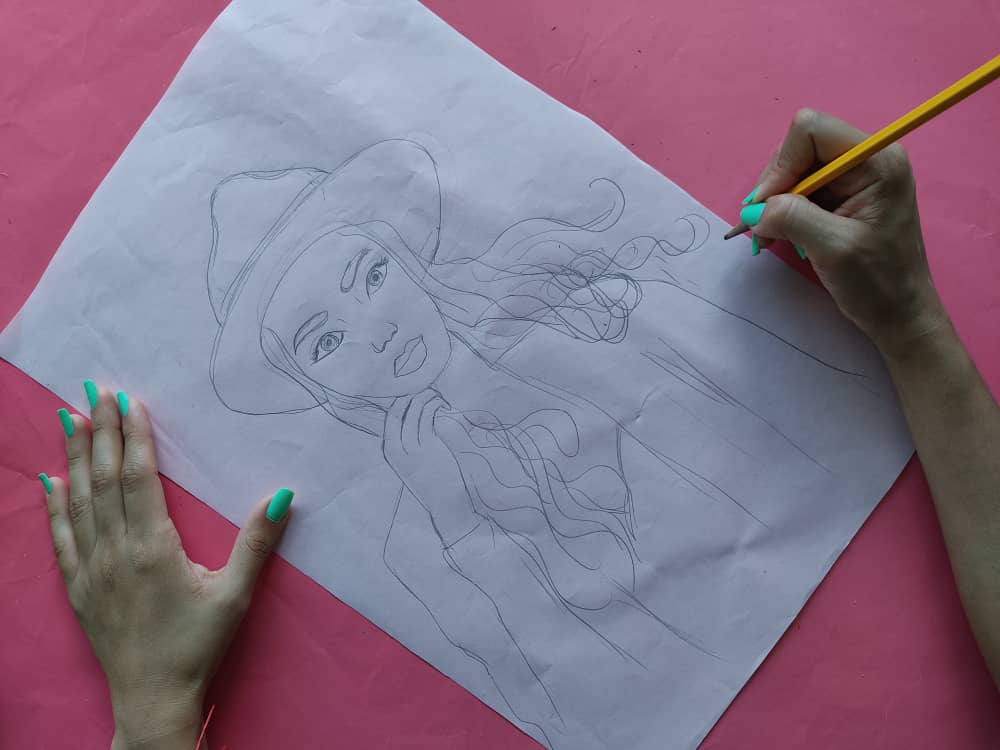
First of all, we made a drawing of a cute girl with a hat and her hair moving in the cold breeze.
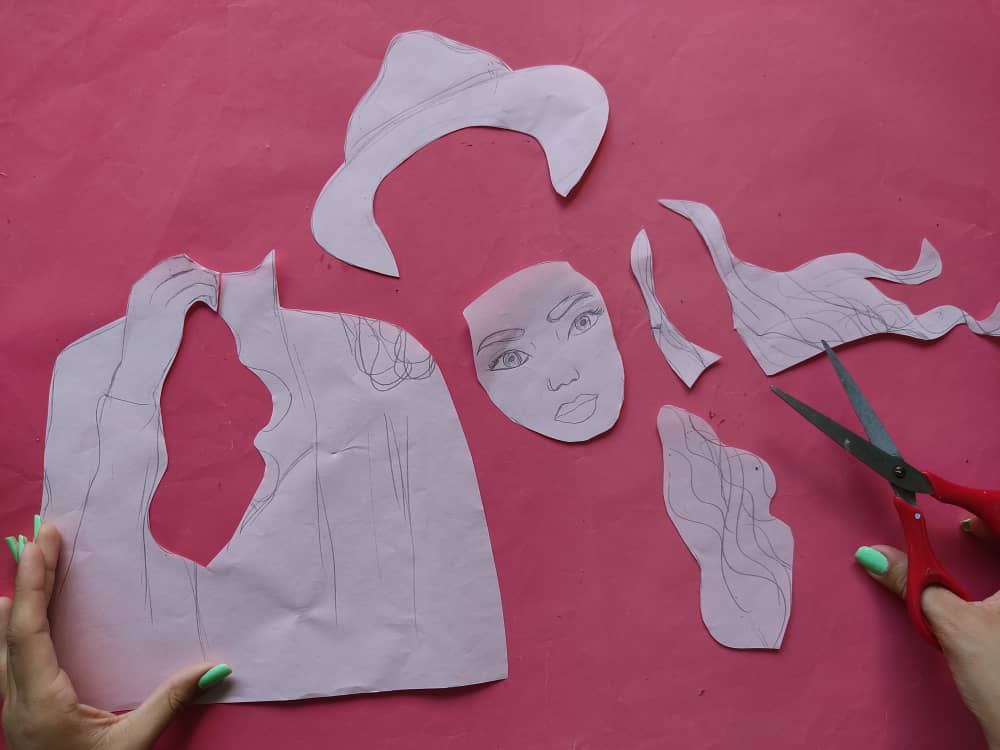
Seguidamente, comenzamos a recortar las partes del dibujo separando las figuras tales como, el sombrero, el cabello de la chica la cara y la parte de su pecho y brazos. Y transferimos a los trozos de foamy de distintos colores según sus formas.
Next, we began to cut out the parts of the drawing, separating the figures such as the hat, the girl's hair, the face, and the part of her chest and arms. And we transfer to the pieces of foamy of different colors according to their shapes.
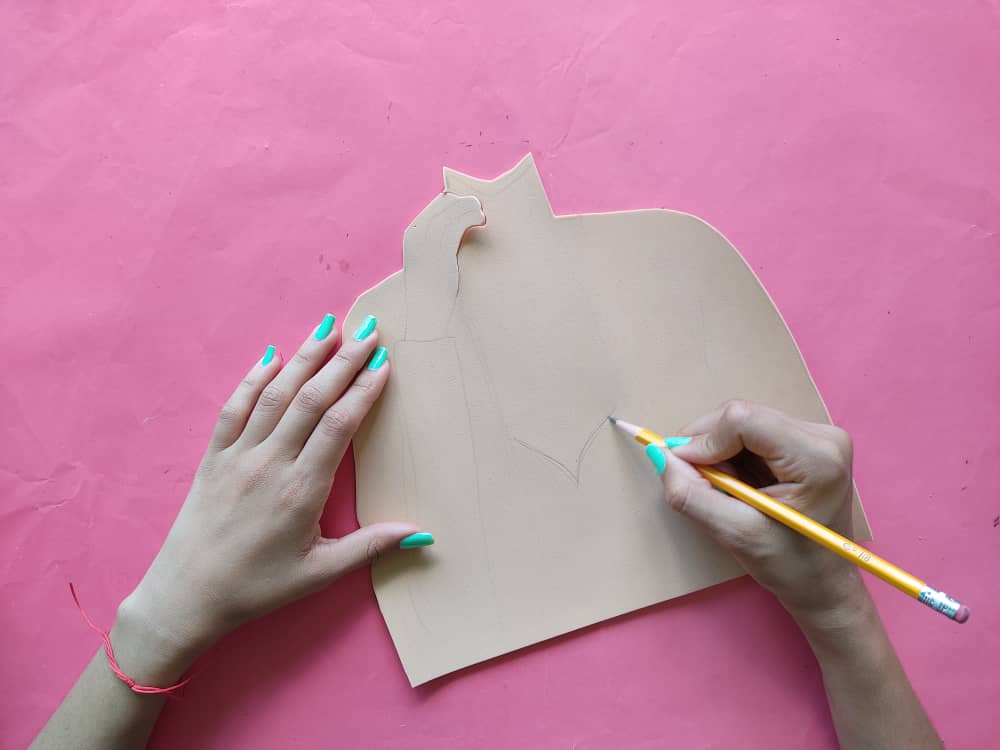
Una vez obtenidas las figuras deseadas, definimos con el lápiz todos los detalles de la cara, el pecho, y brazos.
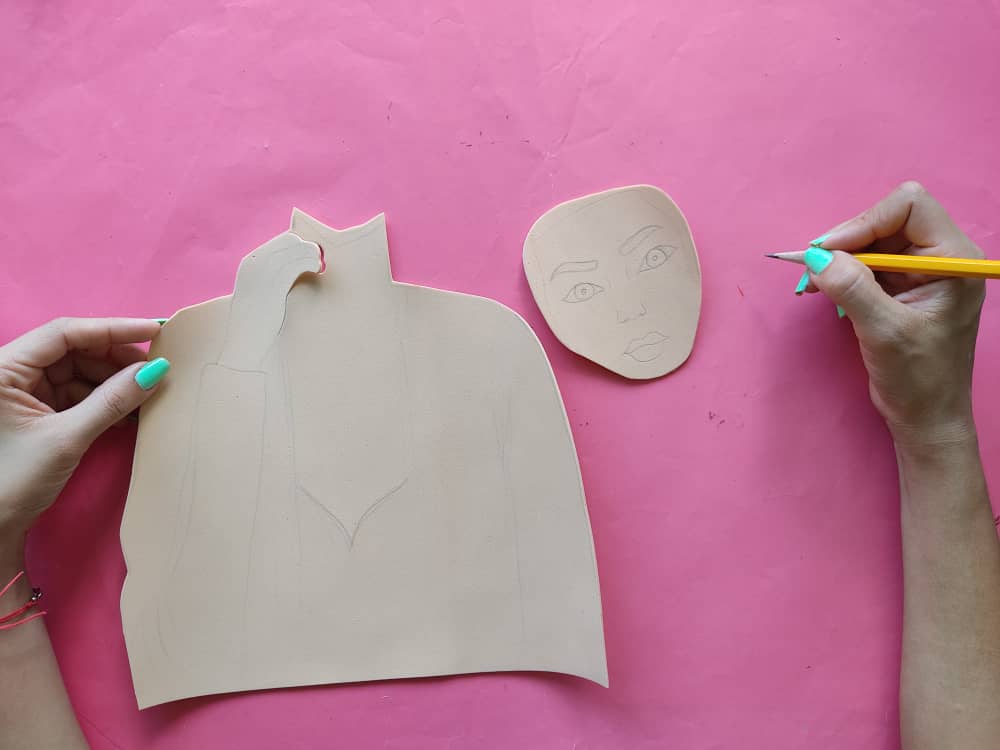
Once the desired figures are obtained, we define with the pencil all the details of the face, chest, and arms.
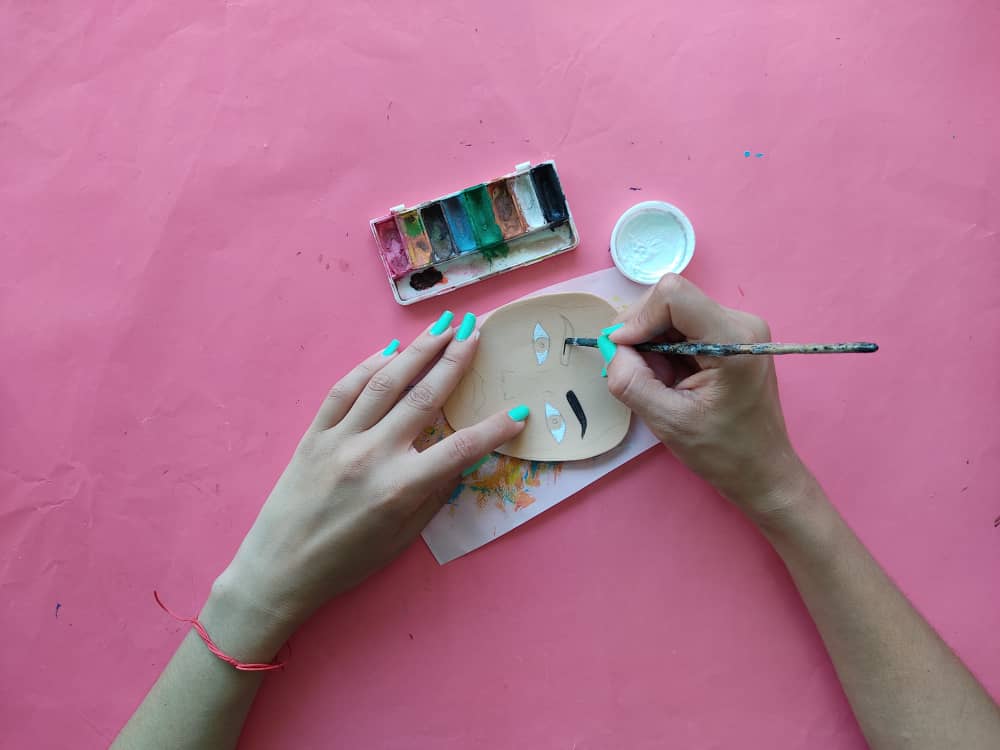
Ahora, comenzamos a pintar la cara de esta hermosa chica, definiendo sus delicados detalles como lo son los ojos, cejas, nariz y boca.
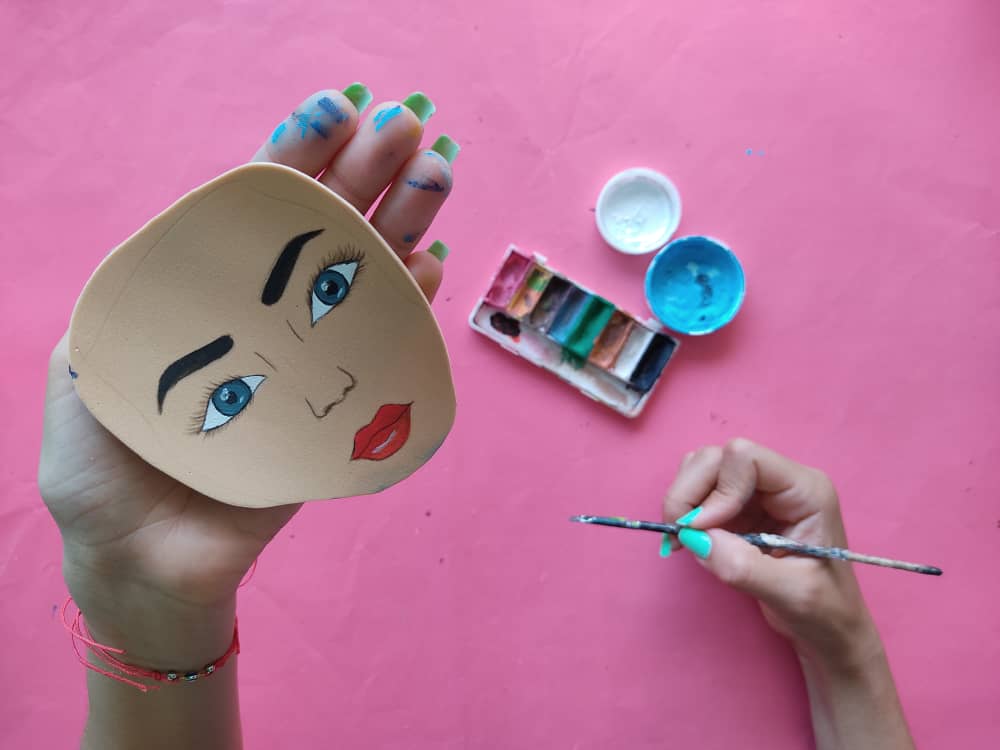
Now, we begin to paint the face of this beautiful girl, defining her delicate details such as the eyes, eyebrows, nose, and mouth.
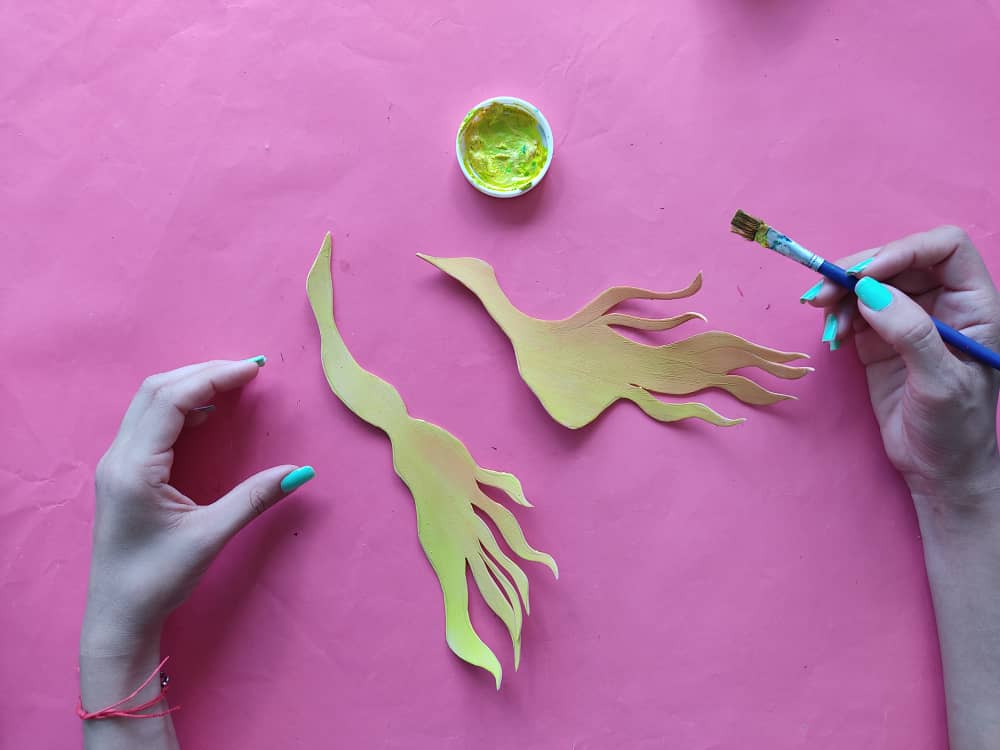
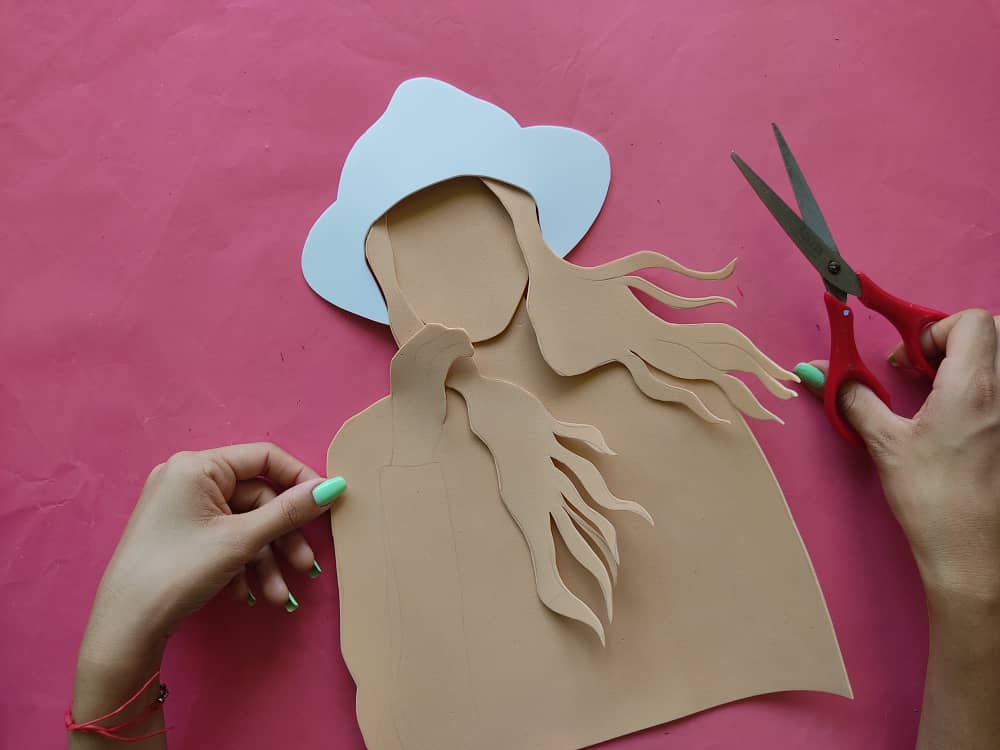
Luego, pintamos el hermoso cabello de color amarillo y aplicamos pequeños toques de naranja, para que luzca como una linda rubia.

Then, we paint the beautiful hair yellow and apply small touches of orange, so that it looks like a cute blonde.
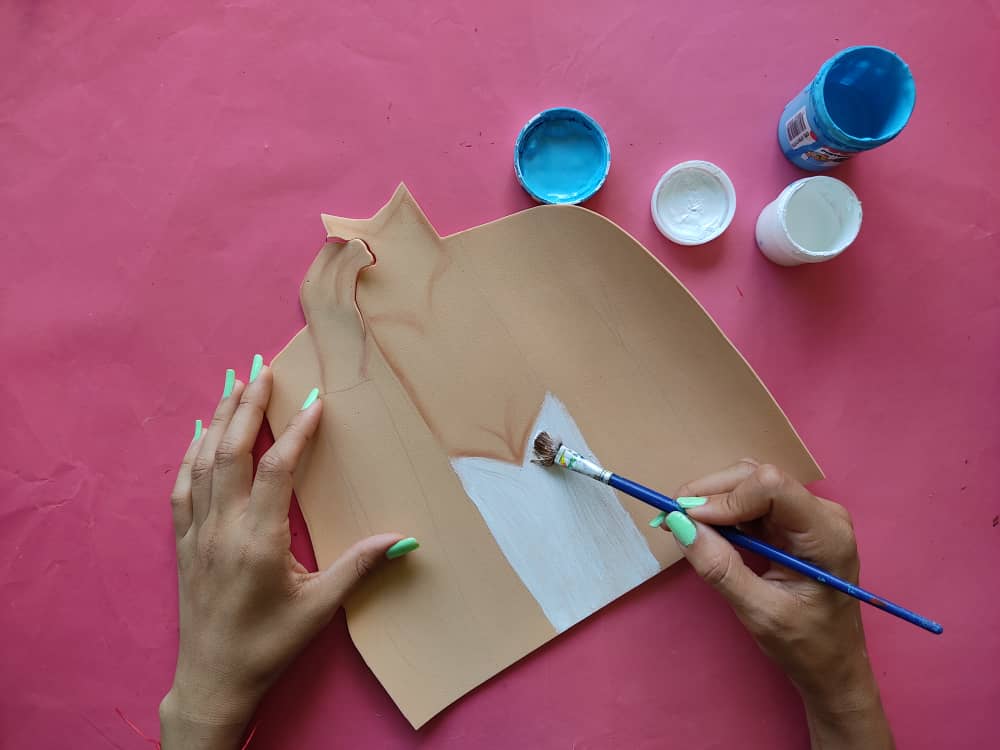
Seguidamente, pintamos la parte del pecho y sombreamos los bordes del cuello, y luego, pintamos una linda ropa de manera que está rubia luzca un estilo súper genial.
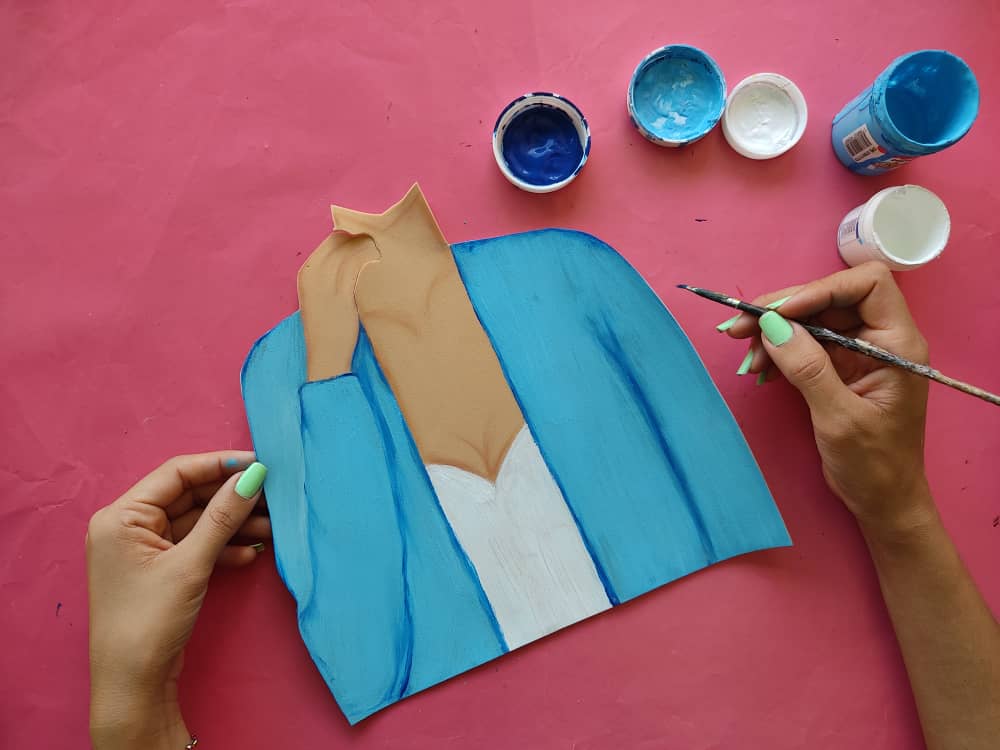
Next, we paint the chest part and shade the edges of the neck, and then we paint some nice clothes so that this blonde looks super cool.
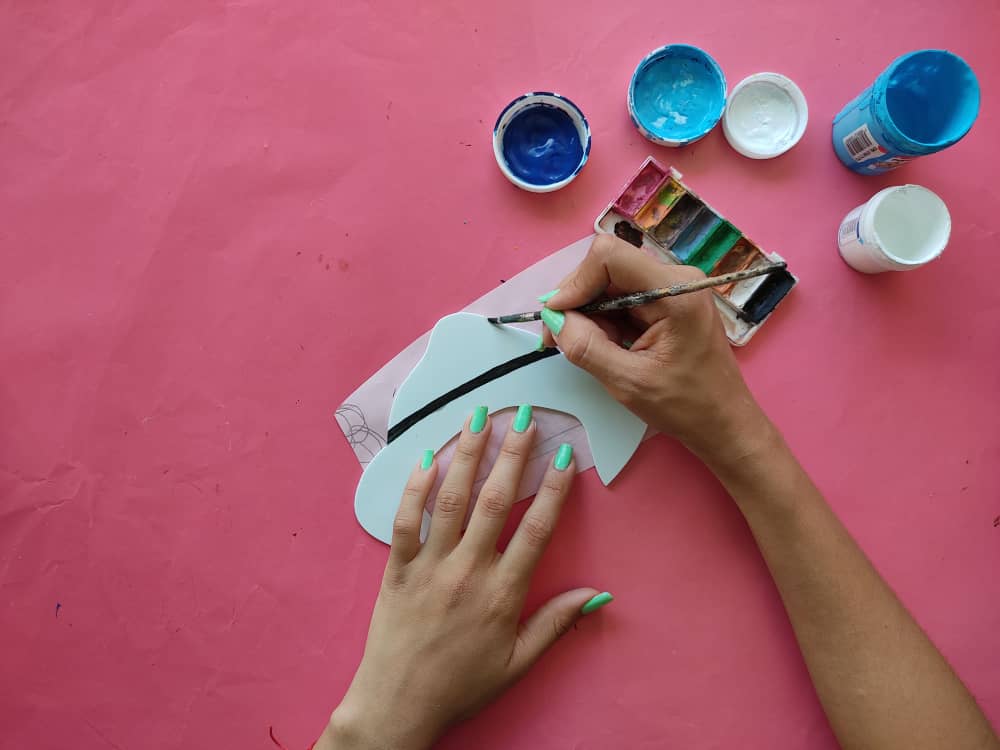
Después, pintamos un lindo detalle de color negro en el sombrero de la chica.
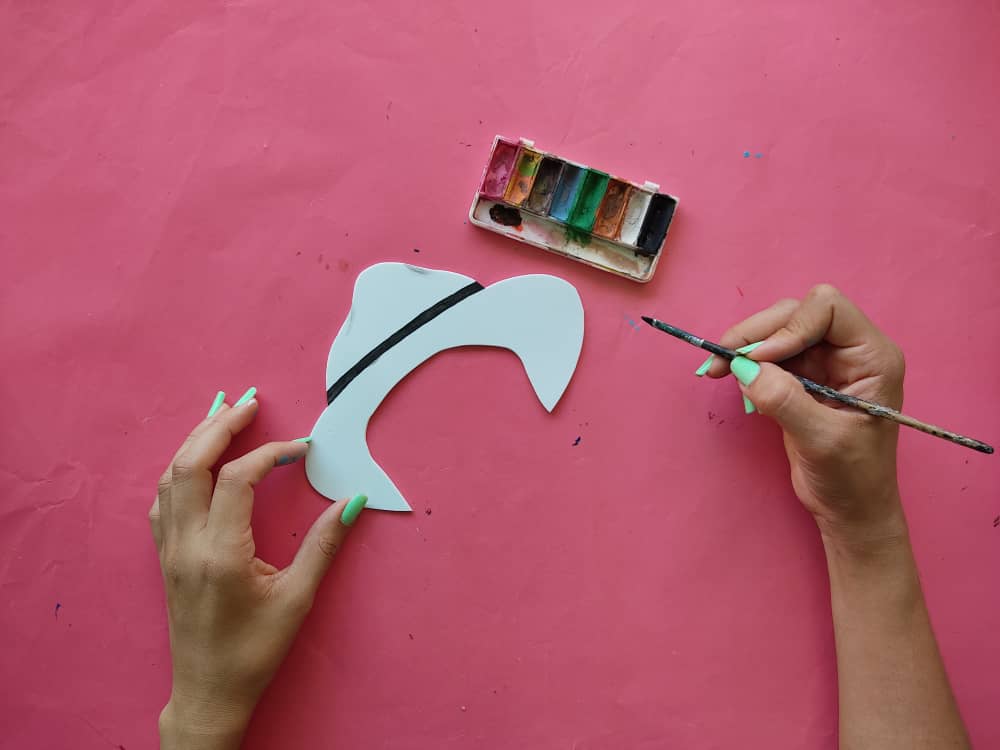
Next, we paint a nice black detail on the girl's hat.
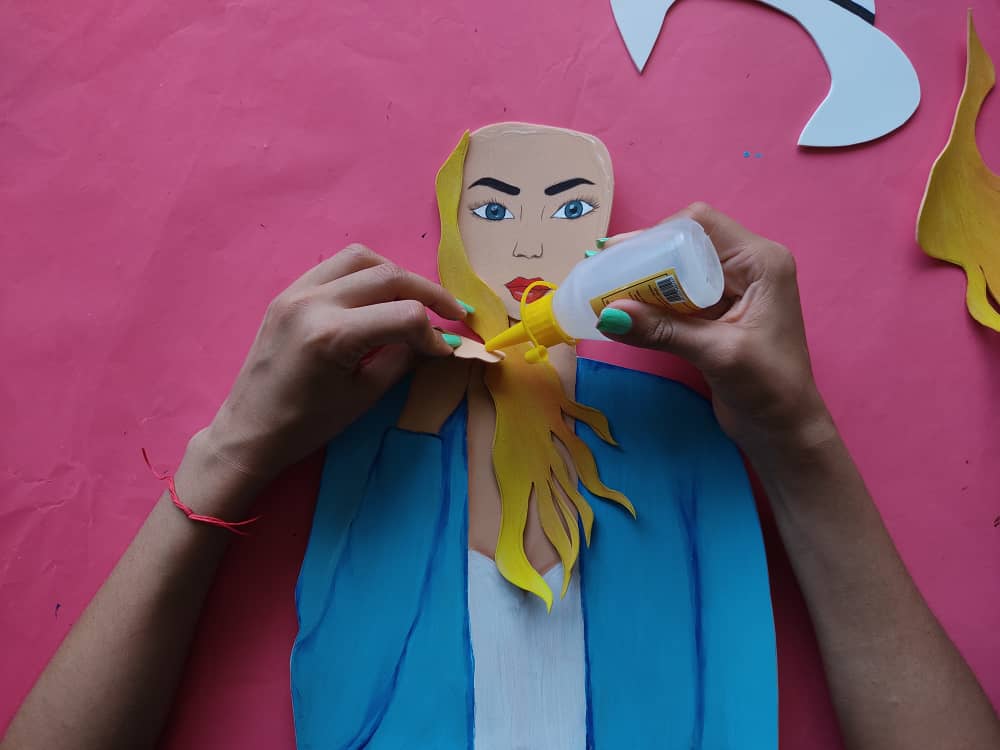
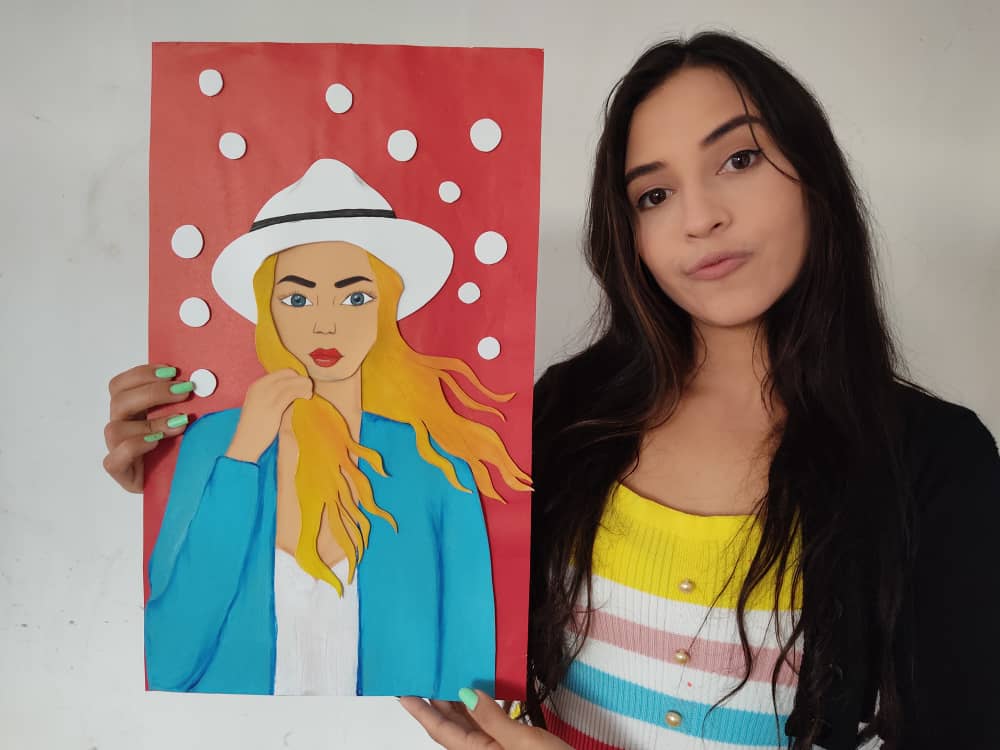
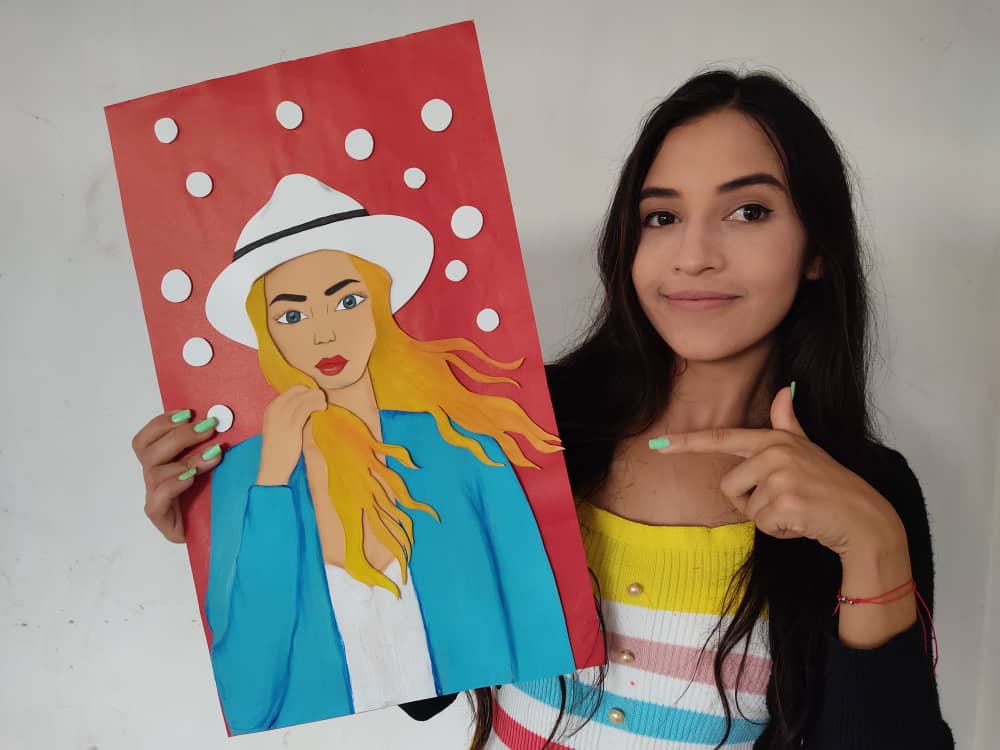
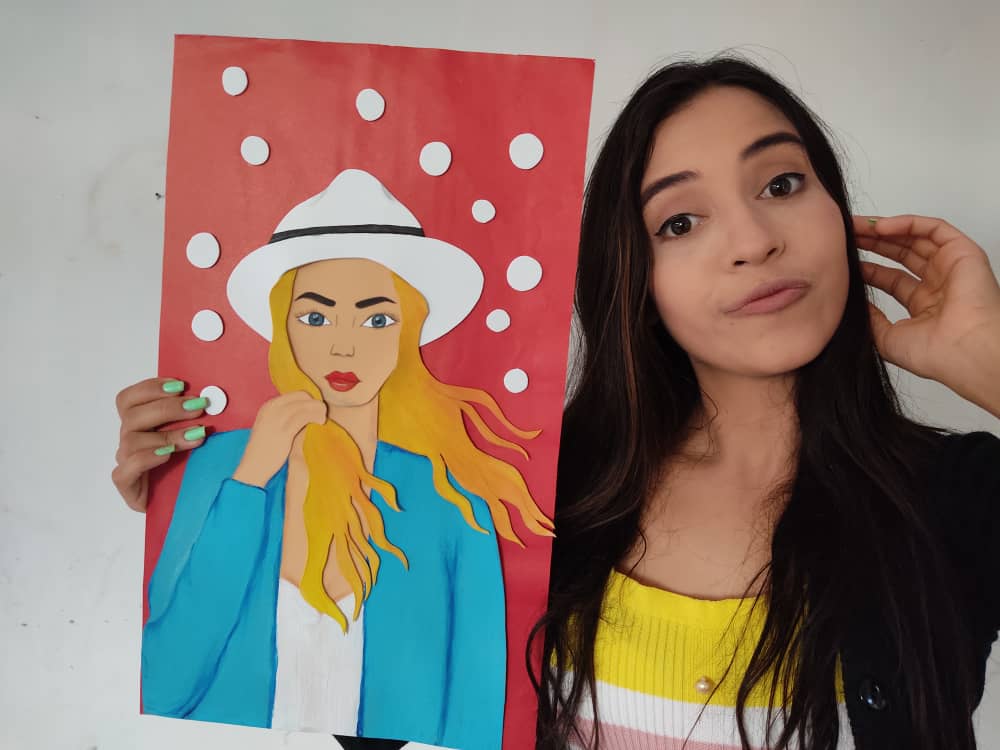
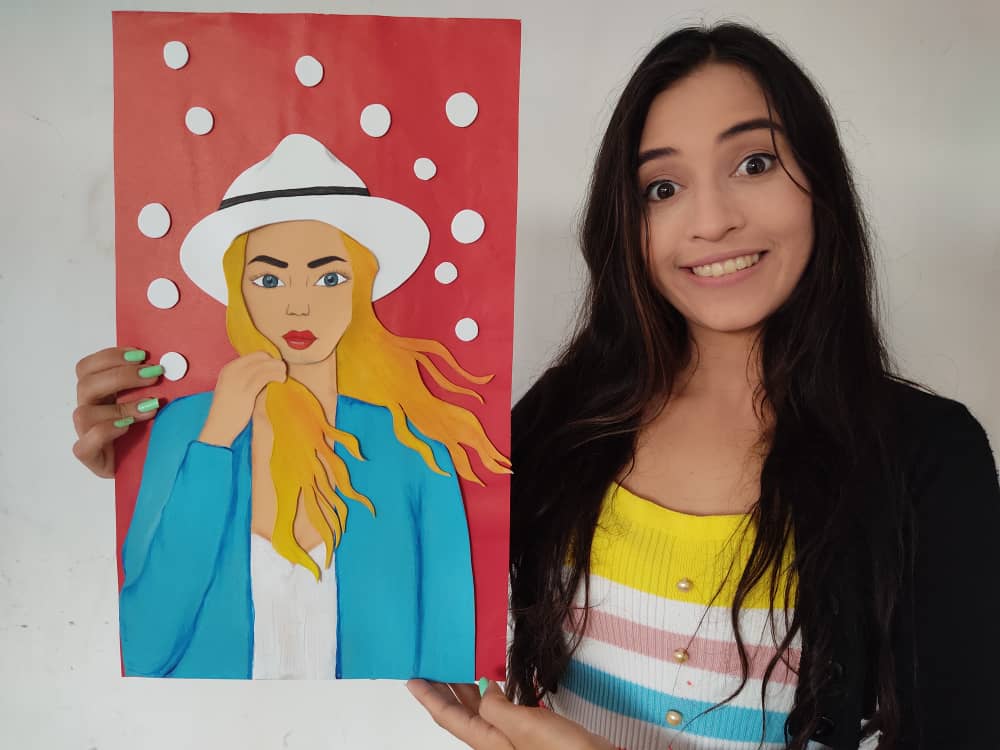
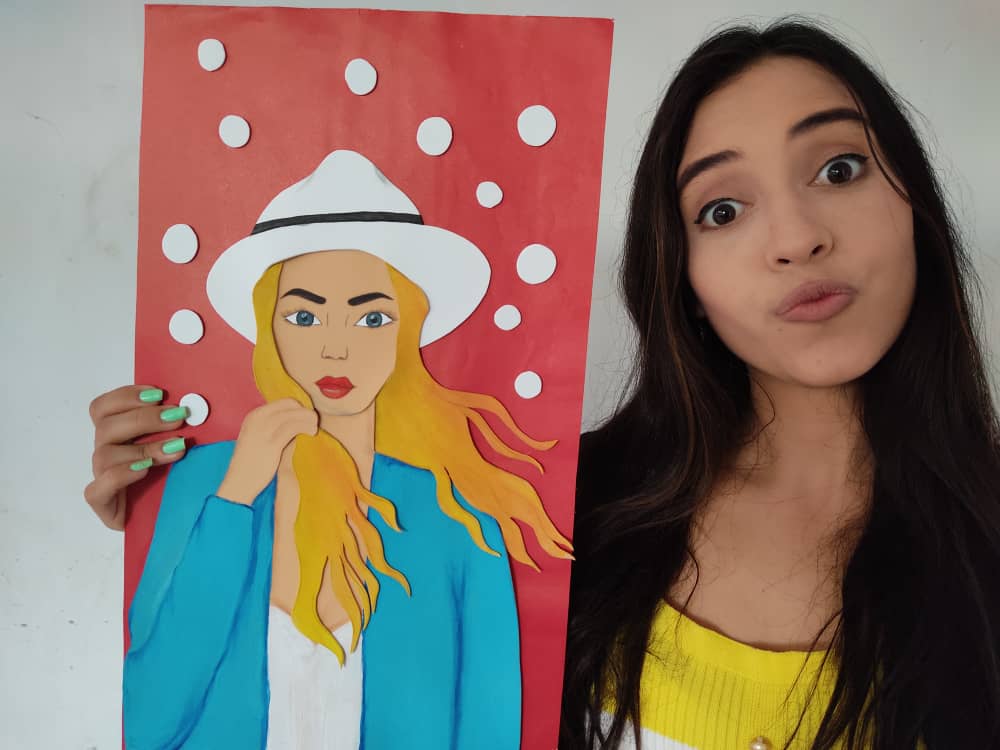
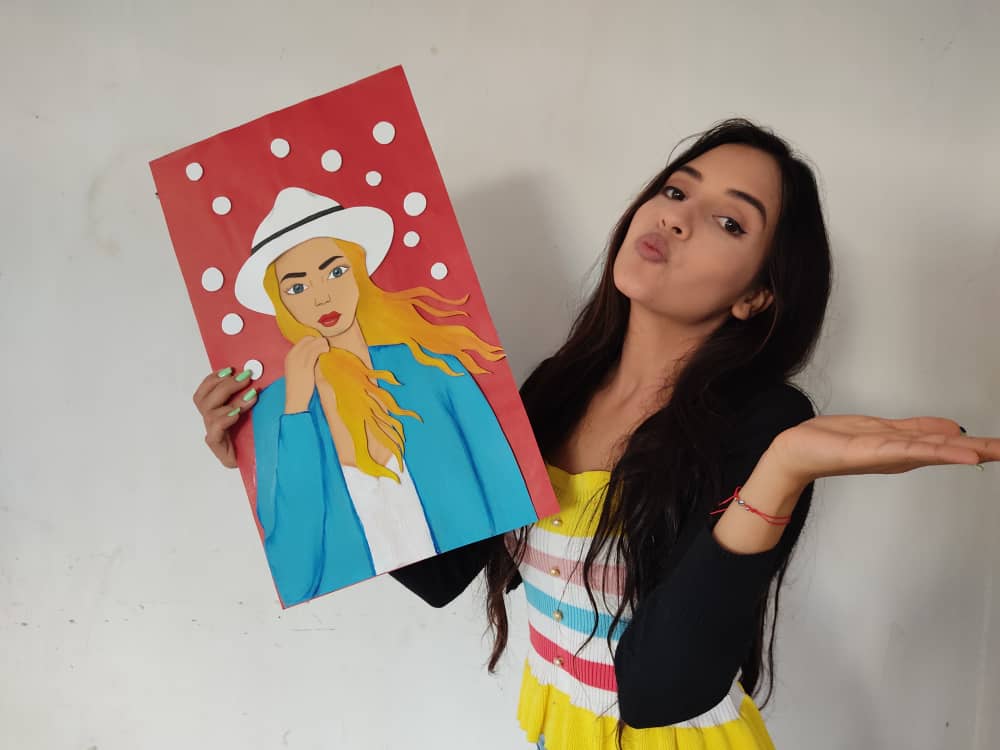
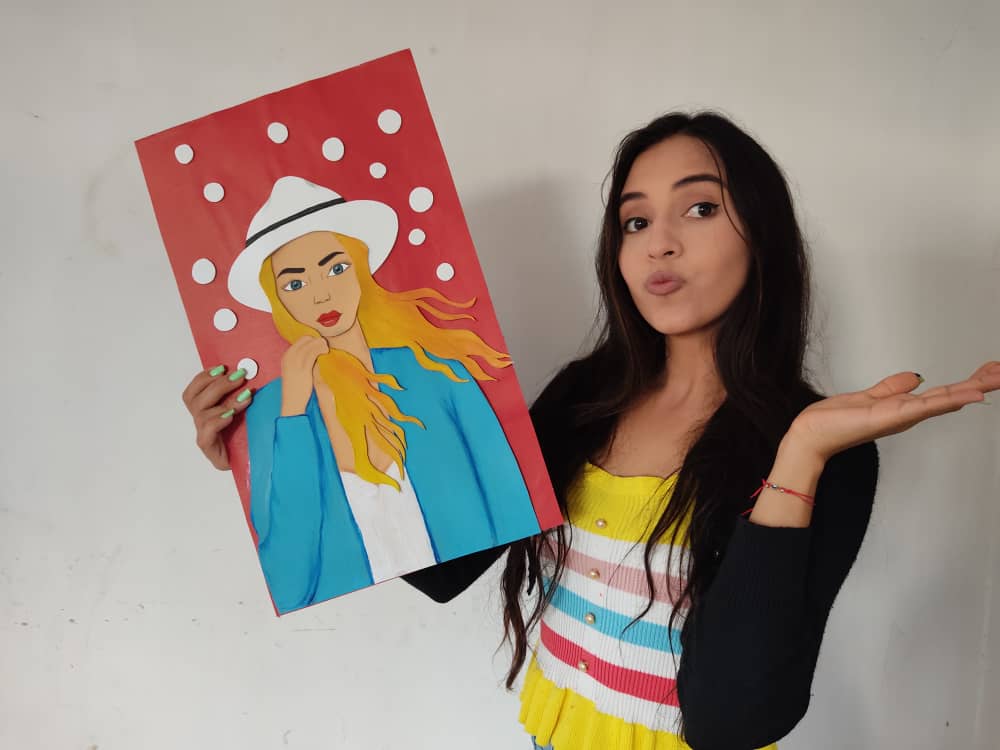
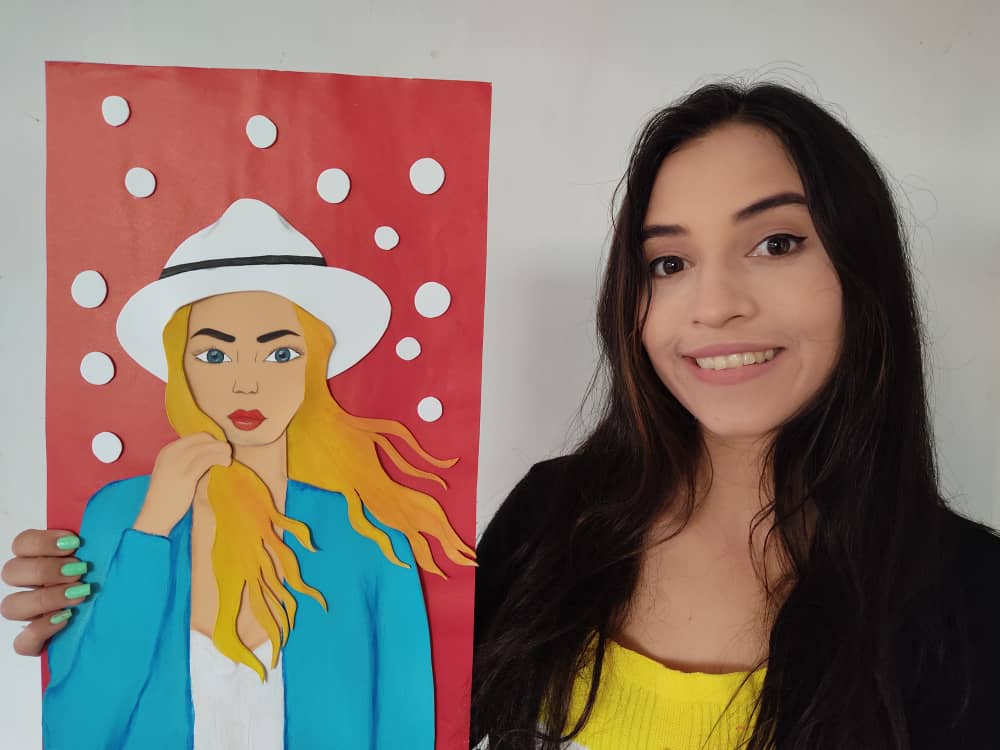
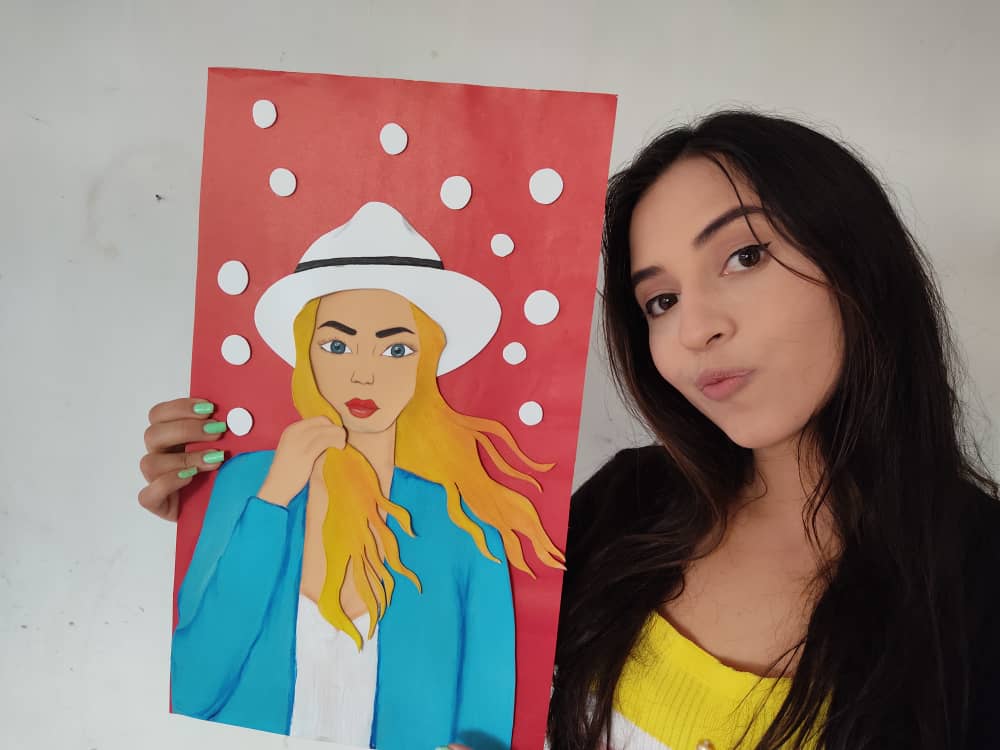
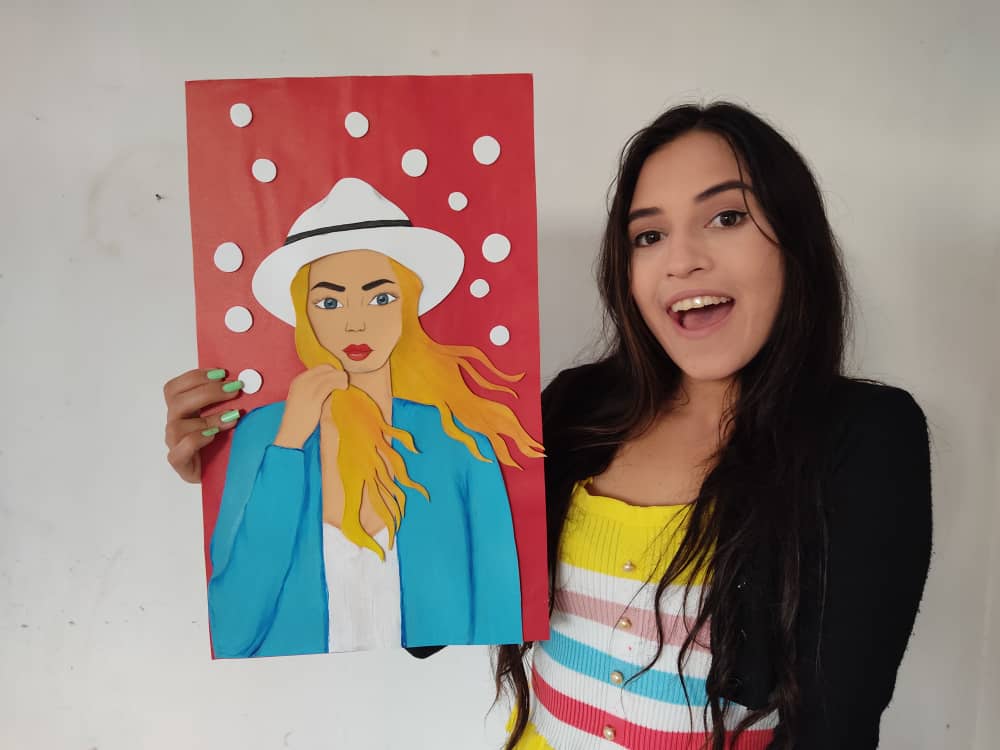
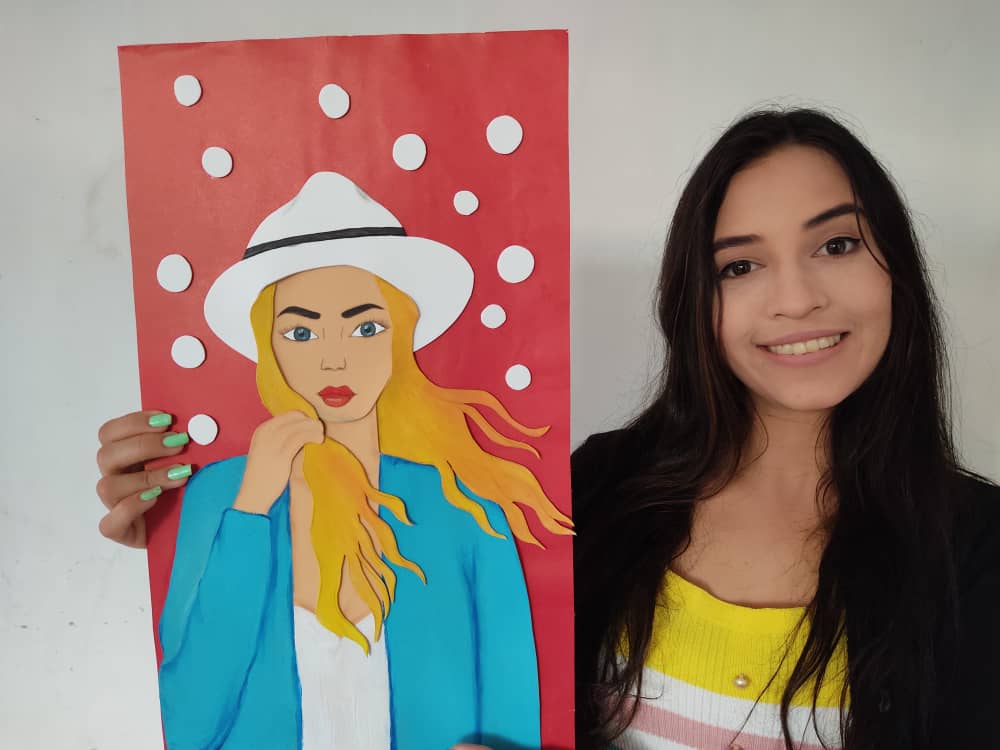
Una vez seca toda la pintura, armamos esta hermosa chica, pegando con mucho cuidado la cara, el cabello más el resto, en este caso pegamos el trozo de cabello del lado derecho por debajo de la mano de la chica y finalmente pegamos el sombrero.

Once all the paint is dry, we put together this beautiful girl, carefully gluing the face, the hair plus the rest, in this case, we glue the piece of hair on the right side under the girl's hand and finally we glue the hat.
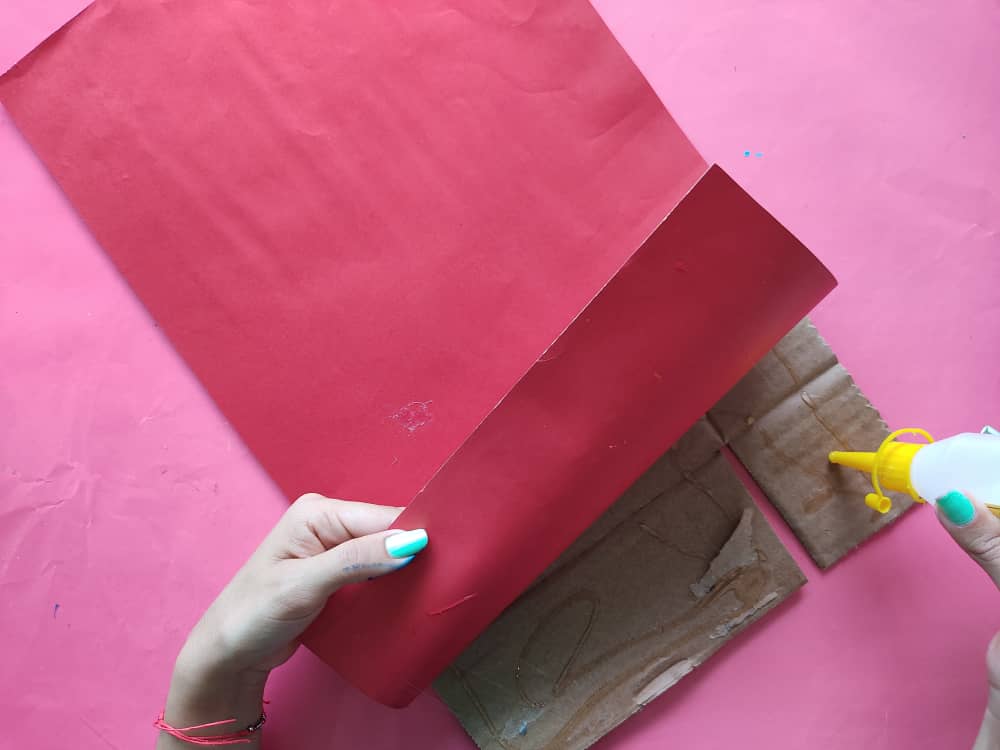
Ahora, fabricamos una base roja de cartón de 24cm por 45cm, y la pegamos sobre una lamina de cartón más gruesa de manera que nuestro cuadro quede muy firme y resistente.
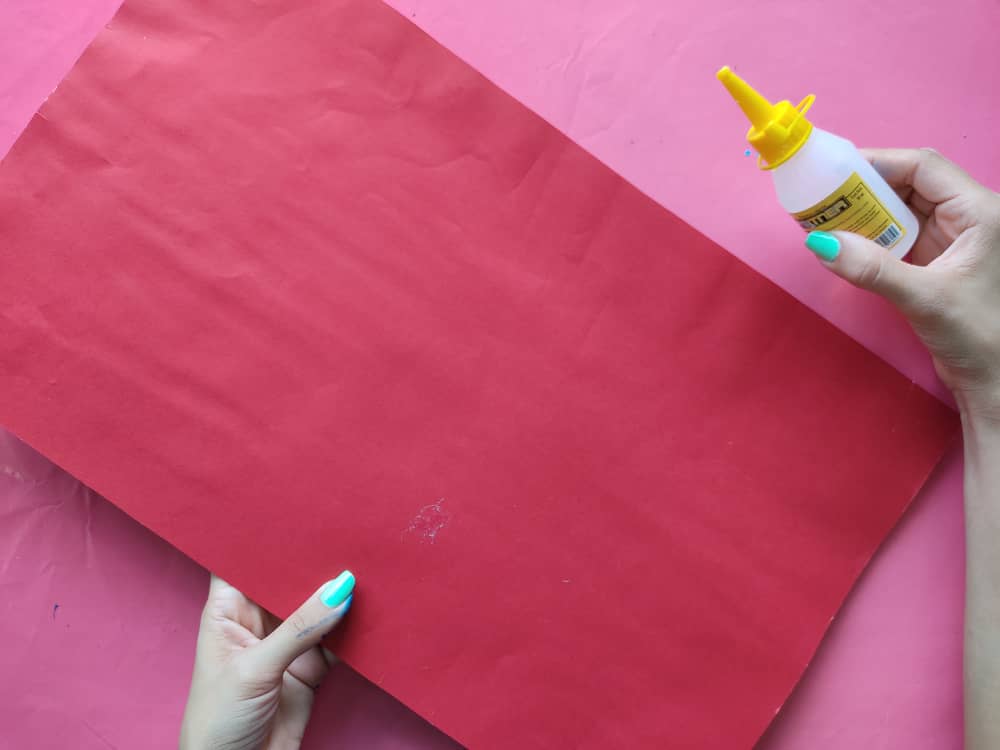
Now, we make a red cardboard base measuring 24cm by 45cm, and we glue it on a thicker cardboard sheet so that our painting is very firm and resistant.
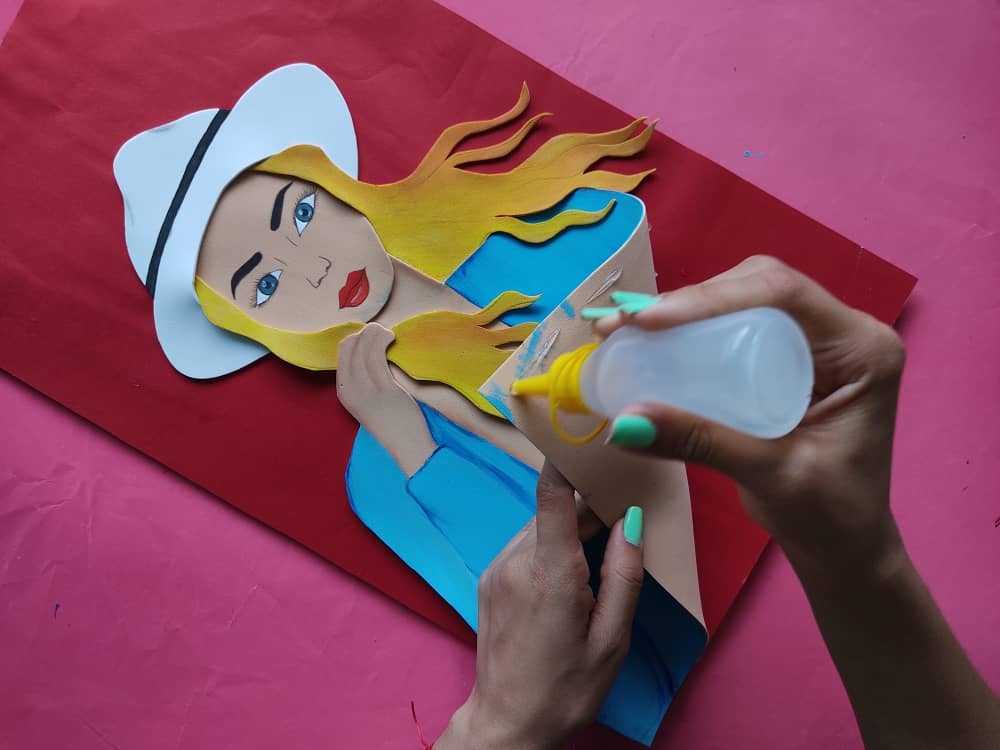
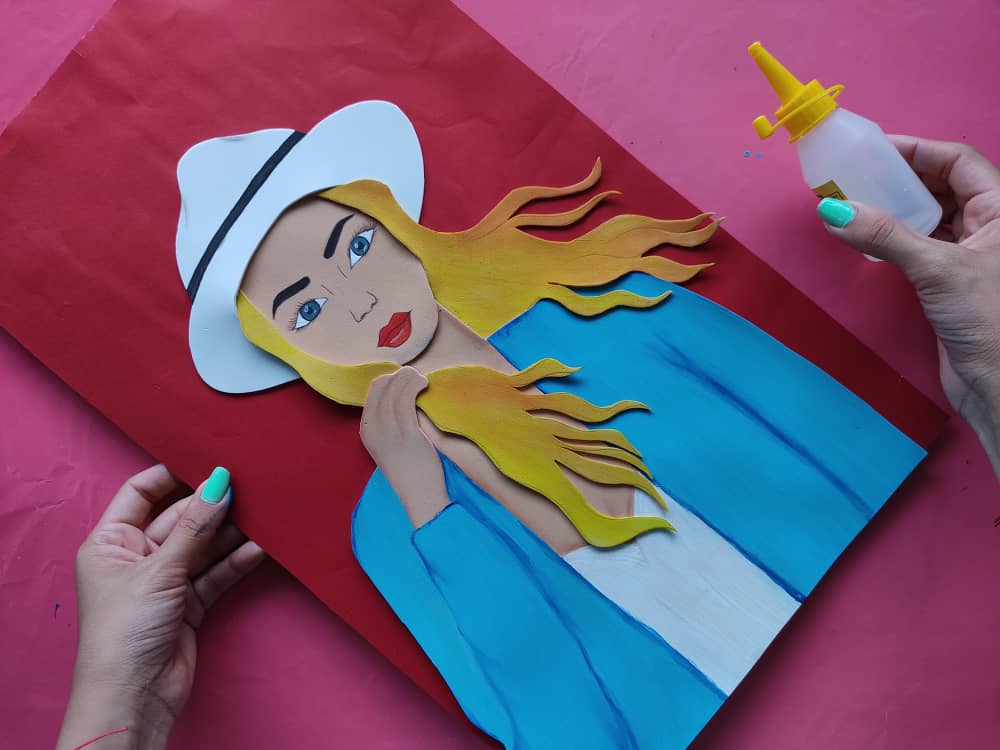
Luego, pegamos a la hermosa chica sobre esta linda base utilizando silicón frío.
Then we glued the beautiful girl onto this cute base using cold silicone.
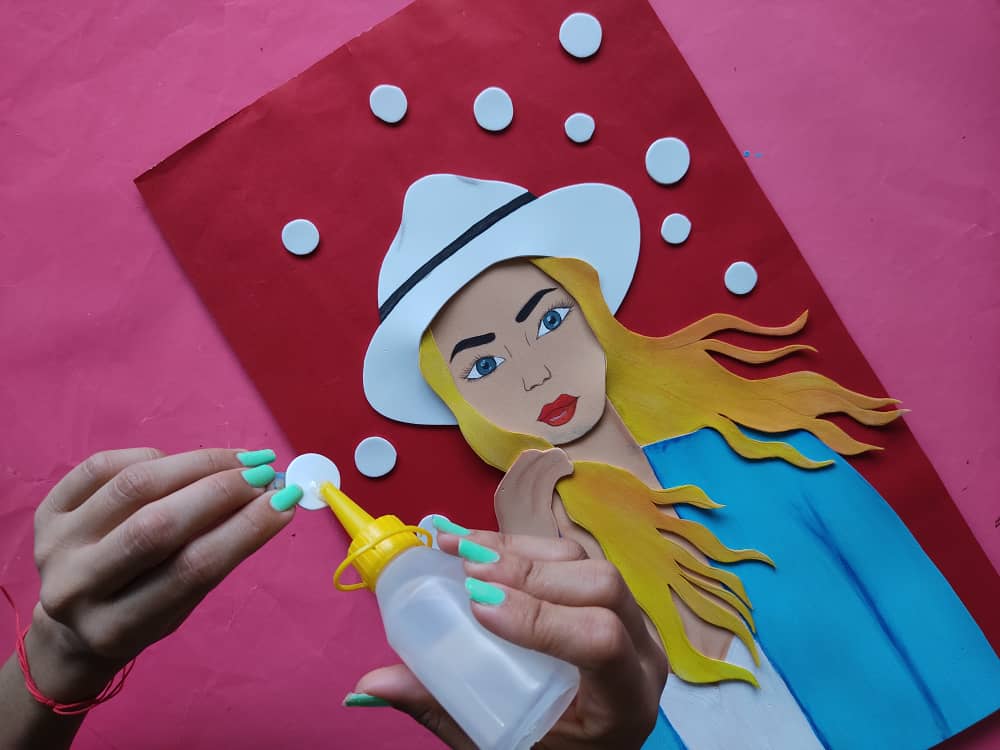
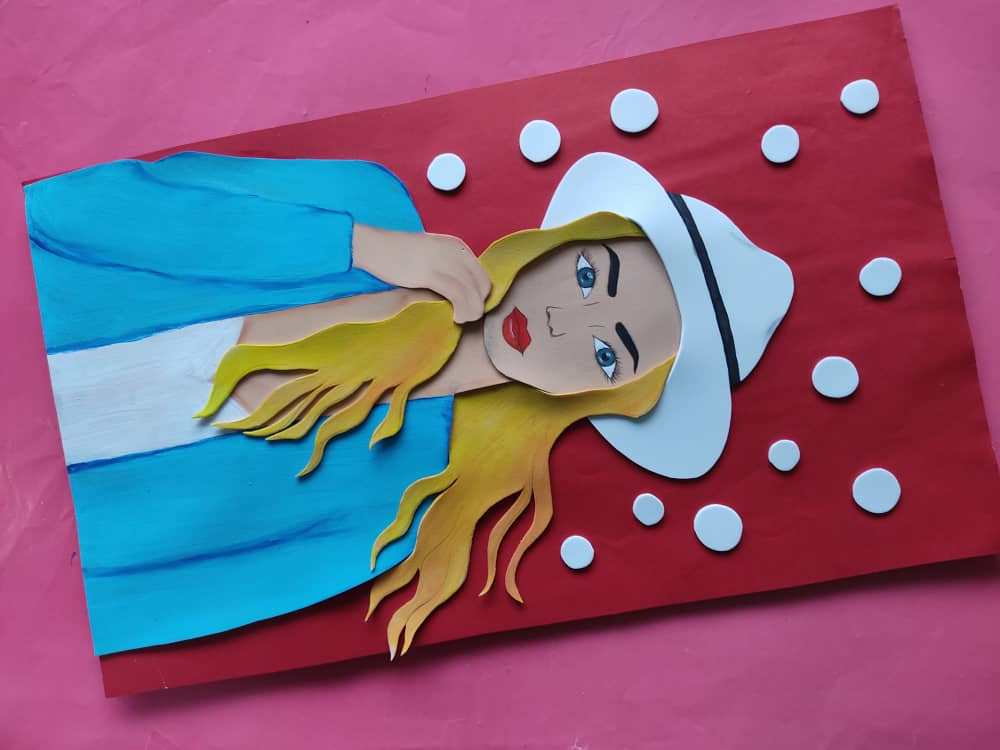
Finalmente, elaboramos pequeños círculos de color blanco y los pegamos por toda el área superior de la base.
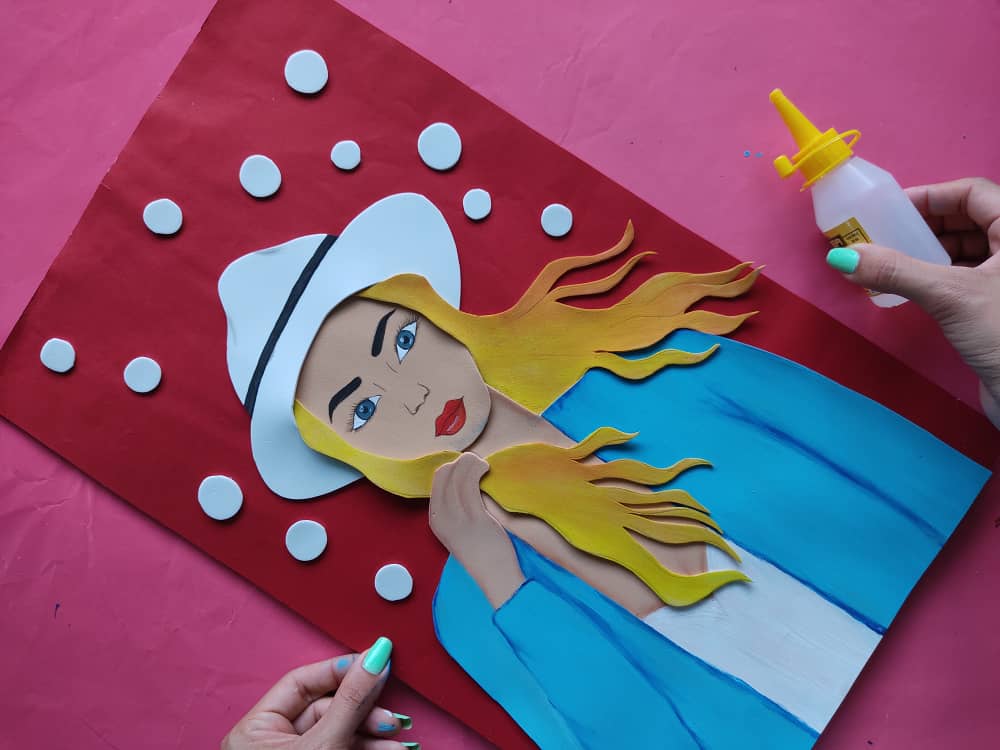
Finally, we make small white circles and glue them all over the upper area of the base.
.jpeg)
.jpeg)
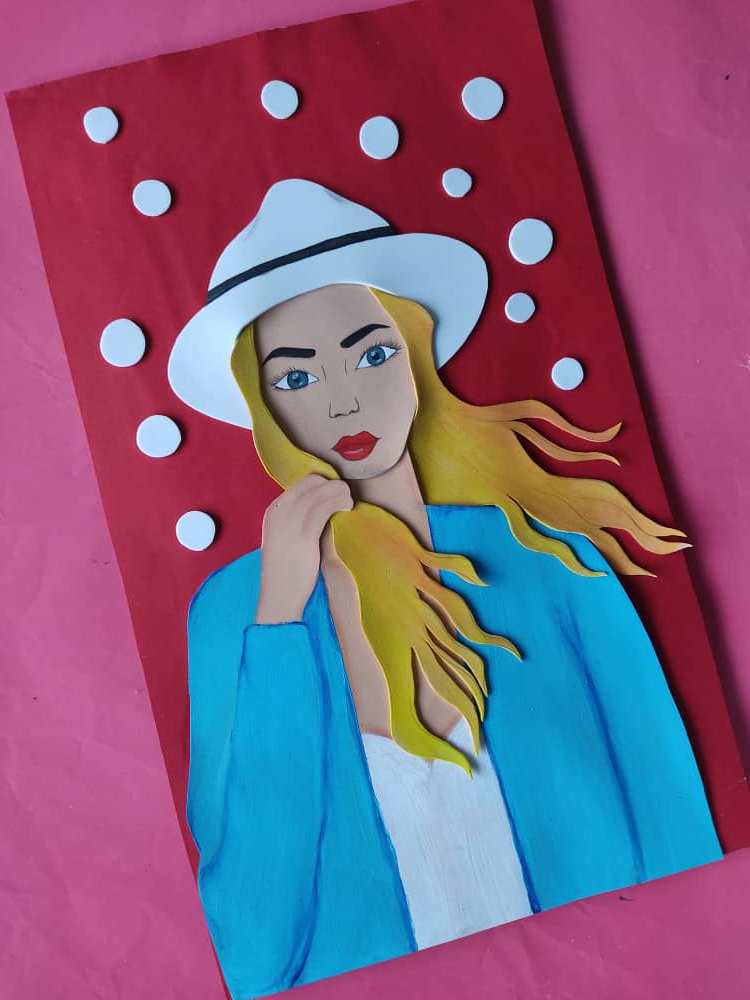
Gracias por acompañarme y espero que lo hayan disfrutado. ❤️
Thanks for joining and I hope you enjoyed it.❤️
.jpeg)
.jpeg)
.jpeg)
.jpeg)
.jpeg)
.jpeg)
.jpeg)
.jpeg)
.jpeg)
.jpeg)
.jpeg)
.jpeg)


My twt #posh
Links dropped in the DNA Discord channel must be about nature. You will be removed from the channel if you continue to drop non relevant links.
Ok am sorry..