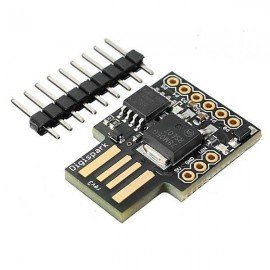
Hello friends, today we will talk about the Digispark ATtiny85 Microcontroller.

The Digispark Attiny85 board from the ATtiny series is the entry-level line of Atmel microcontrollers that have been slimmed down compared to ATmega chips.
The official line of Arduino boards has been greatly expanded by third-party manufacturers and microcontroller programming enthusiasts but compatible boards can either be superior to standard Arduino boards or smaller. A good example of such a board is the Digispark Attiny85.
The specs are the following:
- Persistent storage is 8KB for program code and 512KB for executable code
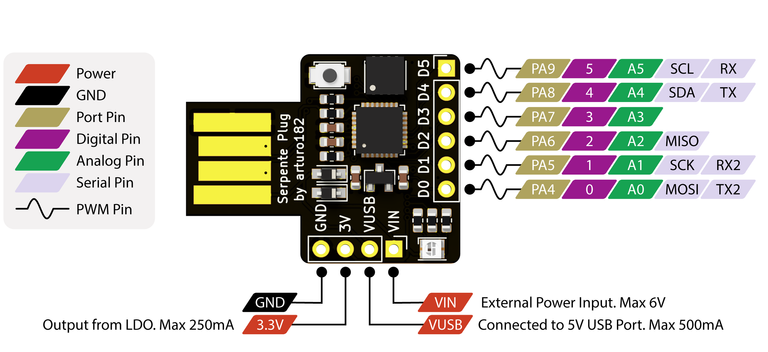
- Since there are only 8 pins available, minus the two positive and negative power, you get 6 digital pins, 4 of which are ADC and 2 are PWM
- Only one hardware interrupt is available
- The controller operates at a frequency of 1 to 20 MHz
- Depending on the chip, the supply voltage varies between 1.8 and 5.5 volts
Pinout

The original Digispark Attiny85 had an interesting design. The board is wired so you can program the microcontroller by simply plugging it into a USB port on your computer. The board is small and easy to assemble, and it won't take long for beginners.
How to program Attiny85?
Compared to the Arduino PIC programmer (or any other PIC programmer) that requires a 13V power supply to force the target microcontroller into programming mode, programming an Atmel microcontroller usually requires only logic level signals, which are easily done by another Atmel microcontroller such as an Arduino Uno.
Atmel microcontrollers have high voltage programming modes (where high voltage means more than 5V), but they are not required in most cases, including the ATtiny85.
The programming method is called ISP. This is actually an SPI interface that uses the microcontroller's RESET pin as the SPI slave select, so it's fairly easy to implement on SPI-enabled microcontrollers.
The Arduino community has created a sketch called ArduinoISP which allows the Arduino board to act like an in-system programmer and send data through the USB serial port of the host Arduino board.
The Arduino board itself, like the UNO version, can be used as a universal programmer. You can easily program other AVR and non-AVR series ICs with the Arduino.
To flash the ATtiny with the Arduino IDE, you must first add libraries to support them. Only ATmega is supported by default. Just add them from Libraries Manager and you are ready to go.
How does this work?
Unlike the Arduino Uno, the ATtiny85 usually does not have a bootloader. The bootloader is a small program that resides in flash memory and actually runs the first time you open it. You may notice that the onboard LED on the Uno blinks a few times no matter what sketch is loaded, this is the bootloader letting you know it's there.
The bootloader listens in the first second of power up, looking for a specific sequence of data on the serial port, and when it detects it, it goes into sketch upload mode. Without this we need another way to get our program on the chip, we can use ISP.
Another benefit of not using a bootloader is that the bootloader takes up valuable flash program space, and for small microcontrollers like the ATtiny85 with only 8KB of flash, any savings would help.
Conclusion
This (AT)tiny device saves space and money when assembled. The truth is that for the price of a cheap Arduino nano, you can buy multiple ATtiny's and you can program them with simple commands without having to learn C.
Interesting! You don't need to use C for that

!1UP
The rewards earned on this comment will go directly to the people( @ptmaker ) sharing the post on Twitter as long as they are registered with @poshtoken. Sign up at https://hiveposh.com.
You have received a 1UP from @gwajnberg!
@stem-curator
And they will bring !PIZZA 🍕. The @oneup-cartel will soon upvote you with:
Learn more about our delegation service to earn daily rewards. Join the Cartel on Discord.
I gifted $PIZZA slices here:
(1/20) @curation-cartel tipped @ptmaker (x1)
Send $PIZZA tips in Discord via tip.cc!