In this article about landscape photography in Java, Indonesia, I show you some of my favorite photo locations in the eastern part of the island. Featured are spectacular waterfalls, temples, and the volcanoes for which Java is known.
Java is the largest island in Indonesia and also home to its capital, Jakarta. It's located between Sumatra in the west and Bali in the east and has a length of more than 1000 kilometers. Since I already showed you some of Java's west in my Sawarna landscape photography guide, I want to dedicate this article to the eastern part of the island.
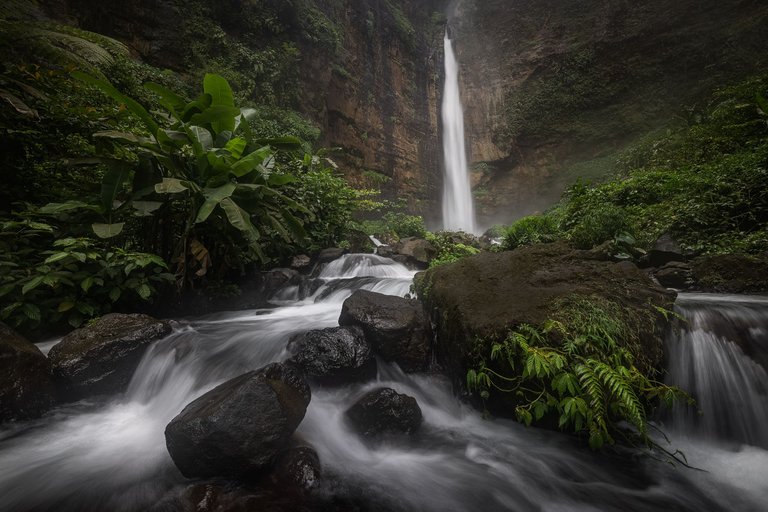
Volcanos, thundering waterfalls, and lush vegetation make this area a landscape photographer's paradise, offering a wide range of breathtaking scenery. From the bustling city of Yogyakarta to the serene waterfalls south of Malang, from Mount Bromo to Mount Ijen, I show you some of the best photo spots.
How to Get to East Java
Let's start with some travel information. I started my tour through East Java in Yogyakarta. It's located roughly in the center of Java island. It has an airport, but you won't find direct international flights heading there. When you travel to Java by plane, you typically arrive in Jakarta or Surabaya.
If you find a flight to Surabaya, this is a good place from which to start exploring East Java. You can reach many of the locations I show below within a day from there. To explore the ancient temples of Yogyakarta and Borobudur, additional travel is required.
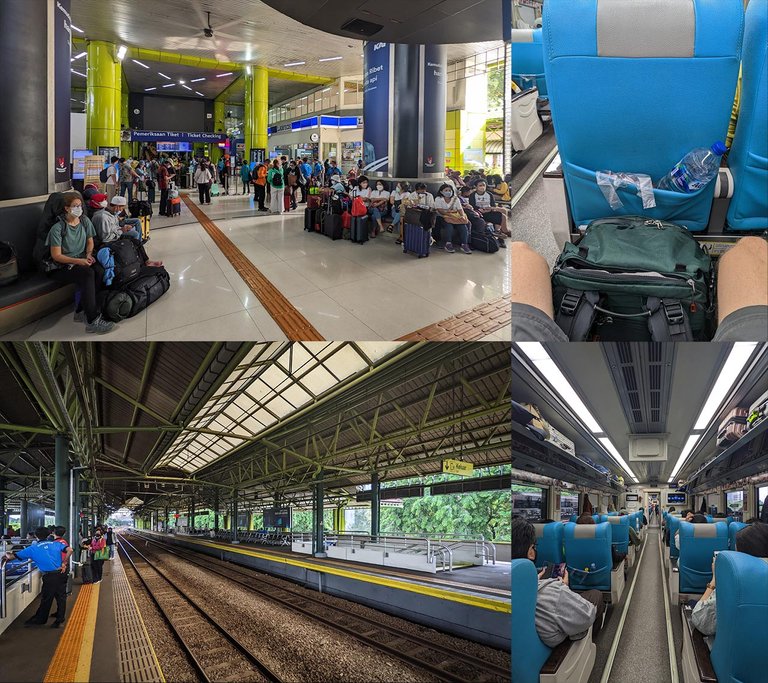
You can fly inland to Yogyakarta using Air Asia or one of the smaller Indonesian Airlines. I have to be honest: I usually avoid those based on what I've heard and the reviews I read. A more reliable and comfortable alternative is taking the train, which costs between $20 and $30 for the executive option. With a service like Traveloka, it's easy to purchase tickets. Be careful when selecting the station from which you want to start your travels. Jakarta, for example, has two stations from which trains leave for Yogyakarta. Make sure you head to the correct station.
How to Get around East Java
In the previous section, you already learned one way of getting around East Java, the train. But that's not very flexible as it only connects the major cities. Most photo spots are located in the countryside, away from public transport. To reach those, you can join one of the many tours that explore Java by minibus. Or you spend a bit more money and get a personal driver.
For landscape photographers, the latter is the only viable option. You might think renting a car would be more flexible, but it's not a good idea for foreigners in Indonesia. I explain the reason for that in my previous article.
If you base yourself in Malang for a few days, you can find a driver that brings you to locations in the area for $30 to $50 per day. It's a convenient way of exploring the waterfalls in the south and some of the mountains. Between Yogyakarta and Malang, you'll find a train connection.
If your time is limited, and you want to get as much out of your trip as possible, you should consider hiring a driver for a couple of days. We did a six-day tour from Yogyakarta to Bali with one driver. We covered a lot of ground that way, and our driver was always ready to bring me to the photo locations I had selected for our itinerary.
Including accommodation, the tour cost us around $1200 for two people. I talk about it in the video below. It was one of the more expensive options available, but when I did my research, Java Private Tour was the quickest to respond, and the communication was good. When we drove to Sawarna with Bogor Private Tour Guide a week before, I learned that they also provide tours in the east of Java. So they would have also been a good option.
When to Visit Java
We visited Java in October, which marks the end of the dry season. Unfortunately, the rainy season had started early, and we experienced some monsoon-like rains during our visit. It made landscape photography difficult.
Based on this experience, I would advise against visiting Java during the rainy season, which typically lasts from November to March. To be on the safe side, also skip October and April. In summer, you'll have a much higher chance of seeing the mountains, and the waterfalls should also still have enough water as they are very powerful.
East Java Landscape Photography
Below I share the photo locations I visited during the six-day photo tour. Before the trip, we stayed in a beautiful hotel in the Borobudur area close to Yogyakarta for a few days. Unfortunately, the Borobudur temple was still closed - it had been for more than a year due to COVID and some renovations - and I wasn't lucky with the weather, as I shared above.
Prambanan Temple Yogyakarta
Borobudur might be the most popular photo location close to Yogyakarta, but the Prambanan temple also offers great photo opportunities. The temple area is huge, with different temples and many interesting viewpoints. With $25 per person, the entrance is not cheap. Since the compounds close around sunset, you can take photos during golden hour, so bring a tripod.
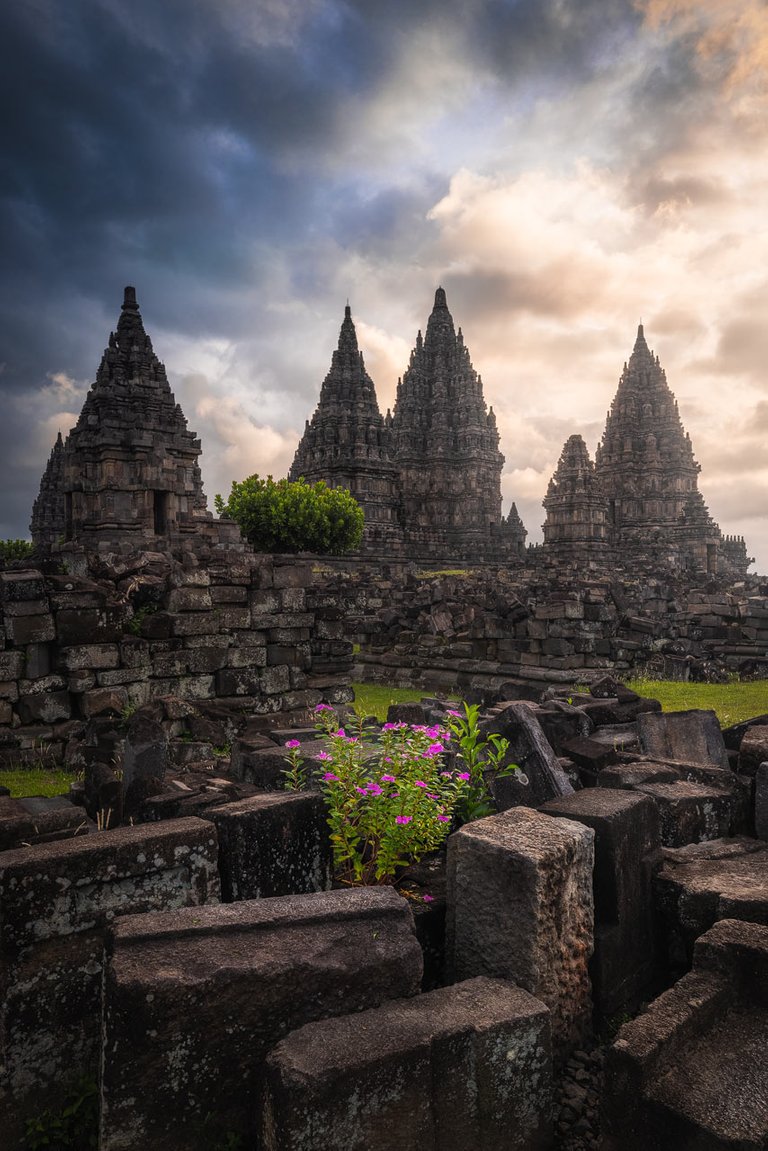
I got lucky with the conditions during our visit, so it was worth paying the entrance fee. I have to admit that finding a good composition was not easy. The Prambanan temple area is very crowded, and you should plan in enough time to find a perspective that allows you to hide the visitors in the photo.
Walking towards the northern end of the compounds, you'll find the Sewu temple. It's a bit smaller, but also much less crowded. It offers some beautiful compositions, so don't miss it.
Selotapak
North of Malang lies a beautiful place with rice fields and other growing areas, Selotapak. Surrounded by mountains, it offers some beautiful views. The only problem is that the popularity of some of the photo spots there has led to extended development. The people in Indonesia seem to like constructed viewpoints, so wherever there is a potential view, wooden and sometimes stone structures will eventually pop up. In the case of Selotapak, they ruin the once beautiful view I wanted to photograph.
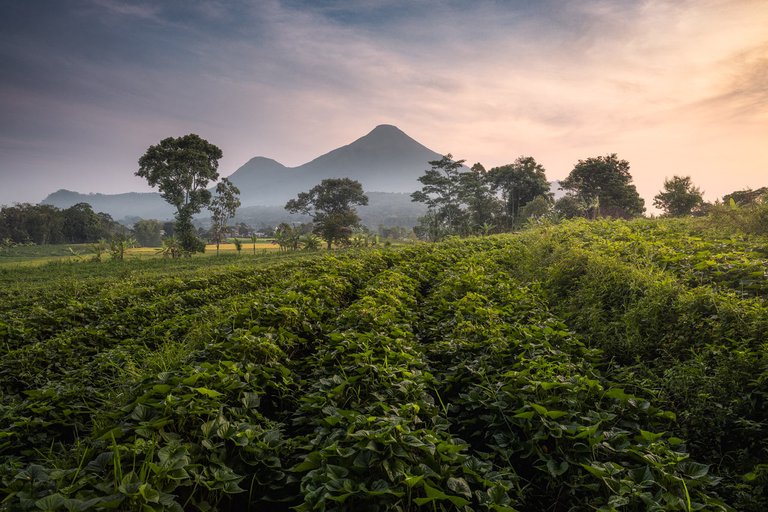
Thankfully, there are still fields with an unobstructed view toward Mount Penanggungan. The field above was just one kilometer east of the popular photo spot you'll find if you google Selotapak. And there are certainly more in the area, so time for exploration will help if you plan a visit.
Kapas Biru Waterfall
Visiting the gorge of the Kapas Biru waterfall gives you the feeling of entering Jurassic Park. It's a bit of a climb to get down, and you must be careful on rainy days - if you own hiking poles, bring them. But the 30 minutes of hiking from the parking area are worth the effort.
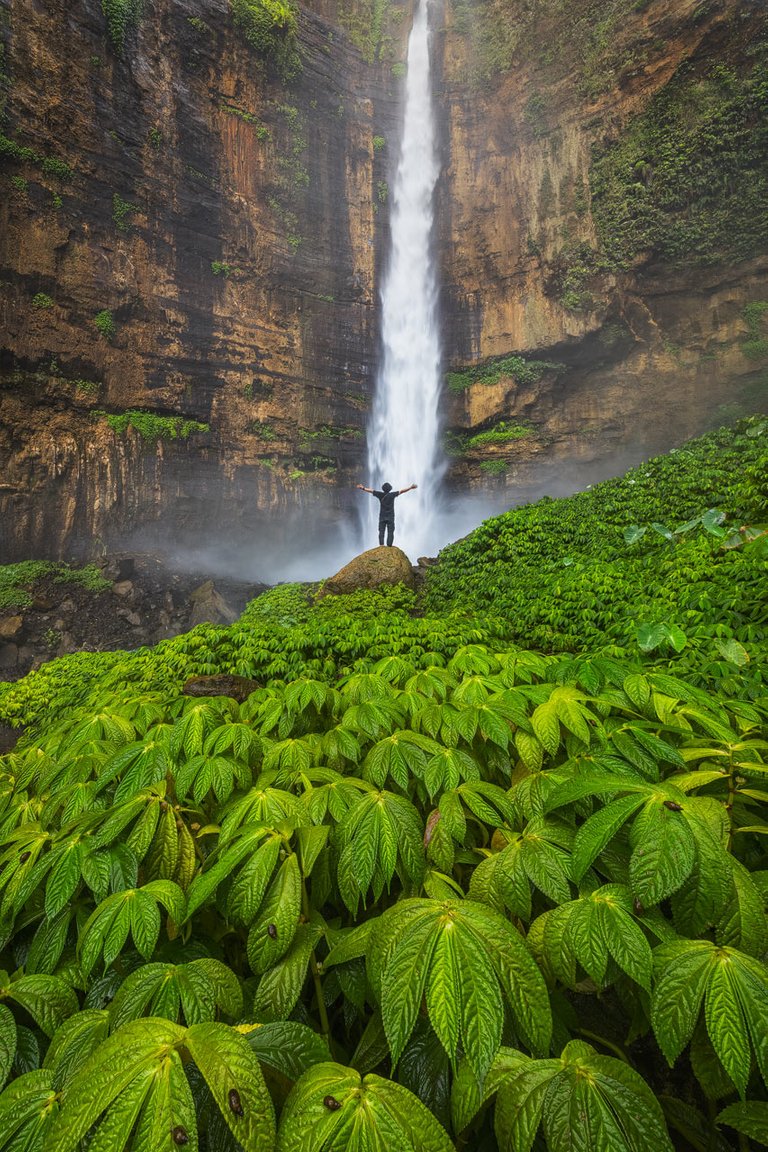
The waterfall is powerful as it tumbles down a massive cliff. Close to the waterfall, there's a lot of spray, and it won't be easy to take a photo. But there's a lot of foreground interest with a carpet of vibrant leaves and vegetation. If you don't want to get drenched, you'll find plenty of compositions farther away from the waterfall. Plan for at least one hour down there to explore all of them.
Tumpak Sewu Waterfall
A visit to Tumpak Sewu waterfall requires less effort than visiting Kapas Biru. A short walk of 10 minutes brings you from the parking area to the main viewpoint. Make sure to head there in the morning. It is the time during which you can photograph a beautiful rainbow on sunny days. There will also be much less direct light on the waterfall than later during the day, which makes capturing it easier.
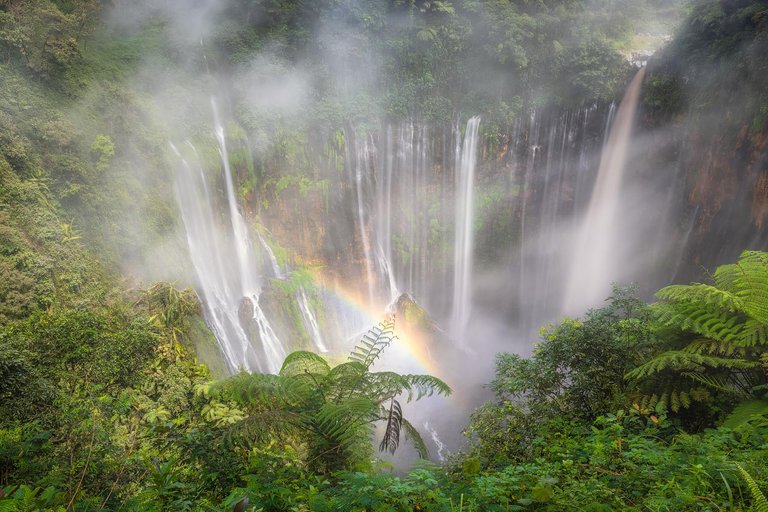
For a bit more of a landscape photography adventure, you can hike down into the bowl where the many cascades of Tumpak Sewu unite. Down there, you'll experience a lot of spray. Depending on how powerful the waterfall is during your visit, it can be difficult to take a proper photo. I decided not to head down when I was there because of the conditions you see in the image above.
If you are interested in hiking down, you can check out this excellent guide on Tumpak Sewu.
Mount Bromo
Our visit to Mount Bromo should have been the highlight of our tour. But the chances of seeing the mountains during the rainy season are low. We spent one evening close to the park, and I tried to photograph Mount Bromo both during sunset and sunrise. It didn't work out, but I still came away with a photo of Cemoro Lawang that I like.
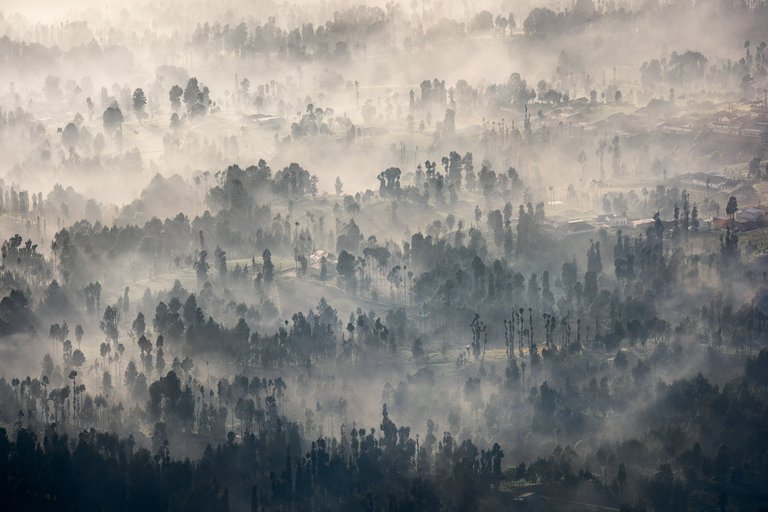
If you want to photograph Mount Bromo, you should stay close to or in Cemoro Lawang, as this is the only way to get up to the viewpoint before the crowds and secure your spot in the front row. Your goal should be to be up there at least 90 minutes before sunrise - during the high season even earlier.
Your question now might be, what is the viewpoint? There are several. The two best views, based on my research, are from Seruni Point and King Kong hill. Getting to Seruni point is easy. If you stay in Cemoro Lawang, you can even walk there as it is located at the northern end of town. Reaching it doesn't require entering Bromo National Park, so you save the $15 entrance fee. I went there for sunset, unfortunately without a view.
Higher up, you'll find King Kong hill. It's the most famous viewpoint and requires more effort to reach if you decide to hike and skip the entrance fee for the National Park. There's a steep path leading up from Seruni point. I didn't do the hike myself but based on what I've heard, you should plan in at least one hour. Also, some sections of the trail are not easy to find in the dark.
The more comfortable option to get up to King Kong hill is by Jeep. It's what most people do, and it takes around 30 minutes from Cemoro Lawang and costs around $35. The Jeep can seat between two and four people.
Once you arrive at the parking area of King Kong hill, walk straight toward the viewpoint marked on Google Maps. After 10 minutes, you'll find a little path to your right. Follow it up to the best view of Mount Bromo.
Because many of the options for staying in Cemoro Lawang are not rated very high, I should also mention where we stayed. The Jiwi Jawa resort is not cheap, but included in the price is a great breakfast that will set you up for the day.
Madakaripura Waterfall
A visit to Mount Bromo is typically combined with a visit to the Madakaripura waterfall. The gorge can get crowded around noon as most of the tours arrive, so try to be there in the morning. From Cemoro Lawang, it's a 90-minute drive to the parking area. The locals will provide you with a ride to the start of the hike on the back of their motorbikes. It takes another 10 minutes and will cost you between $10 and $15 for a return trip, including a guide. In my opinion, you don't need a guide as the hike is pretty easy. So try to just hire a driver.
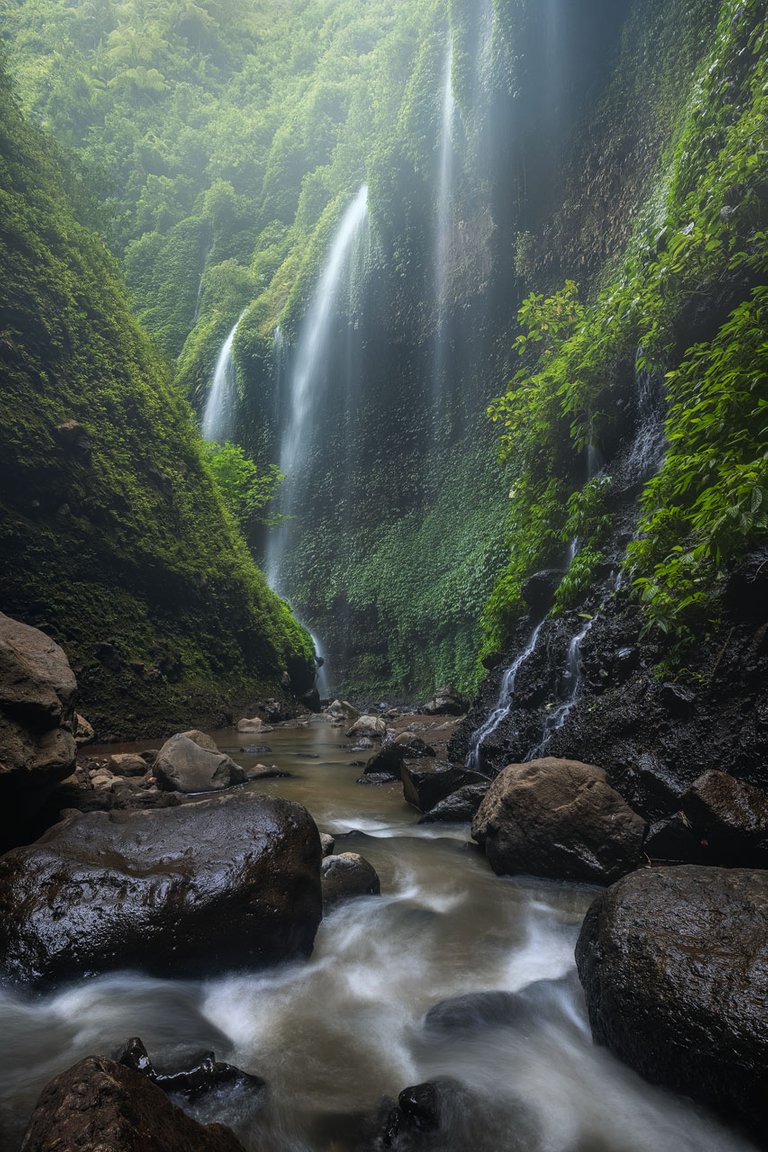
What you will need though is a rain cover for your backpack, a good umbrella, and waterproof clothing. Alternatively, go there in bathing shorts as you will get drenched. The trail goes straight through the waterfall you see in the background of the photo above. It's quite an experience.
The good thing about landscape photography at Madakaripura: the most photogenic area of the gorge is dry. So you can take your time setting up your tripod and taking photos without worrying about your photography equipment.
Mount Ijen
Getting to Mount Ijen requires a long drive from Mount Bromo. It took us more than six hours, and we arrived at our hotel late in the evening. Since Mount Ijen lies at the eastern edge of Java island, it's easier to reach from Bali than from the Surabaya area, including Mount Bromo. Only a narrow channel you can cross by ferry in about an hour separates Java and Bali. It is how we finished our tour, just in the other direction.
If you ever plan a visit to this area, I strongly suggest planning for at least two days. There's much more to explore than the crater lake of Mount Ijen. There are also rice paddies, waterfalls, and a dense forest to photograph.
I spent the one morning I had in the area taking photos from Mount Ijen. It was a rainy night and morning, and I wasn't sure if there would be a view up on the mountain. But with an elevation of 2300 meters, the crater lake area of Mount Ijen will often rise above the clouds. From the parking area I reached at 2:30 am, it took me 45 minutes to the top. It's a steep but easy 3-kilometer hike with 400 meters of elevation.
At the start of the hike, they rent out masks to protect you from the sulfur fumes that rise from the mines in the crater. If you don't plan on heading down there and want to stay at the rim for some landscape photography, you don't need one. I also heard from people who went down into the crater that the masks didn't help much.
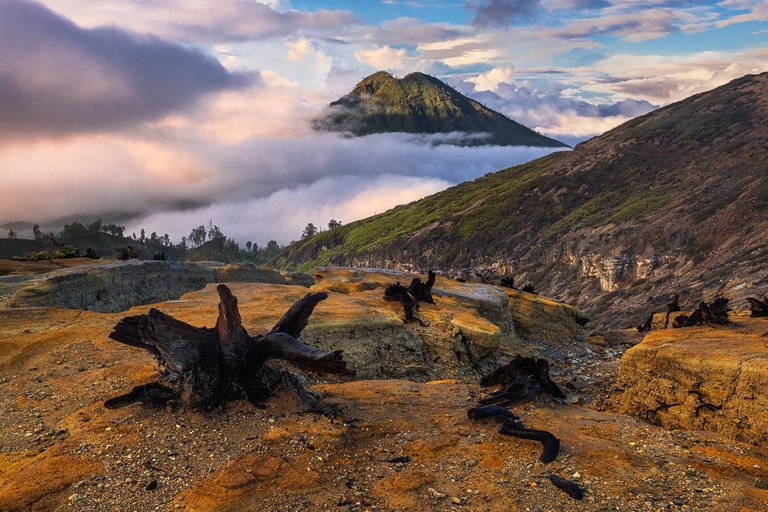
So better head straight past the entrance to the crater and further up the hill. You'll find beautiful rock patterns, burnt trees, and wonderful views if the weather permits.
Conclusion
As you saw in this article, Java has a lot to offer. It's one of the best places for landscape photography in Indonesia and provides a large selection of photo spots. And if the weather is bad and the views obscured by clouds, you can still explore the different gorges and waterfalls. There you can take great photos even on rainy days.
Really good tips
Just stunning!
Congratulations, your post has been added to Pinmapple! 🎉🥳🍍
Did you know you have your own profile map?
And every post has their own map too!
Want to have your post on the map too?
Your content has been voted as a part of Encouragement program. Keep up the good work!
Use Ecency daily to boost your growth on platform!
Support Ecency
Vote for new Proposal
Delegate HP and earn more
thank you for visiting the island of Java, greetings I am from Central Java
Good ideas
Stunning! Your shots are on different level
Thank you
That is some amazing skill you got there.... its breathtaking... literally. Thanks for such great posts.
The rewards earned on this comment will go directly to the people( @askari ) sharing the post on Twitter as long as they are registered with @poshtoken. Sign up at https://hiveposh.com.
much apprechiated!
What a beautiful landscape! I didn't get further than Bali! Love to discover Indonesia a bit more!
Bali is also beautiful. But Java is more wild and in parts much less touristic.
Congratulations @mibreit-photo! You received the biggest smile and some love from TravelFeed! Keep up the amazing blog. 😍 Your post was also chosen as top pick of the day and is now featured on the TravelFeed.io front page.
Thanks for using TravelFeed!
@for91days (TravelFeed team)
PS: TravelFeed is in social media to reach more people, follow us on Facebook, Instagram, and Twitter.
Congratulations @mibreit-photo! Your post has been a top performer on the Hive blockchain And you have been rewarded with the following badge
You can view your badges on your board and compare yourself to others in the Ranking
If you no longer want to receive notifications, reply to this comment with the word
STOPCheck out our last posts:
Support the HiveBuzz project. Vote for our proposal!
Hiya, @LivingUKTaiwan here, just swinging by to let you know that this post made it into our Honorable Mentions in Daily Travel Digest #1794.
Your post has been manually curated by the @pinmapple team. If you like what we're doing, please drop by to check out all the rest of today's great posts and consider supporting other authors like yourself and us so we can keep the project going!
Become part of our travel community: