.png)
If you let go of all your fears,
you will have more space
to live all your dreams.
(Marilyn Monroe)
**

Today I want to share with you an assignment my son was given at school. He had to make a puppet out of recycled material. He was really nervous because he had an exhibition, a biology experiment and an English exam, so I decided to help him with this part, because he had no idea what or how to do and neither did I, so I looked for a tutorial on YouTube to serve as a guide. It didn't look the same, because there were things we didn't have at home and it was the first time we did something like this, but his effort, his sacrifice and the relief he felt because I would help him, was worth it. We already know that there is strength in unity.
The first thing we did was to look in the "just in case" closet to see what we had. Fortunately we had everything we needed, except for the eyes. So that was all we needed.
With the anime ball, the silicone gun, the fabrics, scissors, yarn and the cutter, we had what we needed. So let's get to work!
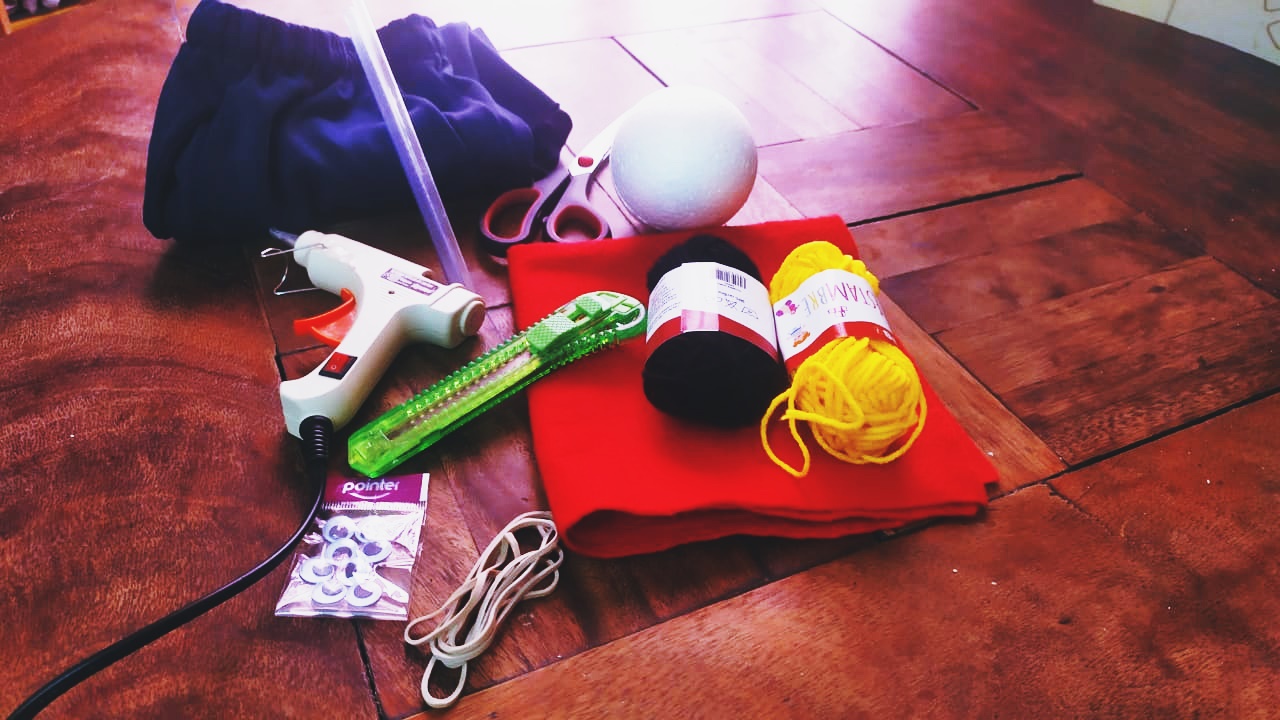
Materials
📌 An anime ball
📌 A roll of yarn
📌 A silicone gun
📌 Scissors
📌 Cutter
📌 Elastic band
📌 Red felt
📌 A piece of fabric
📌 One thin and one thick straw
📌Skin-colored cold paint.
He helped me with a lot of things and
with taking pictures.
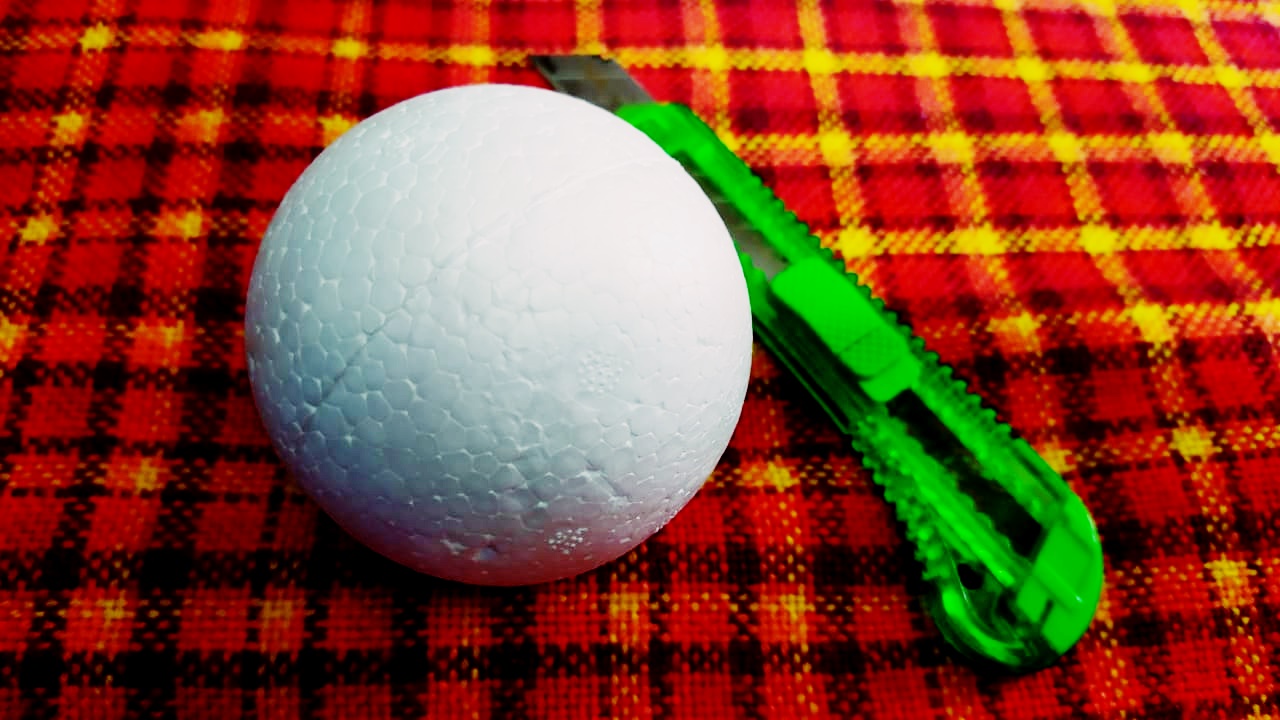
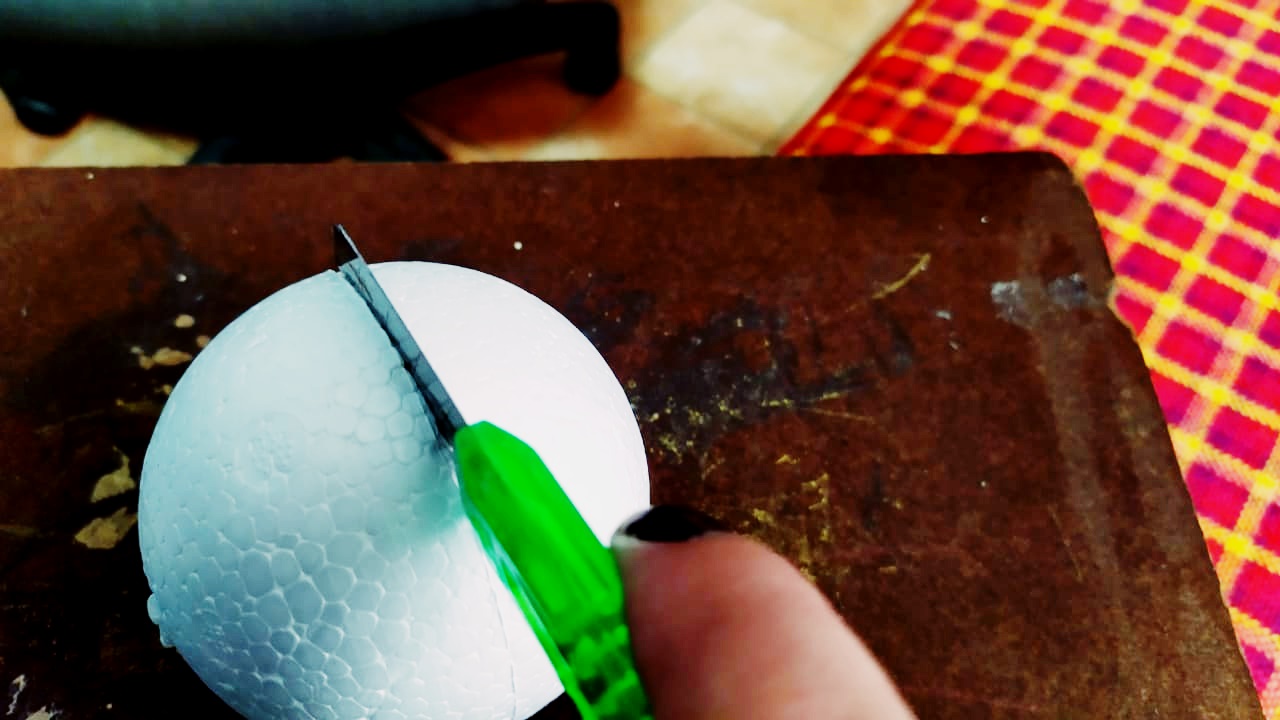
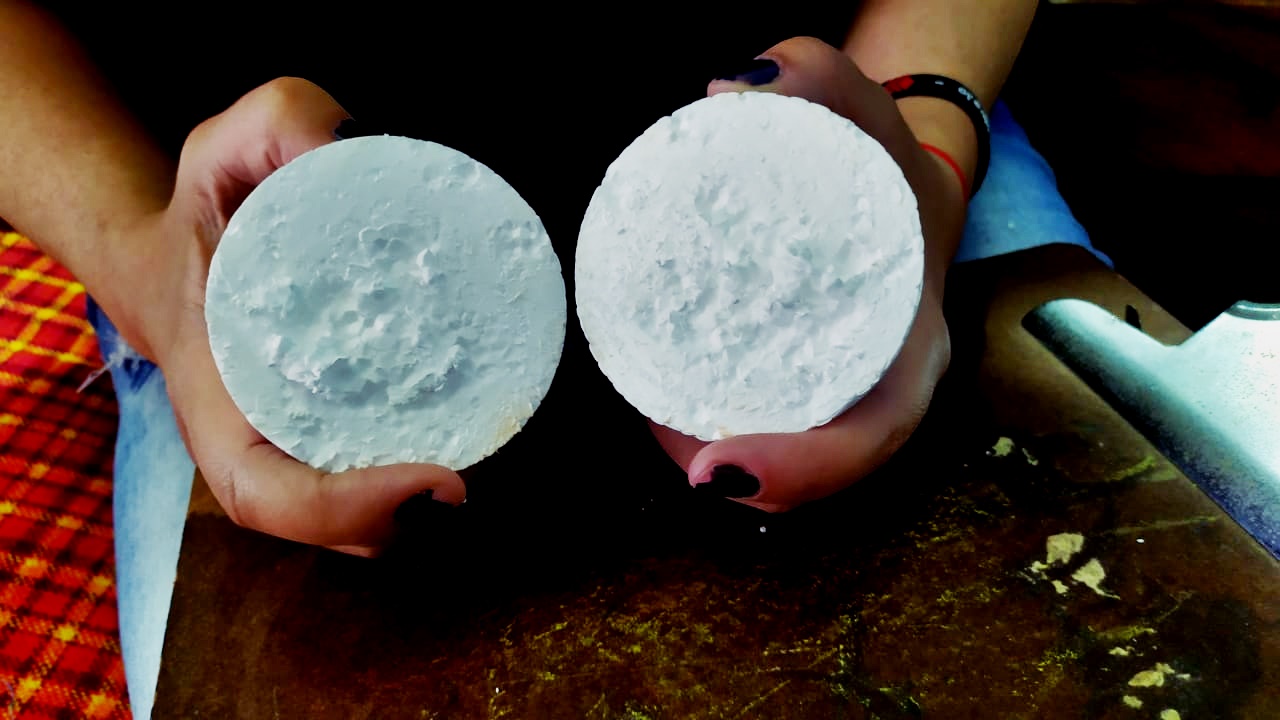
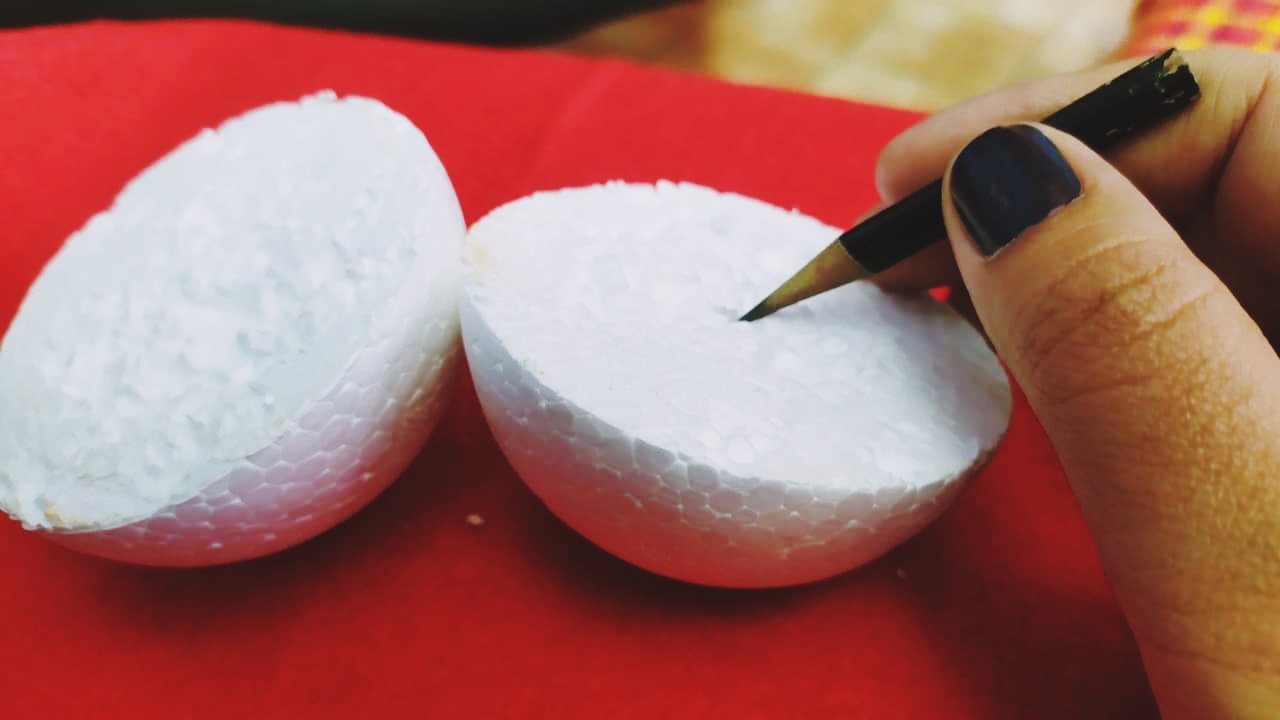
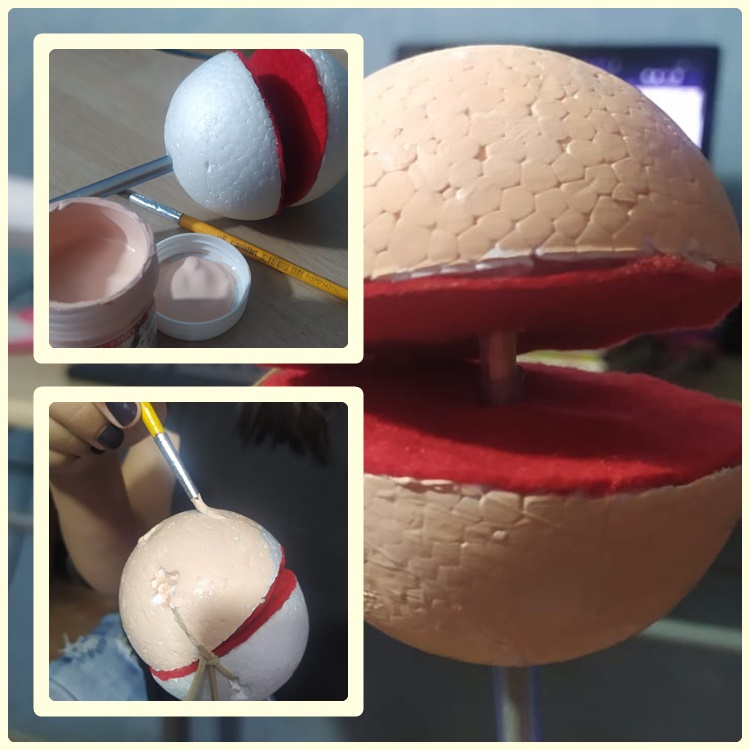
The first thing we did, following the steps in the tutorial, was to cut the anime ball in half with the cutter. Then we painted in the center of each half of the ball, a point that would serve as a guide, to introduce the straws.
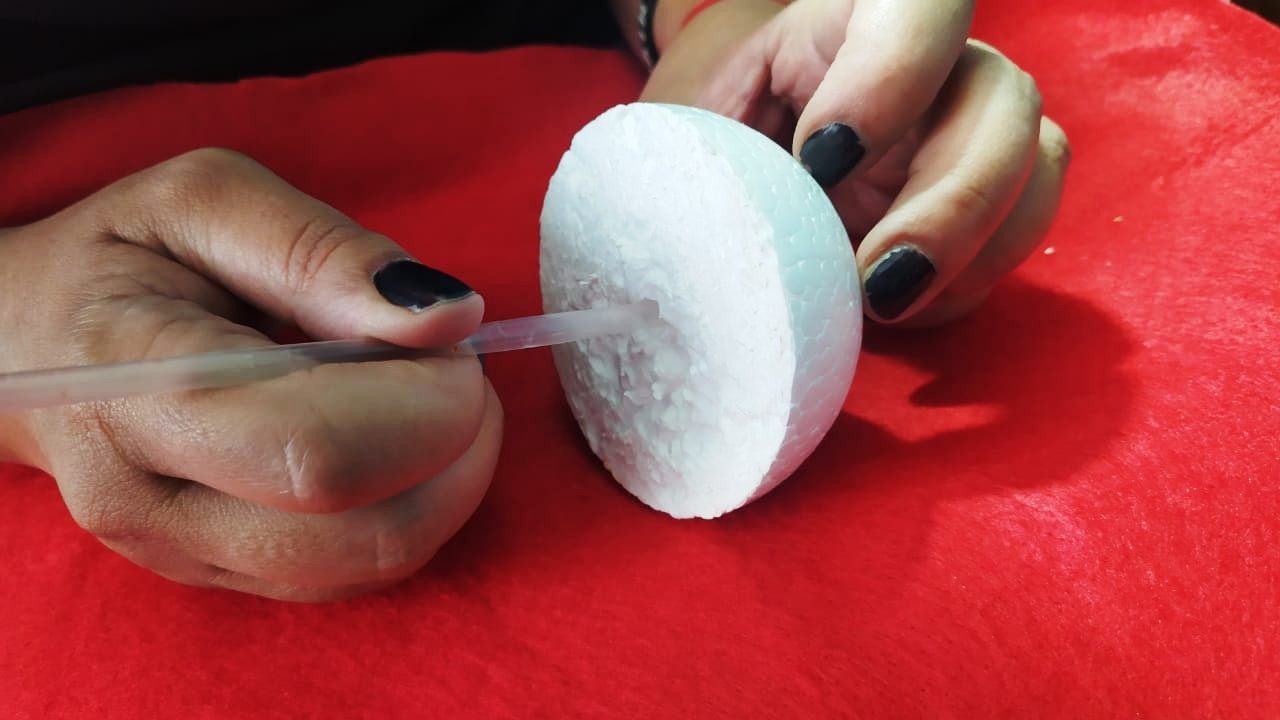
Then we put some hot silicone with the silicone gun around the hole we opened with the straw and we place the same straw in that place.
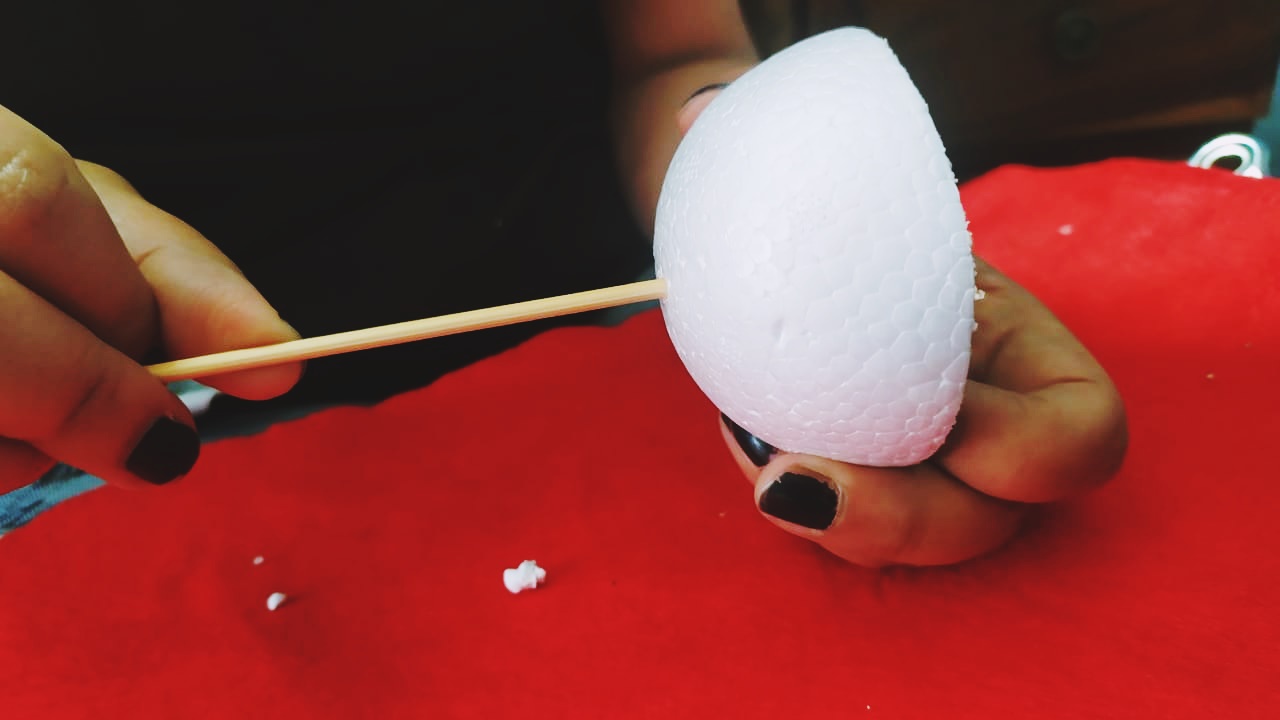
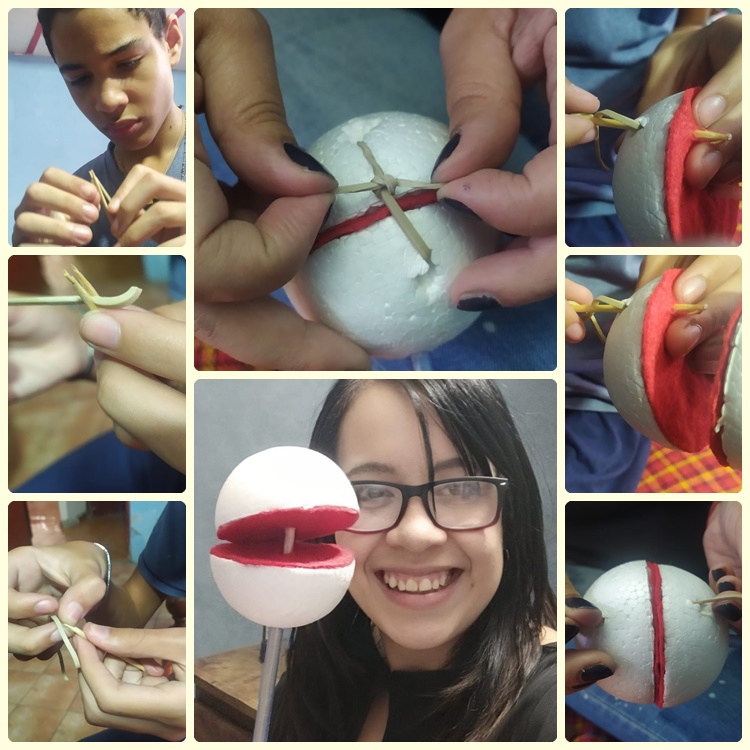
Afterwards, we take a skewer stick and introduce it through the other half of the anime ball, on the opposite side, so we can introduce the thinner straw through both holes, as shown in the following photos:
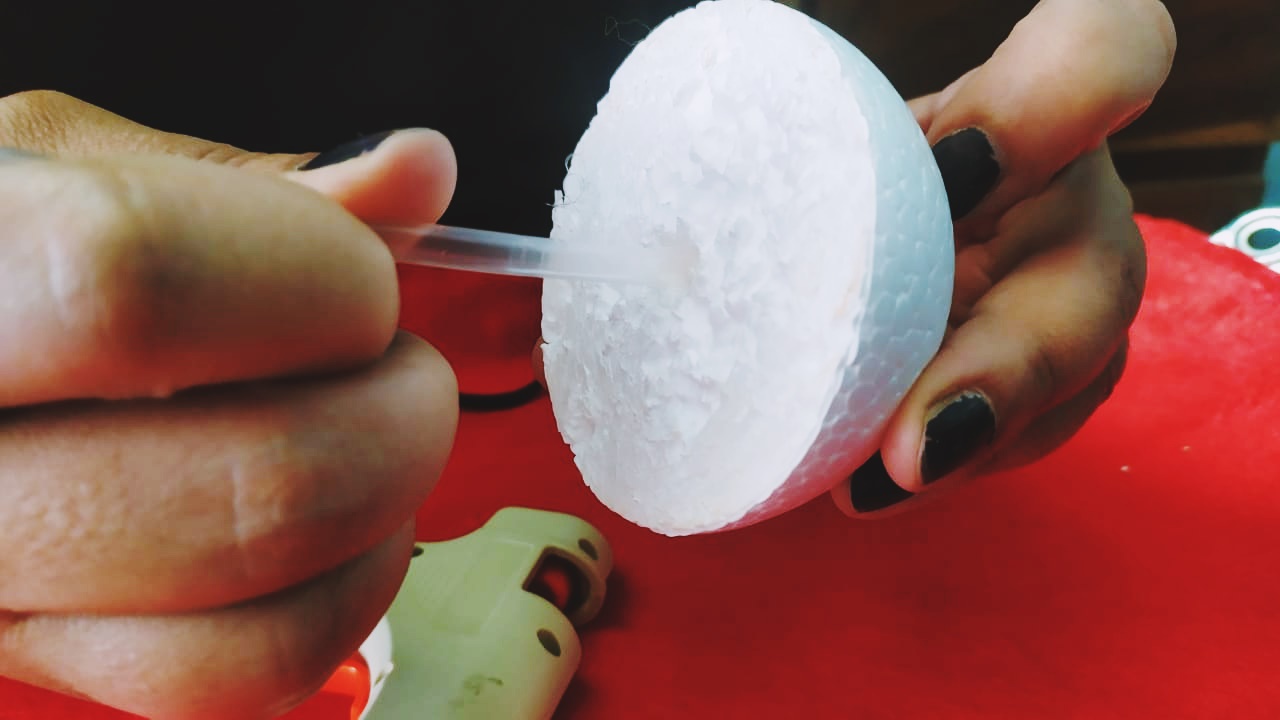
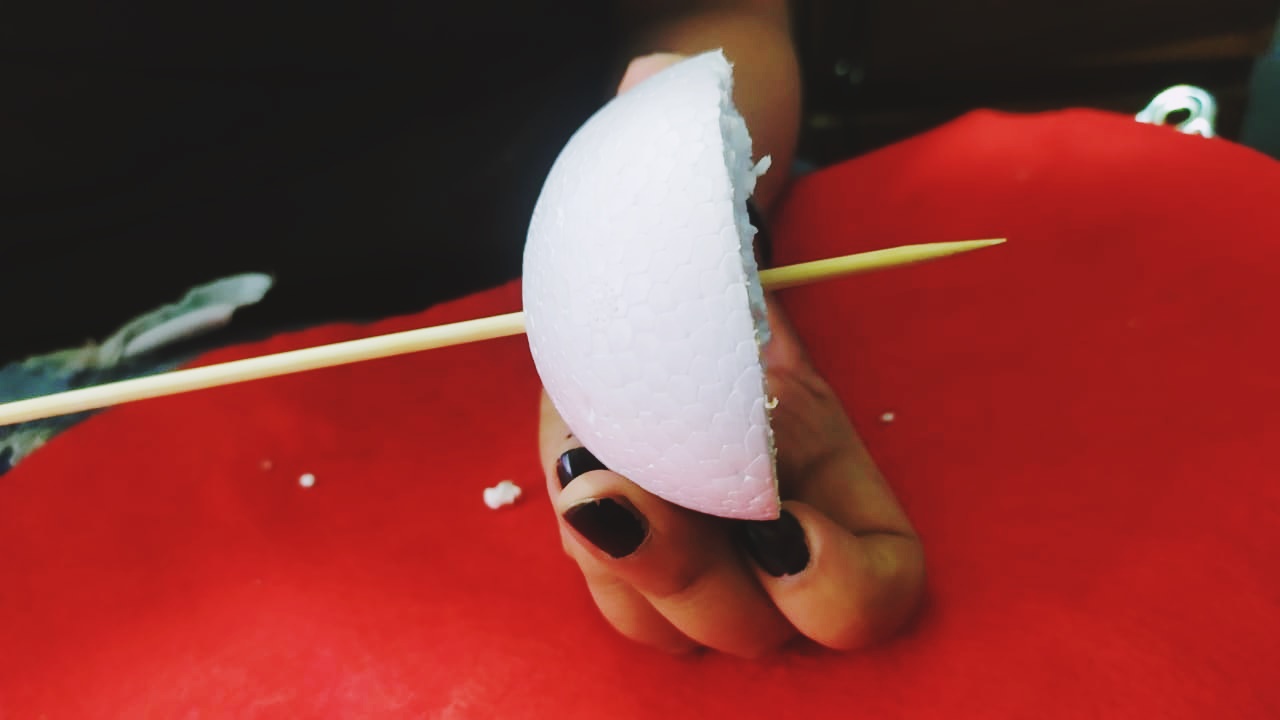
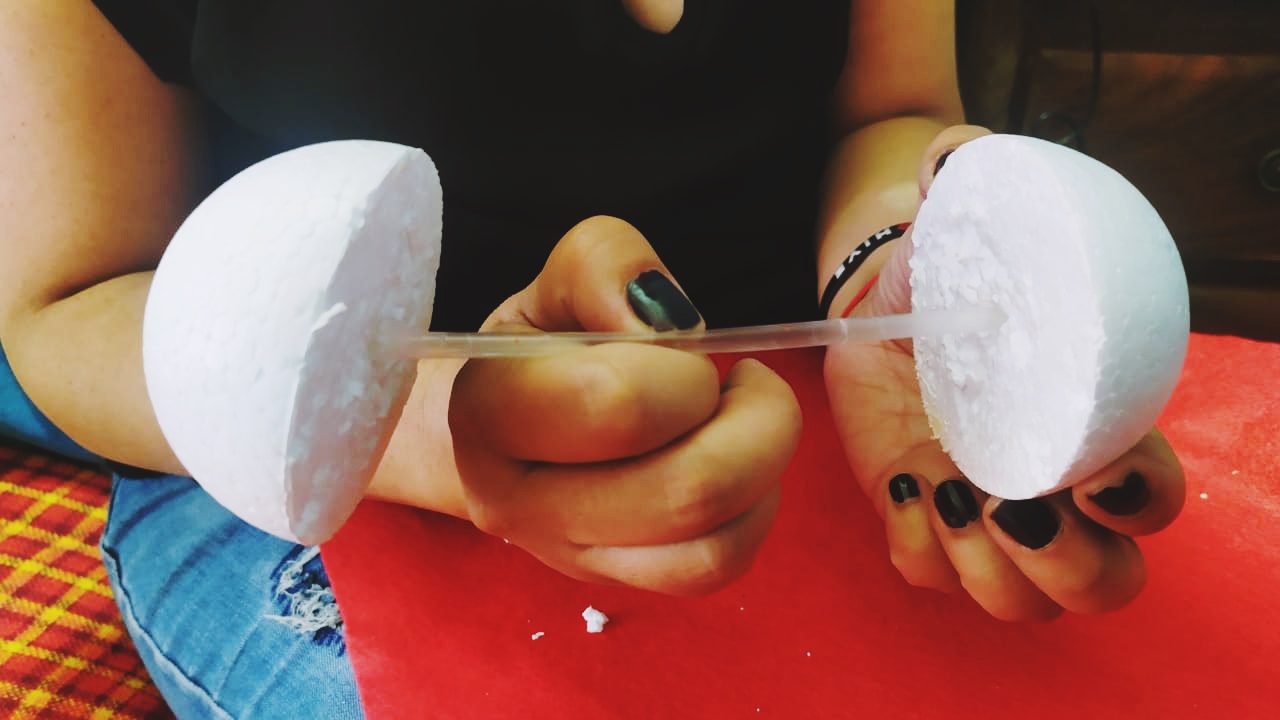
The idea of this step is to be able to achieve a movement between both halves of the anime ball so that it can be opened and closed in this way:
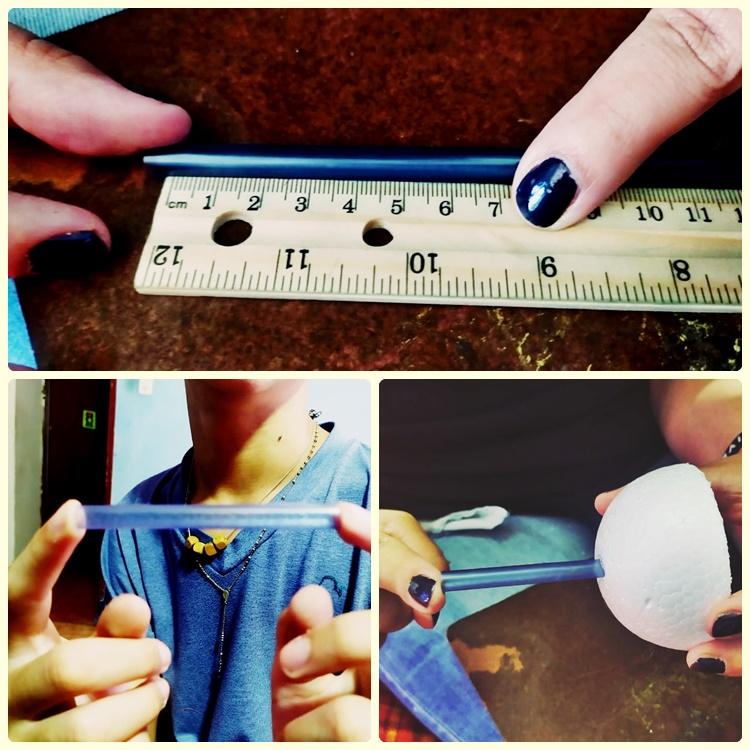
The thickest straw we will cut to eight centimeters, which we will adhere to the other part of the anime ball.
Now we are going to measure the red felt fabric with the anime ball and cut out two pieces of the same size.
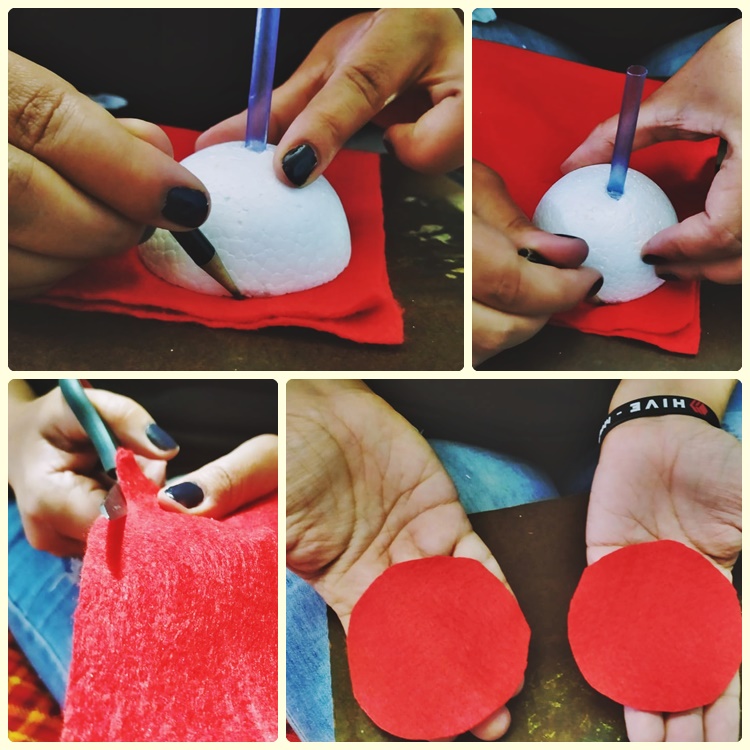
Once cut, we are going to fold them in half and again in half, to open a small hole in the center of the fabric, and then glue each one to both halves of the anime ball. Like this:
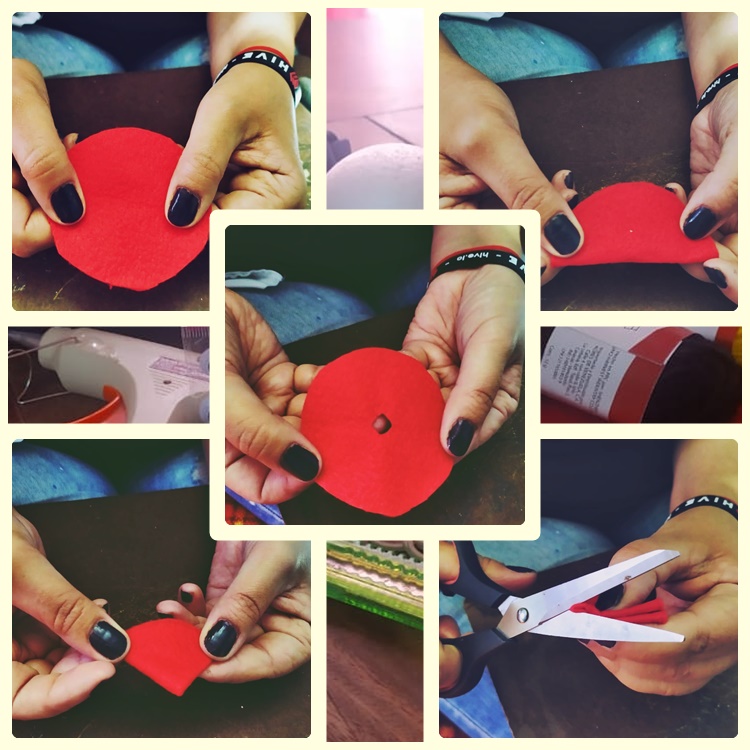
Once we have cut out both circles from the red felt and with the small hole in the center of each one, we take our silicone gun and apply the glue to both anime halves, and then glue the felt.
To create the articulated mouth of the puppet so that it can be closed, take the wooden stick and insert it into both halves of the ball, then make an opening in the thinnest part of the wooden stick and insert the rubber band, and then insert it into the hole we opened in the anime ball.
Then tie the rubber band tightly.
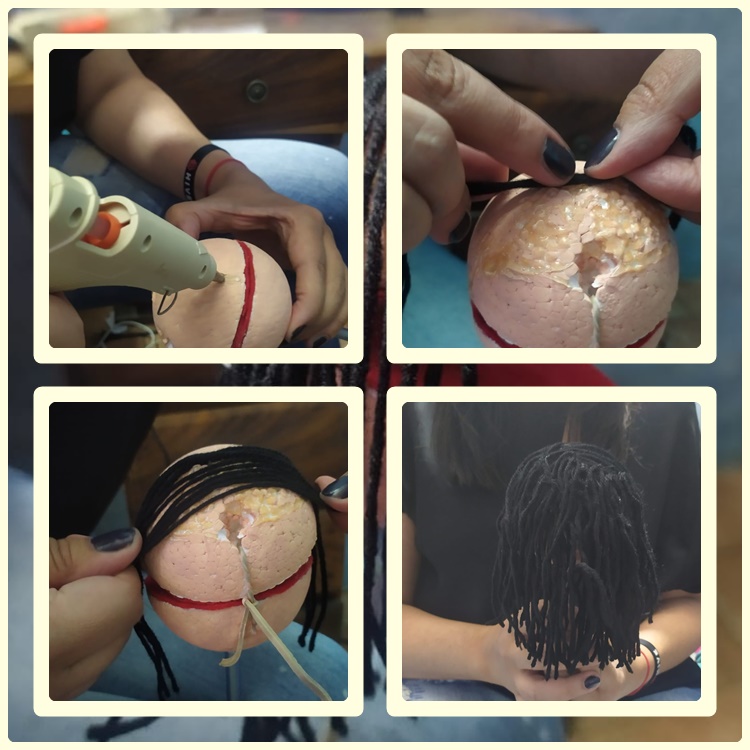
Now we are going to paint our anime ball in skin color and then we are going to put the hair made with black thread. With this, our puppet will start to come to life.
This hair will be glued with the silicone gun. I confess that this step was a little difficult for me because I had no idea how to put the hair, since in the tutorial they didn't do it the same way.
But we had made it this far and the delivery date was today, Monday, so we had to give it a try.
I was satisfied because for the first time we made a puppet, we were not too bad.
Now we will glue the eyes and then we will cut two small pieces of red felt to make sensual lips.
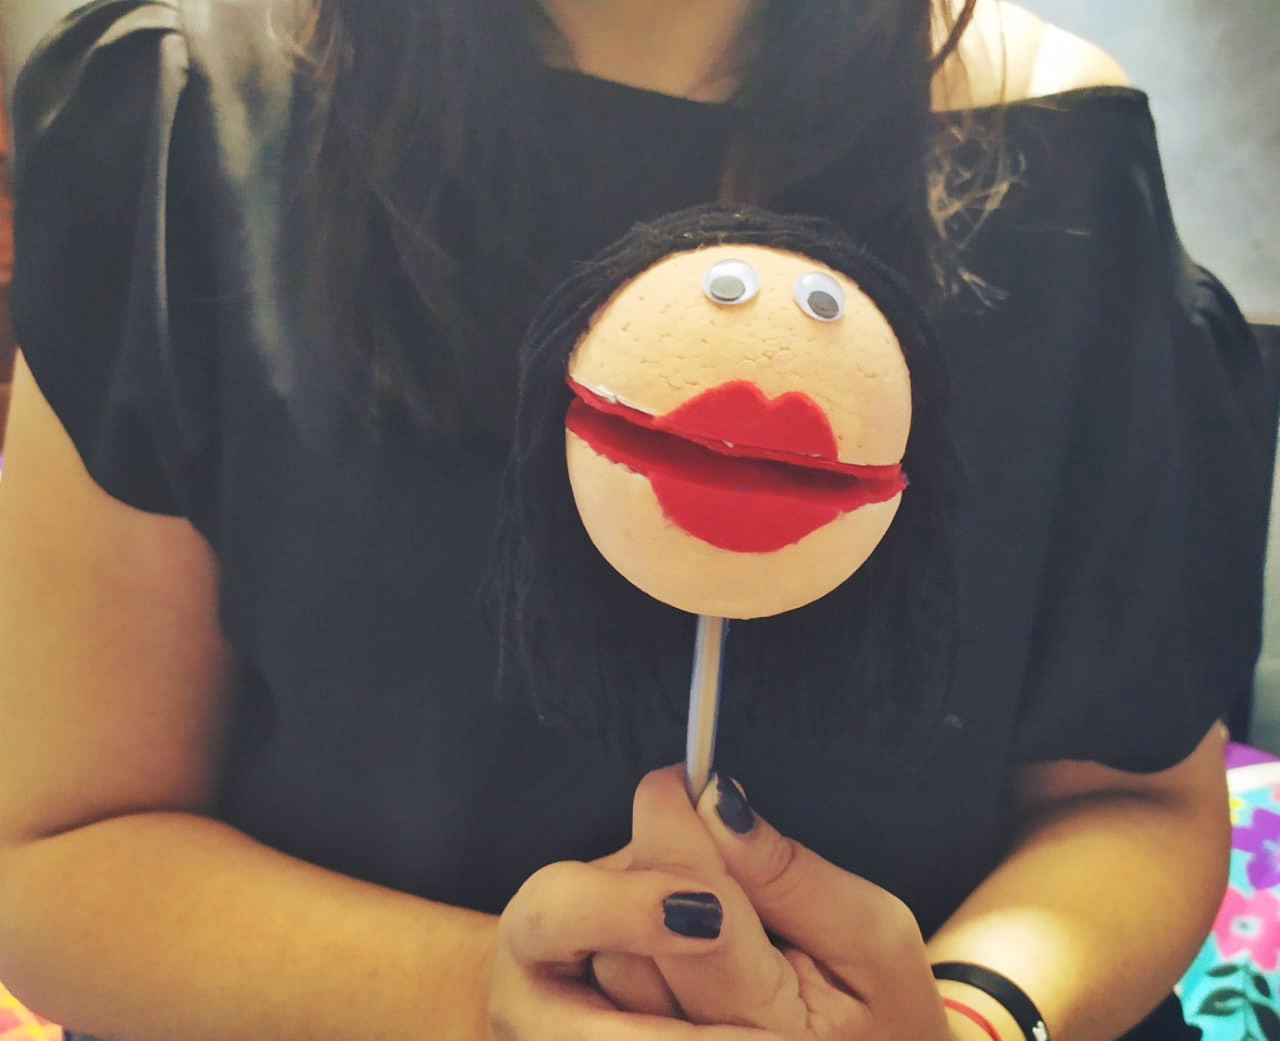
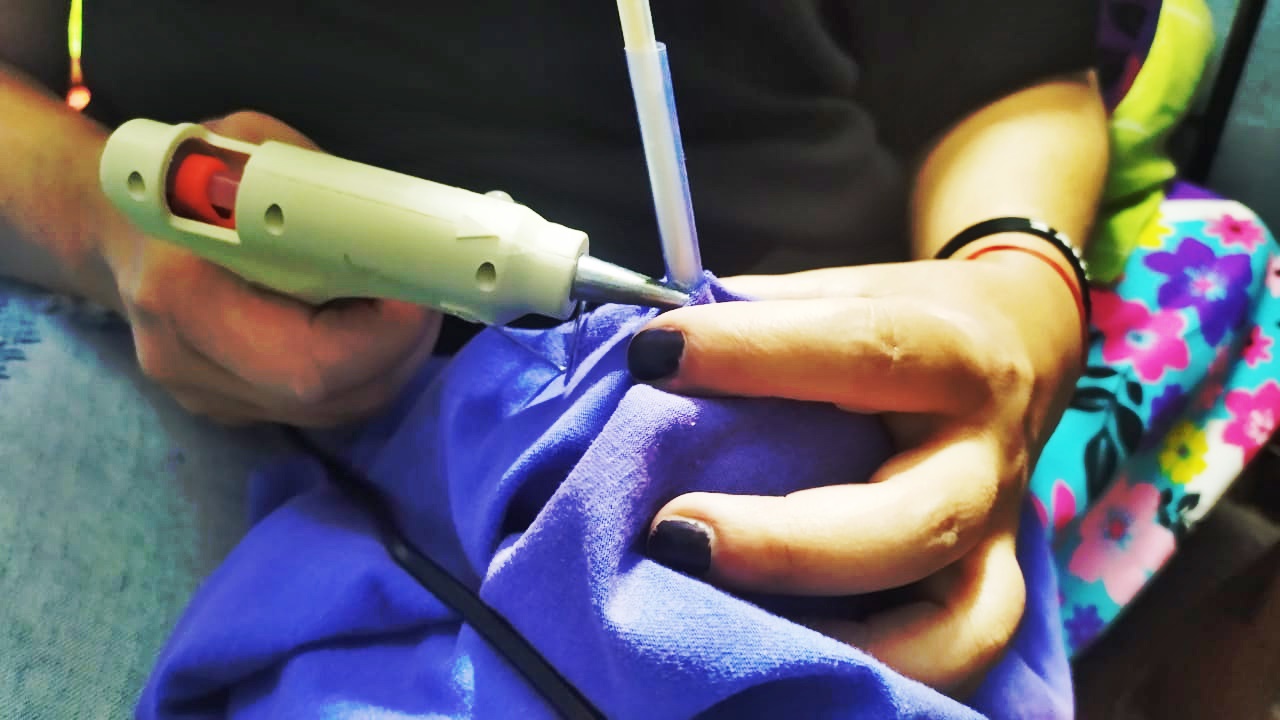
Finally, we made the dress. The rule imposed on the children was that it had to be the color of the school uniform shirt. We decided to add the school insignia.
This is the final result. It is worth noting that the school did not want the puppets to have legs or arms.

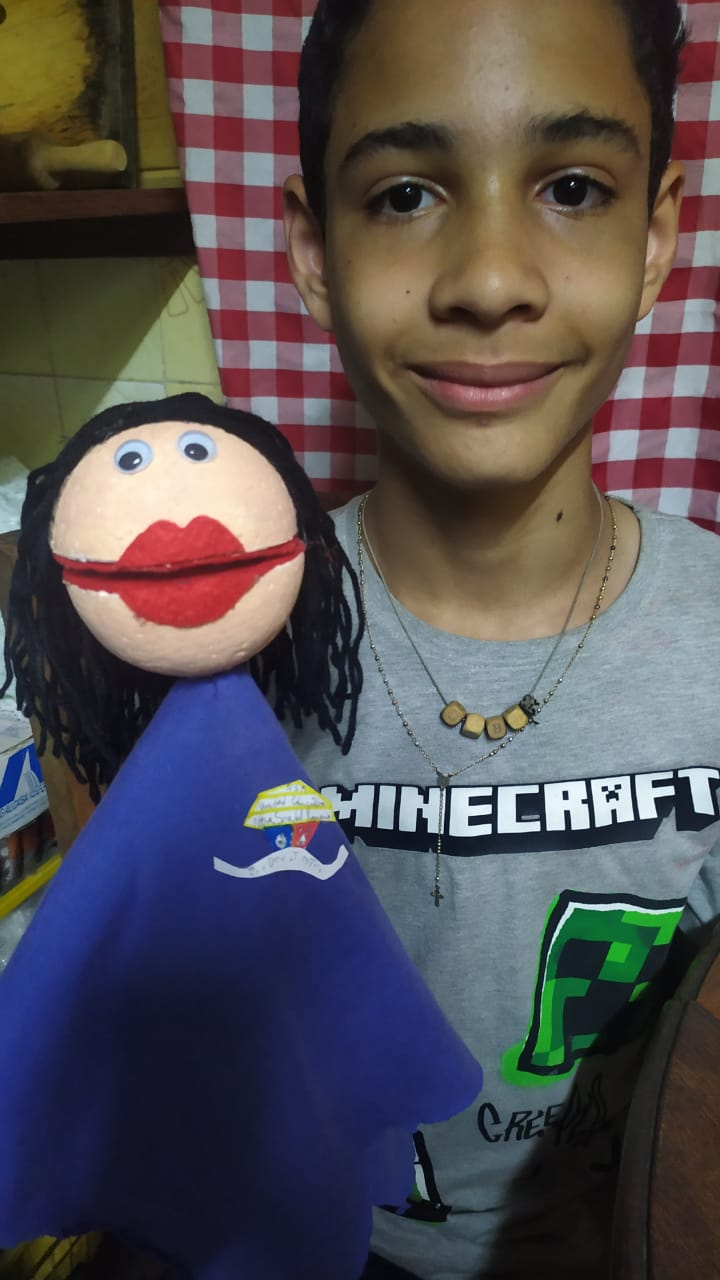
This was a fun experience because the end result made my family laugh a lot, because the puppet is not pretty, but it was made with a lot of love and it was our first time.
I hope it can bring a smile to your faces too.
Resources:
YouTube tutorial to use as a guide.
Cover made with Canva.
Pictures taken with my cell phone camera.
Editions made with PhotoScape.
Tradutor used DeepL.

🧵🧵🧵
Español
🧵🧵🧵
Si dejas salir todos tus miedos,
tendrás más espacio
para vivir todos tus sueños.
(Marilyn Monroe)
Hoy quiero compartir con ustedes un trabajo que le mandaron a mi hijo en el colegio. Tenía que hacer con material de reciclaje, una marioneta. Estaba atacado de los nervios porque tenía una exposición, un experimento de biología y un examen de Inglés, así que decidí ayudarlo con esta parte, porque él no tenía idea de qué o cómo hacer y yo tampoco, por lo que busqué un tutorial por YouTube para que nos sirviera de guía. No nos quedó igual, porque había cosas que no teníamos en casa y además es la primera vez que hacemos algo así, pero es su esfuerzo, su sacrificio y el alivio que sintió porque lo ayudaría, valió la pena. Ya sabemos que en la unión está la fuerza.
Lo primero que hicimos fue buscar en el armario de las cosas que se guardan "por si acaso alguna vez..." a ver qué teníamos. Afortunadamente teníamos todo lo necesario, menos los ojitos. Así que era lo único que nos hacía falta.
Ya con la bola de anime, la pistola de silicón, las telas, tijera, estambre y el cutter, teníamos lo necesario. Así que ¡manos a la obra!
Materiales
📌 Una bola de anime
📌 Un rollo de estambre
📌 Una pistola de silicón
📌 Tijeras
📌 Cutter
📌 Goma elástica
📌 Fieltro rojo
📌 Un retazo de tela
📌 Un pitillo delgado y uno grueso
📌Pintura al frío color piel
Me ayudó con muchas cosas y a hacer fotos.
Lo primero que hicimos, siguiendo los pasos del tutorial, fu cortar la bola de anime por la mitad con el cutter. Después pintamos en el centro de cada mitad de la bola, un punto que nos serviría como guía, para introducir los pitillos.
Luego colocamos un poco de silicón caliente con la pistola de silicón alrededor del orificio que abrimos con el pitillo y colocamos en ese lugar, el mismo pitillo.
Posteriormente, cogemos un palillo de brocheta y lo introducimos por la otra mitad de la bola de anime, para que lo traspase de un extremo al otro, para poder introducir el pitillo más delgado por ambos orificios, como se muestra en las siguientes fotos:
La idea de este paso, es poder lograr un movimiento entre ambas mitades de la bola de anime para que pueda abrirse y cerrarse de esta manera:
El pitillo más grueso vamos a recortarlo a ocho centímetros, que lo vamos a adherir en la otra parte de la bola de anime.
Ahora vamos a medir la tela de fieltro color roja con la bola de anime y recortamos dos trozos del mismo tamaño.
Una vez cortadas, vamos a doblarlas a la mitad y de nuevo a la mitad, para abrir un pequeño orificio en el centro de la tela, para luego pegar cada una a ambas mitades de la bola de anime. Así:
Ya una vez recortados ambos círculos del fieltro rojo y con el pequeño orificio en el centro de cada uno, cogemos nuestra pistola de silicón y le colocamos el pegamento a ambas mitades de anime, para luego pegar el fieltro.
Para crear la boca articulada de la marioneta y que esta se pueda cerrar, cogeremos el palillo de madera y lo introduciremos en ambas mitades de la bola, luego haremos una abertura en la parte más delgada del palillo de madera y le insertamos la liga, para luego introducirla en el agujero que abrimos en la bola de anime.
Después se amarra esta liga bien apretada.
Ahora vamos a pintar nuestra bola de anime de color piel y luego le vamos a poner el pelo hecho con hilo negro. Con esto, nuestra marioneta comenzará a cobrar vida.
Este cabello se lo iremos pegando con la pistola de silicón. Confieso que este paso me resultó un poco difícil porque no tenía idea de cómo ponerle el cabello, ya que en el tutorial no lo hicieron de la misma manera.
Pero ya habíamos llegado hasta aquí y la fecha de entrega era hoy lunes, así que teníamos que intentarlo.
Me sentí satisfecha porque para ser la primera vez que hacemos una marioneta, no se nos dio tan mal.
Ahora le pegaremos los ojitos y luego cortaremos dos trocitos de fieltro rojo para hacerle unos labios sensuales.
Por último, le hacemos el vestido. La regla que le impusieron a los niños, es que tenía que ser del color de la camisa del uniforme del liceo. Nosotros decidimos agregarle la insignia del liceo.
Este es el resultado final. Vale señalar que en el liceo no querían que las marionetas tuviesen piernas ni brazos.
Esta fue una divertida experiencia porque el resultado final hizo reír mucho a mi familia, pues la marioneta no es bonita, pero sí fue hecha con mucho cariño y además fue nuestra primera vez.
Espero que también a ustedes pueda sacarles una sonrisa.
🧵🧵🧵
Recursos:
Tutorial de YouTube para usarlo como guía.
Portada hecha con Canva.
Fotografías tomadas con mi cámara de celular.
Ediciones hechas con PhotoScape.
Tradutor empleado DeepL.
🧵🧵🧵
The rewards earned on this comment will go directly to the people( @lanzjoseg ) sharing the post on Twitter as long as they are registered with @poshtoken. Sign up at https://hiveposh.com.
Con el apoyo de la familia.
También nos puedes apoyar en nuestro Trail de TopFiveFamily
Si desea delegar HP al proyecto de la Familia del Top Family puedes hacerlo desde aquí: Delegue 5 HP - Delegue 10 HP - Delegue 20 HP - Delegue 30 HP - Delegue 50 HP - Delegue 100 HP.
No quedo tan fea como dices, es más me parece que les quedó muy bien.
Una vez hice una con mi hijo en tercer grado con una media, también busqué un tutorial por internet y todavía está en uso.
Chama cuando terminamos de hacerla y la mostré a mi familia, soltaron la carcajada porque era demasiado fea 🤣🤣🤣 eso dijeron.
Lo bueno es que en la actividad del colegio, mi hijo sacó 19/20 de puntuación. Es lo bueno 😋😋😋
Eso es lo importante, que salió bien en su evaluación 😃