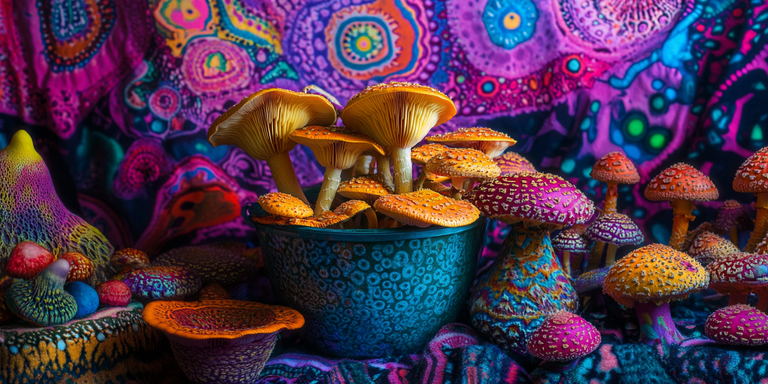
Growing your own mushrooms at home is not just a fun thing to do; it’s a super sustainable way to produce your own food. Mushrooms can be grown at home, and growing them in buckets or containers is perfect for those with no backyard or who want to grow mushrooms indoors all year round. Mushrooms are superfoods, full of vitamins, including B vitamins, and essential nutrients like selenium, copper, and potassium.
They are good for your health—boosting your immune system, gut health, and brain function. Plus, they are low in calories and carbs, making them a great addition to any diet. In this ultimate guide, you will learn how to grow mushrooms in buckets and containers, step by step, covering everything you need—from choosing the right equipment to troubleshooting common problems. Whether you are a beginner or intermediate grower, these instructions and pro tips will have you harvesting healthy and tasty mushrooms every time.
What You Will Need
Key Materials and Equipment
The first step to growing mushrooms is to gather your materials. You don’t need fancy or expensive equipment. Here’s what you’ll need:
Buckets: Buckets are perfect for mushroom growing. A 5-gallon food-grade bucket is the most common choice. These buckets give the mycelium enough room to colonize and allow for good airflow when modified properly.
Mushroom Spawn: Mushroom spawn is like “mushroom seeds” but for mushrooms! Common varieties that do well in buckets and containers are oyster, shiitake, and lion’s mane. These are beginner friendly, fast growing and have many culinary and medicinal uses. For the bucket method, grain spawn is particularly effective as it accelerates colonization and increases mushroom yield.
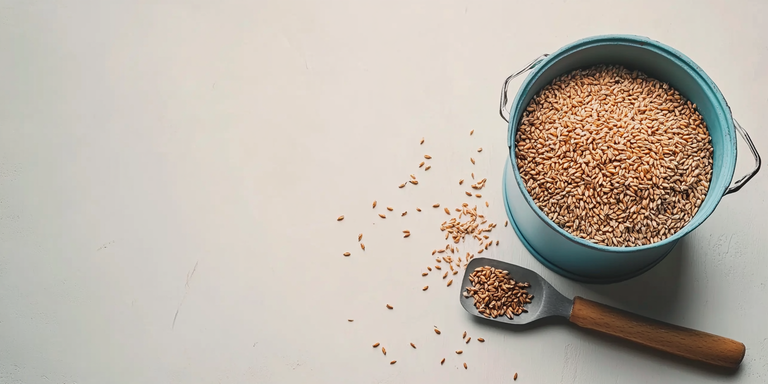
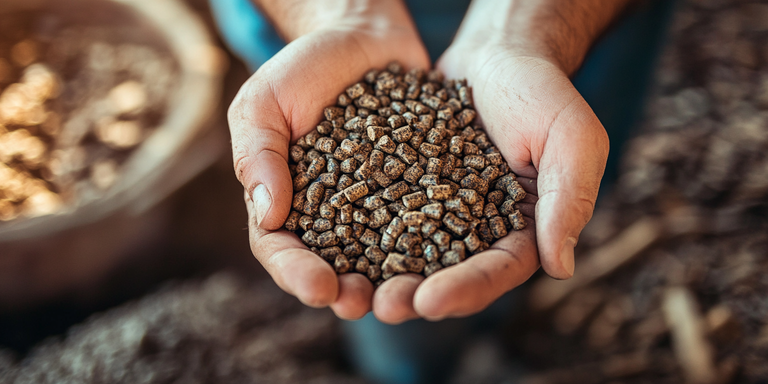
Substrate: The substrate is the food that your mushrooms will eat and break down to grow. Common substrates are straw, hardwood pellets, and hardwood chips. Each mushroom variety has its own preferences, but these substrates cover a wide range of fungi.
Pasteurization Tools: You will need to pasteurize the substrate to kill off contaminants like bacteria and mold. Common pasteurization methods include a hot water bath, holding the substrate in boiling water, or using a pasteurization machine.
Hydrated Lime: Hydrated lime is used in cold water lime bath pasteurization to alter the pH of the water, effectively killing contaminants in the substrate. This ensures a cleaner environment for the growth of mushrooms.
Gloves, Thermometers, and Humidity Monitors: When handling the substrate and preparing containers, use gloves to prevent contamination. A simple thermometer will help you monitor temperature, and a humidity monitor will help you monitor moisture. A simple thermometer will help you monitor temperature and a humidity monitor will help you monitor moisture.
Optional extras: For better results, tools like sterilized mason jars (for spawn inoculation), rubber gloves, and plastic humidity tents (or DIY humidity domes) will come in handy when you are trying to control the air and moisture.

Step 1: Choose and Prep Your Bucket or Container
Choosing the Right Bucket/Container
Growing mushrooms in a bucket is very versatile. Buckets are the most common choice for several reasons:
Size: A 5-gallon bucket is perfect for mushroom growing at home. It’s big enough to allow the mycelium to colonize but small enough to fit in your closet, basement, or garage. A food-grade bucket is important to prevent chemicals from leeching into your substrate.
Material: While buckets are the most common, like pots and other plastic containers, the material itself should be food-safe. Containers meant for food storage are less likely to degrade or release harmful chemicals.
Alternatives: If you have limited space, you can also use large plastic bins, reusable bags, or large pots. As long as the container allows for air exchange and space for your mycelium to spread, they will all work.
Drilling Holes for Air Circulation
Air circulation is key to mushroom growth. Ventilation holes on your containers improve air exchange, keep your mushrooms oxygenated, and encourage the mycelium to grow fast.
Use a drill to create 8–12 evenly spaced holes around the bucket. The holes should be ¼ inch to ½ inch in diameter. This gives a good balance of air exchange and moisture retention, which is important for healthy mushrooms.
If you use a plastic bin or grow bag, you will need to make similar adjustments for it to "breathe." Holes every few inches will provide the ventilation for the mycelium to grow.
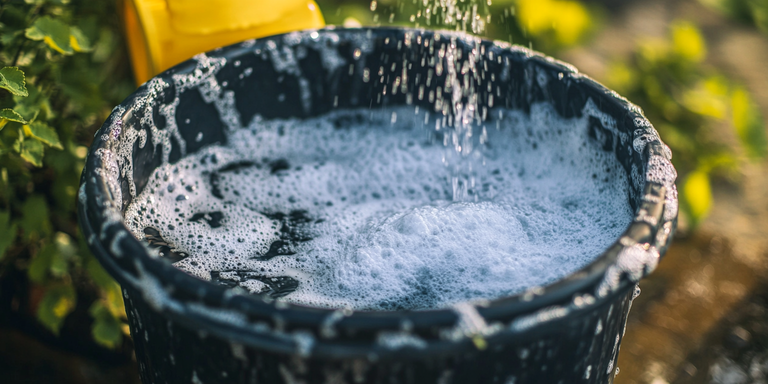
Cleaning and Sterilizing the Bucket
Before you start the mushroom-growing process, you need to sterilize your bucket or container to prevent contamination. Microbes like bacteria or mold can kill your mushroom spawn before it even has a chance to grow.
Use a mild bleach and water solution (around 10% bleach) or food-safe sanitizers. Clean your bucket thoroughly and make sure no grease or dirt remains.
Rinse the bucket or container with clean water and let it air dry in a sterile environment.
Step 2: Choose and Pasteurize Your Substrate
Mushrooms don’t grow in soil but in a nutritious growing medium called a "substrate".
What is a substrate?
The substrate is the food source for your mushrooms. It’s important because mushrooms (which are fungi) feed on this organic material and break it down. Every type of mushroom has its own preferred substrate.
For example:
Oyster mushrooms grow on straw, chopped straw, cardboard, or hardwood pellets.
Shiitake mushrooms prefer hardwood-based substrates like hardwood chips or sawdust.
Lion’s mane mushrooms grow on hardwood sawdust or pellets.
Substrate Options
Straw: Straw is cheap, readily available, and has high water retention, making it a great substrate for beginner growers. Straw works well for oyster mushrooms.
Hardwood Pellets: Hardwood pellets are compressed wood particles. They’re good for wood loving mushrooms like shiitake and lion’s mane. When hydrated, hardwood pellets form a fibrous, nutrient-rich bedding for mushrooms.
Hardwood Chips: These provide a durable medium that decomposes slowly and releases nutrients steadily, good for slower growing varieties or where you want longer harvests.
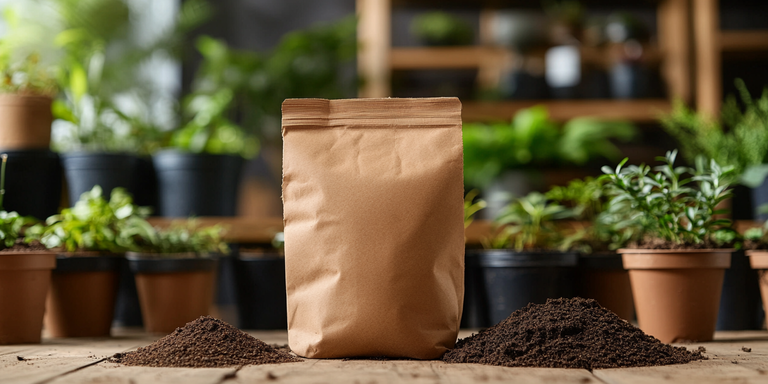
Coffee Grounds: Coffee grounds are an effective and cost-efficient substrate. Fresh coffee grounds, less than 24 hours old, are particularly beneficial. Mixing them with materials like straw can improve air circulation and prevent compaction.
Pasteurization Process
To prevent other organisms like mold or bacteria from competing with your mushroom spawn, you need to pasteurize your substrate before use. Pasteurization kills off harmful pathogens that will compete with the mycelium but retains beneficial organisms that help mushroom growth.
Hot Water Bath Method: This is the easiest method for beginners working with straw or similar materials. Bring a pot of water to 160°F-180°F (70°C-82°C). Place the substrate in a heatproof container (like a mesh bag) and submerge it in the hot water. Let it sit for about 60-90 minutes.
Steaming Method: For hardwood pellets or chips, you can use a double boiler or place the substrate in cloth bags and steam it over boiling water for an hour. This method is good for breaking up pellets and eliminating contaminants.
Commercial Pasteurization Machines: If you’re feeling more adventurous or serious about scaling your mushroom grow, pasteurization machines offer precise temperature control and can handle larger volumes of substrate. After pasteurization, let the substrate cool completely before adding your spawn.

Step 3: Remove and Drain Substrate, Check Moisture Content.
Once you’ve pasteurized your substrate, it’s important to remove any excess water from the substrate while maintaining the right moisture content, which is crucial for mushroom growth.
How to Check Moisture Content
The best way to check if your substrate has the right moisture content is through the “squeeze test”. This simple test will tell you if your substrate has too much or too little water.
Take a handful of the substrate and squeeze it firmly.
Moist but not soggy: If a few drops of water come out when squeezed, you’re good to go.
Too dry: If no water comes out when squeezed, the substrate is too dry, and you may need to add more water.
Too wet: If water pours out or the substrate feels soggy, it’s too wet. Let it drain further by placing it on a clean surface (like a sterile mesh tray) until you get the right moisture level.
Moisture levels are critical for the mushroom mycelium to colonize the substrate.
Step 4: Add Spawn to Substrate
Now that your substrate is pasteurized and at the right moisture level, it’s time to add the mushroom spawn.
What is Spawn?
Oyster mushroom grain spawn is the mycelium, which is the vegetative part of the fungus. Spawn is often grown on grain, sawdust or other organic material, and when you add it to your substrate, it will trigger colonization. Once you add spawn to a substrate, it will send out its roots (called hyphae) and start breaking down the material, preparing for fruiting mushrooms.
Mixing the Spawn
Once your substrate is ready:
Layer the substrate and spawn in your bucket or container. A good ratio is 5-10% spawn to substrate. This will allow the mycelium to spread quickly across the surface and colonize the substrate.
Use your hands or a clean, sterilized spoon to gently mix the spawn into the substrate.
Wear latex gloves during this step to prevent contamination.
Make sure the spawn is evenly distributed so you don’t get localized colonization, which can cause uneven mushroom crops.
Once you’ve added it, seal your bucket or container with a lid or plastic wrap. Be careful not to block the holes you drilled earlier; oxygen is needed for healthy initial growth.
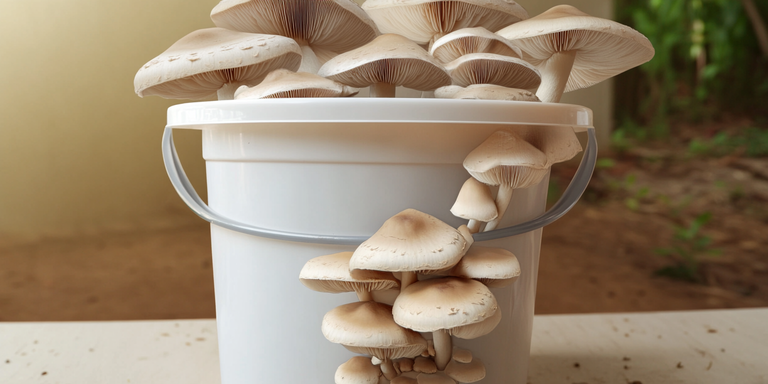
Step 5: Let the Bucket Colonize
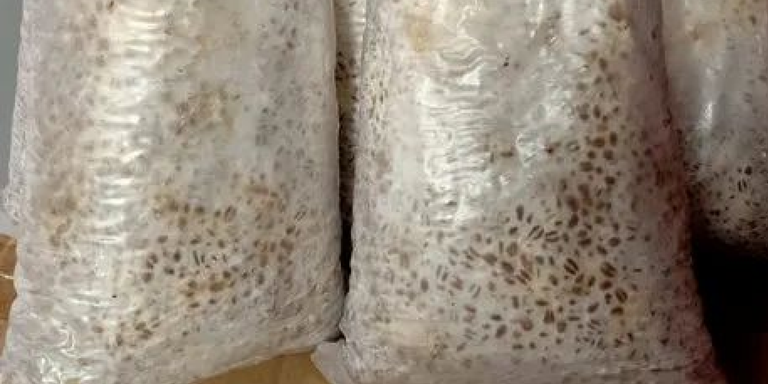
After you’ve inoculated your bucket or container with mushroom spawn, you will have to wait for the mycelium to colonize the substrate. Colonization is the phase where the mycelium spreads throughout the substrate, breaking it down and preparing for fruiting.
Optimal Conditions for Colonization
Here are the variables you need to control:
Temperature: The ideal colonization temperature is usually between 65°F and 75°F (18°C and 24°C), depending on the mushroom you’re growing. Oyster mushrooms like warmer temperatures, while shiitakes can colonize more in slightly cooler conditions. Pink oysters, in particular, require higher colonization temperatures, often around 75°F (24°C), to ensure successful growth.
Humidity and Ventilation: Make sure your colonization chamber (often a dark room or closet) has minimal light and consistent humidity. Mycelium can dry out but still needs some air circulation. The holes you drilled earlier will help prevent CO2 buildup.
Timeframe: Colonization can take 2-4 weeks depending on the mushroom species and growing conditions. White, fan-like growth spreading across the substrate (sometimes looking like a spider web) is the first sign the mycelium is moving.
Pay attention to any changes, such as discolored or slimy areas on the substrate. These are signs of contamination, and you may need to discard or separate the affected containers to prevent it from spreading.
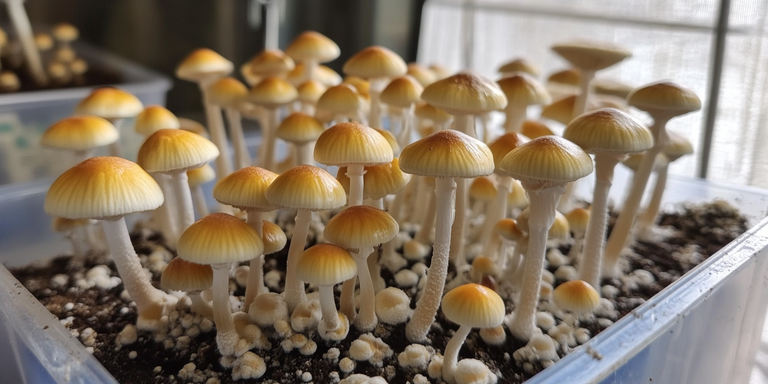
Step 6: Trigger the Fruiting
Once the substrate is fully colonized (the mycelium has covered the entire substrate like a white web), the next step is to trigger the fruiting stage. Fruiting is when the mushrooms actually grow from the substrate.
How to Trigger the Fruiting
To induce the fruiting process, you will need to change the environment.
Increase Light Exposure: While mycelium colonizes well in dark or dim spaces, mushrooms need 4-6 hours of indirect sunlight or grow lamps to know it’s time to fruit. Don’t expose to direct sunlight, which can dry out the mushrooms.
Adjust Temperature: Depending on the mushroom, slightly adjust the temperature to trigger fruiting. For example, from 70°F (21°C) during colonization to 60°F-65°F (15°C-18°C) for fruiting is common.
Boost Humidity: Mushrooms need high humidity (85%-95%). Setting up a humidity tent or grow tent around the bucket is very effective in retaining moisture. A misting system can also work, but don’t oversaturate, as this can cause fungal or bacterial contamination. If the location is too windy, drape a plastic bag loosely over the bucket to maintain humidity and prevent the mushrooms from drying out.
Increase Fresh Air Exchange: Open your humidity tent or container a few times a day to give the growing mushrooms fresh air. Mushrooms produce CO2 as a by-product and, if not vented, can slow down fruiting.
A DIY humidity tent can be made with a large plastic bag, punch holes every few inches and mist the inside. Tent the bag over the container to create a simple greenhouse effect that keeps the mushrooms humid and happy.
Step 7: Harvesting
Once you’ve triggered the fruiting process, mushroom pins will start to emerge. These are the small “buds” of future mature mushrooms. Depending on the variety, it will take several days to a week to harvest.
When to Harvest?
The best time to harvest depends on personal preference and the type of mushroom you’re growing.
Oyster Mushrooms: 4-5 days after pinning. Wait until the mushroom cap starts to flatten, but before the edges curl up. Caps should be plump and smooth and spore release (the gills under the cap start to darken) should be minimal. It's crucial to maintain humidity and careful conditions to ensure the pins develop into full sized mushrooms.
Shiitake Mushrooms: Shiitake mushrooms are ready when the cap has expanded, is flat to concave, and has some firmness. Harvesting too late can result in mushrooms that are past prime, tough, or too spore-rich.
Other Species: Always check for species-specific signs such as change in cap shape, gill color, or overall growth rate.
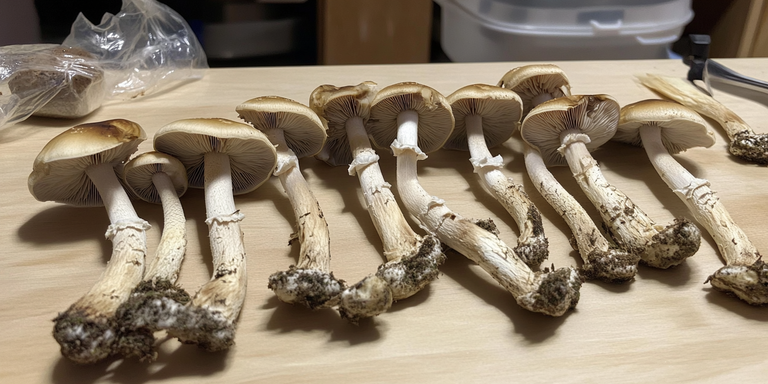
How to Harvest
Harvest mushrooms when they are at their peak plumpness. Hold the base of each mushroom firmly but gently and twist and pull to remove it from the substrate.
Alternatively, you can use a sterile knife to cut them at the base. Don’t pull too hard, as you can disturb the surrounding mycelium. Keep the base as intact as possible to prevent contamination and future flushes.
With proper care, you may get a second or third flush in a few weeks!
Alternative Method: Growing in Buckets with Hardwood Pellets
For some mushrooms like shiitake, using hardwood pellets as substrate may be better than straw. Hardwood pellets are made of sawdust and are perfect for wood-loving mushrooms. Additionally, sawdust spawn is a recommended medium for inoculating substrates, as it can be layered with wood chips to maximize yield.
Advantages of Growing with Hardwood Pellets
Growing with hardwood pellets has several advantages:
Sustained Growth: Slow decomposition of hardwood allows for a more gradual nutrient breakdown, extending the life of your mushroom crop.
Dense Flushes: Wood substrates tend to produce denser and more structured mushrooms, especially for gourmet varieties like shiitake and lion’s mane.
Clean Process: Pellets are pre-compressed and more processed, which can make the pasty infection process simpler and less messy.
After pasteurizing and hydrating the pellets, you can follow the same steps as with the straw method. Stack and “layer” the pellets and spawn while keeping enough moisture to support colonization.
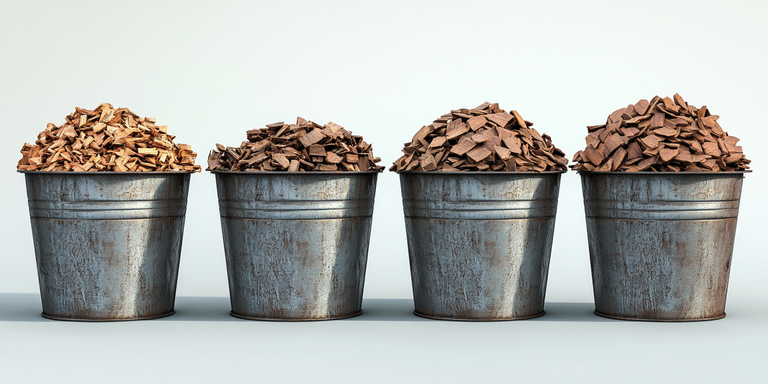
Growing in Containers with Hardwood Chips
If you want to specialize in mushrooms that eat denser materials (like shiitake or chestnut mushrooms), hardwood chips may be a good option for small-scale container growing. For optimal growth conditions, consider burying the mushroom-growing substrate in a vegetable garden.
Why Hardwood Chips in Containers?
Hardwood chips, unlike pellets or straw, take longer to break down. This means slower grow time but allows some mushrooms to fruit for months or even years if done properly. Small urban containers like plastic bins or clay pots can be inoculated with hardwood chips if you live in an apartment or have limited space. Prepare and pasteurize hardwood chips like pellets before inoculating them with your spawn.
For bulk substrates, hardwood chip beds may take longer to see mature flushes, but the durability of the substrate means you’ll have multiple fruiting phases.

Common Problems and How to Avoid Them
Growing mushrooms like any other gardening project can have its pitfalls. Here are some common issues and how to avoid them.
- Contamination
Contamination is one of the biggest problem home mushroom growers face.
How to prevent and spot contamination:
Mold: Green, black, or other odd colored growths (which are NOT white or gray mycelium) are mold. Compost or discard contaminated batches.
Prevention: Always sanitize by sanitizing not only your tools and containers but also your hands and storage space. Filtered air and proper ventilation helps prevent mold.
- No Fruiting
Sometimes mushrooms just won’t fruit even after colonization is complete. This can be due to lack of optimal conditions such as humidity, light or fresh air.
Solutions:
Light: Make sure you’re providing the right amount and quality of light.Grow lights that mimic the light spectrum of the sun or indirect sunlight gives the best results.
Air: Make sure there is enough air during fruiting periods. Stale air can slow down fruiting times by increasing CO2 build-up.
- Overwatering or Underwatering
Some signs include oversaturated or bone-dry substrates. Keep substrates moist but not waterlogged. Excess moisture can inhibit mycelium growth or encourage harmful bacteria growth. Dry patches in your mycelium can inhibit colonization and result to failed fruiting.
- Poor Mycelium Colonization
Mycelium may not colonize properly if pasteurization was not done right, if substrate was too dry or too moist or if contamination occurred.
Prevention and Solution: Correct your pasteurization process by keeping temperatures between 160°F and 180°F and adjusting your substrate’s moisture before you inoculate with spawn and during the colonization phase.

Can You Grow Mushrooms in Buckets Year Round?
Yes you can! With climate control and a little foresight, you can grow mushrooms in buckets and containers year-round, even indoors.
Indoor Mushroom Cultivation Benefits
Indoor environments give you total control over temperature, humidity, and light, so you don’t have to stop growing mushrooms just because winter is coming.
Even if you live in urban apartment buildings, growing mushrooms inside means no garden space is required.
Seasonal Adjustments
Winter: If the area where your bucket is located gets cold during winter (e.g., garages or basements), install space heaters or insulated grow tents to maintain the ideal temperature range. Reduce air humidity slightly during cold spells to avoid excess moisture and possible mold growth due to lower natural evaporation rates.
Tropics or Warm Climates: If you live in tropical areas where the air is always moist and warm, take measures to prevent overheating or CO2 buildup. Indoor growing means fresh mushroom supply for every season.
Growing mushrooms in buckets and containers is a great way for anyone with limited space to have an ongoing supply of fresh, organic mushrooms. Whether you’re a city dweller, an apartment gardener or just starting with home-based mycology, following these simple steps will get you started with homegrown mushrooms. You’ll have a sustainable, renewable food source free of pesticides and pollutants. Even better, you can grow gourmet, medicinal, or even rare mushroom varieties—farm-to-table food right in your home.
Key Takeaways
Bucket: Always use food-grade 5-gallon containers with proper venting (drill holes for air flow).
Substrate: Straw (best for beginners) and hardwood pellets for sustained mushroom growth.
Pasteurization: Pasteurize your substrate to eliminate pathogens and prime the environment for mycelium colonization.
Mixing Spawn: Use 5%-10% mushroom spawn and mix it well with your substrate in a sterile environment to ensure proper colonization.
Ideal Conditions: During colonization, keep the temperature between 65°F and 75°F and maintain darkness. For fruiting, expose to indirect sunlight or grow lights and keep humidity above 85%.
Harvest: Harvest when caps start to open but haven’t released spores, usually 4-7 days after pinning.
Watch Out For: Contamination, fruiting conditions, and over- or under-watering. By following these guidelines, you’ll be a mushroom grower in no time, regardless of your experience, space, or climate!
Hello.
There is reasonable evidence that this article is machine-generated.
We would appreciate it if you could avoid publishing AI-generated content (full or partial texts, art, etc.).
Thank you.
Guide: AI-Generated Content = Not Original Content
Hive Guide: Hive 101
If you believe this comment is in error, please contact us in #appeals in Discord.