
When I started playing Splinterlands, I remember a lot of confusion about attack types and abilities. It took me some time to understand why some Melee monsters could attack from the back row (those with Reach and Sneak abilities – there was no Opportunity back then) and that Ranged attackers could not attack from the first position, while Magic creatures could.
I remember looking up abilities in the FAQ every time I got a monster with an ability that I did not yet own in my deck (there was no mouse over explanation at the time) and having a hard time remembering all of them.
The learning curve was steep and while I learned most about the game from just playing it, a lot of valuable input also came from more experienced players sharing their strategies on HIVE. @slobberchops had a Splinterlands Strategy series back then where he would look at some hand picked cards and elaborate on their use cases which helped me get some insight in niche cards like the Exploding Dwarf.
Fast forward two years and I have now fought way over 10,000 battles myself. So, when I started participating in the Splinterlands battle challenges this year, I thought it might be a nice idea to not only share the battle but also include a short strategy guide on the card of the week in it.
These bits of information are scattered across the different contest posts, though, and will be difficult to find for new players. Therefore, I am collecting these sections and re-publishing them in a dedicated strategy post.

Sea Monster
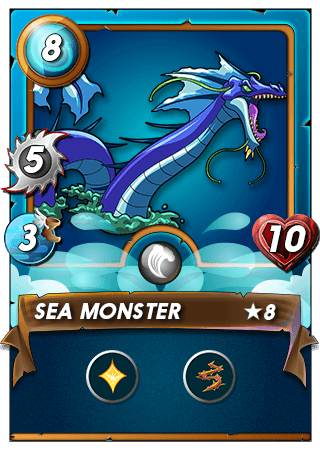
In early Beta, the Sea Monster was one of THE tanks. There was not a big choice of tanks, so when playing a high mana match with the water splinter one would usually go with the Sea Monster in the first spot. This has changed lately now that we have other great tank options available and also more neutral tanks like the Chain Golem.
However, I still do see some distinct niches where the Sea Monster shows its full potential. My two favorite uses are:
Low level matches: The Sea Monster start with 8 HP at level 1 and already has the healing ability. This is difficult, if not impossible, to overcome for most low level attackers. The damage they'll do to the Sea Monster will be recovered by its healing in the next round. Especially powerful when combined with an additional healer in the back rows.
All Sneak/Melee Mayhem rulesets: The Sea Monster gets the Thorns ability at level 6. Therefore, it is a perfect card to use among other monsters with the Thorns ability in an All Sneak or Melee Mayhem match, where your opponent will likely use a high amount of Melee cards. Let them damage themselves!
Lost Legendaries: The Sea Monster is a great alternative when other mighty high-mana cards are blocked because of the Lost Legendaries ruleset.
Water Elemental
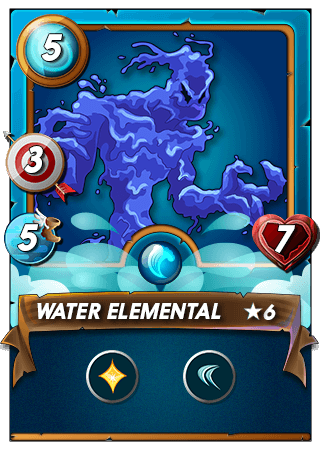
If you are a new player in the lower leagues, I recommend getting a low level version from the market place. With two ranged attack, 4 HP and the healing ability from level 1, this is pretty powerful. Through the levels, the card gains ATK and HP and at level 5 it also unlocks the Dodge ability making it even harder to hit than it would be with its already fast 5 speed points.
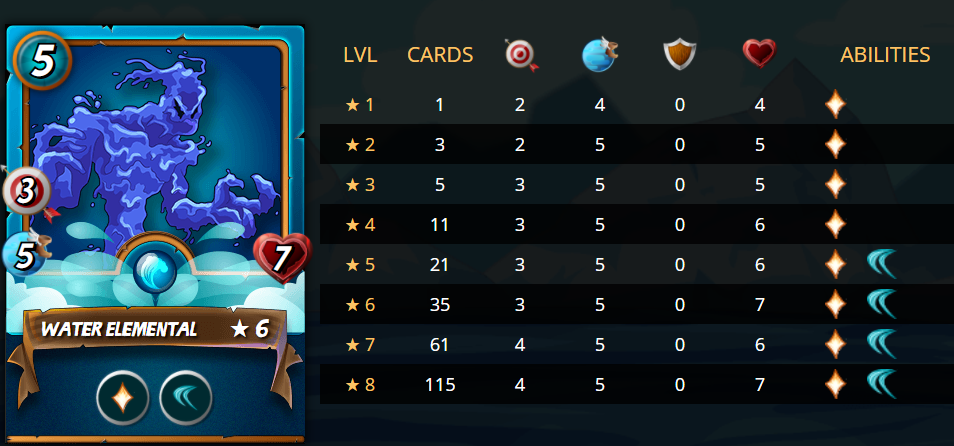
With these early edition cards, the Splinterlands team still had to find the best balance of upgrade costs and added power for the higher and max levels. Some cards from the Beta and early Reward editions are just not worth levelling up when comparing the power of the upgrade to its costs.
My Water Elemental is happily levelled at level 6. I would have to almost double my investment in the card to get it to level 7 at which level it would lose(!) one HP. Being a card I often use to counter sneak attackers (due to its Dodge and high speed it can avoid attacks very efficiently), this would be counter-productive to my strategy.
All Sneak and Melee Mayhem: In these rulesets, Water Elemental can be used to frustrate your opponent. Its Dodge ability and its high speed will make some of their attacks miss and provide you with more time to counter attack before they break through your backline.
Equalizer: I like using Heal monsters in Equalizer. Just like Protect, Weaken or other abilities changing the balance in hits before dying this can make quite a difference when you are even in terms of HP with your opponent.
Noxious Fumes: In a ruleset where all monsters lose health each round, a monster that heals itself is an obvious choice.
Molten Ogre
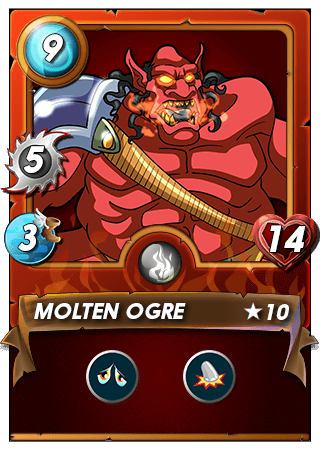
With 3 ATK, 10 HP and Demoralize, the Ogre is already pretty tough at level 1. When maxed out it is a beast with 5 ATK, 14 HP and in addition to Demoralize, also the mighty Trample ability. With 5 ATK the Ogre is likely to score a several kills in battle, so the chance of Trample triggering is a mighty ace up your team's sleeve. The only real downsides of the Ogre are its high mana cost and its slow speed.
Reverse Speed: In this ruleset the Ogre's slowness turns into a strength. When attacking first, depending on the choice of your opponent's tank, you may already score a kill and continue to Trample.
Stampede: This one of the newer rulesets is made for cards like the Ogre. In Stampede rulesets its Trample ability can trigger multiple times, so you may wipe out your opponent's team in a single turn. I like combining the Ogre with the Giant Roc (which also has Trample) to maximize that effect.
Melee Mayhem/All Sneak with High Mana: When playing low mana, I would prefer filling the monster slots with several low-mana monsters instead of using one big one. But with high mana, the Ogre can be a good choice, because your opponent is likely to use many melee monsters putting your Demoralize ability to its best use.
Note that I am not including Unlimited Mana matches in my list of preferred rulesets for the Orc. That is because if none of the conditions above apply, there are other, better choices for the six monster slots.
Exploding Dwarf
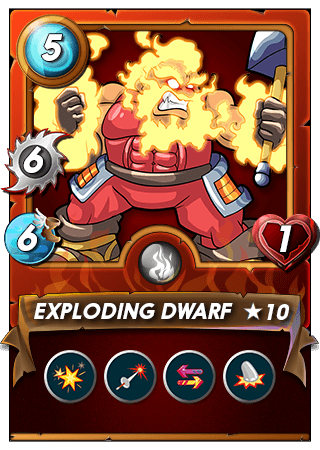
What defines the Dwarf is its high ATK its high speed and its minimalistic HP. With abilities like Blast, Pierce, Trample and Retaliate it can easily take out three of your opponent's cards before they have the chance to strike even once.
The Exploding Dwarf is ultra-niche. With only 1 HP it can only efficiently be used with certain rulesets. Prominent examples are:
Melee Mayhem and All Sneak: Hoping that your opponent does not use a Thorns card which would make the Dwarf kill itself, the Dwarf could be used in the mid-row. Slightly in the front for All Sneak and slighty in the back for Melee Mayhem to have it well protected between other monsters. Even if the Dwarf died by Thorns, there is a chance it might take out one or two of your opponent's monsters first.
Equalizer: This is the ruleset where low HP cards with many abilities shine. The Dwarf is no exception.
Low Mana: Low Mana matches often get you an opponent using many low HP cards or just one high HP card. If the Dwarf gets to strike first its high ATK has a high chance to cause several instant kills.
Stonesplitter Orc
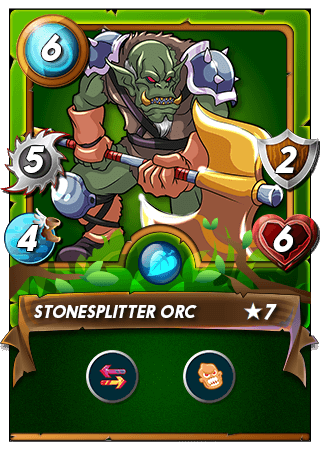
The Stonesplitter Orc is a good but not mandatory-to-own card from the Beta collection. While it comes with a strong 5-point attack, its health is a bit on the low side for a tank. It makes up for that with its 2 armor points but those won't be much use if he's in for a fight with a magic team.
The card is a classical tank. It's a melee monster without opportunity, sneak or reach, so it won't be much use in other positions. However, as there are higher-health alternatives that will be able to take more magic attacks, I rarely see the card used in that position.
When I use it, it usually is as a backline defendant. As the card comes with Retaliate it is nice to pair it up with an opponent's sneak monsters. You have to take a bit of a gamble, though. If you were to use Thorns in this position, you would be guaranteed dealing damage to your opponent's sneaker. With Retaliate, there is luck involved. But when it does trigger the high Orc's high attack strength starts to shine, single-blow-killing most sneak monsters with their low-health and no armor.
Defender of Truth
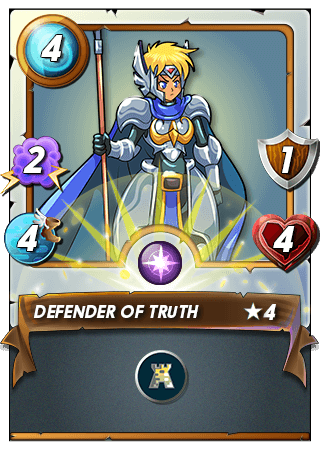
I refrain from upgrading this card to level 5. On level 5 the Defender gains an additional magic attack point but loses one health. This is a considerable downgrade in my opinion as it will get it killed a lot faster by monsters with the Magic Reflect ability and being a support monster with its Protect (+2 armor for all friendly monsters) ability, it should live as long as possible.
Kind of obvious: Use it in rulesets in which Armor is useful and in which Magic Reflect is rarely used.
Weak Magic: Perfect match for the Defender. It is a Magic monster itself, but that can be overlooked because the Defender is used for support and not for attacking.
Earthquake: A nice alternative to flying monsters in Earthquake matches is buffing your monsters with a lot of armor.
All-Sneak and Melee Mayhem: Your opponent is likely to use a lot of melee attackers. So pair up some Thorns monsters with the Defender and watch your opponent break out their own teeth.
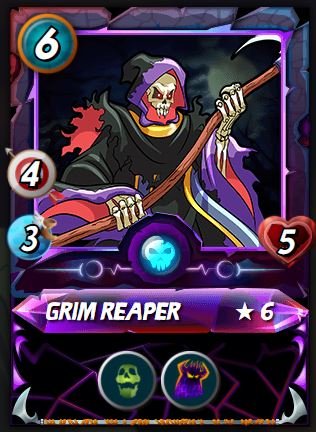
Grim Reaper
With Affliction (prevent enemy from healing) and Oppress (double damage to enemies without attack) the card has two niche abilities which are better than none but not too powerful. On max level the card also gets the Piercing ability which does leftover damage to the enemies HP when its armor gets destroyed.
While its abilities are certainly of the weaker sort it comes with a nice 4 ranged attack points that can do serious damage to your opponent.
To be honest I found that week's challenge really difficult and considered not submitting an entry because I really don't use this card often. The six mana are expensive and the abilities are sort of random which makes it hard to use the card when following a consistent strategy, especially if you have better ranged alternatives.
I reconsidered, though, and viewed the Weekly Battle challenge also as a challenge to find new strategies and use-cases for this card. I came up with these two:
Keep your Distance: This is a ruleset where players often expect you to use a lot of magic creatures and thus will try to counter with Lord Arianthus. Since Onyx Sentinel came into the game this is also an obvious choice should your opponent own one (since Onyx has Return Fire, the Grim Reaper would prefer Lord A. for sure). I have also seen many Gelatinous Cubes and Peaceful Giants in this ruleset, played from people who do not own the Legendary and Epic alternatives. The Grim Reaper cuts in perfectly here with its Oppress ability dealing double damage to those passive tanks. In case of Gelatinous Cube it would also disable its Healing ability.
Armored Up: You'd have to own a maxed version of the Grim Reaper for this ruleset but in that case it could be used for its Piercing ability. The Reaper's 4 ranged attack will easily destroy enemy armor and then apply excess damage to their health.
Noxious Fumes: While I was waiting for a "Keep your Distance" match to pop-up, I was suddenly confronted with the new "Noxious Fumes" ruleset. I considered for a second, then I thought "Hey, if every monster is losing health due to poison each round, my opponent may try to counter this with healing." So, as counter for the counter you may consider using monsters with the Affliction ability.
Delwyn Dragonscale
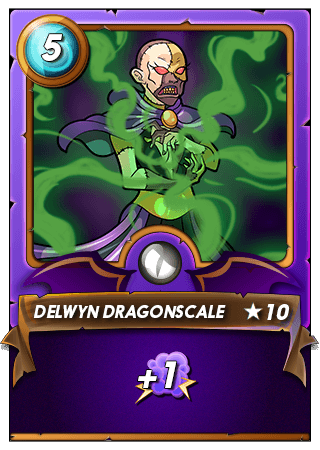
The high mana cost of the card are a big limitation to its usability but since high mana matches became more common, I started using it more often.
The +1 Magic buff is strong and mighty but it gets difficult when dealing with magic reflect. For this reason the new summoner Owster Rotwell is a killer for Delwyn. Consider twice before using him when Death is active in the match! Also be careful in Armor Up matches. Magic seems the obvious choice but this makes many players use Magic Reflect monsters.
A great ruleset for Delwyn is the Monsters Lose all Abilities ruleset as this takes away their magic reflect ability. Put Peaceful Giant as tank in your lineup and fill the remaining slots with magic monsters to watch your opponent go down.
Enchanted Defender
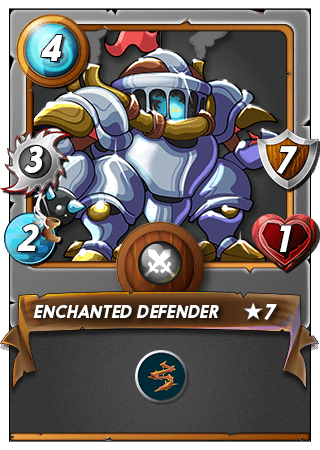
What makes this card so special is that it only has 1 HP, even when maxed out. It has a strong armor, though, and the Thorns ability.
Weak Magic: The card shines in the weak magic ruleset. Unlike in other rulesets magic monsters can not take it out with a single shot, but have to overcome its armor first.
All-Sneak: There are few magic monsters with the Sneak ability, so the risk of having the Defender killed by one is quite low. Melee monsters, however, will have to target the Defender in this ruleset and hurt themselves on its Thorns. Note that this is one of the cases where All-Sneak differs from Melee Mayhem. In Melee Mayhem do not use the Defender as your opponent may have a magic monster in their lineup targeting the tank!
Furious Chicken
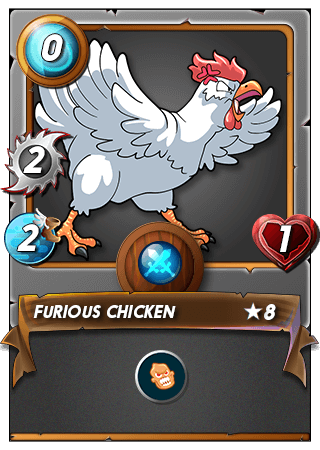
The Furious Chicken must be my most-played card. It is the only monster in the game so far with a zero mana cost. You can use all available mana on the summoner and other monsters and still add the Chicken. How great is that? Needless to say, this card instantly became part of the meta when it was released as a reward card edition at the end of the beta period.
A level 1 chicken is about $0.44 and certainly worth it. If you can't afford a higher level one, just stick with a level 1 chicken. I have seen Champions league players who didn't care to upgrade their Chickens because the level ups don't really do much of a difference with the monster dying instantly on the first hit anyways.
Personally, I own three copies of the Chicken:
A max level version: This Chicken has 2 melee ATK points. When played with Malric, Plado or Daria and buffed by Beetle Queen's and Enchanted Pixie's Inspire ability, this will turn it into a 5 ATK beast! Great in All-Sneak and Melee Mayhen matches!
A level 1 version: I'm holding this single-BCX version of the card for "Keep Your Distance" rulesets. This allows me to use a Chicken even when I can't use my maxxed version. There's no point in updating to level 2 by the way, as all stats would stay exactly the same.
A gold-foil version: I'm playing a gold-league gold-foil deck in my alt account and keep a golden Chicken in there. This is such a great card. Being gold-foil it will apply a boost to you DEC earnings when winning the match! This means, you can add a zero-mana card to an empty monster slot in your team and not only profit from stalling your opponent's advance but also earn an additional DEC bonus from it!
Using the chicken is straightforward: Use it whenever you have a spare monster slot but no mana left.
There is no downside, except for when your opponent has a scavenge monster which will heal when the Chicken dies. But as there is no way to anticipate that, just go forward and play it.
The question, however, is where to put it. So, with the Chicken let us look a bit closer at placement.
I often see the Chicken put thoughtlessly in the 6th monster slot. Probably people assemble their team, realize they have a slot left and put the Chicken in there. I do not believe this is ideal.
While having a backline Chicken provides a shield to Sneak attackers, if your opponent does not use any sneak monsters, the Chicken will just sit there until the end of the match, not being of any actual meaning.
Therefore, I prefer placing the Chicken behind the tank, or when a reach monster is used, behind the reach monster. Following after the Chicken will usually be the sneak & opportunity attackers, then the magic monsters and ranged attackers go in the back. This order has the advantage, that when the tank and reach positions die, the Chicken stalls your opponent from forcing your ranged attackers to the front, where they will sit uselessly unless you are playing a Close-Ranged match, of course.
In this position the Chicken can also absorb the first round of blast damage which otherwise would go through to your backline directly.
There are, indeed, two scenarios in which I would also put my Chicken in the back row. These are the Earthquake and Noxious Fumes rulesets. The Chicken will die at the end of round 1 in these rulesets, so there is absolutely no point of having it sit in the middle of your formation. In these cases I take the gamble and hope for my opponent to use a sneak monster whose first attack will be nullified through this.
In exceptional cases, the Chicken can also work as a tank. For instance, in an Equalizer (all monsters have as much HP as the highest-HP monster on the field) match with Selenia or Prince Rennyn as summoner. The Chicken will allow you to use all available mana on ranged monsters profiting from the summoner buff, while serving as a free tank. Equalizer is one of the rare occasions where you may also profit from the Chicken's Enrage ability.

Want to join the fight?
Create an account at the Splinterlands today and start earning NFT trading cards by completing daily quests!
Images courtesy of Unsplash.com
Some links in the article are referral links, feel free to use other sign-up methods.
Posted Using LeoFinance Beta
Nice!!!
Posted Using LeoFinance Beta
Thanks for sharing! - @marianaemilia

Wow! What an amazing post. I will save the link and share it with many new friends, thanks for that. Congratulations on creating great content and helping the new player community.
Wow nice post, that‘s exactly what I was looking for.
Splinterlands can be a little overwhelming for beginners at first...
Congratulations @handtalk5! You have completed the following achievement on the Hive blockchain and have been rewarded with new badge(s) :
Your next target is to reach 3500 upvotes.
You can view your badges on your board and compare yourself to others in the Ranking
If you no longer want to receive notifications, reply to this comment with the word
STOPThanks For the information