What we're currently using right now is Binance. You can also install using my referral link. So, first, you need to have your account verified using an email or mobile phone number and a valid ID. You also need to install Google Authenticator as part of the withdrawal process. I think there are alternative ways, but I do use Google Authenticator.


There will be a code given in Binance, and in the Google Authenticator app, you will see a plus (+) sign where you could either scan a QR code or enter a setup key. You connect your Binance account there. Once you already have your verified Binance account, you're already good to go. So now, let's proceed with the process.
For you to have a smooth trading process, please make sure that you already turned on these Two-Factor Authentication (2FA) specifically the passkeys, authenticator app which is the Google Authenticator, and email. Once all these secondary verifications are enabled, everything's already set for withdrawal, and you won't already get any troubles along the process, especially at the last part when confirming a sale.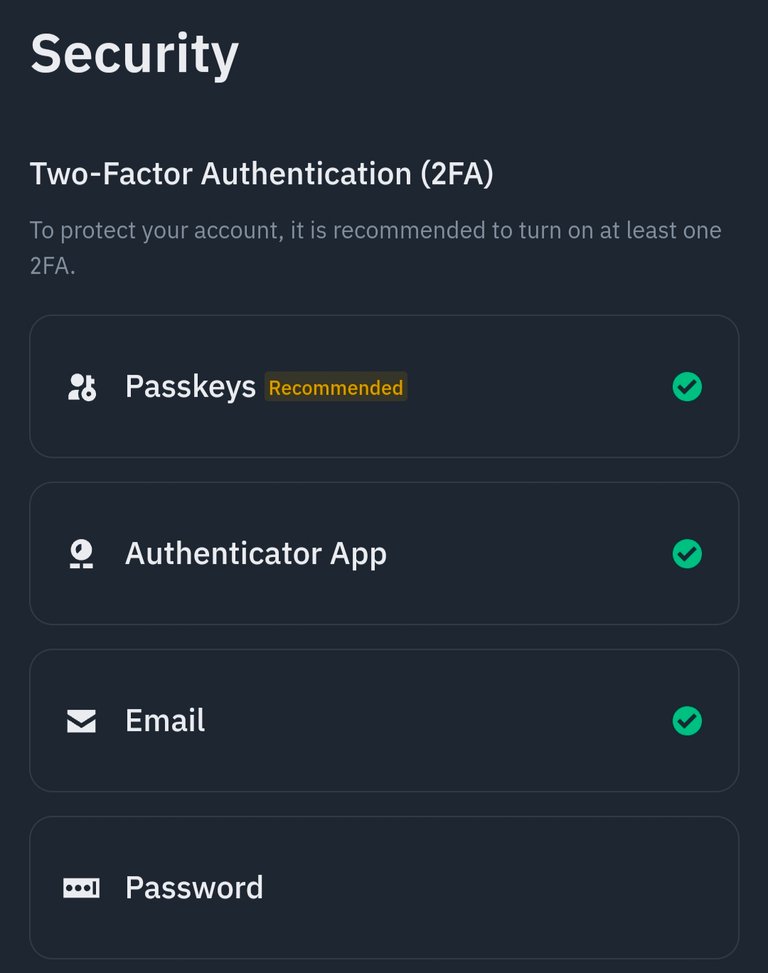
STEP 1: CONVERT YOUR HBD TO HIVE
First things first, you have to buy HIVE using your HBD. So what you're going to do is go to Hive.blog and log in to your Hive wallet. I usually do the first step on Hive.blog because, as far as I remember, whenever I use Peakd, it takes 3 days to complete, even though it's not stored in savings.
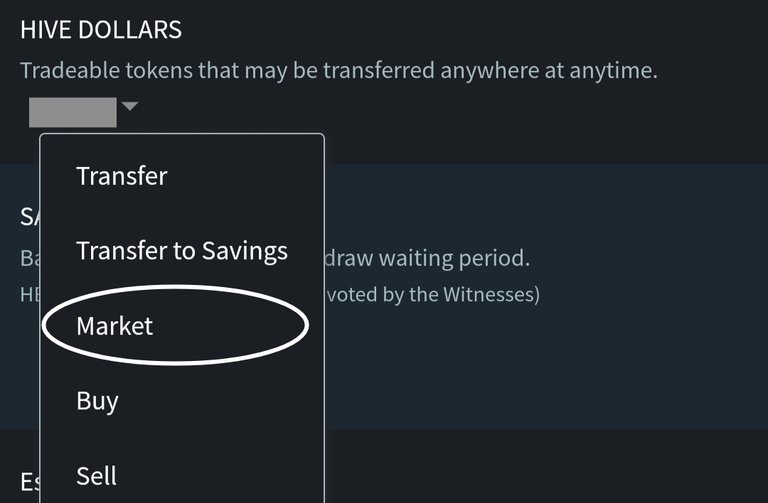
- Click the arrow sign in Hive Dollars, then click Market.
- Go to the Buy Hive section and click Available and Lowest Ask in red text. You can also simply enter the desired amount of HBD that you want to withdraw.
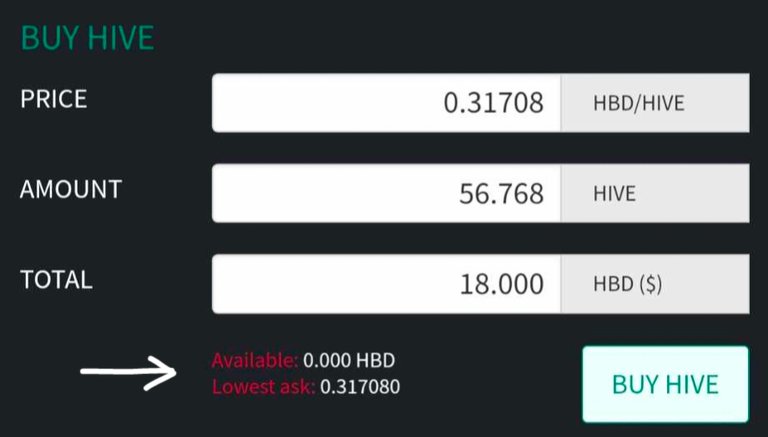
- Click Buy Hive, then paste your Active or Owner key or Master password.
By the way, the cheaper the price, the better, because you can acquire a greater amount of HIVE. Additionally, you need to ensure that the order has already been completed, meaning there's now the exact amount of Hive in your wallet. Now that you have successfully purchased HIVE, you will see it deposited in the Hive Tokens (HIVE) section.
STEP 2: TRANSFER/DEPOSIT YOUR HIVE TO BINANCE
You have to make sure that you're using Binance Pro, not Binance Lite. Kindly open Peakd and the Binance app at the same time.
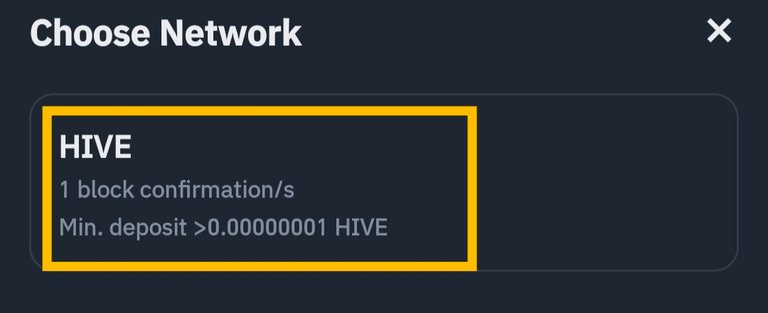
- On your Binance app, click on Wallet and then Spot. Among the cryptos, search for HIVE and select the HIVE network.
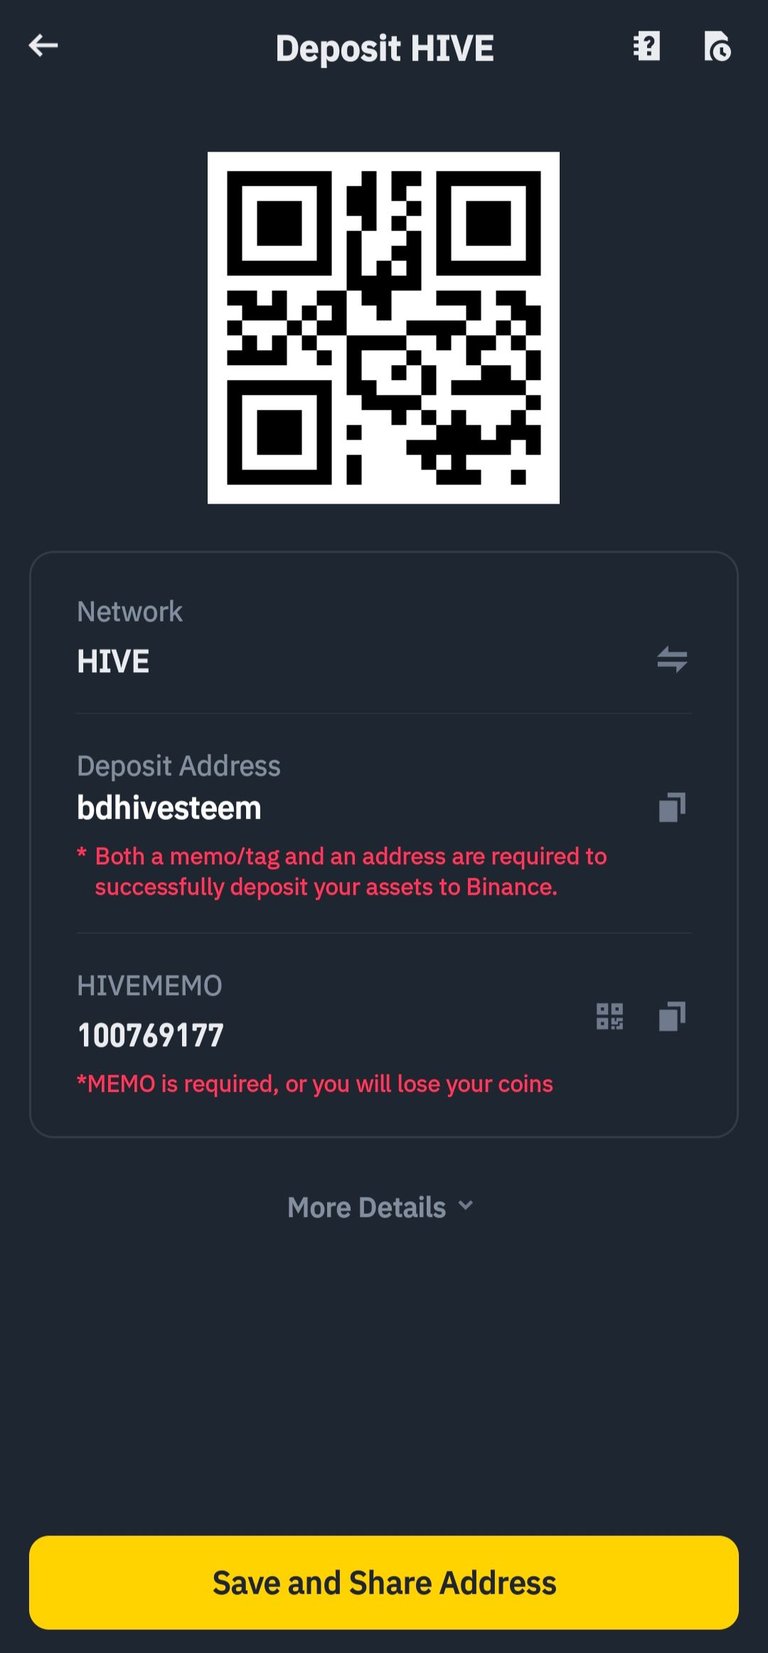
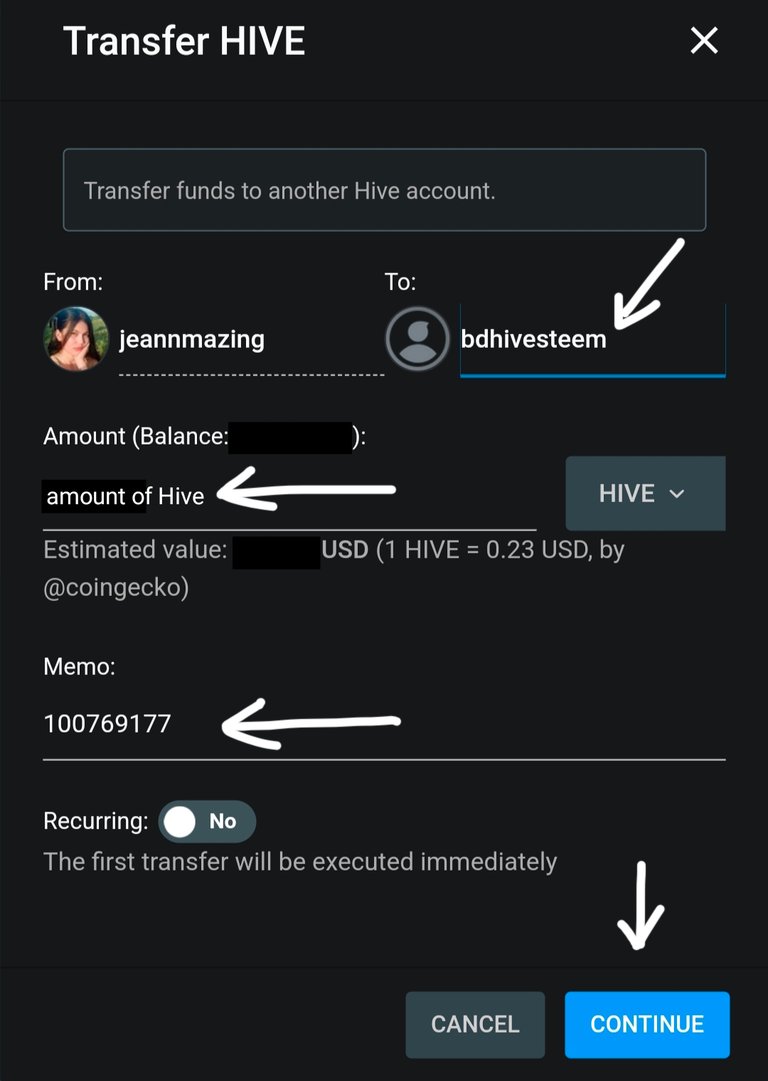
You will then see an address (currently it's bdhivesteem) and a memo (usually contains numbers) that will be required to successfully deposit your HIVE to Binance.
- In another window, open your Peakd wallet and click the arrow shape to transfer Hive.

- Now, you copy and paste. Copy the deposit address from Binance and paste it into the payment recipient field in Peakd.
- Enter the amount of HIVE you want to transfer or simply tap on the balance written in blue text.
- After that, copy and paste the memo. You click Continue, paste your active key, and then confirm.
You have to make sure that there are no spaces nor special characters added in the address and memo field. Just open the two windows simultaneously and have everything copied and pasted.
After that, you'll just check if your HIVE has already been deposited or transferred to Binance.

STEP 3: SELL YOUR HIVE TO USDT.
In your Binance, go to Market, and then Spot.

After that, search for the coin pair HIVE/USDT. As per recommendations, it's best to convert it to USDT because it's the one that has the closest value to the dollar.
Click Sell.
Change the default order limit to Market. Please remember this step each time.
Slide the amount of HIVE up to 100% and then Sell HIVE.
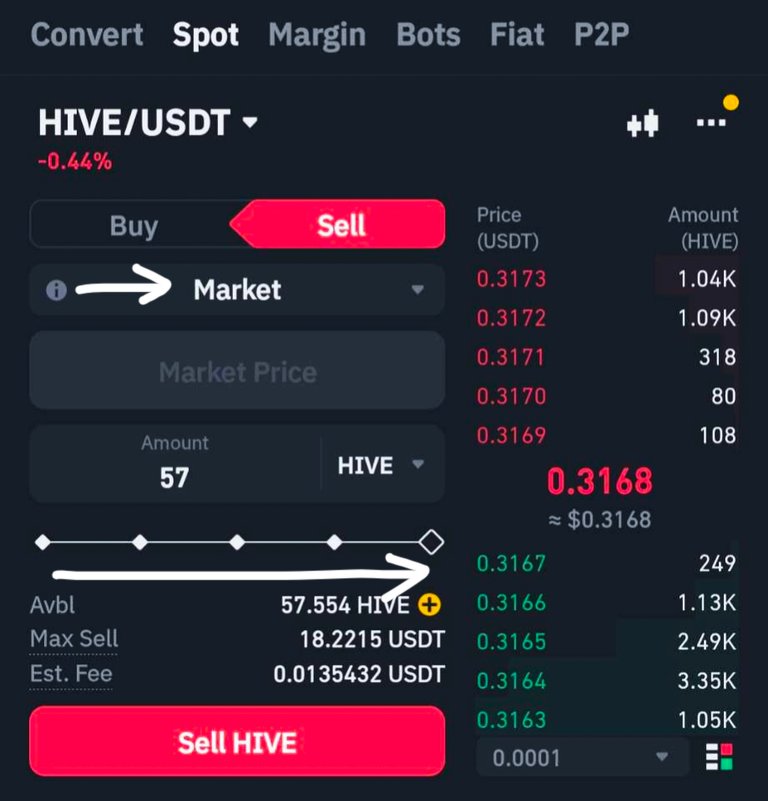
By the way, contrary to what you have seen in the picture, it's actually best to sell HIVE to USDT when the market price is high, as this yields greater value.
STEP 4: TRANSFER USDT VIA P2P (PEER TO PEER) TRADING IN BINANCE TO YOUR FUNDING.
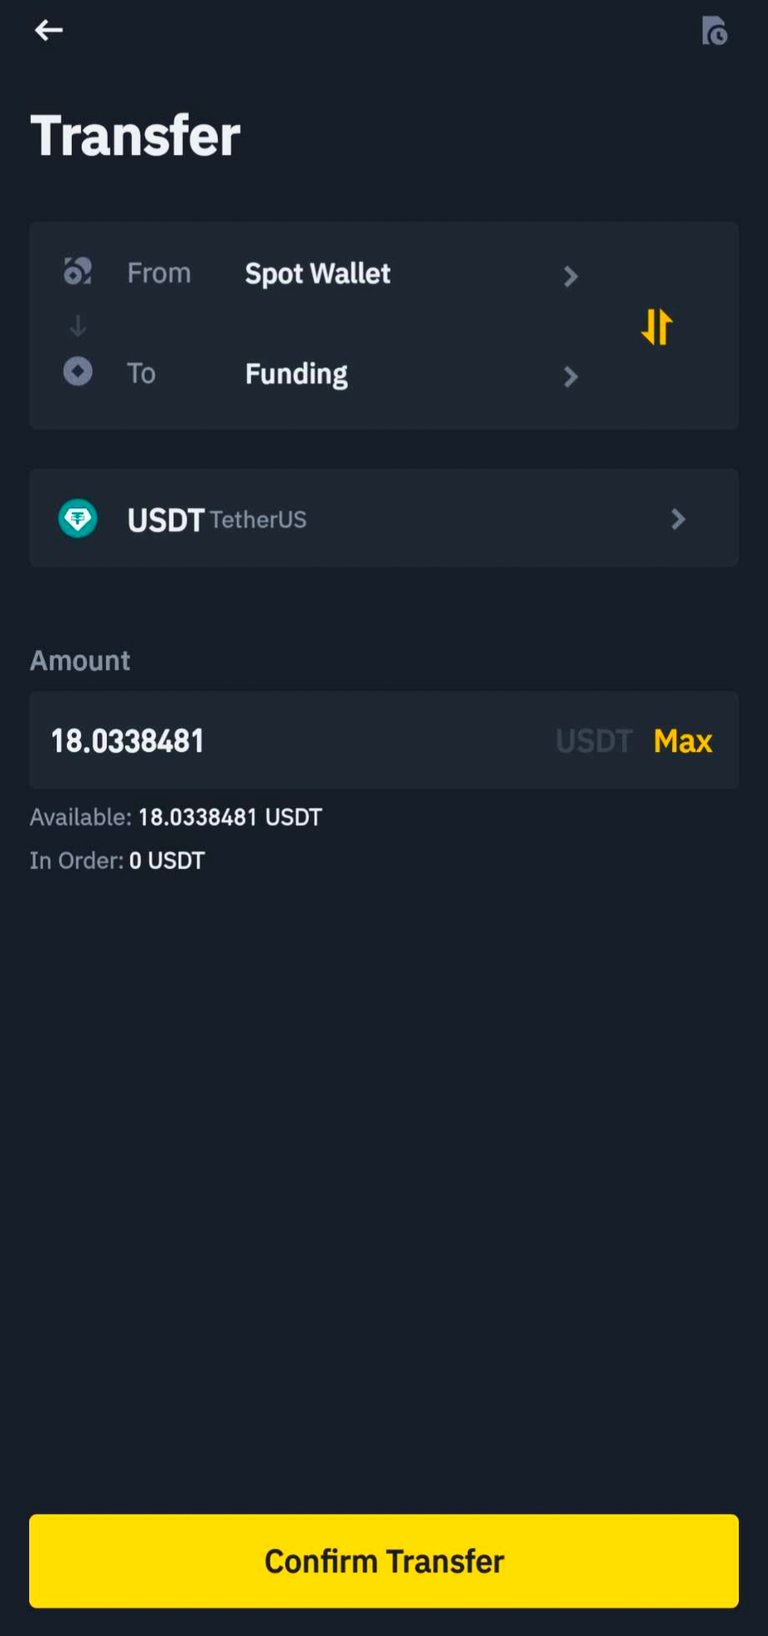
- Please go to Wallet, click Spot, and then Transfer.

- Change the default from BTC to USDT.
- Enter the available USDT amount or simply click Max. It should look like this: from Spot Wallet to Funding, USDT.
- When everything is correct, click Confirm Transfer.
FINAL STEP: SELLING USDT TO YOUR LOCAL CURRENCY THROUGH PAYMENT CHANNELS.
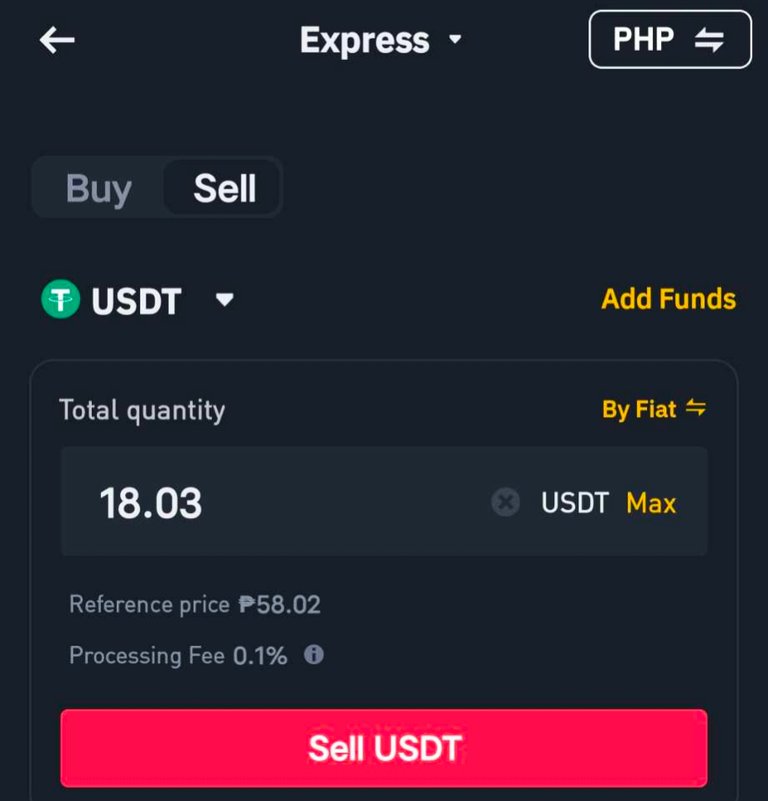
There are various payment channels available, whether bank cards or e-wallets. For mine, I use Gcash because it usually offers the best value. You just have to link your preferred channel. Please check first if you are using the Express and have selected the correct currency.
- Click Wallet, select Funding, and then P2P.
- You should be in the Sell window because you'll be selling your USDT to PHP.
- Enter the available USDT or simply click Max.
- Sell USDT. Friendly note: Binance already has a processing fee now, but don't worry, it's just 0.1%.
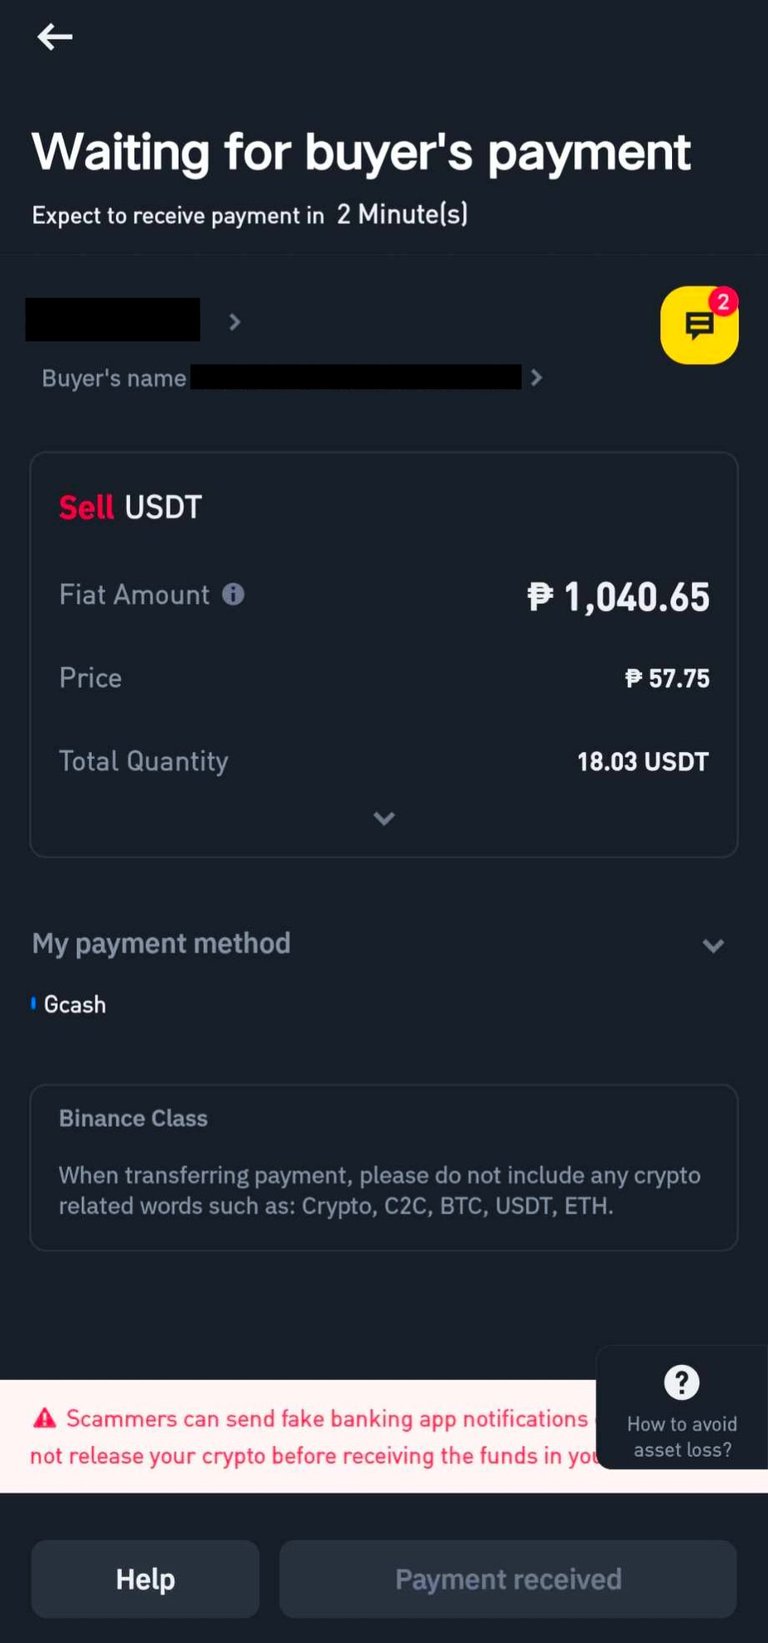
After that, you will be directed to the portion where you wait for the buyer's payment. You can have a conversation with the buyer during the trading process. At this time, I will already open another window for Google Authenticator.
IMPORTANT NOTE: If the buyer has already noted that the payment has been sent to you, please triple-check your wallet first to see if you have received the exact amount of money before releasing the crypto. Once the payment is confirmed, you can now click the “payment received” and paste the authentication code from Google Authenticator (if you're using the same one as mine).
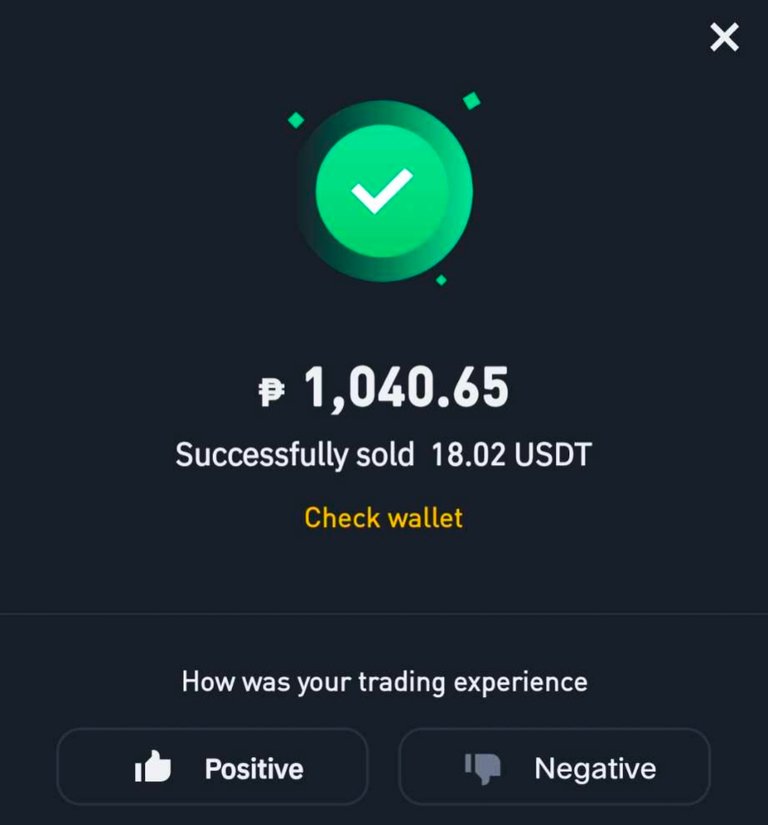
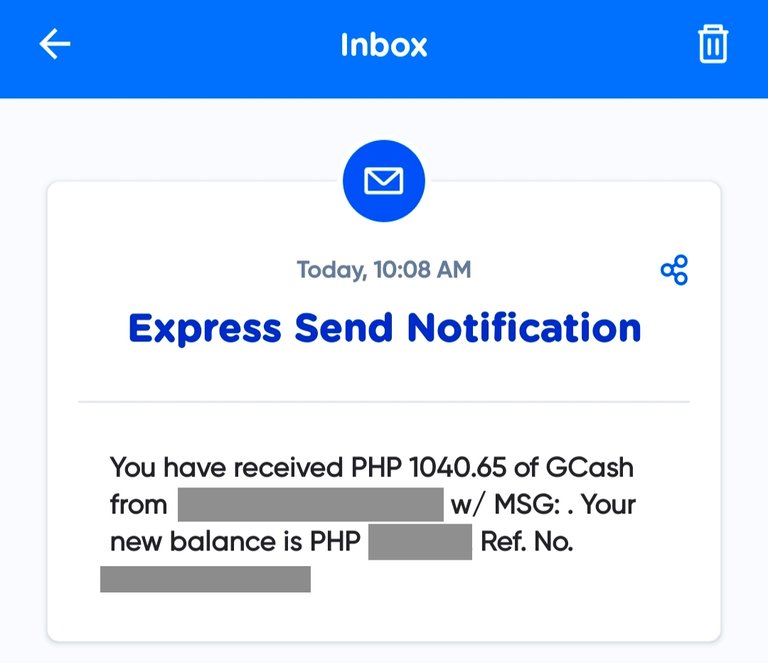 There you are! Congratulations, you have successfully finished the process. 👏 This might be quite tricky for newbies, but as time goes by, it'll get easier for you to navigate. Just learn until you understand and master how it works. If you have any questions in mind, please don't hesitate to drop a comment. Ciao!
Finally! I hope I can navigate all the steps thoroughly. Thank you for this @jeannmazing ❤️
You're welcome, miss @mariejeijeim! ❤️
Thank you for sharing this @jeannmazing!❤️✨
My pleasure, @brandonwrites! 🫡
Thank you @jeannmazing it really helps.
You're welcome, ma'am @chimegipamus! 🫶
Well explained! Thank you @jeannmazing for sharing 😊
You're welcome, @macben! ☺️
Wow. Thank you for this informative article ma'am @jeannmazing. This is a great help for all.
You're welcome, sir @edver143! I'm glad to know that it would be of great help. ❤️
Thanks a lot Ma'am @jeannmazing for the step-by-step guide. It is a great help
You're welcome, ma'am @diamondinthesky! 🤗
Helpful guide, thank you for sharing
Thank you, sir @intoy.bugoy! ❤️❤️