¡Hola a todos mi linda comunidad de hive.blog! el dia de hoy vengo a compartirles un nuevo post en el que personalizo una chaqueta, estoy muy feliz de poder compartir este tipo de creaciones con ustedes porque en el poco tiempo que llevo por estos lares,considero que he tenido un buen apoyo de parte de toda esta gran comunidad.
Hello everyone my nice hive.blog community! Today I come to share with you a new post in which I customize a jacket, I am very happy to be able to share this type of creations with you because in the short time that I have been in these parts, I consider that I have had good support from all this great community.
Los materiales que utilice para crear esta chaqueta, fueron pinturas acrilicas y pinceles, sin mas que acotar comencemos con el proceso creativo.
The materials I used to create this jacket were acrylic paints and brushes, without further ado, let's start with the creative process.
Primero pinte todo el fondo de la chaqueta con blanco y marque las lineas guia de los tacones, luego comence a aplicar el rojo fuego y posteriormente aplique vinotinto para realizar la sombra del tacon, jugue con estas dos tonalidades hasta conseguir que hubiese profundidad y luz. Luego añadi brillos blancos para hacerlo notar brillante o reluciente y despues como no me gustaban los lazos en color rojo decici cambiarles el tono a un rosado intenso y agrandar un poco el tamaño.
First paint the entire bottom of the jacket with white and mark the guide lines of the heels, then I began to apply the fire red and later applied red wine to make the shadow of the heel, I played with these two tones until there was depth and light . Then I added white sparkles to make it look shiny or shimmering and then since I didn't like the red bows I decided to change the tone to a deep pink and enlarge the size a bit.
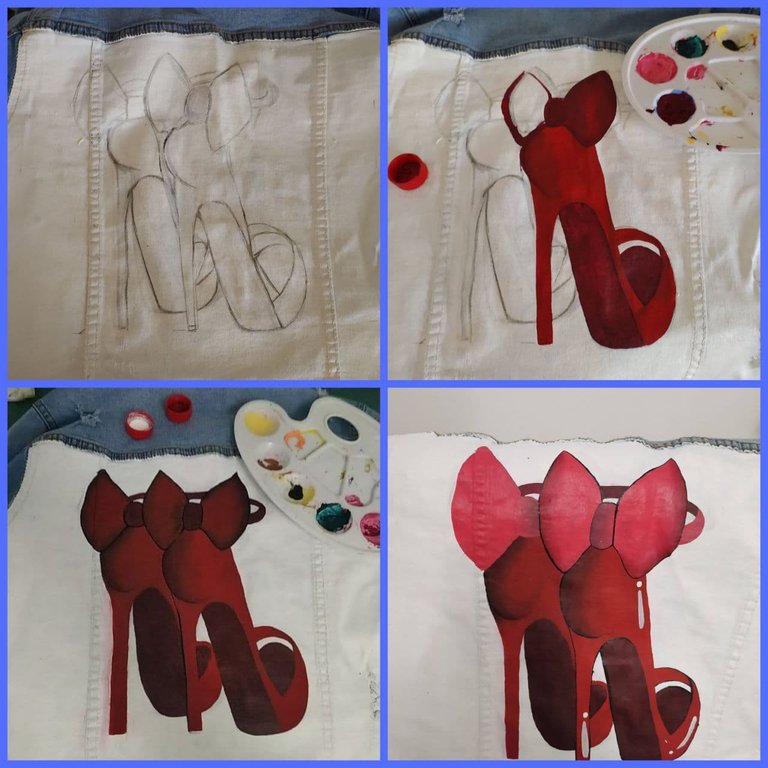
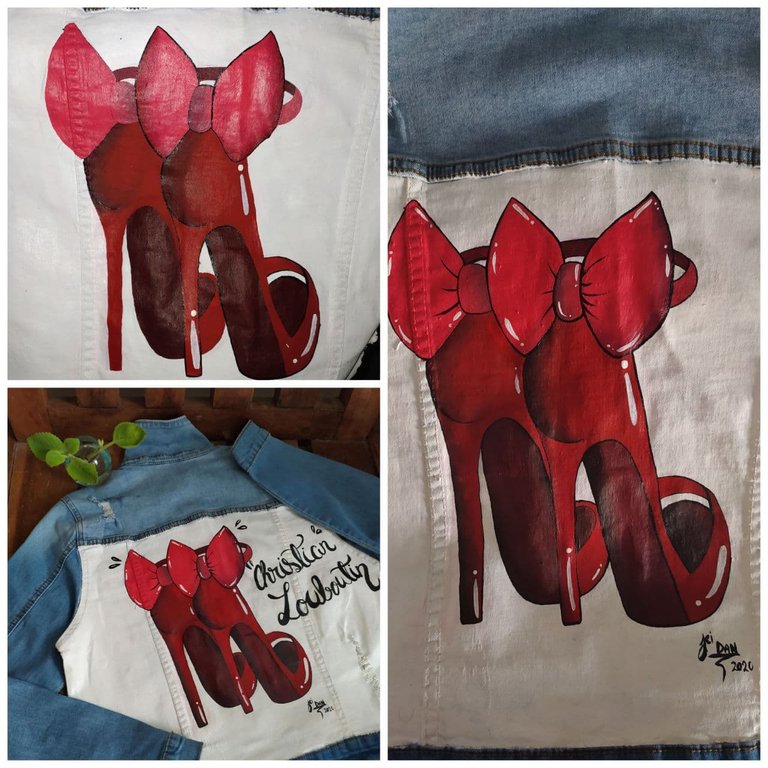
Una vez que cambie el color, hice un morado mezclando rosado y un poco de azul para que hiciera la sombra de los lazos y bordee con un poco de negro. Escribi la frase en lettering, aplique brillos, detalles finales y listo ya tenia finalizada la parte trasera de la chaqueta.
Once the color changed, I made a purple by mixing pink and a little blue to shade the bows and border with a little black. I wrote the phrase in lettering, applied glitter, final details and voila, the back of the jacket was finished.
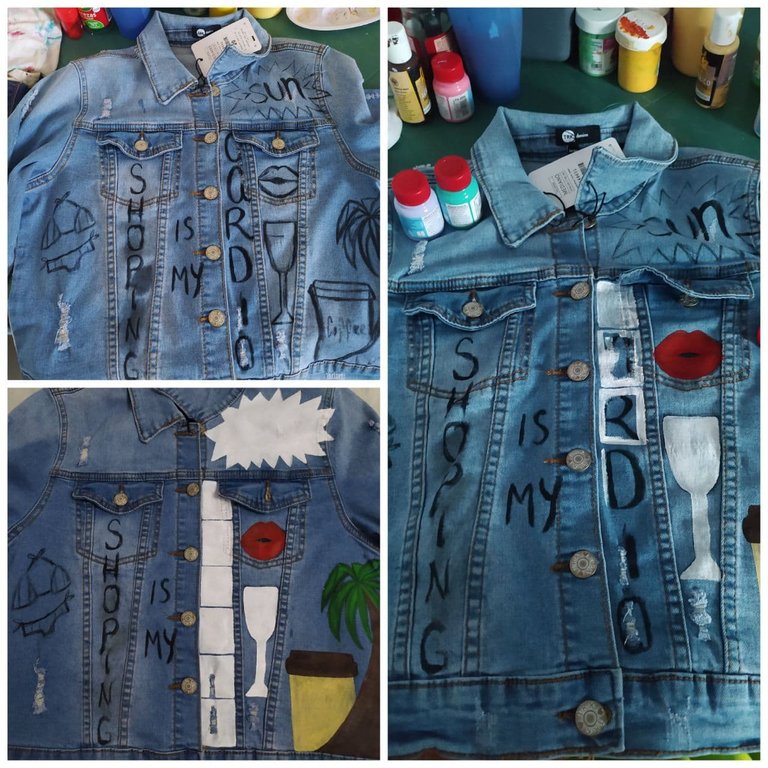
Con la parte frontal no tuve que fondear, solo empece directo a hacer las lineas guia, corregia y definia los iconos con blanco y prosegui a pintarlos con sus colores respectivos, en la pintura acrilica hay colores que necesitan de una base blanca para poder hacer notar su color original de lo contrario se vera una tonalidad mas oscura de la que se ve y habra que aplicar varias capas para que se note.
With the front part I did not have to anchor, I just started directly to make the guide lines, corrected and defined the icons with white and continued to paint them with their respective colors, in acrylic paint there are colors that need a white base to be able to notice Its original color, otherwise it will be a darker tone than it is seen and it will be necessary to apply several layers to make it noticeable.
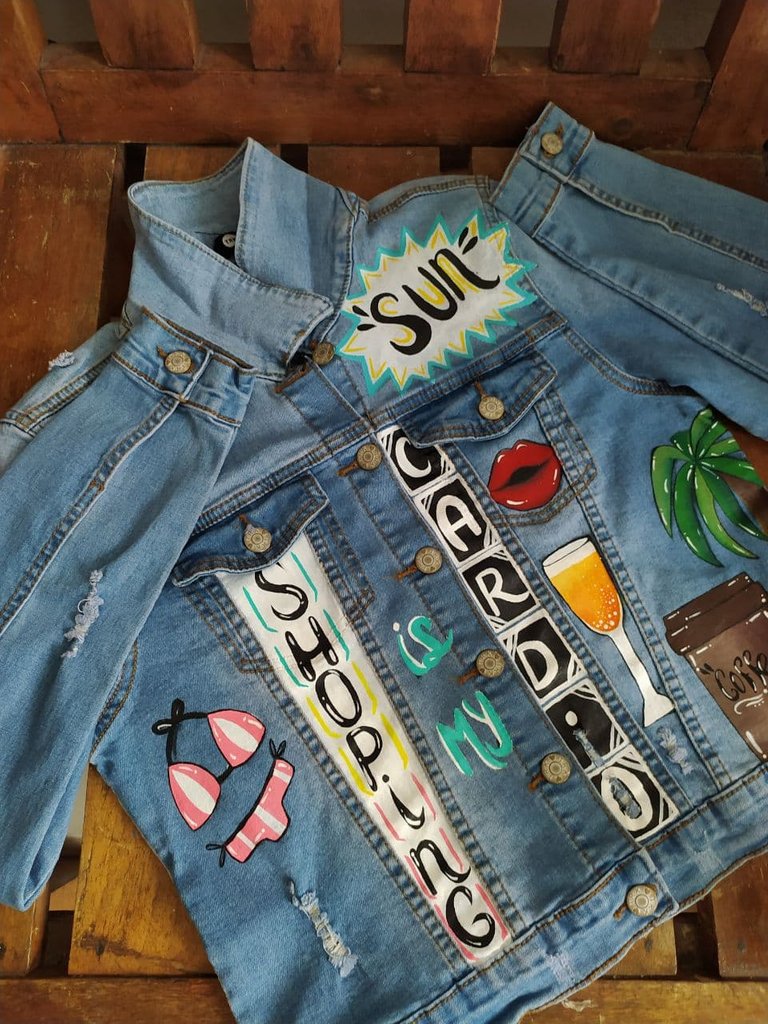
Segui aplicando colores y dando brillos, lo curioso es que le di atencion a cada uno, por individual, y los termine de esa forma, las letras, la palma, el cafe y demas tuvieron muchos cambios, pero al final despues de terminarlos y darles los detalles finales este fue el resultado.
I continued applying colors and giving shine, the funny thing is that I paid attention to each one, individually, and finished them that way, the letters, the palm, the coffee and others had many changes, but in the end after finishing them and giving them the final details this was the result.
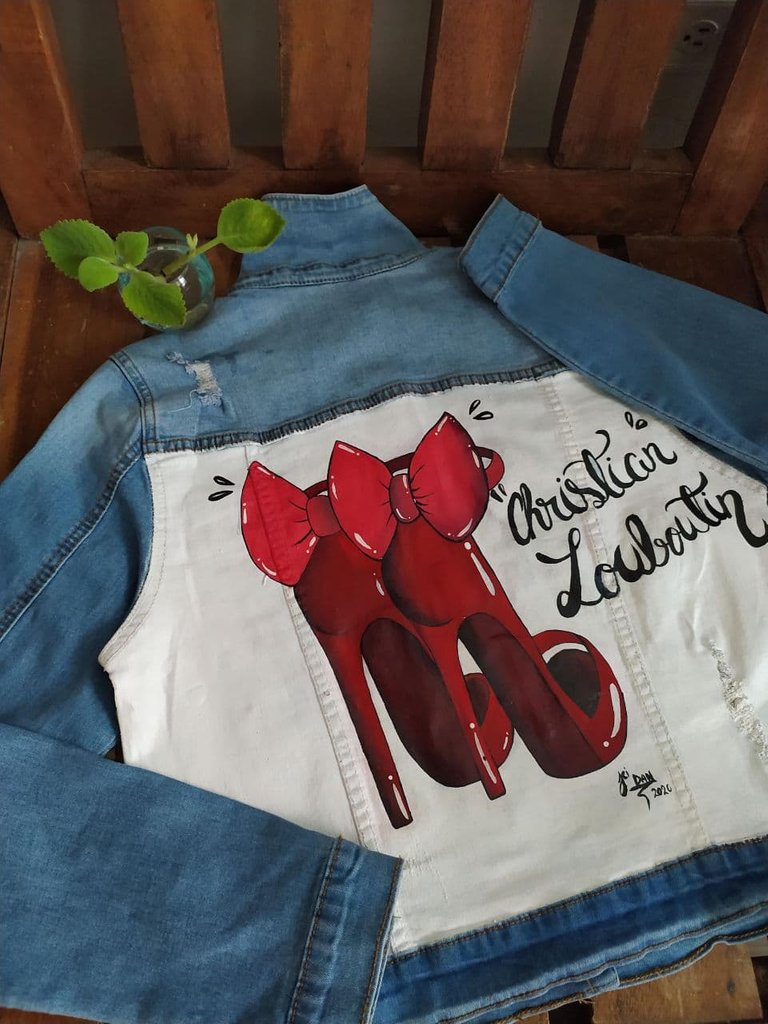
Espero que le haya gustado este resultado tanto como a mi, fue una gran experiencia personalizar ropa, es algo muy bonito. sin mas nada ue acotarnos vemos en otro post chau.
I hope you liked this result as much as I did, it was a great experience to customize clothes, it is something very beautiful. Without further ado, we will see in another post bye.
Todas las fotos mostradas aca me pertenecen y son editadas con Picsart y Canvas.
All the photos shown here belong to me and are edited with Picsart and Canvas.

Your content has been voted as a part of Encouragement program. Keep up the good work!
Use Ecency daily to boost your growth on platform!
Support Ecency
Vote for new Proposal
Delegate HP and earn more
Congratulations @jeikold! You have completed the following achievement on the Hive blockchain and have been rewarded with new badge(s):
Your next target is to reach 1750 upvotes.
You can view your badges on your board and compare yourself to others in the Ranking
If you no longer want to receive notifications, reply to this comment with the word
STOPCheck out the last post from @hivebuzz:
Quedó demasiado BRUTAAAAAL, me fascino de verdad, ahora quiero jajaja♥♥
Ains muchas gracias vale🥺 me alegra que te gustara ♥️ jsjsjs sería interesante hacer una cámara con colores cálidos 🤭👀 en una camisa o chaqueta😌
Si vale, claro que me encanto. Y no me digas esoooooo, que me antojo okk♥
JAJAJAJAJ me diste una idea con solo comentar así que Luego te la enseño ✨✨
Genialisimo jajaja, espero verla entonces✨
¡WAOOOO, WAOOO Y MAS WAOOOO chamooo me encantaaaa!
Yo tengo una chaqueta que estoy personalizando pero con aplicaciones, con el arte de la ilustración y pintura aún no me he atrevido, pensando en marcadores y tu usaste pintura acrílica! por cierto, pregunto, ¿Al final colocaste algún spray fijador o algo para que no se te dañe?
Mis respetos, me encantó.

🙈🙈🙈muchas gracias vale🥺🥺, bueno atreverse siempre trae buenos resultados 😊así que pensarlo más de dos veces te hace entrar en un bucle jajajaj, pero sip, de hecho una vez que está lista le aplico barniz (uno especial para la pintura acrílica, creo que el spray sirve pero no lo he probado) y pues una vez seco todo, plancho la parte interior y listo de ahí resiste las lavadas, aunque a mano por supuesto y sin estrujones fuertes, si la tela es elástica se cuartea la pintura y si la tela es muy rígida, hay que cuidar que la capa de pintura no sea gruesa o también corre ese riesgo 😊. Me han recomendado usar pintura de tela porque es más para eso, pero lleva el mismo proceso de sellado que con las acrílicas, me alegra que te haya gustado 🥺♥️.
Oye que interesante vale, ¡Me estas animando a atreverme! el fin de semana pasado personalicé fue una taza con unos marcadores que según son muy buenos para todo tipo de material se llaman POSCA, pero; que baile que nunca falta un pero, ¡ya los había usado tanto en ilustración en papel que cuando los fui a usar para la taza casi no servían!🤦♀ de éso voy a hablar en un próximo post jeje.
Por cierto, ¿Ya estas vendiendo esas maravillas?
JAJJAJA vamos que si se puede!, ay suele pasar, aveces me sucede con la pintura, que se me acaba o los pinceles de tanto uso pues no dan los mismos acabados, pero voy a buscar esos POSCA me interesaron jeje, y de tener las chaquetas a la venta...
¡Entonces espero ése post porque aprenderé muchísimo jeje, bendecido inicio de semana!
jejej gracias! igualmente para ti:3