Hello @Sketchbook community and welcome! I'm bringing you the process of how to draw Spider-Man in his zombie-hunting version. You can see that process in the video I left on my YouTube channel.

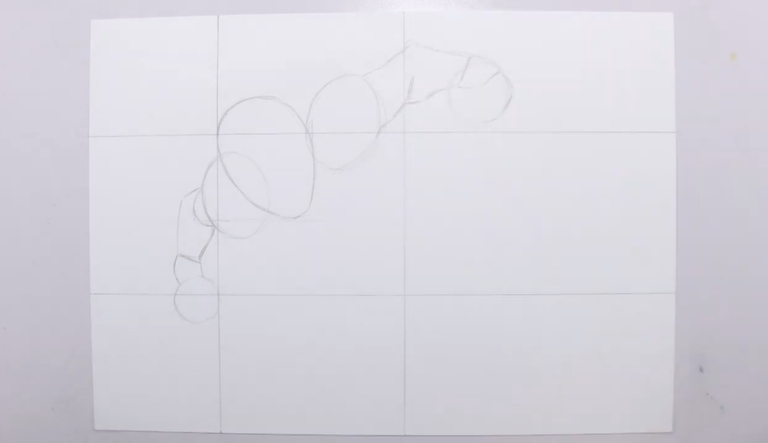
Now, let's start sketching. First, we'll draw a couple of lines in the center of a large box. The line on the left side should be a little below the center, so make sure you don't miss it. In this corner, we'll draw a circle that will serve as the head, taking up a bit of space above the horizontal line. We'll also draw another circle to locate the left shoulder and part of the arm. Remember that this drawing will be made up of many circles, so don't get bored if you see the word "circle" several times.
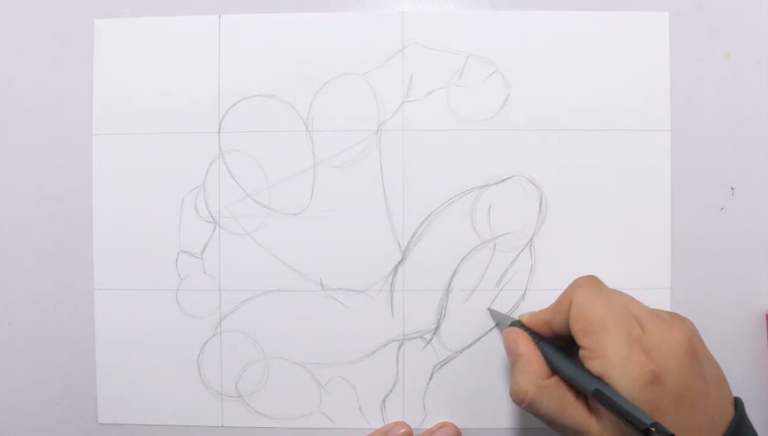
Now, let's form the torso with a more rectangular sketch inside the large square. At the bottom, we'll locate one of the legs, which will be bent from Spider-Man's jump. To do this, we'll draw a circle for the knee and a quick sketch of the foot. On the other side, occupying both spaces, we'll sketch the other leg with circles to make it easier to position. I always recommend using basic shapes to put together your sketch, as this will help you with the proportions.
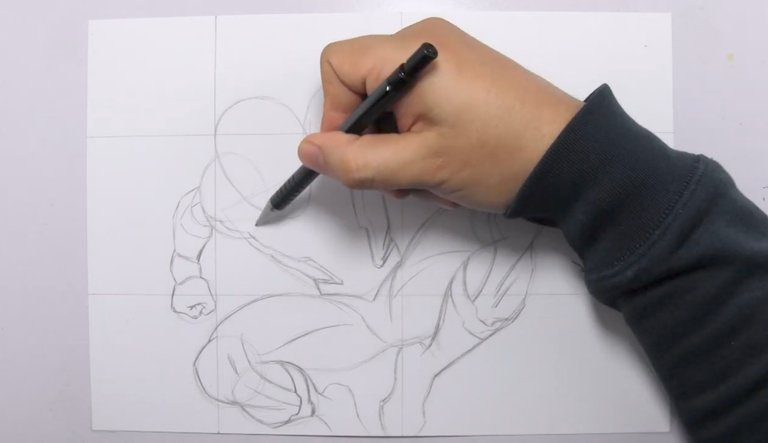
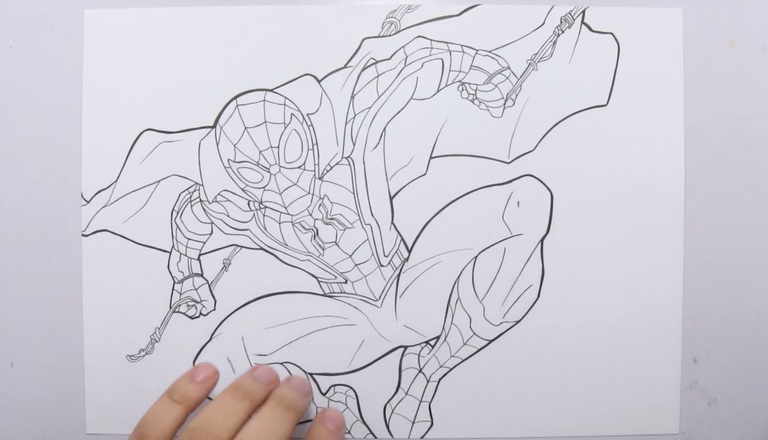
With the sketch ready, it's time to detail our drawing. We'll mark the muscles and details of the suit. Don't forget to clearly mark the web-shooters, which are like wristbands. Make sure the lines dividing Spider-Man's suit are correctly positioned, as this suit is a modified version for the series and has extra details. Take your time and, if necessary, save these photos to study so you can learn every detail.

Once we have the costume's divisions, we'll place a circle in the lower left corner of the head. Although it may seem to be in the center, measure the distances carefully so that the spidery eyes are well proportioned. After drawing the eyes, we'll add the inner border and move on to our character's characteristic lines. There won't be many, which will help make the character look more stylized.
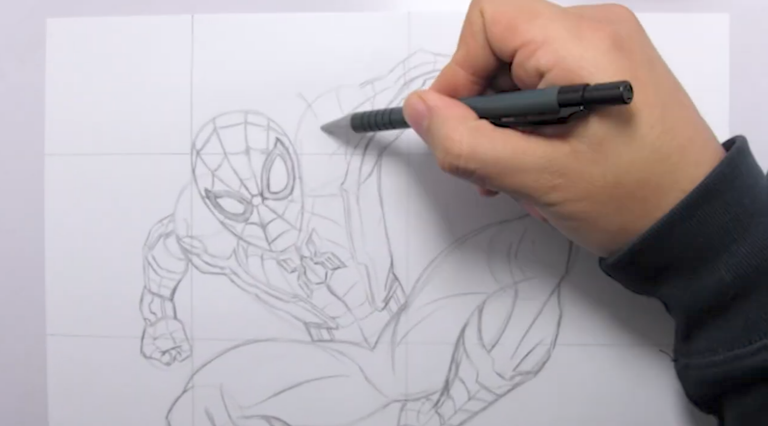
Now, we'll draw a line down the middle of the torso and begin making the spider symbol, which should have several corners and a grid pattern to give it a technological look, since the suit comes from Mr. Stark's design. We'll continue adding lines to emphasize the texture of the suit, but remember to keep them to a minimum to maintain a modern look.
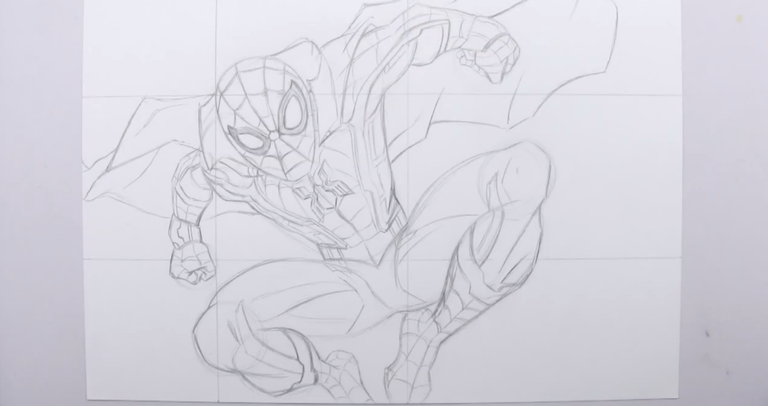
Since we're following the "What If" theme and focusing on the zombie episode, we'll make Doctor Strange's cape for Spider-Man. We'll draw one flap folded inward and another open to the left side to give the drawing dynamism. Make sure the cape looks wrinkled to give the impression of movement.
With the sketch ready, it's time to ink.
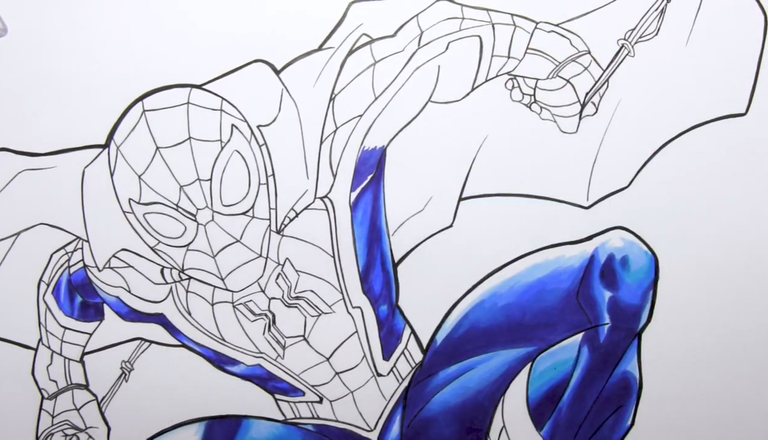
After I've finished inking, I used a list of markers for this drawing. If you don't have markers, don't worry, I'll tell you which colored pencils you can use. We'll start bringing Spider-Man to life, starting with his leg. This time I'm painting from darker to lighter colors, something I don't normally do, but the result is turning out very well.

For the black areas, use a deep gray and black to mark the shadows. Now, let's paint the entire suit red. You can use a red, a vermillion, or a deep brown for the shadows.
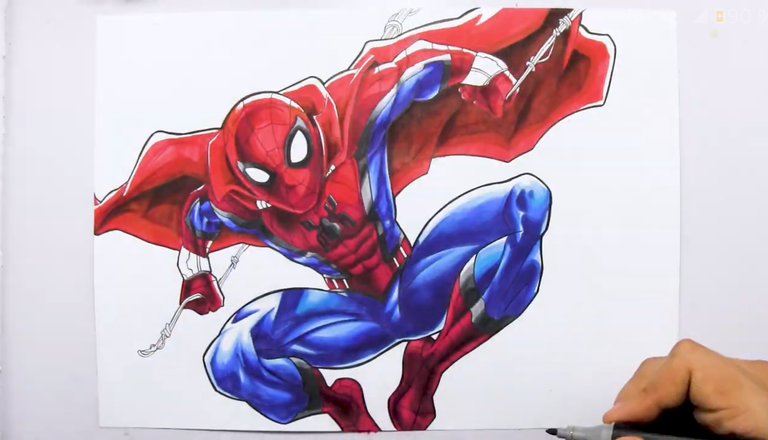
For the cape, I used the same colors, but I made sure it looked a little lighter than the rest of the costume to differentiate it. To fill in some of the empty space on the sheet, we'll draw a friend and neighbor jumping in perspective. This will give more dynamism to the composition. Now, let's ink and paint this part to complete our drawing.

And here we have it, our Zombie-Slayer Spider-Man! I'm very happy with the result and I love how the painting and the colors turned out. But now I want to know your opinion,

Created: blog gif
The images were taken from my YouTube video
The translation was done in Google Translate
______________
Versión Español
______________
Hola comunida @Sketchbook y bienvenidos, les traigo el proceso de como dibujar a Spider-Man en su versión de caza Zombies Pueden ver ese proceso en el video que les deje de mi canal de Youtube
Ahora, vamos a empezar a bocetar. Primero, trazamos un par de líneas en el centro de un gran recuadro. La línea del lado izquierdo debe estar un poco más abajo del centro, así que asegúrate de que no se te pase. En esta esquina, dibujaremos un círculo que nos servirá para situar la cabeza, ocupando un poco de espacio sobre la línea horizontal. También dibujaremos otro círculo para ubicar el hombro izquierdo y una parte del brazo. Recuerda que este dibujo se conformará de muchos círculos, así que no te aburras si vez la palabra "
círculo varias veces.
Ahora, formemos el torso con un boceto más rectangular dentro del cuadrado grande. En la parte inferior, ubicaremos una de las piernas, que estará doblada por el salto que está dando Spider-Man. Para esto, dibujaremos un círculo para la rodilla y un boceto rápido del pie. En el otro lado, ocupando ambos espacios, bocetaremos la otra pierna con círculos para facilitar la ubicación. Siempre recomiendo usar figuras básicas para armar tu boceto, ya que esto te ayudará con las proporciones.
Con el boceto listo, es hora de detallar nuestro dibujo. Marcaremos la musculatura y los detalles del traje. No olvides marcar bien los lanzatelarañas, que son como muñequeras. Asegúrate de que las líneas que dividen el traje de Spider-Man estén bien ubicadas, ya que este traje es una versión modificada para la serie y tiene detalles extra. Tómate tu tiempo y si necesitas, guarda estas foto para estudartelas para que te aprendas cada detalle.
Una vez que tengamos las divisiones del traje, ubicaremos un círculo en la parte inferior izquierda de la cabeza. Aunque parezca que está al centro, mide bien las distancias para que los ojos arácnidos queden bien proporcionados. Después de dibujar los ojos, haremos el reborde interior y pasaremos a las líneas características de nuestro personaje. No serán muchas, lo que ayudará a que el personaje se vea más estilizado.
Ahora, trazaremos una línea en medio del torso y comenzaremos a hacer el símbolo de la araña, que debe tener varias esquinas y un diseño cuadriculado para que se vea tecnológico, ya que el traje proviene del diseño del Sr. Stark. Continuaremos agregando líneas para remarcar la textura del traje, pero recuerda que no deben ser muchas para mantener un estilo moderno.
Como estamos con la temática de "What If" y centrados en el episodio de zombies, haremos la capa de Doctor Strange para Spider-Man. Dibujaremos una solapa doblada hacia adentro y otra abierta hacia el lado izquierdo para darle dinamismo al dibujo. Asegúrate de que la capa se vea arrugada para dar la sensación de movimiento.
Con el boceto listo, es momento de entintar
Despues de haber terminado de entintar y para este dibujo use una lista de marcadores. Si no tienes marcadores, no te preocupes, te diré qué lápices de color puedes usar. Comenzaremos a darle vida a Spider-Man, empezando por la pierna. Esta vez estoy pintando de colores más oscuros a más claros, algo que no hago normalmente, pero el resultado está quedando muy bien.
Para las zonas negras, usa un color gris intenso y negro para marcar las sombras. Ahora, vamos a pintar todo el traje de rojo. Puedes usar un color rojo, un bermellón y un café fuerte para las sombras.
Para la capa, he usado los mismos colores, pero he procurado que se vea un poco más clara que el resto del traje para diferenciarla, para llenar un poco el espacio vacío en la hoja, dibujaremos a un amigo y vecino saltando en perspectiva. Esto le dará más dinamismo a la composición ahora vamos a entintar y pintar esta parte para que nuestro dibujo esté completo.
Y aquí lo tienen, ¡nuestro Spider-Man Caza Zombies Estoy muy contento con el resultado y me encanta cómo quedó el pintado y los colores. Pero ahora quiero saber tu opinión,
__________________
Gracias por Leer
__________________
Las fotos fueron tomadas del video de mi canal de Youtube