Hola amigos de Hive / Hello Hive friends
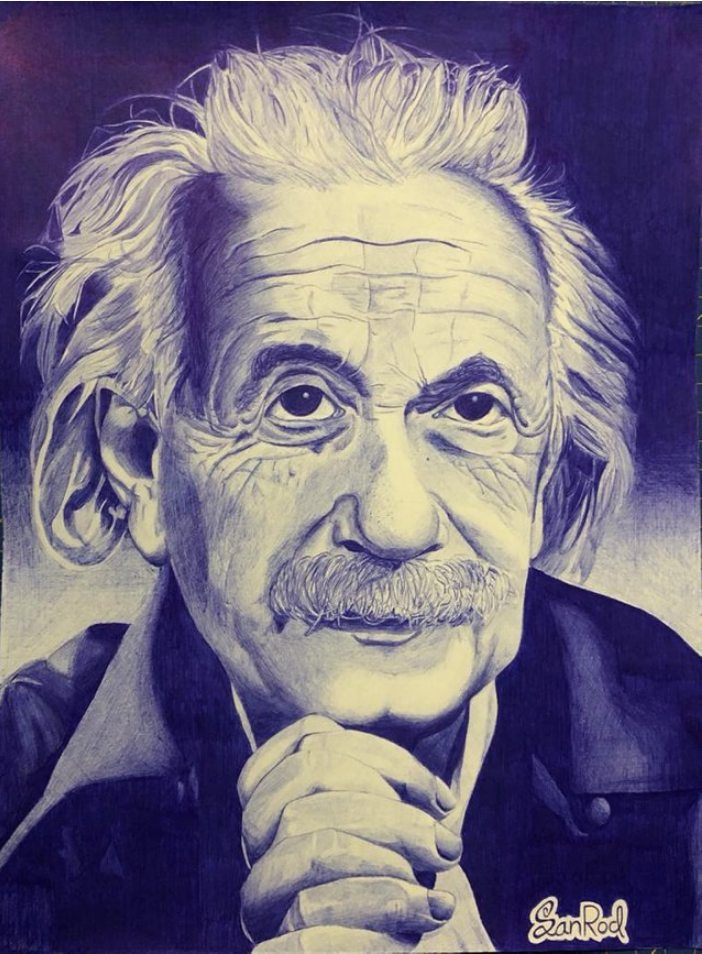
Last year I made this portrait of Albert Einstein. German and novice prize, he contributed to physics with his numerous contributions such as the theory of relativity, the concept of gravity or the photoelectric effect.
Antes de nada coloco un trozo de cinta de carrocero en cada esquina del dibujo para evitar que se mueva. Luego comencé dibujando el boceto y las lineas principales del dibujo en un formato en este caso en un papel Canson de 130 g, de 24x32cm con un lápiz 2HB normal de los que utilizan los niños en la escuela.
Para que el dibujo me quede tal y como quiero, utilizo una cuadricula, es decir, a la foto del móvil le hago una cuadricula y la traspaso al papel, para ir guiándome y conseguir bien las proporciones.
First of all I put a piece of masking tape in each corner of the drawing to prevent it from moving. Then I started by drawing the sketch and the main lines of the drawing in a format in this case on a Canson paper of 130g, 24x32cm with a normal 2HB pencil of the kind used by children in school.
In order for the drawing to stay the way I want it, I use a grid, that is, I make a grid for the mobile photo and transfer it to paper, to guide me and get the proportions right.
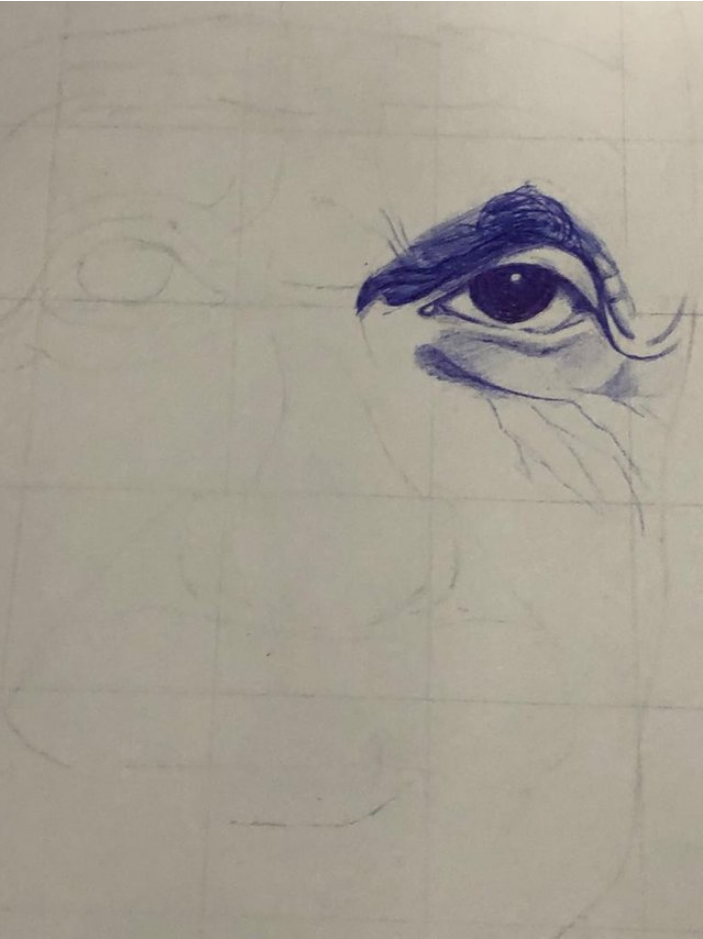
Veréis, estos dibujos se realizan por capas, es decir, le vamos dando pequeñas y suaves pasadas por todo el dibujo y donde queremos dar oscuridad, una textura especial o cualquier otro efecto le damos mas y mas pasadas hasta conseguir el tono deseado. Este trabajo tiene muchas zonas oscuras por lo que tiene muchísimas pasadas en algunas zonas.
You will see, these drawings are made in layers, that is, we are giving small and soft strokes throughout the drawing and where we want to give darkness, a special texture or any other effect we give it more and more passes until we achieve the desired tone. This job has a lot of dark areas so it has a lot of passes in some areas.
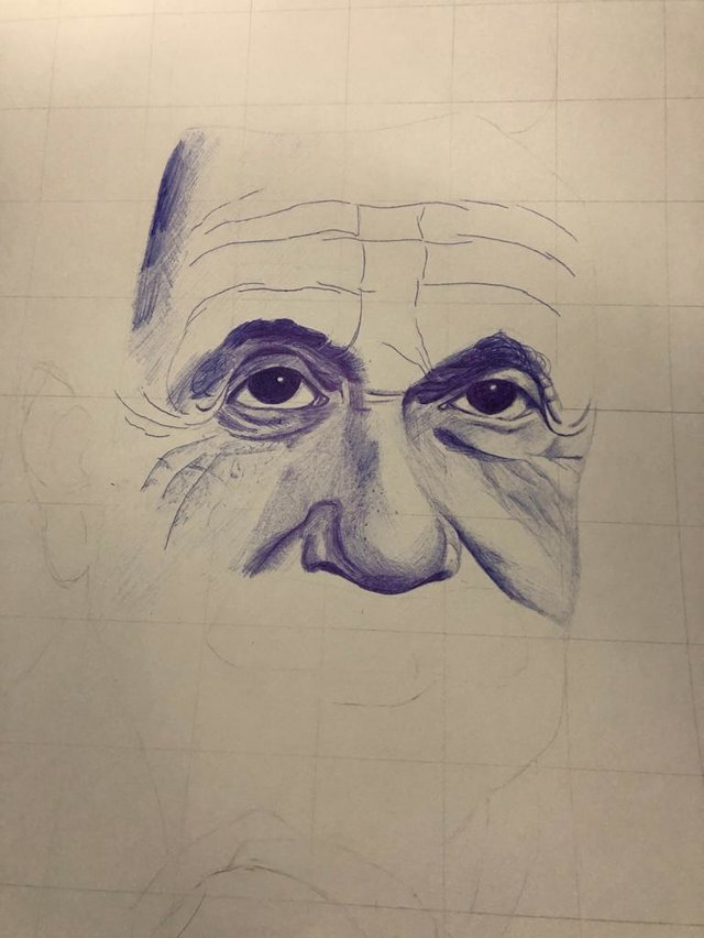
Usando la técnica del bolígrafo al contrario de otras como el grafito por ejemplo, no hace falta borrar el lapiz de la cuadricula ya que en algunas zonas el bolígrafo tapa por completo las marcas de lápiz y en las que no desaparezca, una vez que esté el trabajo terminado y seco se puede borrar sin problemas dandole suave con una goma para no estropear el papel.
Using the pen technique unlike others such as graphite for example, it is not necessary to erase the pencil from the grid since in some areas the pen completely covers the pencil marks and in which it does not disappear, once the Finished and dry work can be erased without problems by giving it smooth with an eraser so as not to damage the paper.
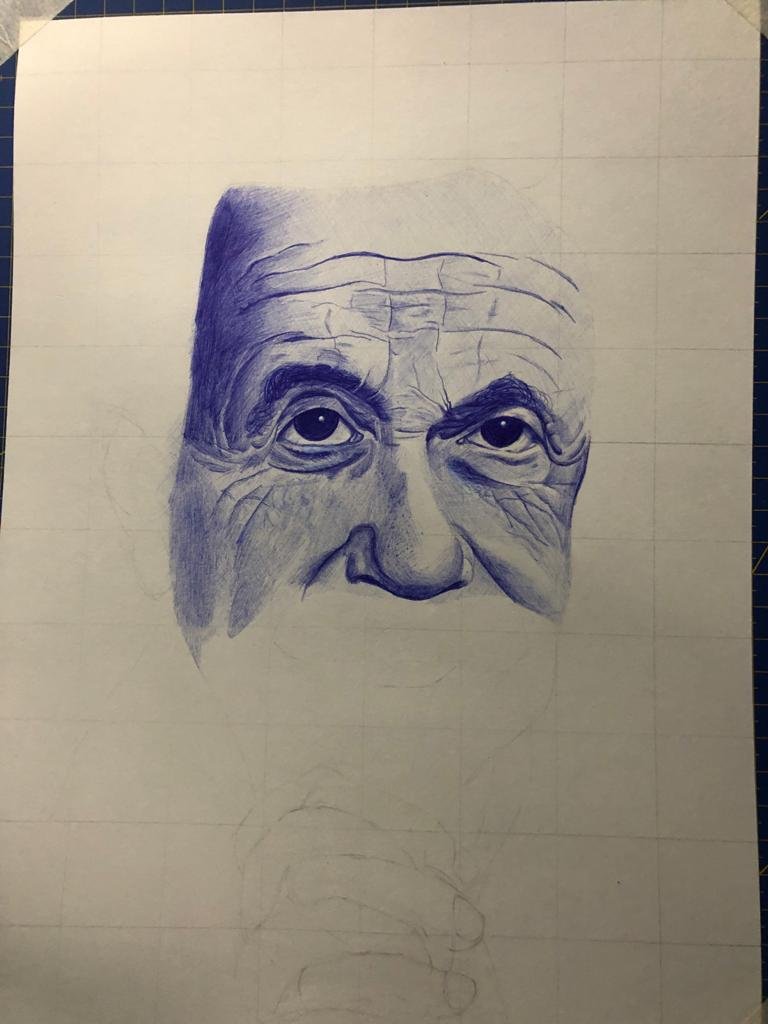
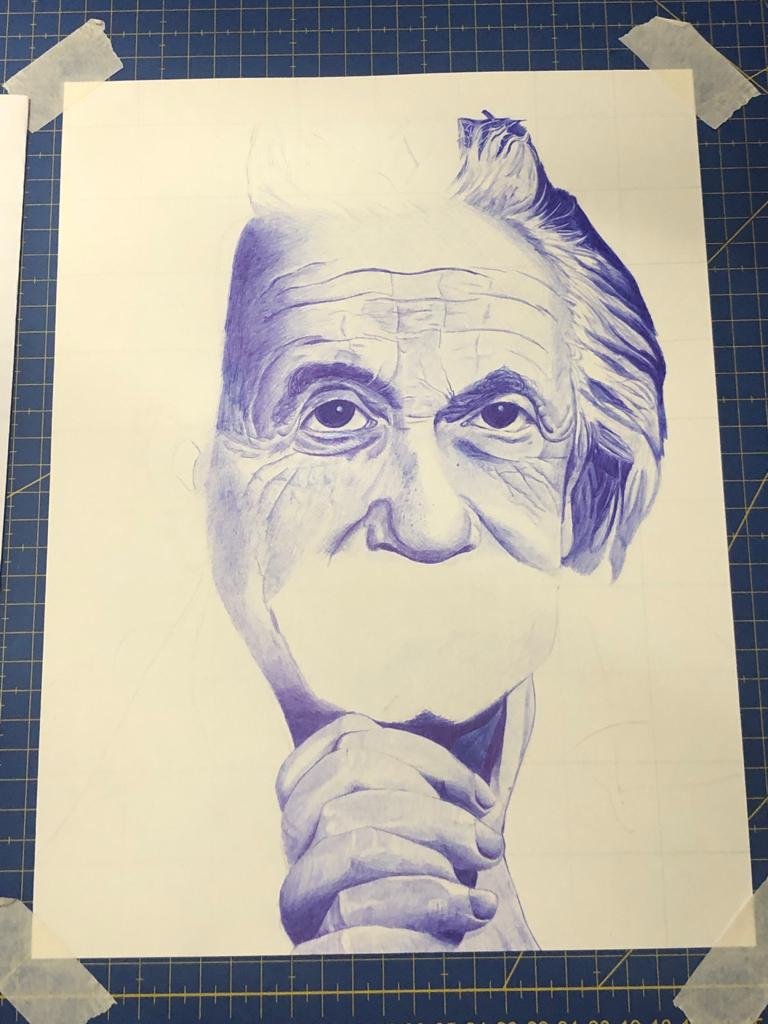
Es aconsejable tener un trozo de papel de cocina al lado ya que algunas veces se acumula en la punta del bolígrafo un poco de tinta y es un fastidio que lo deje en el papel ya que se queda como una mancha. Yo cada 4/5 minutos dibujando me paro a limpiar la punta con el papel y me aseguro de no fastidiarlo.
Este consejo es muy importante ya que las manchas del boli pueden estropear el dibujo, os recuerdo que el boli no se borra y un error puede ser fatal.
It is advisable to have a piece of kitchen paper next to it since sometimes a little ink accumulates on the tip of the pen and it is a nuisance to leave it on the paper since it remains as a stain. I every 4/5 minutes while drawing I stop to clean the tip with the paper and make sure not to mess it up.
This advice is very important since the stains of the pen can spoil the drawing, I remind you that the pen does not erase and a mistake can be fatal.
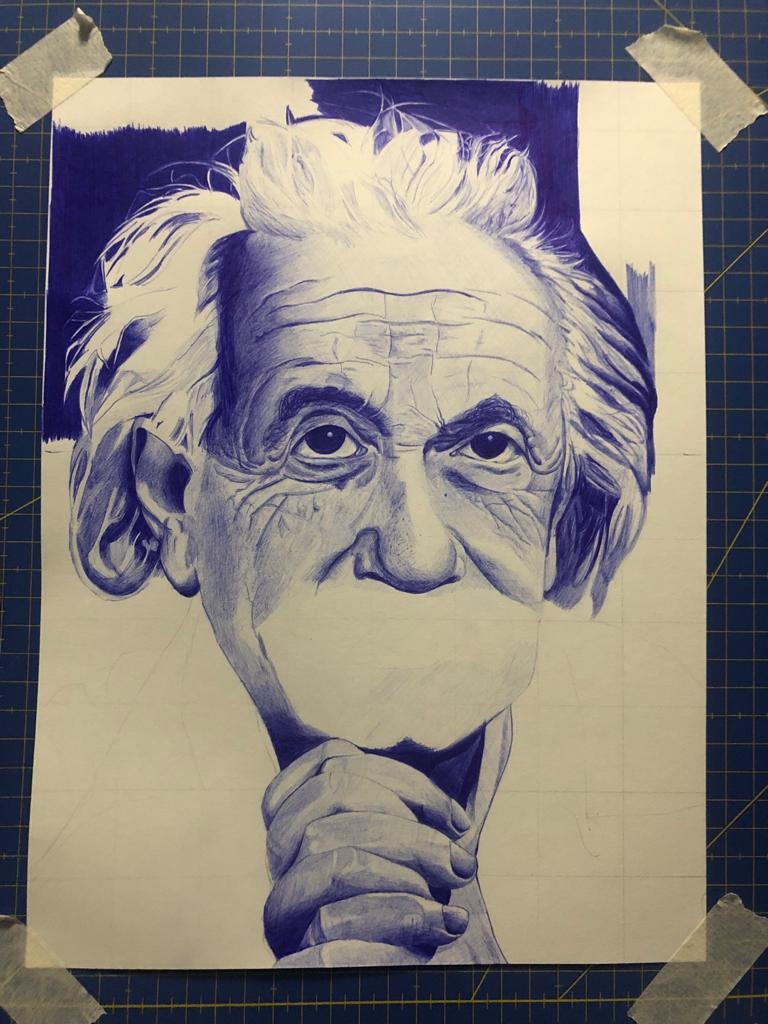
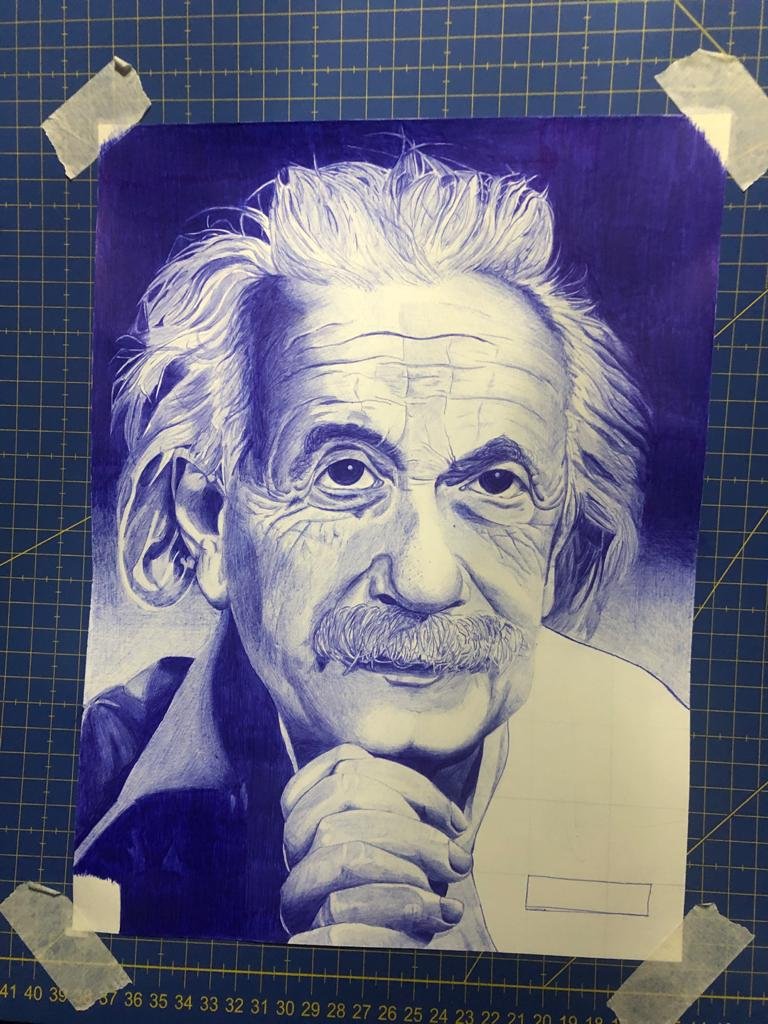
En estos trabajos, al realizarse con trazos, puede llegar a frustrar la sensación de ver como tachones o arañazos, pero no os preocupéis, lo importante es ver el resultado final ya que hasta que el dibujo no está bien avanzado no tienes una perspectiva real de cómo está quedando. Podéis verlo comparando las primeras fotos que he subido con el resultado final.
In these works, when carried out with strokes, it can frustrate the sensation of seeing as studs or scratches, but do not worry, the important thing is to see the final result since until the drawing is well advanced you do not have a real perspective of how it is going. You can see it by comparing the first photos I have uploaded with the final result.

Por ultimo retiramos los trozos de cinta de carrocero que pusimos para sostener el dibujo, para terminar de pintar todo el papel y como siempre aconsejo al final de cada trabajo, aplicar un spray de barniz, para que en este caso la tinta aguante muchísimos años en el papel sin perder el color.
Yo en este caso he colocado esta lamina en un marco que he comprado en IKEA y ha quedado genial, ¿No os parece?
Finally we remove the pieces of masking tape that we put to support the drawing, to finish painting all the paper and as I always advise at the end of each job, apply a varnish spray, so that in this case the ink will last for many years in the paper without losing color.
In this case, I have placed this sheet in a frame that I bought at IKEA and it has been great, don't you think?
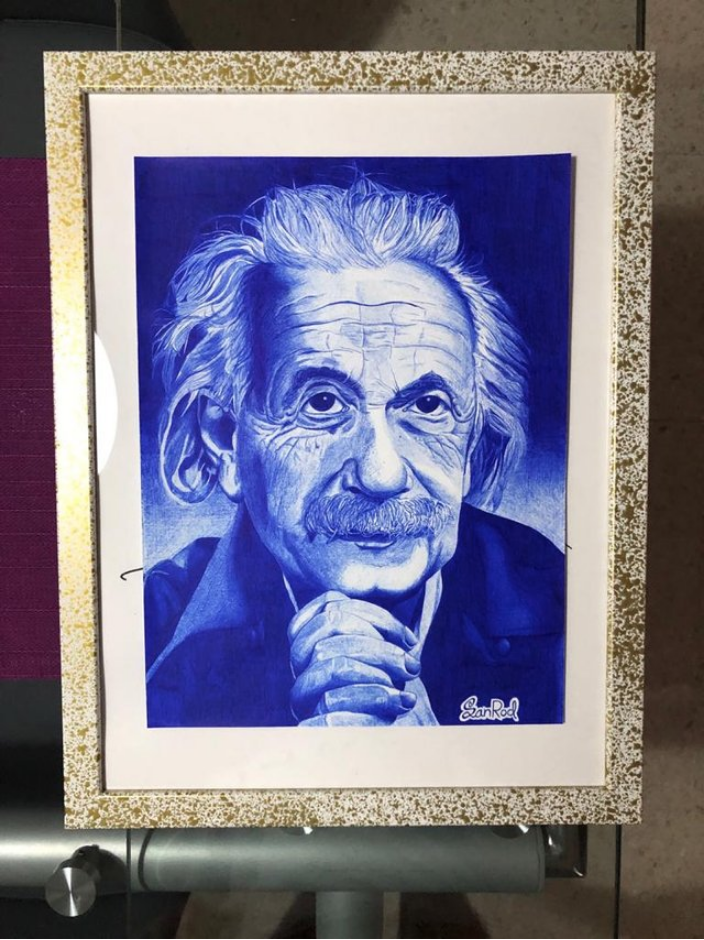
Todas las fotos son de mi propiedad y han sido realizadas con mi teléfono móvil
All photos are my property and have been taken with my mobile phone
| 🎨 | Materiales utilizados |
|---|---|
| 1 | Papel Canson 130 g |
| 2 | Lápiz 2HB |
| 3 | Bolígrafo Bic azul |
| 4 | Goma de borrar |
| 5 | Spray fijador de barniz |
| 6 | cinta de carrocero |
Si tenéis alguna sugerencia, consulta u opinión sobre este trabajo podéis dejarlo en comentarios y os contestaré gustosamente.
También podéis seguirme en instagram, @enrique.sanrod
If you have any suggestions, questions or opinions about this work, you can leave it in the comments and I will answer you with pleasure.
You can also follow me on instagram, @enrique.sanrod