Hello artist!! So you decided it's time for you to draw some gems! Well, I don't blame you; ever since Zelda came out using magic gems as puppies, everybody went crazy for them, right!?
Today, I want to share my digital approach to drawing and painting magic gems using Photoshop!
Let's jump into it.
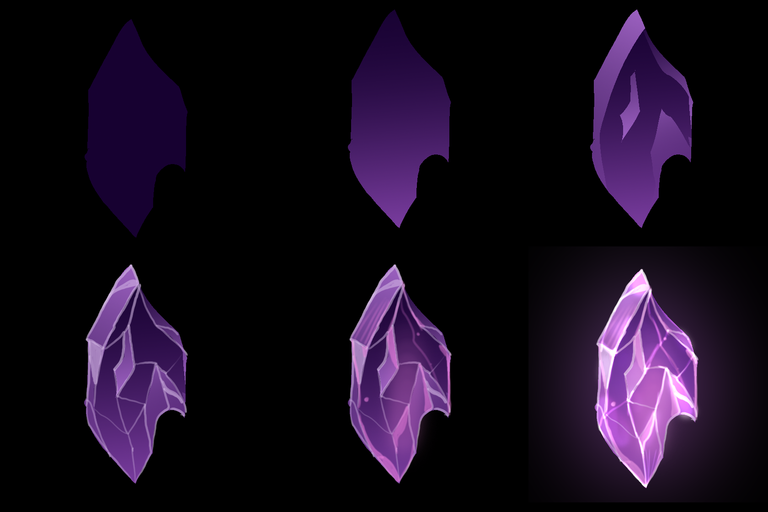
Step 1 - Start with a simple shape
It could be anything you'd like. Shapes with sharp edges tend to look cooler in my opinion. Make sure you start with a darker color as well because from here on, we will add some light to it, baby!

Step 2 - Add a gradient light from the bottom
Gems usually reflect some light from the bottom side when we shine a light on them from the top (coming next!).
It's good to pick a lighter version of the color you picked for the solid shape. In this case, I used pink since my share was purple.

Step 3 - Add the primary light source from above
The light that shines from below is reflected light. That means that a brighter light must be coming from the opposite direction. We can show this by adding an even brighter tone on the upper part of the gem. You can use the lasso tool to make it hit multiple areas as well, as long as the brightest part is the one on the upper part.

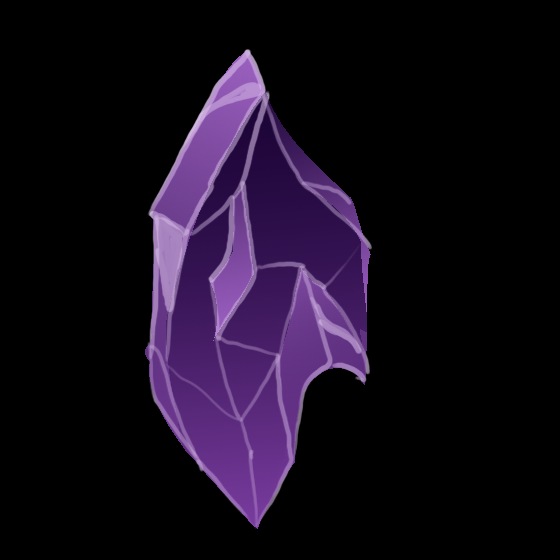
Step 4 - Define edges and add more reflections
Typically, a magic gem is roughly cut, which displays its rarity. It's a cool idea to paint some rough edges with your lighter color to suggest that there are many sharp edges on the surface of your gem. You can make this by just drawing polygons and connecting their vertices.
You can also use this light to add some reflections in the smooth surface of each polygon.
Step 5 - Add some "Inner" glow
It is cool to add some light glow coming from inside the gem. This will help sell the idea that magic is kept inside this gem as if the stone itself is imprisoning the magic light.

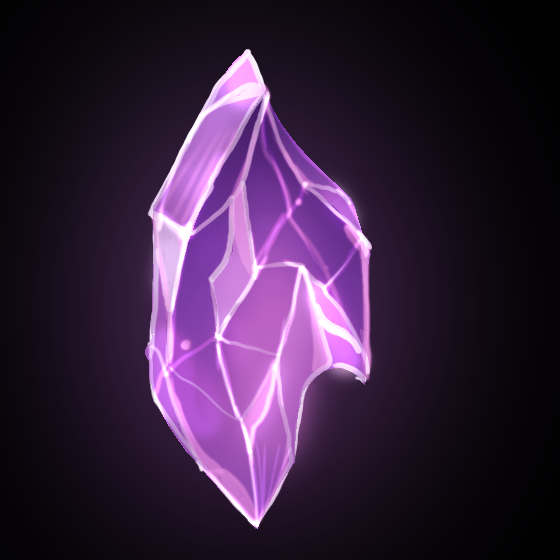
Step 6 - Color Dodge!
Yeeeeah! Color Dodge is your friend! On this final step, grab a mid-tone (like pink) and revisit all your highlights with color dodge. This will gradually bring the underlying color closer to white, making the whole location even brighter and more magical!! Hehehehe! =)
To finish up with an excellent note, you can also copy your gem to another layer, add a Gaussian blur, and set that layer into Overlay mode.
That will give you a BLOOM effect that will finish your piece with a magical look! 😊
Colour dodge is always a game changer for that glowing effect, interesting and well detailed tutorial 👌
Yes it is!! Hehehe Thanks for your kind words @leeendah! =)
So proud of you!