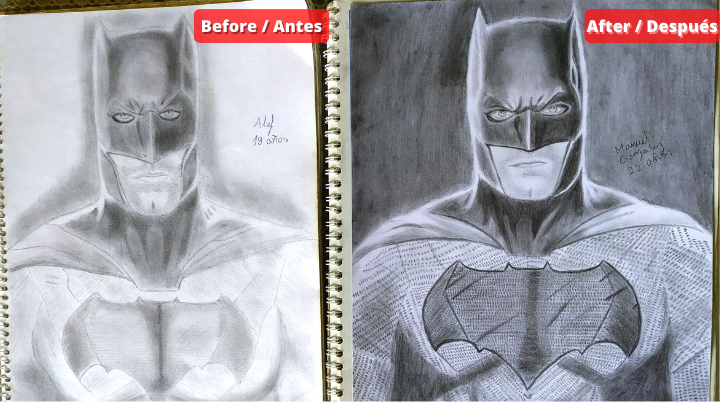
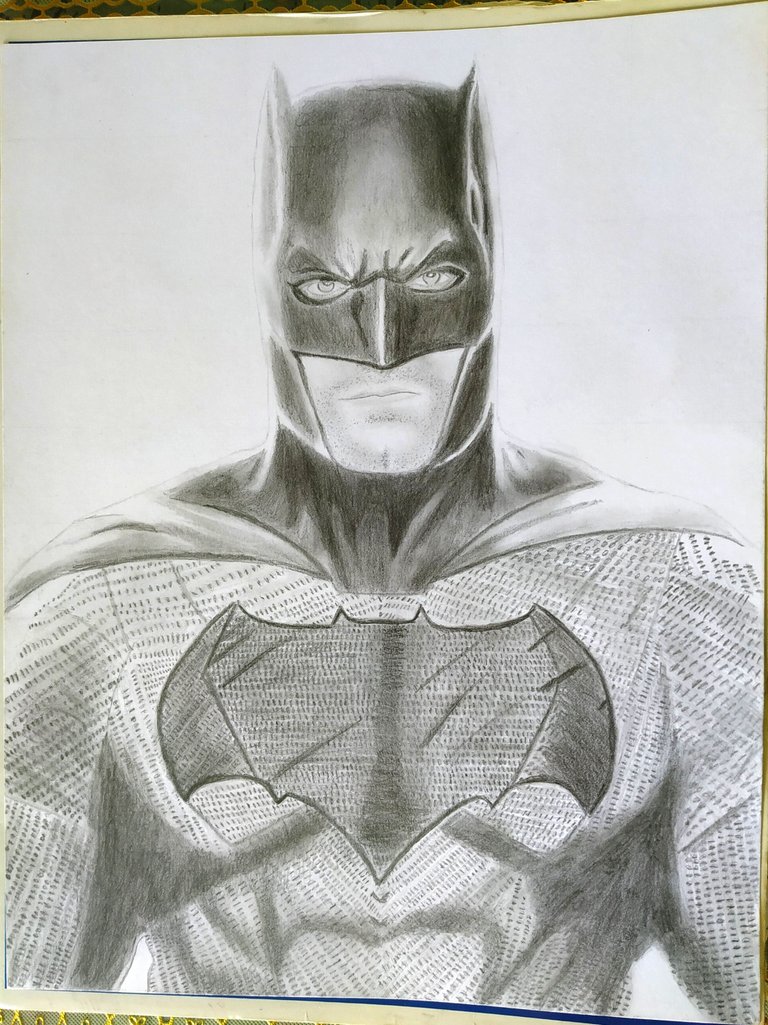
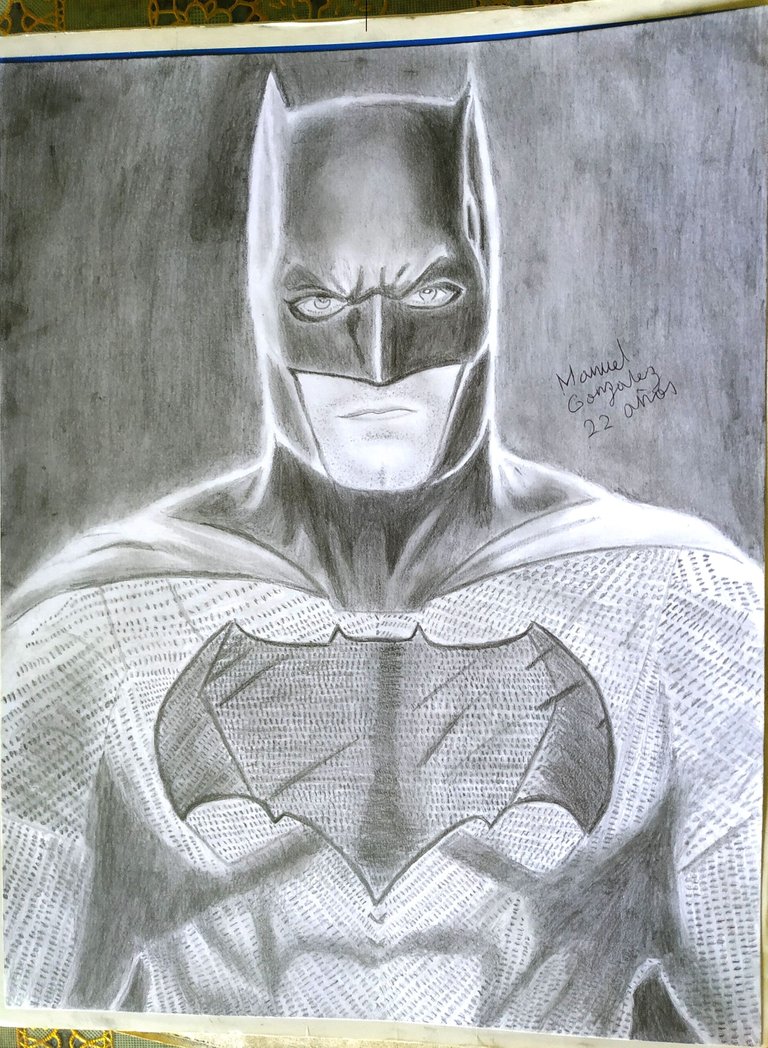
Hello friends of Hive I hope you are well, here I bring you a before and after drawing of Batman. I did the first drawing of Batman when I was 18 years old, and the second drawing I did when I was 22 years old, this is 4 years apart for being someone like me who doesn't draw much is a big step forward. I hope you like this drawing.
Hola amigos de Hive espero estén bien, aqui les traigo un antes y después de un dibujo de Batman el primer dibujo de Batman lo hice cuando tenía 18 años, y el segundo dibujo lo hice con 22 años, esto quiere son 4 años de diferencia para ser alguien como yo que no se dedica mucho a dibujar es un gran progreso. Espero que les guste este dibujo.
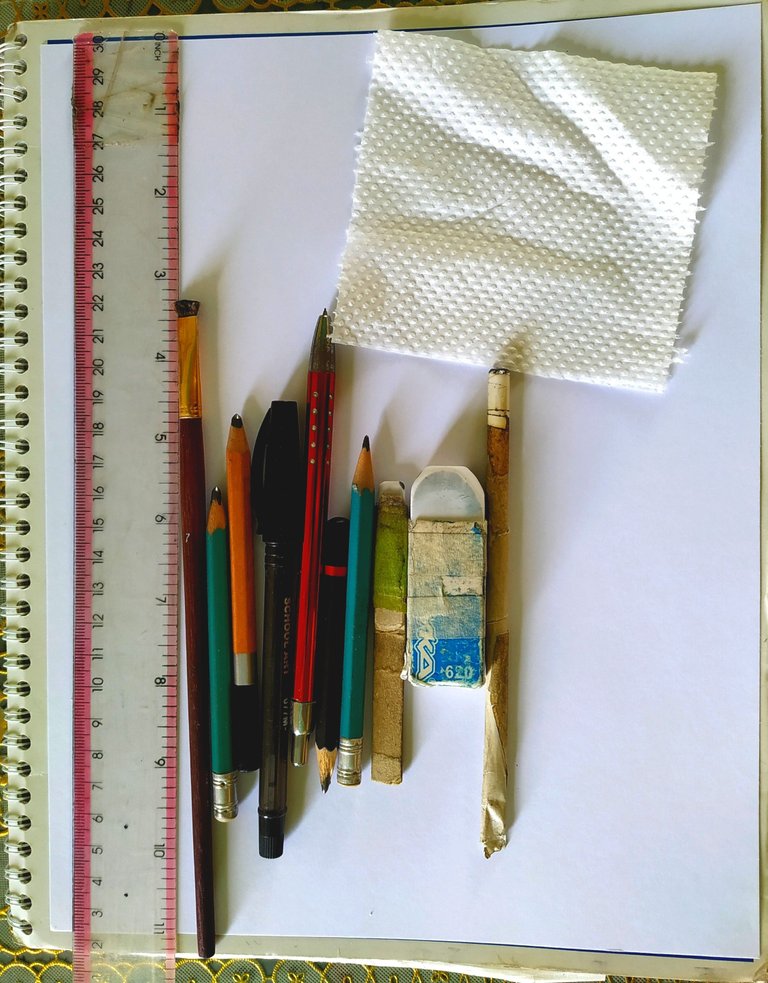
Materials:
• 1 opaline cardboard of 150 grs.
• 1 ruler
• 1 clipped brush
• 1 HB mechanical pencil
• 1 pen
• 1 pencil HB, 2B, 4B, 6B and 8B
• 1 homemade smokey
• 1 small homemade stick eraser
• 1 eraser
• 1 pencil sharpener
• 1 piece of toilet paper
Materiales:
• 1 cartulina opalina de 150 grs.
• 1 regla
• 1 pincel recortado
• 1 portaminas HB
• 1 bolígrafo
• 1 lápiz HB, 2B, 4B, 6B y 8B
• 1 esfumino casero
• 1 borrador pequeño de barrita casero
• 1 borrador
• 1 sacapuntas
• 1 pedazo de papel higiénico
Step 1:
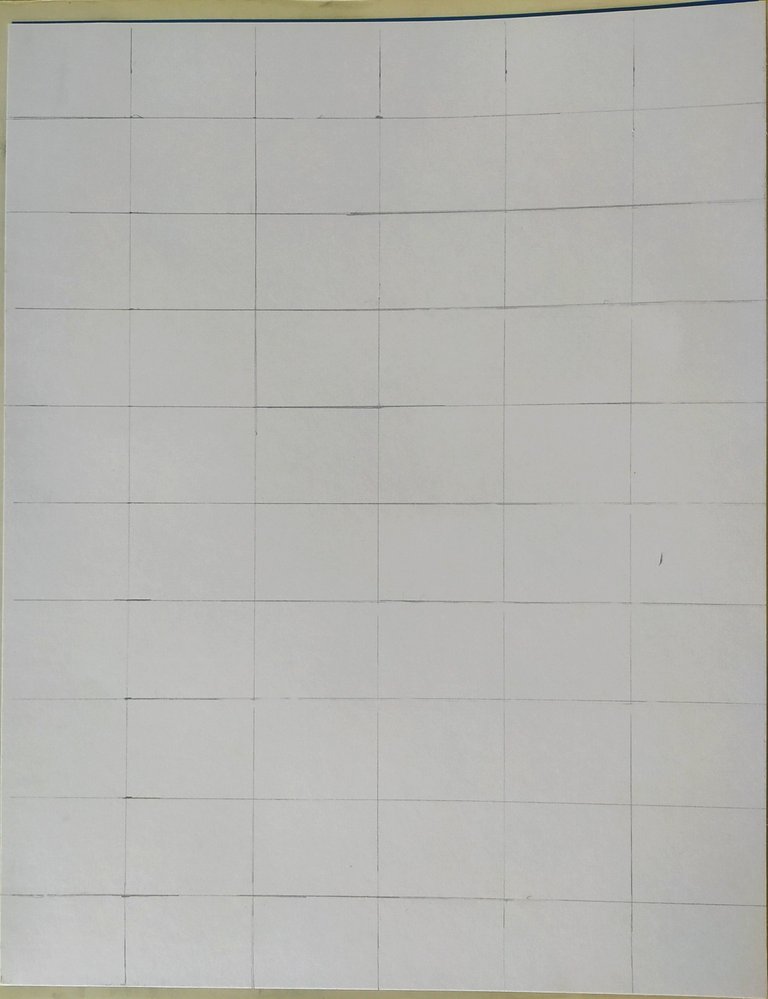
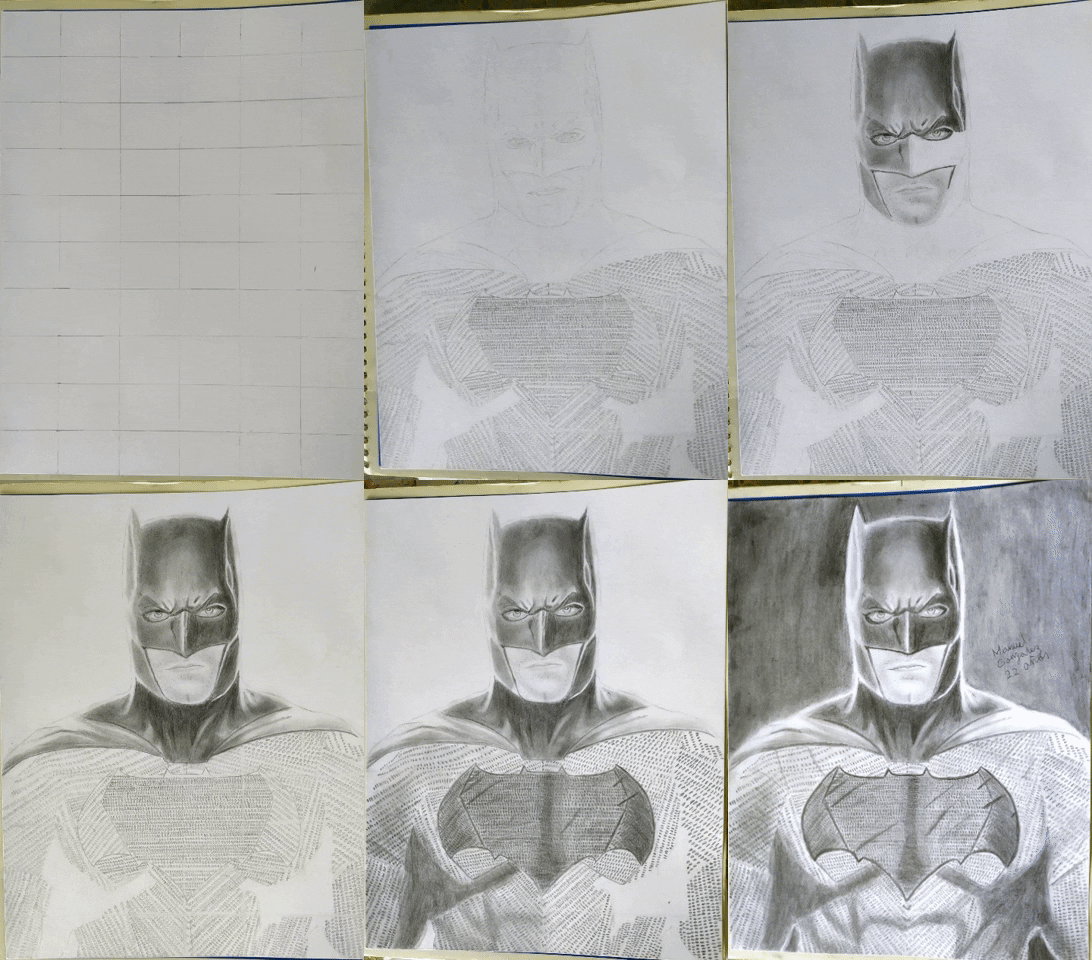
I first made the grid on the opaline card stock with an HB pencil and a ruler.
Paso 1:
Primero hice la cuadrícula en la cartulina opalina con un lápiz HB y una regla.
Step 2:
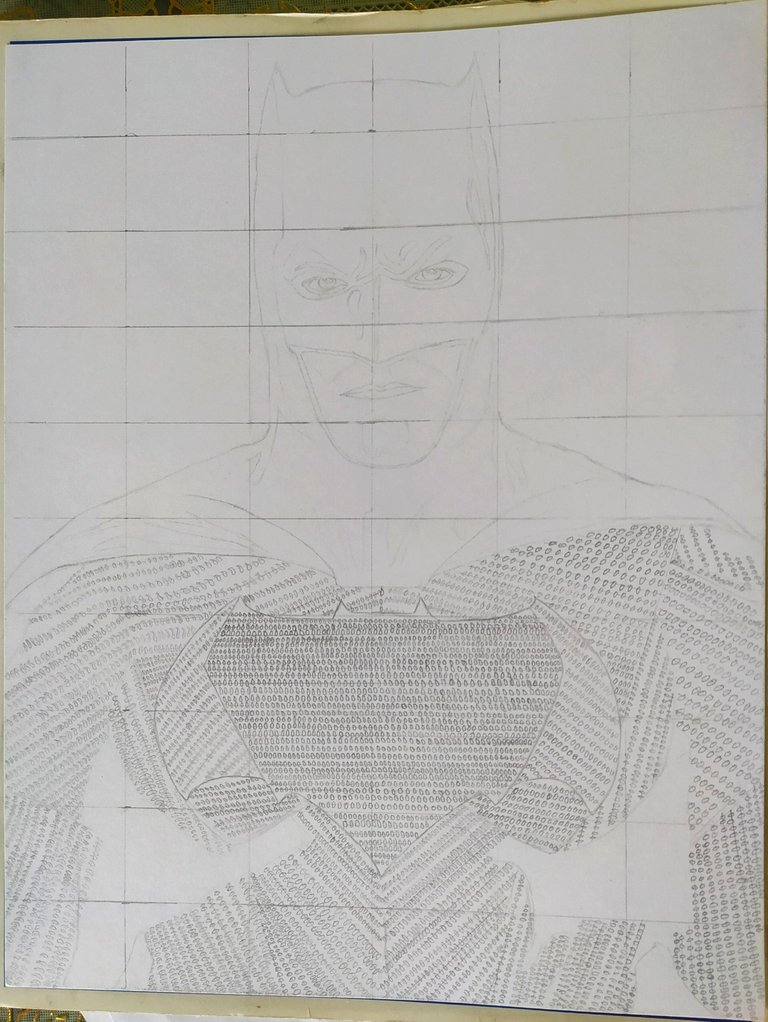
Draw the sketch of batman with the HB mechanical pencil.
Paso 2:
Dibuja el boceto de batman con el portaminas HB.
Step 3:
Erase the grid, without erasing the sketch.
Paso 3:
Borre la cuadrícula, sin borrar el boceto.
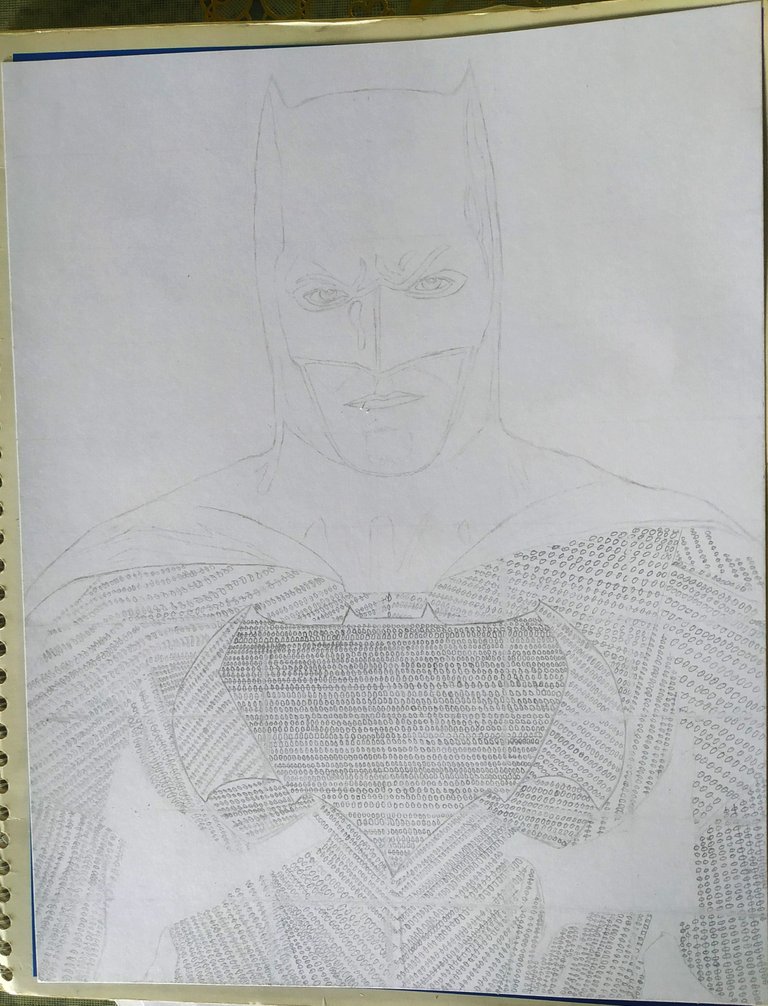
Step 4:
Shade the mask with the 2B, 6B and 8B pencils, use the 2B pencil in the lightest part, the 6B in the semi-dark part and the 8b in the darkest part and blend it with a piece of toilet paper and on the eyes use the 2B pencil to shade the eyes and blend it with the homemade blender.
Paso 4:
Sombree la máscara con los lápices 2B, 6B y 8B, use el lápiz 2B en la parte más clara, el 6B en la parte semioscura y el 8b en la parte más oscura y lo difumine con un pedazo de papel higiénico y en los ojos utilice el lápiz 2B para sombrear los ojos y lo difumine con el esfumino casero.
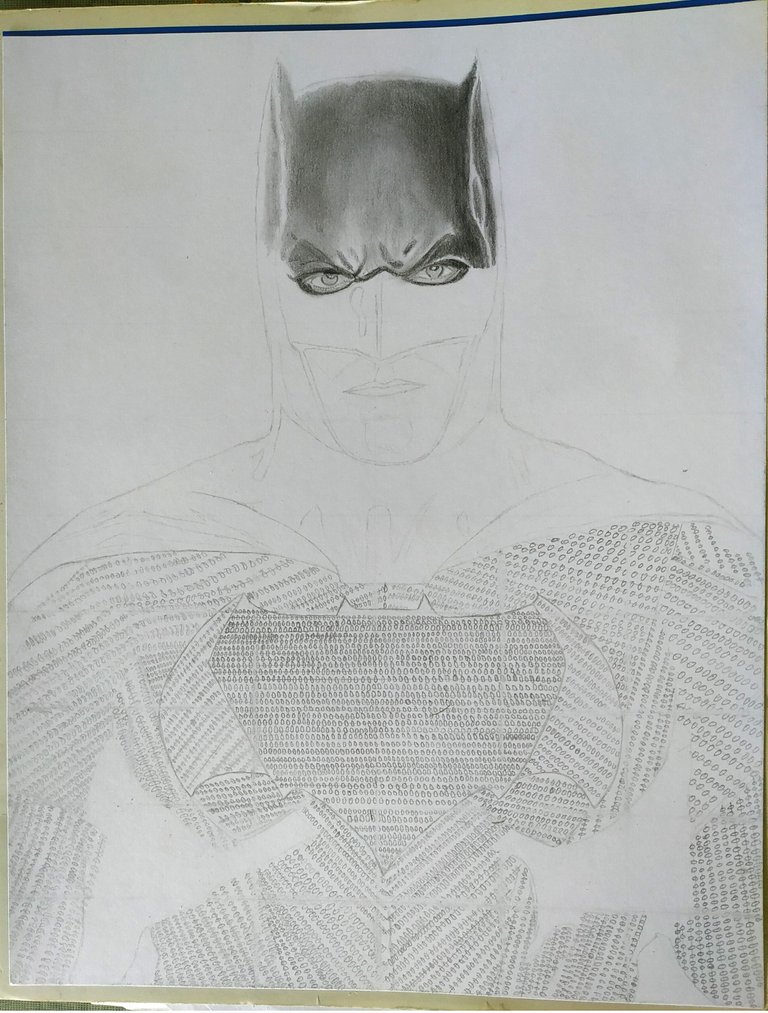
Step 5:
I continued to shade the mask with the 6B pencil and blend it with the toilet paper, use the 8B for the edge of the mask, use the 2B pencil to shade the face and lips and also blend it with the toilet paper, and the mechanical pencil. HB use it to make the points of the beard.
Paso 5:
Seguí sombreando la máscara con el lápiz 6B y lo difumine con el papel higiénico, utilice el 8B para el borde de la máscara, use el lápiz 2B para sombrear el rostro y los labios y también lo difumine con el papel higiénico, y el portaminas lo HB lo utilice para hacer los puntos de la barba.
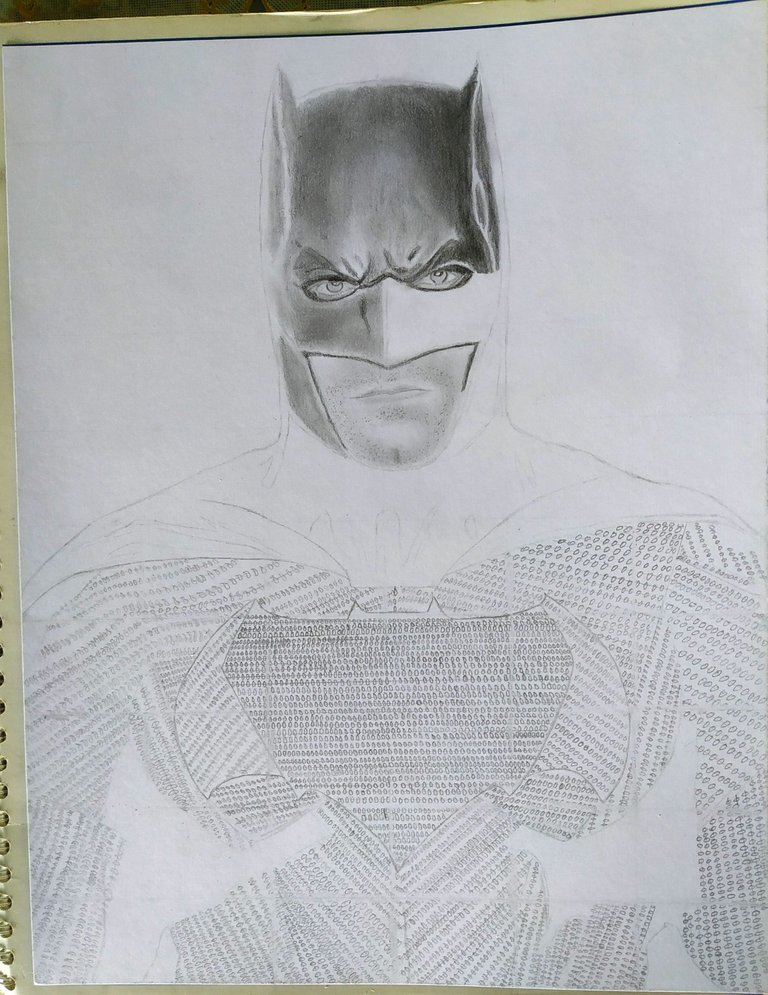
Step 6:
I shaded the mask with the 8B pencil and I decided to give another layer with this same pencil and spread the graphite with a cut brush.
Paso 6:
Sombree la máscara con el lápiz 8B y decidí dar otra capa con este mismo lápiz y esparcir el grafito con pincel recortado.
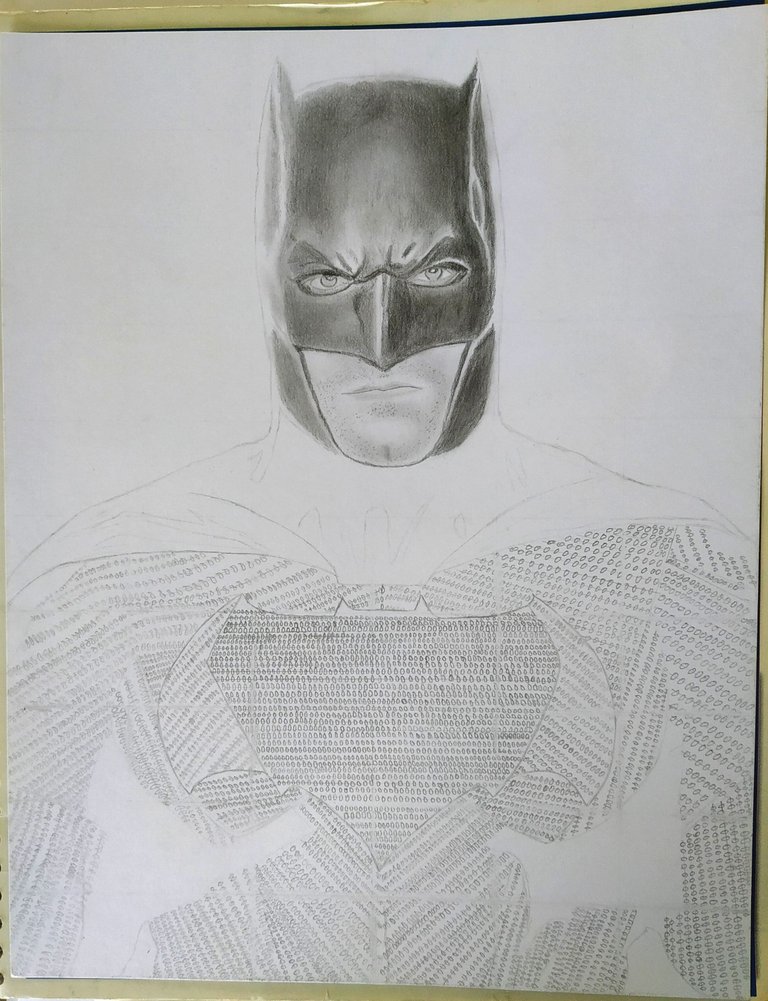
Step 7:
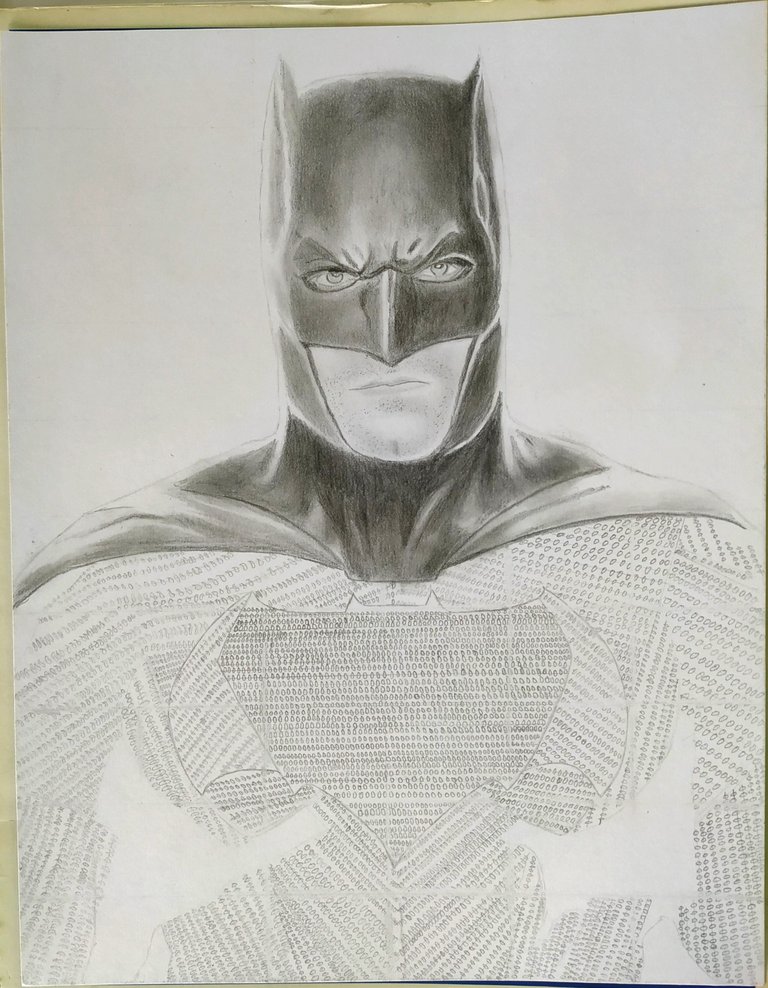
Shade the layer with the 2B, 6B and 8B pencils and use the trimmed brush to better spread the graphite.
Paso 7:
Sombree la capa con los lápices 2B, 6B y 8B y use el pincel recortado para esparcir mejor el grafito.
Step 8:
Shade the points of the suit with a 4B pencil, in the dark part of the armpit use the 6B pencil gently and spread the graphite with the cut brush, the rest of the suit use the 2B pencil and blend it with the toilet paper, in the symbol of the bat use the 4B pencil for the dots inside the bat symbol, the 6B pencil to shade the bat and spread the graphite with the clipped brush and the 8B pencil to mark the edges of the bat symbol.
Paso 8:
Sombree los puntos del traje con lápiz 4B, en la parte oscura de la axila use el lápiz 6B suavemente y esparcí el grafito con el pincel recortado, el resto del traje utilice el lápiz 2B y lo difumine con el papel higiénico, en el símbolo del murciélago utilice el lápiz 4B para los puntos dentro del símbolo de murciélago, el lápiz 6B para sombrear el murciélago y esparcir el grafito con el pincel recortado y el lápiz 8B para marcar los bordes del símbolo de murciélago.
Step 9:
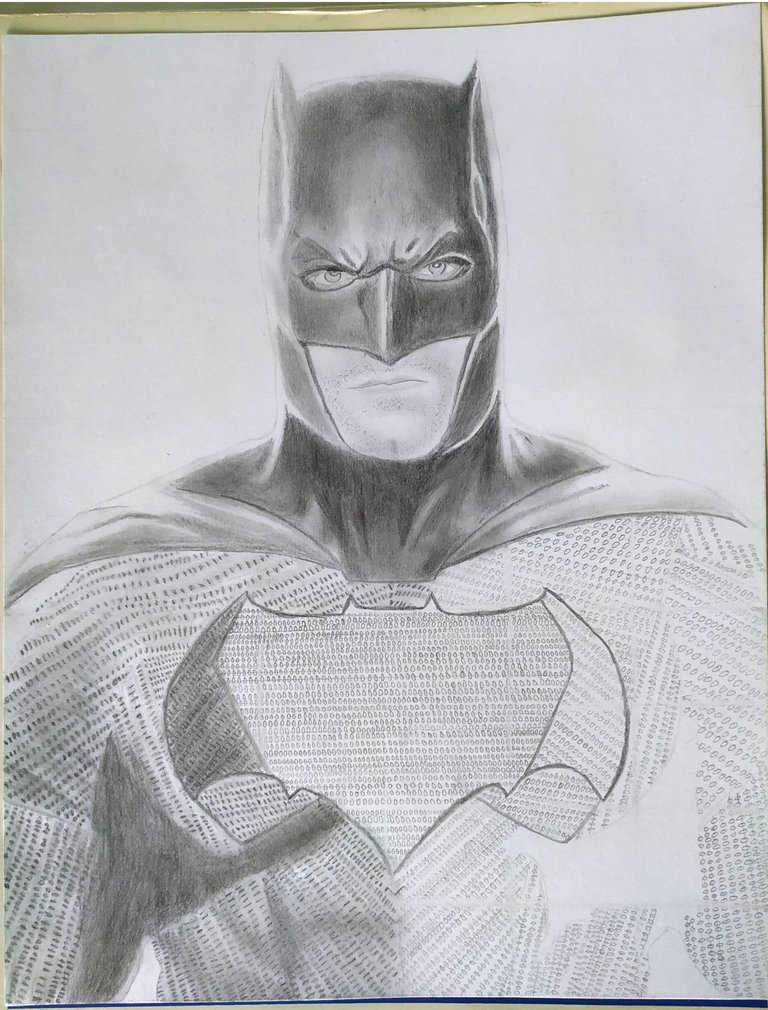
Use pencil 4B and 8B to finish shading the bat symbol and use pencil 8B specifically for the wrinkles that are in the bat symbol and in the part on the right that is darker.
Paso 9:
Utilice el lápiz 4B y 8B para terminar de sombrear el símbolo de murciélago y el lápiz 8B lo use específicamente para las arrugas que están en el símbolo del murciélago y en la parte de la derecha que quedo mas oscura.
Step 10:
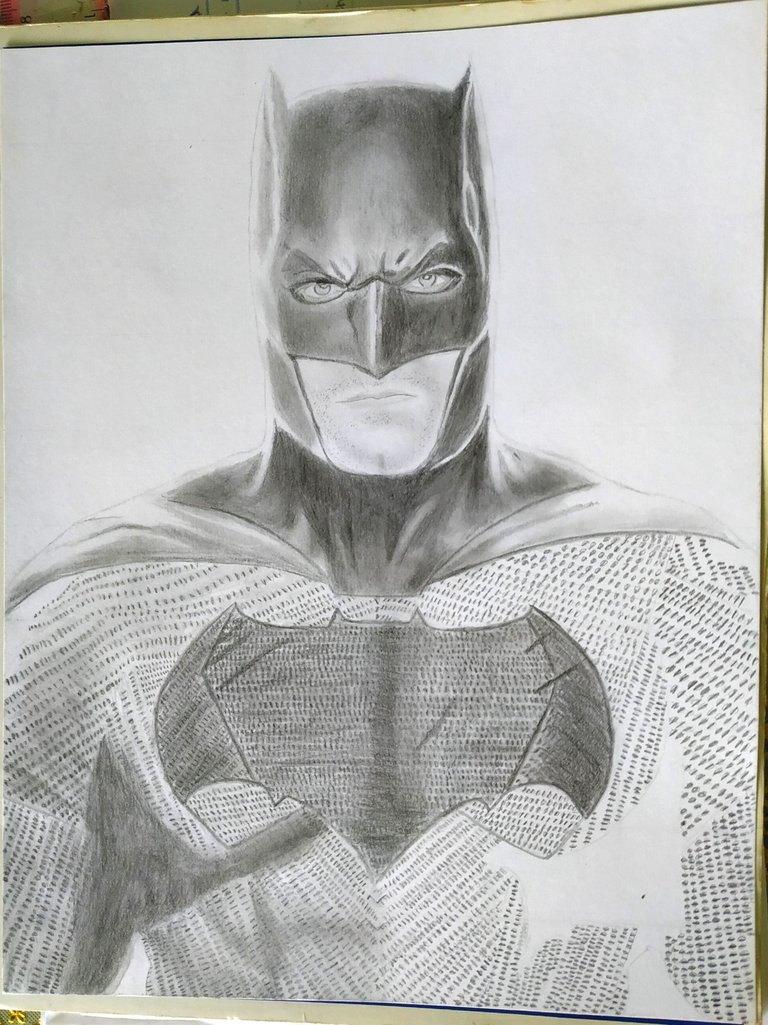
Here I repeat the same steps from step 8, but I also made a small correction to the chin and nose since the face was not well centered.
Paso 10:
Aquí repito los mismos pasos del paso 8, pero además hice una pequeña corrección en la barbilla y en la nariz ya que no estaba bien centrado el rostro.
Step 11:
Lastly, shade the background with the 6B and 8B pencil and use the piece of toilet paper to blend the background. And finally I signed with the pen.
Paso 11:
Por último sombree el fondo con el lápiz 6B y 8B y utilice el pedazo de papel higiénico para difuminar el fondo. Y por último hice la firma con el bolígrafo.
As you can see in the following GIF images, the drawing process is shown:
Como se puede ver en las siguientes imágenes GIF se muestra el proceso del dibujo:
Translated from google translator Link
The gif was made from the giphy page Link
Photo editing program: PhotoFiltre 7 and Canva Link
Las fotos fueron tomadas desde un Xiaomi Mi A2.
Traducido del traductor de Google Enlace
El gif se hizo desde la página de giphy Enlace
Programa para editar fotos: PhotoFiltre 7 y Canva Enlace
I say goodbye until another opportunity.
Thanks for your support.
Me despido hasta otra oportunidad.
Gracias por su apoyo.
Copyright @manuelgoa2000. All rights reserved.
Fantastic work ❤️ . Very improved than before , its true that practice makes better .
That's right, practice makes perfect.
Congratulations @manuelgoa2000! You have completed the following achievement on the Hive blockchain And have been rewarded with New badge(s)
Your next target is to reach 3750 upvotes.
You can view your badges on your board and compare yourself to others in the Ranking
If you no longer want to receive notifications, reply to this comment with the word
STOPCheck out our last posts:
Support the HiveBuzz project. Vote for our proposal!