Hello Hivers, how are you today? may you always be healthy and happy. The inspiration for the digital images that I made came from the Strawberry Flavor sponge cake dessert. The following is the step by step drawing process.Let's check this out!
Title: Slice of Strawberry Sponge Cake
Artist: @mochanoz
Technique: 2D Digital Art
Application : ibis Paint X
Media: Digital
Tool: Brush
Steps to Make a Digital Image Dessert Illustration Slice of Sponge Cake
DETAILS
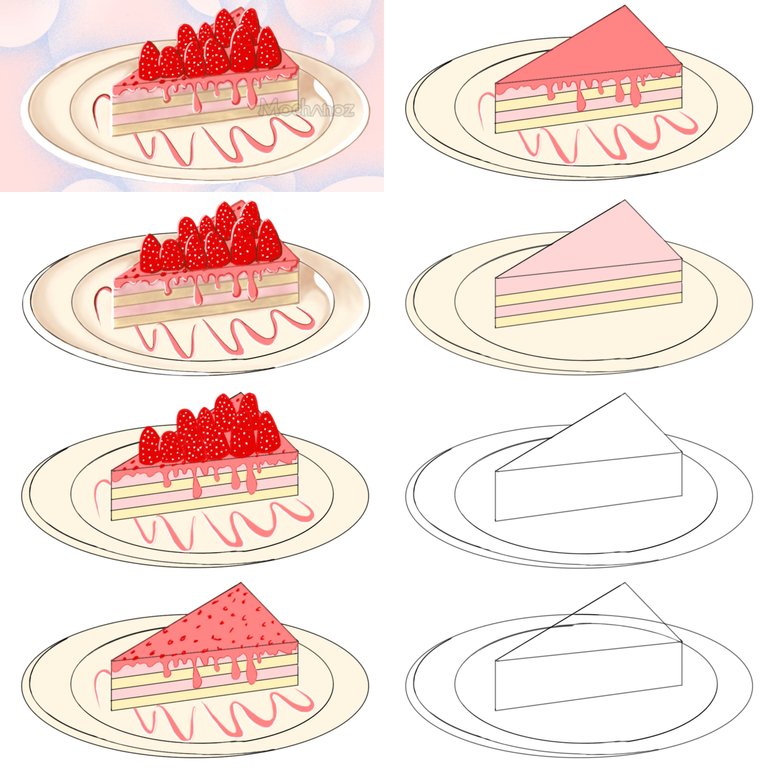
Step by Step Process
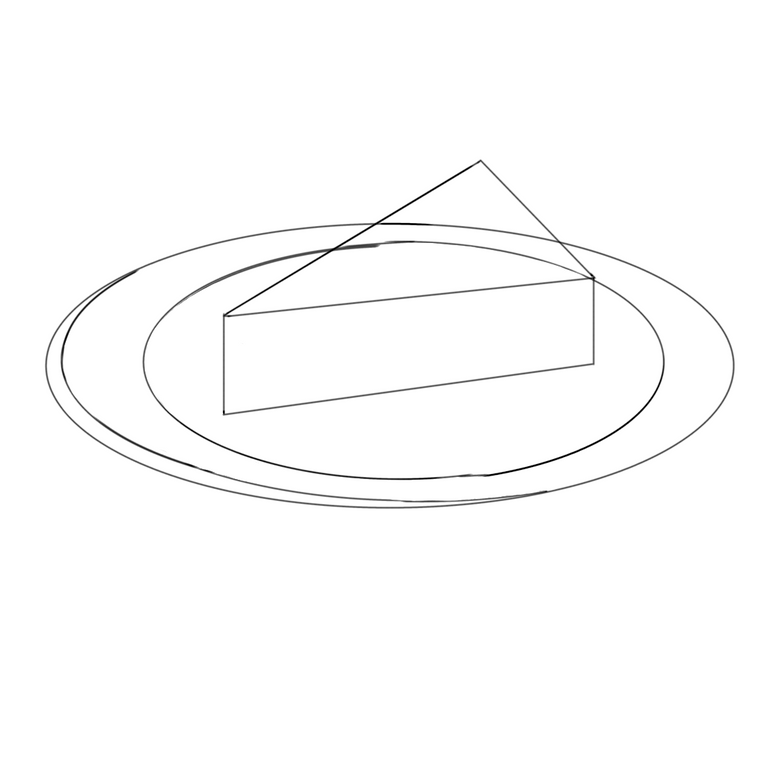
LAYER 1
First I open the ibis Paint X application, there is a menu select My Gallery, there is a new canvas display, the canvas setting is 1080 x 1080 select OK
Then there will be a blank canvas display that I will draw a picture of
We will make a sketch first to make it easier when making images. Choose a Brush, Custom, choose a pencil
Then select the gray color in the colored box on the bottom toolbar
After choosing a dark gray color for the pencil, then we use a ruler to make the cake first to make it look straight
Next we will draw a cake plate using a circle ruler to make it look neater
The sketch is ready
LAYER 2

Now we will create layer 2 in the bottom toolbar to create an outline
The outline that we will draw using a brush, choose a black custom dip pen (hard) so that it is different from the sketch color
Choose a ruler to outline the cake slices
Use a circle ruler to outline the plate
Use the eraser to erase unnecessary lines
LAYER 3
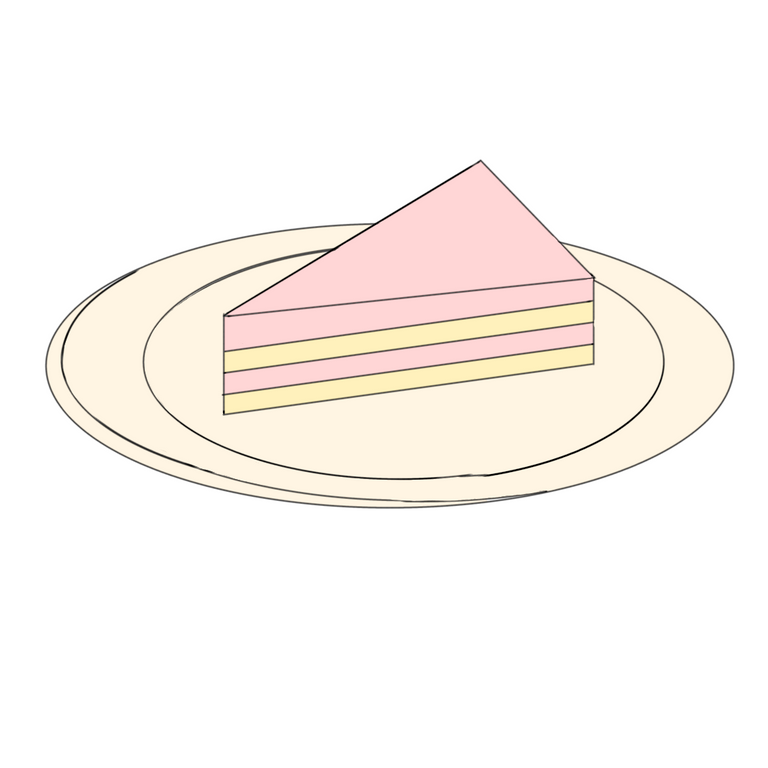
Next we create layer 3 in the lower toolbar to color the image
Choose pastel pink for cake slices, light yellow for cake layers and plates using light brown color on the bottom toolbar
Use the bucket on the toolbar beside and color the image
LAYER 4
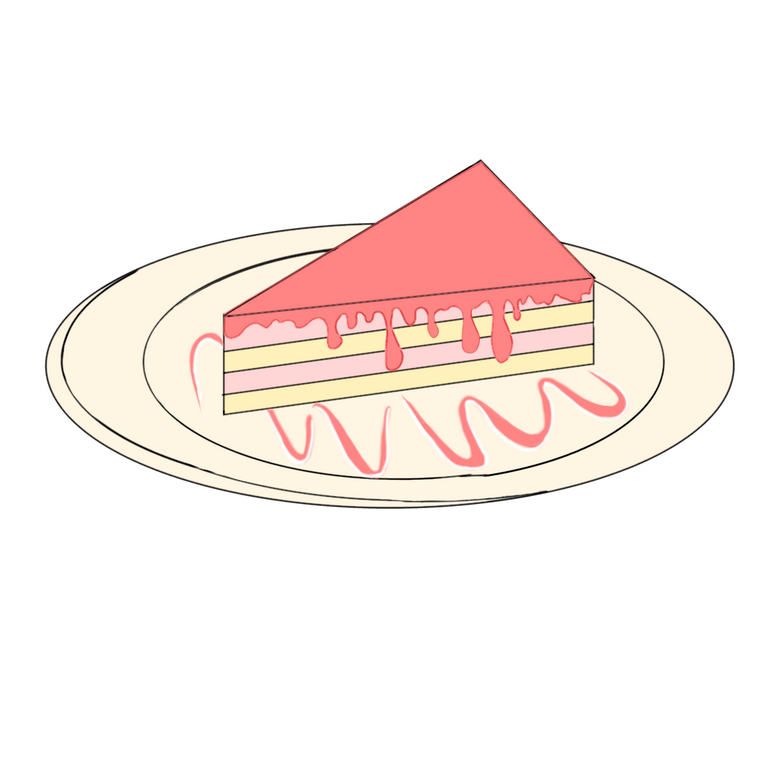
Next we create layer 4 in the lower toolbar to create a melted strawberry cream image
Choose a pastel red color to melt the strawberry cream and garnish on the plate using a brush
Use the bucket on the toolbar beside and color the image
LAYER 5
Next we create layer 5 in the lower toolbar to make a red jelly topping image
Choose a pastel red color for the red jelly using a brush
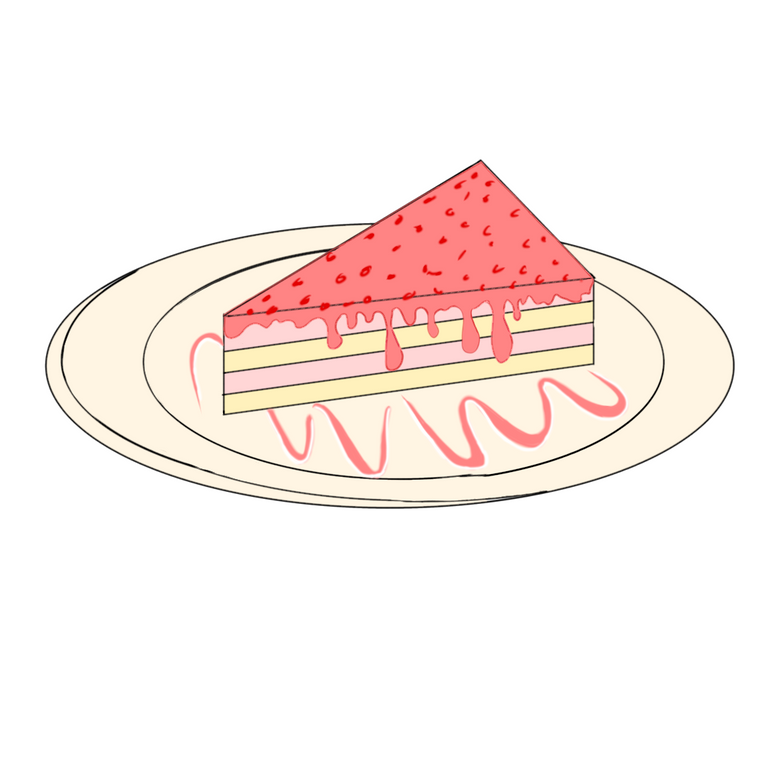
LAYER 6
Next we create layer 6 in the lower toolbar to create a strawberry image
Choose a red color to draw a strawberry using a brush
Use the bucket on the toolbar beside and color the image
Put a white dot on the strawberry as a strawberry seed
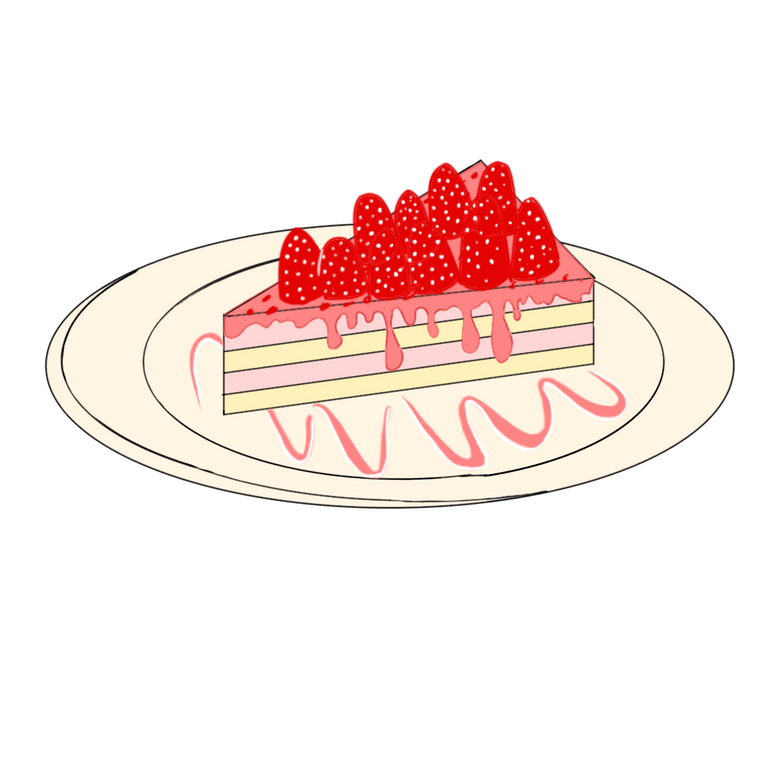
LAYER 7
After giving color to the image, give a dark and light effect according to the direction of the light on the cake pieces and plates
Use a brush to detail the light and dark border, then add color using the bucket on the toolbar on the side and color the image
To make it look like there is volume, I give the effect of shading and highlighting on the image of the cake slice
Use the brush on the toolbar beside, then select a custom airbrush, adjust its size and opacity
The colors used match the color of the cake pieces using an eyedropper
Then color the border between the colors so that they are evenly mixed and soft, do the same thing on the plate
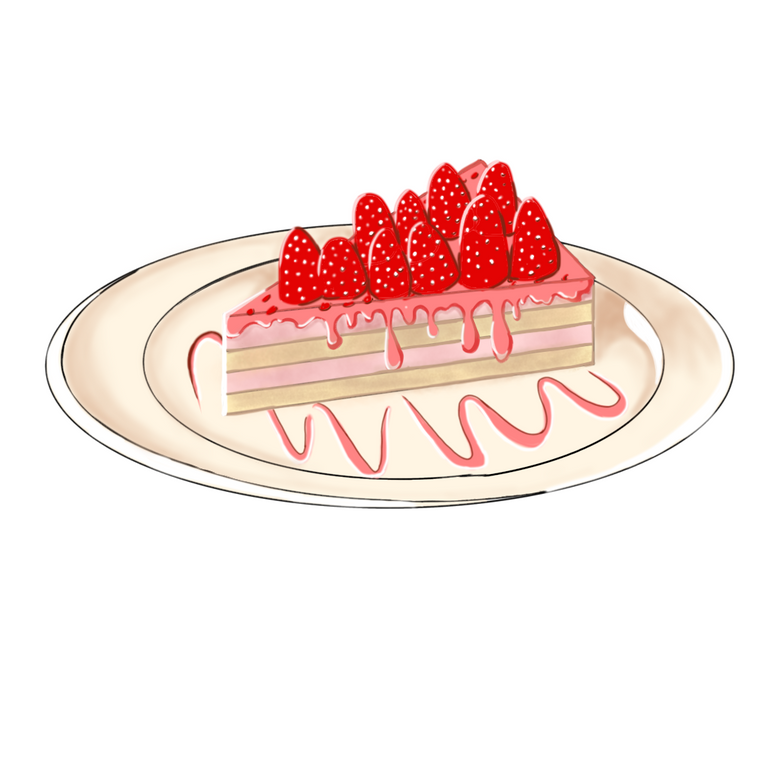
LAYER 8
Finally, we give a pastel pink background
Give a bubble effect to the image using the stipple circle 01 transparent effect
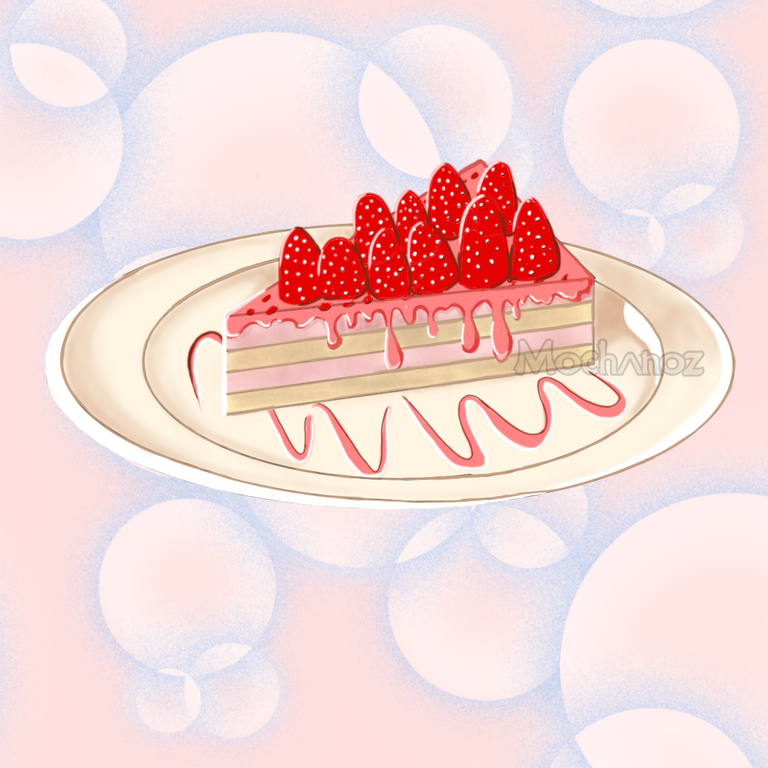
RESULTS OF DESIGN IMAGES
Here's a picture of the whole strawberry flavored cake
- Select save as PNG to save the created cake slice image.
I'm using Galaxy Tab A with S Pen
Thank you for visiting this post. Greetings For Me @mochanoz
Visit My Gallery:
Yum
Thanks for stopping by ...
Your post made me hungry hahaha. very nice and cheerful design :D
!discovery 20
Thank you ... slice cake make me happy ... dessert i'm lovin it ...
This post was shared and voted inside the discord by the curators team of discovery-it
Join our community! hive-193212
Discovery-it is also a Witness, vote for us here
Delegate to us for passive income. Check our 80% fee-back Program
Your content has been voted as a part of Encouragement program. Keep up the good work!
Use Ecency daily to boost your growth on platform!
Support Ecency
Vote for new Proposal
Delegate HP and earn more
Congratulations @mochanoz! You have completed the following achievement on the Hive blockchain and have been rewarded with new badge(s):
Your next target is to reach 80 posts.
Your next target is to reach 2500 upvotes.
You can view your badges on your board and compare yourself to others in the Ranking
If you no longer want to receive notifications, reply to this comment with the word
STOPTo support your work, I also upvoted your post!
Support the HiveBuzz project. Vote for our proposal!
The rewards earned on this comment will go directly to the person sharing the post on Twitter as long as they are registered with @poshtoken. Sign up at https://hiveposh.com.
Thank you for sharing this amazing post on HIVE!
non-profit curation initiative!Your content got selected by our fellow curator @stevenson7 & you just received a little thank you via an upvote from our
You will be featured in one of our recurring curation compilations and on our pinterest boards! Both are aiming to offer you a stage to widen your audience within and outside of the DIY scene of hive.
Join the official DIYHub community on HIVE and show us more of your amazing work and feel free to connect with us and other DIYers via our discord server: https://discord.gg/mY5uCfQ !
If you want to support our goal to motivate other DIY/art/music/homesteading/... creators just delegate to us and earn 100% of your curation rewards!
Stay creative & hive on!
Thank you ...