I’ve learned a lot since starting my journey in 3D Art. Made a lot of progress and wasted lots of time trying to make my workflow easier from each mistake I make. Along the way I learned that other 3D art softwares like Blender has better technology for creating easy human anatomy just like Daz3D. There is Blender Market with a catalog of 3D resources like anatomy and more for download and used in improving your workflow but they don’t come for free.
MetaMixer
Here is just an example of what MetaMixer can do to speed up the process of creating human anatomy to your liking. This only shows morphing and sculpting on the human head but it can also morph the body and makes ready made poses for export to Blender.
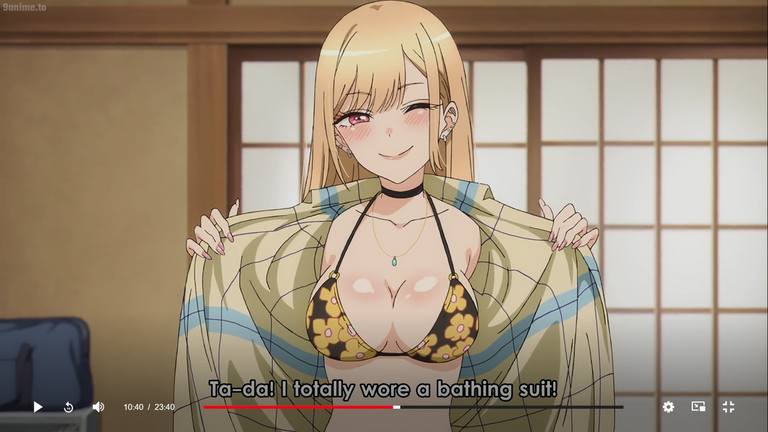
On Twitch, I’ve been livestreaming my progress on this project and somehow I thought of sculpting a character that was familiar to me. Something that is already familiar to me is that I don’t need to create concept art and it’s an anime character named “Marin Kitagawa” from “My Dress Up Darling”.
Marin Kitagawa from My Dress Up Darling

I’m trying to recreate the look in the scene where she was in her bikini trying to get a measurement of her body from her friend who is a boy that never had a friend nor seen a girl half-naked before.
Bikini Modeling
In this livestream, modeling her upper bikini using the technique the same way as retopology is what I’ve learned from another 3d artist on his Youtube tutorials. This method takes kinda long to make since this is manual but knowing more techniques this would have been faster using Mask and Extract from a high poly mesh.
Bikini Modeling part 2 with Coloring
I’ve added more details to the bikini, I did the bottom then added the strings and the details that go along with it. For an easy way for me to identify a mesh which part they belong to, I change their color in the Viewport Display in the Object Properties tab. Finally was able to add hair mesh just to give a visual of how the hair should be like as a rough draft.
Anatomy Rework and Polishing the Mesh
I made a huge skip in this progress. There are times that I don’t feel like going live just to relax and do some work or at times when there is no internet access because the service provider goes on maintenance that could take a whole day.
This specific session I’ve learned not to use a low poly mesh for posing the character for sculpting. It destroys the mesh that I have to fix, which was the whole thing that I did in a day. While fixing the mesh, I was also trying to find a lot of reference pictures online on female anatomy to make my sculpt not just anatomically correct but believable but I don’t want to add a lot of detail since I want the result to be stylized like an anime.
I’ve started using Face Sets to work specifically on highlighted parts they’re just like masks but way better. I’ve also had problems with sculpting the feet. It's just hard to repose each toe and sculpt them so cutting them off using a mask and sculpting them in a singular mesh was the best option.
Another part that’s hard to fix was the hands. After fixing the anatomy on the hands, duplicating the hands and flipping the object and using the pose tool in sculpt mode was a better option than sculpting manually.
Anime Hair Detailing
This part to me was the most exciting since this is very new to me. Creating “Anime Hair” is a stylized way to make 3d hair and I didn’t know how to make one. I researched tutorials and learned there was only 1 way to make it. I tried to sculpt hair using a sphere mesh but it took so long and it looked very deformed which isn’t really ideal. The final form ended up using Bezier Curves as it is way easier to manipulate the length and width of each batch of hair. Adding a lot more detail to this will add more time. That's the reason why after this project, I will only use Curves for creating Anime hair. Also the last part I fixed was the ears since a viewer was commenting on it that it looks weird.
That was all for this long week of 3D Art Training. In the next session, I’m hoping to finish the project soon enough. I’ll be adding details and learning how to paint the texture on the sculpture but I already have in mind what to go for but that’ll be in the next blog post.
Buen trabajo amigo, soy aficionado al 3d, aunque solo he usado Blender y he aprendido con el a mi ritmo.