.jpeg)

Español
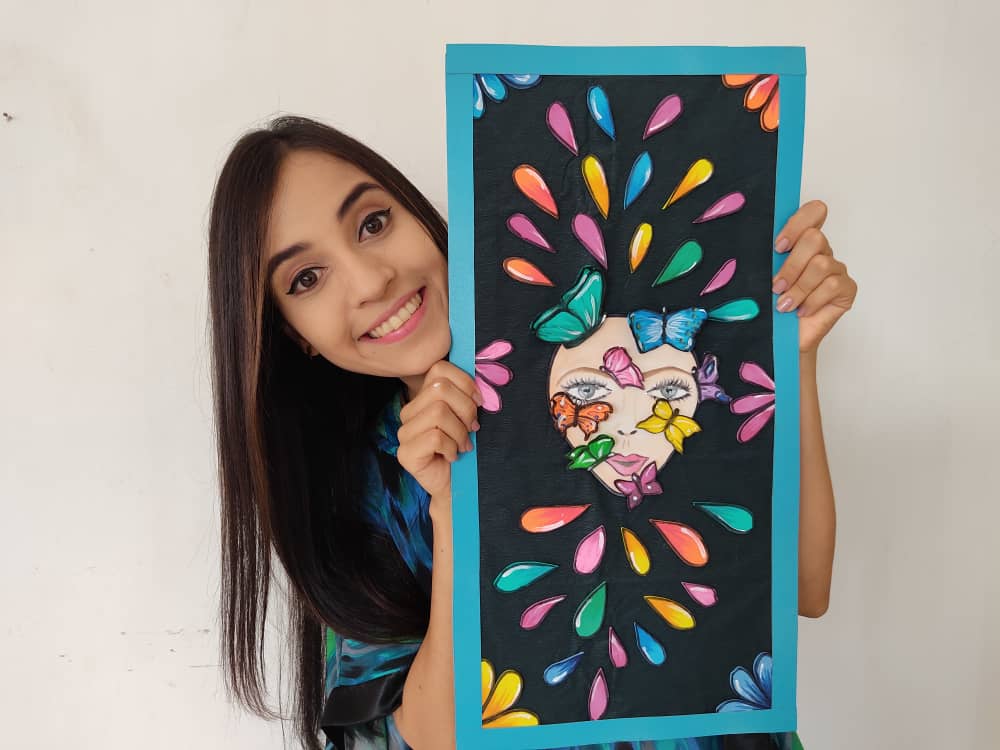
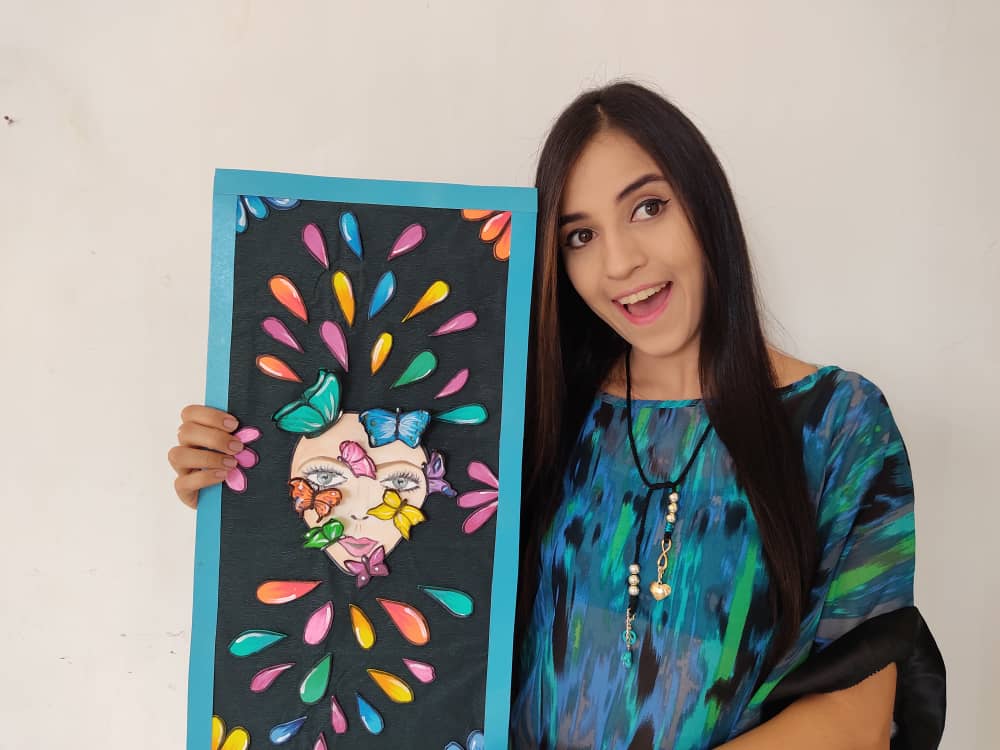
Hola querida familia de HIVE 👋 En esta oportunidad tengo el placer de presentarles un nuevo y divertido paso a paso donde les mostrare como hacer una obra llena fantasía, se trata de una hermosa dama con mariposas muy lindas en su rostro, pues debo recordarles que si van a intentarlo no duden en agregarle los detalles que ustedes quieran a esta obra, ya que mi deseo es que cada persona, en especial, los más pequeños de la casa, descubra quien es, quien quiere ser, cuáles son sus gustos y todo estos aspectos que construyen nuestra personalidad. Y la mejor forma de descubrir que es lo que en realidad nos gusta es practicando cada día las actividades que amamos. Está demás decirles que amo mi trabajo, y créanme no siempre todo debe salir perfecto pero, no olviden que clave está en hacer las cosas con amor para obtener los mejores resultados. Además es una idea perfecta para pasar un rato agradable con nuestros pequeños en casa e incentivarlos, ya que, pueden ir, de a poco, desarrollando su ingenio y acercándose un poco más al trabajo artístico.
English
Hello, dear HIVE family 🖖 This time I have the pleasure of presenting you a new and fun step by step where I will show you how to make work full of fantasy, it is a beautiful lady with very cute butterflies on her face, because I must remind you that if you are going to try it, do not hesitate to add the details that you want to this work since my desire is that each person, especially the smallest of the house, discover who he is, who he wants to be, what his tastes are and all these aspects that build our personality. And the best way to discover what we really like is to practice the activities we love every day. It goes without saying that I love my work, and believe me, not everything should always be perfect, but don't forget that the key is to do things with love to obtain the best results. It is also a perfect idea to spend a pleasant time with our little ones at home and encourage them, since, they can go, little by little, developing their ingenuity and getting a little closer to artistic work.
¿Qué están esperando?
Utilizar estos hermosos materiales para transformarlos en un hermoso cuadro es una idea muy original y económica para decorar nuestro entorno. Antes de comenzar no olvidemos lavarnos nuestras manos.
What are they waiting for?
Using these beautiful materials to transform them into a beautiful painting is a very original and economical idea to decorate our environment. Before we start, let's not forget to wash our hands.
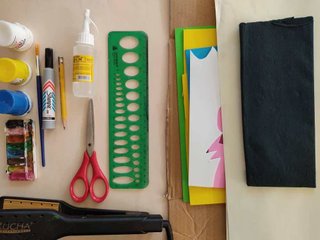
[Materiales | Materials]
Para hacer esta hermosa dama necesitaremos:
- Moldes.
- Foami o goma eva.
- Papel vegetal o calco.
- Cartón.
- Lápiz.
- Tijera.
- Pincel o brocha.
- Pinturas.
- Cinta.
- Papel crepe negro.
- Plancha para cabellos.
- Pegamento o silicón liquido.
To make this beautiful lady we will need:
- Molds.
- Foamy or EVA foam.
- Vegetable paper or tracing.
- Cardboard.
- Pencil.
- Scissors.
- Brush or brush.
- Paintings.
- Tape.
- Black crepe paper.
- Hair straightener.
- Glue or liquid silicone.
Procedimiento (paso a paso)
Process (step by step)
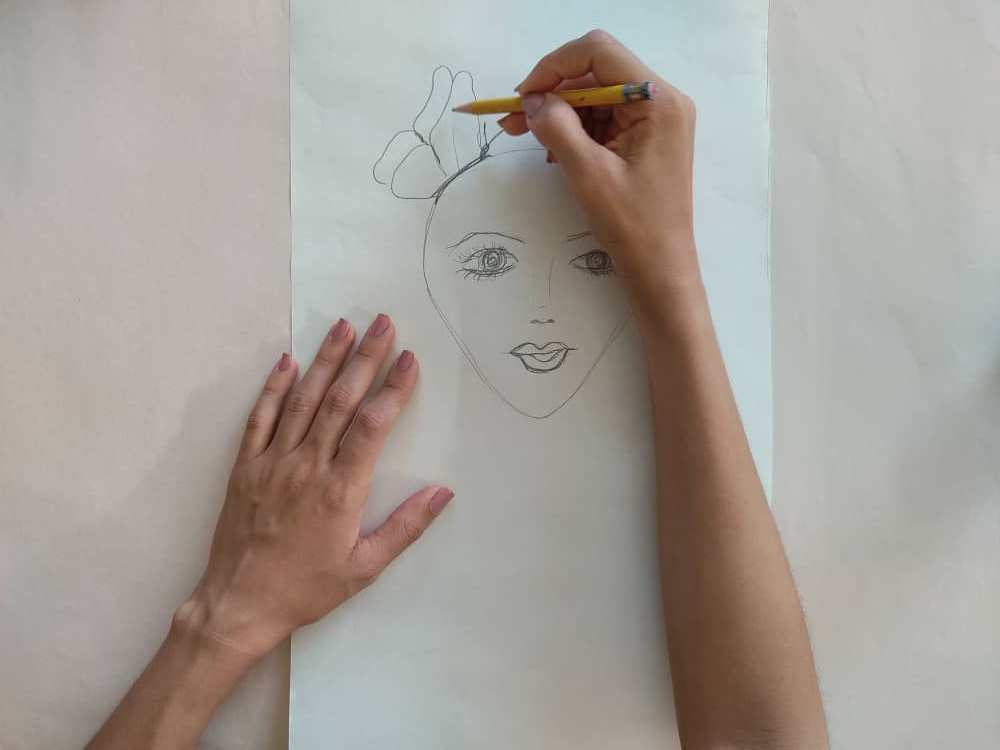
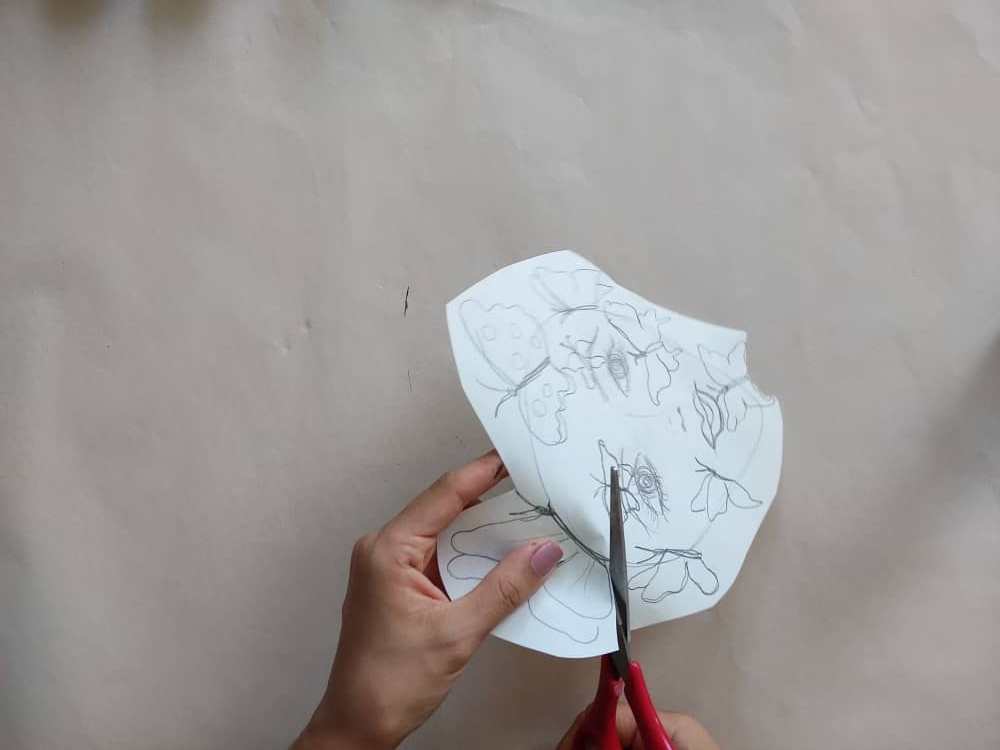
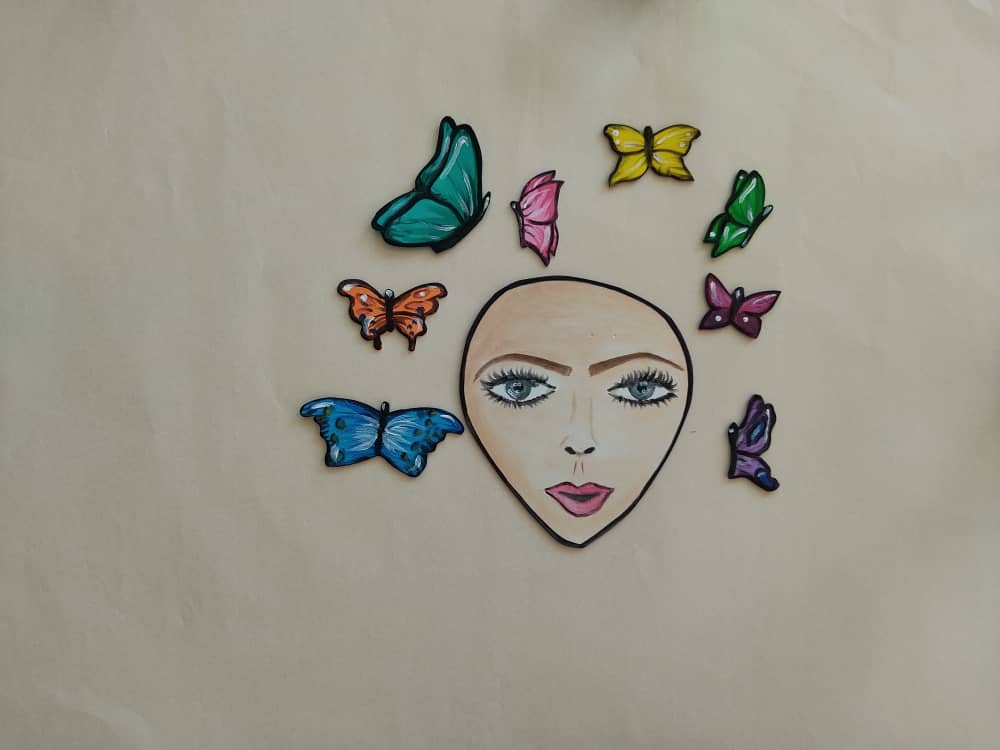
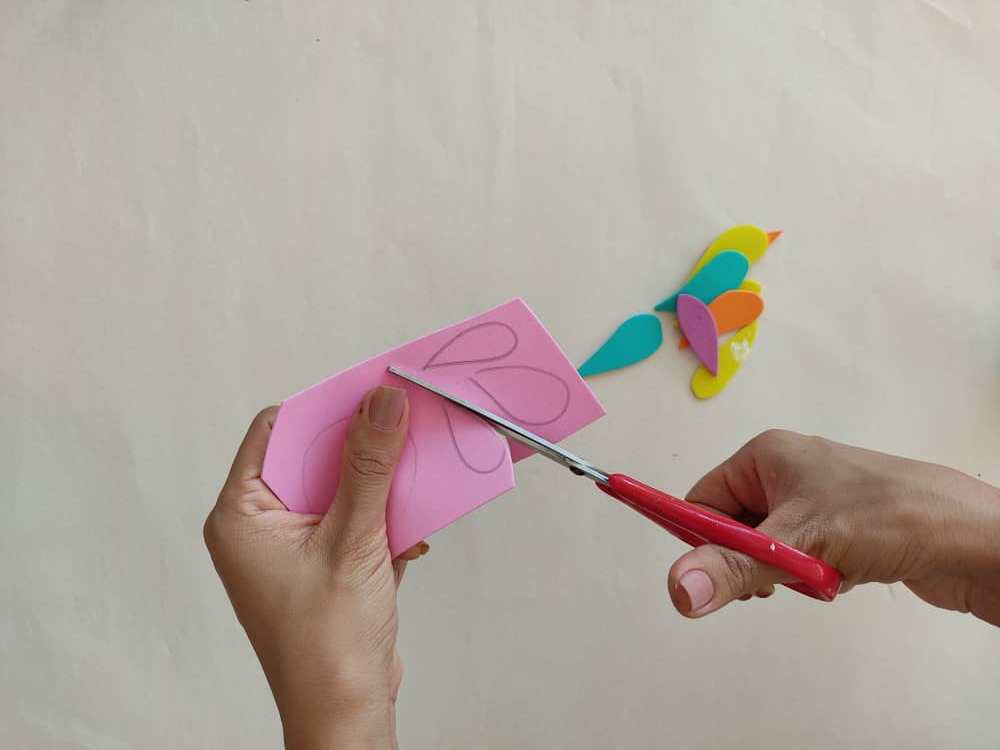
Primero, dibujamos la cara de una chica muy linda por supuesto, y sobre está lindas mariposas de diferentes formas y tamaños, cuidando que las mariposas no tapen sus ojos nariz y boca.
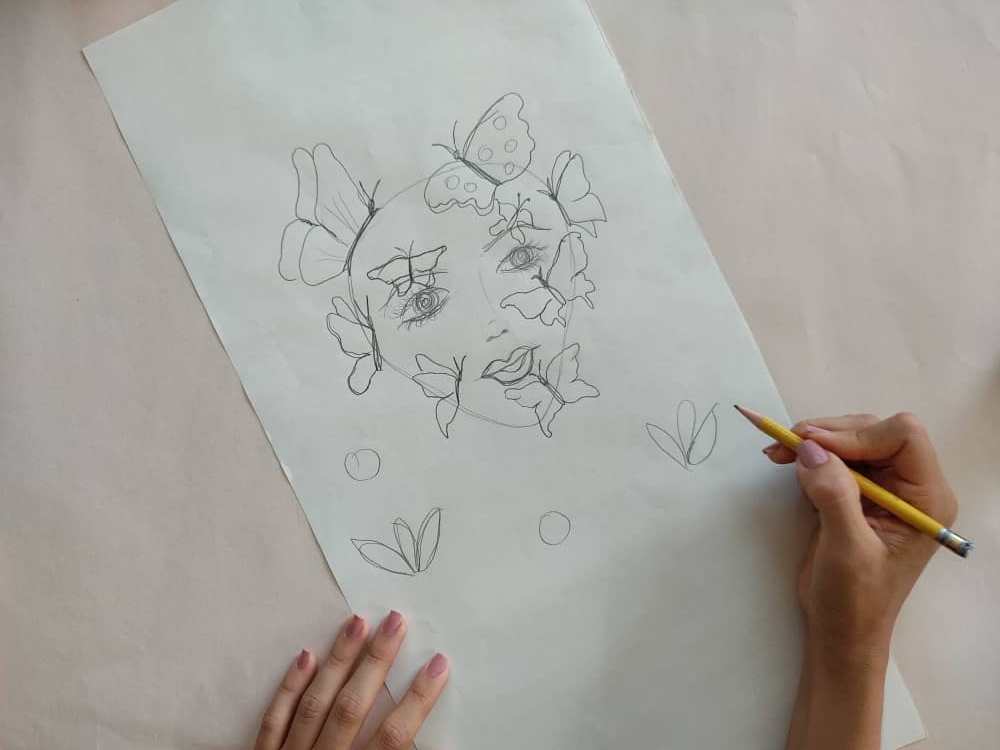
First, we draw the face of a very pretty girl of course, and on it are pretty butterflies of different shapes and sizes, taking care that the butterflies do not cover their eyes, nose, and mouth.
Ahora, transferimos la cara de la chica al foami, preferiblemente goma eva de color melón como nuestra piel, en caso de no contar con este color, podemos utilizar un foami de color blanco y luego aplicar un poco de pintura.
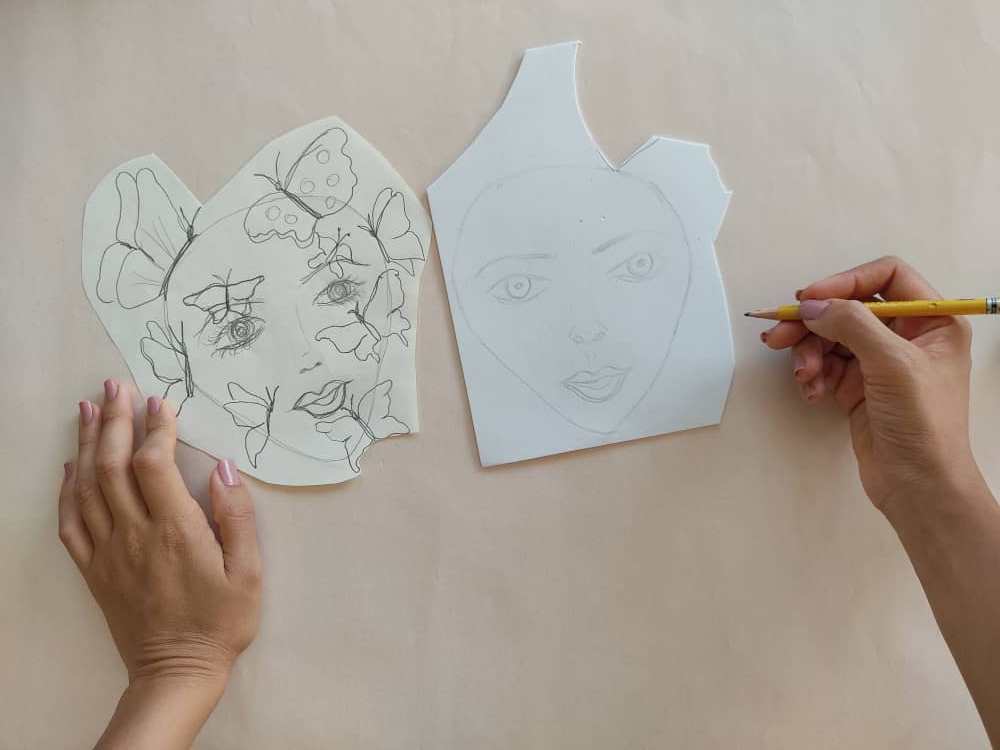
Now, we transfer the girl's face to the foamy, preferably melon-colored Eva foam as our skin, if we do not have this color, we can use a white foamy and then apply a little paint.
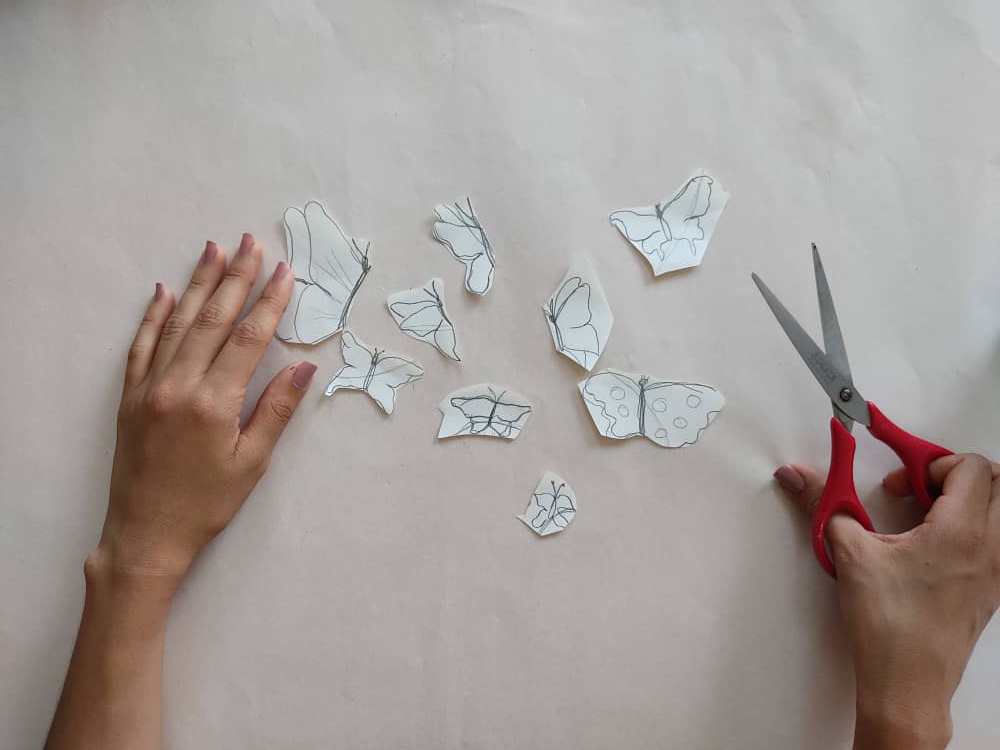
Una vez que hayamos transferido la cara en al foami, recortamos cuidadosamente cada una de las mariposas, así facilitar la transferencia de estás al foami.
Once we have transferred the face to the foamy, we carefully cut each of the butterflies, thus facilitating the transfer of you to the foamy.
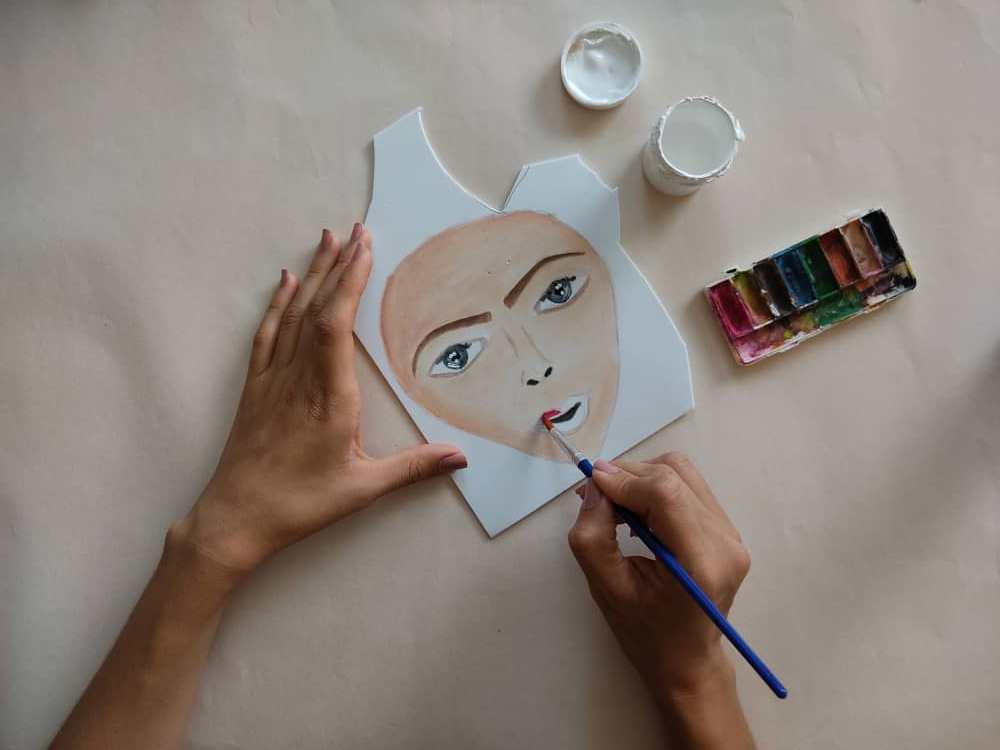
Ahora, comenzamos a darle vida a la cara, como les dije antes, si el foami es de color blanco no hay problema, pintamos con hermosos tonos rosa que simulen el color de nuestra piel, y definimos cada rasgo de la cara.
Now, we begin to give life to the face, as I told you before if the foamy is white, no problem, we paint with beautiful pink tones that simulate the color of our skin, and define each feature of the face.
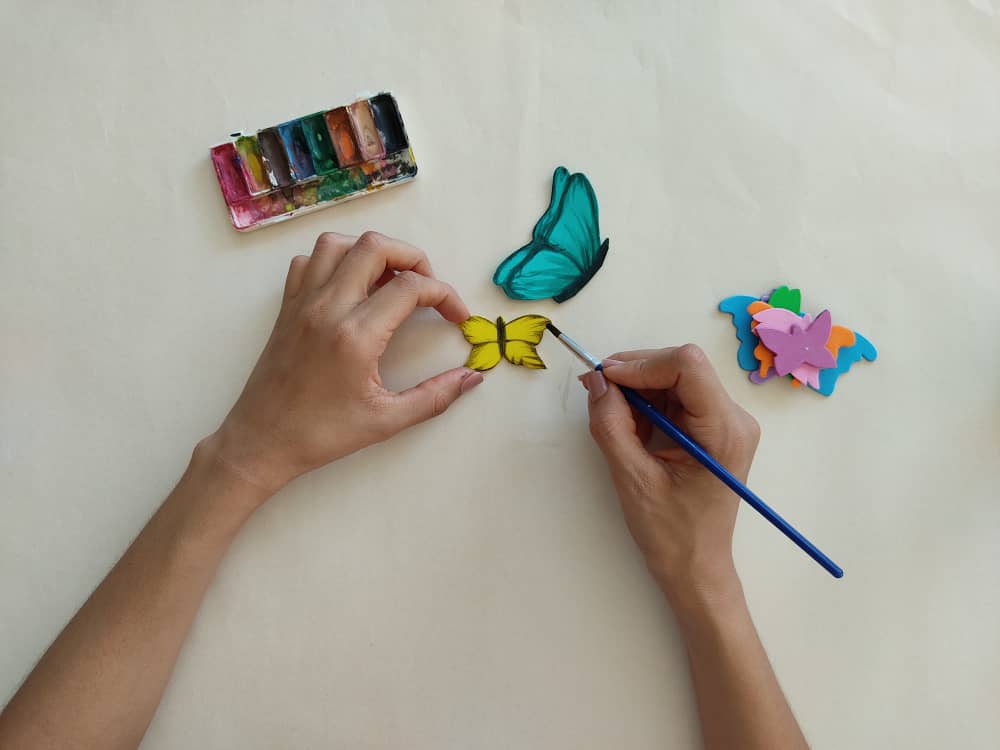
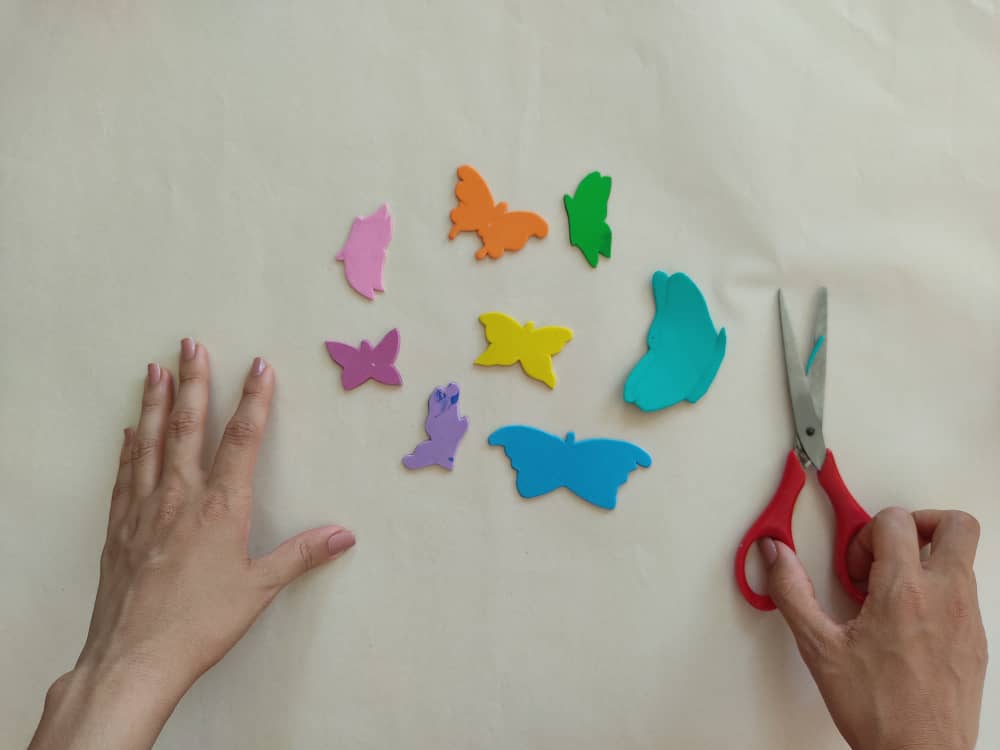
Luego, pintamos las mariposas dejando volar nuestra imaginación pues hay muchísimas especies de mariposas, de distintas formas y colores.
Then, we paint the butterflies, letting our imagination run wild as there are many species of butterflies, of different shapes and colors.

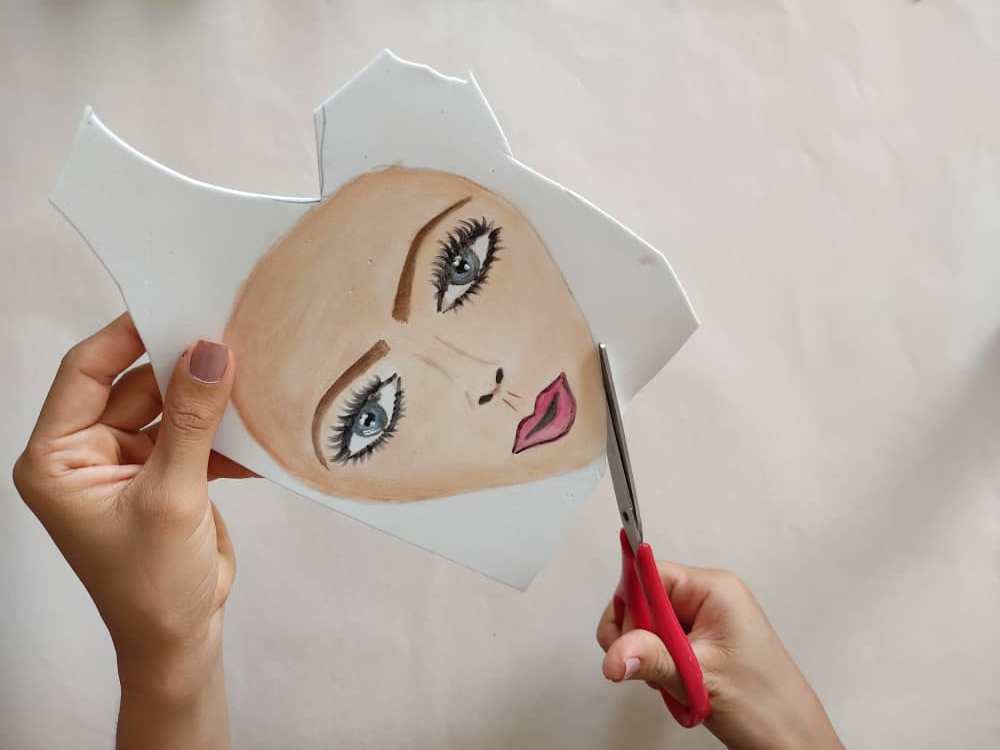
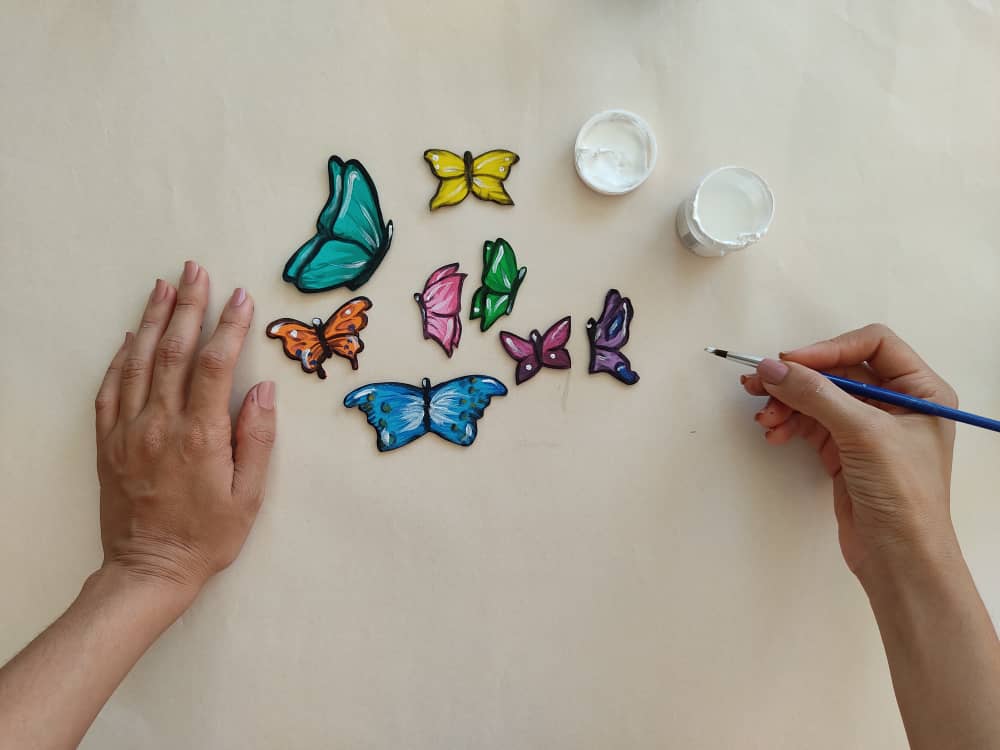
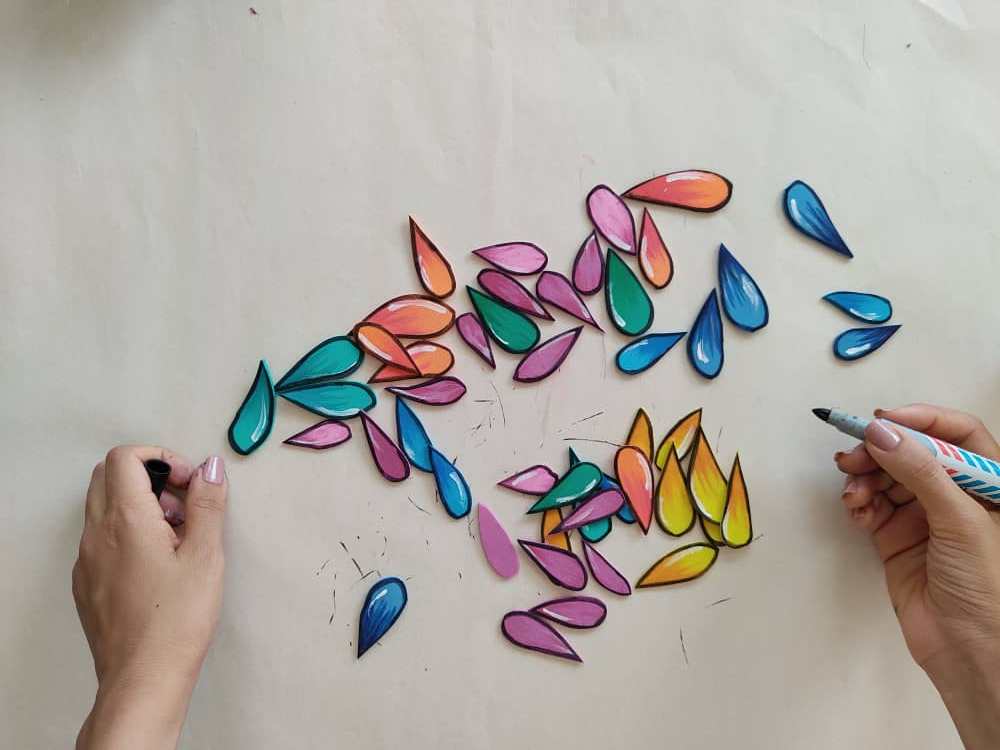
Seguidamente, remarcamos los bordes de nuestras figuras con la ayuda de un marcador de punta fina, y mira que bien realza su apariencia.
Next, we highlight the edges of our figures with the help of a fine tip marker and see how well it enhances their appearance.
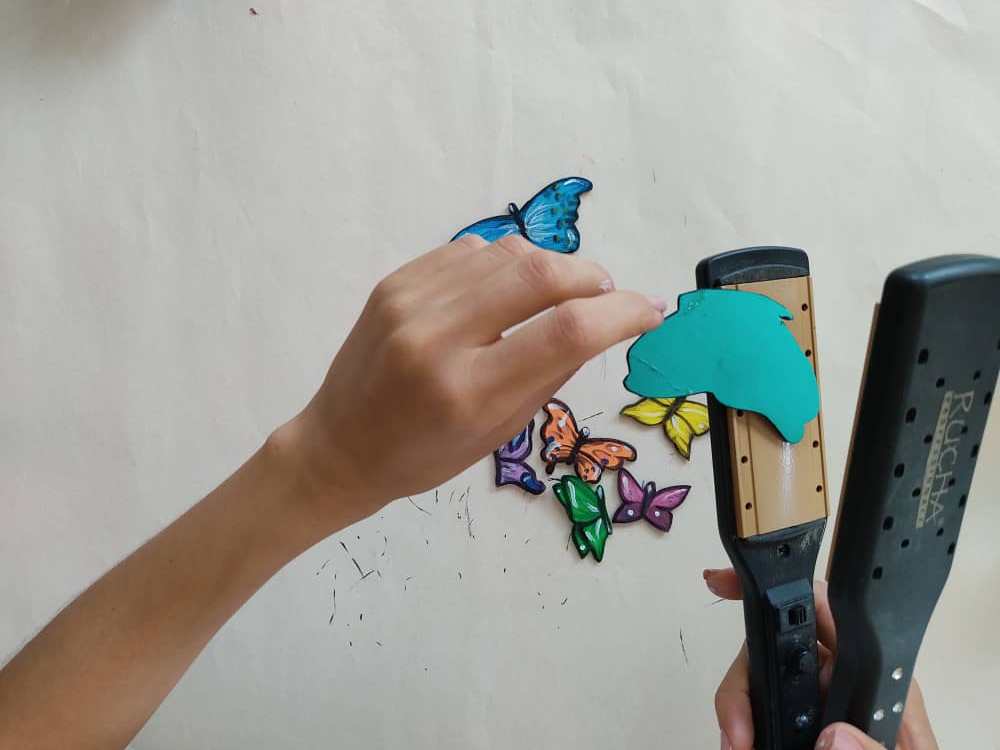
Con la ayuda de una plancha para cabello, aplicamos la técnica de termoformado a nuestras mariposas, dicha técnica consiste en aplicar alta temperatura al foami, y así, deformar o cambiar la forma de este material. Hagámoslo y veamos que nuestras mariposas se verán muy reales.

With the help of a hair straightener, we apply the thermoforming technique to our butterflies, this technique consists of applying high temperature to the foamy, and thus, deforming or changing the shape of this material. Let's do it and see that our butterflies will look very real.
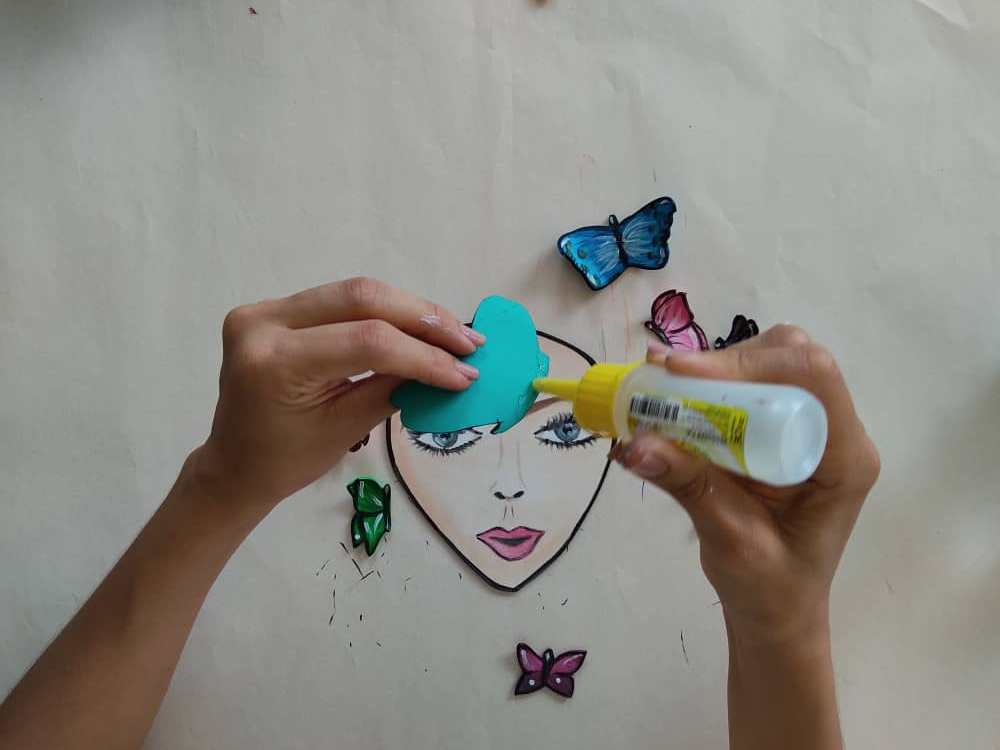
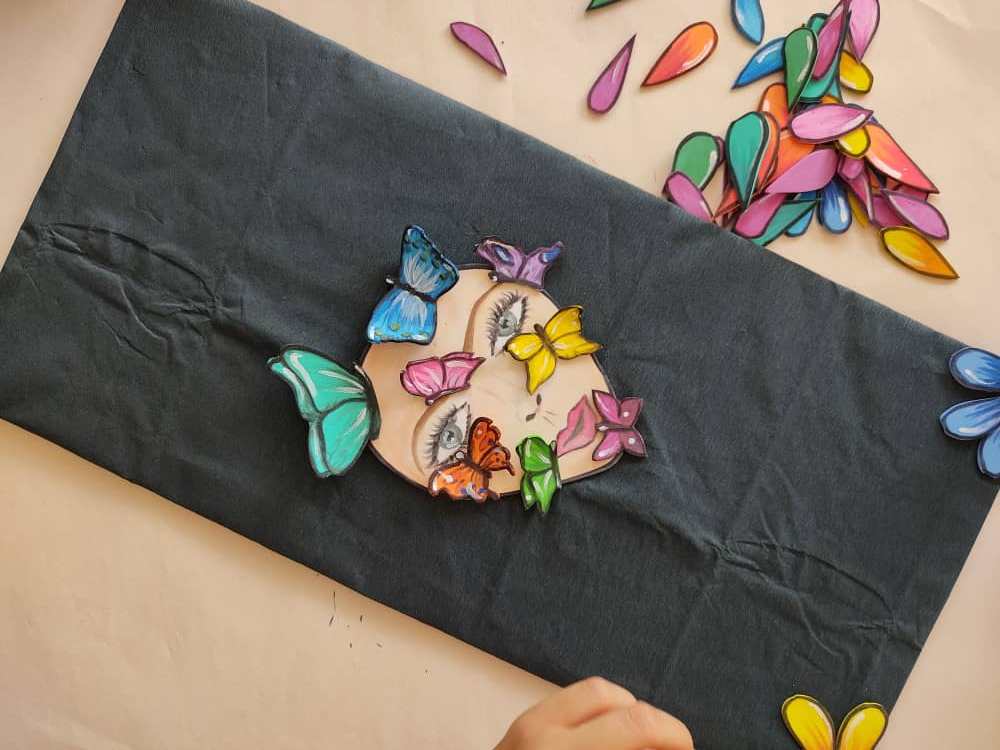
Ahora, pegamos las hermosas mariposas sobre el rostro de esta linda mujer. Y recuerda, no tapar sus ojos nariz y boca.
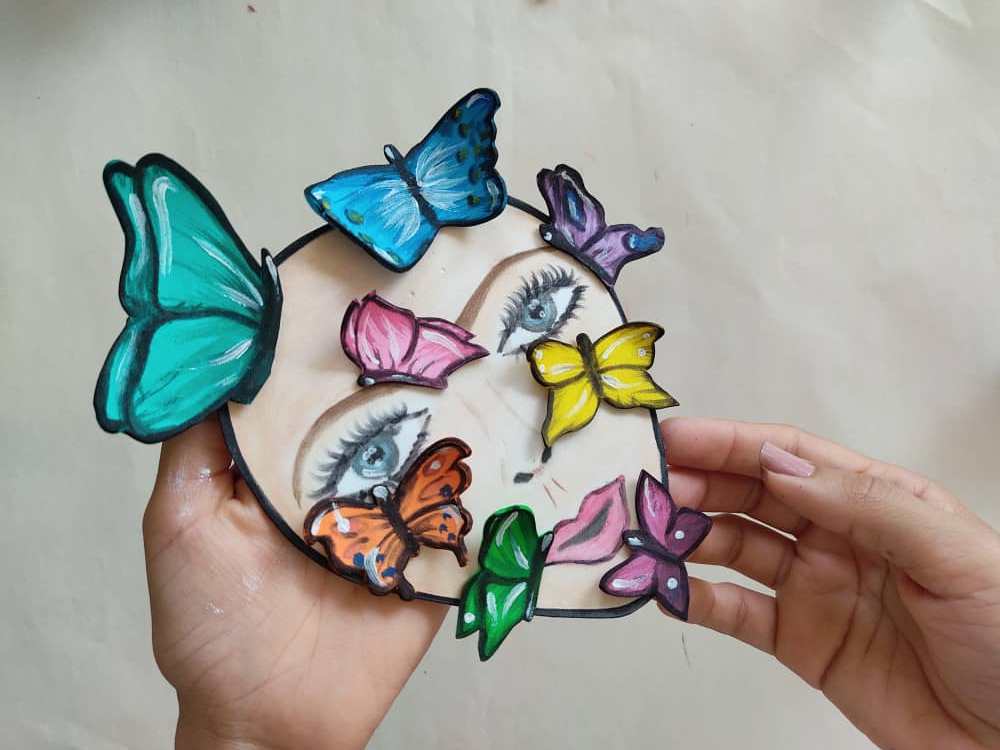
Now, we paste the beautiful butterflies on the face of this pretty woman. And remember, don't cover your eyes, nose, and mouth.
Como ya sabemos, no pueden faltar detalles decorativos, y en este caso elaboramos en retazos de foami una especie de pétalos en forma de gotas, hacemos suficientes y de muchos colores, y recortamos.
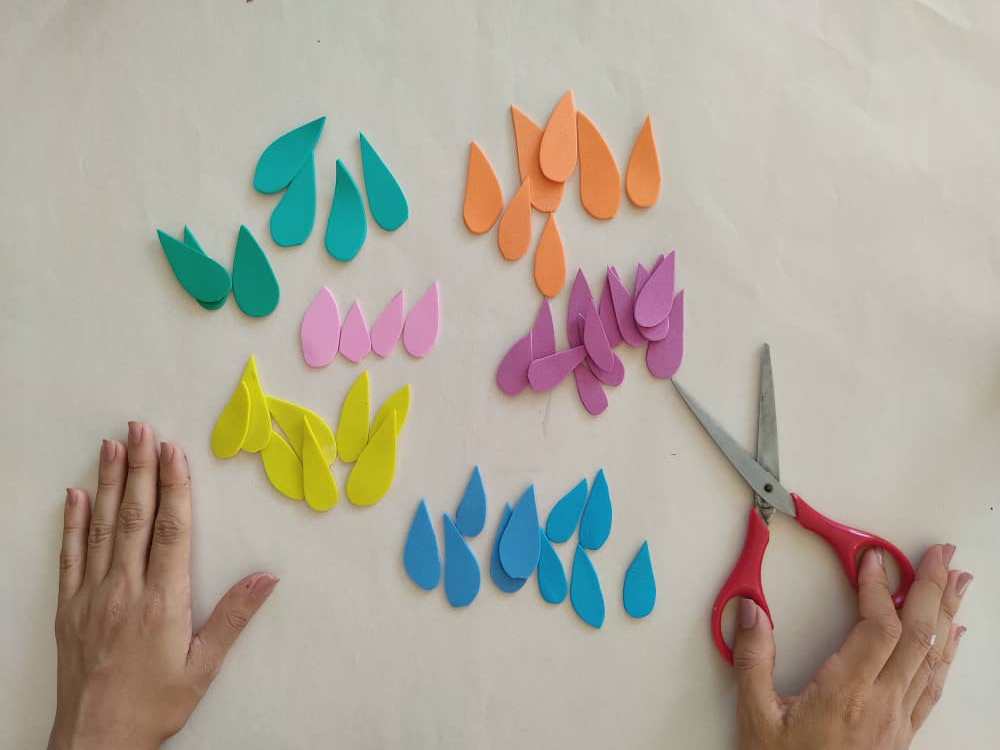
As we already know, there can be no lack of decorative details, and in this case, we make pieces of foamy in the form of drops, we make enough and many colors, and cut.
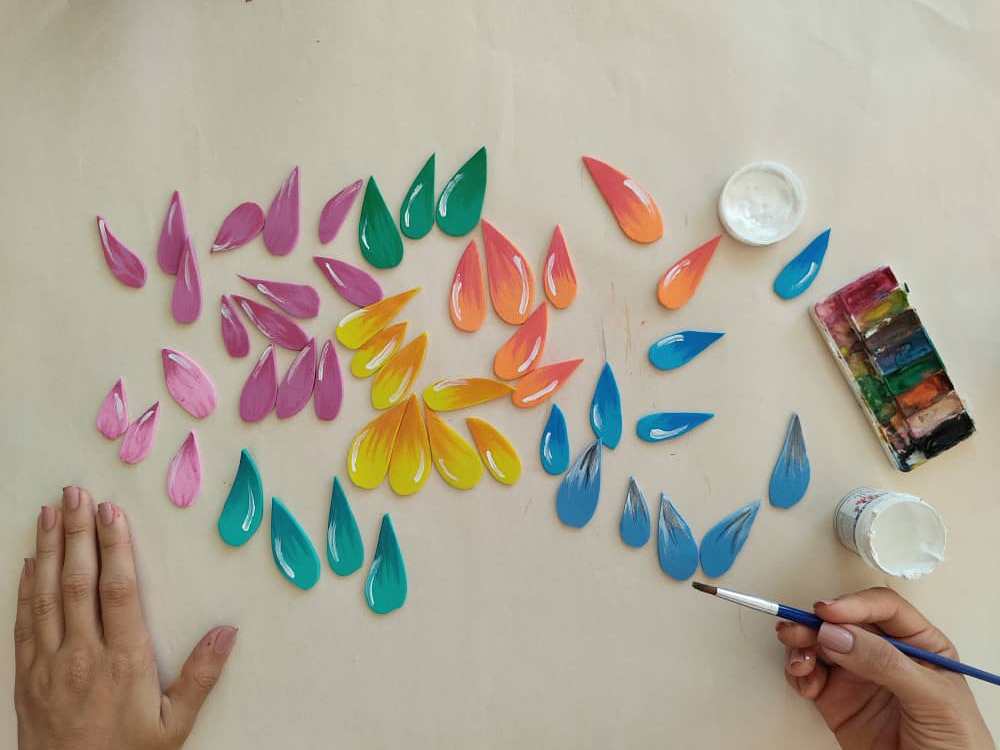
Luego, pintamos estas lindas figuras con pequeñas pinceladas del color que más nos guste, y marcamos sus bordes con el marcador.
Then, we paint these cute figures with small brushstrokes of the color that we like the most, and we mark their edges with the marker.
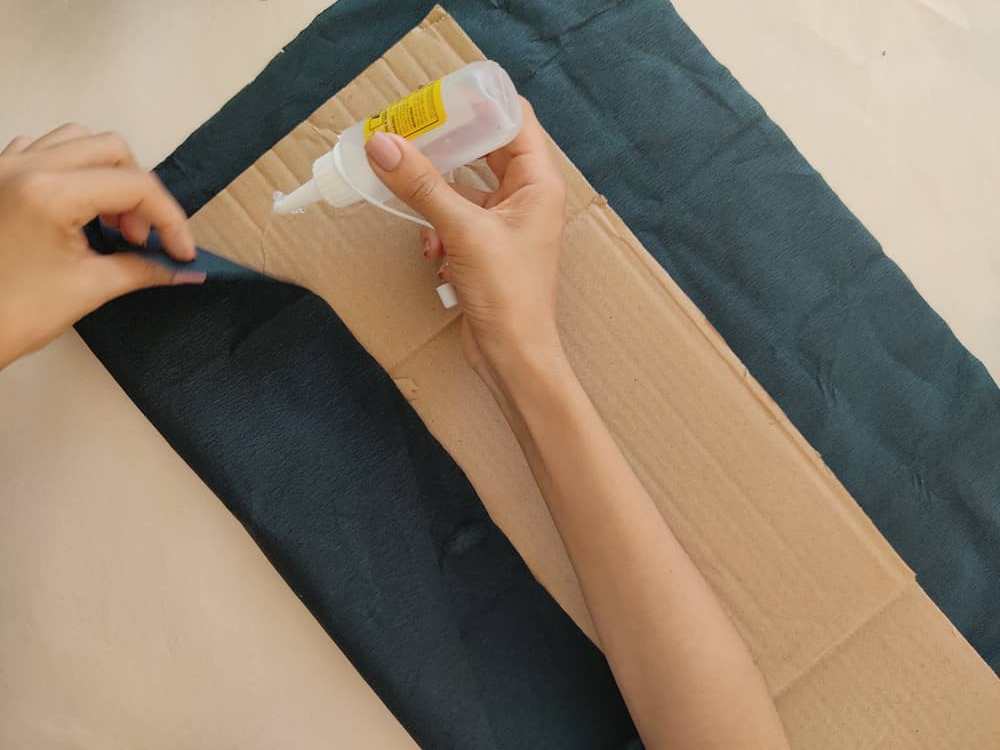
Ahora, armamos una base de cartón de 48cm x 24cm para nuestro cuadro, y lo forramos con papel crepé negro aplicando silicón líquido en la parte trasera y pegando el papel suave y cuidadosamente, ya que es muy frágil.

Now, we assemble a 48cm x 24cm cardboard base for our painting and line it with black crepe paper by applying liquid silicone to the back and gluing the paper gently and carefully, as it is very fragile.
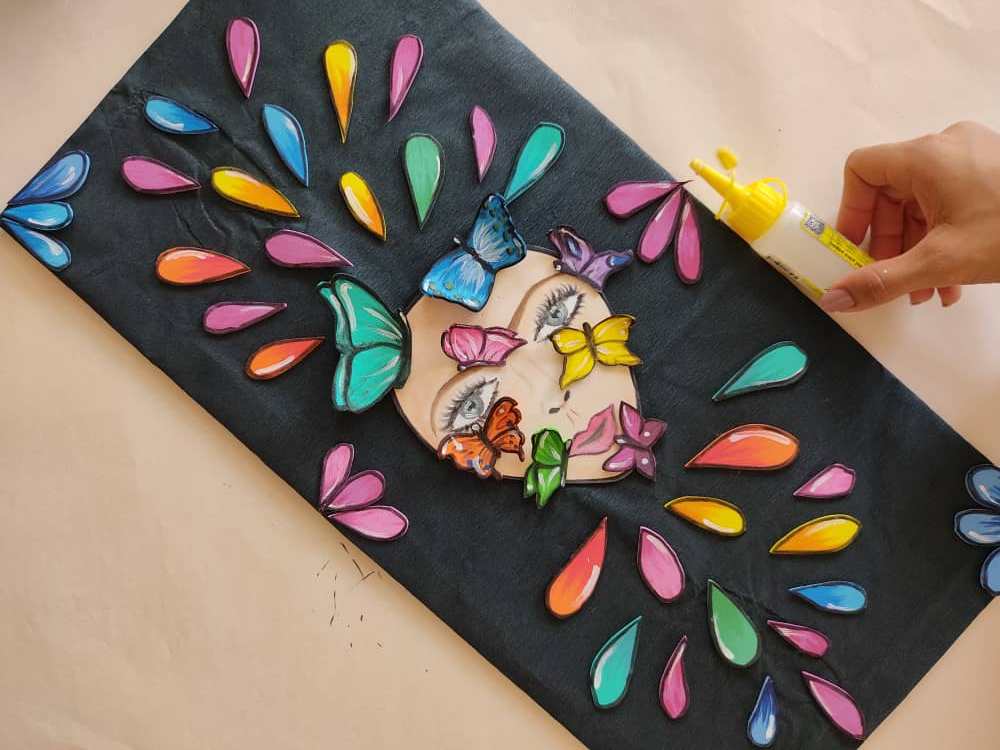
Una vez que esté lista la base, pegamos la cara de nuestra dama mariposa en el centro de esta utilizando silicon líquido, también podemos ubicarla arriba o abajo, como mas nos guste. Y luego, pegamos los pétalos decorativos por toda la base del cuadro.
Once the base is ready, we glue the face of our butterfly lady in the center of it using liquid silicone, we can also place it above or below, as we like. And then we glue the decorative petals all over the base of the painting.
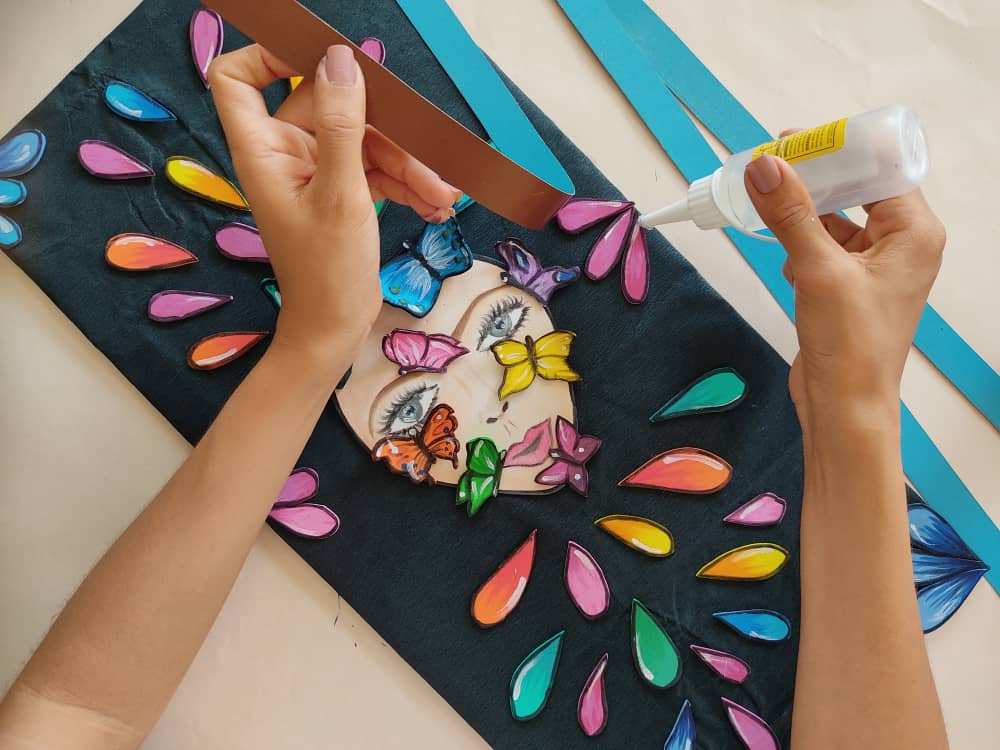
Finalmente, fabricamos un lindo marco cortando 4 tiras del color que más nos guste, y que, coincidan con el tamaño del cuadro, y pegamos en el borde del cuadro.
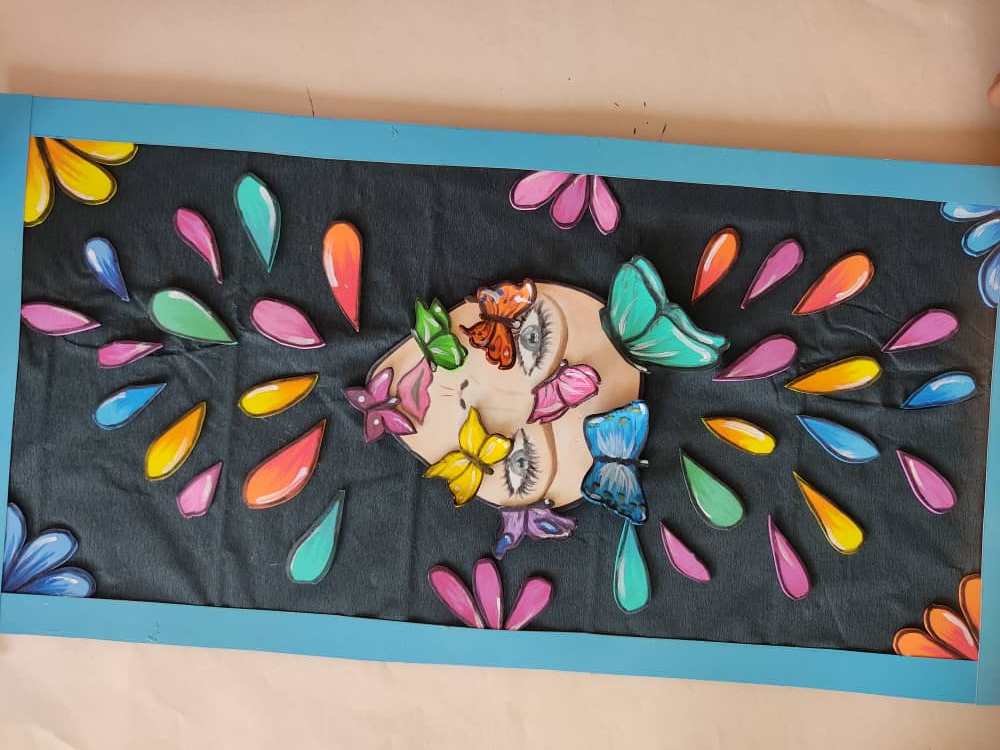
Finally, we make a nice frame by cutting 4 strips of the color that we like the most, and that match the size of the painting and glue it to the edge of the base.

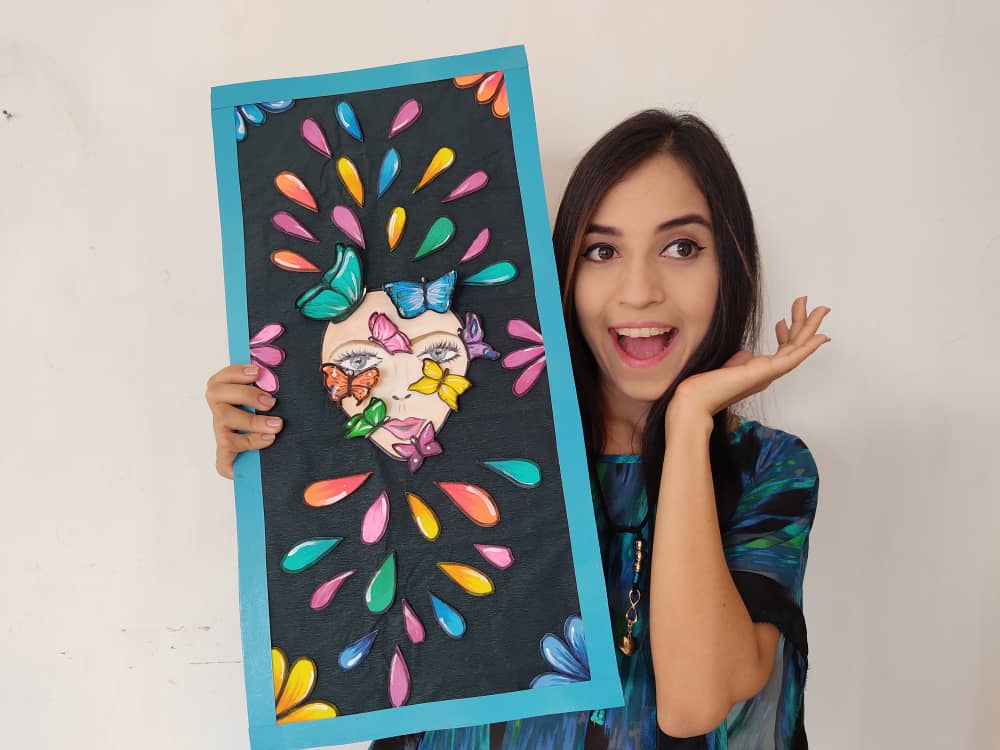
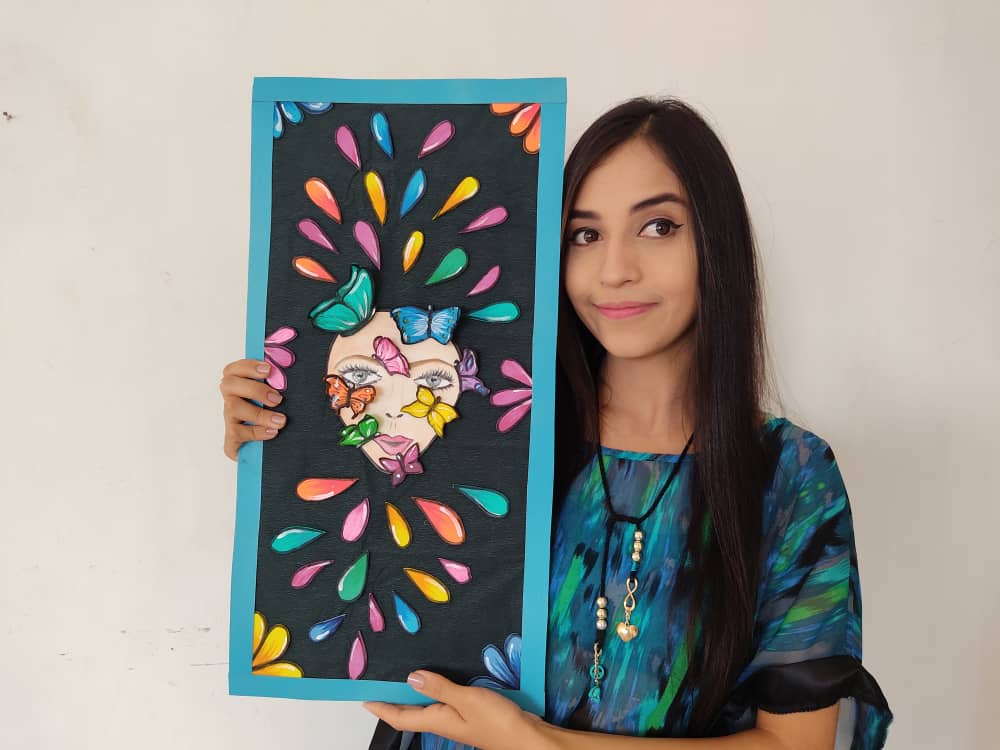
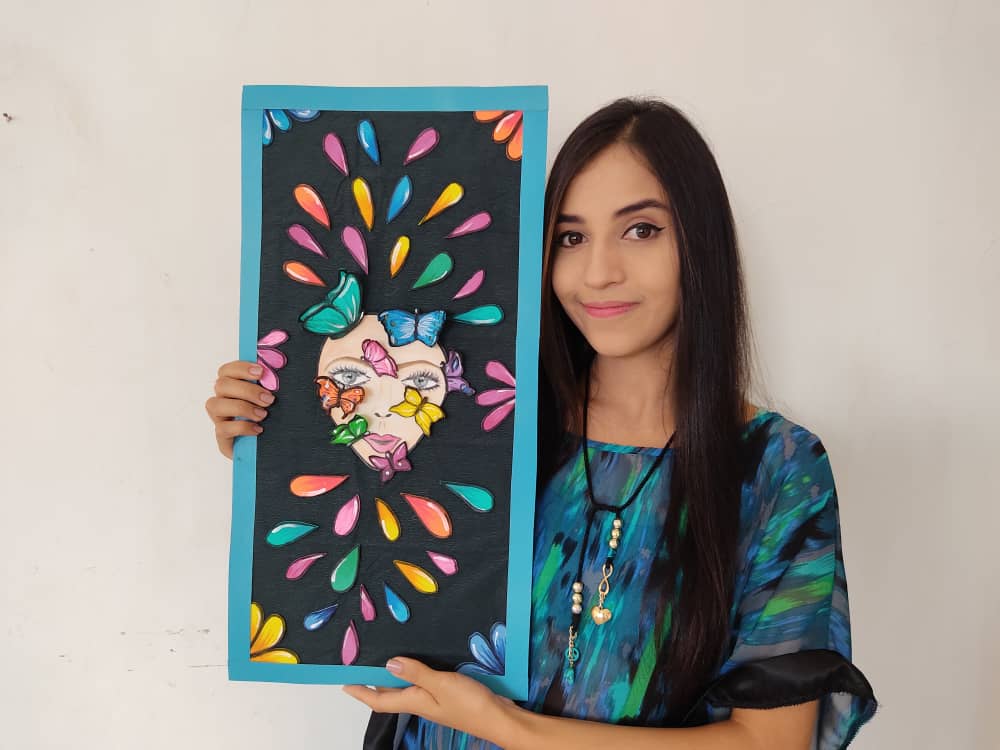
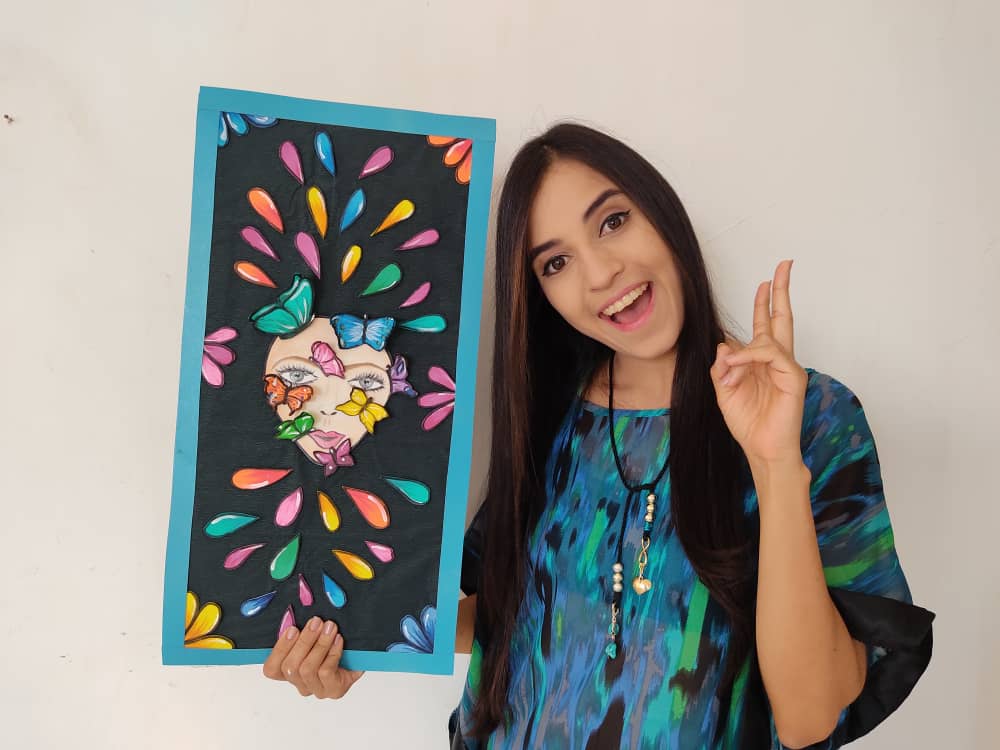
Gracias por acompañarme y espero que lo hayan disfrutado. ❤️
Thanks for joining and I hope you enjoyed it.❤️
.jpeg)
.jpeg)
.jpeg)
.jpeg)
.jpeg)
.jpeg)
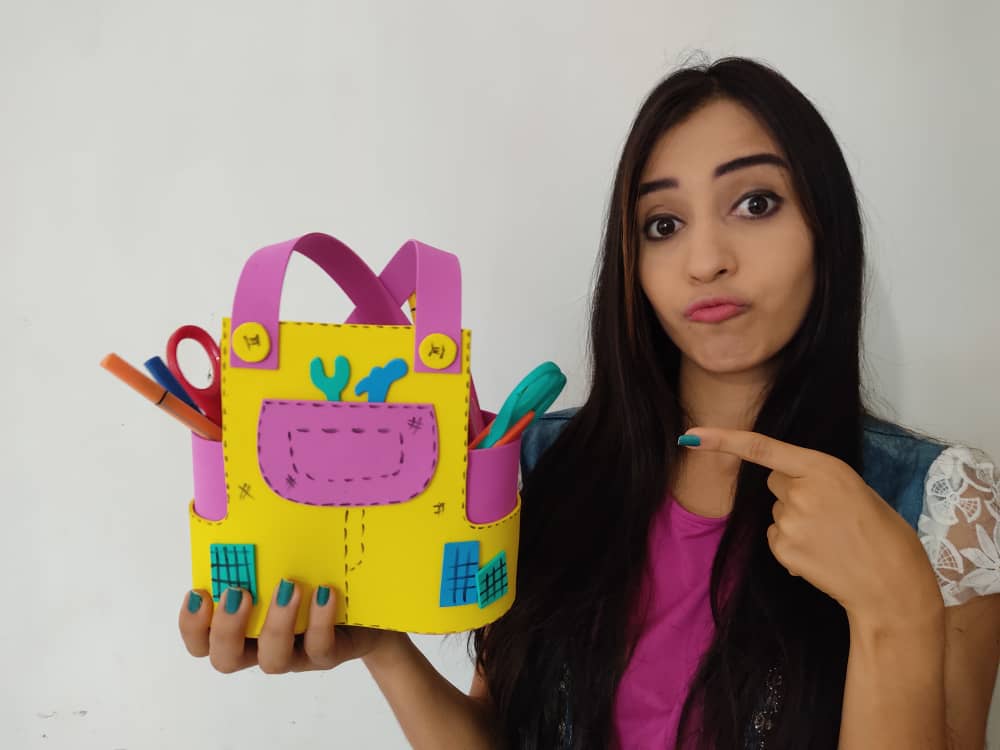
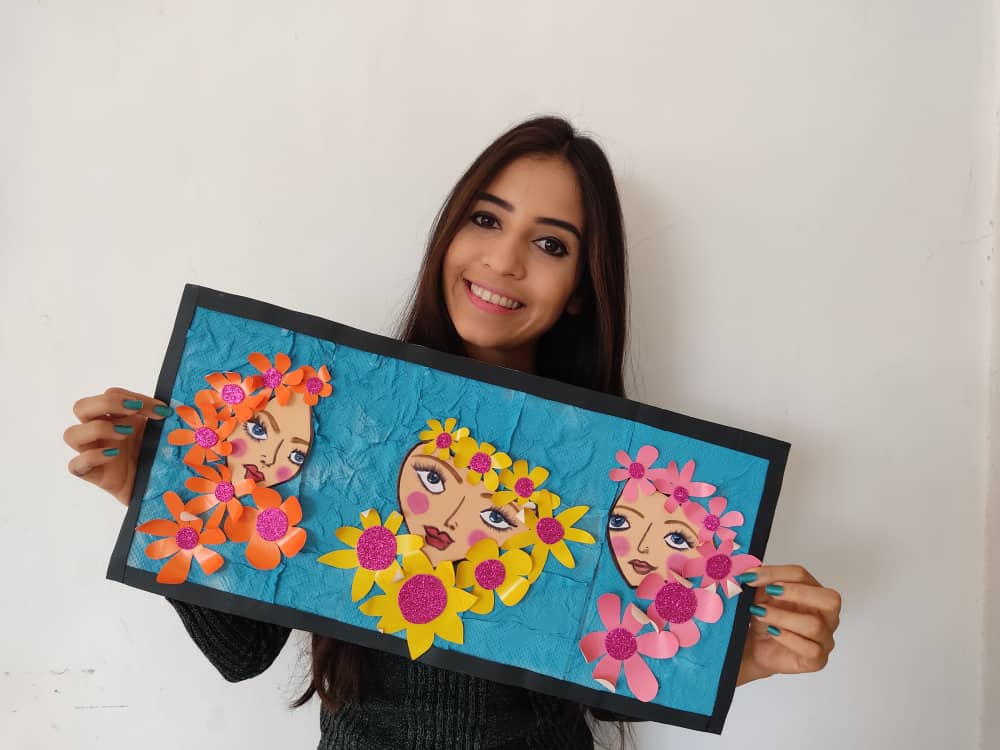
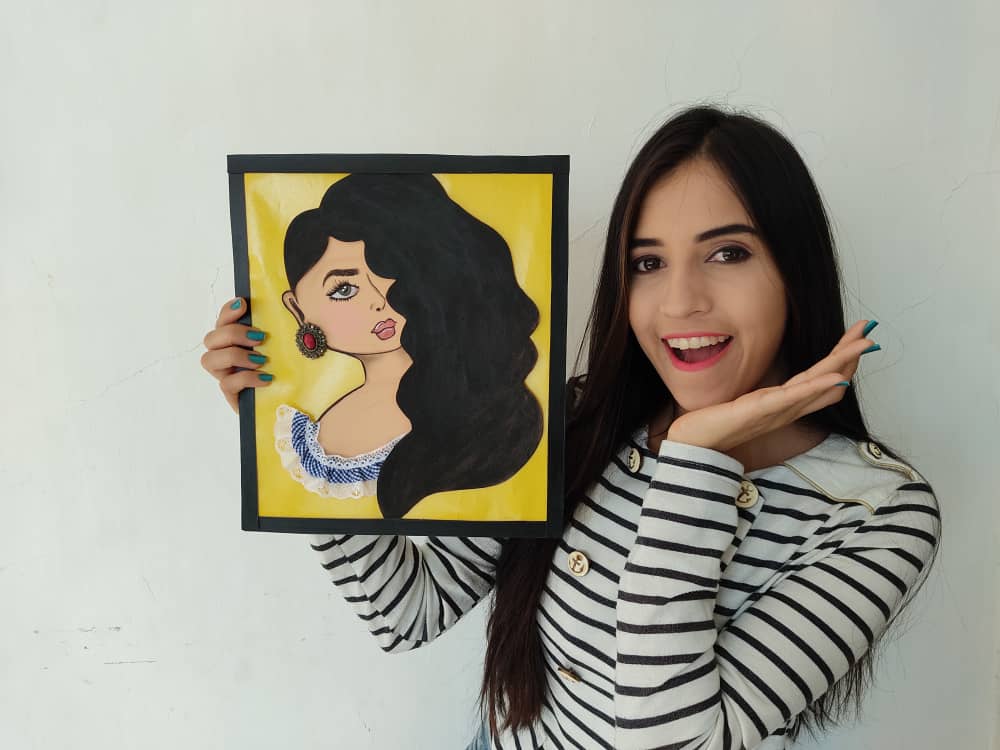
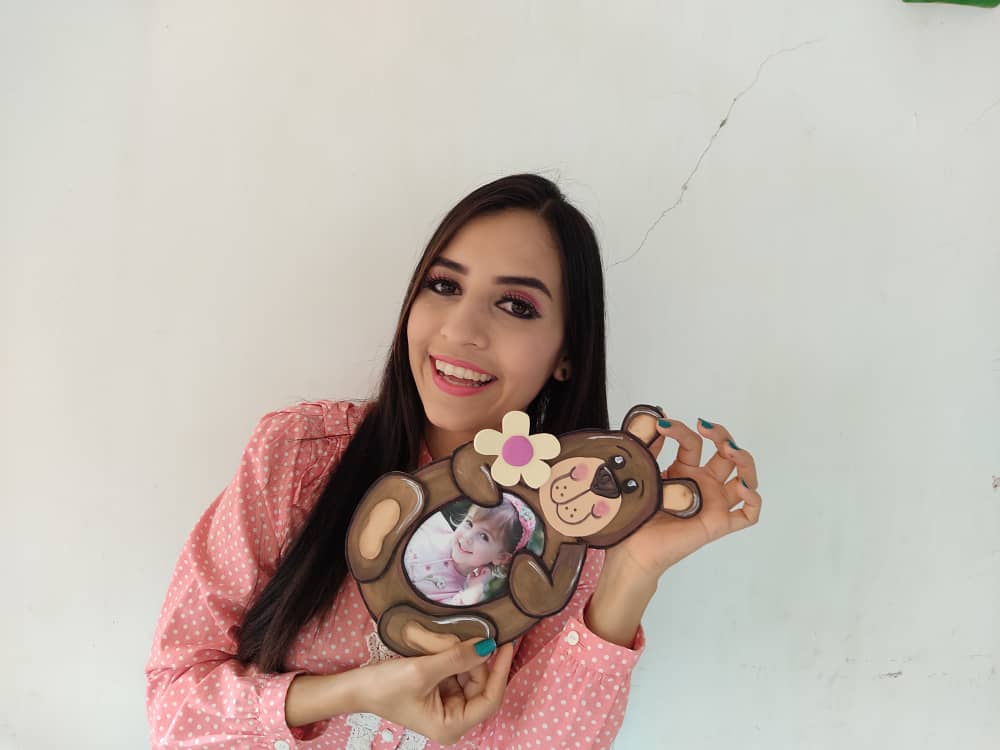
Clic para ver trabajos anteriores | Click to see previous works


What a cool and creative painting, Sara! I love your colourful shirt, by the way. 😉
Thanks dear friend XOX <3
My twt #posh
Hermoso cuadro
Gracias amigoo!
@tipu curate
Muchas gracias querido por tu valioso apoyo! Saludos!
Upvoted 👌 (Mana: 24/32)
Thanks dear friend @@@jasonmunapasee
Que lindo, me imagino tu taller lleno de muchas cosas para crear.
admiro tus trabajos y me gusta la didáctica y pedagogía que tienes para enseñar, gracias por compartirlo con todos nosotros.
Gracias por tu lindo comentario amiga :D
Gracias amiga, con muchas cosas hechas y mis materiales!
Que buen contenido <3
Amo las mariposas, recién mostré como hacerlas en papel, con tu post me doy cuenta que las recreo muy poco, gracias por la inspiración.
Learn more.This post earned a total payout of 32.846$ and 16.423$ worth of author reward that was liquified using @likwid.