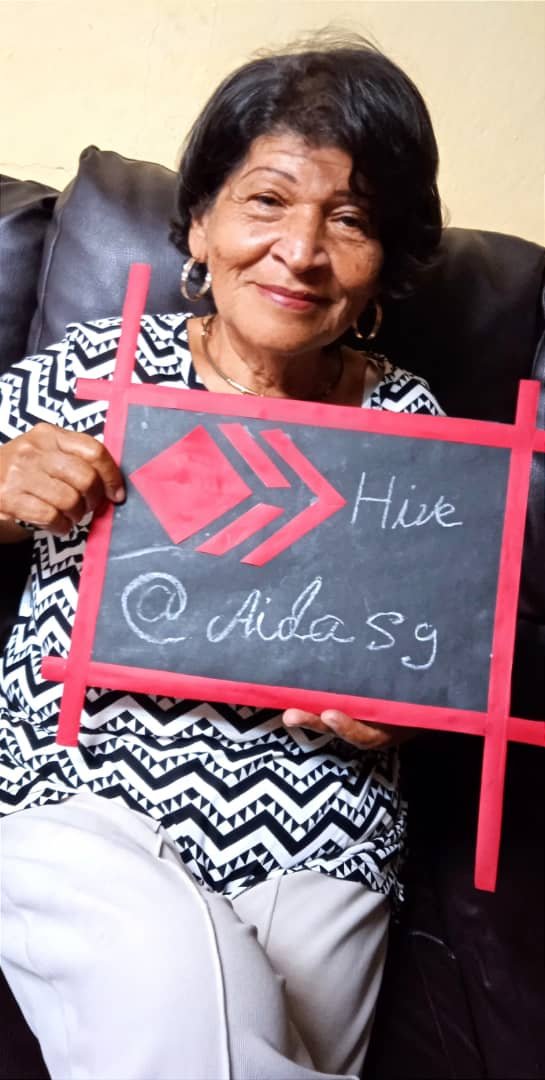
Pizarra Personalizada para Hive Blog.
Saludos para todos en Hive Blog. Hoy estoy subiendo mi segundo post y decidí hacer una pizarra personalizada porque en ella podré colocar además de mi nombre, también mis recetas cuando sea el momento de publicar algunos de mis platos.
Para la elaboración de esta pequeña pizarra me fui a la papelería y compré dos cartulinas de color rojo y negro para la pizarra el negro y el rojo para el logo.
La cartulina negra es muy amigable porque sobre ella puedes escribir con tiza blanca o de colores y después borrar con un trapito de algodón seco.
Ya las tizas las tenía de uno de mis nietos así que no tuve que comprar.
Creo que la idea de esto es también sacar provecho de todo lo que tengamos en casa y darle una nueva función.
Personalized Slate for Hive Blog.
Greetings to everyone at Hive Blog. Today I am uploading my second post and I decided to make a personalized chalkboard because on it I will be able to place besides my name, also my recipes when it is time to post some of my dishes.
For the elaboration of this little chalkboard I went to the stationery store and bought two cardboards in red and black for the chalkboard the black one and the red one for the logo.
The black cardboard is very friendly because you can write on it with white or colored chalk and then erase with a dry cotton cloth.
I already had the chalk from one of my grandchildren so I didn't have to buy it.
I think the idea of this is also to take advantage of everything we have at home and give it a new function.
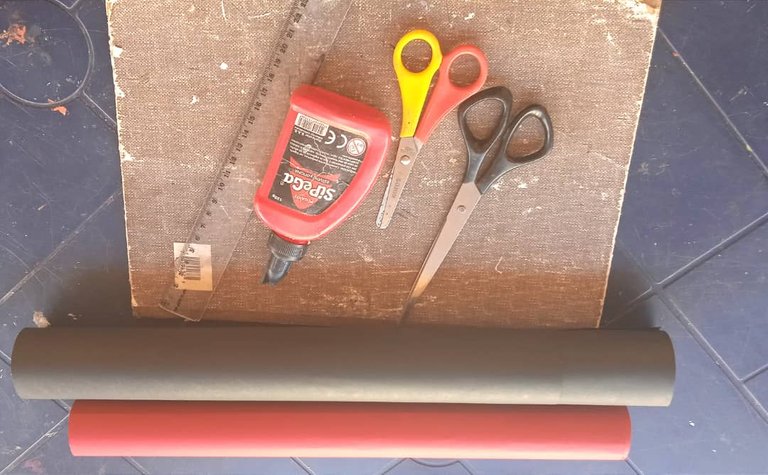
Ahora les daré la lista de.materiales que usé:
Cartulinas.de colores (negro y rojo).
Pegamento Escolar.
Tijeras.
Un trozo de cartón rígido
Tiza Blanca.
Now I will give you the list of materials I used:
Color.cardstock (black and red).
School glue.
Scissors.
A piece of stiff cardboard.
White chalk.
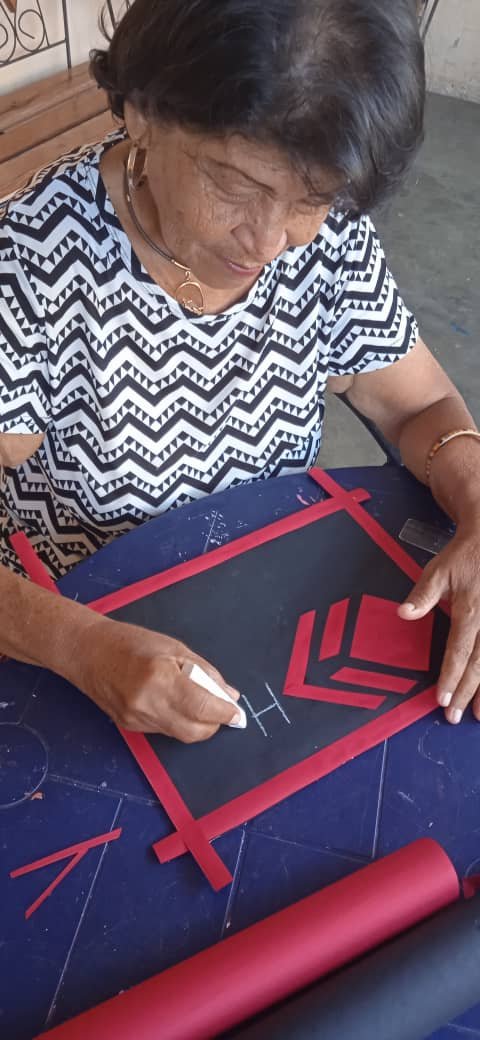
Lo primero que hice fue cortar la cartulina negra del tamaño del cartón y pegarla encima con el pegamento y cortar las diferentes formas del logo de Hive Blog.
También corte unas tiras largas de aproximadamente un centímetro de grosor que me servirán de.marco para la pizarra.
The first thing I did was to cut the black cardboard to the size of the board and glue it on top with the glue and cut out the different shapes of the Hive Blog logo.
I also cut some long strips about a centimeter thick that will serve as a frame for the board.
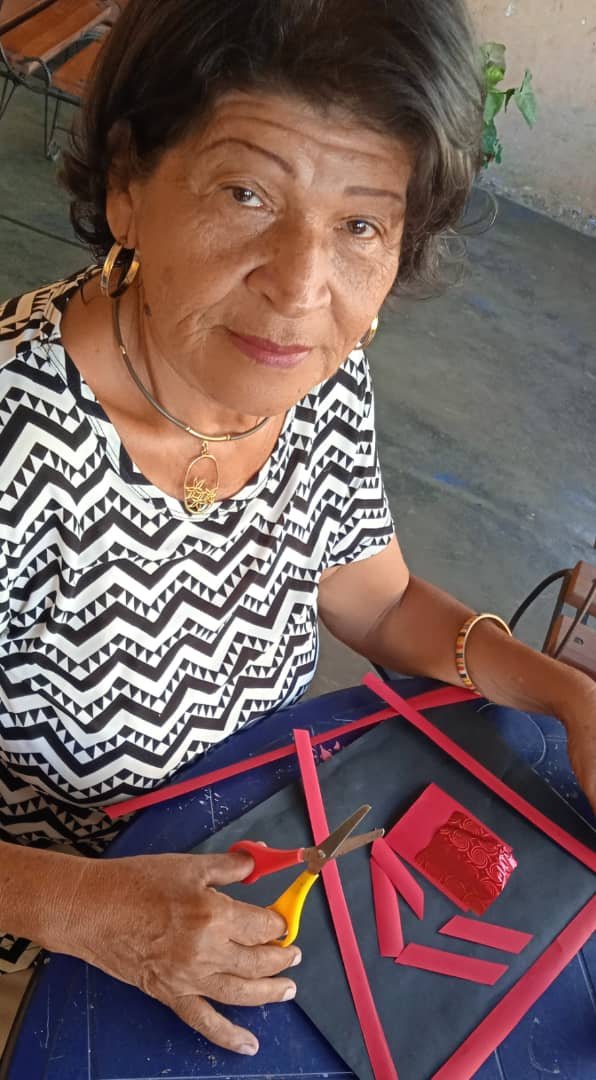
Luego fui pegando las partes del logo dejando espacio suficiente para dar uso a la pizarra.
Then I glued the parts of the logo, leaving enough space to use the board.

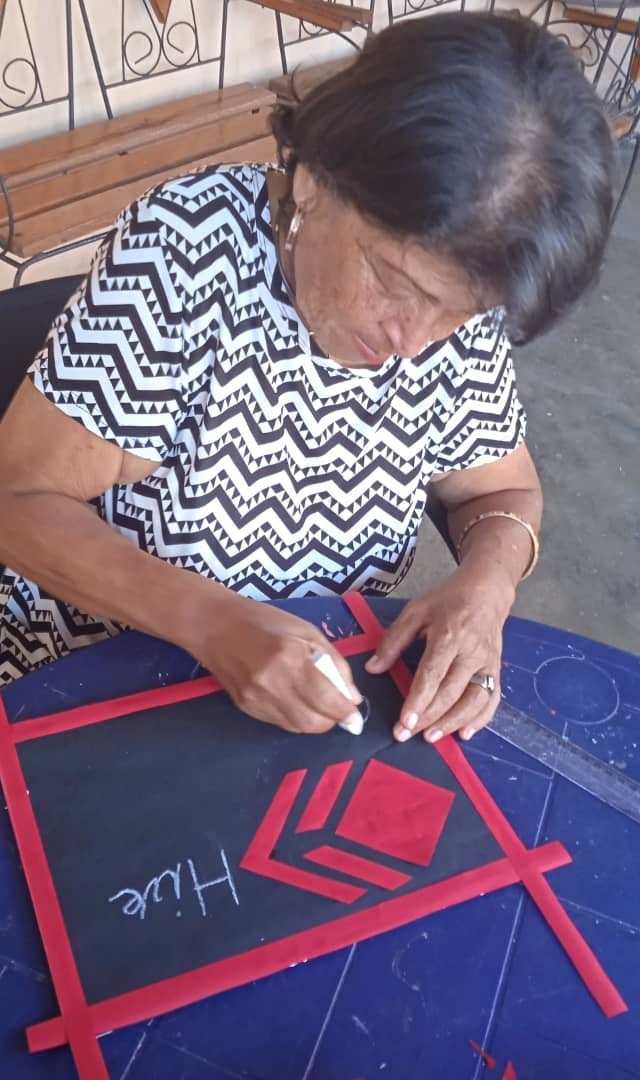
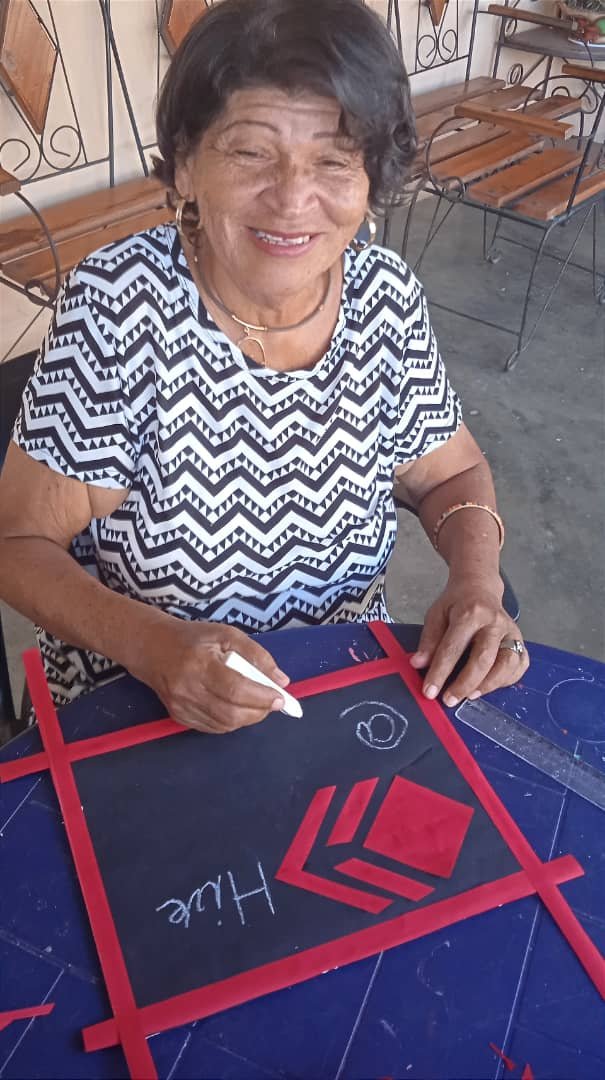
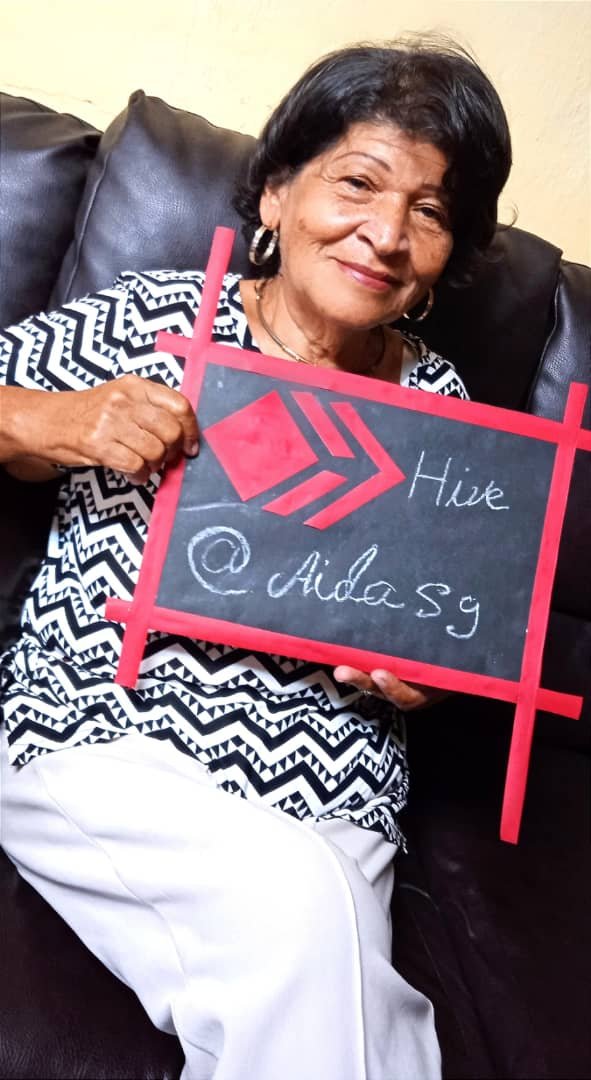
Luego de pegar todas las piezas coloqué inauguré mi pizarra colocando mi usuario de Hive Blog y aquí quiero contarles que me pareció muy chistoso que hasta el momento no había escrito un arroba a mano alzada. La verdad es que me estoy divirtiendo mucho haciendo esto y apenas es el comienzo.
After gluing all the pieces together I inaugurated my board by placing my Hive Blog user and here I want to tell you that I found it very funny that I had not written a freehand arroba so far. The truth is that I'm having a lot of fun doing this and it's just the beginning.