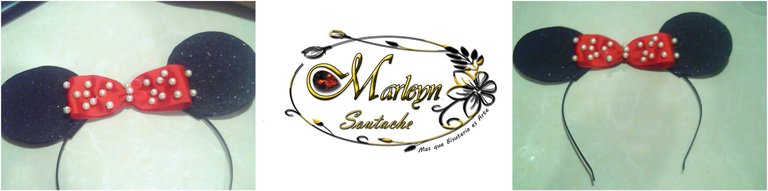
Hola a todos :) hoy super emocionada con un nuevo tutorial que a mi particularmente me ha gustado mucho super fácil, Manos a la obra con amor y animo!!! el tutorial de hoy es un cintillo de minie que a todas las niñas les encanta, todos los materiales son de fácil acceso puedes usar el foami de cualquier color que tengas así no sales de casa y te entretienes
Hello everyone :) Today super excited with a new tutorial that I particularly liked very easy, Hands on with love and encouragement !!! Today's tutorial is a minie headband that all girls love, all the materials are easily accessible you can use the foami of any color you have so you do not leave the house and entertain yourself

We are all teachers, in some cases we have to be the students, and in others we are someone else's teachers.
MATERIALES:
Foami negro escarchado
Tijera
Silicon en barra con su pistola
Cinta Razo roja 4 centímetros de ancho por 24 centímetros de largo
20 Pepitas de perlas 6 milímetros
Aguja e Hilo del color de la cinta
Base de Cintillo o Diadema
Animo, Amor y Ganas de aprender!
MATERIALS:
Frosty Black Foami
Scissors
Silicon stick with your gun
Red Razo ribbon 4 centimeters wide by 24 centimeters long
20 pearl nuggets 6 millimeters
Ribbon Color Needle and Thread
Headband Base or Headband
Encouragement, love and desire to learn!
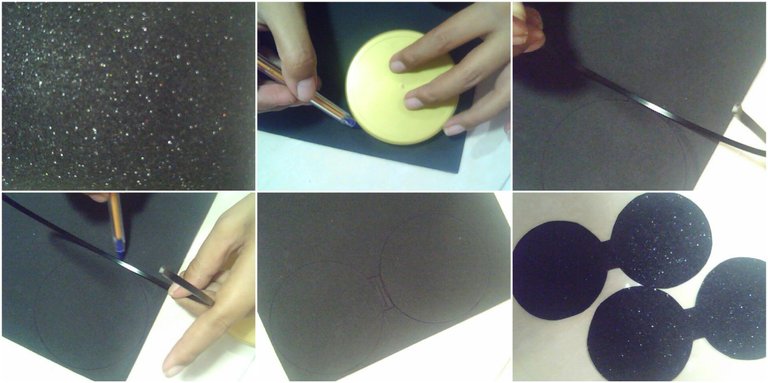
STEP 1: Let's start full of positive energy. On the back of the chosen foami, he makes a circumference of 8 centimeters in diameter, I helped myself with a cap that just happens to be the same at the end of making the first circle marks twice the thickness of the headband or headband and just below again make the other circle, perform this process twice and carefully cut it as I show in the images.
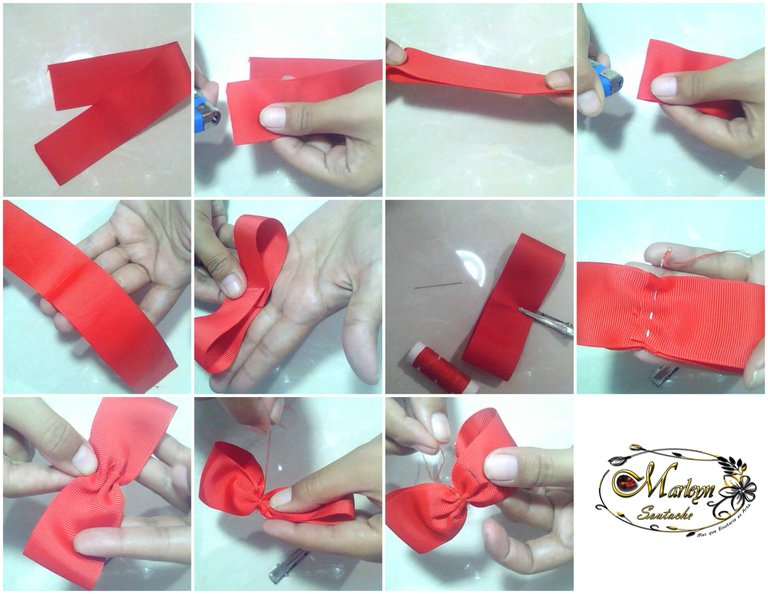
STEP 2: The razo tape should measure 4 centimeters high and 24 centimeters long, burn the tips with the lighter, fold it in half you can carefully pass the lighter through the half to mark, fold each end towards the center and cook through the entire center of the ribbon, grasping the two ends, squeeze and tie, cut the remaining thread.

STEP 3: Thread the needle with the thread and carefully sew the stones in loop 10 on each side you choose where to place them according to your taste, when finished insert 3 stones into the thread and cook them right in the center it will be beautiful and it is super easy, you can put a piece of tape around it before baking the 3 stones to cover the back, it looks beautiful and looks very original!
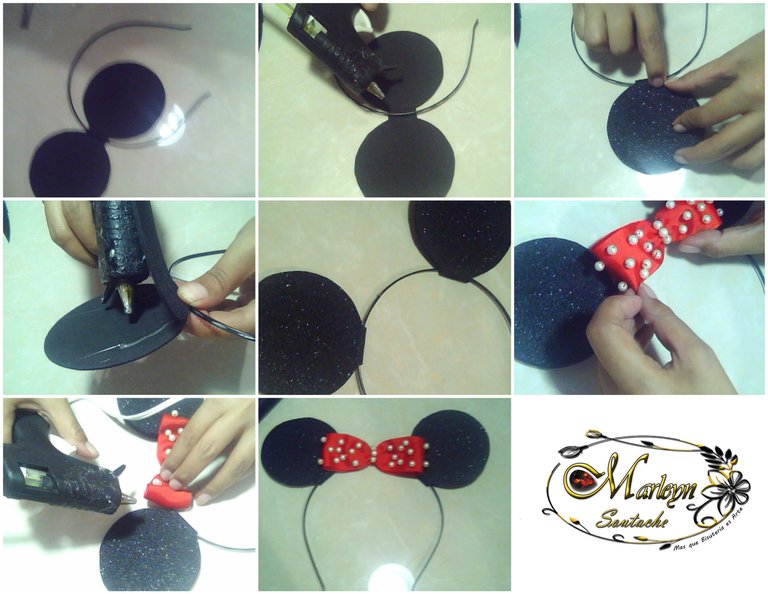
STEP 4: Since we have everything ready we are going to assemble our beautiful headband, measure 11 centimeters from the tip up and there we will glue our first ear, perform the same step on the opposite side and glue the another ear with a little hot silicone from the bottom up making pressure so that it is well glued, in the center measure the loop and carefully stick it with hot silicone from the corners with the ears in this way we have a beautiful and original headband ready or Diadema the best of this is that you made it yourself.


Gracias por compartir tu contenido con la comunidad de El Arca Delegate 25 HP Delegate 50 HP Delegate 100 HP Delegate 250HP Delegate 500HP (@elarca), el mismo ha sido votado por nuestra iniciativa de curación artística @stellae. Si deseas puedes delegar HP al proyecto:
Muchisimas Gracias
A su orden, saludos.
My granddaughter would love that she is a huge Minnie fan :)
How good I hope you do it, it will surely be beautiful and you will be very happy. I have given it to my daughter and she made her very happy. Thanks for reading me.
He visto tu publicación de promoción en nuestro Discord en El Camino Antiguo. Espero que puedan unirse a nuestra comunidad activa, estamos premiando a las personas que comparten su tiempo viendo nuestro video explicado por el hermano eli soriano y dan sus comentarios, porque Tu comentario es muy importante para nosotros. Dios te bendiga
Muy bonito el resultado final, y muy buen explicado el proceso, excelente post!🐻🚀
Gracias por leerme, me alegra saber que le ha gustado.