Hello Hivers,
Last time I wrote about uploading a 3d object on the web - part 1, which is quite technical and could be boring to some audience.
Anyway, instead of continuing part 2 of that series, I will switch to a design project, which is of benefit for Hive community and might be more interesting to most people.
I've been thinking about making a marketing video for Hive, something that we can show the world some parts that Hive has to offer.
So my idea is as follows :
a. Create some bees with Hive logo on their bodies
Sneak peek of our today creations:

b. Create a Hive for the bees to hover around
c. Maybe create a girl who is writing a blog
d. And Hive Dollars pop up like magic, going straight to her wallet
That story plot can make people know that they can earn money by writing blogs on Hive. Of course the blogs must adhere to Hive rules ( no plagiarism, etc.)
For the first part, I will show you how to make bees on Blender.
I just finished making a bee on Blender. It is really simple and anyone can do it. I hope this project will inspire everyone to try out this new hobby.
Before we start
We need to download the software and are somehow familiar with the interface before starting.
- Blender is a free 3D graphics software. You can download it here.
Blender is free and open-source so we don't need to worry about expenses while we're trying to learn how to use the software. Many use Blender to create 3D printed models and animated films. The use of this software is unlimited.
- Basic Blender knowledge. This tutorial is easy for beginners to follow.
In case you don't have time to watch the whole tutorial, I will summarize basic points down here.
- Modes
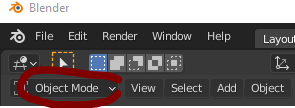
I personally just use object mode, edit mode up to this point because I'm still new to this software.
When we add new objects to the scene, we should be in Object Mode.
Edit mode is helpful when it comes to moving, resizing, extruding, modifying the object. Most of the time, we will be in Edit Mode to model the 3D objects.
- Viewport

- Moving
- Rotating
- Scaling
- Modifiers
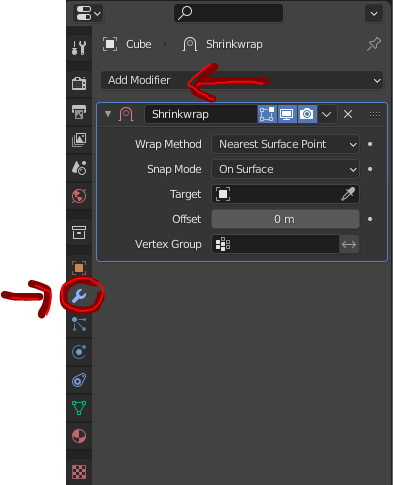
There are a ton of modifiers. I only use the Mirror modifier in this post.
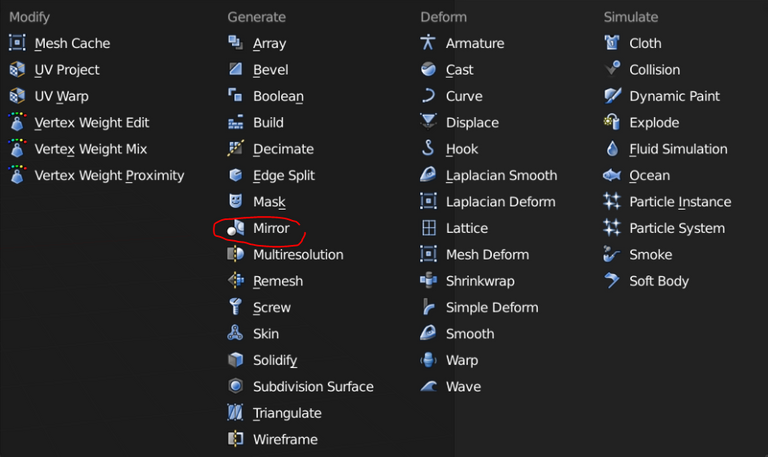
The mirror modifier mirrors a mesh along its local X, Y, and/or Z axes, across the object origin.
- Material Properties
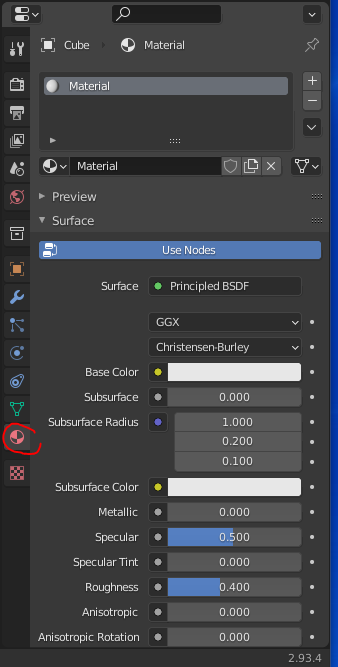
This is the simplest way to color an object. However, if we paint complicated objects, we need to use Texture Paint instead.
Okay, that's all we need to know before following this post.
My working steps
Create the bee
Create a new sphere: Shift-A -> Select Mesh -> UV Sphere
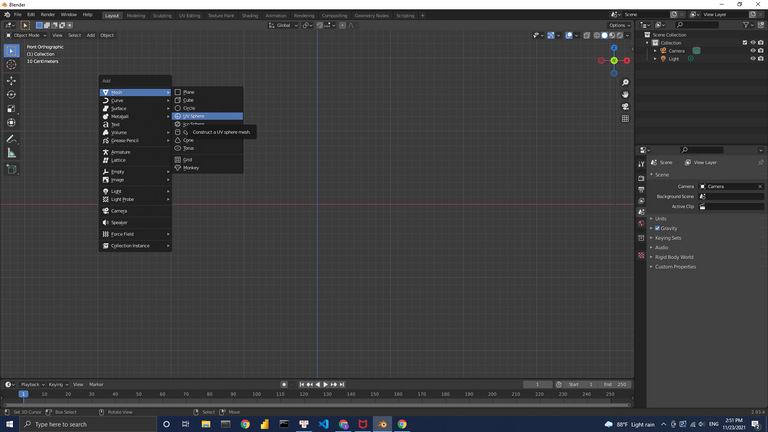
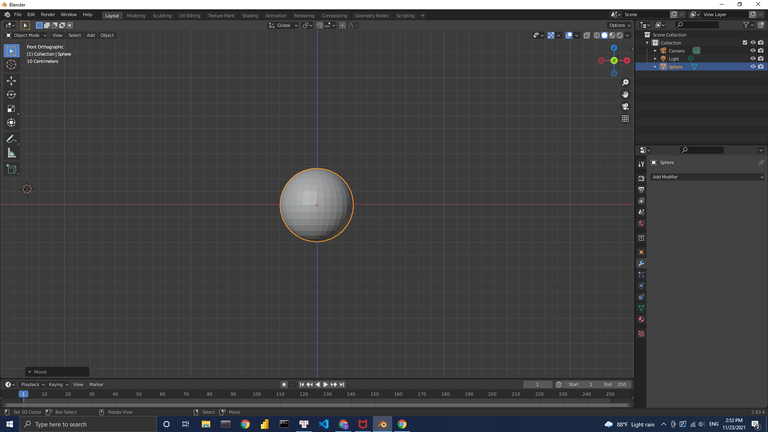
Here is the sphere we just created:
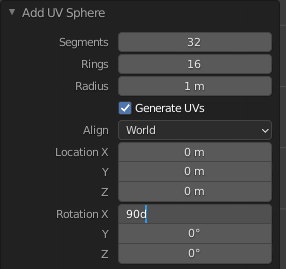
Click Add UV Sphere → Rotate the sphere in X direction 90 degrees.
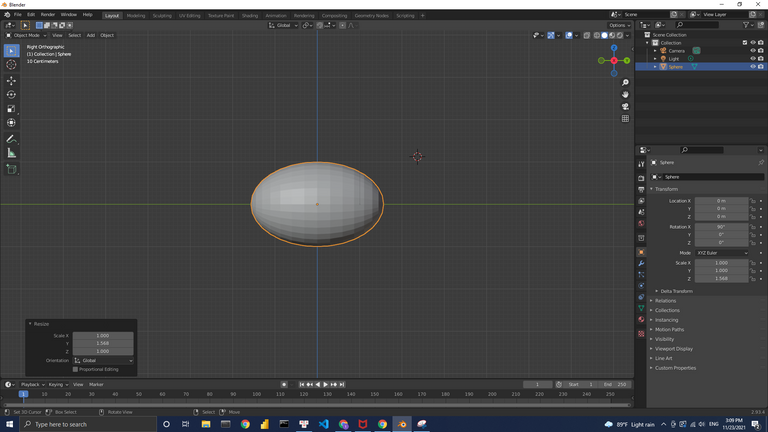
Press number 3 in the Numpad to change perspective to the side of the sphere.
Scale the sphere in Y direction by pressing S then Y
Select the vertex of one end and press G then Y to make bee sting
Remember to click proportional editing when move the vertex.
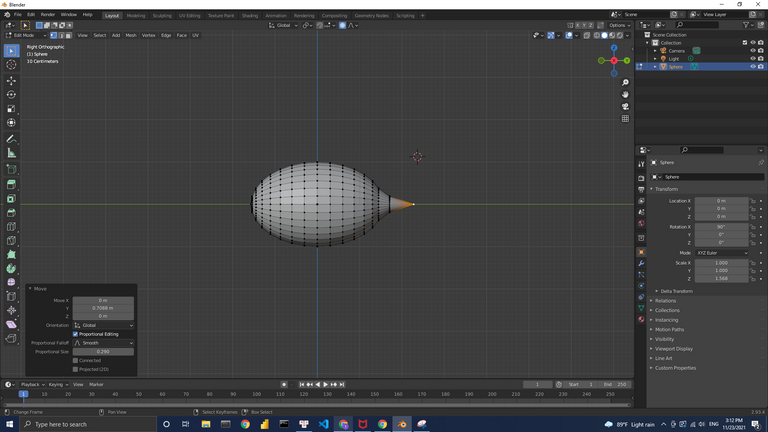
As I scaled the bee's body a bit longer than normal, I scaled it down a bit by pressing S → Y
Now I paint the bee's body
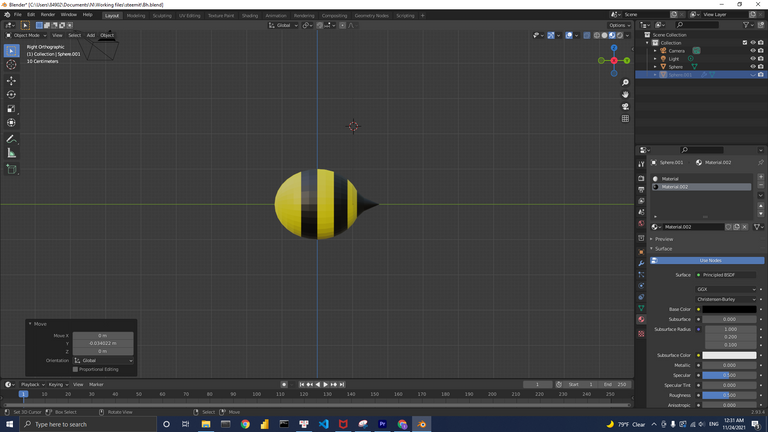
Create the eyes for the bee
Shift-A → UV Sphere → Rotate 90d in x-direction
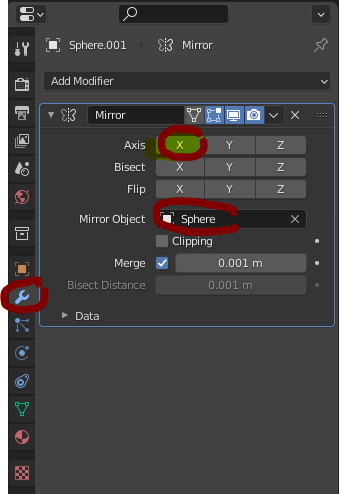
Add modifier → Mirror → select X and Cube as the axis
Paint the eyes
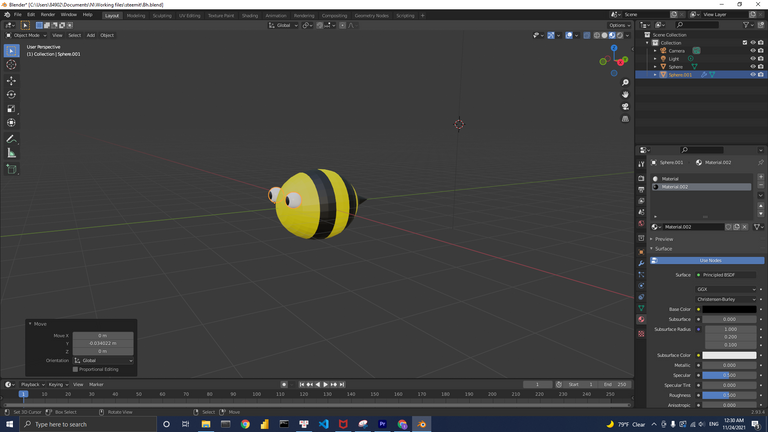
Add the wings
Shift-A → Mesh → UV Sphere
Scale down the sphere in the z-direction ( S + Z ) and x-direction ( S + X ) and y-direction ( S + Y ) if needed to make it look like a wing.
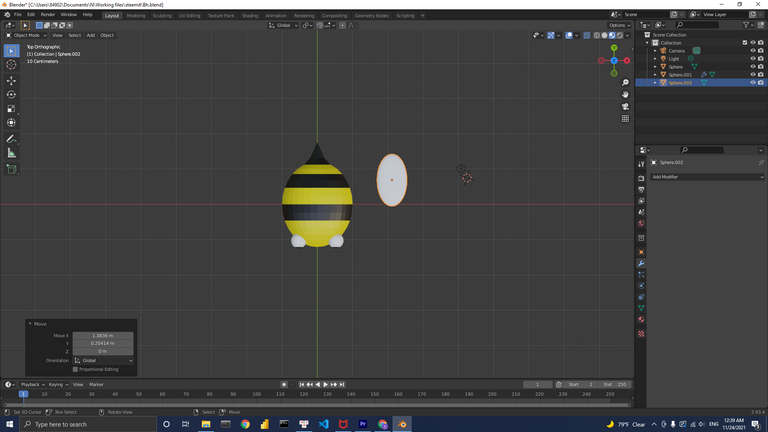
Then I will rotate the wing to attach it to the bee's body.
Press key R + X/Y/Z to rotate the wing in the x/y/z direction.
Press key G to move the object.
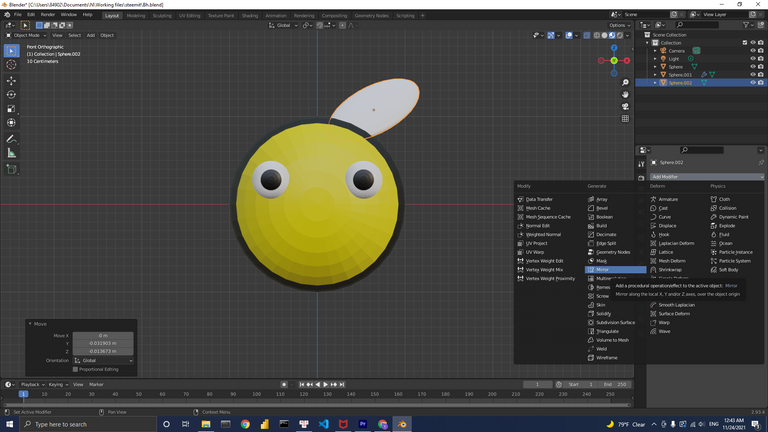
Add modifier → mirror → to create the other wing.
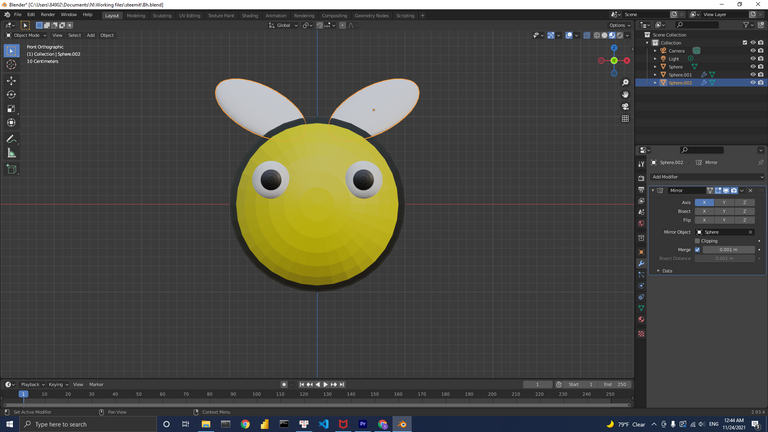
We finished making the bee.
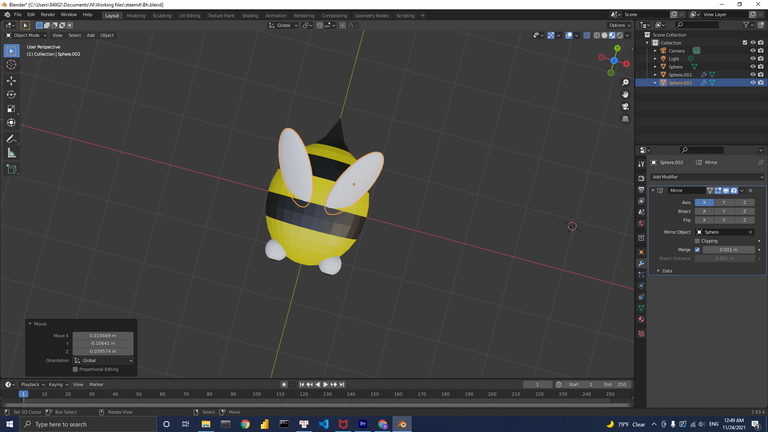
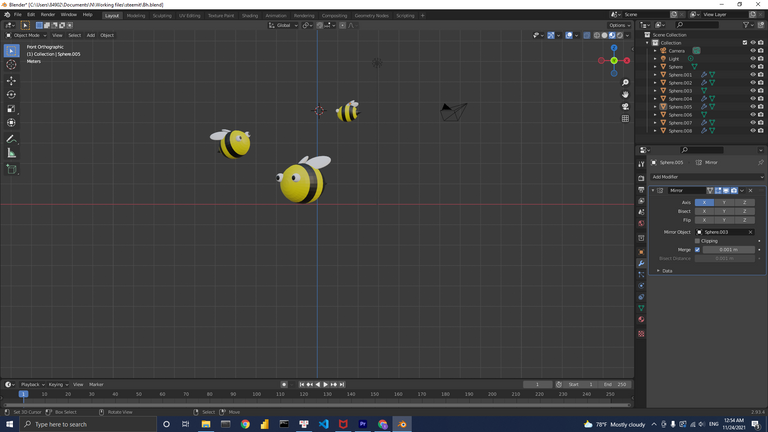
Duplicate the bee
Select the whole old bee and press Shift+D → move your mouse away → click the left mouse to drop the new bee.
Scale down the new bees to vary the sizes of the bees.
Add background
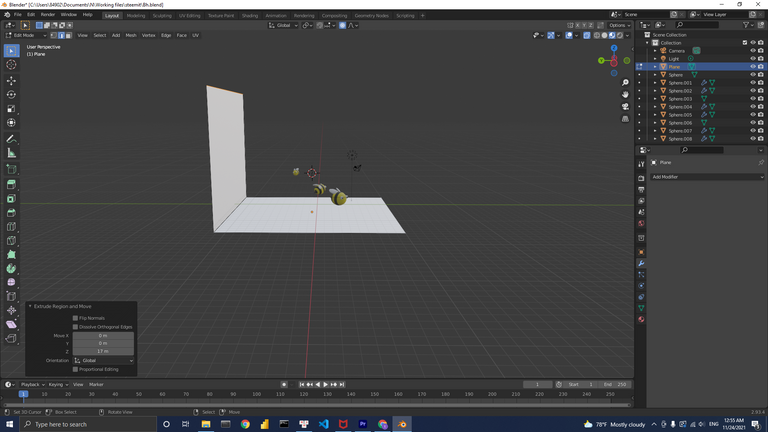
Shift+A → Mesh → Plane
Extrude one side of the plane in z-direction by pressing E and then Z.
Move your mouse then click the left mouse to stop the extrusion.
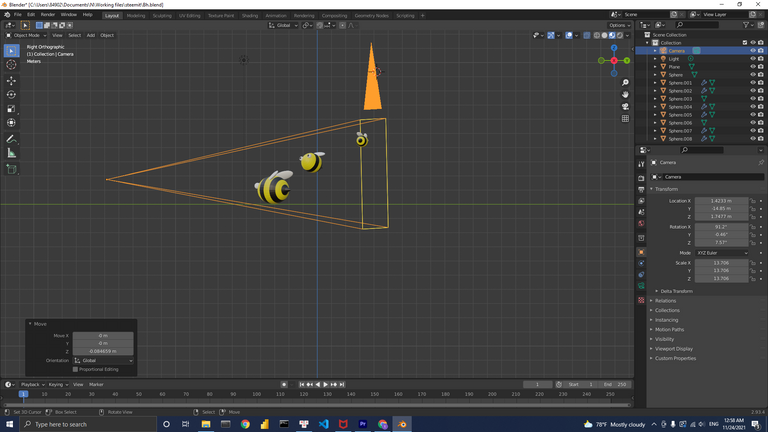
Scale the camera
Move and scale the camera to capture the whole scene
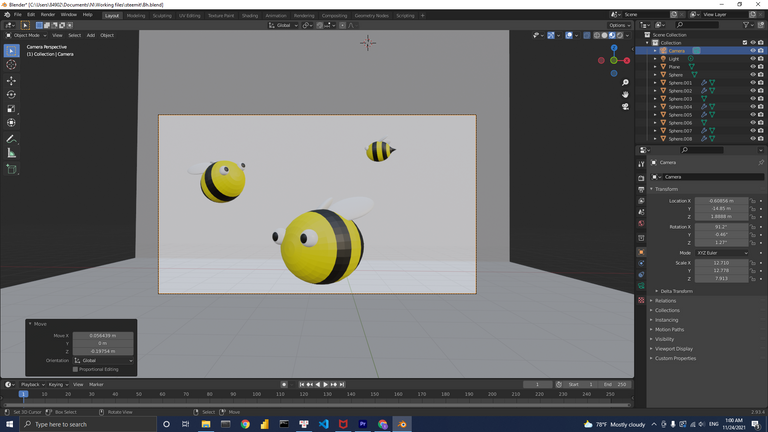
Press number 0 in Numpad to see the scene in camera view.
Shade smooth the bees
Mode: Object mode
Press F3 → Type Shade Smooth → Select it
The bees will look way smoother than before
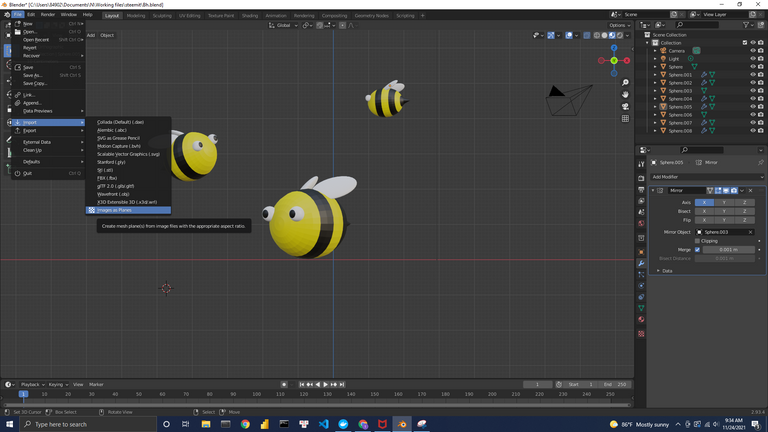
Apply the logos on their bodies
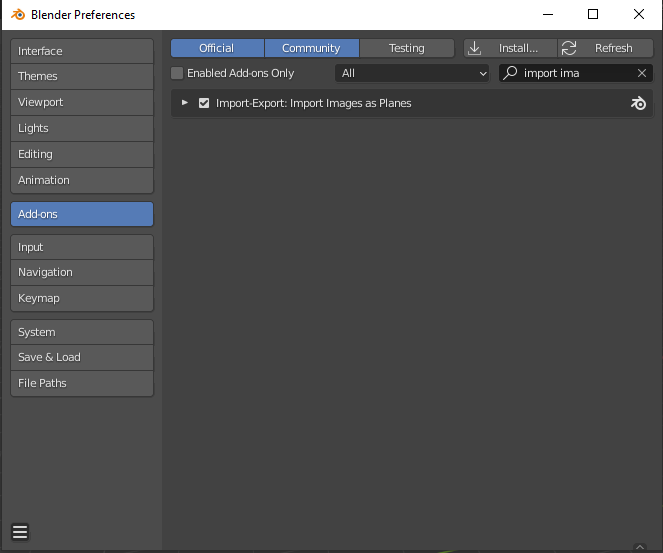
Import image as plane
Apply the logos to the wings
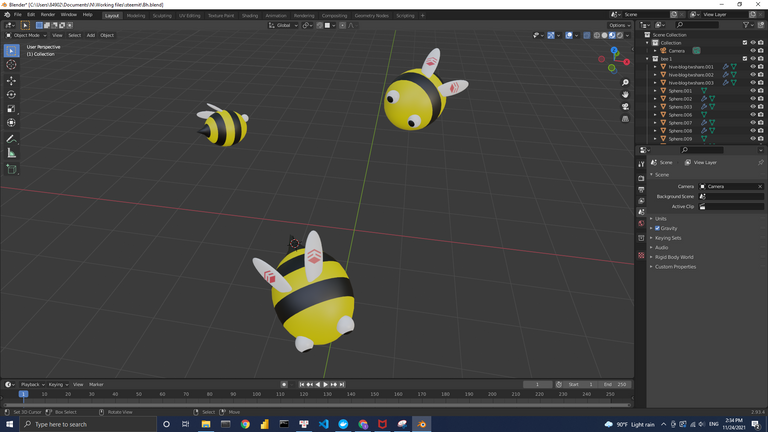
Voila, we're done with making some cute bees with Hive logos on their wings.
If you follow me to this point, well done! I know it's a long post 😅
So what's next ?
In part 2, we're gonna make the hive.
In part 3, I'm going to add the bones to the bees and animate them. So you will watch a short clip of bees flying around the hive
In parts 4 & 5, we will complete our marketing video to show the world
Before you ask, I know some people find it easier to watch tutorial videos to follow along.
I myself find it easier to learn by reading though.
Anyway, I will share the tutorial clip on 3speak later on.
Last but not least, all of the assets I create here will be shared with Hive community by the end of the series.
I love it and you are new in Hive !!!!
yea I'm a new bee here. Have just found my Hive =))
Sweeeeet , if you need delegation please let me know
Congratulations @mikevuu! You have completed the following achievement on the Hive blockchain and have been rewarded with new badge(s):
Your next target is to reach 50 upvotes.
Your next target is to reach 50 comments.
You can view your badges on your board and compare yourself to others in the Ranking
If you no longer want to receive notifications, reply to this comment with the word
STOPTo support your work, I also upvoted your post!
Check out the last post from @hivebuzz:
xời đỉnh luôn anh ơi