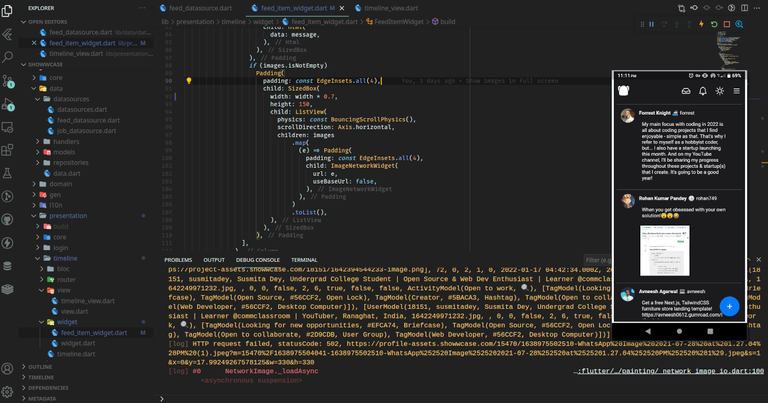
The first thing... The problem
I am a mobile application developer. I develop apps for both Android and iOS using Flutter. One of the main problems I had when I started in this world of mobile development is the high consumption of RAM memory that emulators have, the solution: directly use a physical device, in this case I use my own phone to run and test the applications that I developing.
At first everything was fine, enable developer mode on the phone, enable USB debugging and ready to work; Flutter recognizes your device and allows you to run and debug apps directly on it. There is only one problem, you must control the device in the traditional way, that is, using your hands, it is complex when you are writing code to leave your precious keyboard to touch the phone; and unless you have a stand to put your phone on, your neck is likely to start to hurt from looking at your PC screen and phone repeatedly during your workday. Another problem is that with time and constant movement, the USB cable is likely to start to wear out and present problems, making development very uncomfortable.
These are the reasons that led me to ask myself the following questions and investigate (do a Google search):
- How can I connect to the phone and use the adb (Android Debug Bridge) functions without using the USB cable?
- How can I display the phone screen and control it from PC in a similar way to Android emulators?
Use adb to connect to the phone via WiFi
This solution is basic, adb already provides a way to connect to an android phone using the classic TCP IP connection protocol. What is required is that both the PC and the Android device are connected to the same network (usually a LAN network). In my case, what I do is activate the phone's hotspot and connect the PC to it, another way would be to create a hotspot on the PC (or laptop) and perform the reverse operation or simply connect both the PC and the phone to the same router, the point is that they are on the same network and can communicate with each other.
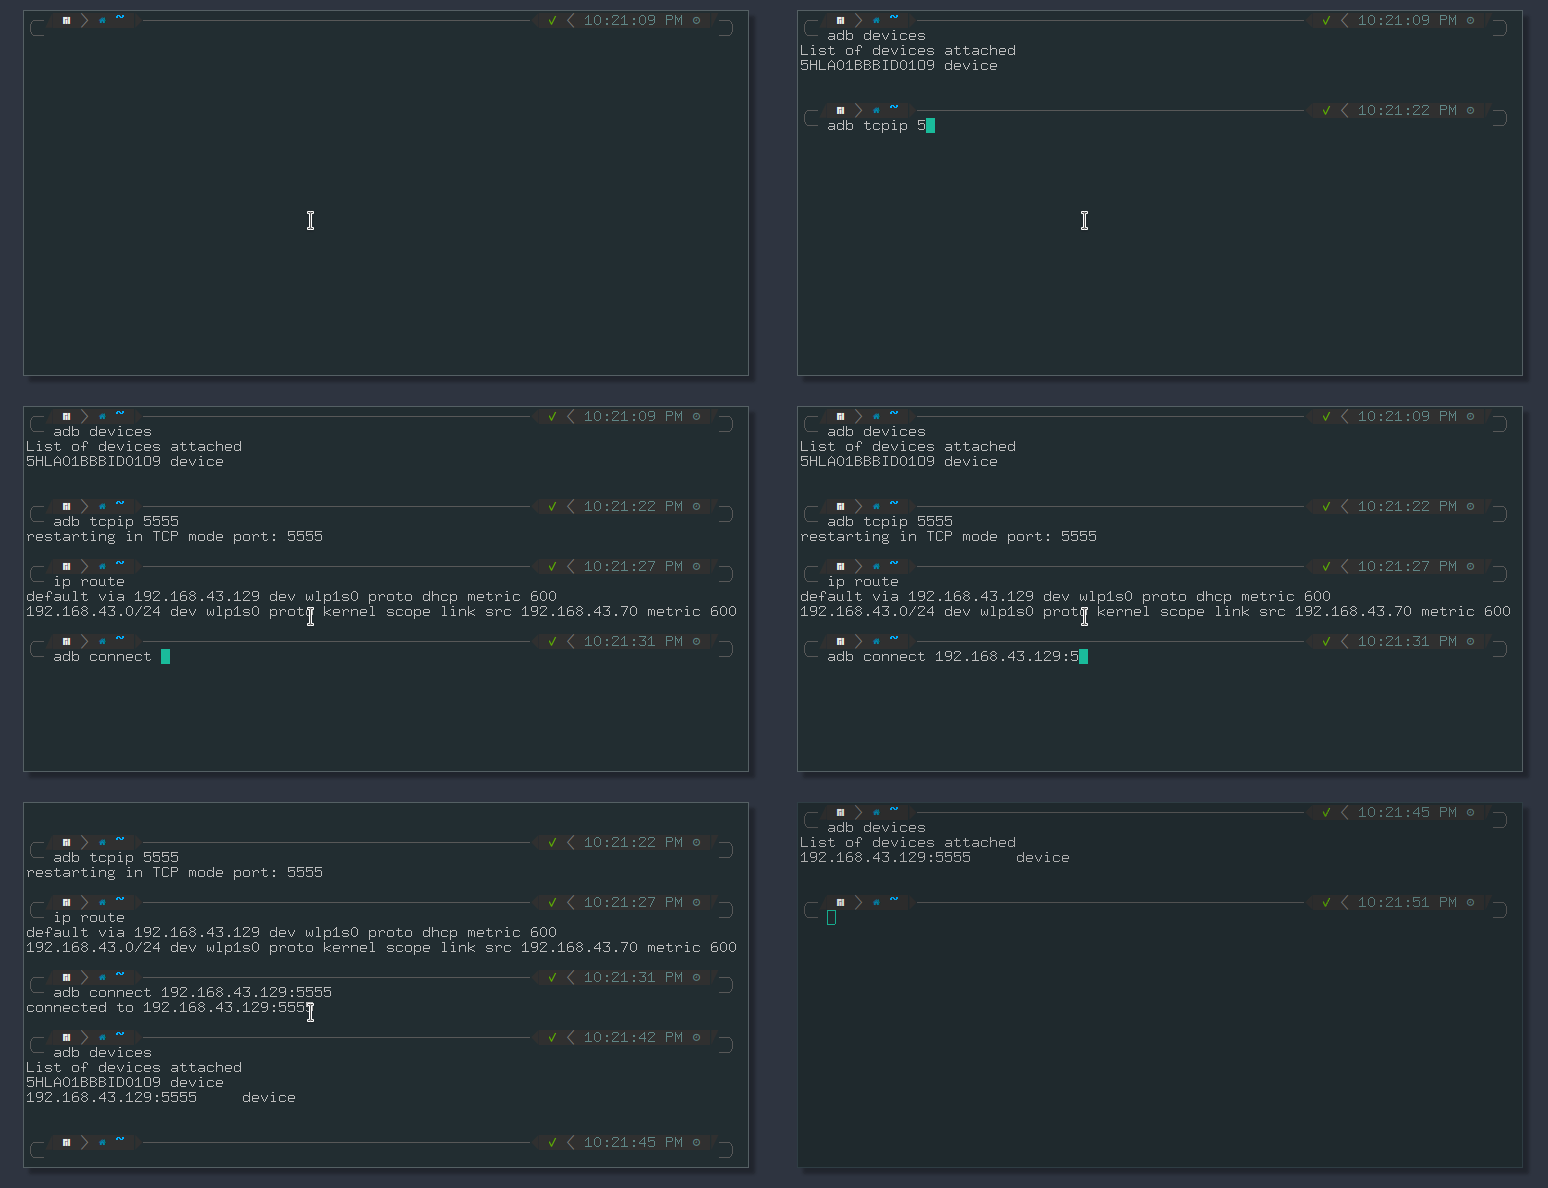
The first step is to connect the phone via USB to the PC and execute the following commands.

The first adb devices command is used to list the devices adb is connected to. As we have connected the device via USB, it is shown. Then run adb tcpip 5555 this causes that an adb server to run in TCP IP mode inside the device and listen on port 5555, you can select any port you want as long as it is greater than 1024 and less than 65535. Then I run the ip route command this is just to know what is the IP of my phone, there are different ways to obtain this information, in my case the phone functions as a router then my gateway is its IP. Finally what I do is connect via TCP IP using adb connect . Once this is done you can unplug the phone from the USB cable and it will be linked to adb using TCP IP over the WiFi network.
Share screen and control device from PC
Since this is the easiest step, all you have to do is install this wonderful tool: scrcpy. There are several ways to install it depending on your operating system, it is available for Linux, Mac OS and Windows. In the case of Linux, some distros already include it in their repositories, in others you may have to download and compile the code or use one of the binaries that are available on Github. In the case of Mac OS the package is available in homebrew.
Debian / Ubuntu
sudo apt-get install scrcpy
Mac OS
brew install scrcpy
Arch Linux / Manjaro
sudo pacman -S scrcpy
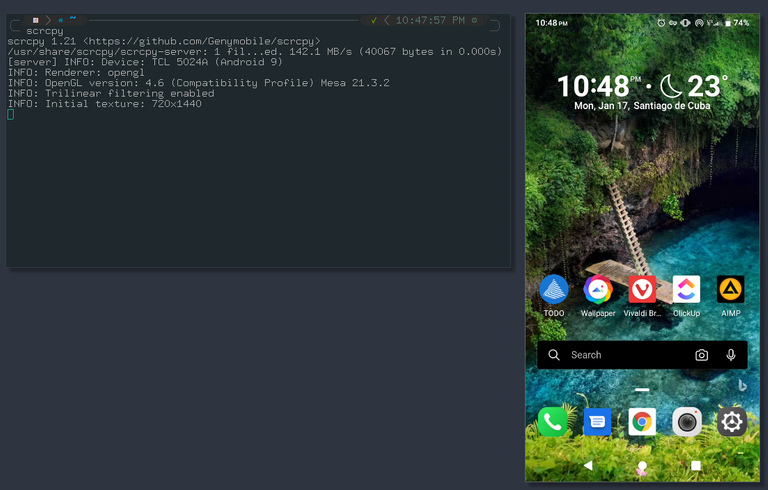
Once this tool is installed, all you have to do is run it from the command console.
scrcpy
After running it will start showing the device screen.

scrcpy also has other useful options such as recording the screen of the device, which I use a lot when making application demos.
scrcpy --record phone_record.mp4
Problem solved
With this I can safely connect to my android phone via Wi-Fi, run and debug the applications I develop on it without worrying about the USB cable. In addition to viewing and controlling the device from the PC, thus improving the experience when developing and saving time and effort.