The Molten Ash Golem helps burn the opposition in this week’s SYB challenge.

This week's “Share Your Battle” feature is the Molten Ash Golem. This 6-mana cost, Chaos Legion, close-ranged archer is a bit of an oddity in the heavy hitting, melee damage centric fire splinter. But being different isn’t always a bad thing, and with the addition of Conqueror Jacek to team fire’s summoner pool, all of the games fire and neutral archers have a chance to find new life in Splinterland’s hottest splinter.
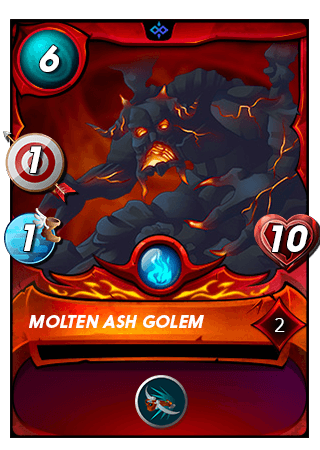
At level one the Molten Ash Golem has nine health points making it quite beefy. Add to this the close range ability, allowing it to launch ranged attacks from the front lines, and we have the basis for this card’s 6-mana cost. Bottom of barrel speed, attack power and armor (1, 1 and 0 points worth respectively) round out the unleveled Golem’s vital statistics.
Looking at the Molten Ash Golem’s level-progression chart we find that its advancement is modest in all areas and that its greatest development is probably in the abilities it acquires over time. At level two, the golem gains one health point bringing its total to ten. But this is as much health as the molten man will ever have. Similarly, at level three the golem’s attack power rises to two, but ultimately maxes out at three. Finally the Molten Ash Golem never gains any armor at any level.

However, this flaming arrow shooter’s lack of stat growth is balanced by its gaining additional abilities. At level five, the MAG is granted the weaken ability which lowers the health of all of the members of the opposing team. And at its maxed out level eight, the golem gains the demoralize ability which lowers the melee attack power of the opposing team. So, when the Molten Ash Golem isn’t gaining strength for itself, it is weakening its opposition instead.


As one of my first matches of the new season, I received a bout that was to be played with max (99) mana. As I play in the bronze league, and had just been hit by the start of season rank reduction, this match was governed by standard rules. My opponent hadn’t played any 99-mana matches in their last five. Further, they were not showing any cards that would lead me to believe that they would deviate much from the bronze league standard for their team. Which is to say I expected to face either a forward attacking earth or light team.
For such matches, I usually send out a Conqueror Jacek lead fire team. While the Molten Ash Golem doesn’t usually make the cut, knowing that this card was the focus for the latest Share Your Battle challenge, I decided to work it onto my team. This was no great sacrifice, while I usually choose an attacker with a higher attack power, the Golem’s high health could also be made to work with my max-mana-team strategy. So, it was game on!


As a matter of strategy, my team is broken into two parts. The first part is a wall of heath and armor to absorb an anticipated frontal assault. Behind the wall, the second part of my team consists of high powered ranged attackers which will all have the scattershot ability gained from my summoner. The hope is that my wall will absorb the barrage of forward fire long enough for my taunt-resistant scatter-shooters to clean out the enemy backfield–especially of any glass cannons hiding there.


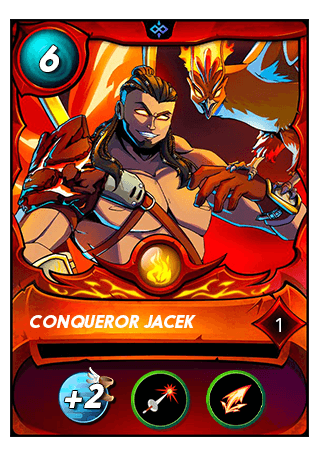
Conqueror Jacek serves as my summoner. Jacek is central to my strategy on two counts. First, the scattershot ability that I am counting on to clear out the enemy backfield is granted as one of the Conqueror’s buffs. And just as importantly, the +2 speed buff also granted will help ensure that my team is always acting first. It’s good to clear out the opponents backfield, but it’s better to do so before they can attack in the first place! And if that isn’t enough Jacek’s armor piercing buff is another nice bonus.
For my tank, and as the first brick in my wall, I chose The Forgotten One. This fire team behemoth with four armor and eight health is intended to serve as the first line of defense protecting my backlines.
Next is another brick in the wall, and what a brick: Grum Flameblade. With five armor, ten health and the void shield ability, big Grum will absorb a minimum of fifteen points of damage whether or not he is attacked with magic.
In third position I usually place my most healthy ranged attacker. The fighter in this position is part wall and part attacker, but I think higher attack power works better than higher health. However, for this battle I am placing The Molten Ash Golem here, filling the slot with a team member that is more wall than attacker.
Starting with the fourth position, I am beginning to place my serious attackers. And in this case, a Lava Launcher is utilized. Its 3-powered attack, aided by the armor piercing buff, makes this mechanized menace a force to be reckoned with.
My penultimate slot is filled by the Fire Elemental. With a 2-powered ranged attack and the blast ability this fast archer will be dealing three or four points of damage per attack.
And finally, playing rear guard, is the Gargoya Devil. At level two, this reward card packs a two-point-damage punch and after receiving Jacek's speed buff is a flying 5-speed attacker. I place it last in case my opponent surprises me and slips sneaks onto their team. Facing backfield attackers is not ideal for my crew, but at least my fast flying fiend has a fighting chance to evade any blows thrown its way.

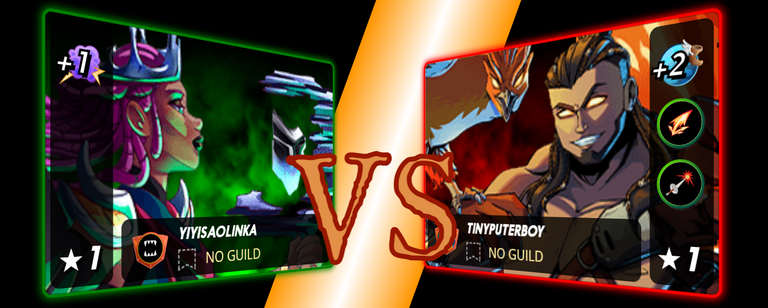
Earth led by Obsidian. So far, no surprises.
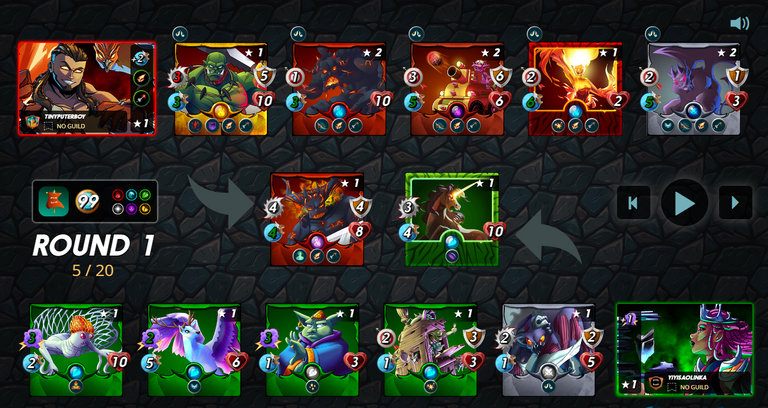
Here is the field with all buffs and debuffs applied.
Admittedly, it can be difficult to analyze Conqueror Jacek matches because of the highly random nature of scattershot. However, here is how I look at my match’s setup. First, my team is generally faster than the opposition. So, I can simplify the match into “my whole team attacks then my opponent attacks.” It’s not completely right, but it’s close enough for an estimate of what to expect.
So, in the first round I will deal eight or nine points of damage to team green (depending on if my elemental catches one or two foes with its blast,) and then they will take down my tank, unless I happened to have eliminated the Goblin Psychic. Next round I will deal another eight or nine points of damage. After my opposition takes their shots, my Grum will still be standing unless I had somehow managed not to kill at least one of Earth’s active attackers in my two rounds of attack.
Before my opponent acts in round three, I will deal another eight or nine points of damage. Here I am assuming that any melee attacks landed on the Mustang Unicorn are healed, so actually, it is a conservative analysis. My total damage prior to when my tanks fall is 24 to 27. At this point, there is an excellent chance that I will have reduced the opposing ranks enough that their third round volley isn’t strong enough to take down my Ash Golem. This will bring my damage to 32 to 36 before I am attacked in the fourth round. With a total of 42 points of health/armor to start, Earth will now be severely depleted and still facing my back three.
So, I believe I have an excellent chance of coming out on top in this match.
You can see how it played out for yourself here.

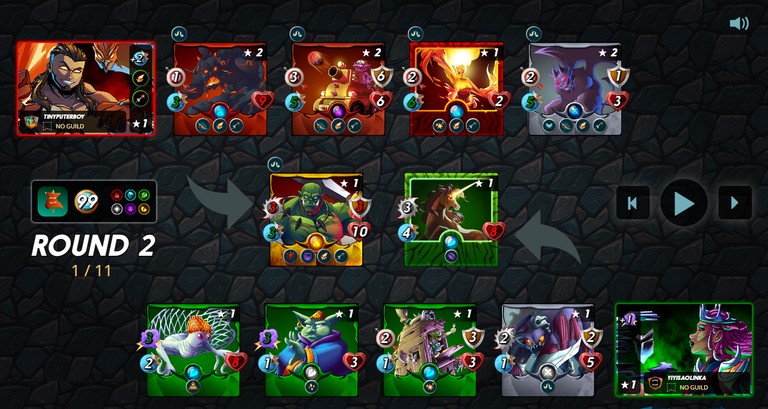
Here is the field before the start of round two. I have lost my first tank and my opponent is short a Regal Peryton. The missing 2-attack points from the Earth team ensures that Grum is still standing at the start of round three, and that makes my path to victory that much easier.
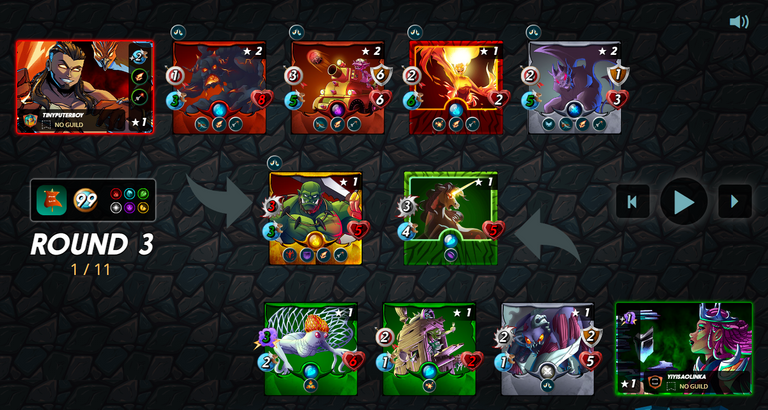
Before the start of round three we can begin to clearly see that the green team is in a hopeless situation. Now their healer has fallen and all the damage I deal from now on is permanent. The Mustang Unicorn can’t bring down Grum, so earth is facing 11 more points of damage before they can effectively counterattack. But they only have 20 points of damage left. Even at their current strength, they can’t get past my Molten Ash Golem in round three. Round four will begin with my opponent losing at lease eight of their last nine health points. Game over.
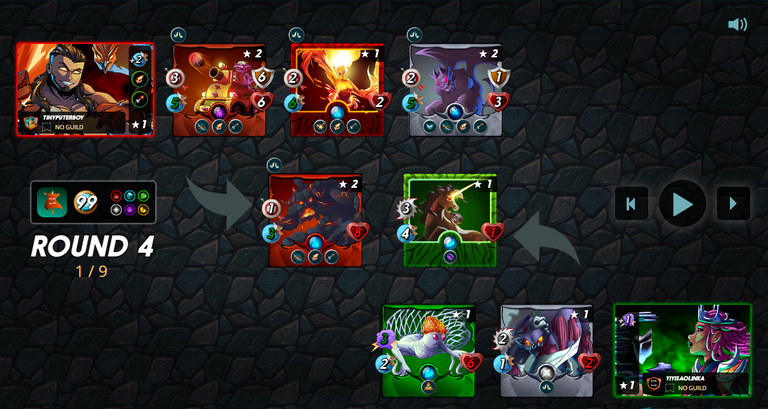
As predicted, at the beginning of round four earth stands with nine points of damage and no hope.

My Gargoya Devil lands the death blow.

Although this week's SYB focus is the Molten Ash Golem, Conqueror Jacek was clearly the star on my team. With both speed and scattershot buffs, this summoner can head a team capable of laying waste to an entire team while they barely have the time to respond.
Admittedly any ranged attackers will do well in this setting, but even so, the Molten Ash Golem slotted in exceptionally well. With it barely touched, I had plenty more wall intact so I could have stood a chance against a more stacked team, like the ones l am sure to face as I progress through the season and up the rankings.
May I ask you to review and support the new HiveSQL Proposal so we can keep it free to use for the community?
You can do it on Peakd, ecency, or using HiveSigner
Thank you!Dear @tinyputerboy,
Done. Thank you for calling the proposal to my attention.
Congratulations @tinyputerboy! You have completed the following achievement on the Hive blockchain And have been rewarded with New badge(s)
Your next target is to reach 3000 replies.
You can view your badges on your board and compare yourself to others in the Ranking
If you no longer want to receive notifications, reply to this comment with the word
STOPCheck out the last post from @hivebuzz:
Thanks for sharing! - @rehan12
