Hallo allerseits!
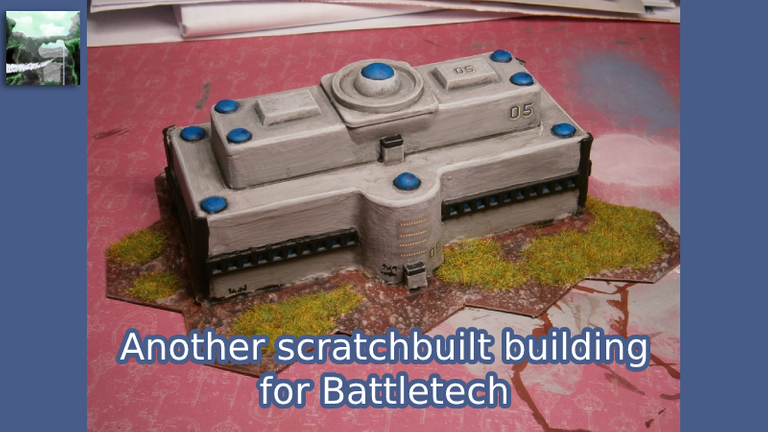
der Booster macht mich immer noch platt, so muss ich zuhause bleiben, habe aber diese Woche dafür mehr Zeit fürs Basteln. Heute habe ich ein weiteres Gebäude für Battletech-Hexfeldkarten fertiggestellt. Ich wollte diesmal etwas mehr Details als bei meinem Advents-Post hinzufügen und ein paar Anregungen geben, was man alles für so ein Scratchbuild-Projekt gebrauchen kann!
| English Translation |
|---|
| Hi All! The booster vaccination still takes me down so I have to stay at home but on the other hand have more time for doing handicrafts. Today I finished another building for Battletech hexmaps. This time I wanted to provide it with some more details than the one from my advent post and give some inspiration for what stuff you could use for a scratchbuild project! |

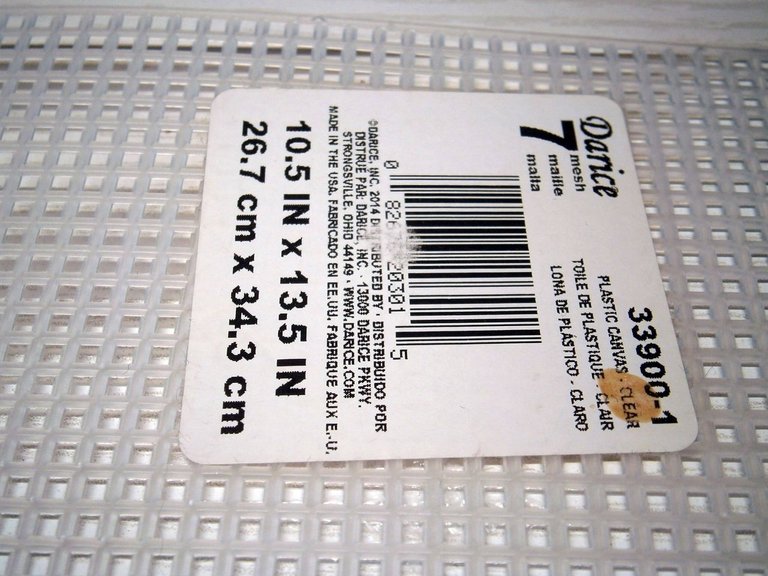
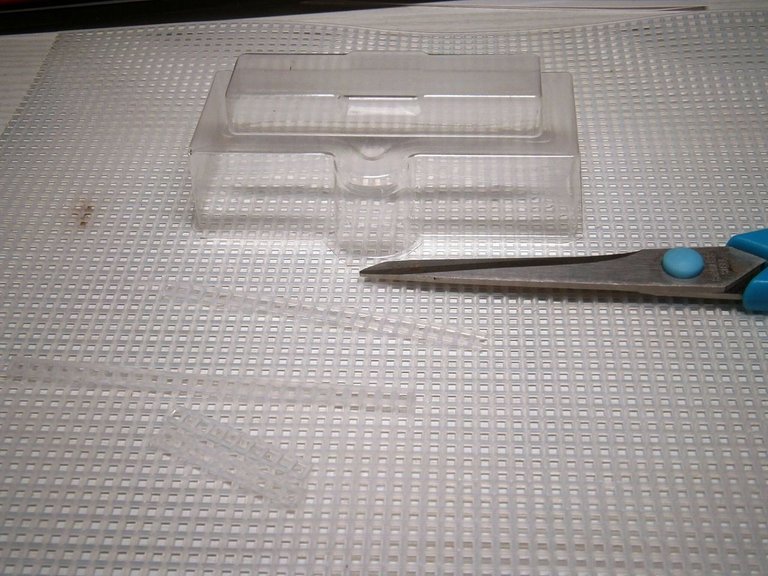
Die Basis bildete wieder ein Plastikstück aus einem Adventskalender. Ich habe noch eine ganze Tüte davon, das wird für dieses Jahr sicher erst einmal reichen 😅 Für die Fensterfronten bot sich diese Mesh-Matte an, die meine Frau aus irgendeinem Grund wohl einmal gekauft und dann doch nicht gebraucht hatte. Ich maß die Breite der einzelnen Außenwände ab und schnitt dann etwas kürzere Streifen aus der Matte aus, die die Fenster darstellen sollten. Alternativ geht sicher auch das Mesh einer (unbenutzen ^^) Fliegenklatsche.
| English Translation |
|---|
| The main body was made out of a plastik piece from the advent calendar again. I got a whole bag full of them - this will surely provide me with buildings for the whole year 😅 For the window facades this mesh mat came in handy, which my wife had bought for some reason but did not use anyway. I measured the length of the walls and cut out some pieces a little shorter from the mesh - these should become the windows. Alternatively you can surely use the mesh from an (unused ^^) fly swat. |
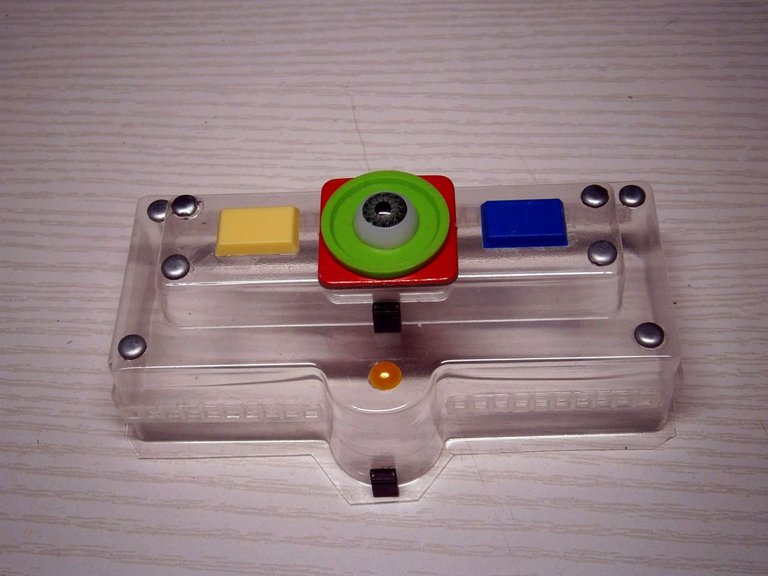
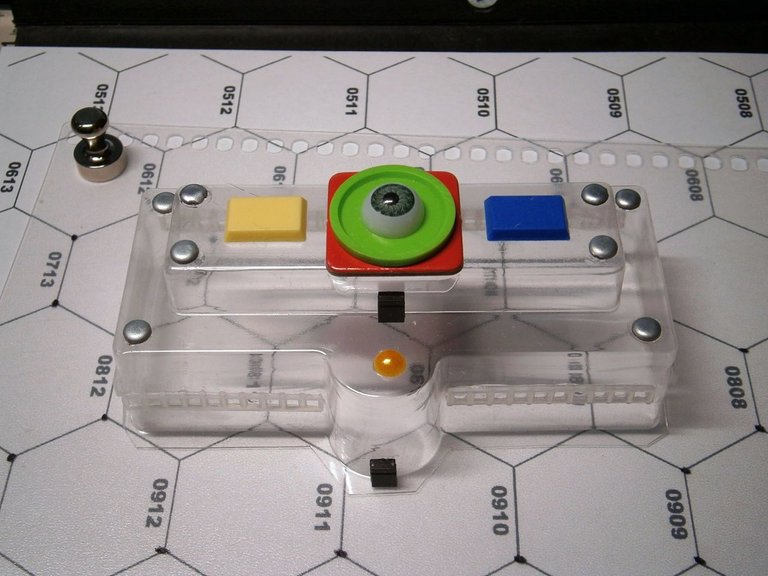
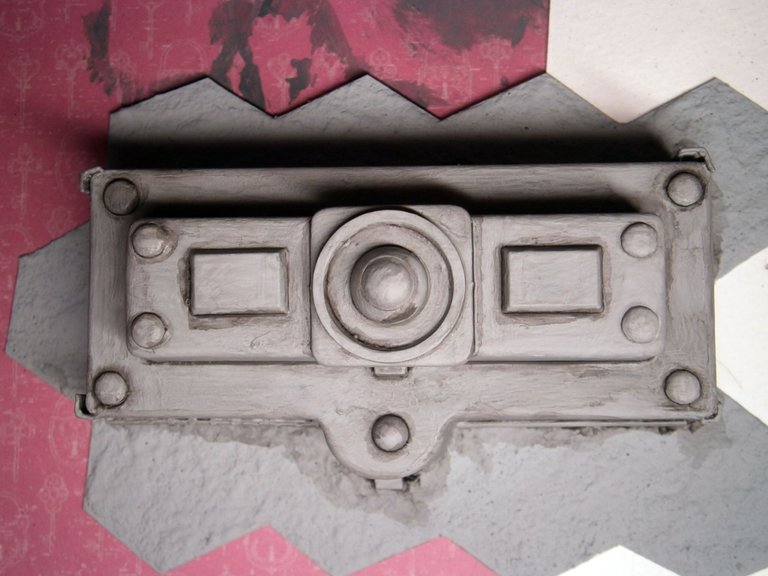
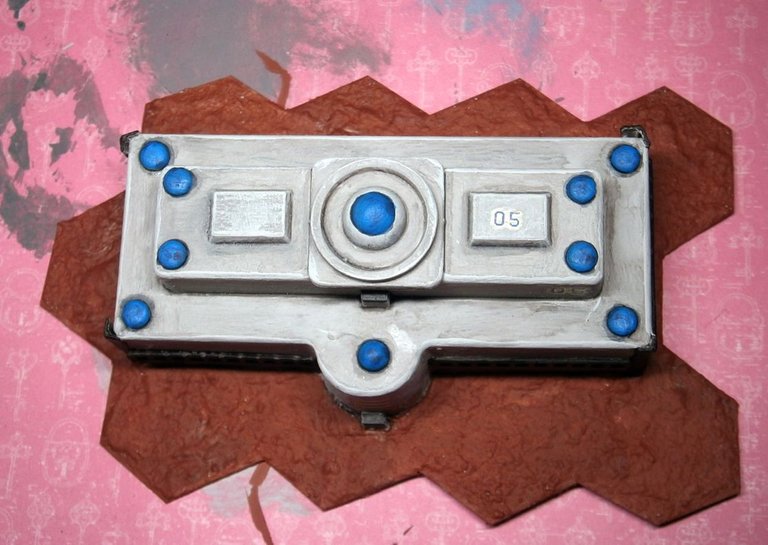
Als große Kuppelfenster hielten ein paar Bastelperlen in einer Art plattgedrückter Halbkugelform her. Die Eingänge ließen sich prima mit zwei Jumpern darstellen, die ich noch vom letzten Rechnerbau übrig hatte. Auf dem Dach sorgten ein Papp-Plättchen aus einem alten Brettspiel, zwei Teile eines Mosaik-Kreativsets, ein Einkaufswagen-Chip sowie ein altes Auge eines kleinen Plüschtieres (nein, das habe ich nicht extra dafür zerstört - es war schon hinüber ^^) für etwas mehr Details. Die Chips hatte ich mir mal als Bases für ausdruckbare Papierminiaturen oder kleine Geländestücke oder Marker besorgt.
| English Translation |
|---|
| For the big window domes some DIY beads formed like some kind of flattened half sphere were used. The entrances could be nicely portrayed by two jumpers I got left from my last PC build. On the roof a cardboard counter from an old boardgame, two plastic pieces out of a mosaic DIY set, a plastic chip used for shopping carts and some eye from an old little plush toy (no, I did not destroy it for this building it had been teared a while ago ^^) provided some details. I got me the shopping cart chips someday for being used as bases por printable paper miniatures or littel terrain pieces or markers. |
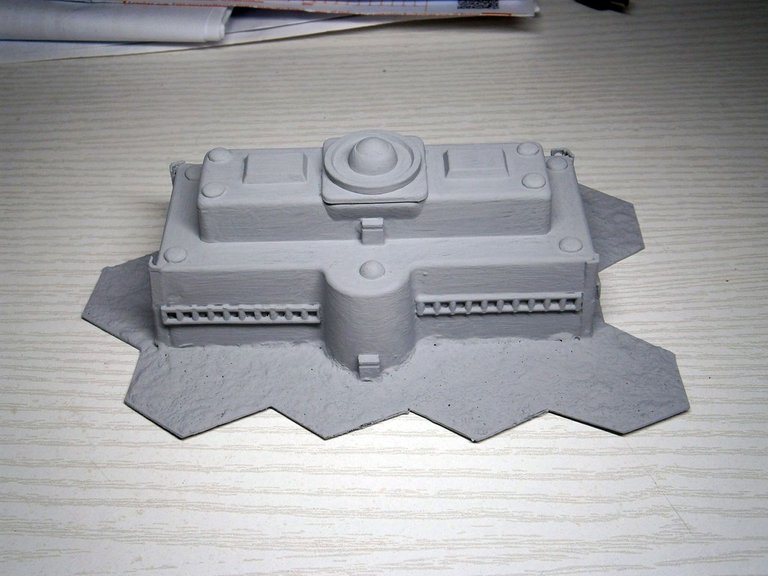
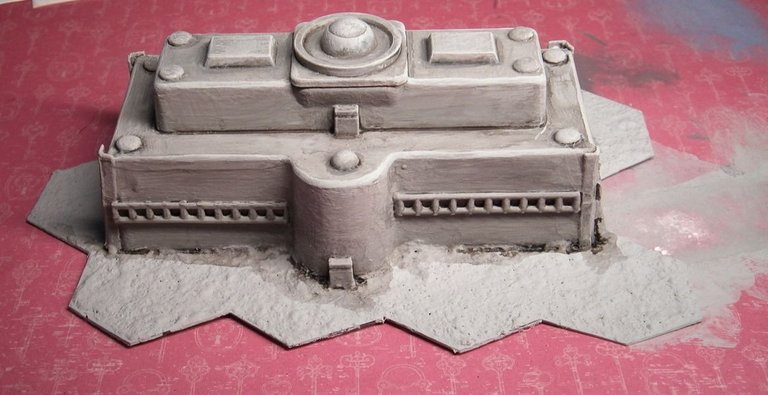
Das schien mir genug an Details zu sein und es war Zeit, das Gebäude auf ein Base mit passendem Hexfeld-Muster zu kleben. Ich bin mir aber mittlerweile nicht mehr sicher, ob das die beste Variante ist oder ob es nicht besser aussieht, die Gebäude einfach auf eckigen Bases zu platzieren. So könnten sie auch für andere Tabletops genutzt werden. Als Base benutzte ich diesmal eine Trennseite aus hartem Plastik, welche ich aus dem alten Schulplaner meiner Tochter noch vor dessen Entsorgung entfernt hatte. Das verhindert im Gegensatz zur Pappe vom letzten Mal, dass sich durch Feuchtigkeit irgendetwas beim Bemalen verziehen kann. Zuletzt klebte ich noch kleine Papp-Ecken an die vier Ecken des Gebäudes, das muss allerdings wohl erst nach dem Foto passiert sein 😅
| English Translation |
|---|
| These seemed to be enough details and it was time to glue the building onto a base with fitting hex map pattern. Meanwhile I am not sure if this is the best method or if it would look better to place the buildings on simple rectangular basess. That way they could be used for other tabletops, too. as a base this time I used a dividing page from my daughters last year school planner I had removed before its disposal. This prohibits the base from being soaked with humidity and being deformed a bit while being painted instead of the cardboard from the last time. Last I glued some edges made out of cardboard onto the four edges of the building - this obviously must have been done after taking the pictures 😅. |
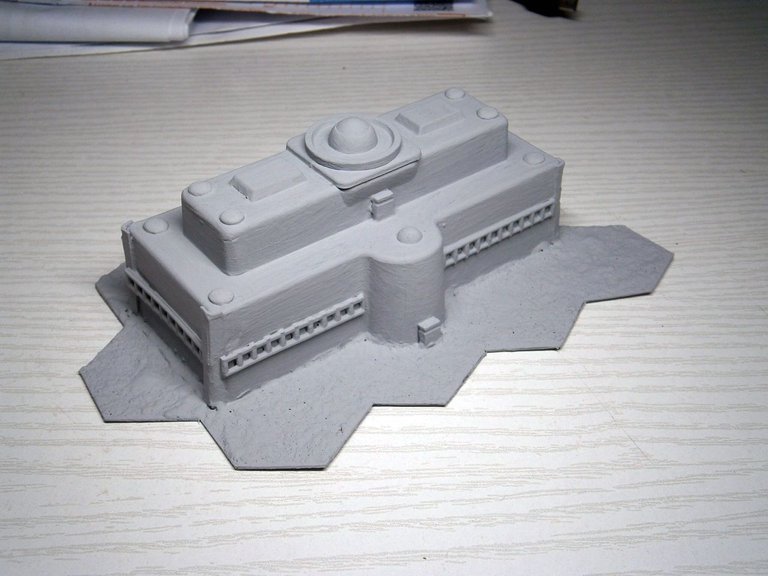
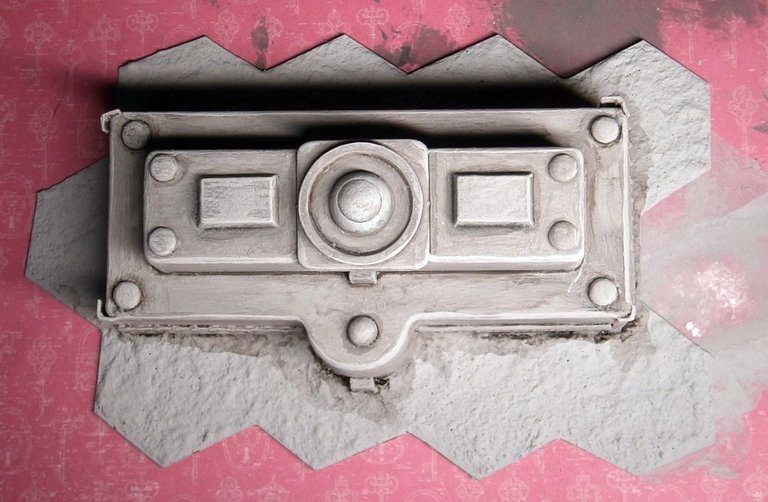
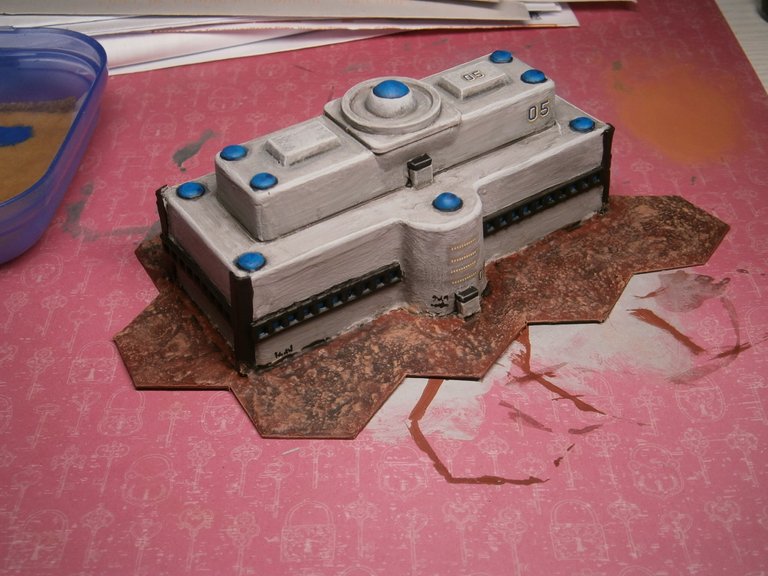
Das ausgeschnittene Base wurde dann mit dem Gebäude bestückt und bekam eine Schicht aus einem Mix aus Bastelkleber und Sand aufgestrichen. Das Ganze wurde dann nach dem Trocknen mit Abtönfarbe grau grundiert. Beim nächsten Mal werde ich aber vielleicht lieber Farbe für Miniaturen für die Grundierung benutzen - die Farbe aus dem Baumarkt benötigte trotz ihrer dicken Struktur einige Schichten, bis Alles dicht war.
| English Translation |
|---|
| The cut out base was then populated with the building and got applied a mix out of (modgge podge like) glue and fine sand. The whole piece was then basecoated with a grey colour from the hardware store after having dried completely. The next time I perhaps will use miniature colour for the basecoat, the colours from the hardware store need a couple of layers to cover nicely despite them being very thick. |
Nach dem Tuschen konnte man dann schon gut die Details erkennen.
| English Translation |
|---|
| After having applied the in the details coome out nicely. |
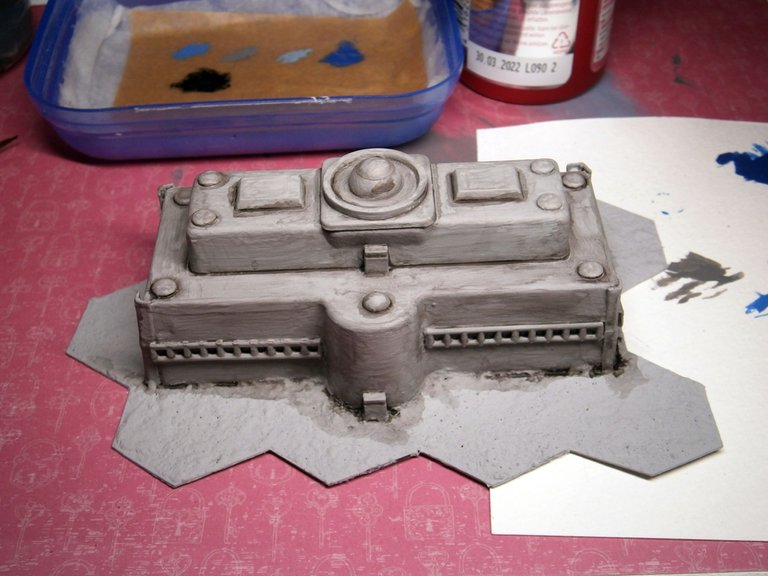
Im nächsten Schritt wurde das Gebäude mit einem helleren Grauton trockengebürstet und die Kanten betont.
| English Translation |
|---|
| In the next step the building was drybrushed with a lighter grey tone so that the edges got some accents. |
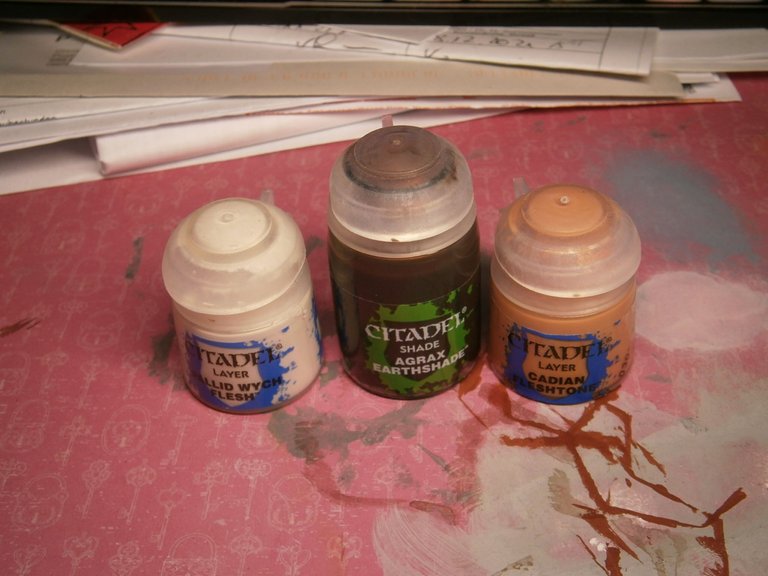
Das Gebäude war nun fertig zum Bemalen! Die Kuppeln und Innenbereiche der Fenster bekamen eine Schicht aus "Voidshield Blue" von Army Painter, bevor sie mit "Drakenhof Nightshade" getuscht wurden. Ein paar weitere Akzente wurden mit "Abaddon Black" gesetzt, die Eingänge bekamen dann noch Highlights mit "Dawnstone". Das Base wurde zuerst mit "Dark Fleshtone" von Vallejo grundiert. Ich muss mir demnächst ein oder zwei neue braue Farbtöpfe bestellen, dies ist meine einzige noch halbwegs gute dunkelbraune Schichtfarbe und sie lässt sich schon nicht mehr komplett beim Schütteln komplett durchmischen. Ein paar weitere Details wie die Ziffern und die kleinen Lichter über dem Eingang habe ich dann mit ein paar alten Decals realisiert. Ich werfe alte Decals von Bausätzen nie weg, manchmal werden auch billige Seiten davon auf Ebay angeboten. Es gibt immer eine Möglichkeit, diese bei einem zu benutzen und sie nehmen ja nicht viel Platz weg!
| English Translation |
|---|
| The building now was ready for painting! The domes and inner parts of the windows got a layer of "Voidshield Blue" from Army Painter before being washed with "Drakenhof Nightshade". Some more accents were done with "abaddon Black", the entrances additionally got some edge highlights with "Dawnstone". The base was the first basecoated with "Dark Fleshtone" from Vallejo. I have to get me one or two new dark brown colours, this is my only relatively good dark brown layer colour left and it can not be mixed up completely by shaking anymore. Another couple of details like the numbers and the lights above the entrance were achieved by applying some old decals. I never throw decals from old hobby kits away, sometimes there are also some of them sold cheap on ebay. There is always a possibility to use them on aproject and the do not take away much place! |
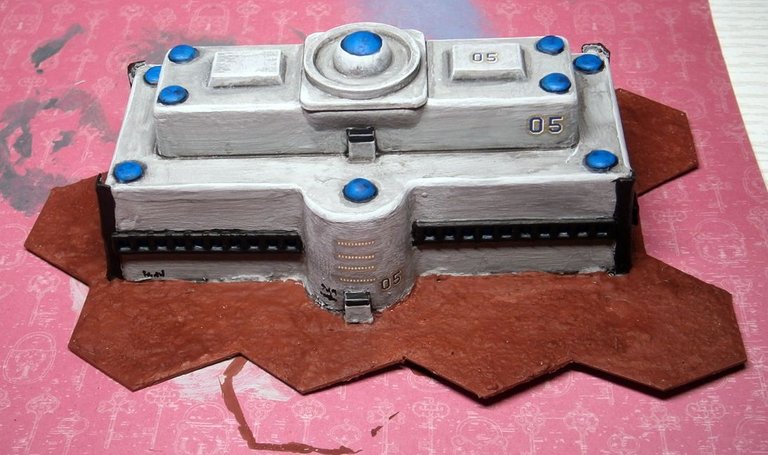
Das Base wurde dann relativ großzügig mit "Agrax Earthshade" getuscht und bekam eine trockengebürstete Schicht aus "Cadian Fleshtone".
| English Translation |
|---|
| The base was then inked relatively generous with "Agrax Earthshade" and got a drybrushed layer with "Cadian Fleshtone". |
Die letzten Akzente wurden dann leicht mit "Pallid White Flesh" trockengebürstet.
| English Translation |
|---|
| The last accents were then done by drybrushing slightly with "Pallid White Flesh". |
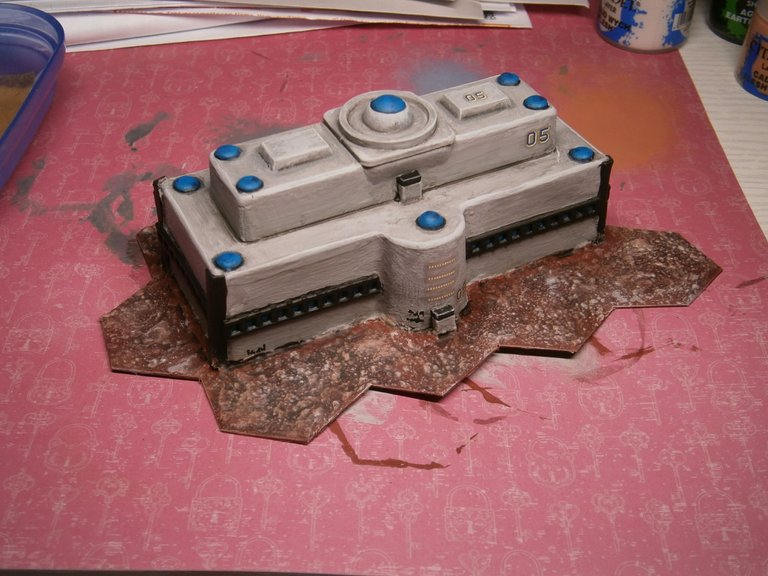
Jetzt fehlte nur noch das statische Gras und das Gebäude war einsatzbereit, vor dem Spiel muss es dann nur noch mit einer transparenten Schutzschicht besprüht werden.
| English Translation |
|---|
| Now just the static grass was missing and the building was done, it just has to be sprayed with a transparent protective layer before battle. |

Vielleicht werde ich demnächst mal ein Gebäude auf einer kleinen rechteckigen Base platzieren und schauen, wie das so aussieht. Das wäre dann flexibler einsetzbar und kann auch für andere Spiele in ähnlichem Maßstab verwendet werden, die kein Hexfeld nutzen. Was würdet ihr bei Battletech Gebäuden bevorzugen?
| English Translation |
|---|
| Perhaps I will place a building on a litthe rectangular base in the future and see how that looks. That could be utilized more flexible and could also be used for other tabletop games with similar scale the use no hex maps. What would you prefer for your battletech buildings? |
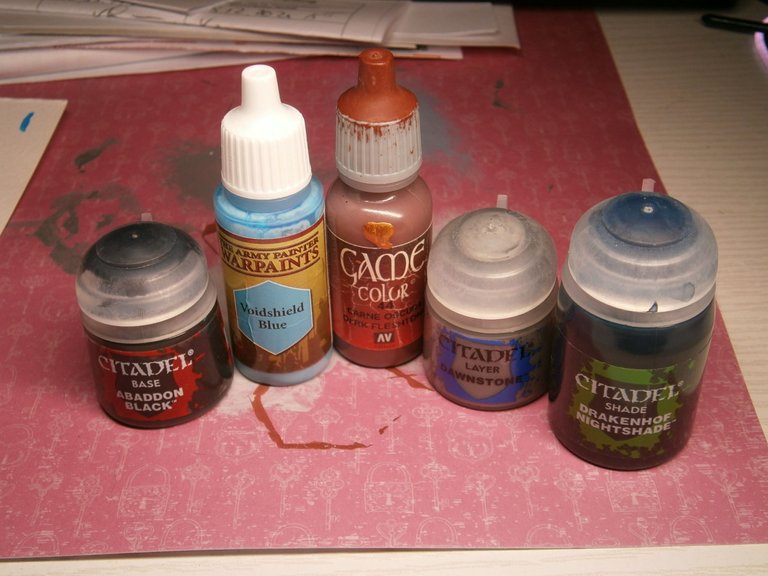
Dann bis zum nächsten Mal! Hier noch einmal die verwendeten Farben:
| English Translation |
|---|
| Until next time then! Here again the colours that have been used: |
Auf die Idee muss man erstmal kommen, sehr cool😄 Ich hoffe ich werde auch mal zeit finden meine Dark Angels weiter zumalen
Ja Zeit ist leider echt oft der begrenzende Faktor 😅 Zu irgendeinem Turnier oder dergleichen würde ich sowieso nie eine komplette Armee zusammen haben, bevor die Modelle obsolet sind g Immerhin scheint es nun langsam etwas sonniger zu werden und man hat insgesamt vollere Batterien!
Congratulations @captainglondo! You have completed the following achievement on the Hive blockchain and have been rewarded with new badge(s):
Your next target is to reach 700 upvotes.
You can view your badges on your board and compare yourself to others in the Ranking
If you no longer want to receive notifications, reply to this comment with the word
STOPCheck out the last post from @hivebuzz: