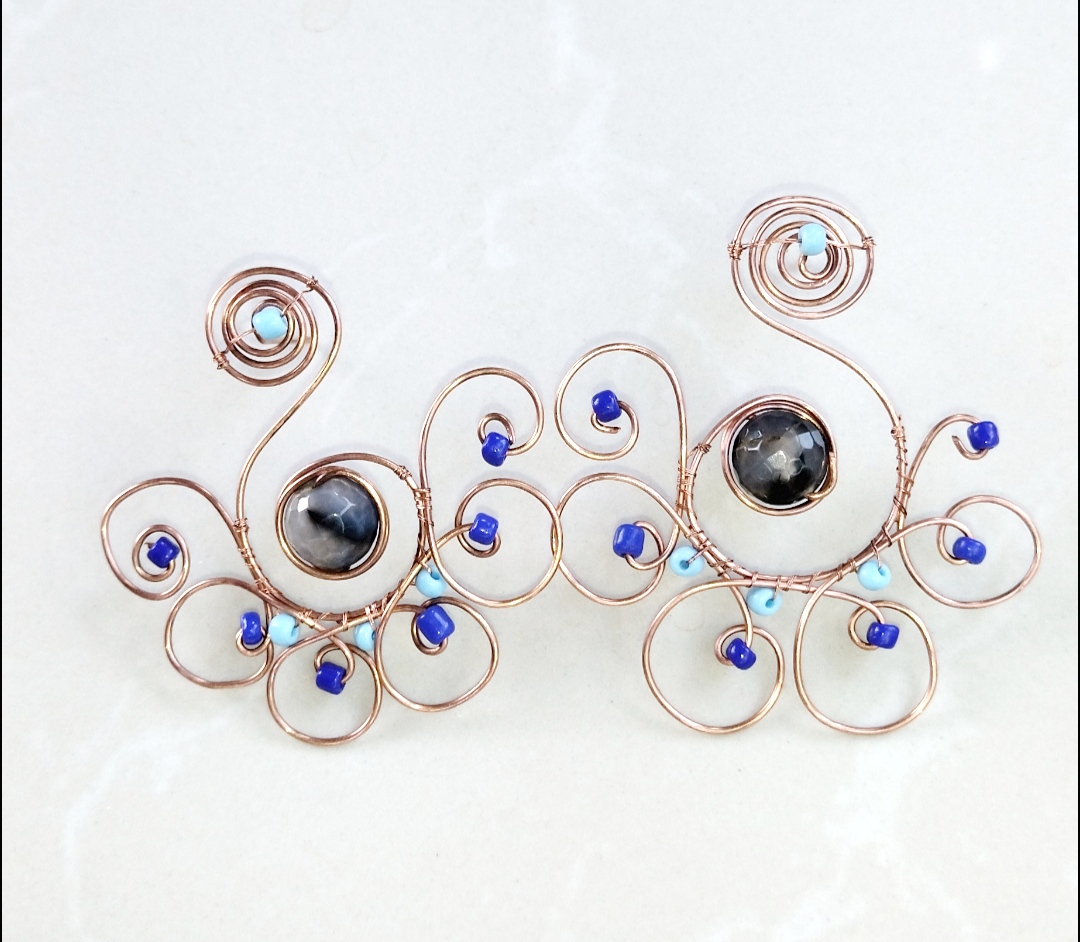
It's time to make our girls fall in love, beautiful peacock-themed earrings
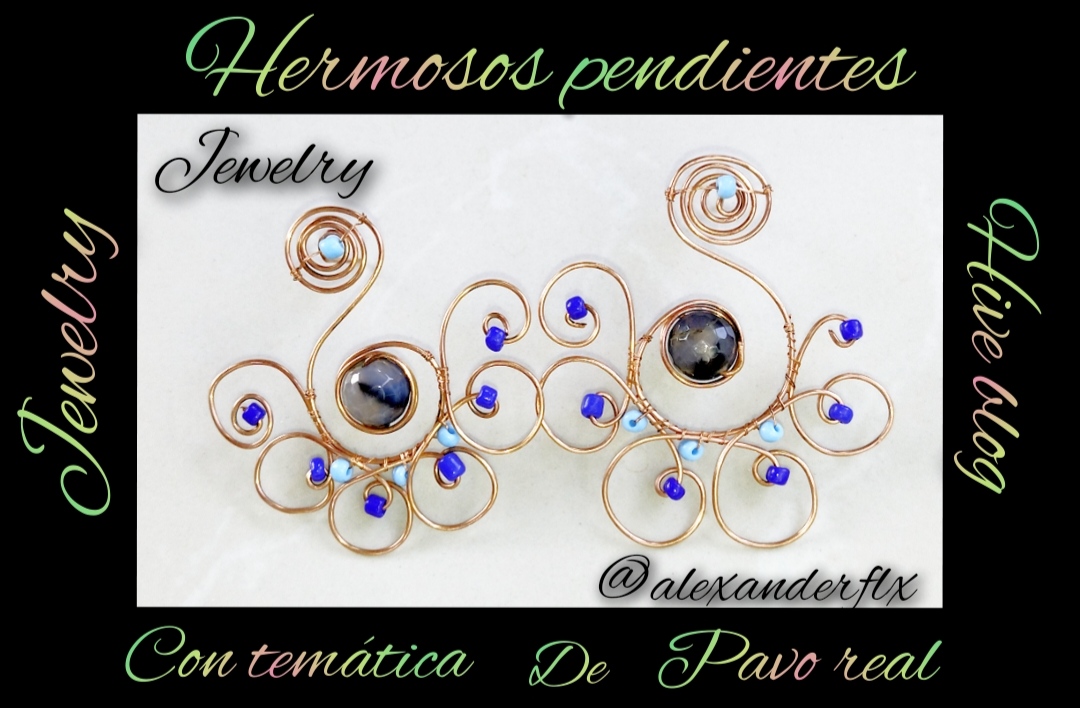
Hola feliz noche para todos espero estén bien y pasen una hermosa noche esta noche les quiero compartir unos hermosos zarcillos con temática de pavo real, estos zarcillos los logré hacer con mucho esfuerzo y demasiado amor tome la imagen de un pavo real y intenté darle la forma más parecida a mis zarcillos son muy fácil de realizar y con muy pocos materiales como siempre los ago la verdad no sé si están un poco grande pero eso lo dejo a opinión de ustedes, estos pendientes están echo con piedra de bisutería y alambre y mucho cariño bueno les doy las gracias ante mano espero les guste siempre es un gusto compartir con ustedes, sin mas que decir pasaremos al paso a paso.
Hello happy night to all I hope you are well and have a beautiful night tonight I want to share some beautiful earrings with a peacock theme, these earrings I managed to make with a lot of effort and too much love I took the image of a peacock and tried Give it the most similar shape to my earrings. They are very easy to make and with very few materials, as I always do, I really don't know if they are a bit big, but I leave that to your opinion. These earrings are made with jewelery stone and wire. and a lot of love, well, I thank you in advance, I hope you like it, it is always a pleasure to share with you, without further ado, we will go step by step.
What do we need.
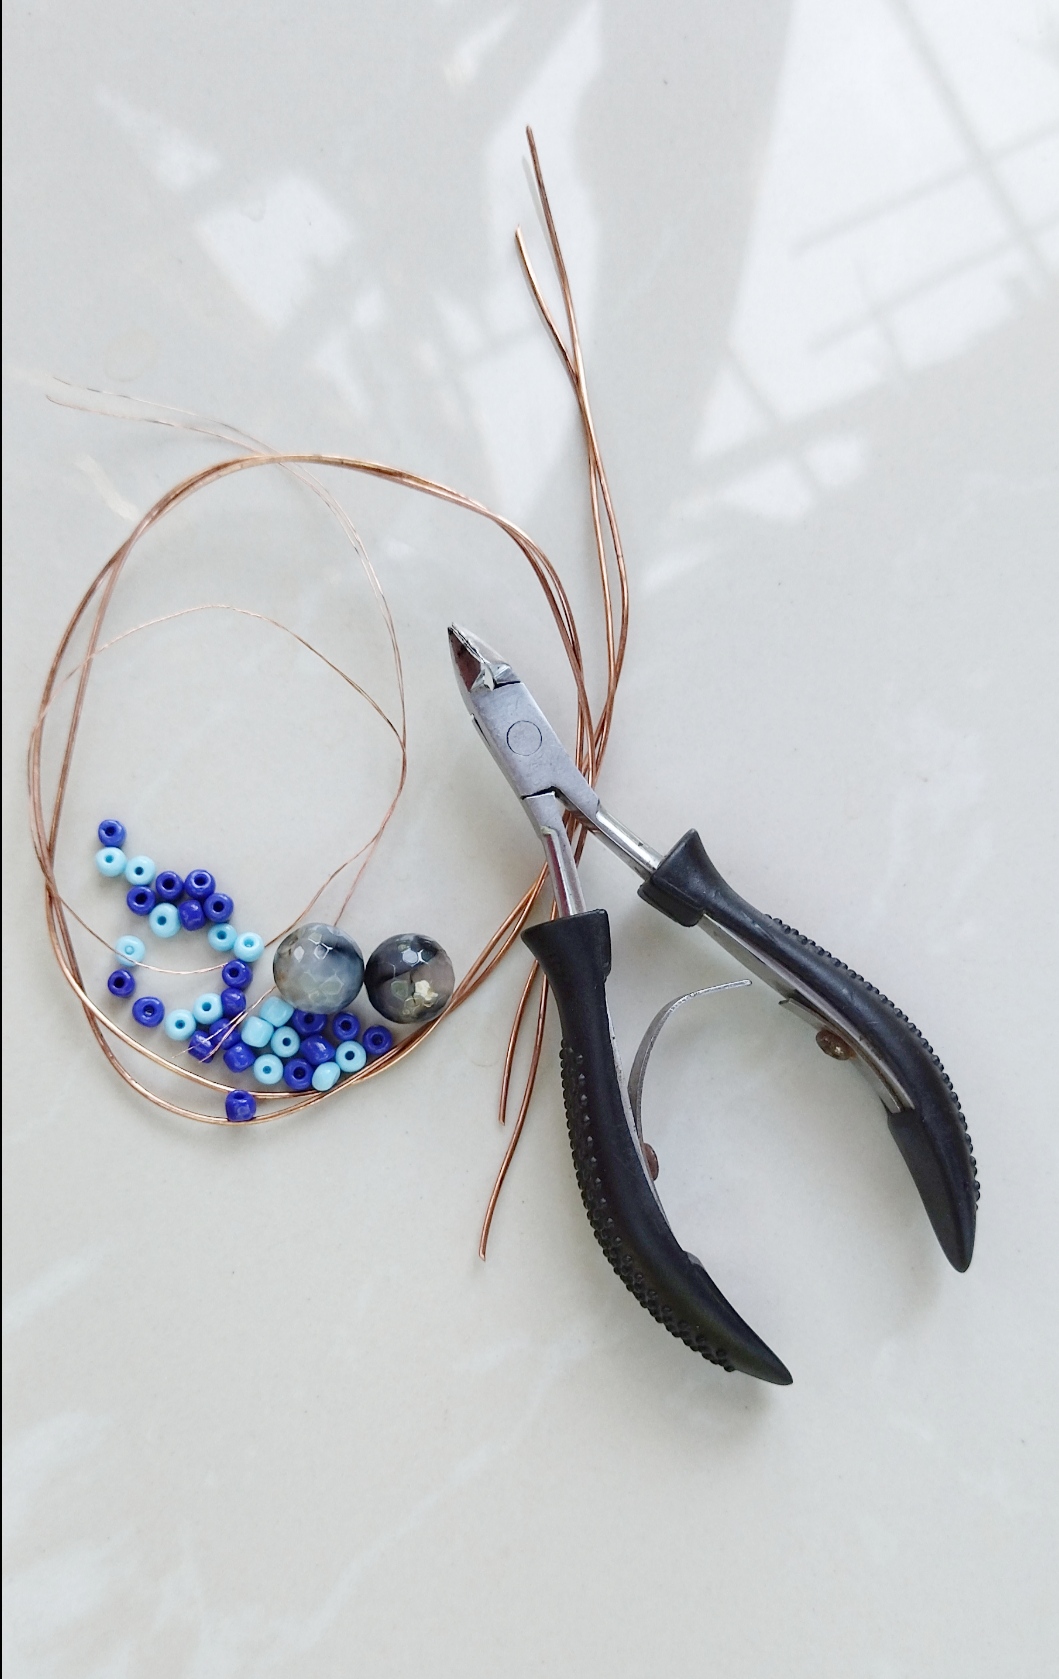
- piedras de bisutería
- alambre para bisutería calibre 22
- pinzas
jewelry stones
22 gauge jewelry wire
tweezers
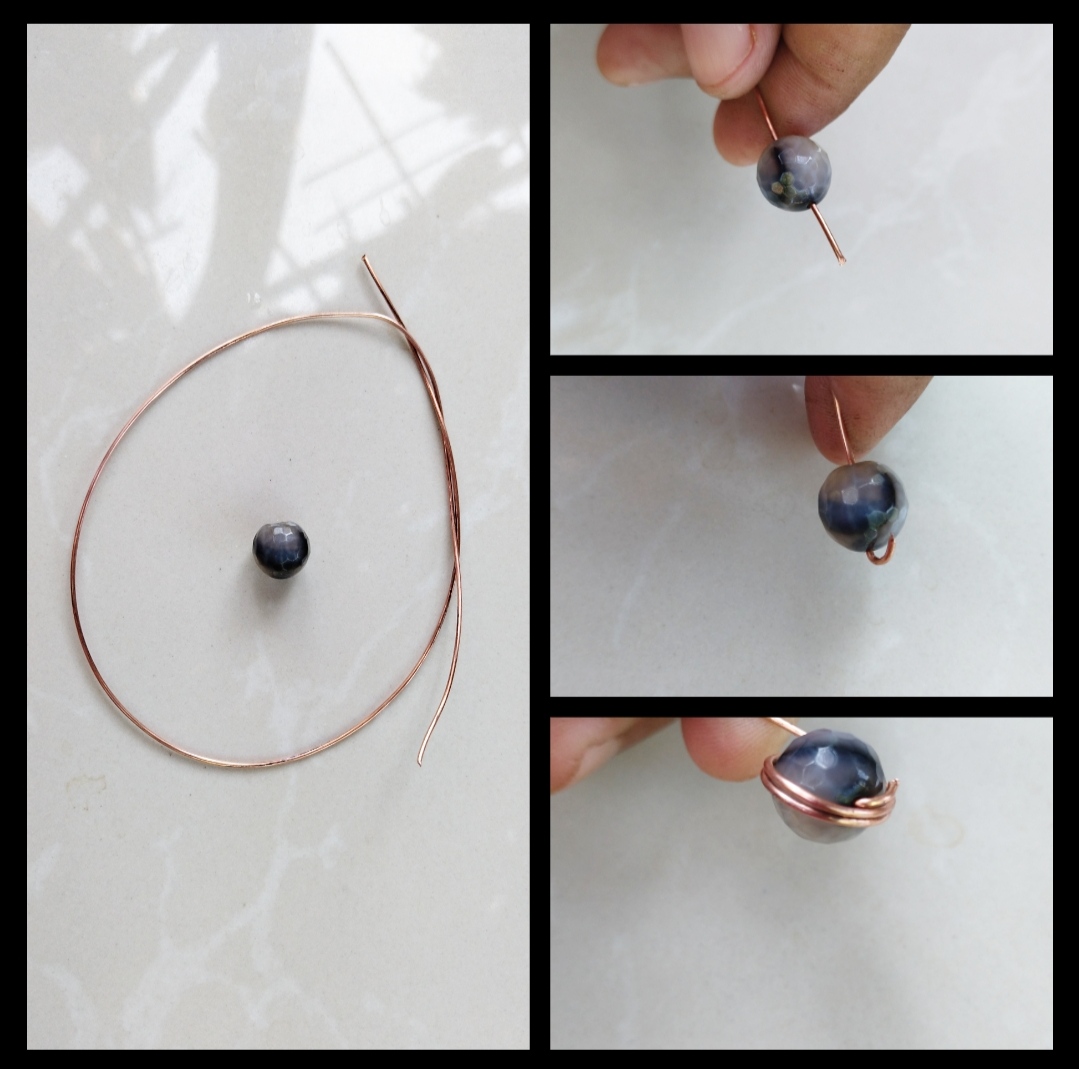
Paso 1:Para empezar tomaremos un trozo de alambre y una de las dos piedras grandes luego de tener nuestra piedra y el alambre meteremos el alambre por el agujero de la piedra como podemos ver en la foto luego doblaremos un poco la punta del alambre trataremos de nos quede muy pegado de la piedra luego le daremos unas vueltas al alambre al rededor de la piedra con dos vueltas es suficiente.
Step 1:To begin we will take a piece of wire and one of the two large stones. After having our stone and the wire, we will put the wire through the hole in the stone as we can see in the photo, then we will bend the tip of the We will try to keep the wire very close to the stone, then we will wrap the wire around the stone a few times, two turns is enough.
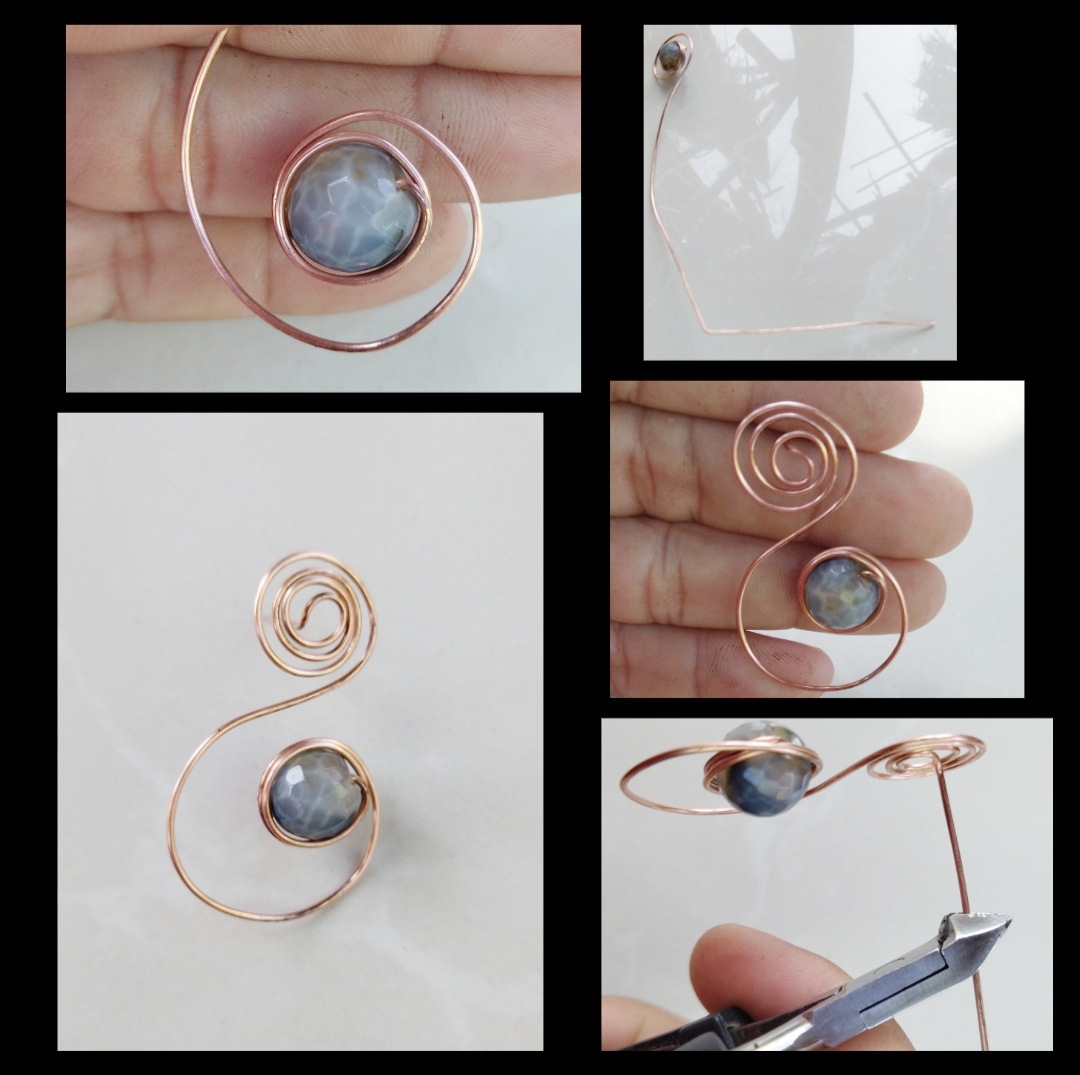
Paso 2: Seguimos con nuestro segundo paso tomaremos la pieza que realizamos en el primer paso y aremos una especie de S primero aremos la parte de abajo que es donde tenemos la piedra trataremos de hacer un espiral y luego trataremos de doblar el alambre hacia el otro lado como lo aremos primero medimos de donde queremos empezar hacer el espiral cuando ya tengamos la medida doblaremos el resto del alambre hacia atrás y desde hay empezaremos hacer el espiral hacia el lado contrario de donde hicimos el otro de esa forma lograremos hacer la S luego de tener la pieza lista cortaremos el exceso de alambre que nos quede en la parte de atrás.
Step 2: We continue with our second step we will take the piece that we made in the first step and we will make a kind of S first we will make the bottom part which is where we have the stone we will try to make a spiral and then we will try to bend the wire towards the other side as we will do it first we measure from where we want to start making the spiral when we already have the measurement we will bend the rest of the wire backwards and from there we will start making the spiral towards the opposite side of where we made the other one in that way we will be able to make the S after having the piece ready we will cut the excess wire that remains in the back.
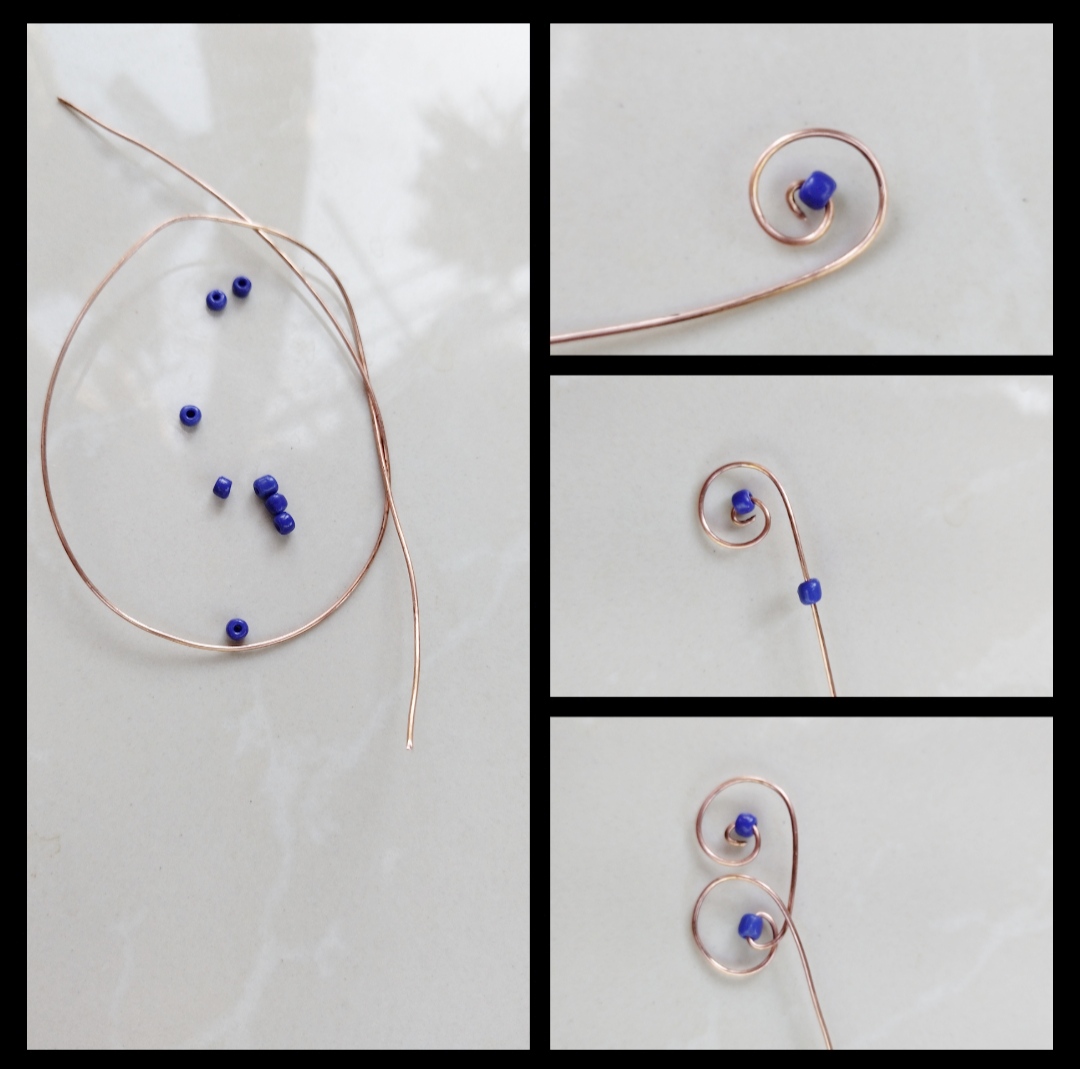
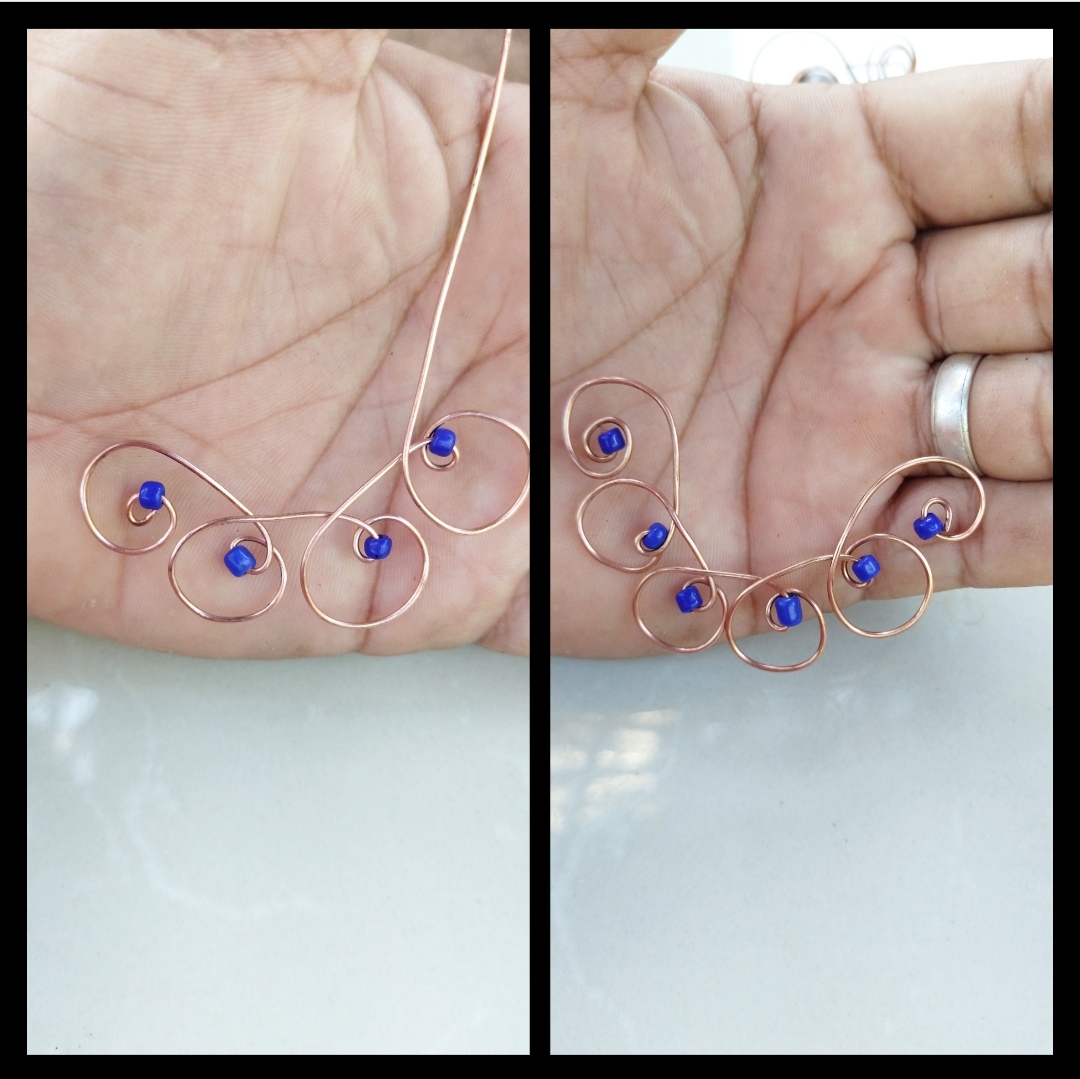
Paso 3: Ya estamos en nuestro tercer paso para este paso tomaremos nuestra piedras de color azul oscuro como pueden ver en la foto, trozo de alambre luego de estar listo tomaremos una de las piedras y meteremos en el alambre luego aremos un espiral un poco separado luego meteremos otra piedra por el otro extremo del alambre y le daremos una vuelta a nuestro alambre al rededor de la piedra trataremos que la piedra quede en el centro del redondo luego de la misma forma daremos otra vuelta pero esta es un poco más grande y este es el proceso seguiremos ese patrón un redondo pequeño y uno grande asta tener la pieza lista.
Step 3: We are already in our third step for this step we will take our dark blue stones as you can see in the photobybunbpiece of wire after being ready we will take one of the stones and put it in the wire then we will make a little aspiral separated then we will put another stone through the other end of the wire and we will turn our wire around the stone we will try to make the stone remain in the center of the round then in the same way we will make another turn but this one is a little bigger and this is the process we will follow that pattern a small round and a large one until we have the piece ready.
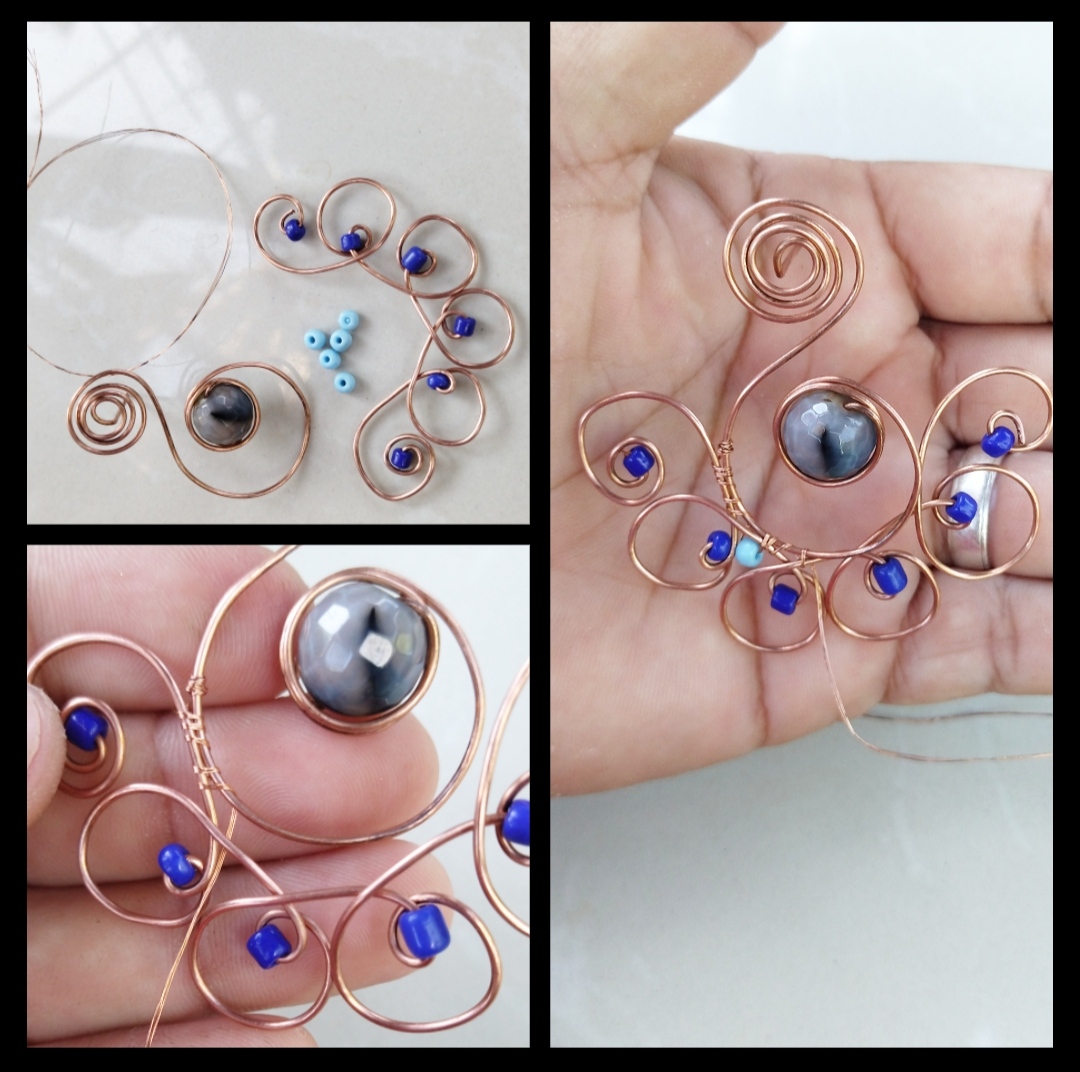
Paso 4:Ya estamos terminando como podemos ver en la foto tenemos dos piezas que ya emos echo en nuestro tres pasos en este paso uniremos las dos piezas y le pondremos otras piedras más para darle un poco más de color como uniremos las dos piezas como pueden ver yo tengo un trozo de alambre muy fino con ese alambre uniremos las dos piezas para empezar entorcharemos un poco el alambre en la S y luego empezaremos a unir las dos piezas como pueden ver en la foto yo le coloque tres piedras de color azul claro esa las coloque metiéndola por el alambre delgado y así uni las dos piezas y coloque las piedras super fácil este paso le podemos colocar las piedras que queramos hay depende el gusto de cada uno pero muestras más colorido mejor, bueno fue un gusto compartir con ustedes espero les guste, a sido un gustazo.
Step 4: We are already finishing as we can see in the photo we have two pieces that we have already made in our tres pazon in this step we will join the two pieces and we will put other stones to give it a little more color as we will join the two pieces as you can see I have a piece of very fine wire with that wire we will join the two pieces to begin we will tighten the wire a little in the S and then we will begin to join the two pieces as you can see in the photo I put three colored stones light blue that I put them by inserting them through the thin wire and thus I joined the two pieces and placed the stones super easy this step we can place the stones that we want there depends on the taste of each one but samples more colorful better, well it was a pleasure to share with I hope you like it, it has been a pleasure.
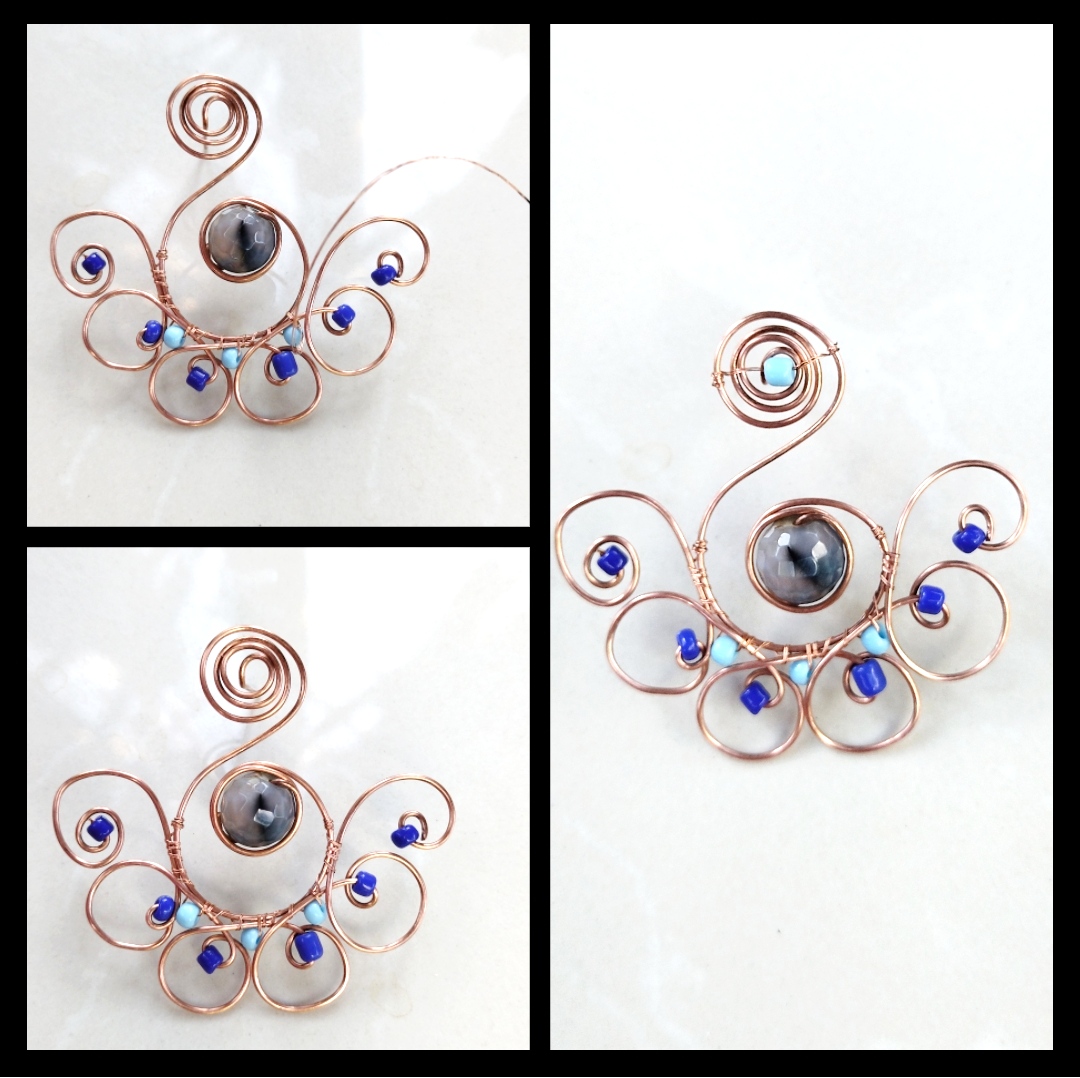
listo nuestros hermosos pendientes , espero que a las damas les guste, fue un gusto compartir con ustedes .
ready our beautiful earrings, I hope the ladies like it, it was a pleasure to share with you.
Todas las Fotos son de mi autoría y fueron tomadas con mi Celular Redmi 9T
All Photos are my authorship and were taken with my Redmi 9T Cellphone
The rewards earned on this comment will go directly to the people( @dayadam ) sharing the post on Twitter as long as they are registered with @poshtoken. Sign up at https://hiveposh.com.
Muy Hermoso 🌟😍
Muy buen trabajo.
Hola feliz día, muchas gracias es un gusto
Hermoso trabajo 👏👏@alexanderflx, Saludos 🤗
Hola muchas gracias por su visita, que bueno que les gustó 👍👍👍
Bellísimos amigo. Amo tu trabajo, tu delicadeza. Siempre me ha llamado la atención el trabajo con alambrismo, y la verdad lo dominas de una manera genial. Mil felicitaciones y muchos éxitos. 💕
Hola, muchas gracias si siempre me as comentado es un gusto tener un comentario suyo es super fácil realizar cualquier pendiente solo debemos hacerlo con cariño, inténtalo y veras que fácil es🦚🌼🌹👍👍💖🌺👗💘
Hermoso trabajo, como siempre piezas impecables.... gracias por compartir
🎆🎇🎉🎊🌧️💐✨🌾🌱🌹🌙🌿🍃🥀⚡🌺☘️🍀🌈🌷⭐🪴🌵🌸🌟💮🌴🌳💫☀️💮☔🌲🌳🌍🌌🌠☄️🏵️🐝🌻🌼🍄🐞🦋💙☕💜🍍🎆🎇🎉🎊🎆🎇🎉🎊🌧️💐✨🌾🌱🌹🌙🌿🍃🥀⚡🌺☘️🍀🌈🌷⭐🪴🌵🌸🌟💮🌴🌳💫☀️💮☔🌲🌳🌍🌌🌠☄️🏵️🐝🌻🌼🍄🐞🦋💙☕💜🍍🎆🎇🎉🎊
!PIZZA
!LADY
View or trade
LOHtokens.@chacald.dcymt, you successfully shared 0.1000 LOH with @alexanderflx and you earned 0.1000 LOH as tips. (1/3 calls)
Use !LADY command to share LOH! More details available in this post.
Hola muchas gracias , siempre a sido un gusto compartir con ustedes 👍👍👍👍
Muy bonitos ❤️. Trabajar con alambre nunca ha sido mi fuerte, se te da muy bien 😁.
Hola, muchas gracias inténtalo es muy fácil
PIZZA Holders sent $PIZZA tips in this post's comments:
(1/5) @chacald.dcymt tipped @alexanderflx (x1)
Join us in Discord!
Nos encanta la temática que has utilizado, realmente se ve como la cola del pavo real, los colores preciosos y el diseño con el alambre es hermoso, nos gusta tu paso a paso buen trabajo.
Hola feliz día espero te encuentres bien, muchas gracias la verdad trate de que los pendientes tuvieran la forma del pavo real y creo que lo logré muchas gracias por su visita espero seguir haciendo un buen trabajo. Asta la próxima 🦚🦚👍👍👍👍👍
Me encantan las cuentas añadidas al hacer el pendiente de pavo real. Le diste un buen vistazo sin importarte que fuera una prueba.
Bueno @alexanderflx, creo que sí podrás lograr tu objetivo de enamorar a las chicas con esos pendientes; te quedaron muy bonitos, así que mucho exito, saludos.
waooo waoooo me encantaron amigo enamorada de este trabajo.. Felicidades que habilidad realmemte espectacular.. ❤️
Que belleza @alexanderflx me ha encantado tu trabajo! Los haces ver super fácil.. Gracias por compartir con nosotros.