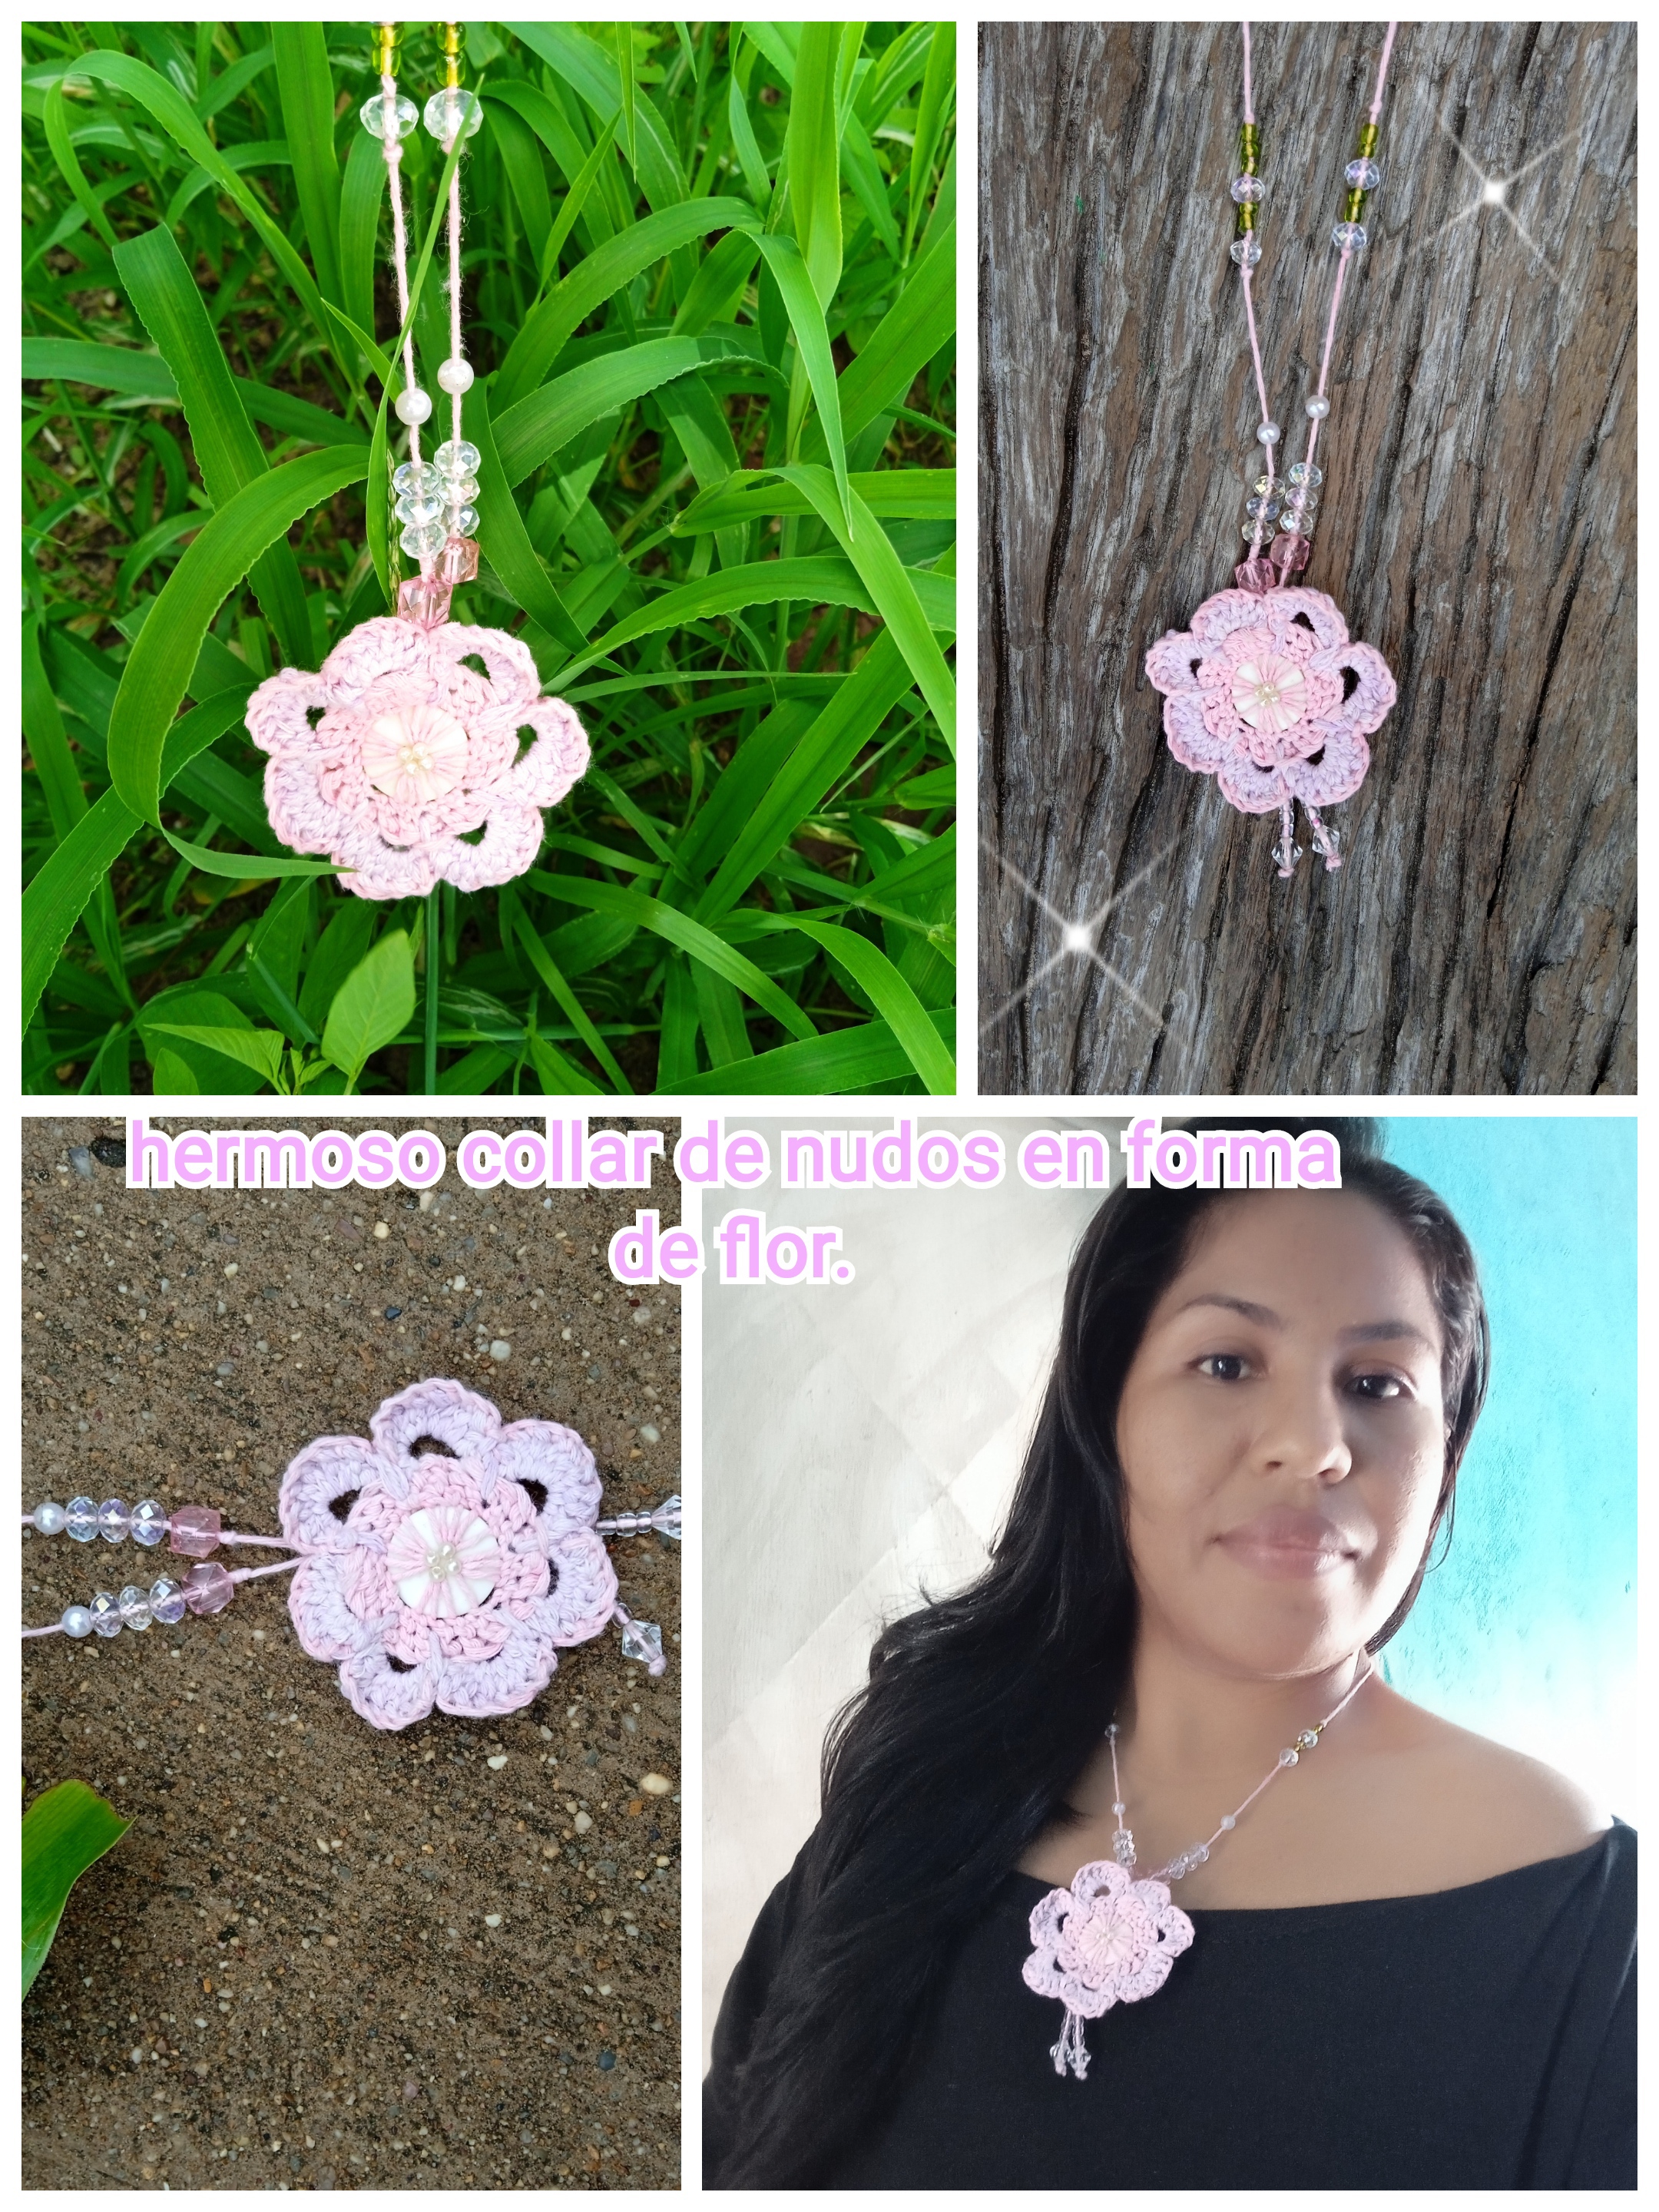
Hola mis queridos amigos de la joyería, les saludo con mucho cariño, deseando que tengan una preciosa noche llena de muchas bendiciones. Es una rica noche muy fría y tranquila, así que, aprovecho para compartir un lindo tutorial con todos. Este que les traigo es un lindo collar de lana, con una hermosa flor hecha de nudos, sin necesidad de utilizar aguja para crochet sino con aguja manual número 6. Hace algún tiempo una amiga me mostró como hacer está flor con nudos utilizado este hilo de lana. Recordando un poco quise volver a practicar para ver si quizás lograría hacer una y creo que lo logré. Para darle un poco de color a este hilo he utilizado unos marcadores que ya no utilizaba y han quedado muy bien teñidos. Si quieres ver el procedimiento, les invito a leer hasta el final.
Hello my dear jewelry friends, I greet you with love, wishing you a beautiful night full of many blessings. It's a nice, very cold and calm night, so I take this opportunity to share a nice tutorial with everyone. This one I bring you is a cute wool necklace, with a beautiful flower made of knots, without using a crochet needle, but with a number 6 manual needle. Some time ago a friend showed me how to make this flower with knots using this thread woolen. Remembering a little, I wanted to practice again to see if maybe I could make one and I think I did. To give a little color to this thread I used some markers that I no longer used and they turned out very well. If you want to see the procedure, we invite you to read until the end.
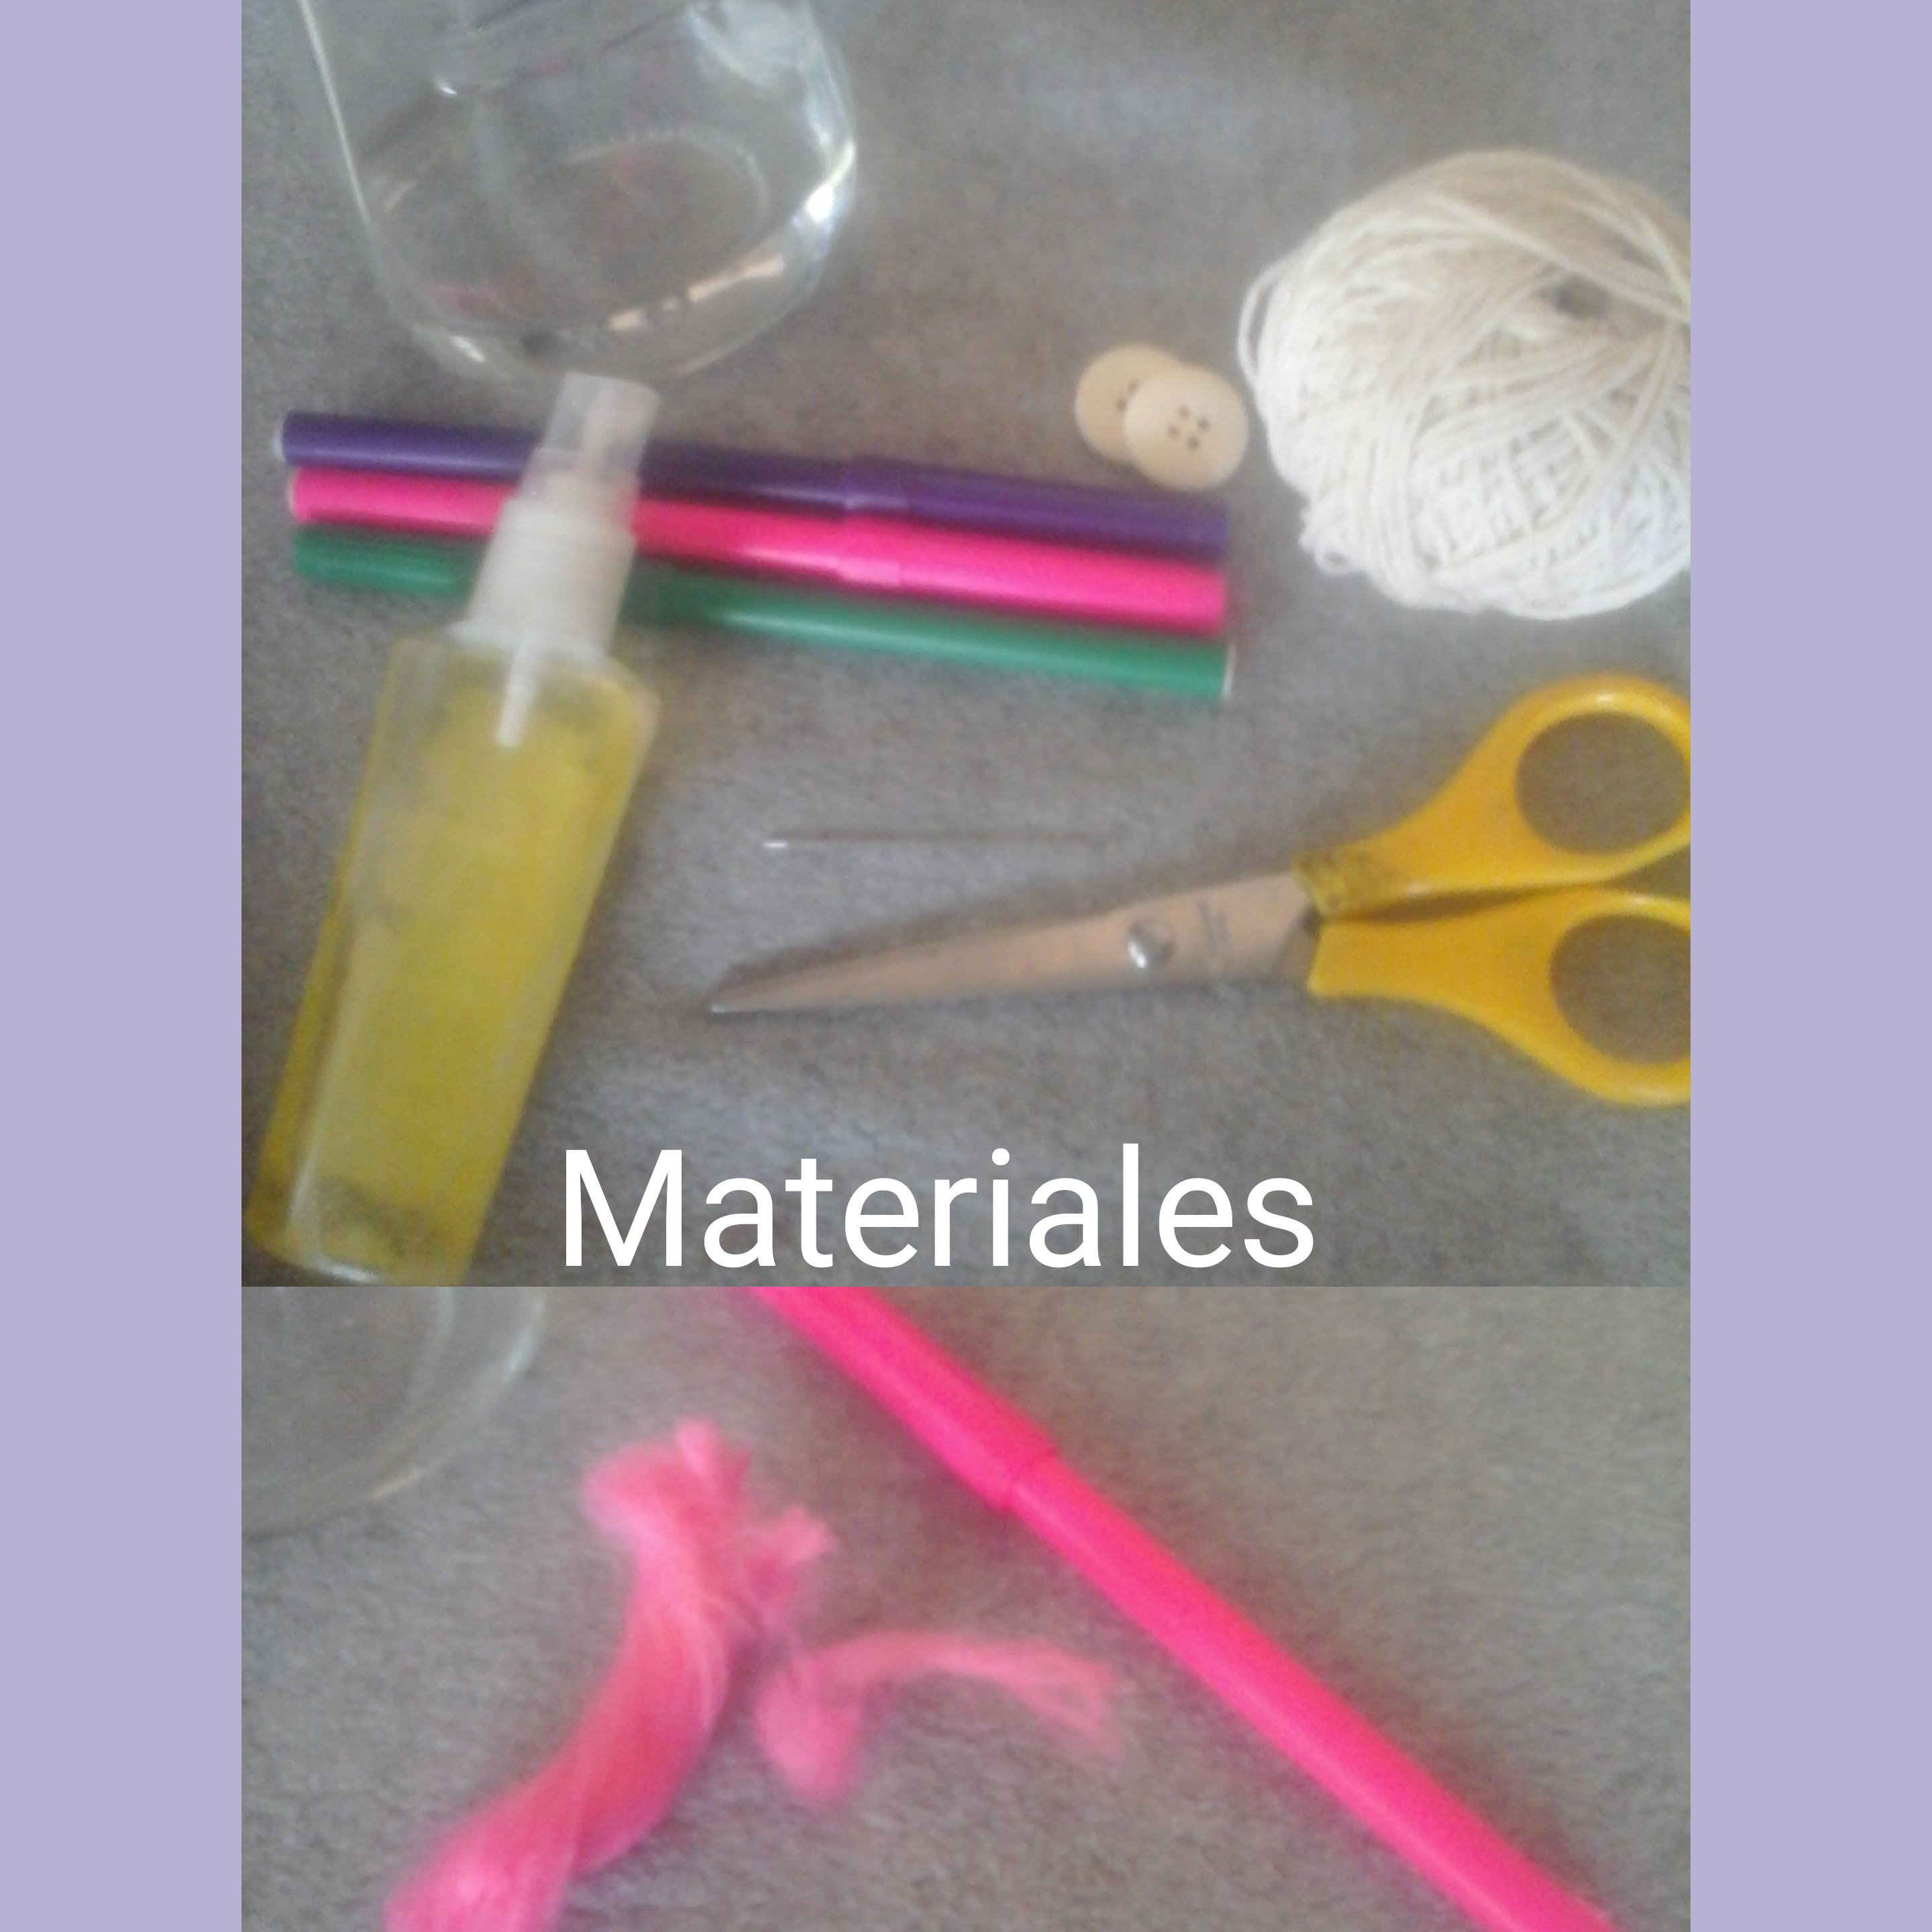
Materiales.
- Tijera.
- Hilo de lana
- Marcadores.
- Alcohol.
- Botones.
- Aguja manual número 6.
- Un envase de cristal con un poco de agua.
Materials.
- Scissors.
- Wool thread
- Markers.
- Alcohol.
- Buttons.
- Manual needle number 6.
- A glass container with a little water.
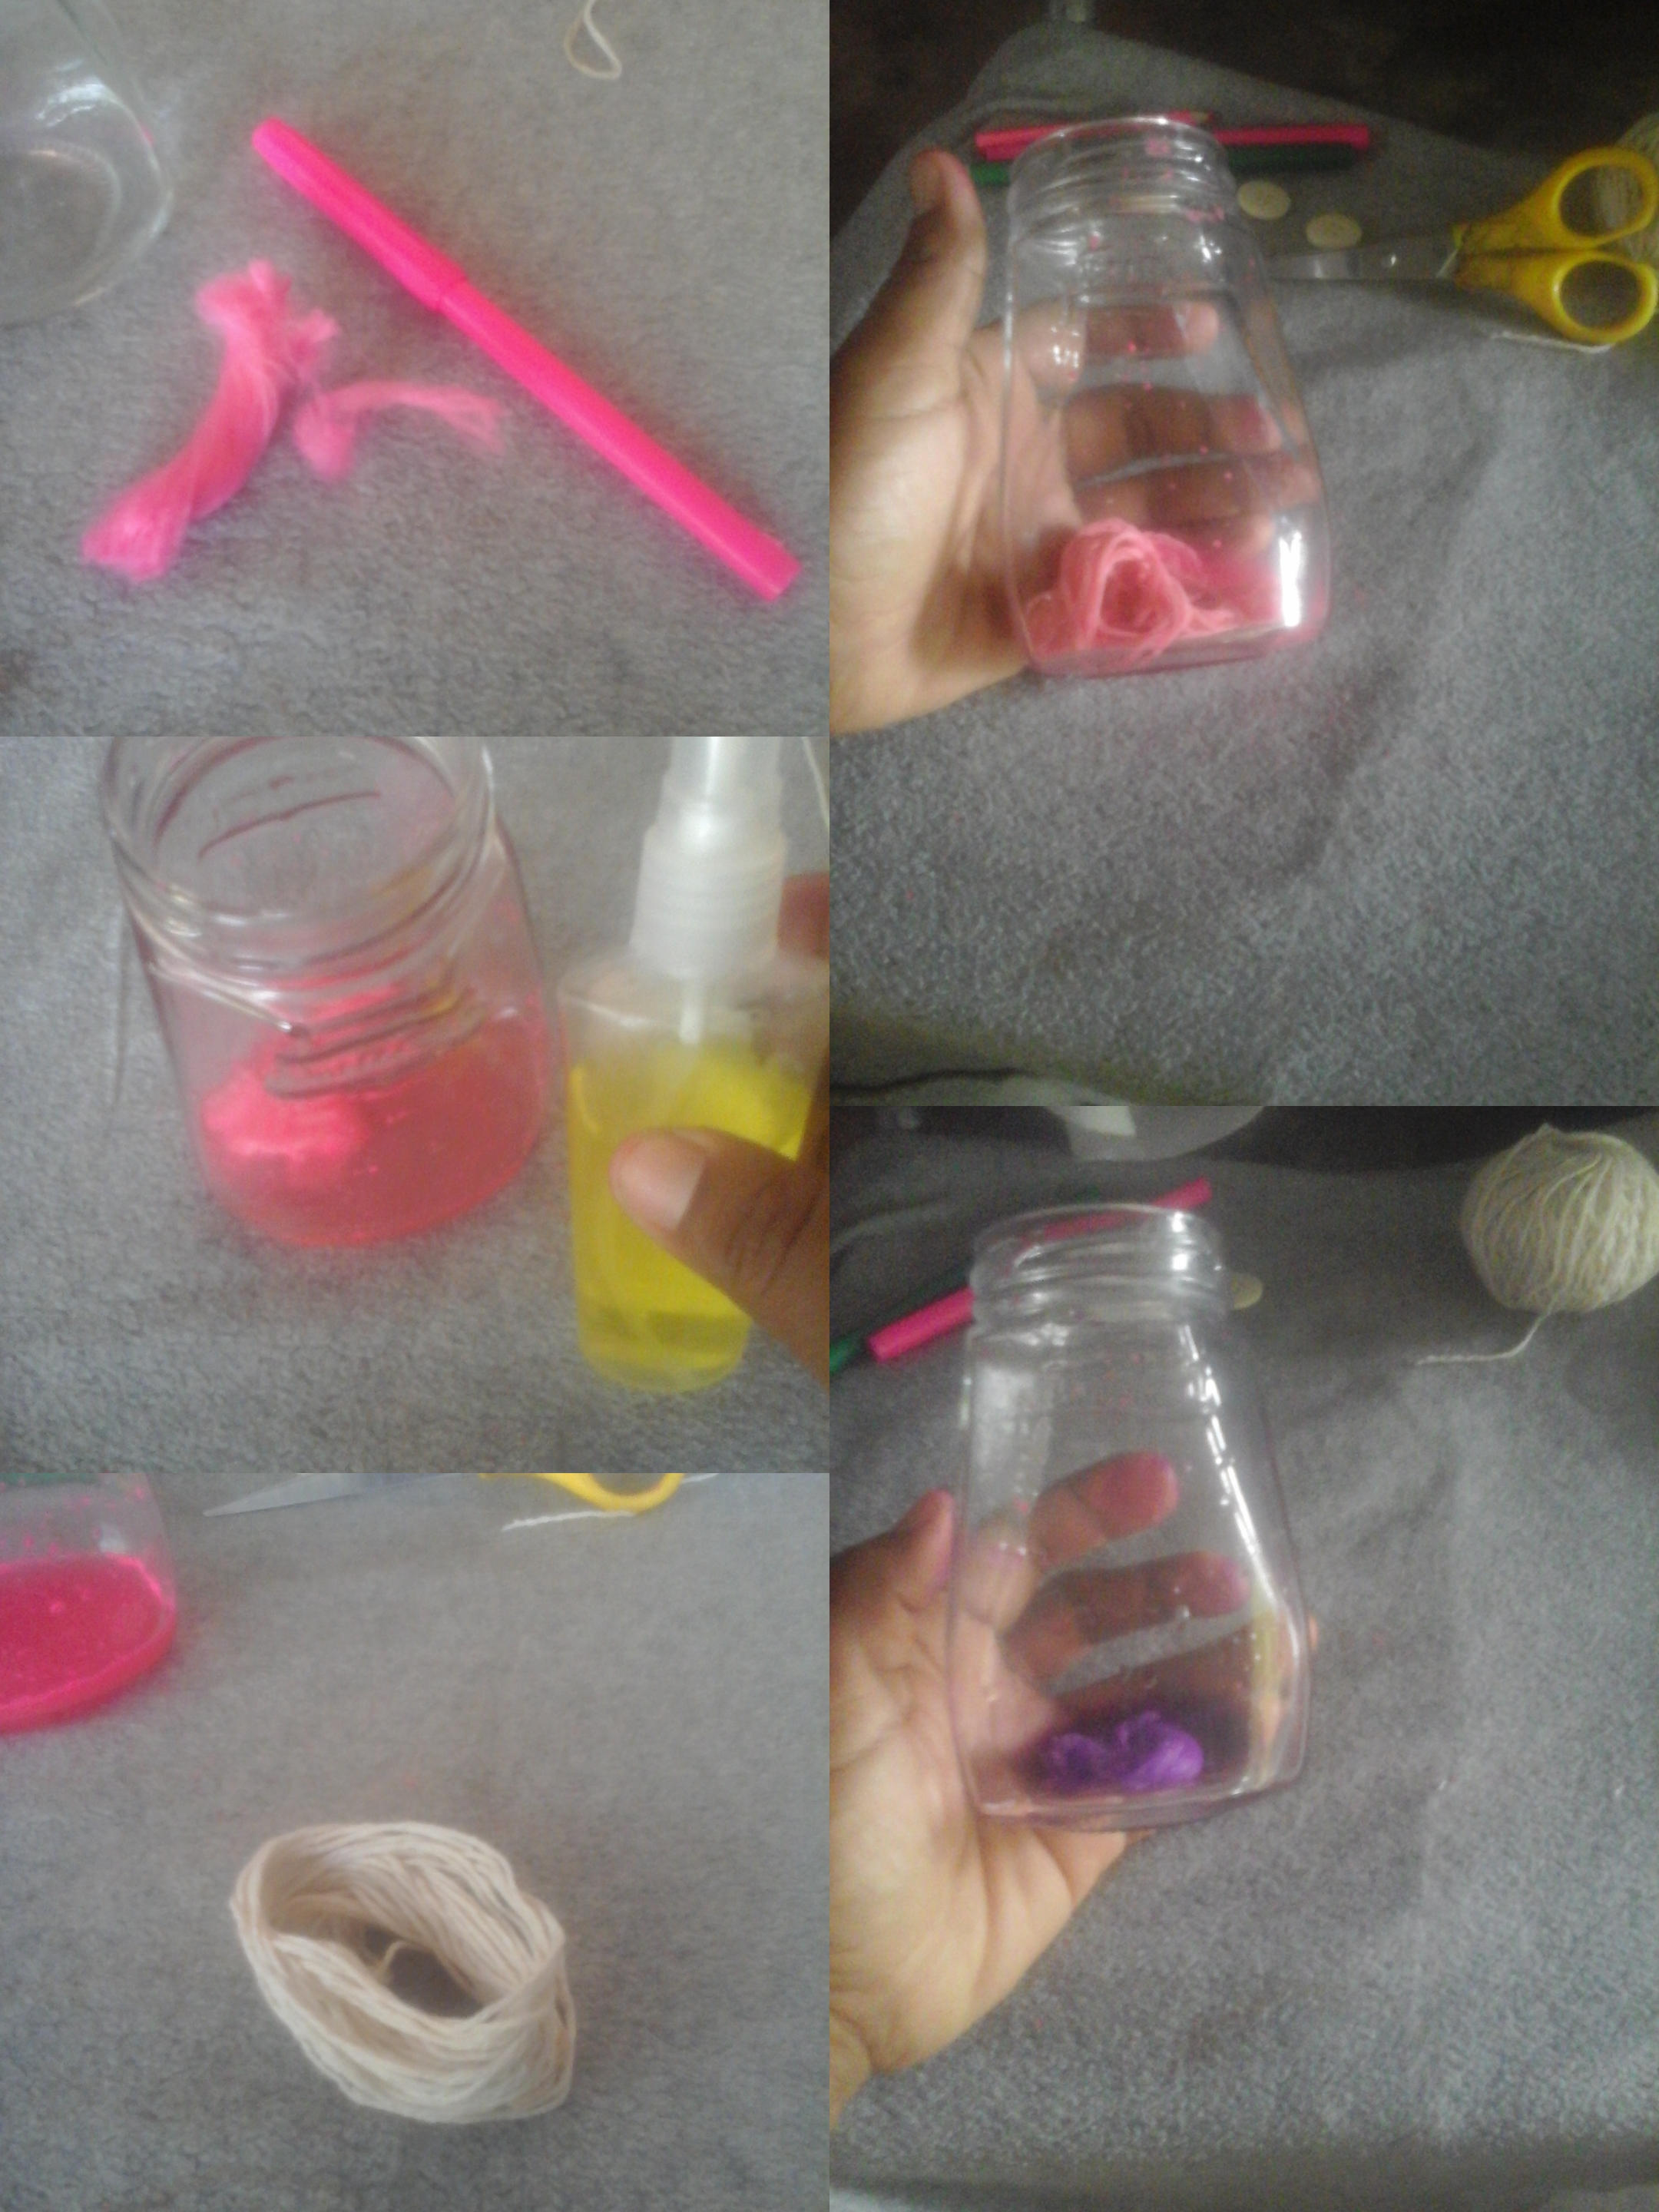
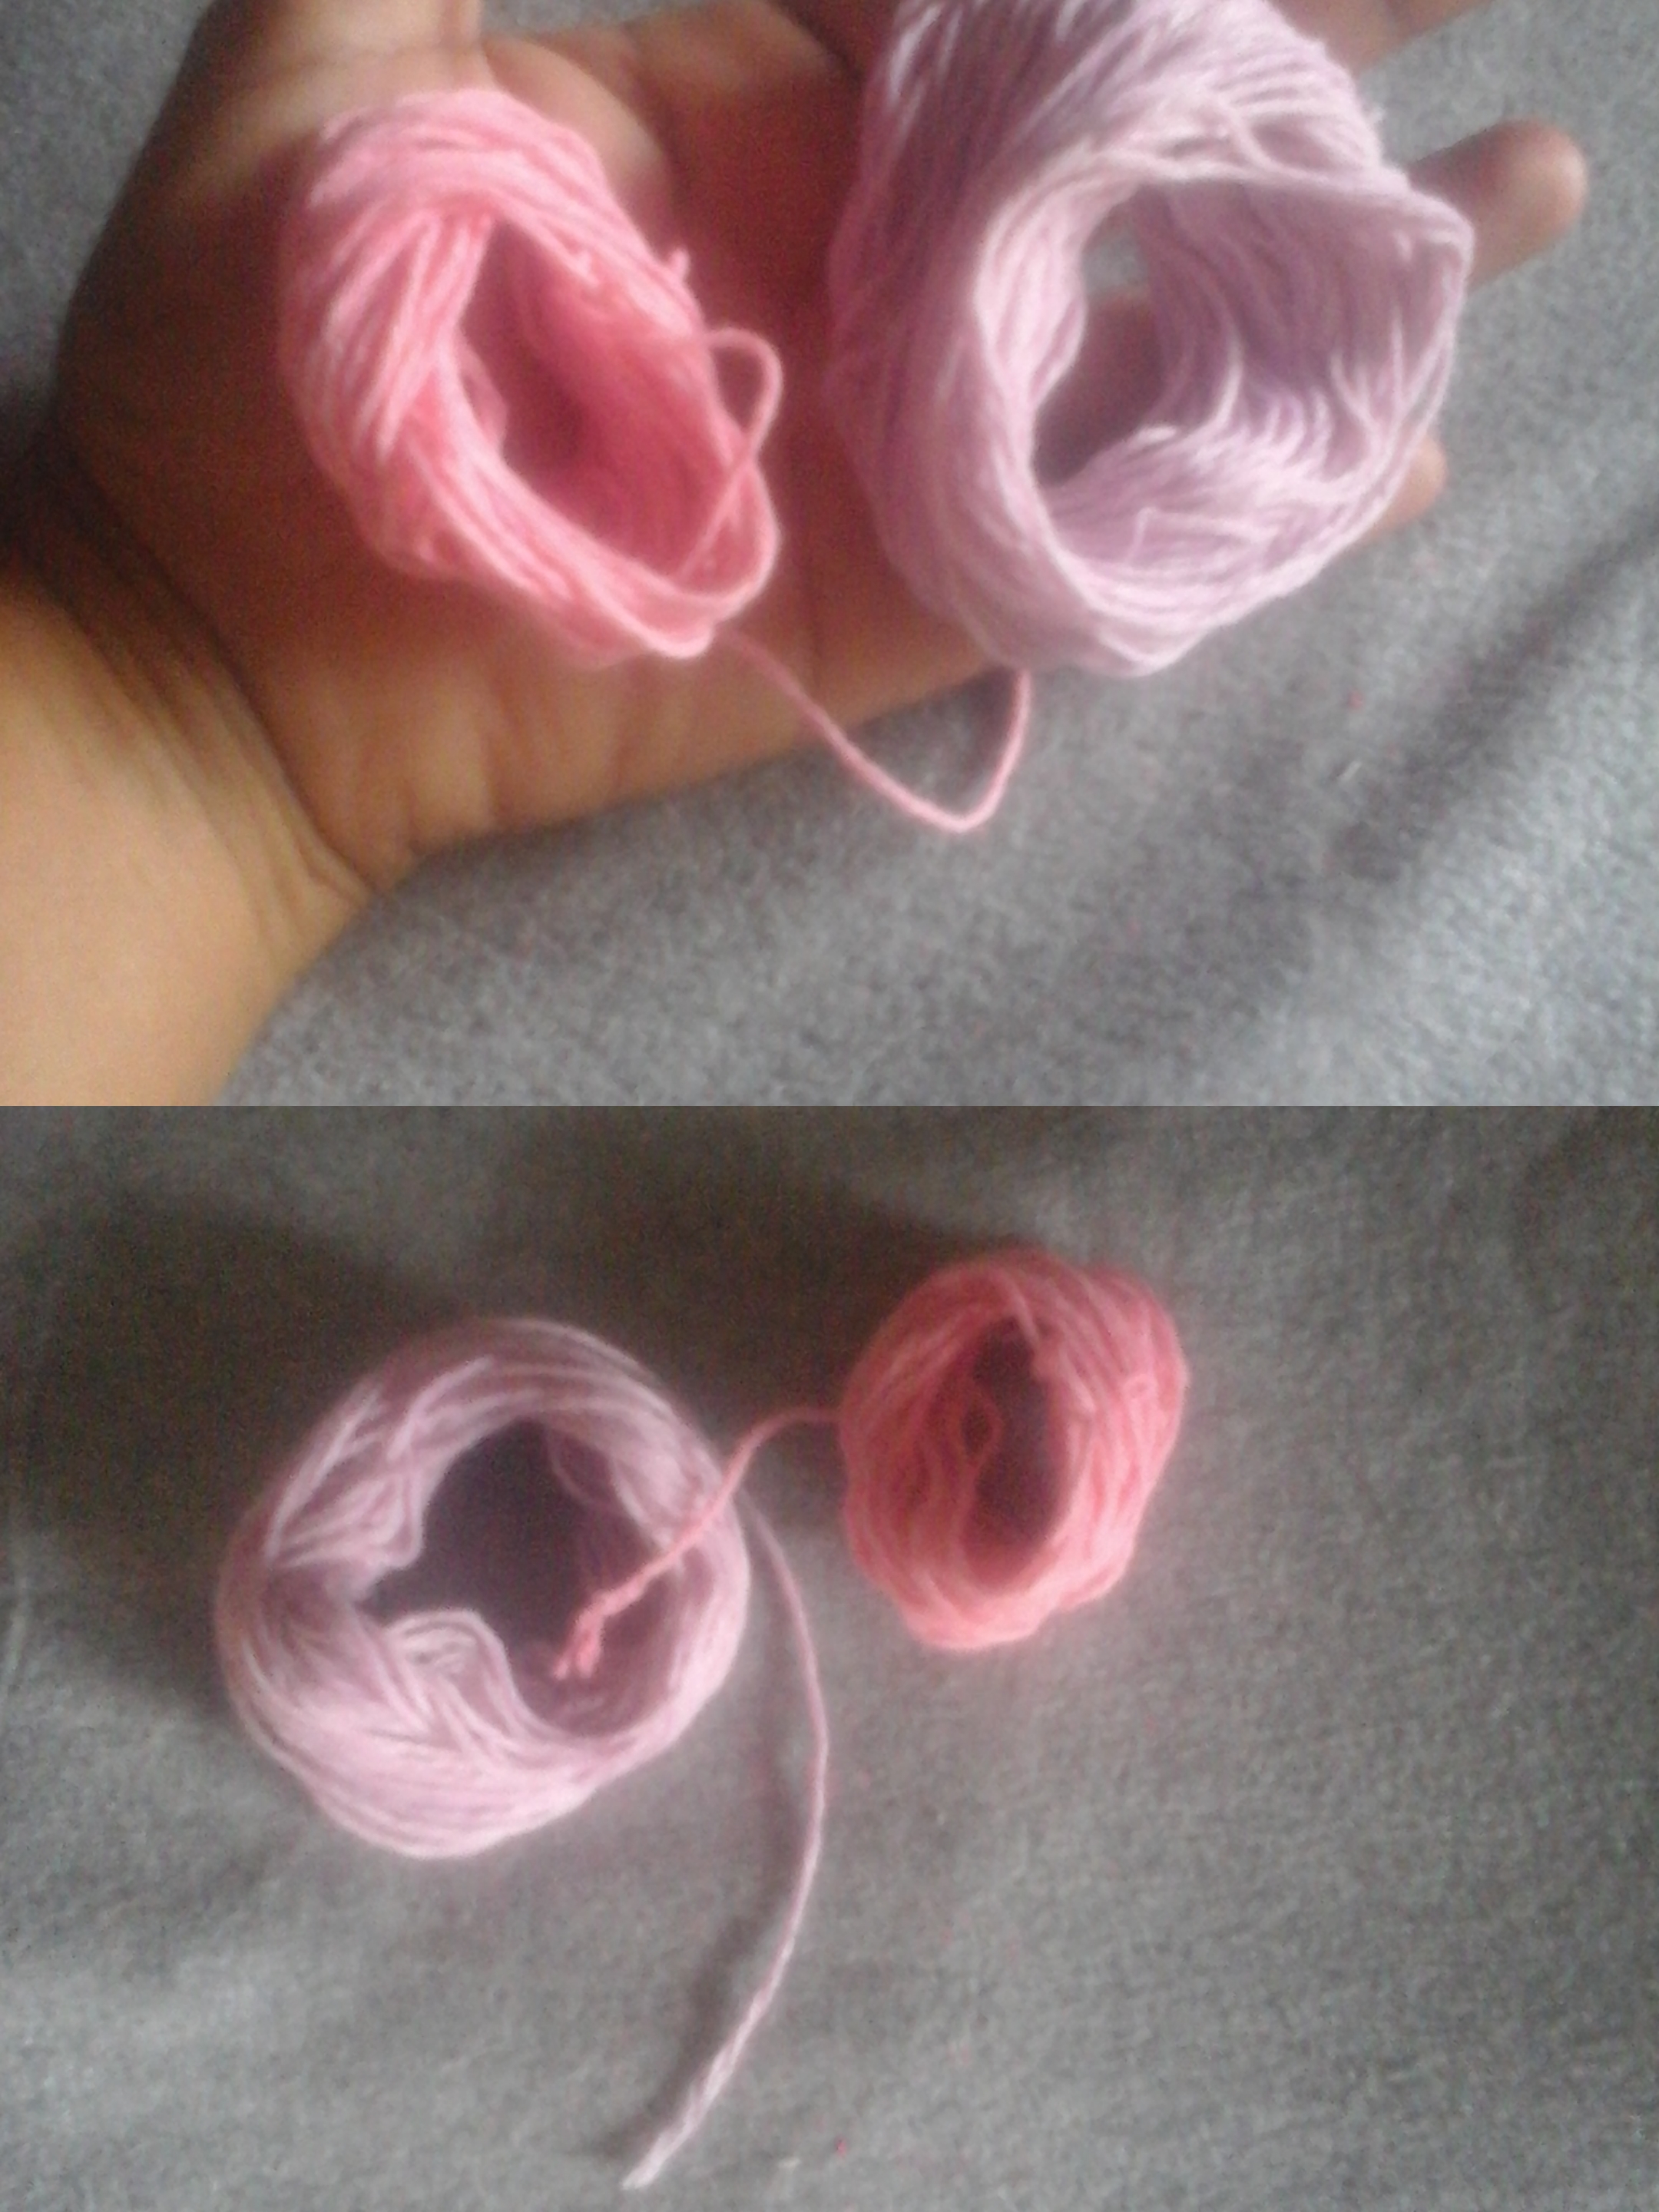
Amigos vamos a iniciar con el primer procedimiento, el de teñir el hilo. Tomamos el marcador y sacamos la parte interna donde se encuentra la tinta y retiramos el plástico. Ahora vamos colocar la tinta al envase con un poco de agua y alcohol. No quise utilizar pintura para telas por qué dejará el hilo un poco áspero. Introducimos la cantidad de hilo que vamos a utilizar y lo dejamos unos minutos, sacamos del envase y dejamos secar al aire libre.
Friends, we are going to start with the first procedure, dyeing the thread. We take the marker and remove the internal part where the ink is located and remove the plastic. Now we are going to place the ink in the container with a little water and alcohol. I didn't want to use fabric paint because it will leave the thread a little rough. We introduce the amount of thread that we are going to use and leave it for a few minutes, remove it from the container and let it dry in the open air.
Comenzamos, tomando un botón blanco de cuarto agujeros. Vamos a imaginar que estamos cosiendo, por qué este nudo es parecido a la costura feston la que utilizamos para decorar los bordes de la tela. Introducimos la aguja con la hebra de lana por uno de los agujeros, atamos y comenzamos con los nudos. Por uno de los agujeros pasamos la aguja tres veces haciendo nudos.
We start by taking a quarter-hole white button. Let's imagine that we are sewing, this knot is similar to the festoon seam that we use to decorate the edges of the fabric. We introduce the needle with the strand of wool through one of the holes, tie and begin with the knots. Through one of the holes we pass the needle three times making the knots.
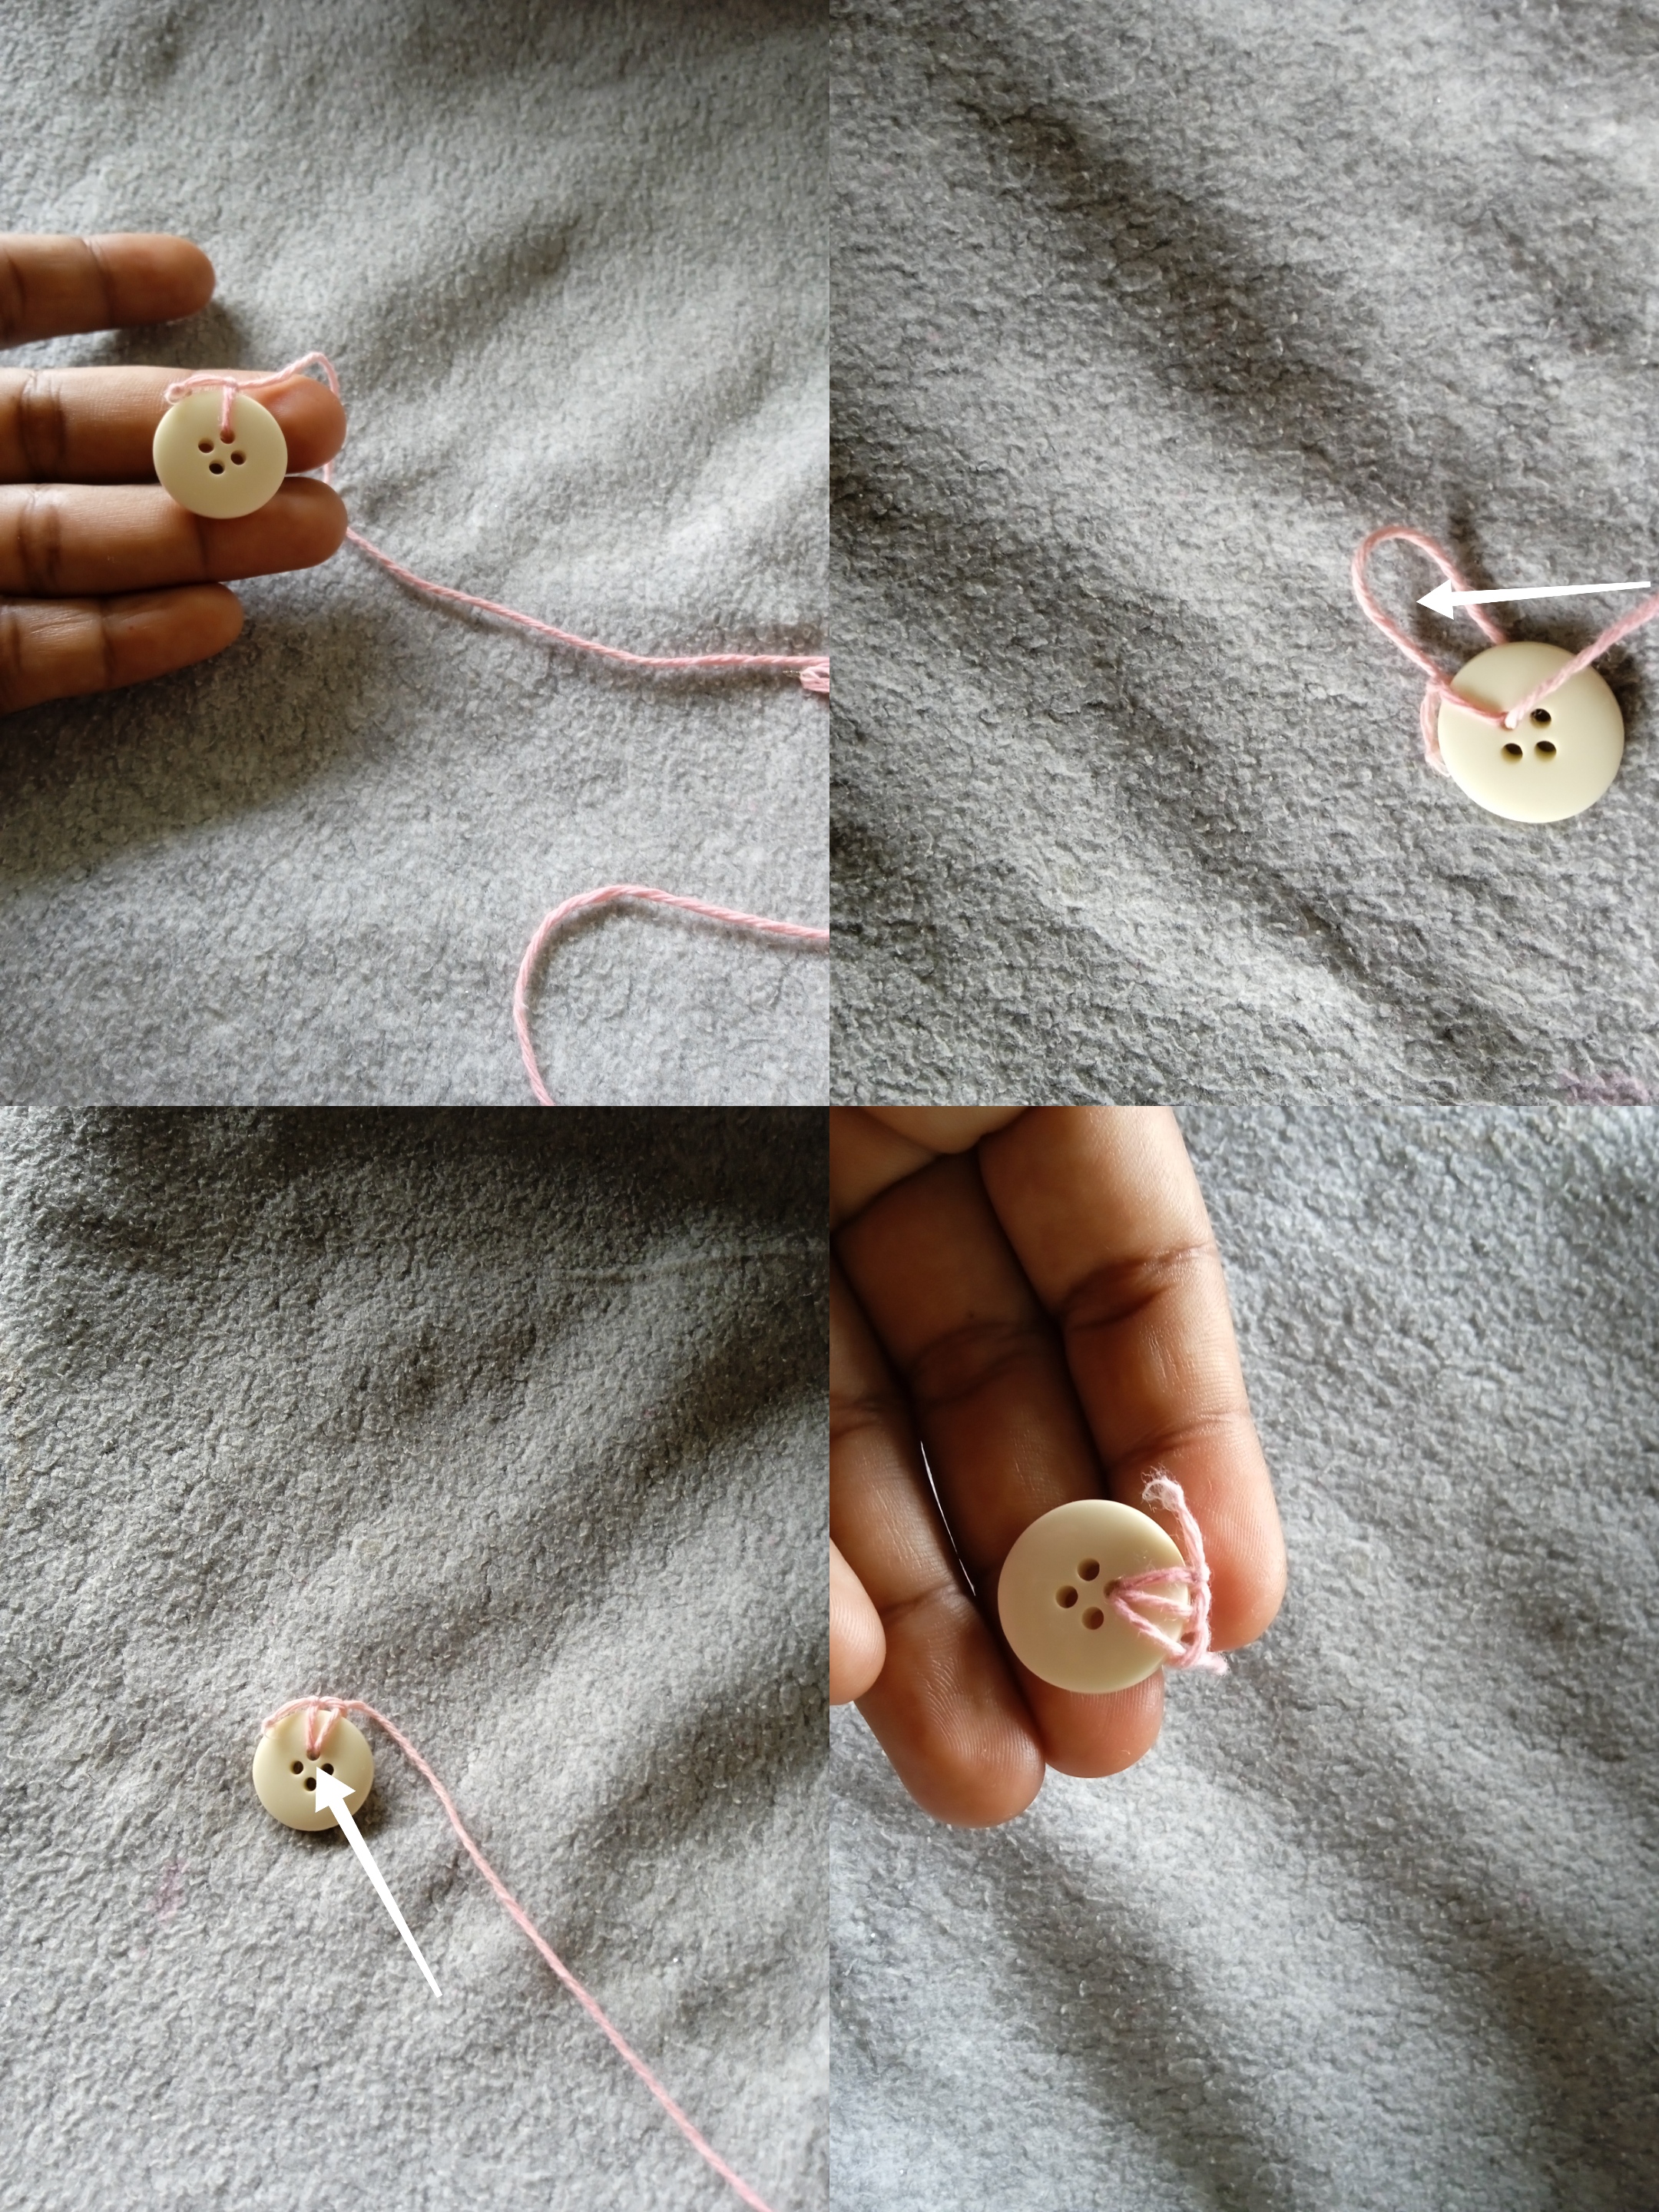
Una vez que terminamos de hacer los nudos en uno de los agujeros, introducimos la aguja por el segundo agujero. Sacamos el hilo dejando una alzada, luego introducimos la aguja dentro de la misma y halamos.
Once we finish tying the knots in one of the holes, we insert the needle through the second hole. We take out the thread leaving a lift, then we insert the needle inside it and pull.
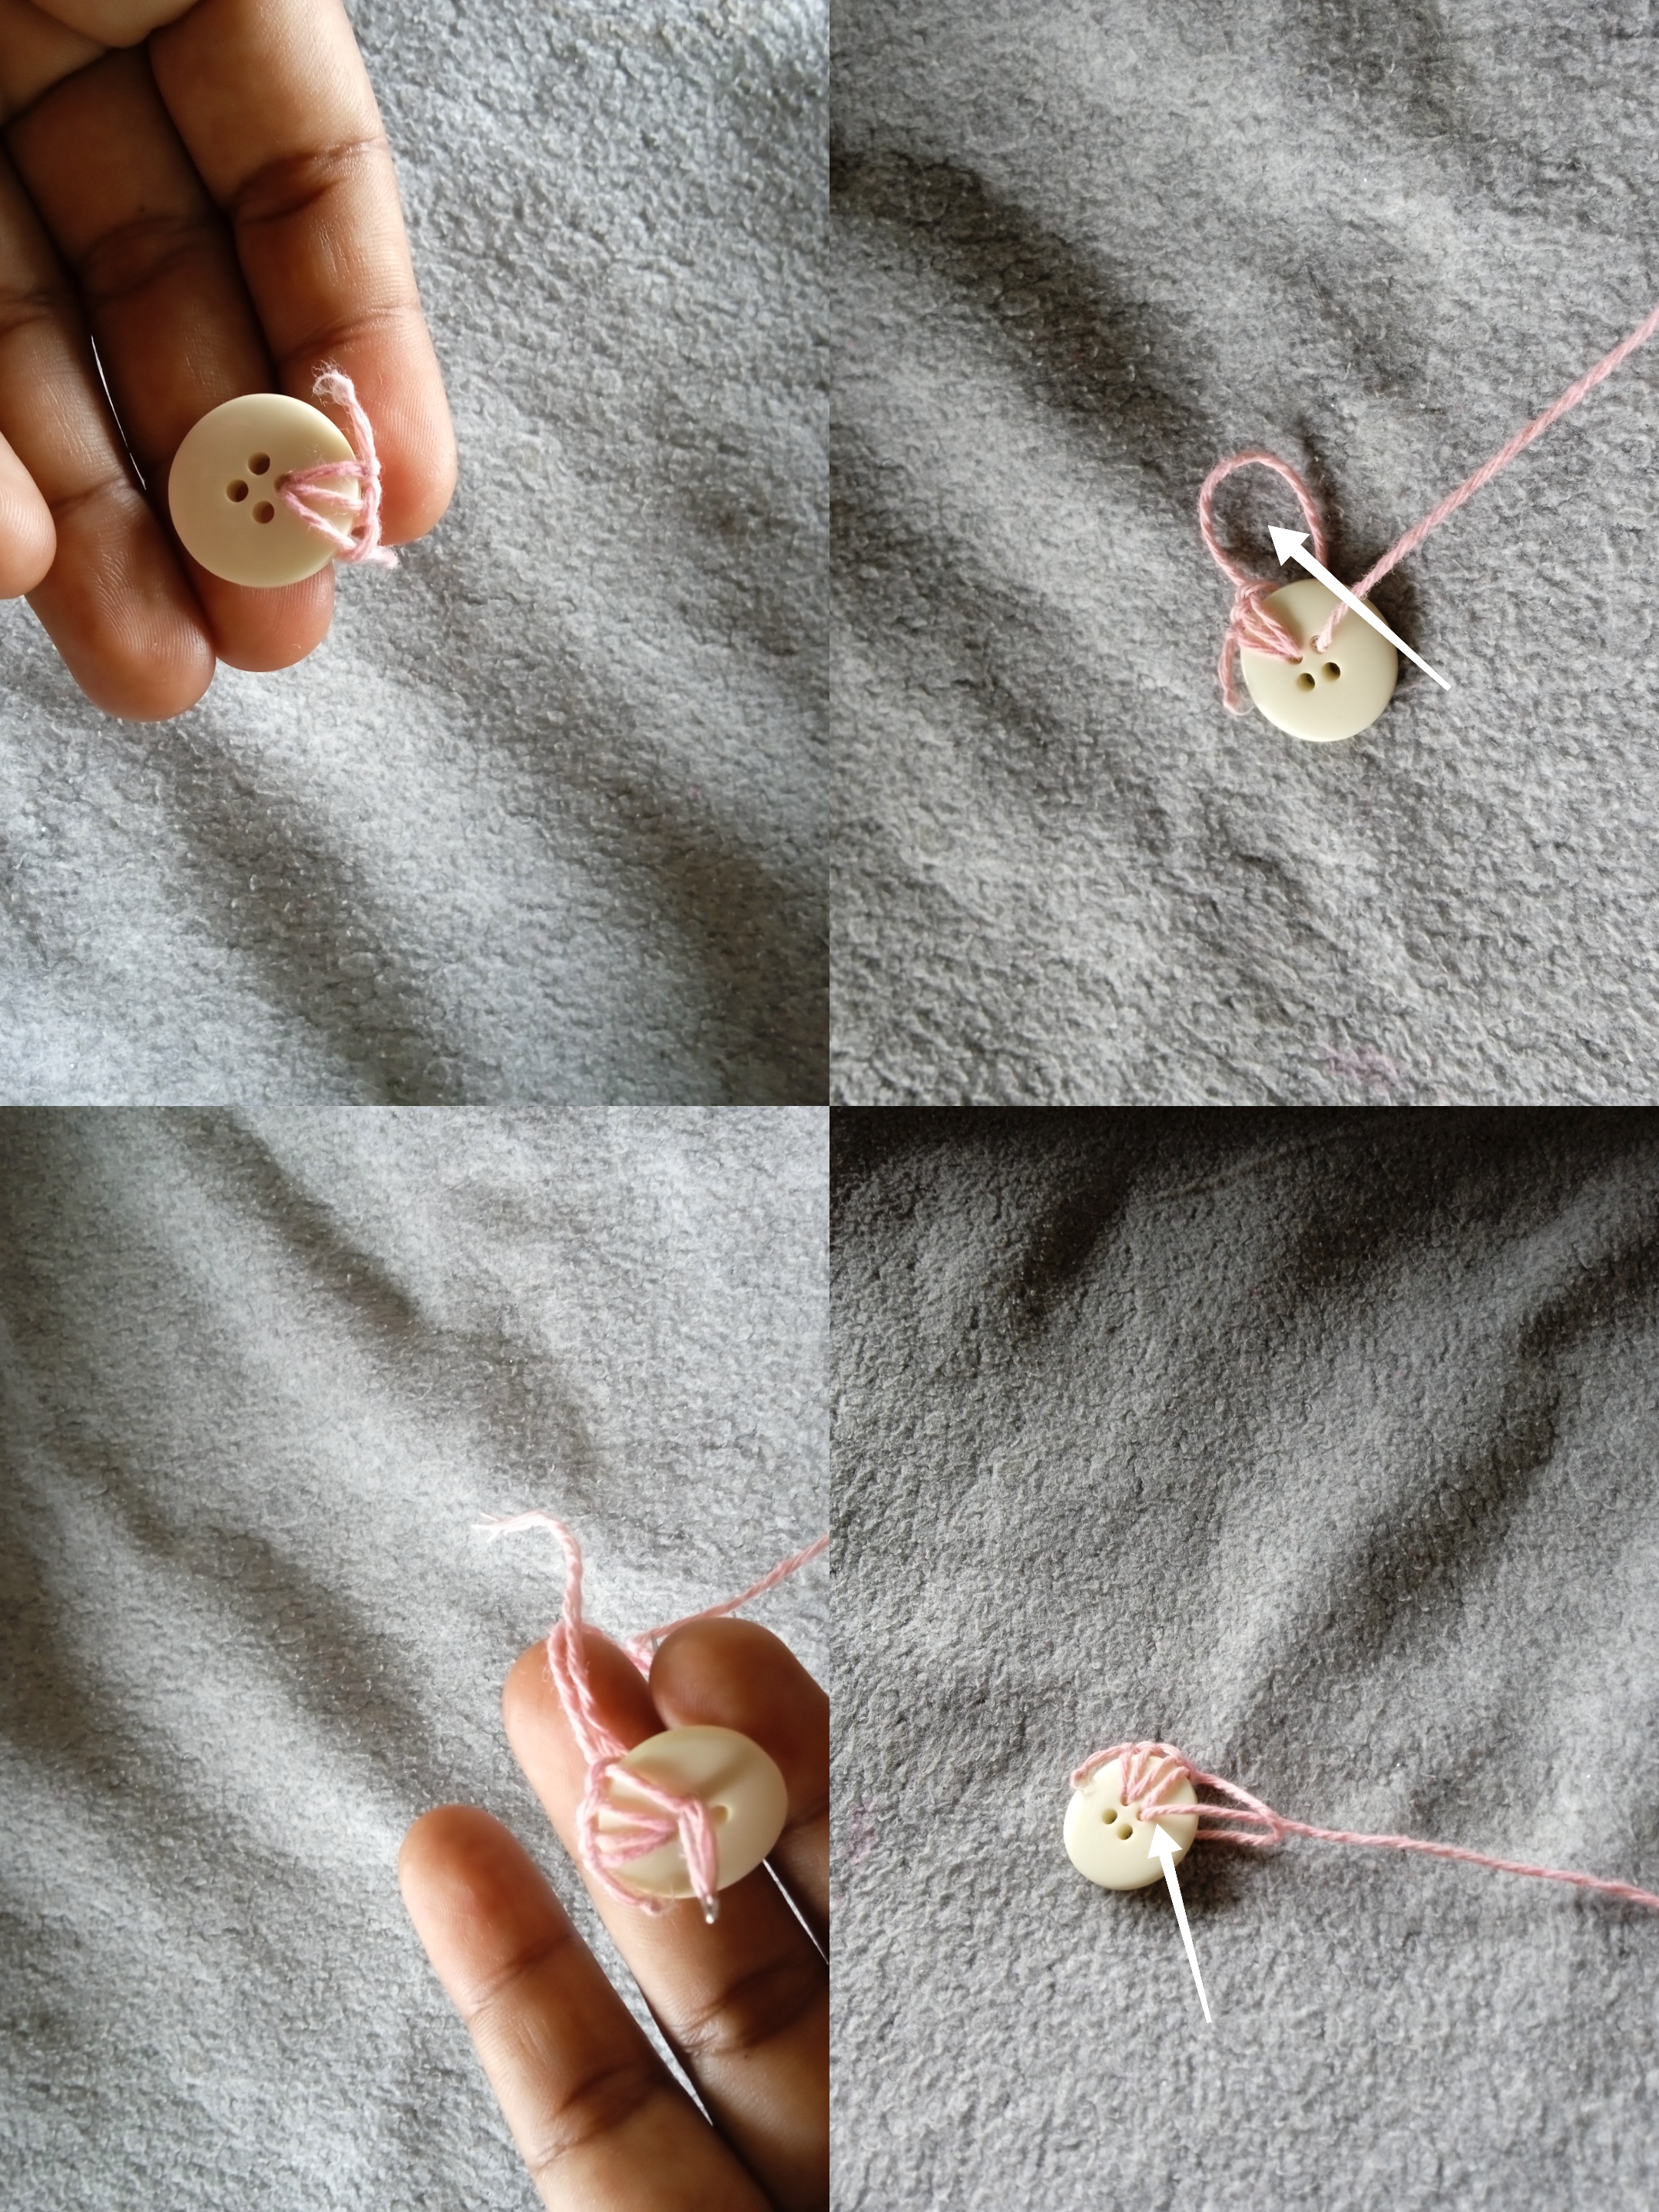
Introducimos la aguja por el tercer agujero del botón tres veces, hacemos el mismo nudo hasta cubrir todo el botón.
We introduce the needle through the third hole of the button three times, we tie the same knot until the entire button is covered.
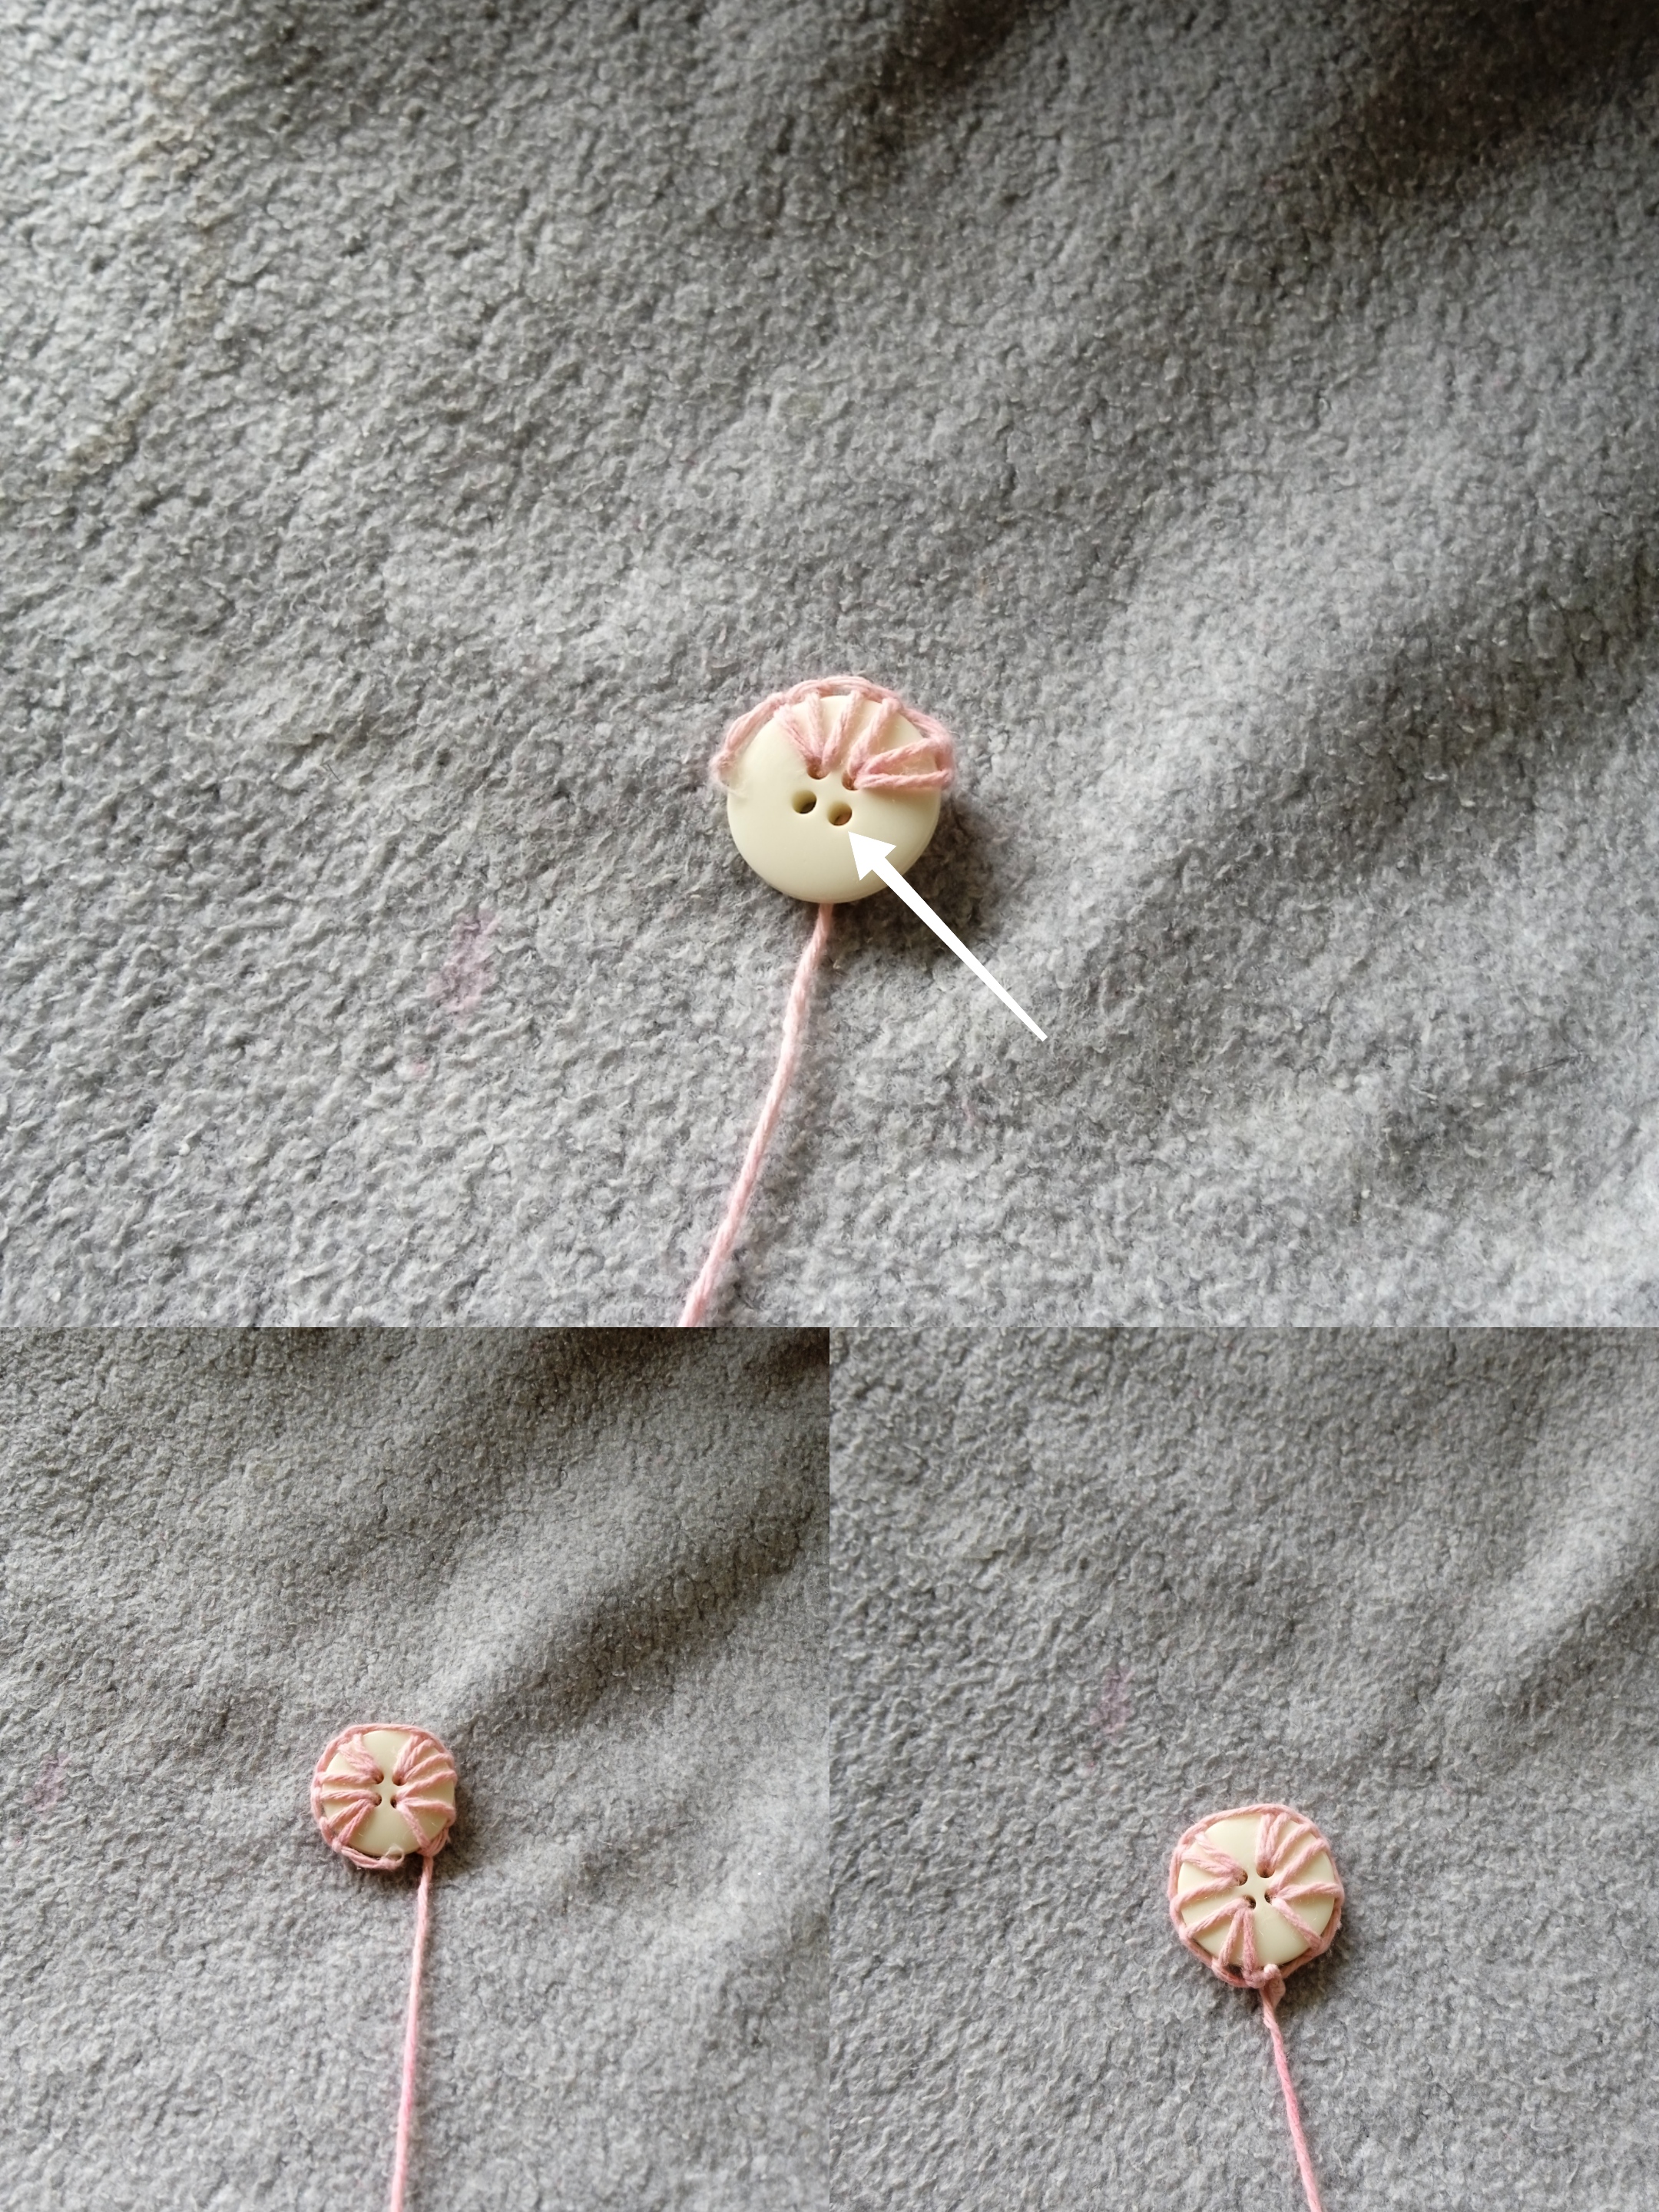
Finalmente hacemos un nudo para cerrar, luego seguimos haciendo nudos alrededor introduciendo la aguja por cada punto.
Finally we tie a knot to close, then we continue tying knots around it, introducing the needle through each point.
Comenzamos haciendo nudos gruesos, vamos a llevar la aguja hasta el centro del hilo para hacerlo grueso y doble. Nuevamente hacemos el mismo nudo pero con el hilo un poco grueso. Vamos introduciendo la aguja por cada punto sin halar mucho el hilo de modo que queden flojos. Una vez terminado de cubrir todo, cerramos los puntos y cortamos sobrante.
We start by making horrible knots, we are going to take the needle to the center of the thread to make it horrible and double. We tie the same knot again, but with the thread a little thicker. We introduce the needle through each stitch without pulling the thread too much so that they are a little loose. Once everything is covered, we close the stitches and cut off the excess.
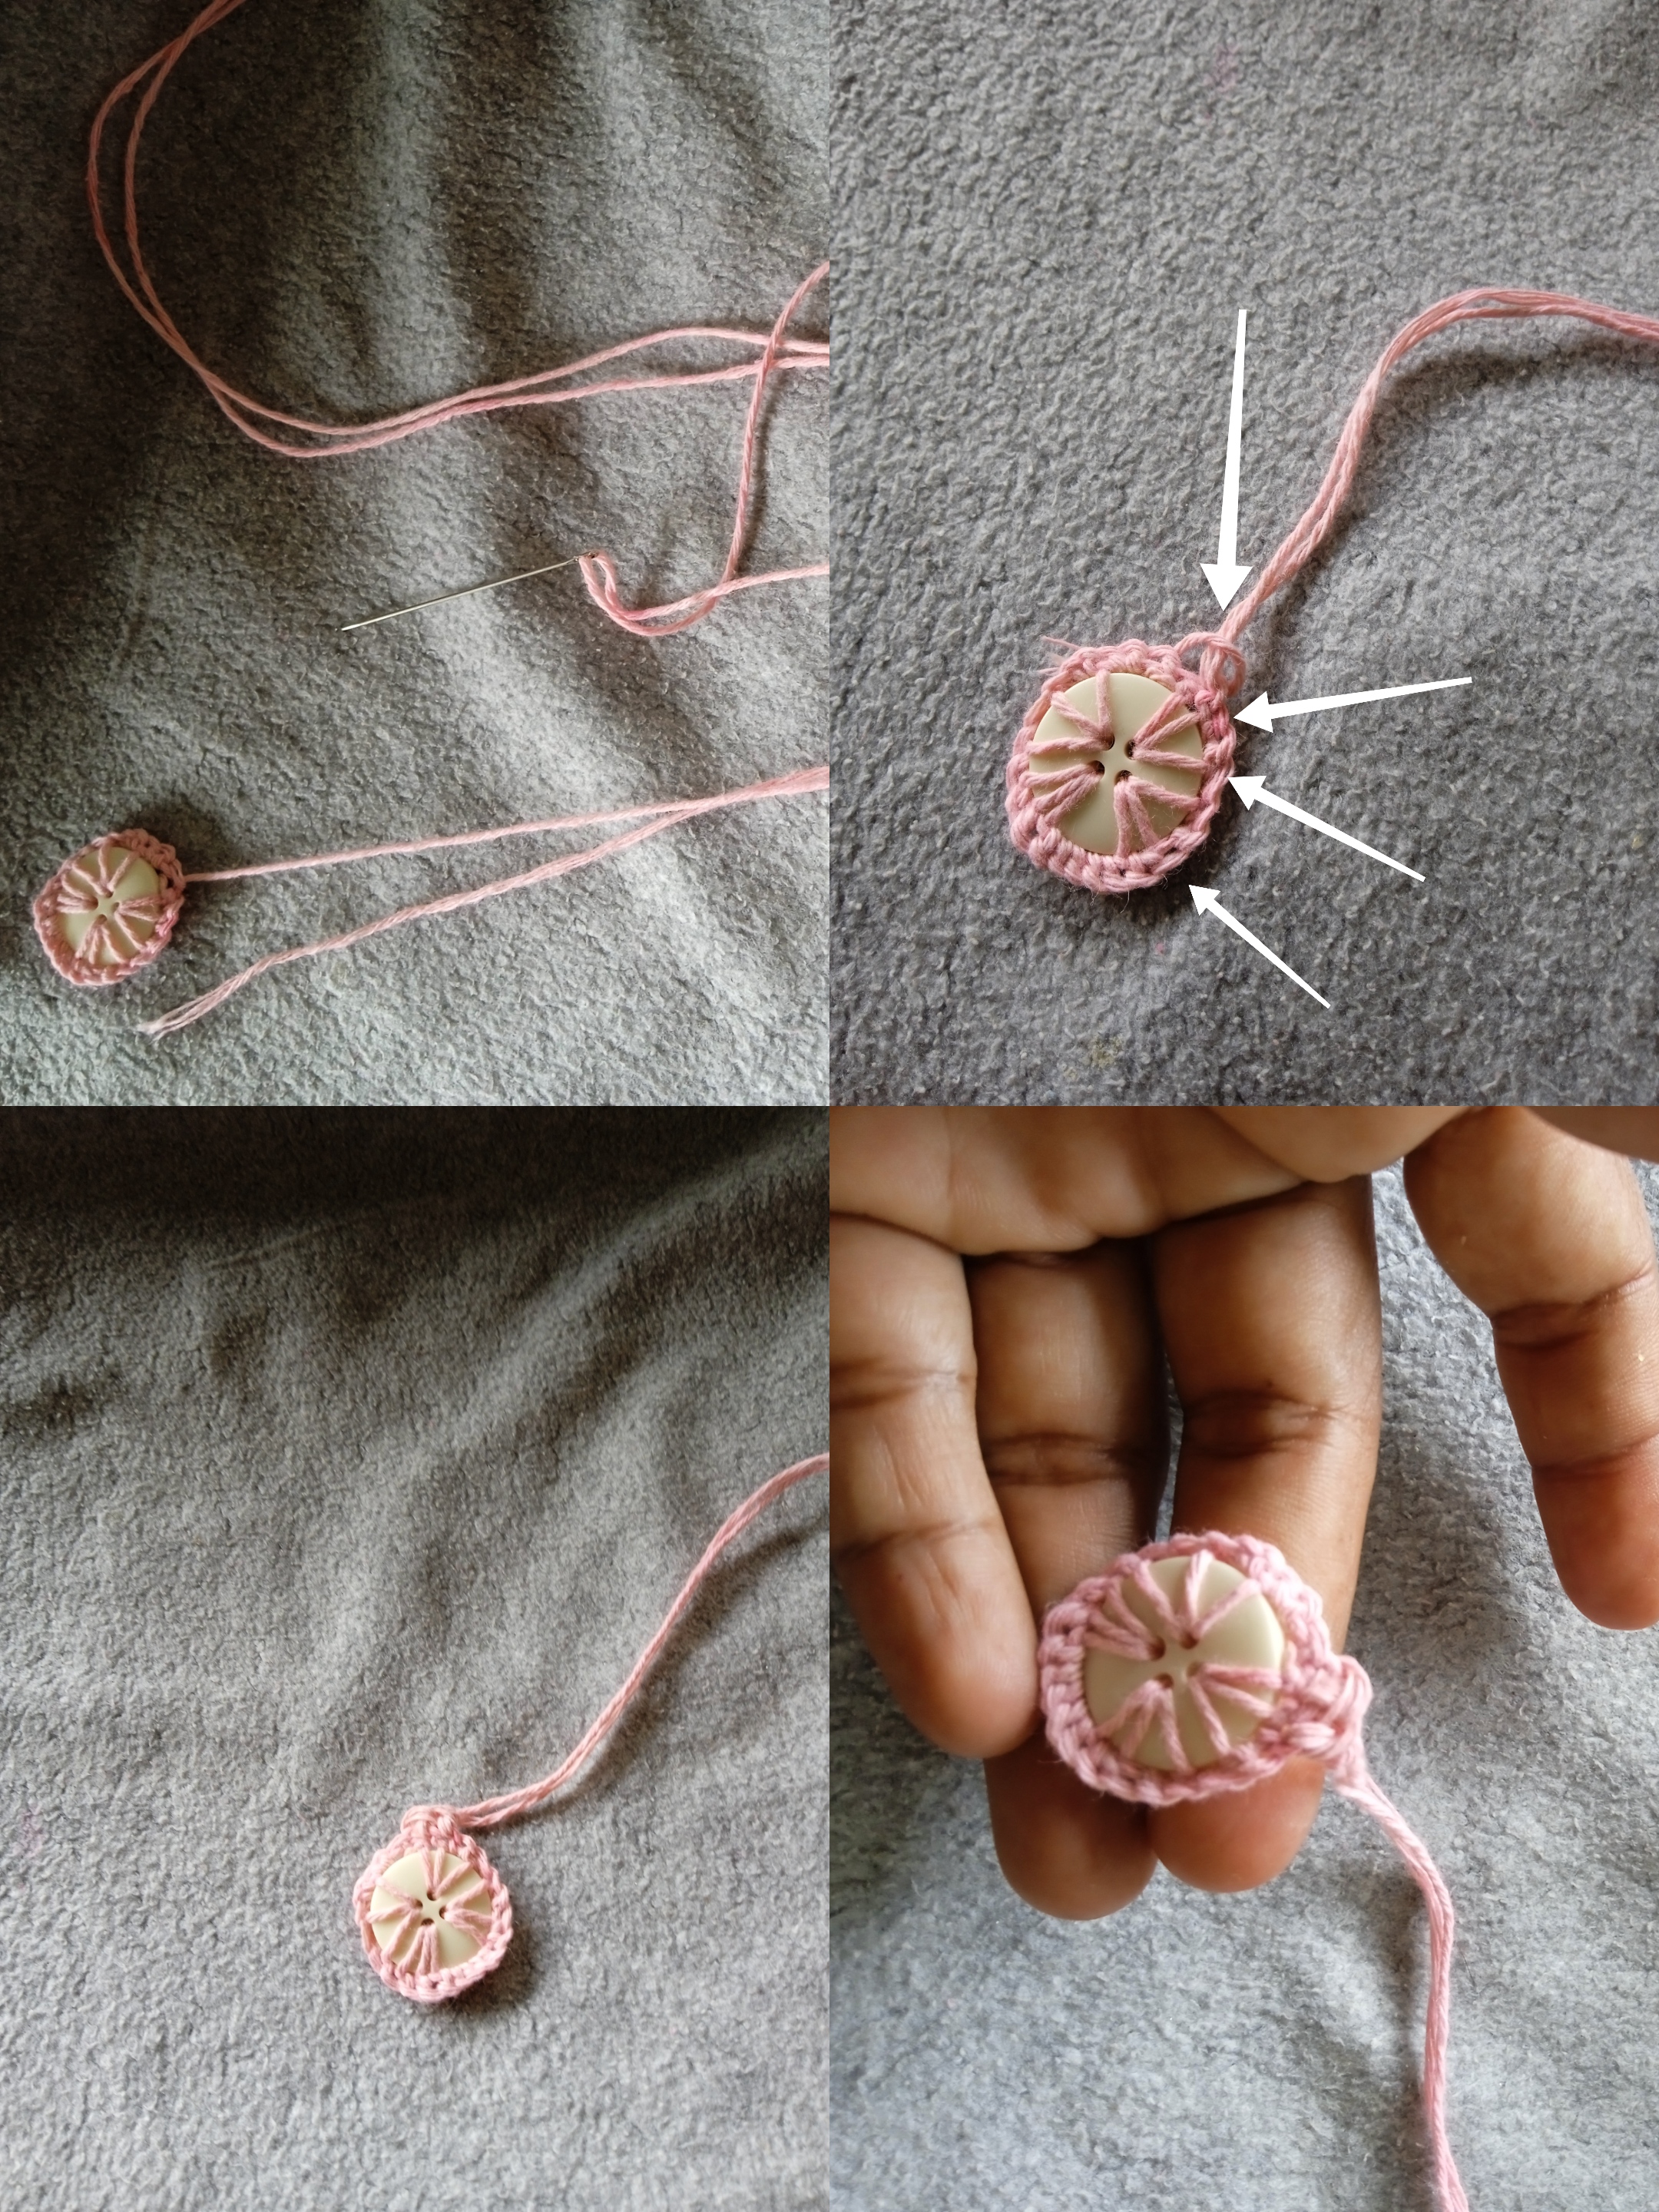
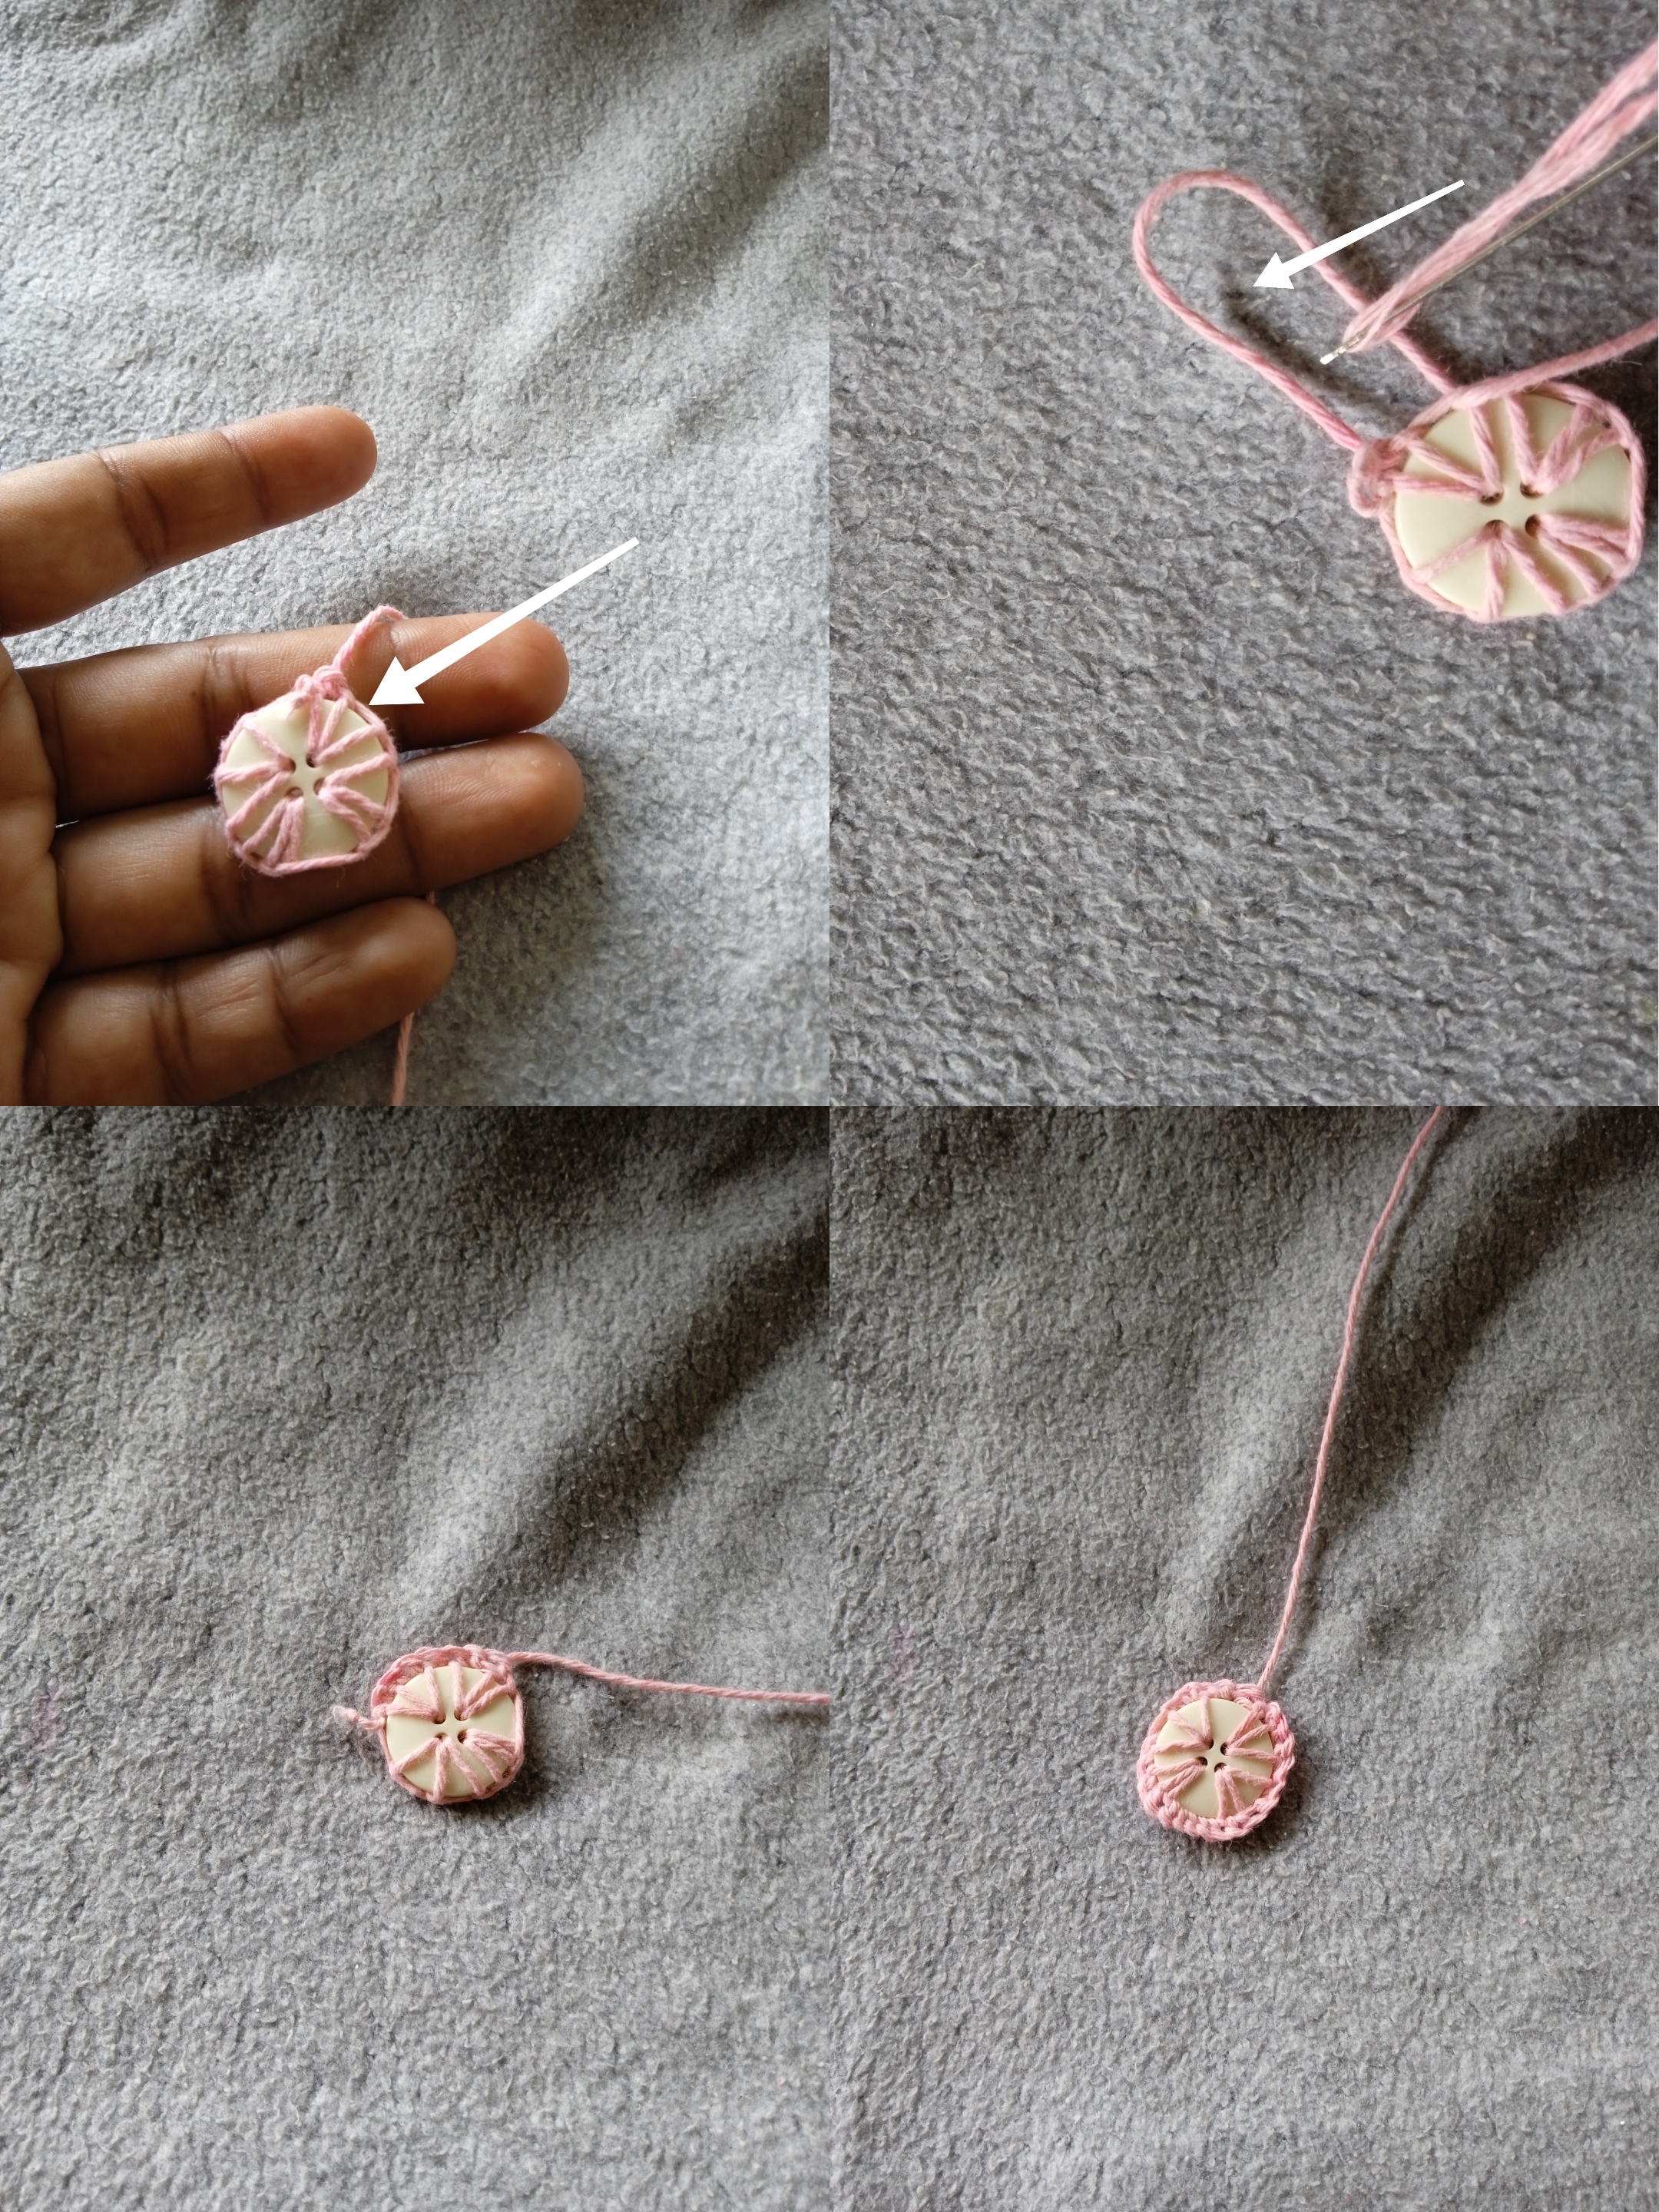
Comenzamos a elaborar los pétalos que serán de color morado, enhebramos la aguja con el hilo haciéndolo doble y atamos a uno de los puntos con nudo normal. Ahora vamos a contar tres puntos e introducimos en el tercero o cuarto punto, sacamos la aguja y la introducimos por la lazada. Observen la imagen.
We begin to make the petals that will be purple, we thread the needle with the thread making a double and we tie one of the points with a normal knot. Now we are going to count three stitches and insert the third or fourth stitch, take out the needle and insert it through the loop. Look at the image.
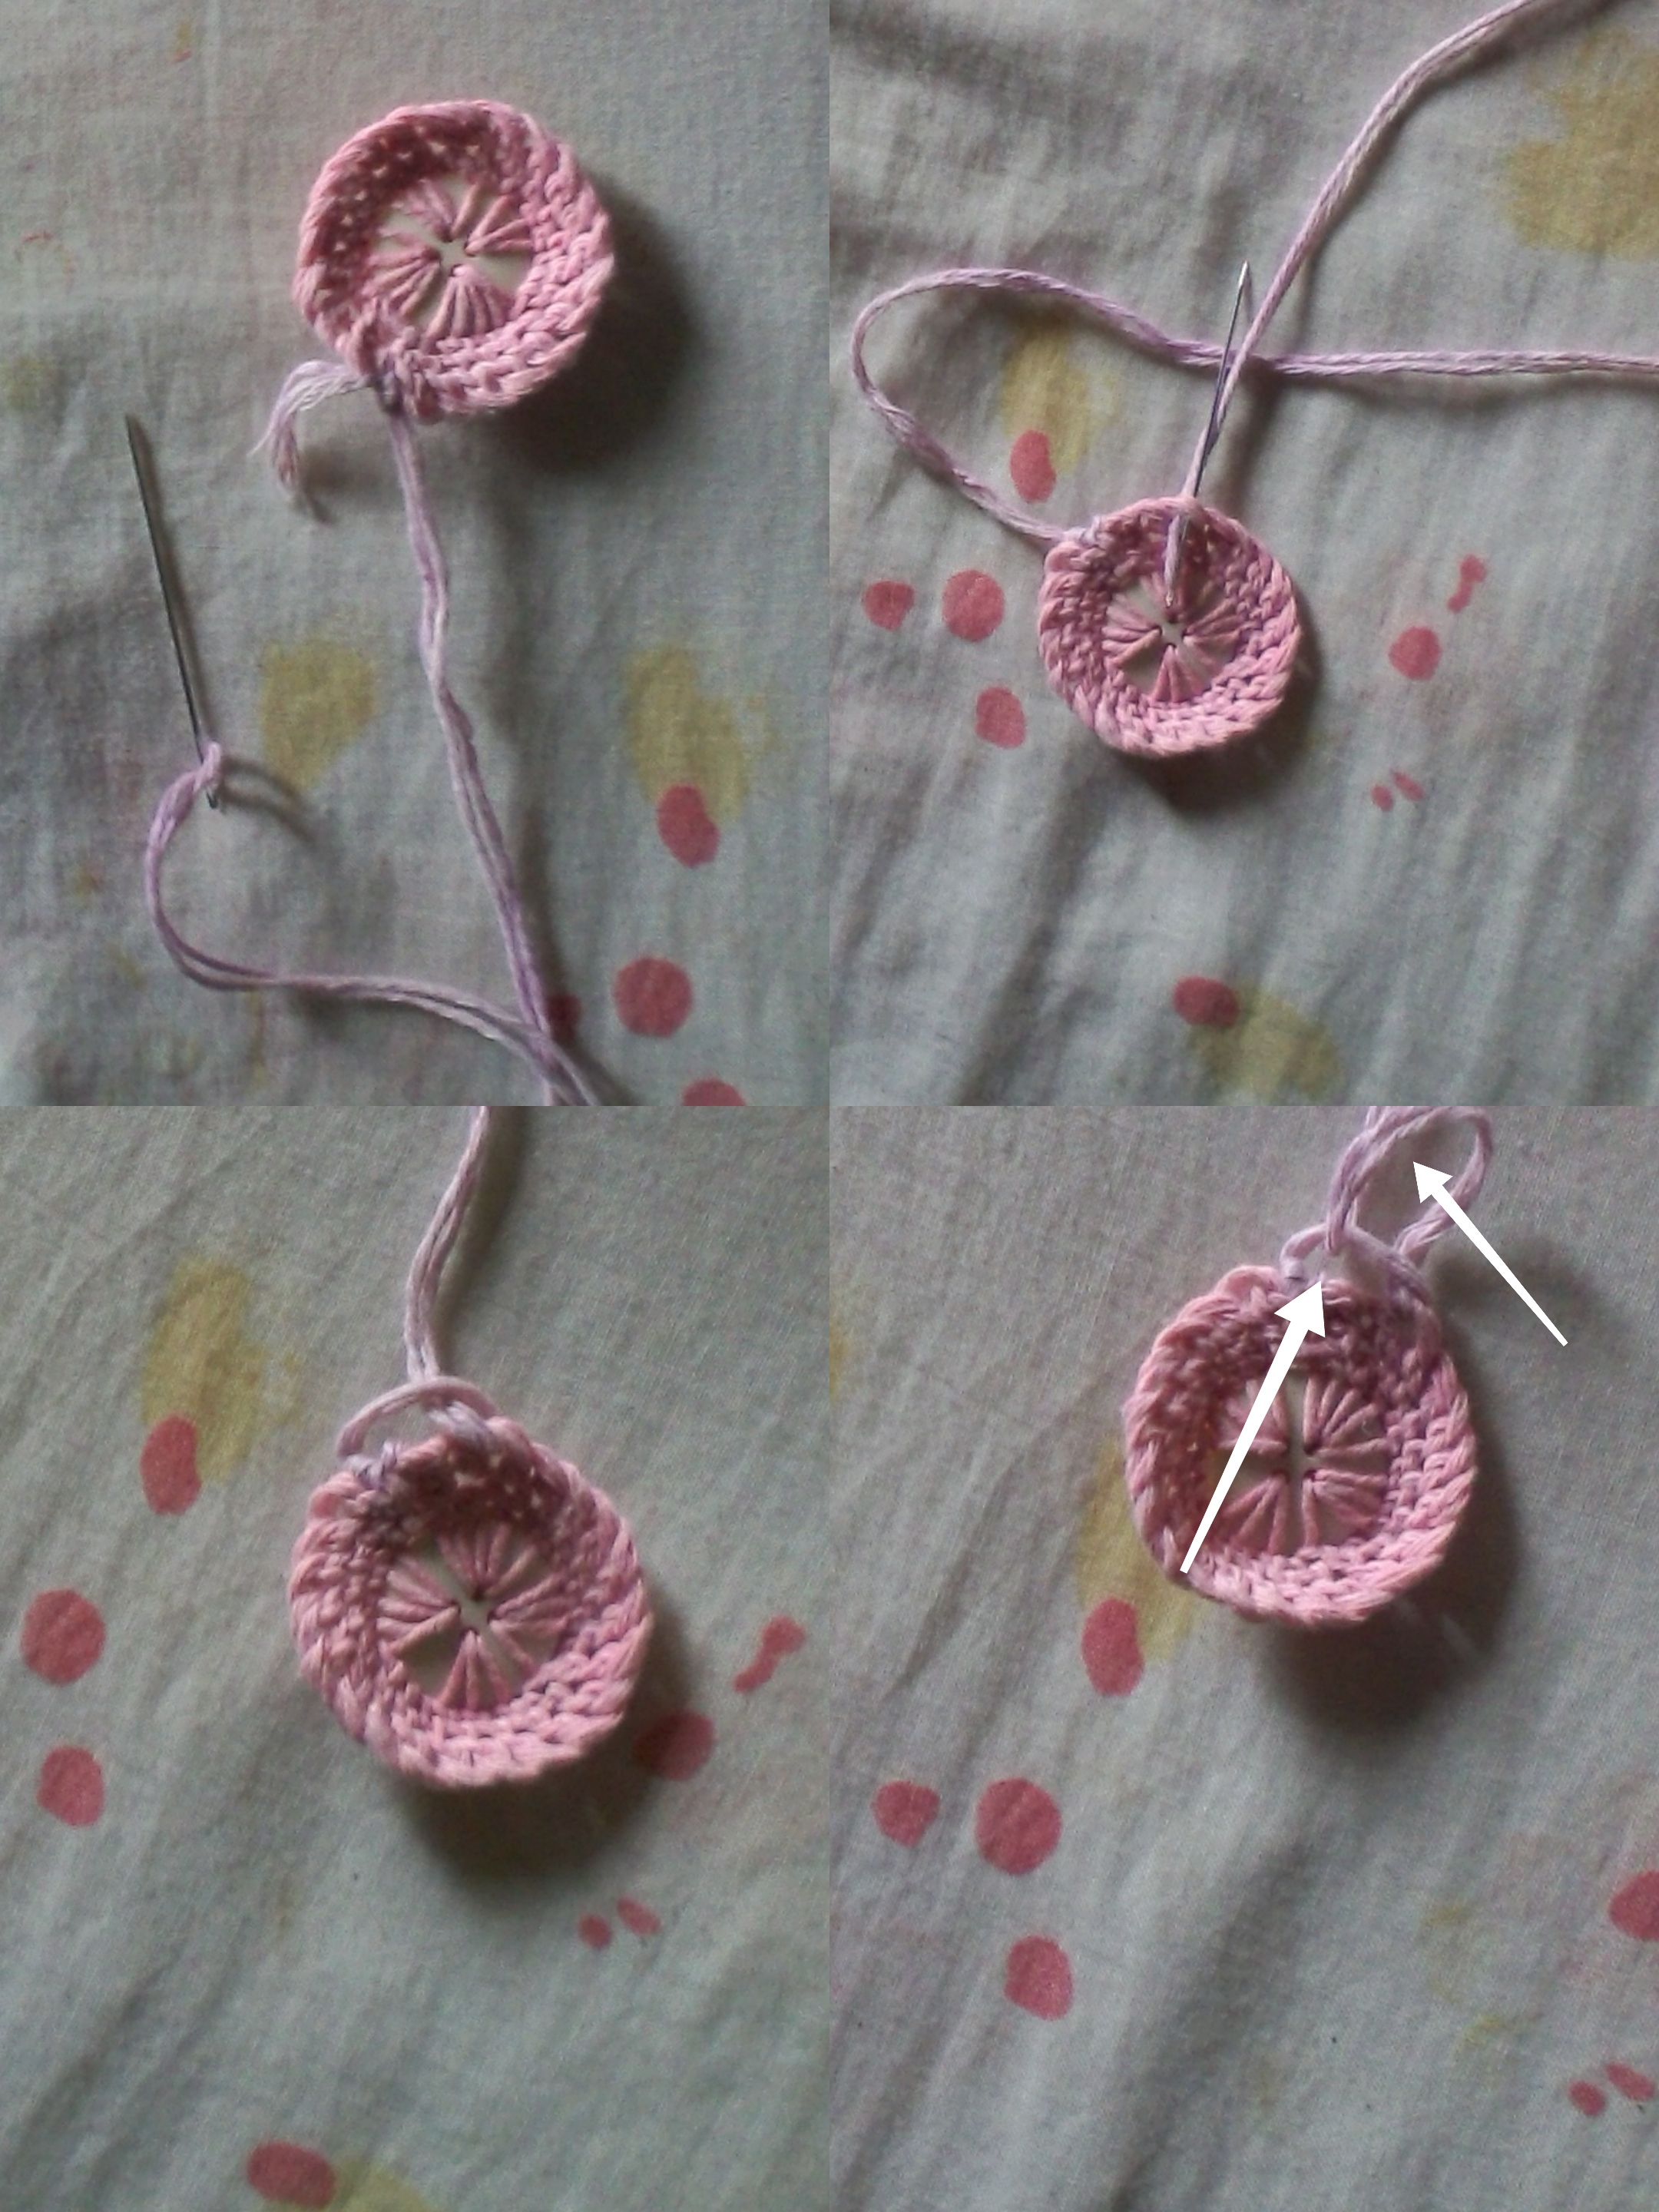
Hacemos nudos para cubrir la lazada de hilo y hacemos el próximo pétalo de la misma manera. Contamos tres puntos e introducimos en el tercero, repitiendo el procedimiento anterior.
We tie knots to cover the loop of thread and make the next petal in the same way. We count three points and enter the third, repeating the same previous procedure.
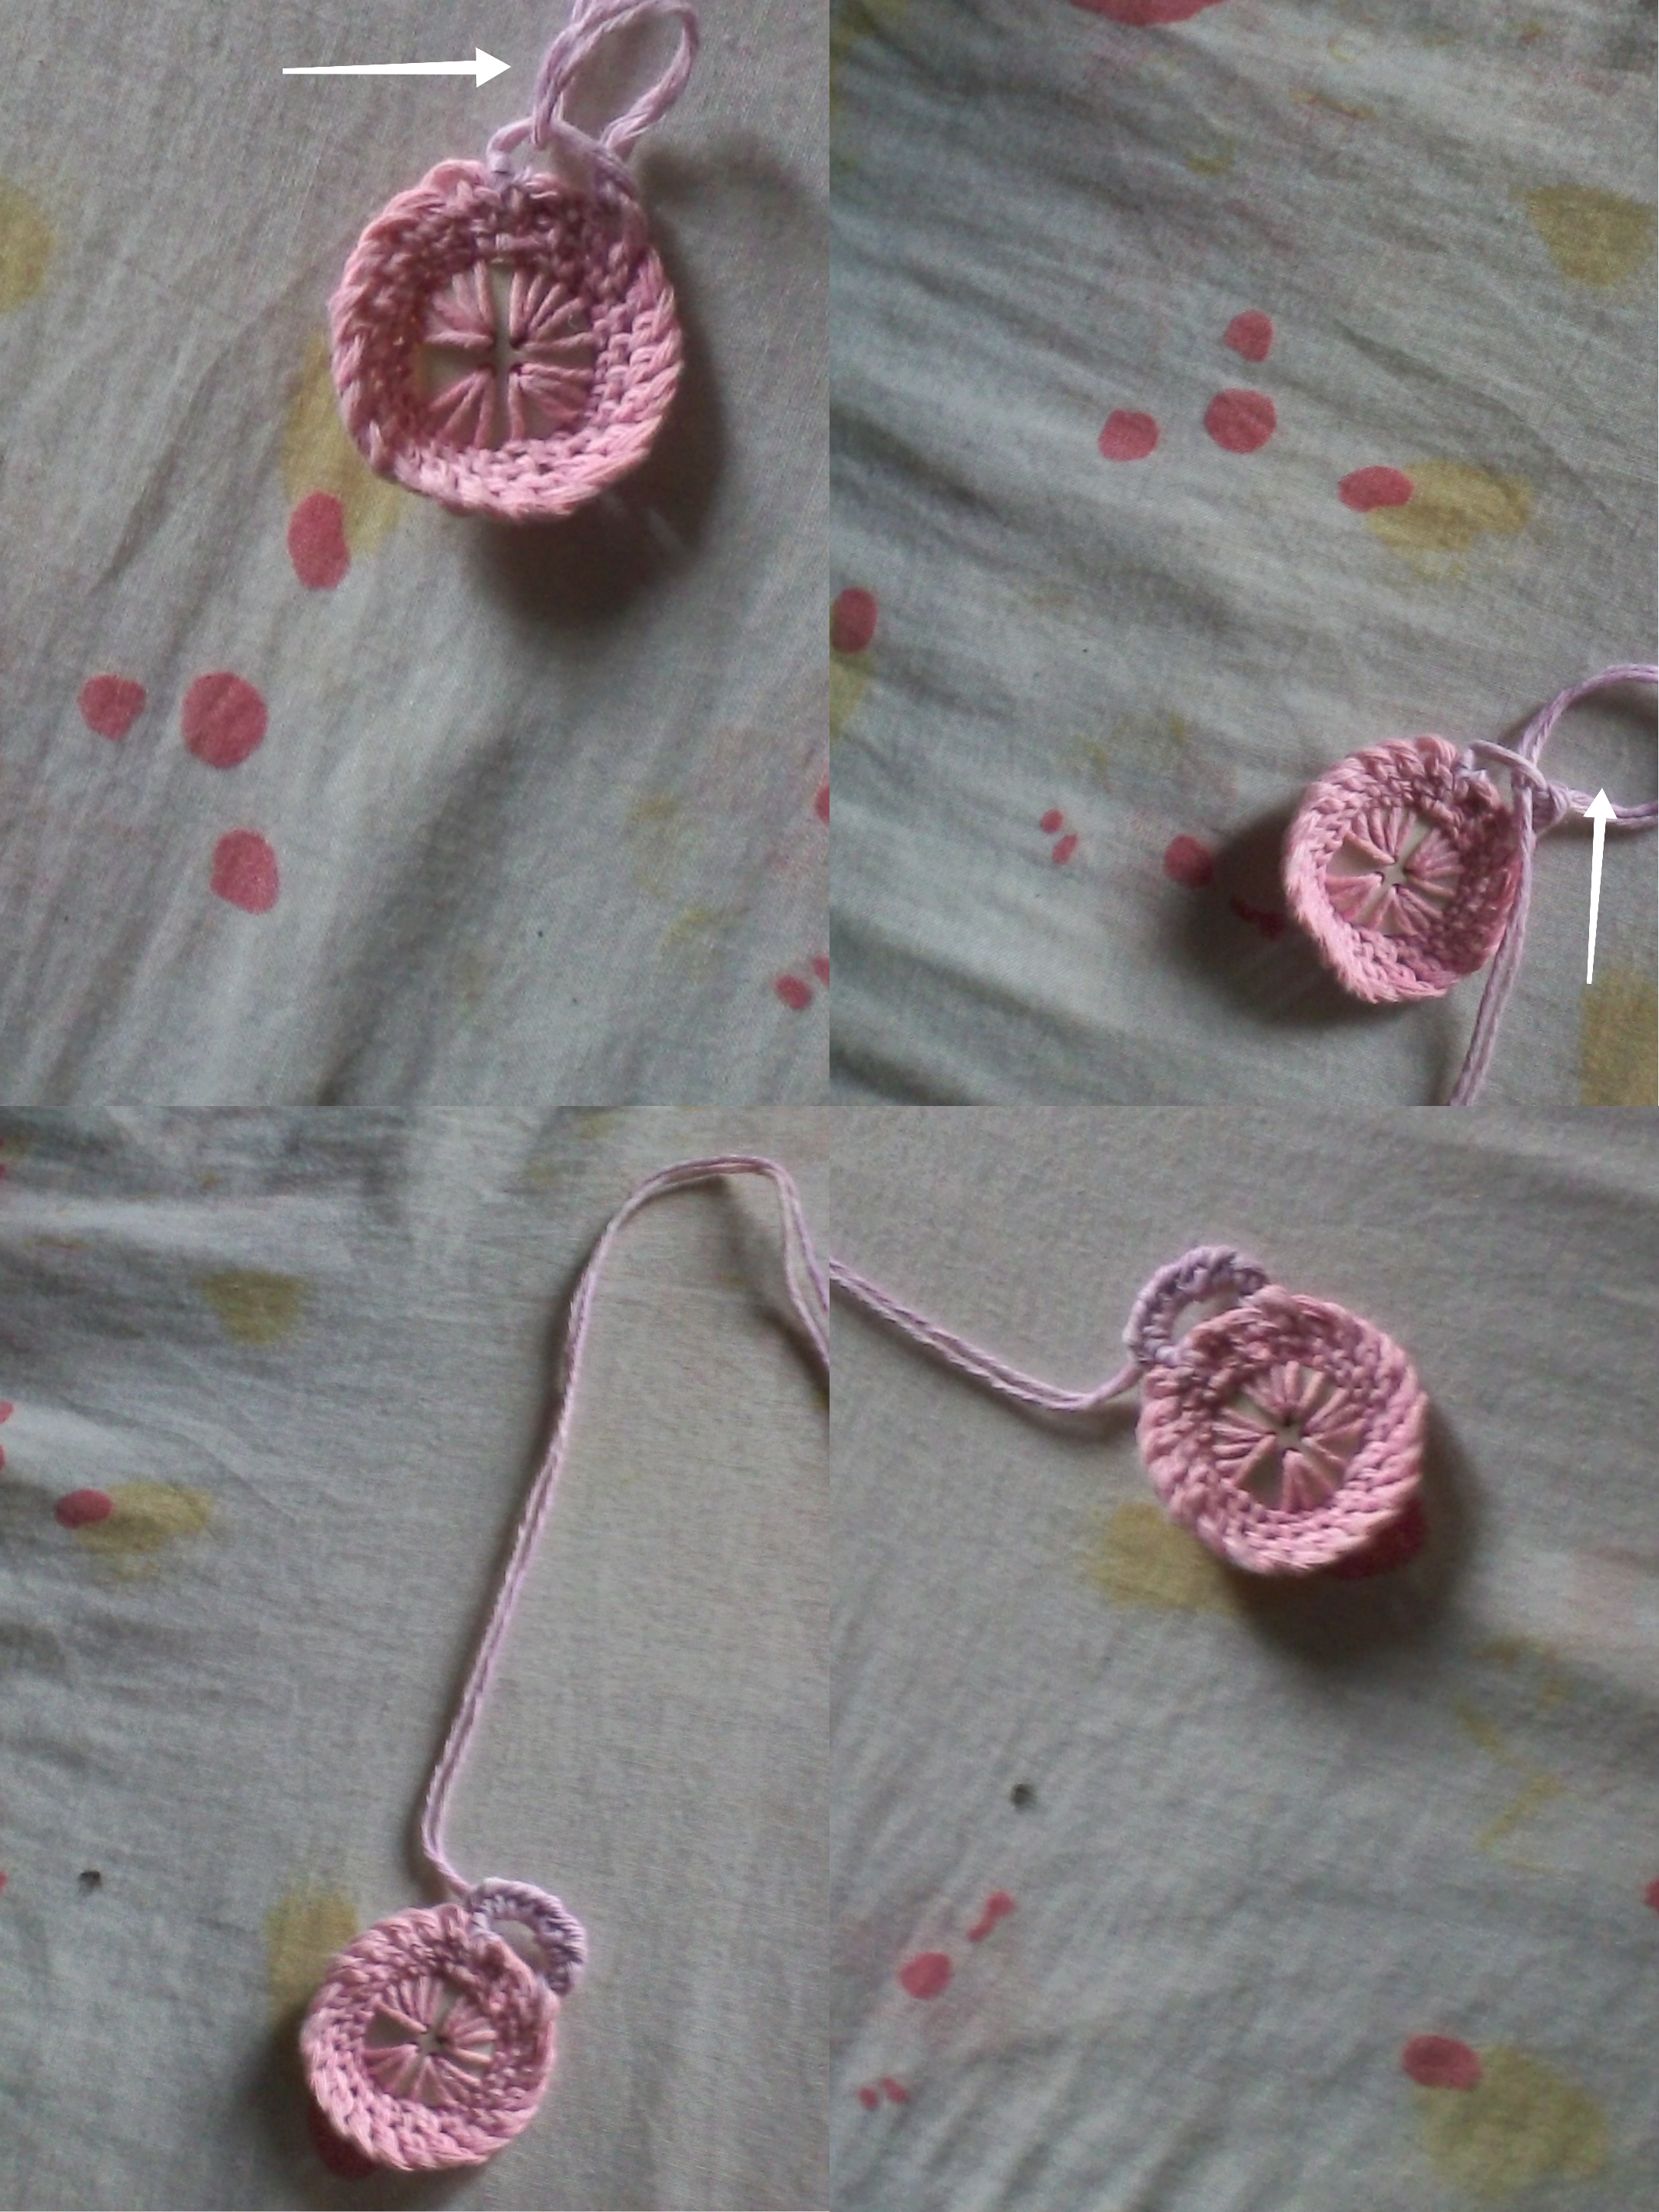
Podemos ir atando trozos de hilos alrededor para ir creando los pétalos. Siempre haciendo el mismo nudo que hemos hecho desde el principio.
We can tie pieces of thread around it to create the petals. Always tying the same knot that we have done from the beginning.
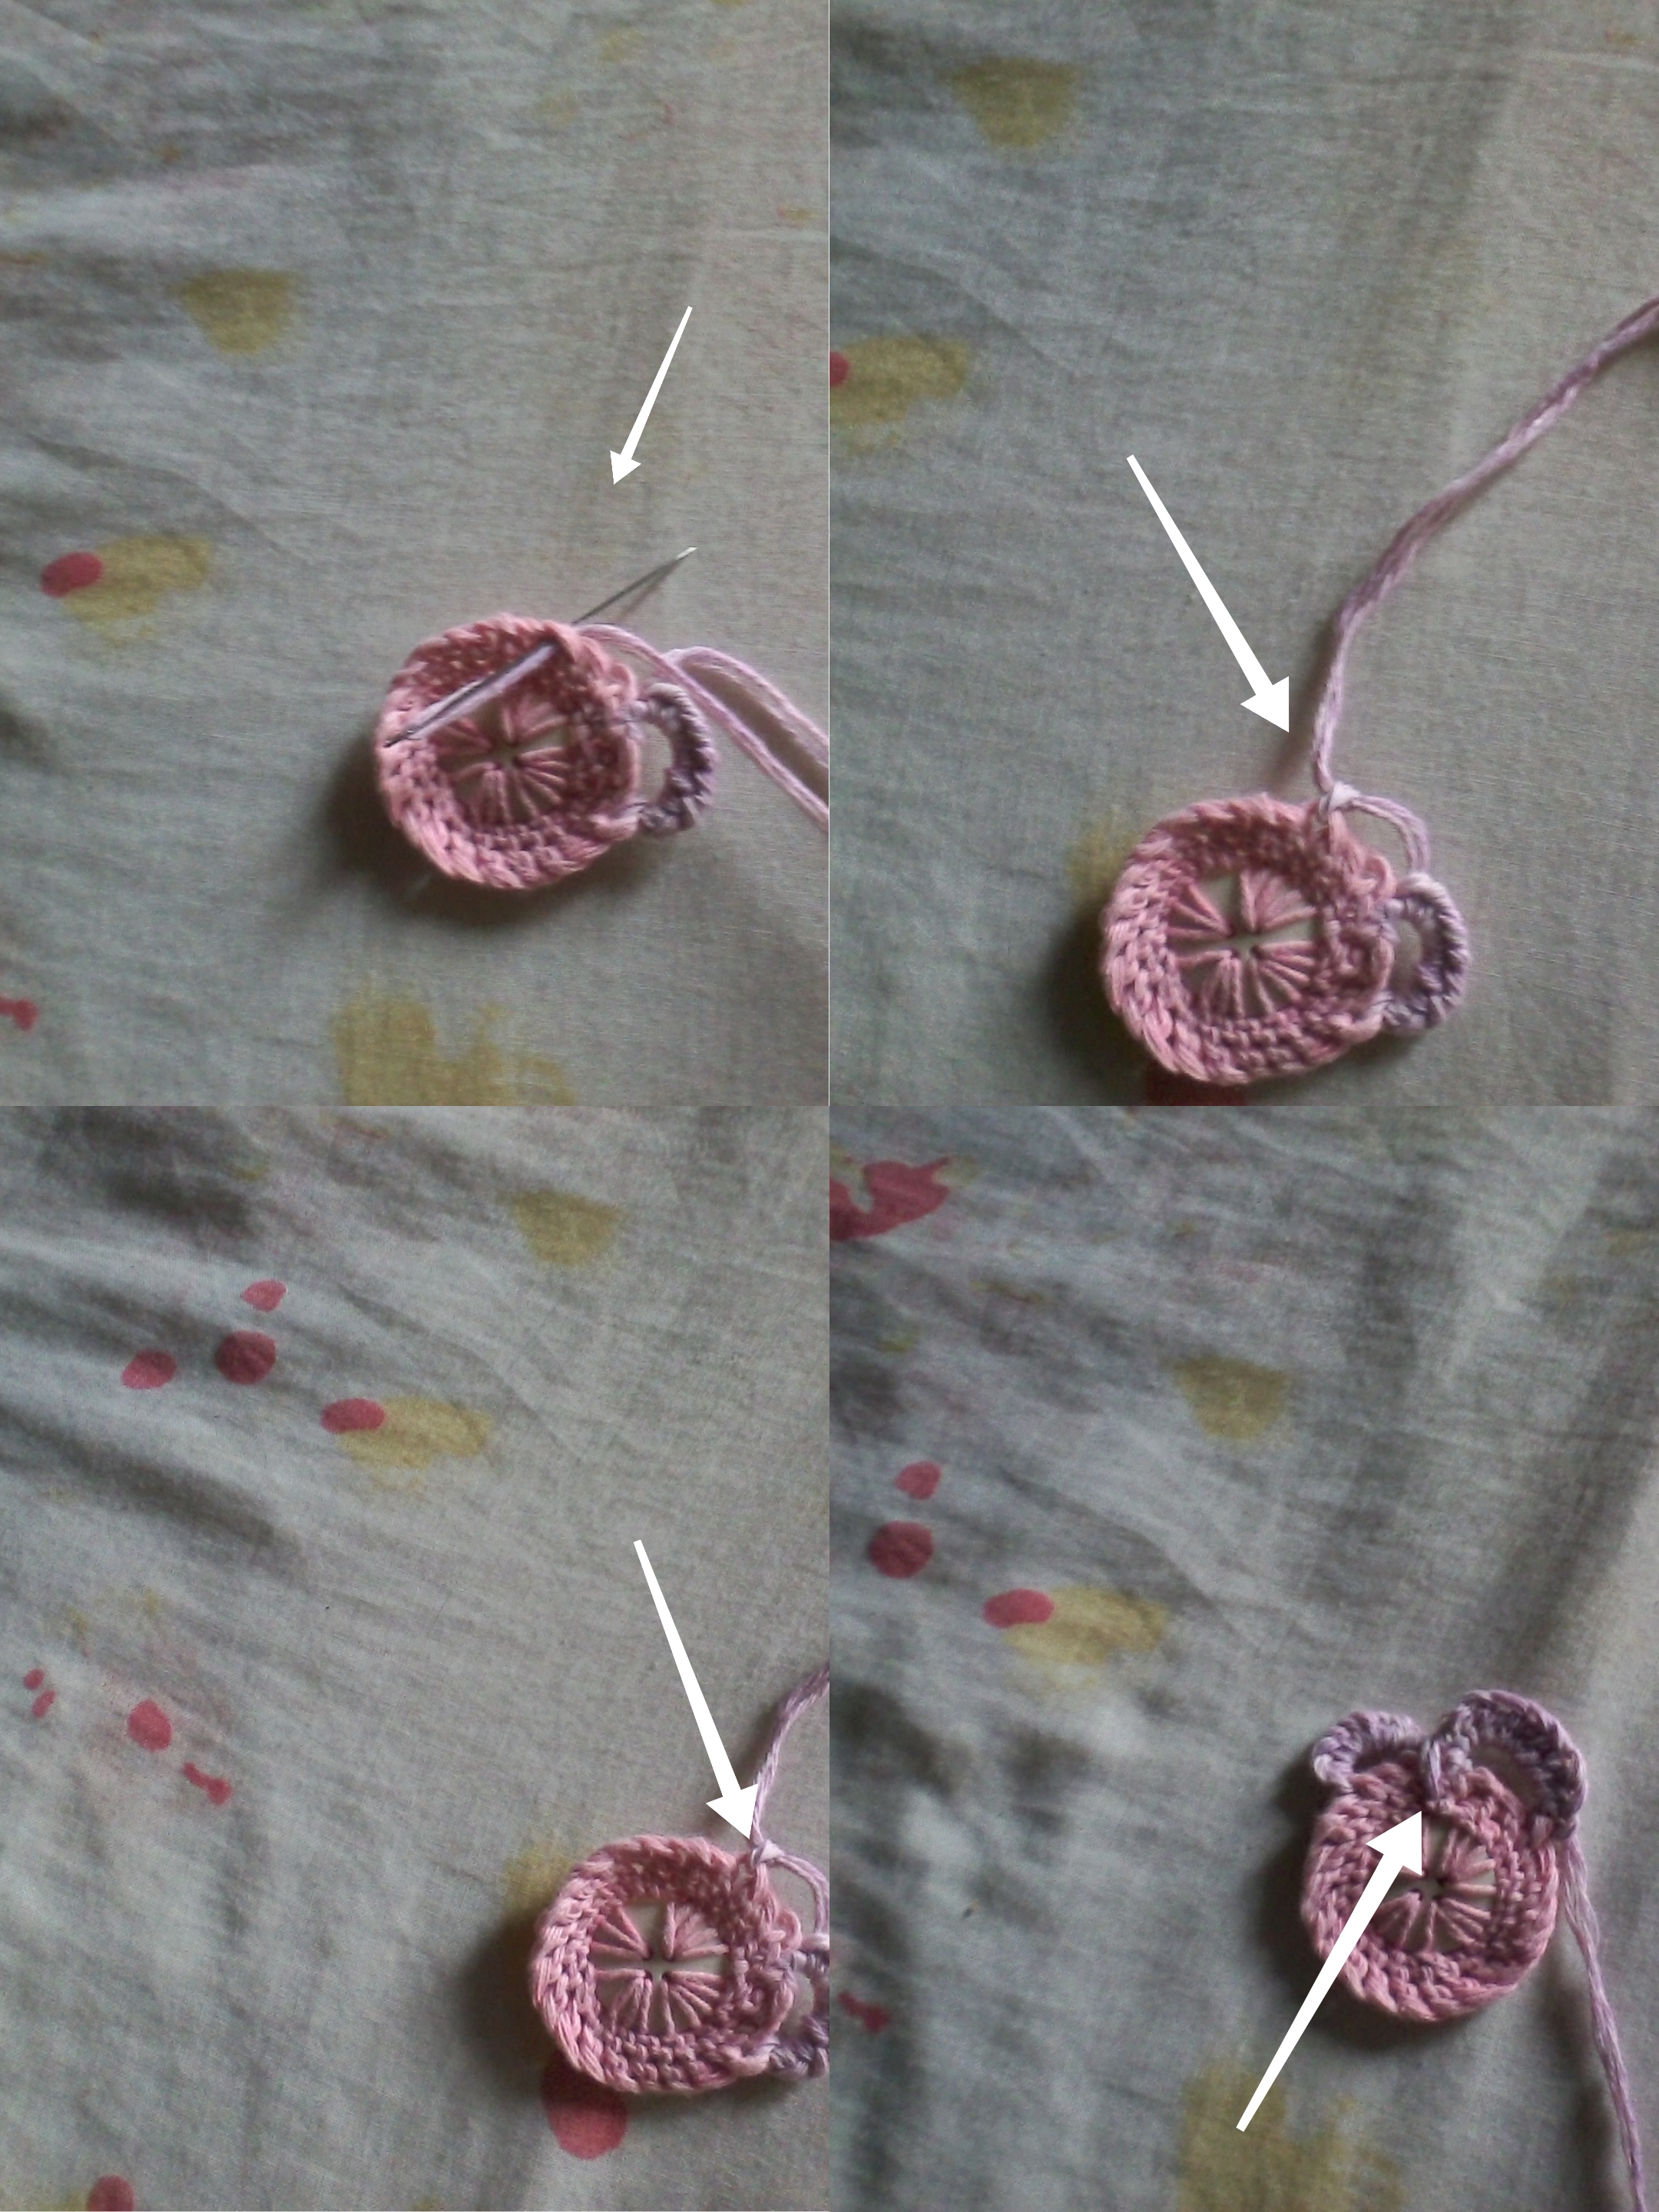
Podemos hacer pétalos más anchos, solo haciendo más nudos sobre los nudos anteriores.
We can make wider petals, just by making more knots on top of the previous knots.
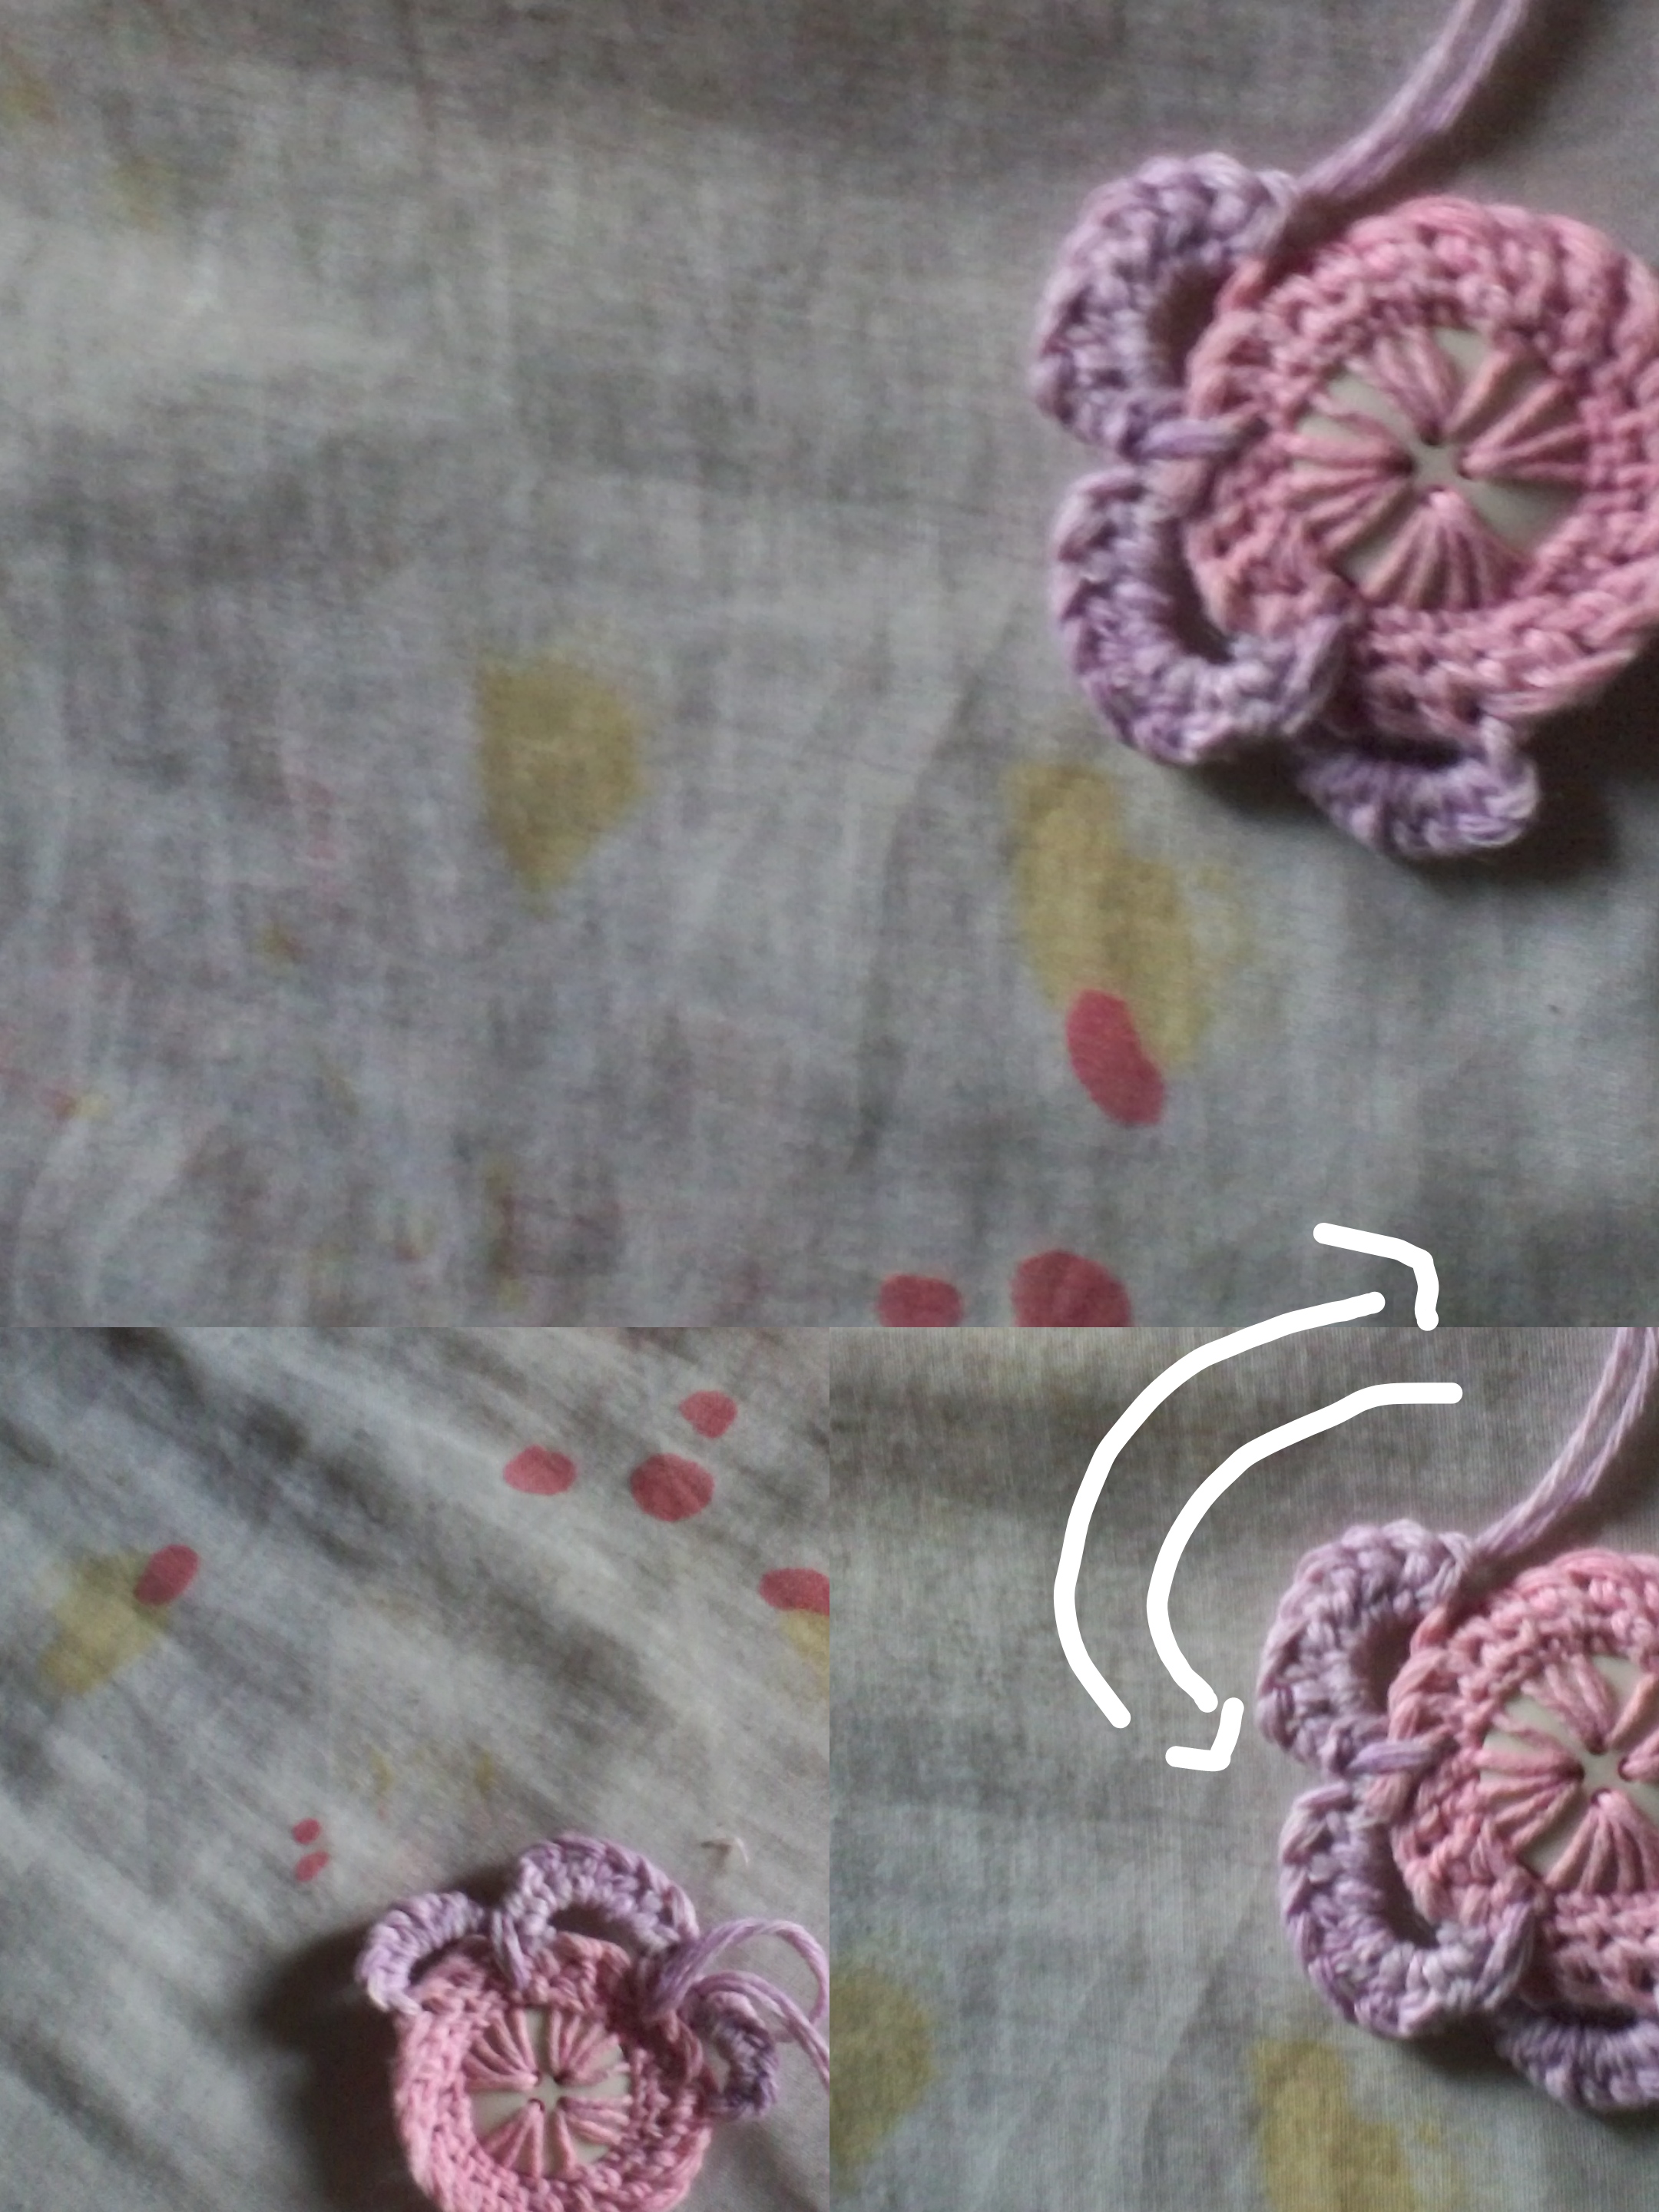
Al terminar los pétalos, hice nudos con hilo rosa sobre el morado para hacerle un borde bonito y resalte un poco la flor.
When finishing the petals, I tied knots with pink thread on the purple one to make a nice border and highlight the flower a little.

Amigos, para terminar este hermoso collar colocamos un trozo de hilo rosado, hacemos nudos y colocamos pedrería y cristales para decorar y hacerlo muy hermoso. De esta manera he terminado este proyecto con un hermoso resultado, espero que les guste.
Friends, to finish this beautiful necklace we place a piece of pink thread, tie knots and place rhinestones and crystals to decorate and make it very beautiful. This way this project ended with a beautiful result, I hope you like it.

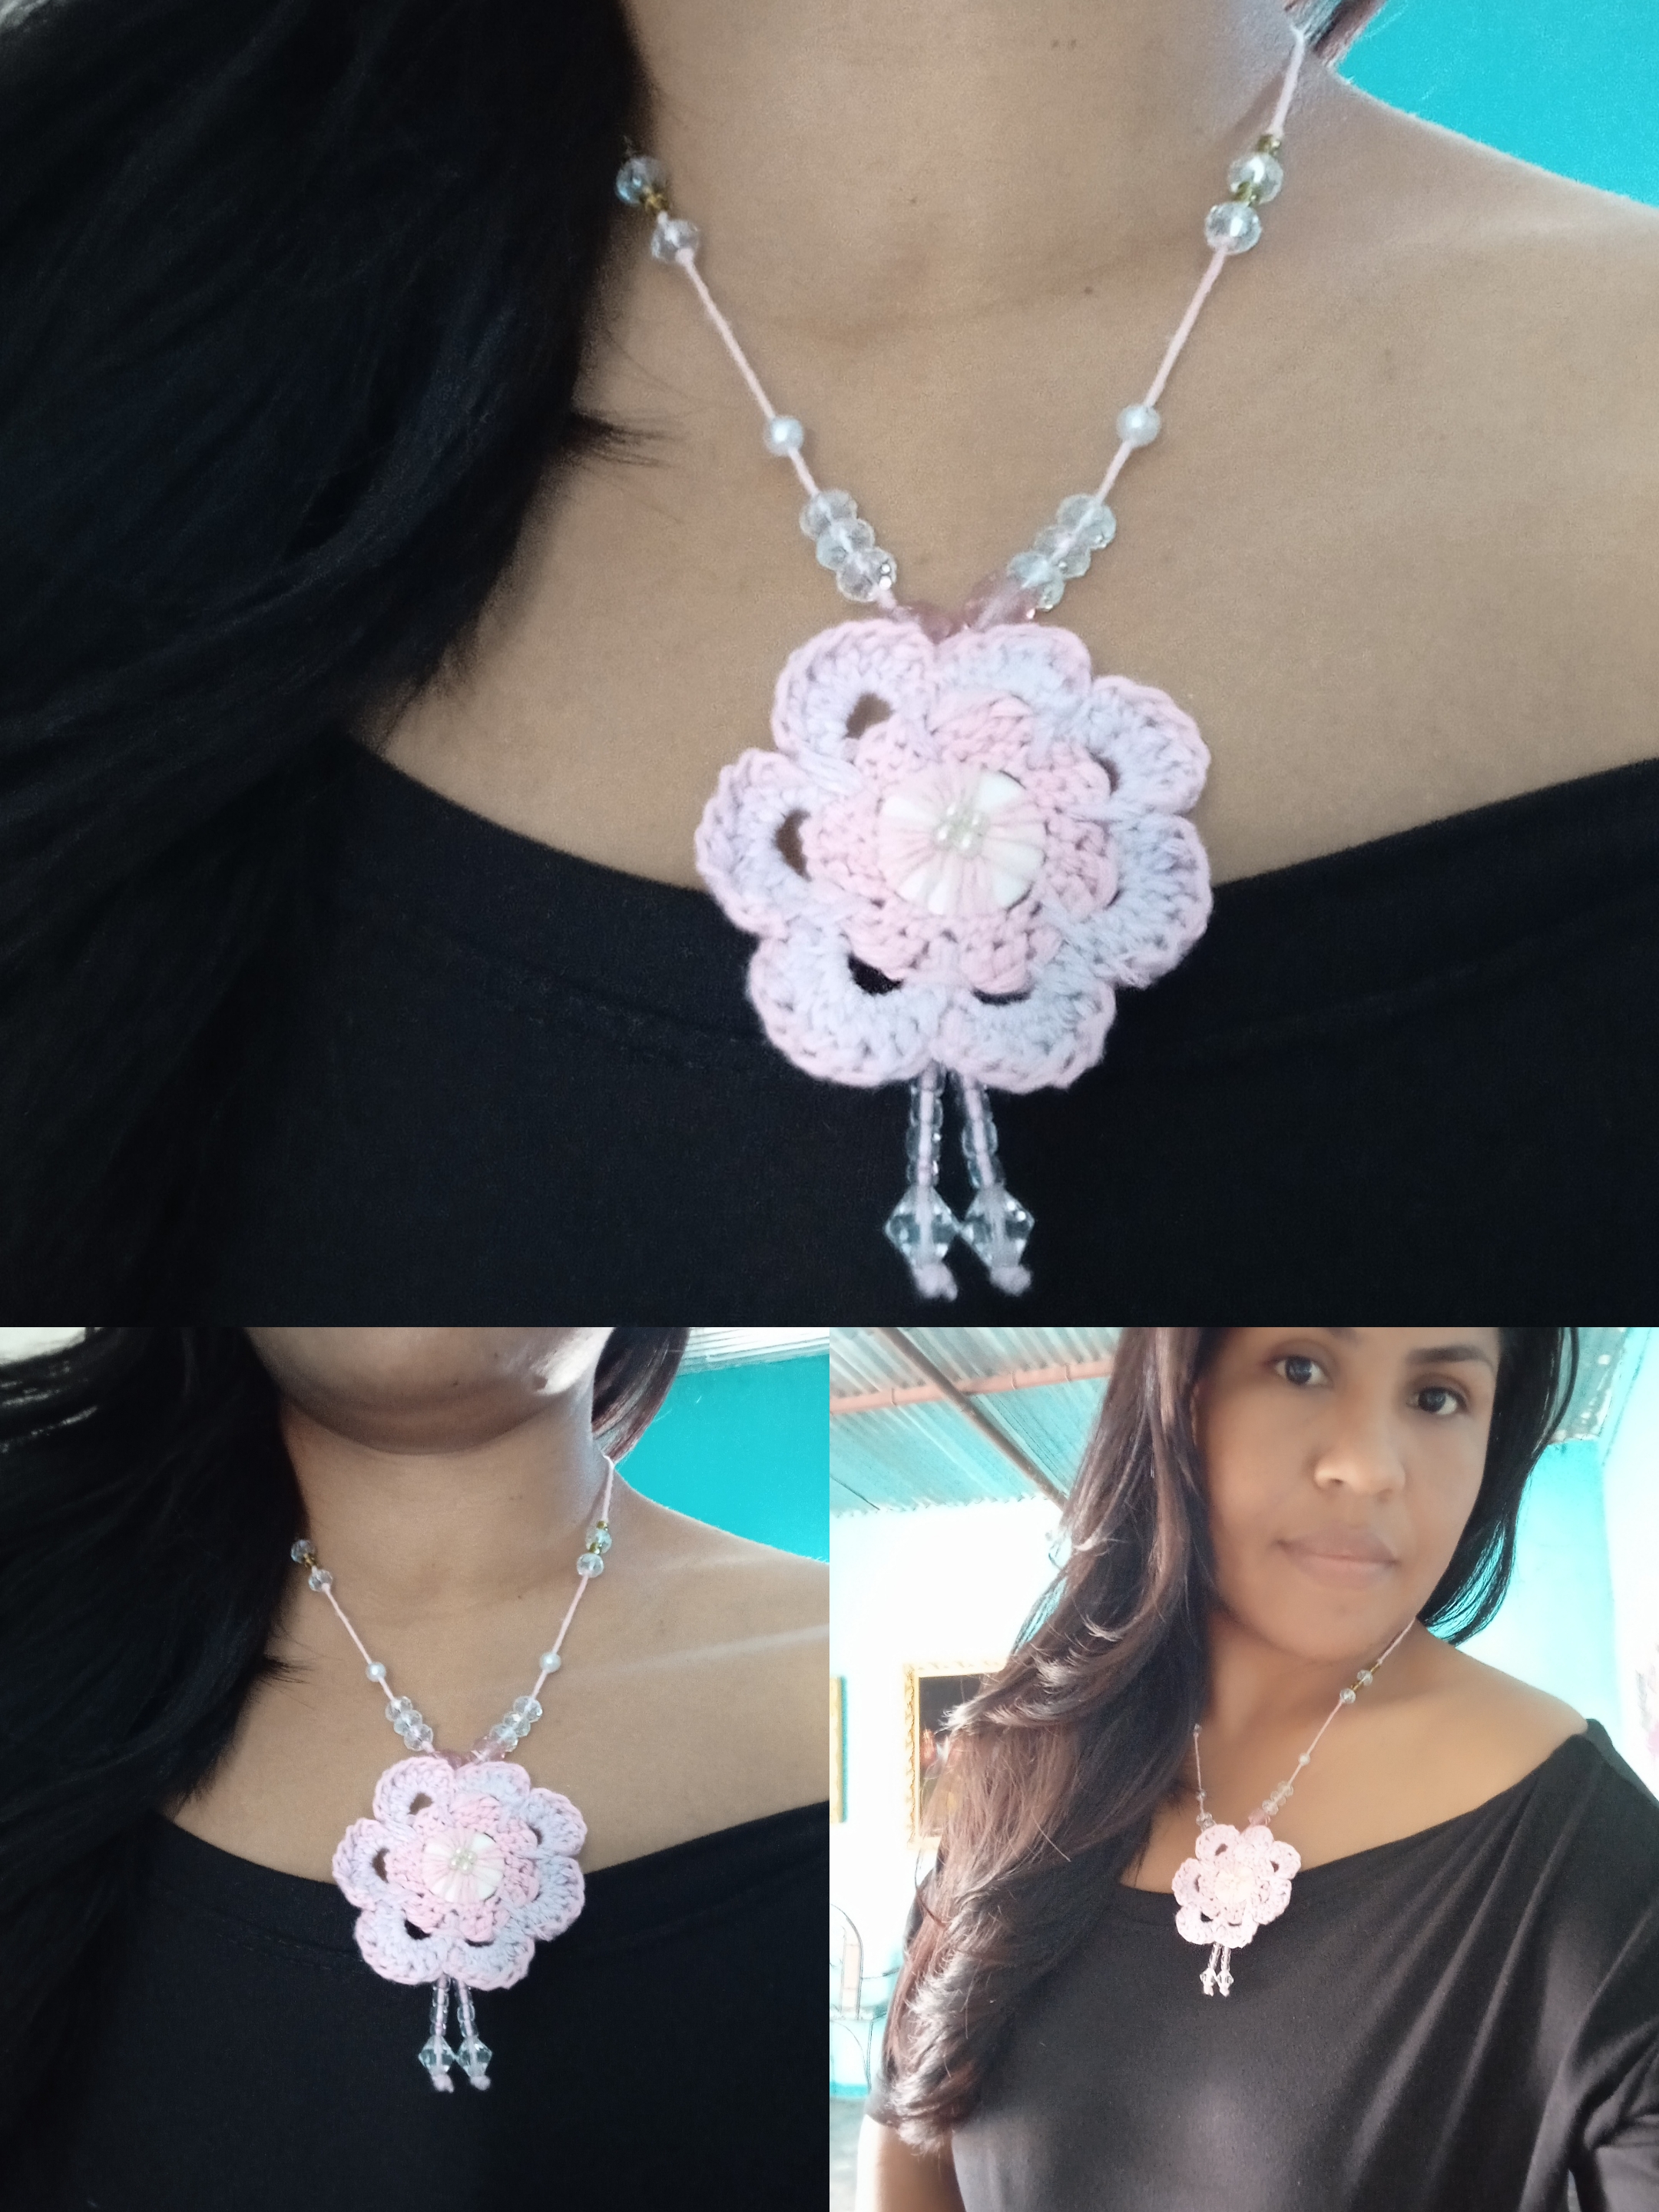
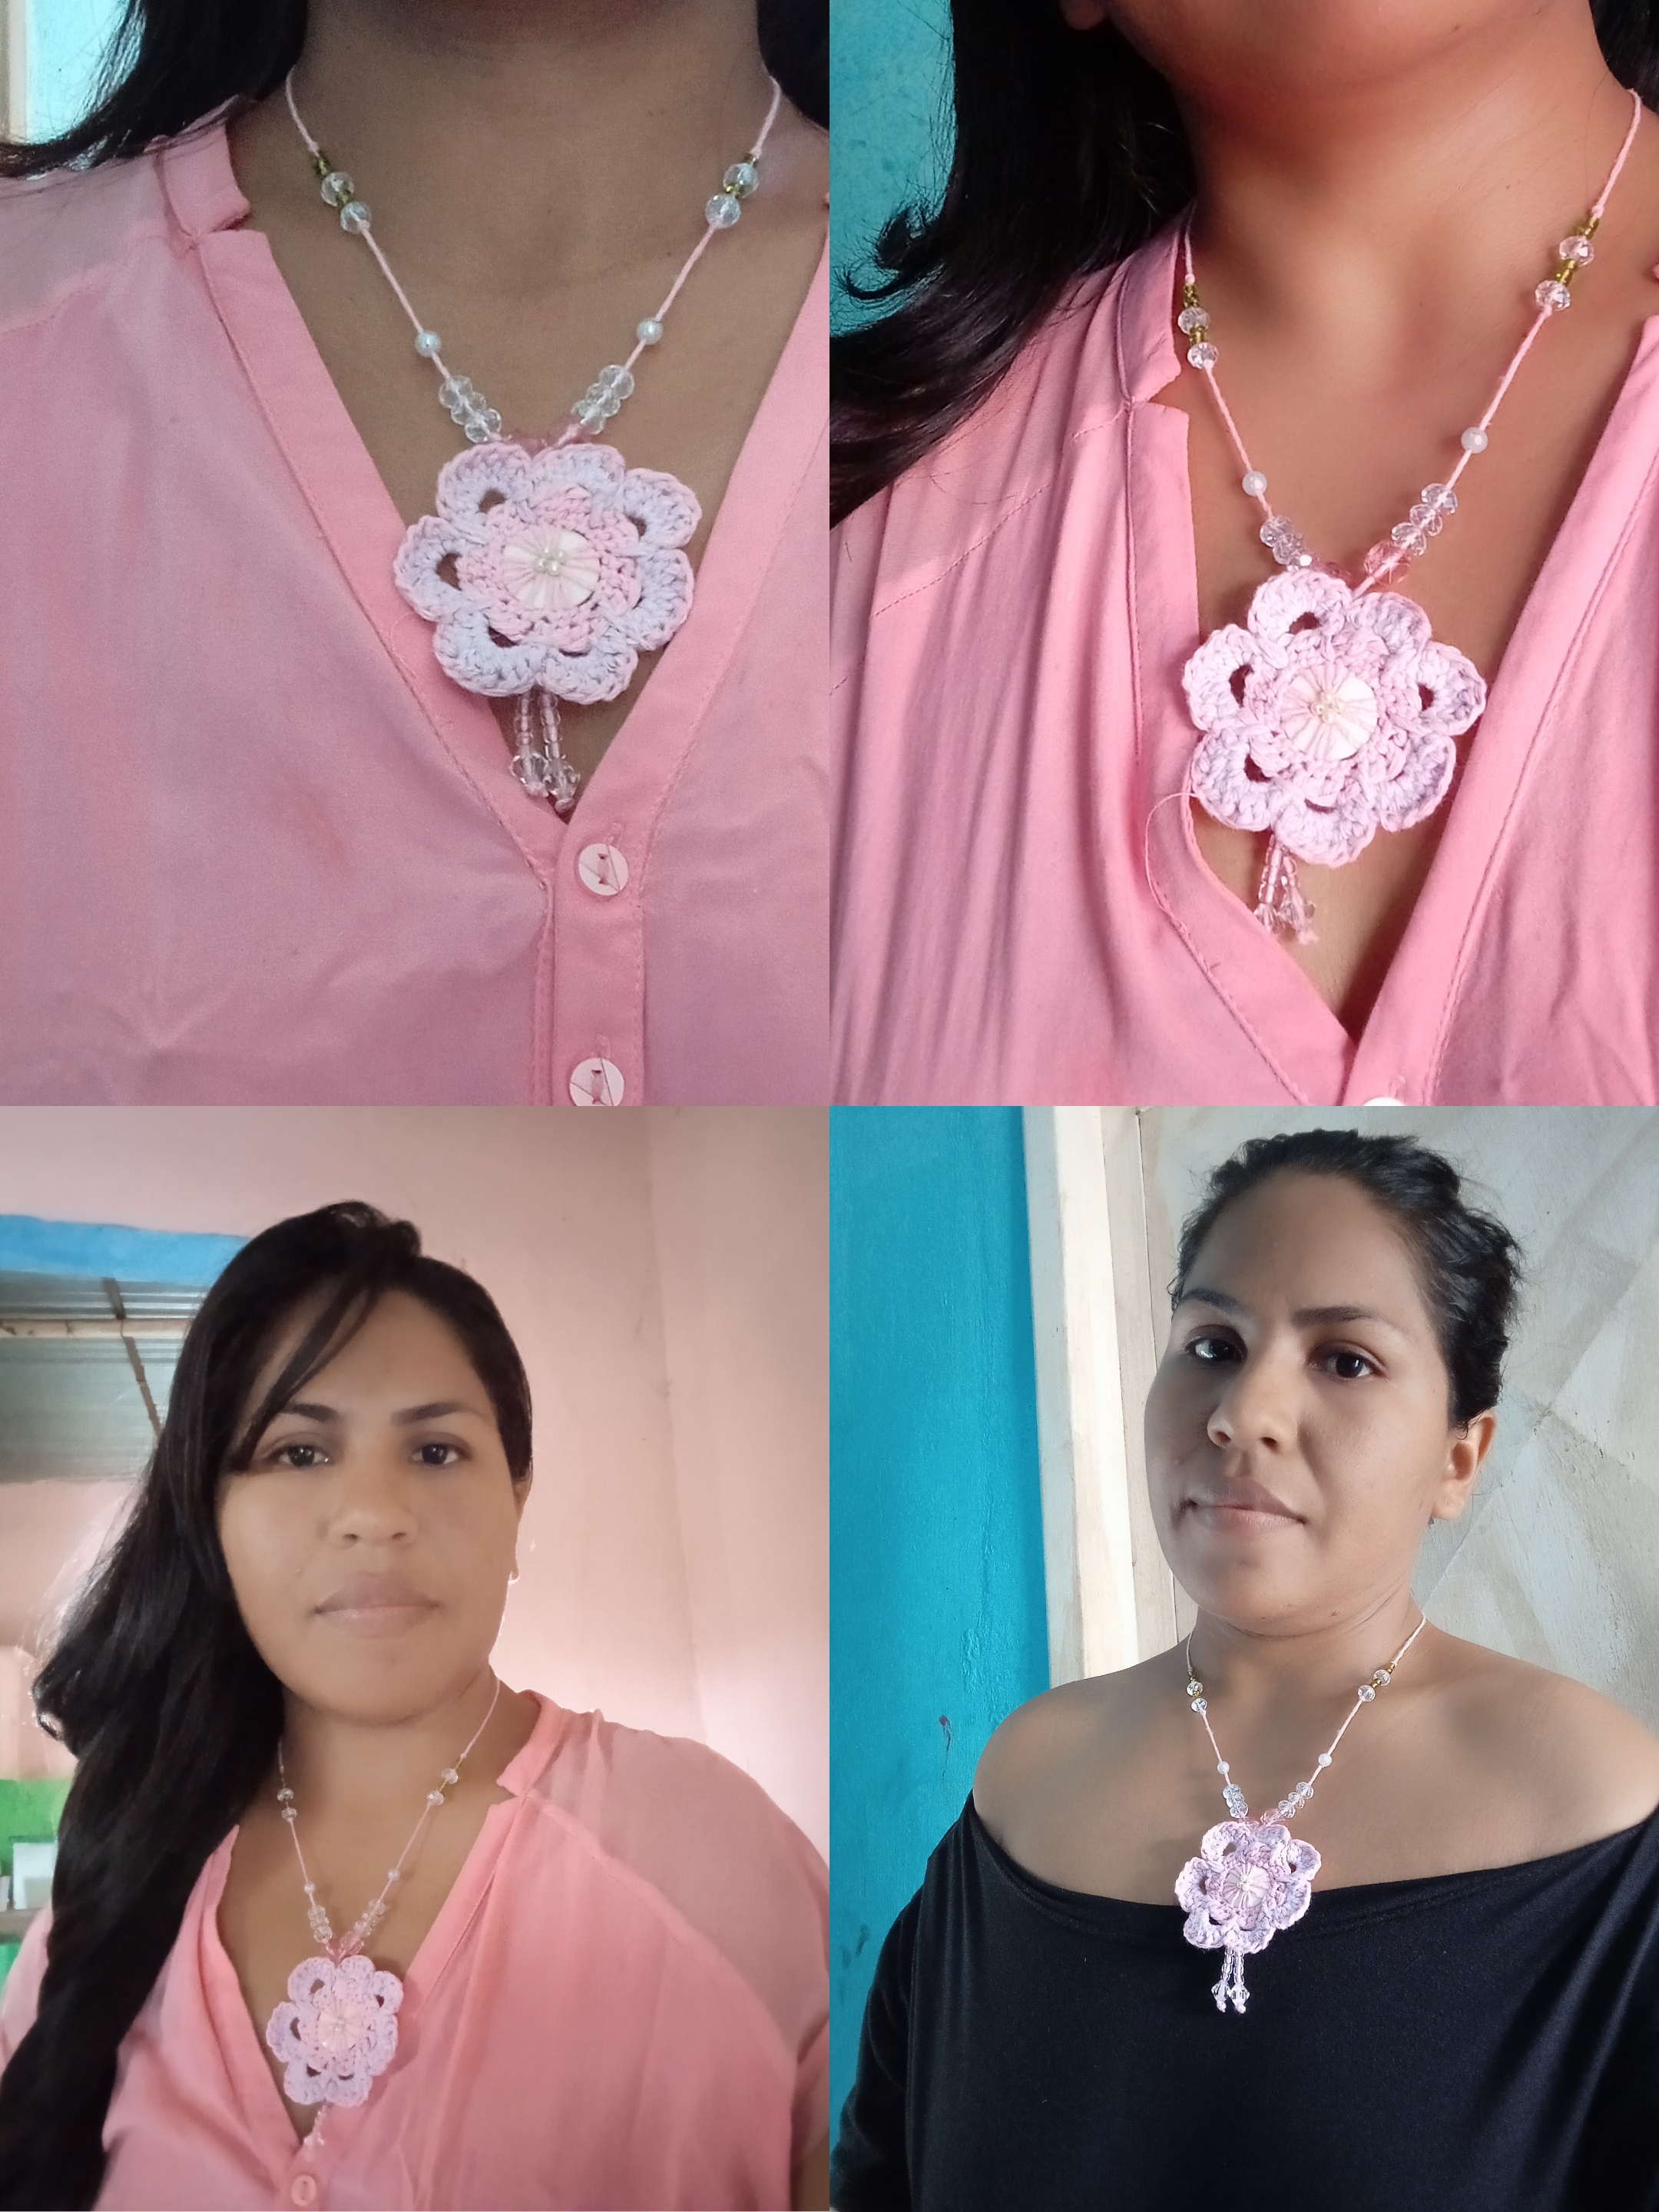

Amigos encantada de poder compartir este trabajo con todos ustedes, les agradezco su grata visitar en mi blog y leer hasta el final. Sin más, les deseo una feliz y hermosa noche. Bendiciones para todos.
Friends, delighted to be able to share this work with all of you, I thank you for visiting my blog and reading until the end. Without further ado, I wish you a happy and beautiful night. Blessings to all.
Todo el contenido y fotos son de mi propiedad.
Editor: GridArt
Traductor: Google.com
All content and photos are my property.
Publisher: GridArt
Translator: Google.com
Esta muy bonito el collar, me gusto mucho el proceso de elaboración a partir del botón y nudos sin necesidad de usar agujas. Te luce muy lindo puesto. Gracias por dejarnos este paso a paso.
!discovery 40
Feliz dia! Muchas gracias por el apoyo, lo aprecio mucho. Bendiones y un fuerte abrazo.
This post was shared and voted inside the discord by the curators team of discovery-it
Join our Community and follow our Curation Trail
Discovery-it is also a Witness, vote for us here
Delegate to us for passive income. Check our 80% fee-back Program
Gracias por el apoyo.
a community encouraging first-hand content, and each individual living their best life.
The flower pendant is so beautiful the processes remaing me of when I did some roses........ I love it dear
Thank you very much for the support, greetings and many blessings