Bienvenidos a mi blog amigos de joyería 🍒✨💎
Welcome to my blog, jewelry friends 🍒✨💎
Hellooooo. A big hug for you all ☺️🫂 I hope you are having a great day today ❤️, it has been a long time since I showed you some of my jewelry work on this community, although I have dedicated more time to my sewing work there are times when I want to make some jewelry for myself and my friends but I feel like I need more time than normal to do it 🤭 but I know that I can always find the time I need to start making new jewelry projects that I really love to share on this community.
.jpg)
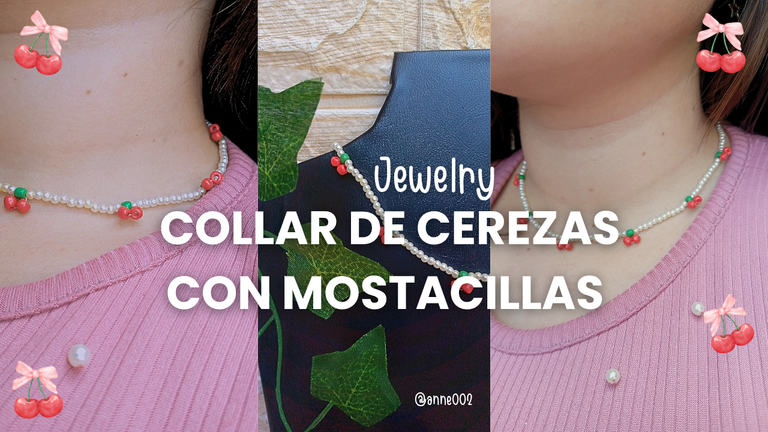
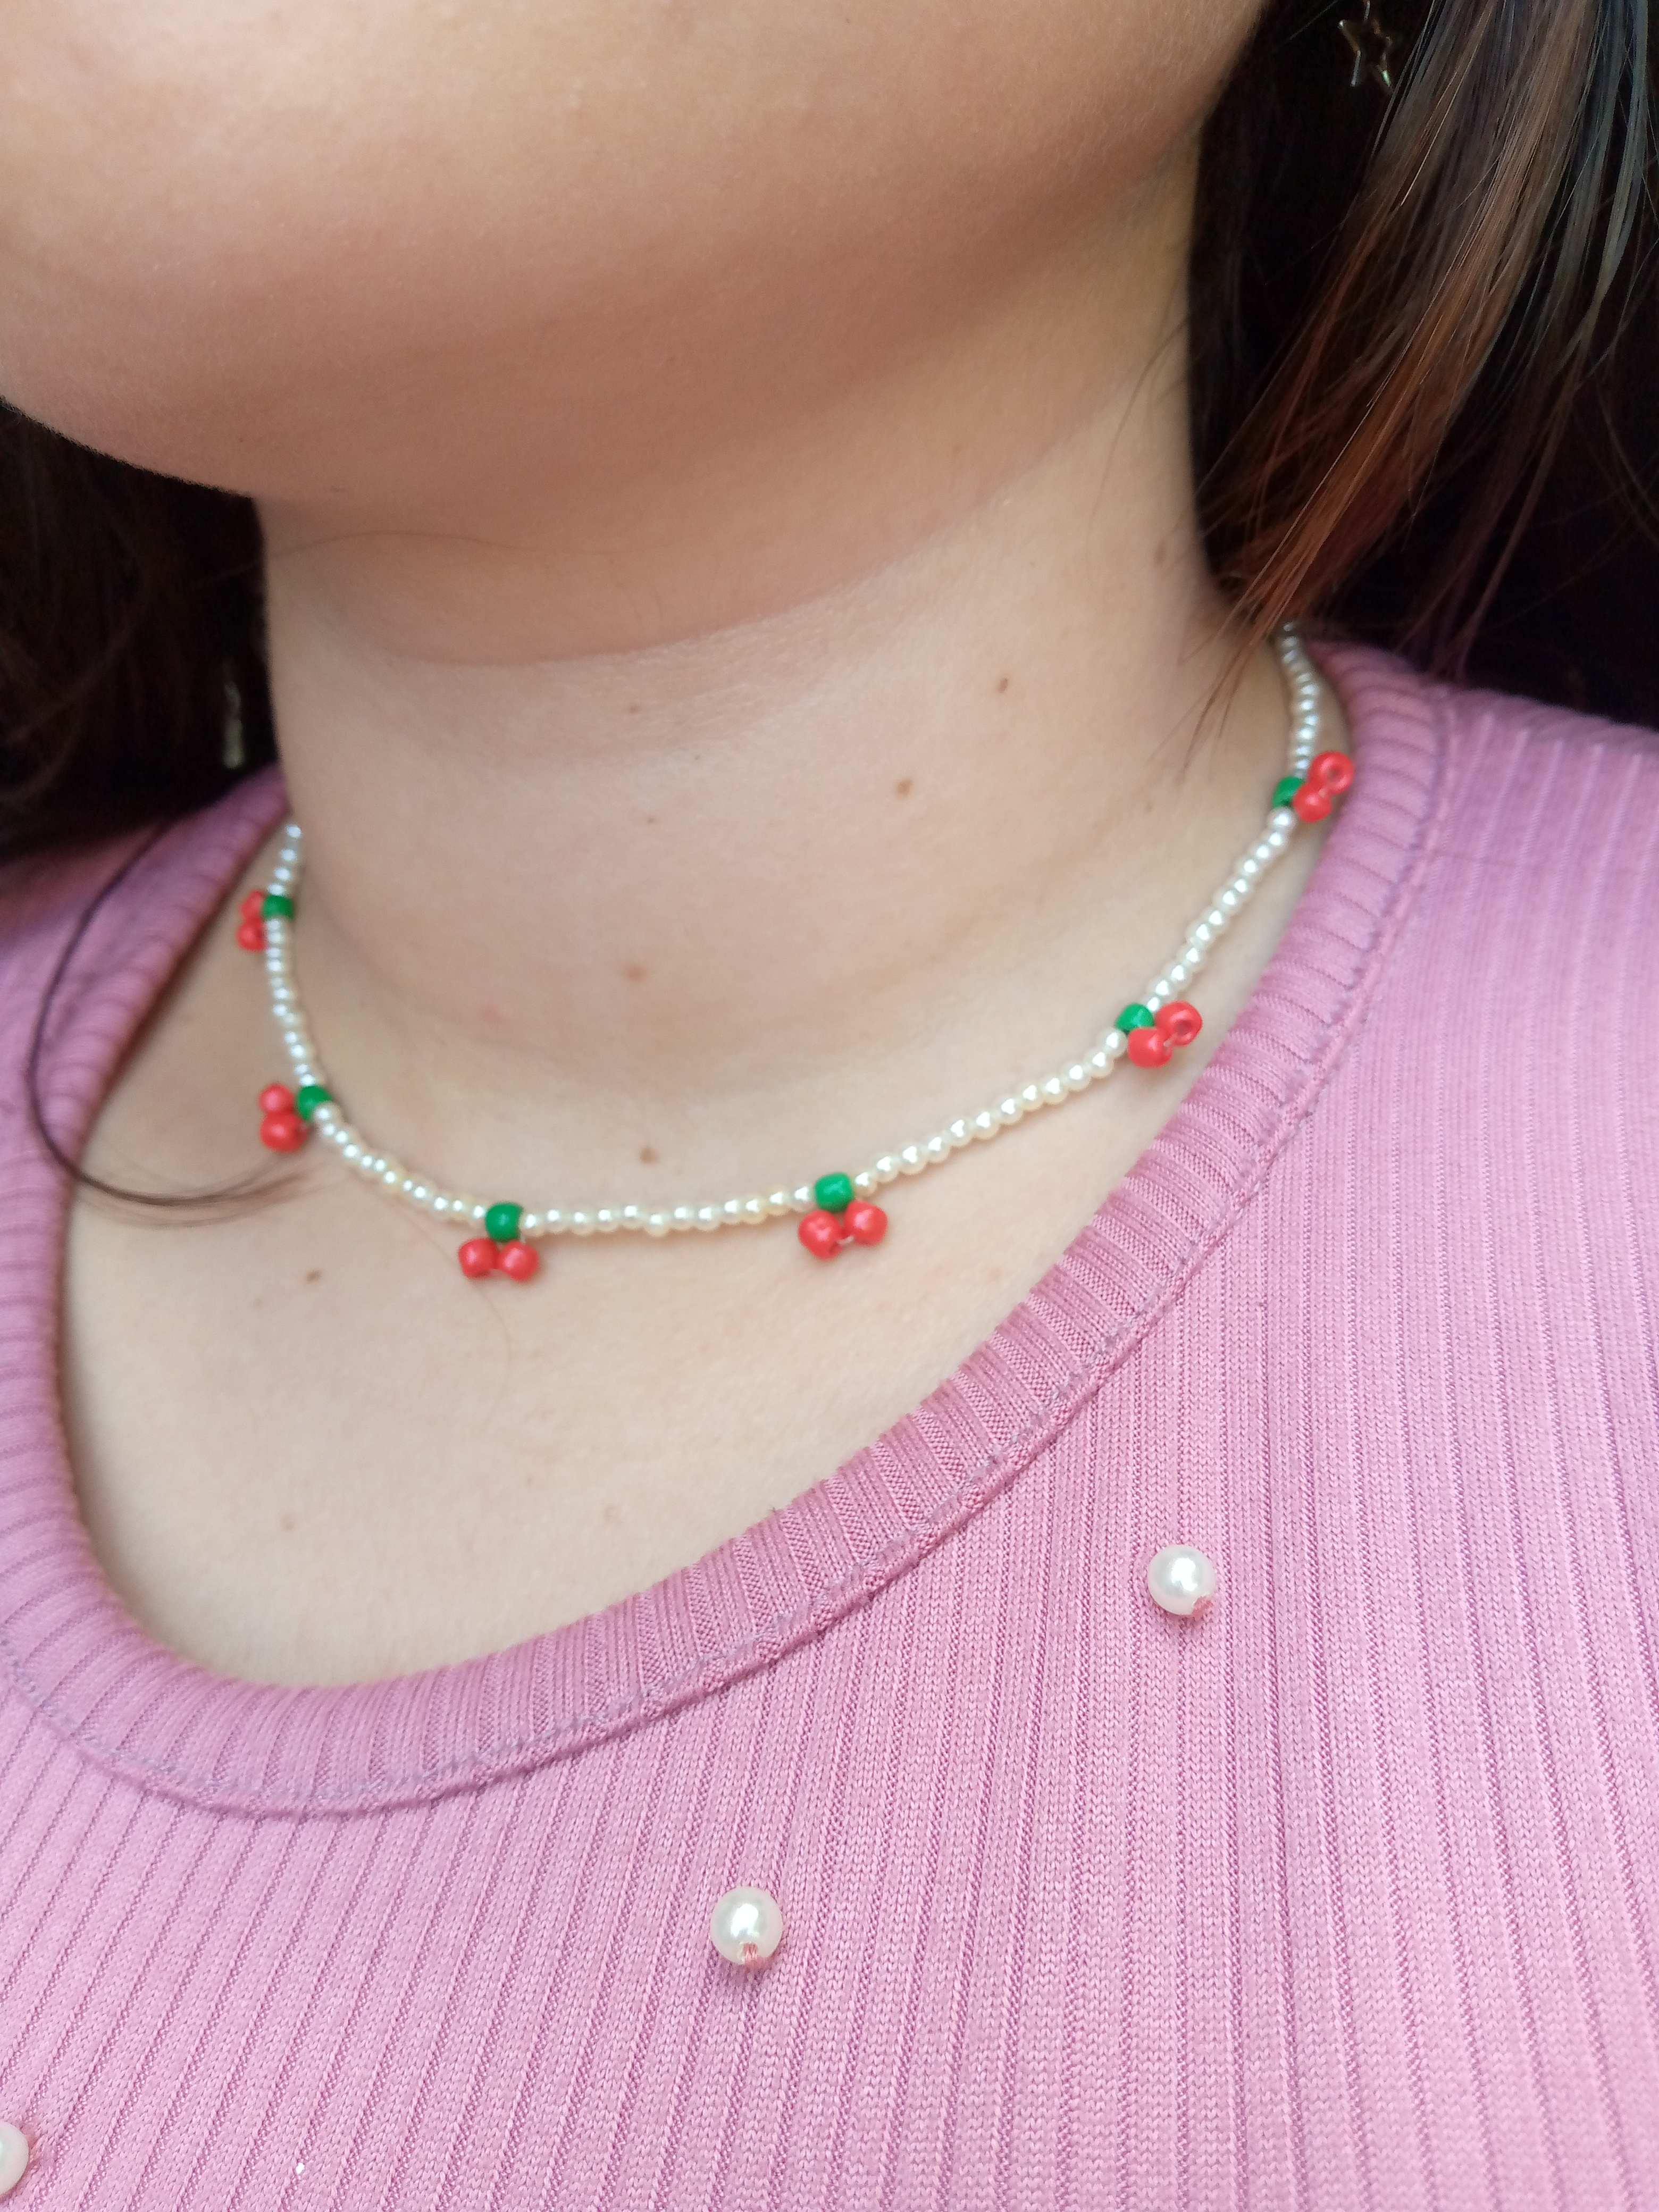
You see, I really love making these types of vintage necklaces, or rather short ones that are close to the neck or choker style. There are so many models on Pinterest to make that I didn't know which one to choose, but I had already made some with little flowers in different colors of beads and also yellow ones like sunflowers. I really love flowers and that's why I made several choker models in this style.
This time I decided to make a cherry choker, which seemed difficult to make at first, but after seeing many models and instructions to be able to do it, well, later it began to seem simple to me, and well, I want to show you the process of how to do it and super simple.
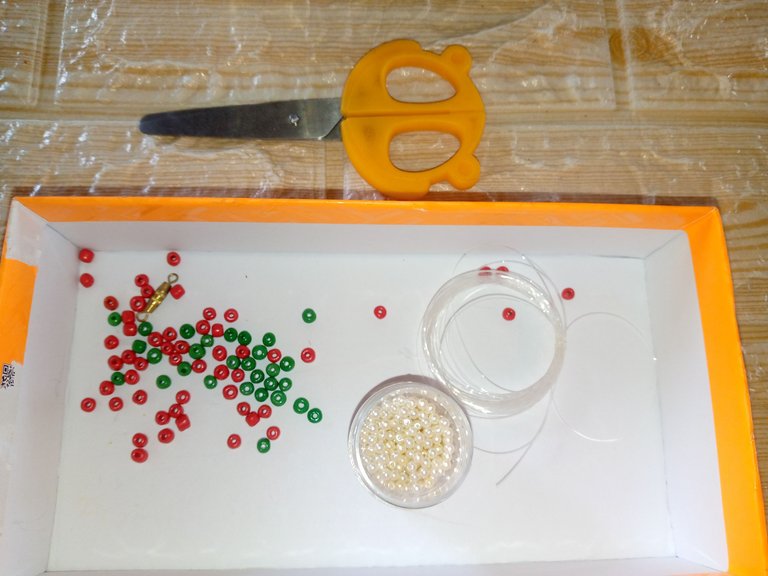
Materiales:// Materials:
- 40 cm de nailon transparente de bisutería
- Tijera
- Mostacillas rojas y verdes
- Perlitas pequeñas
- Ganchito de bisutería
- 40 cm of transparent nylon jewelry
- Scissors
- Red and green seed beads
- Small pearls
- Jewelry hook
Pasos a seguir://Steps to follow:
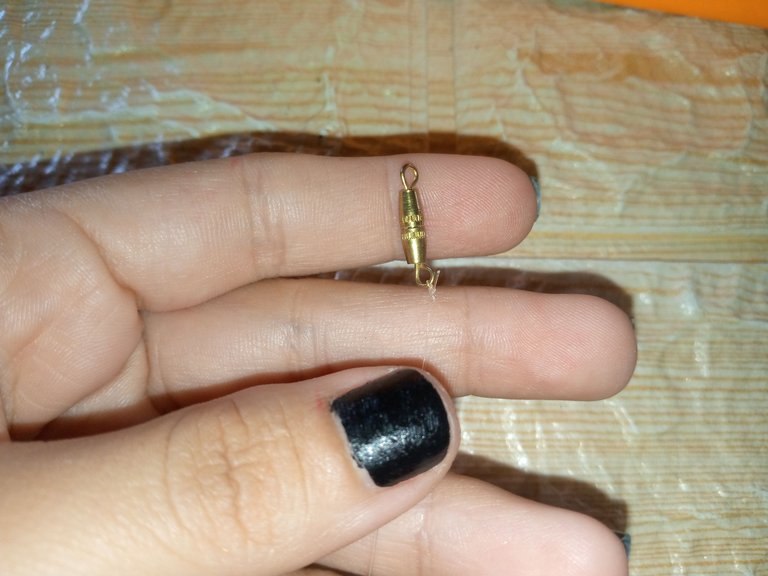
Paso 01
Step 01
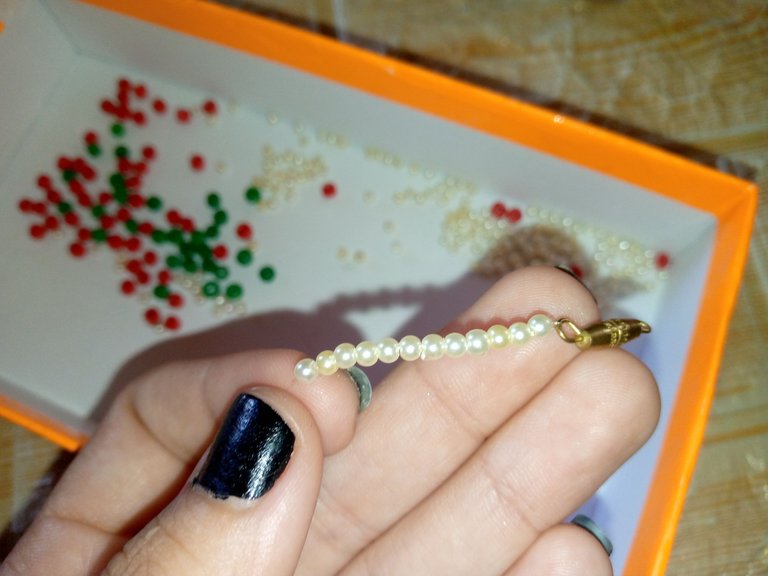
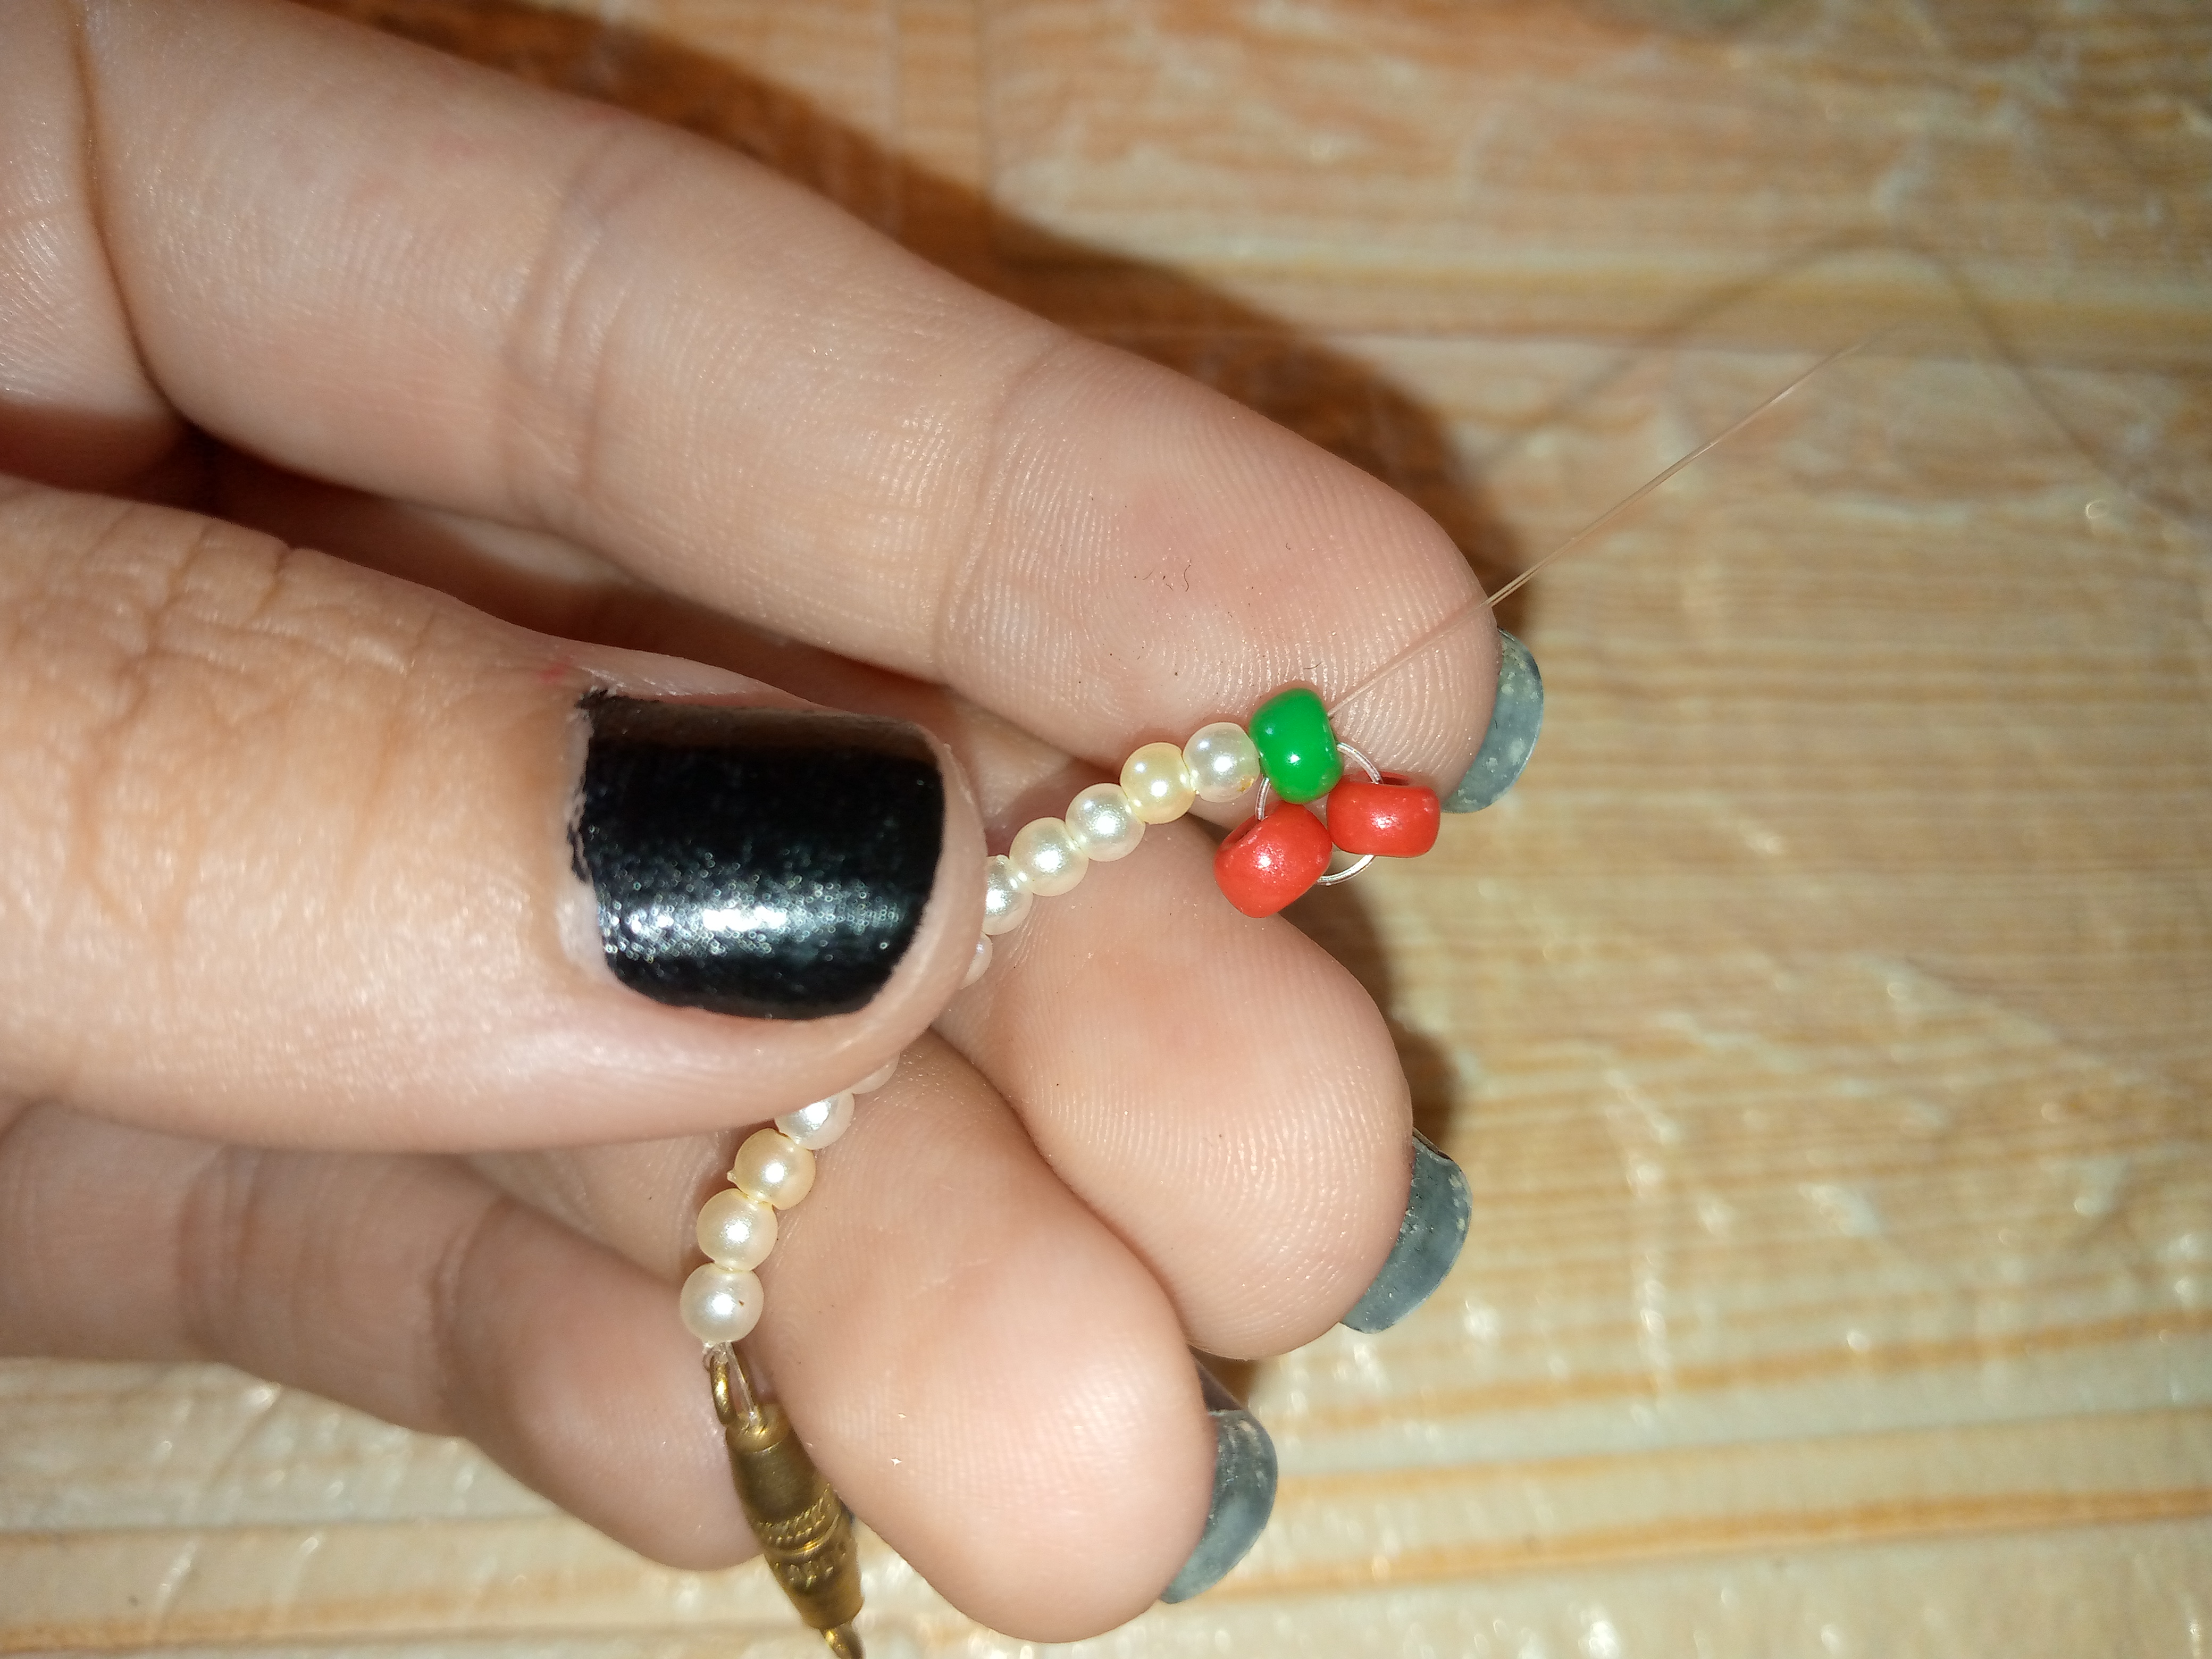
Well my friends, we start by cutting the thread to the width you want your choker to be, leaving 5 cm wider than the measurement it is. Then, at one end, we adjust one end of the hook and give it three turns to hold it well. Then, we insert 12 white pearls into the thread to begin making the design of our choker.


Paso 02
Step 02
Next, what we'll do is insert a large green bead and two large red beads that will simulate the leaf and the cherries. So, we'll insert the thread from the left side to the right and remove it. This is to give my cherry its shape.
Paso 03
Step 03
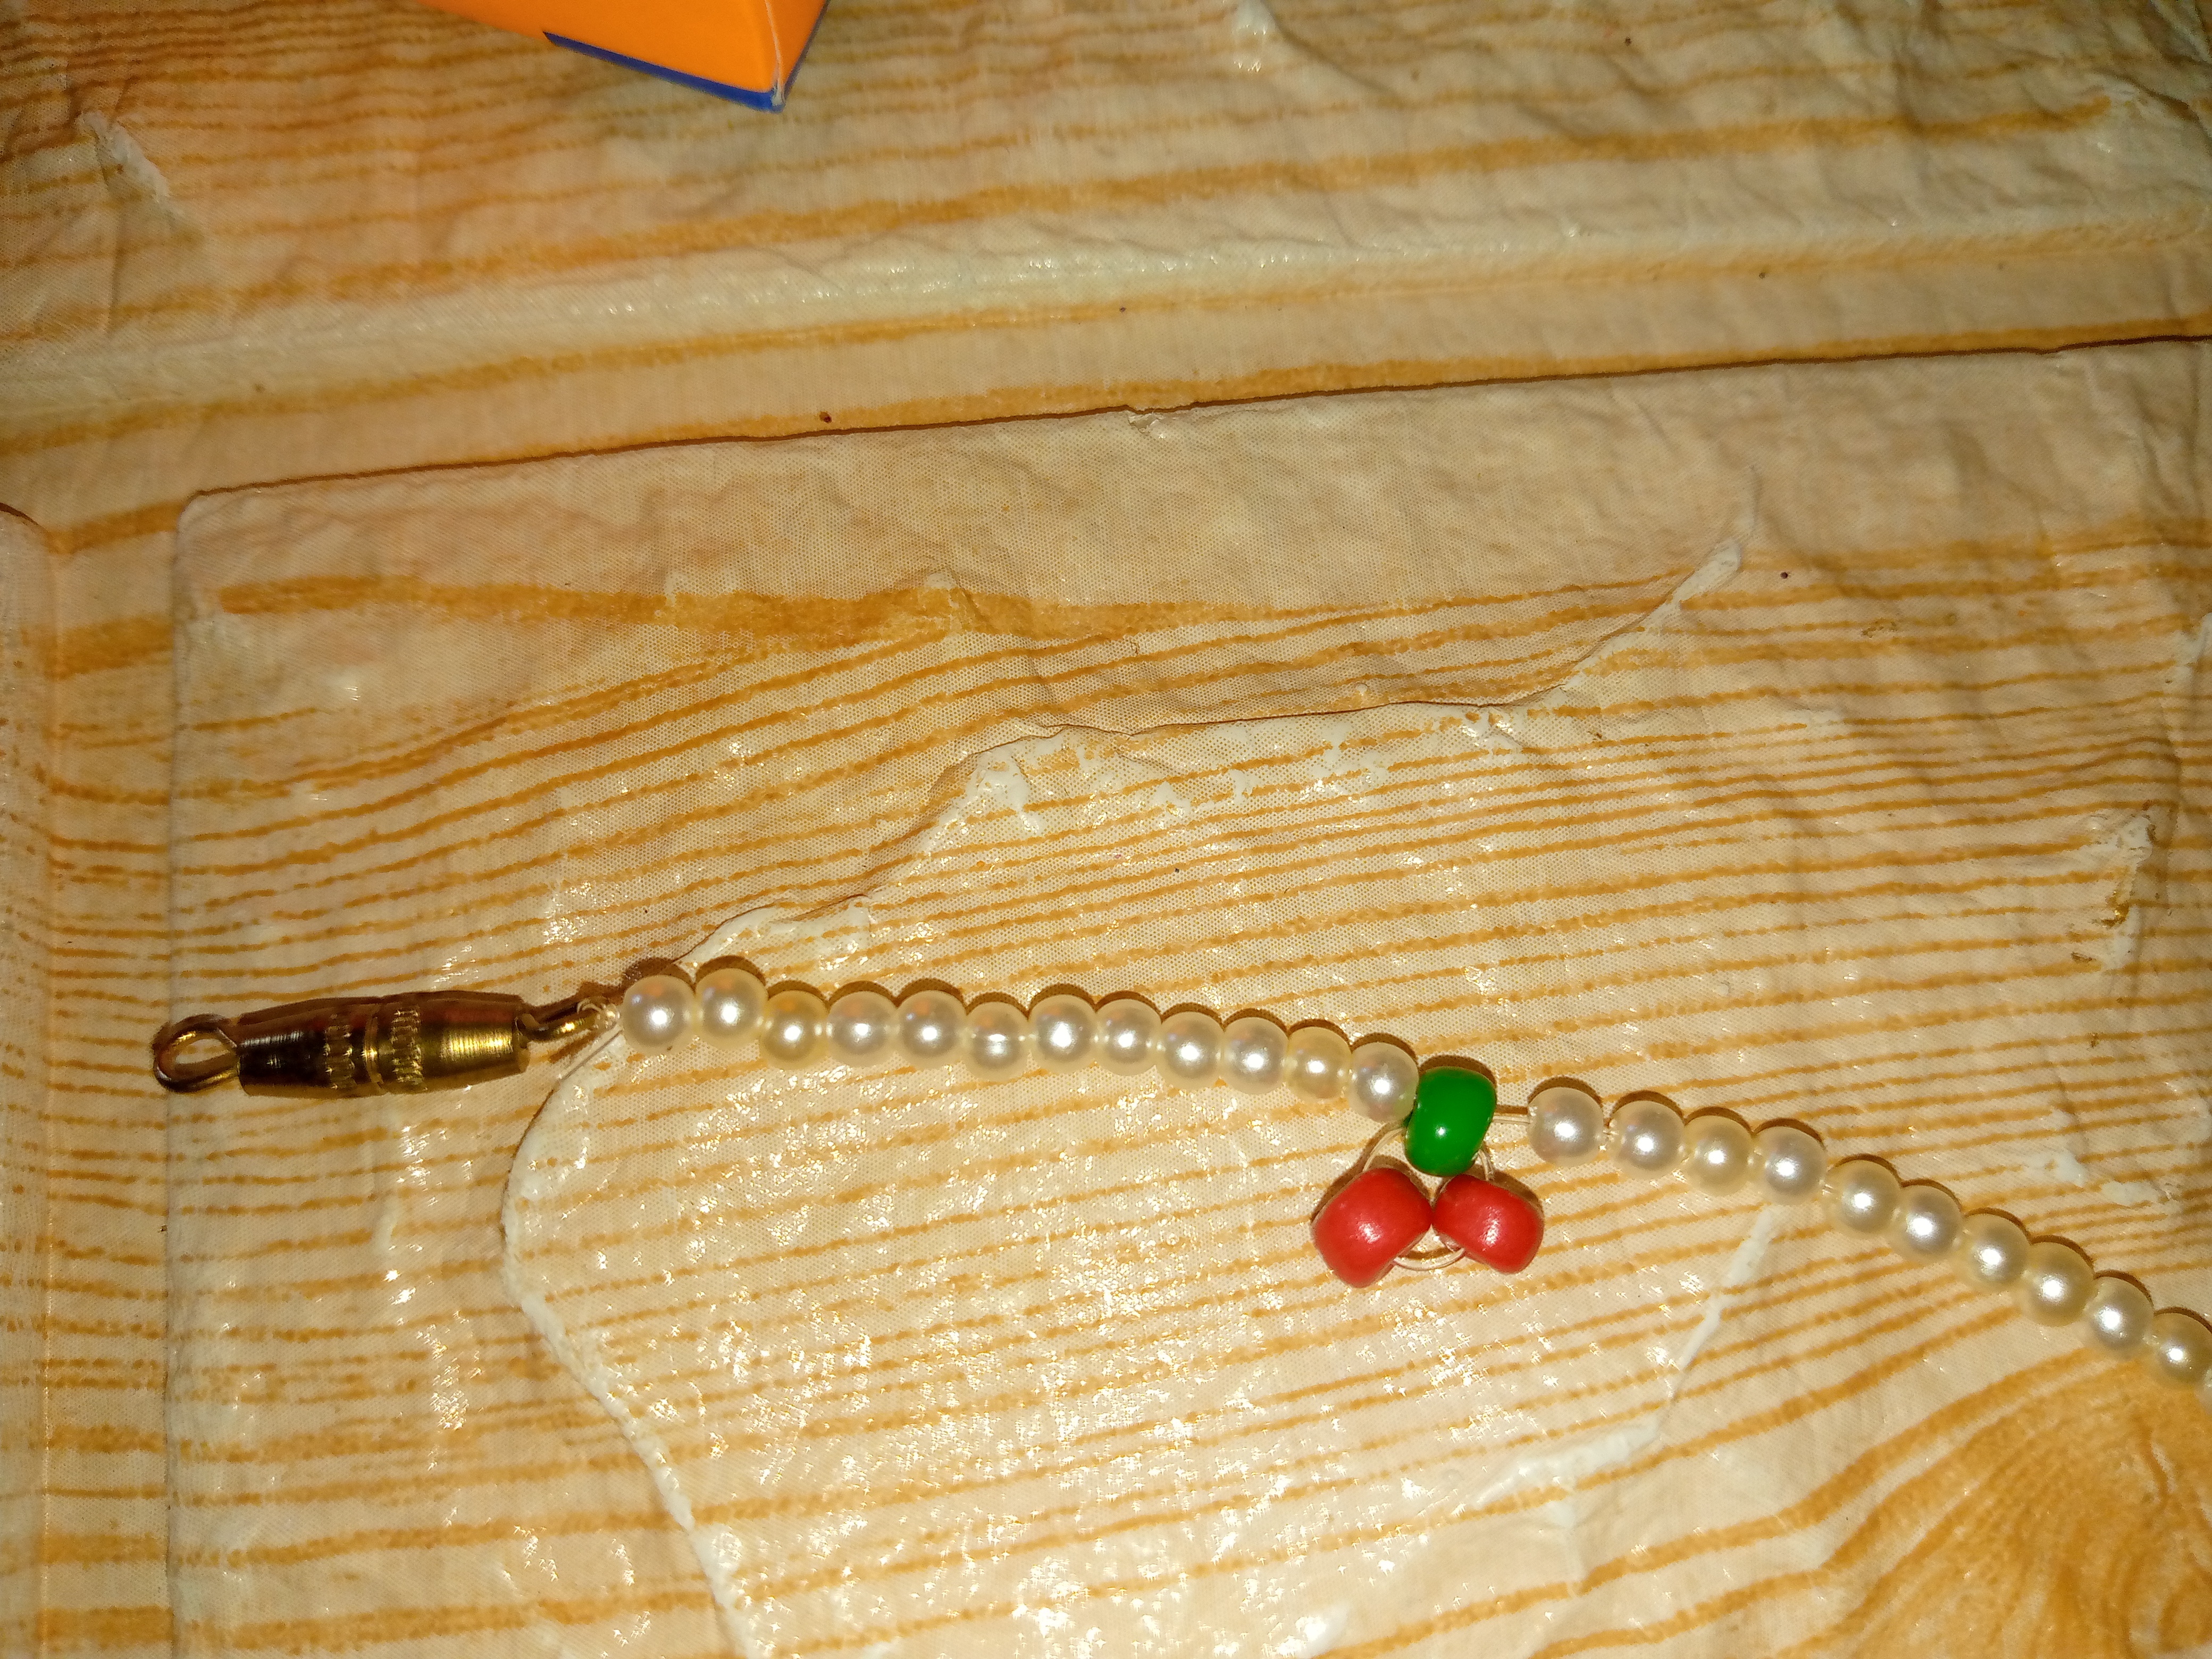
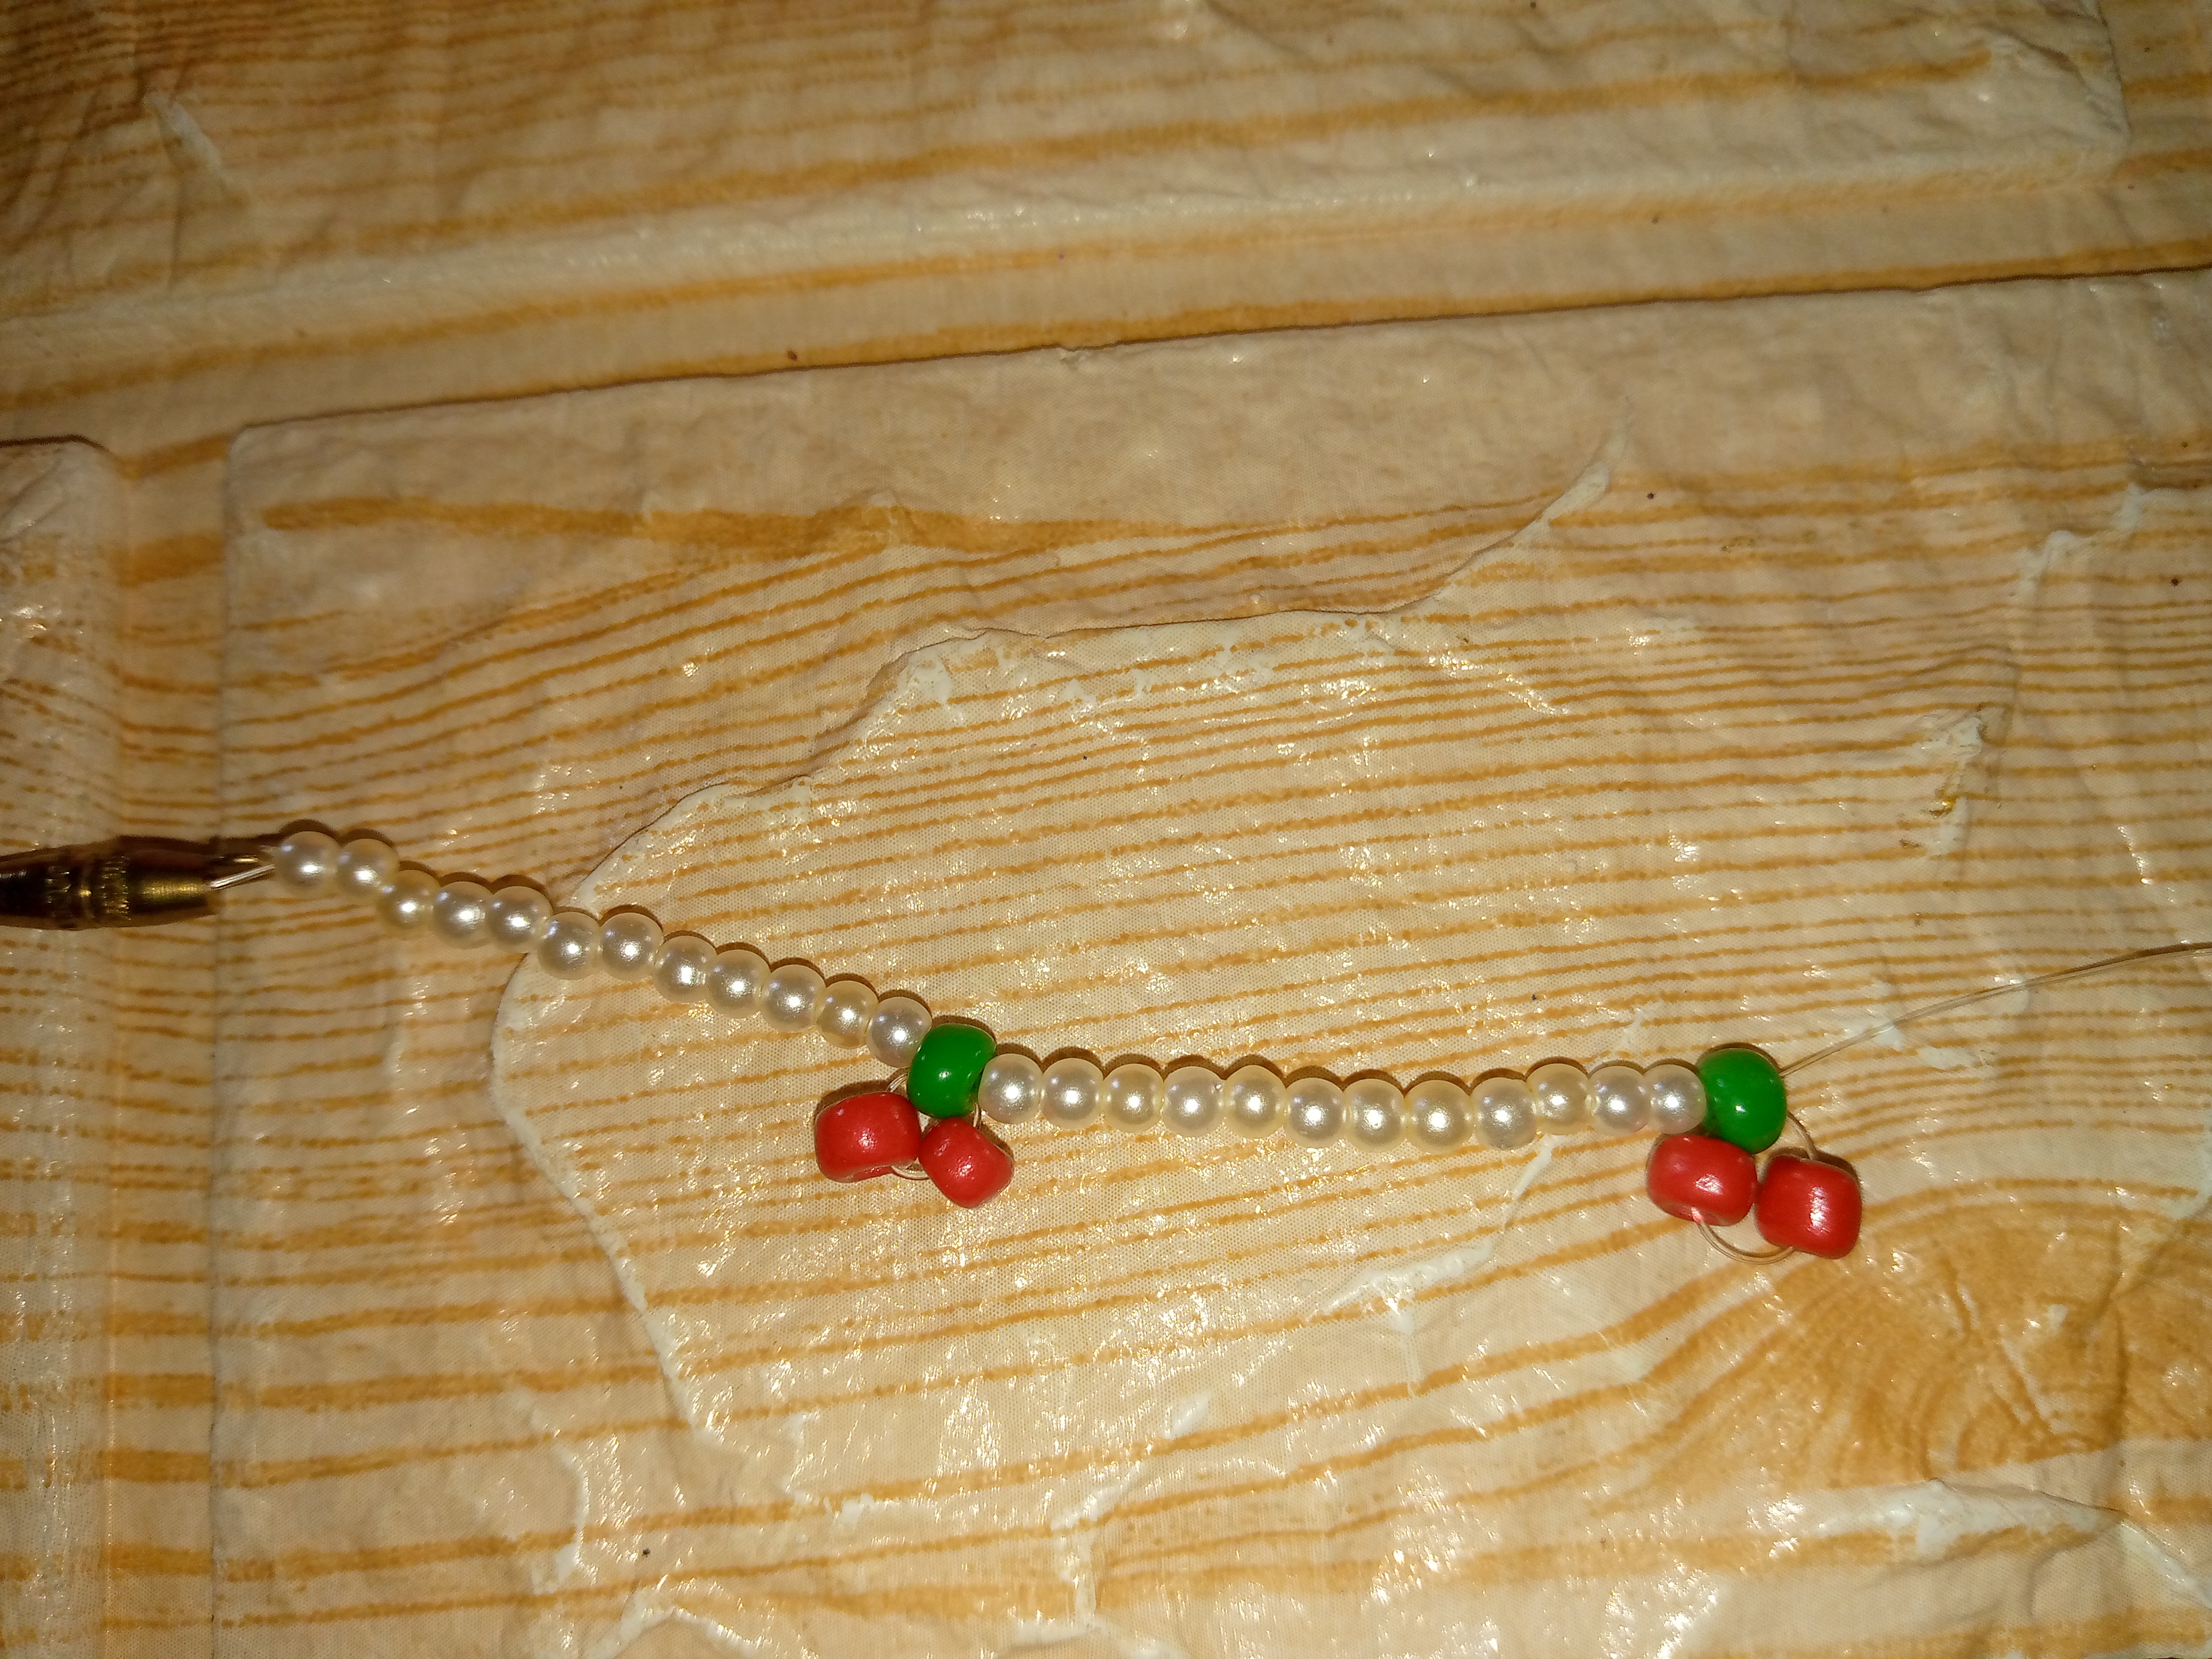
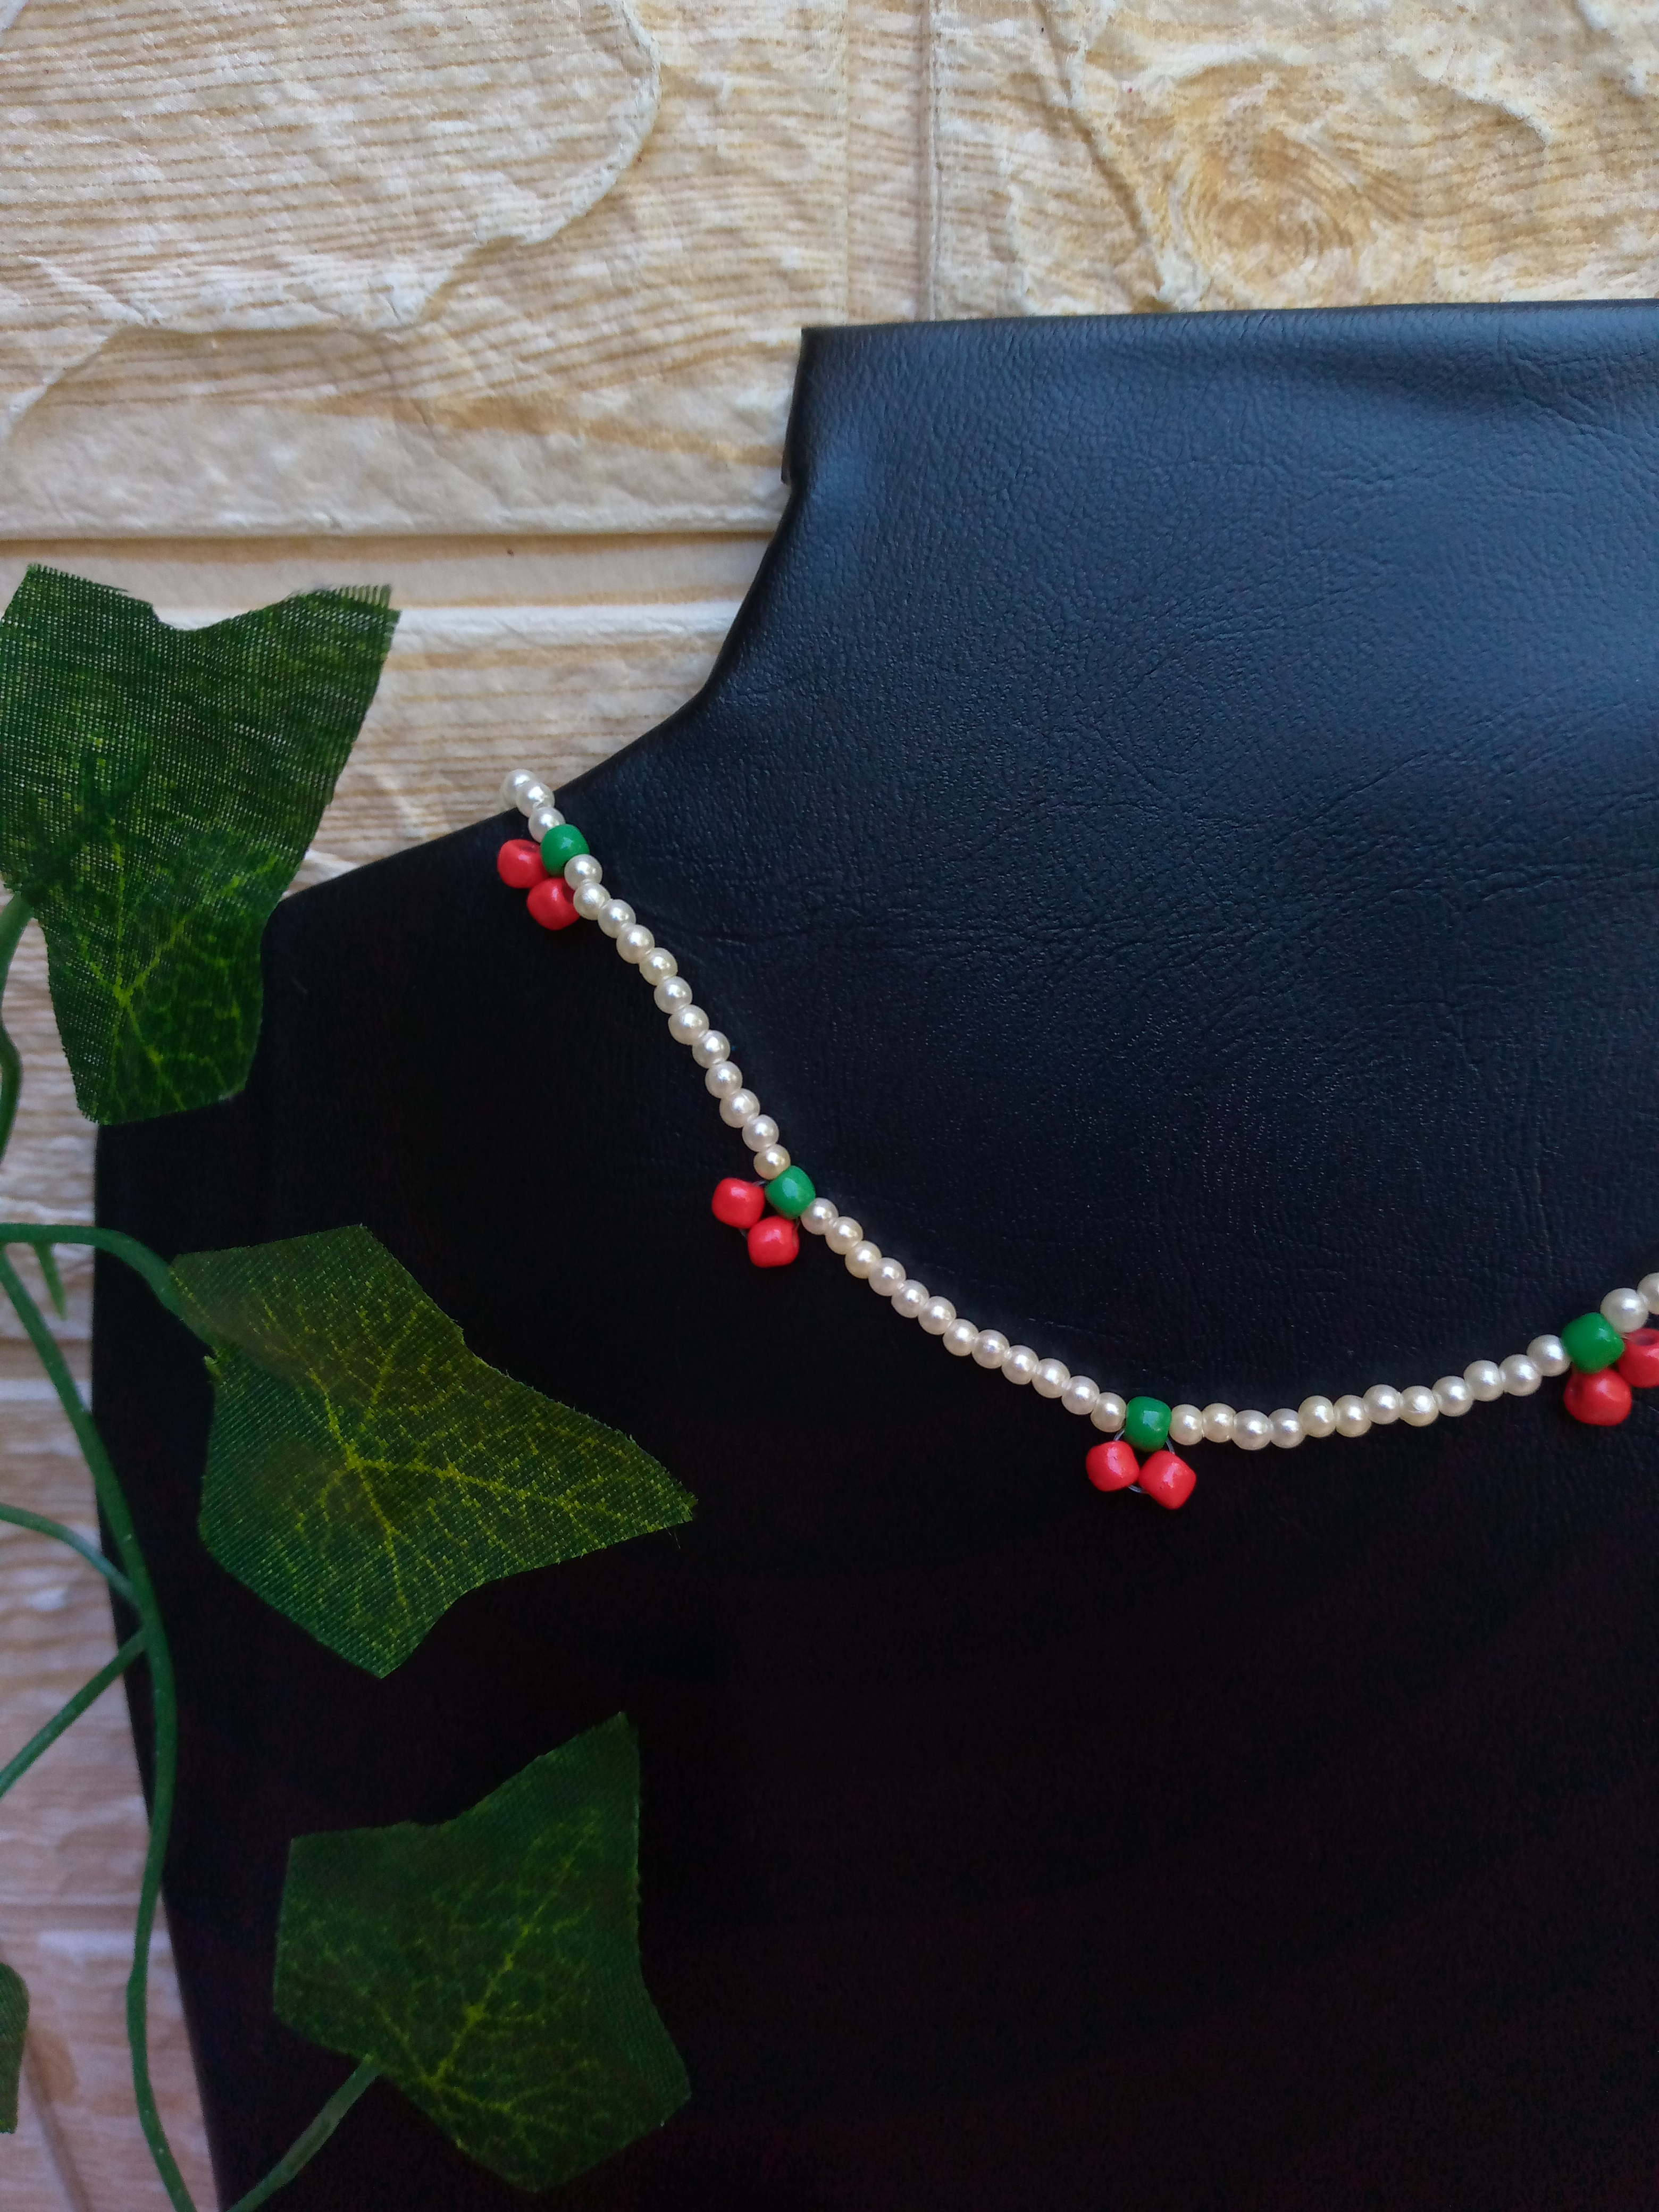
This is how the sequence looks like once we make the first cherry, we continue inserting 12 pearls again in white and we make the cherries again and so we go until the length we want, of course.
Paso 04
Step 04
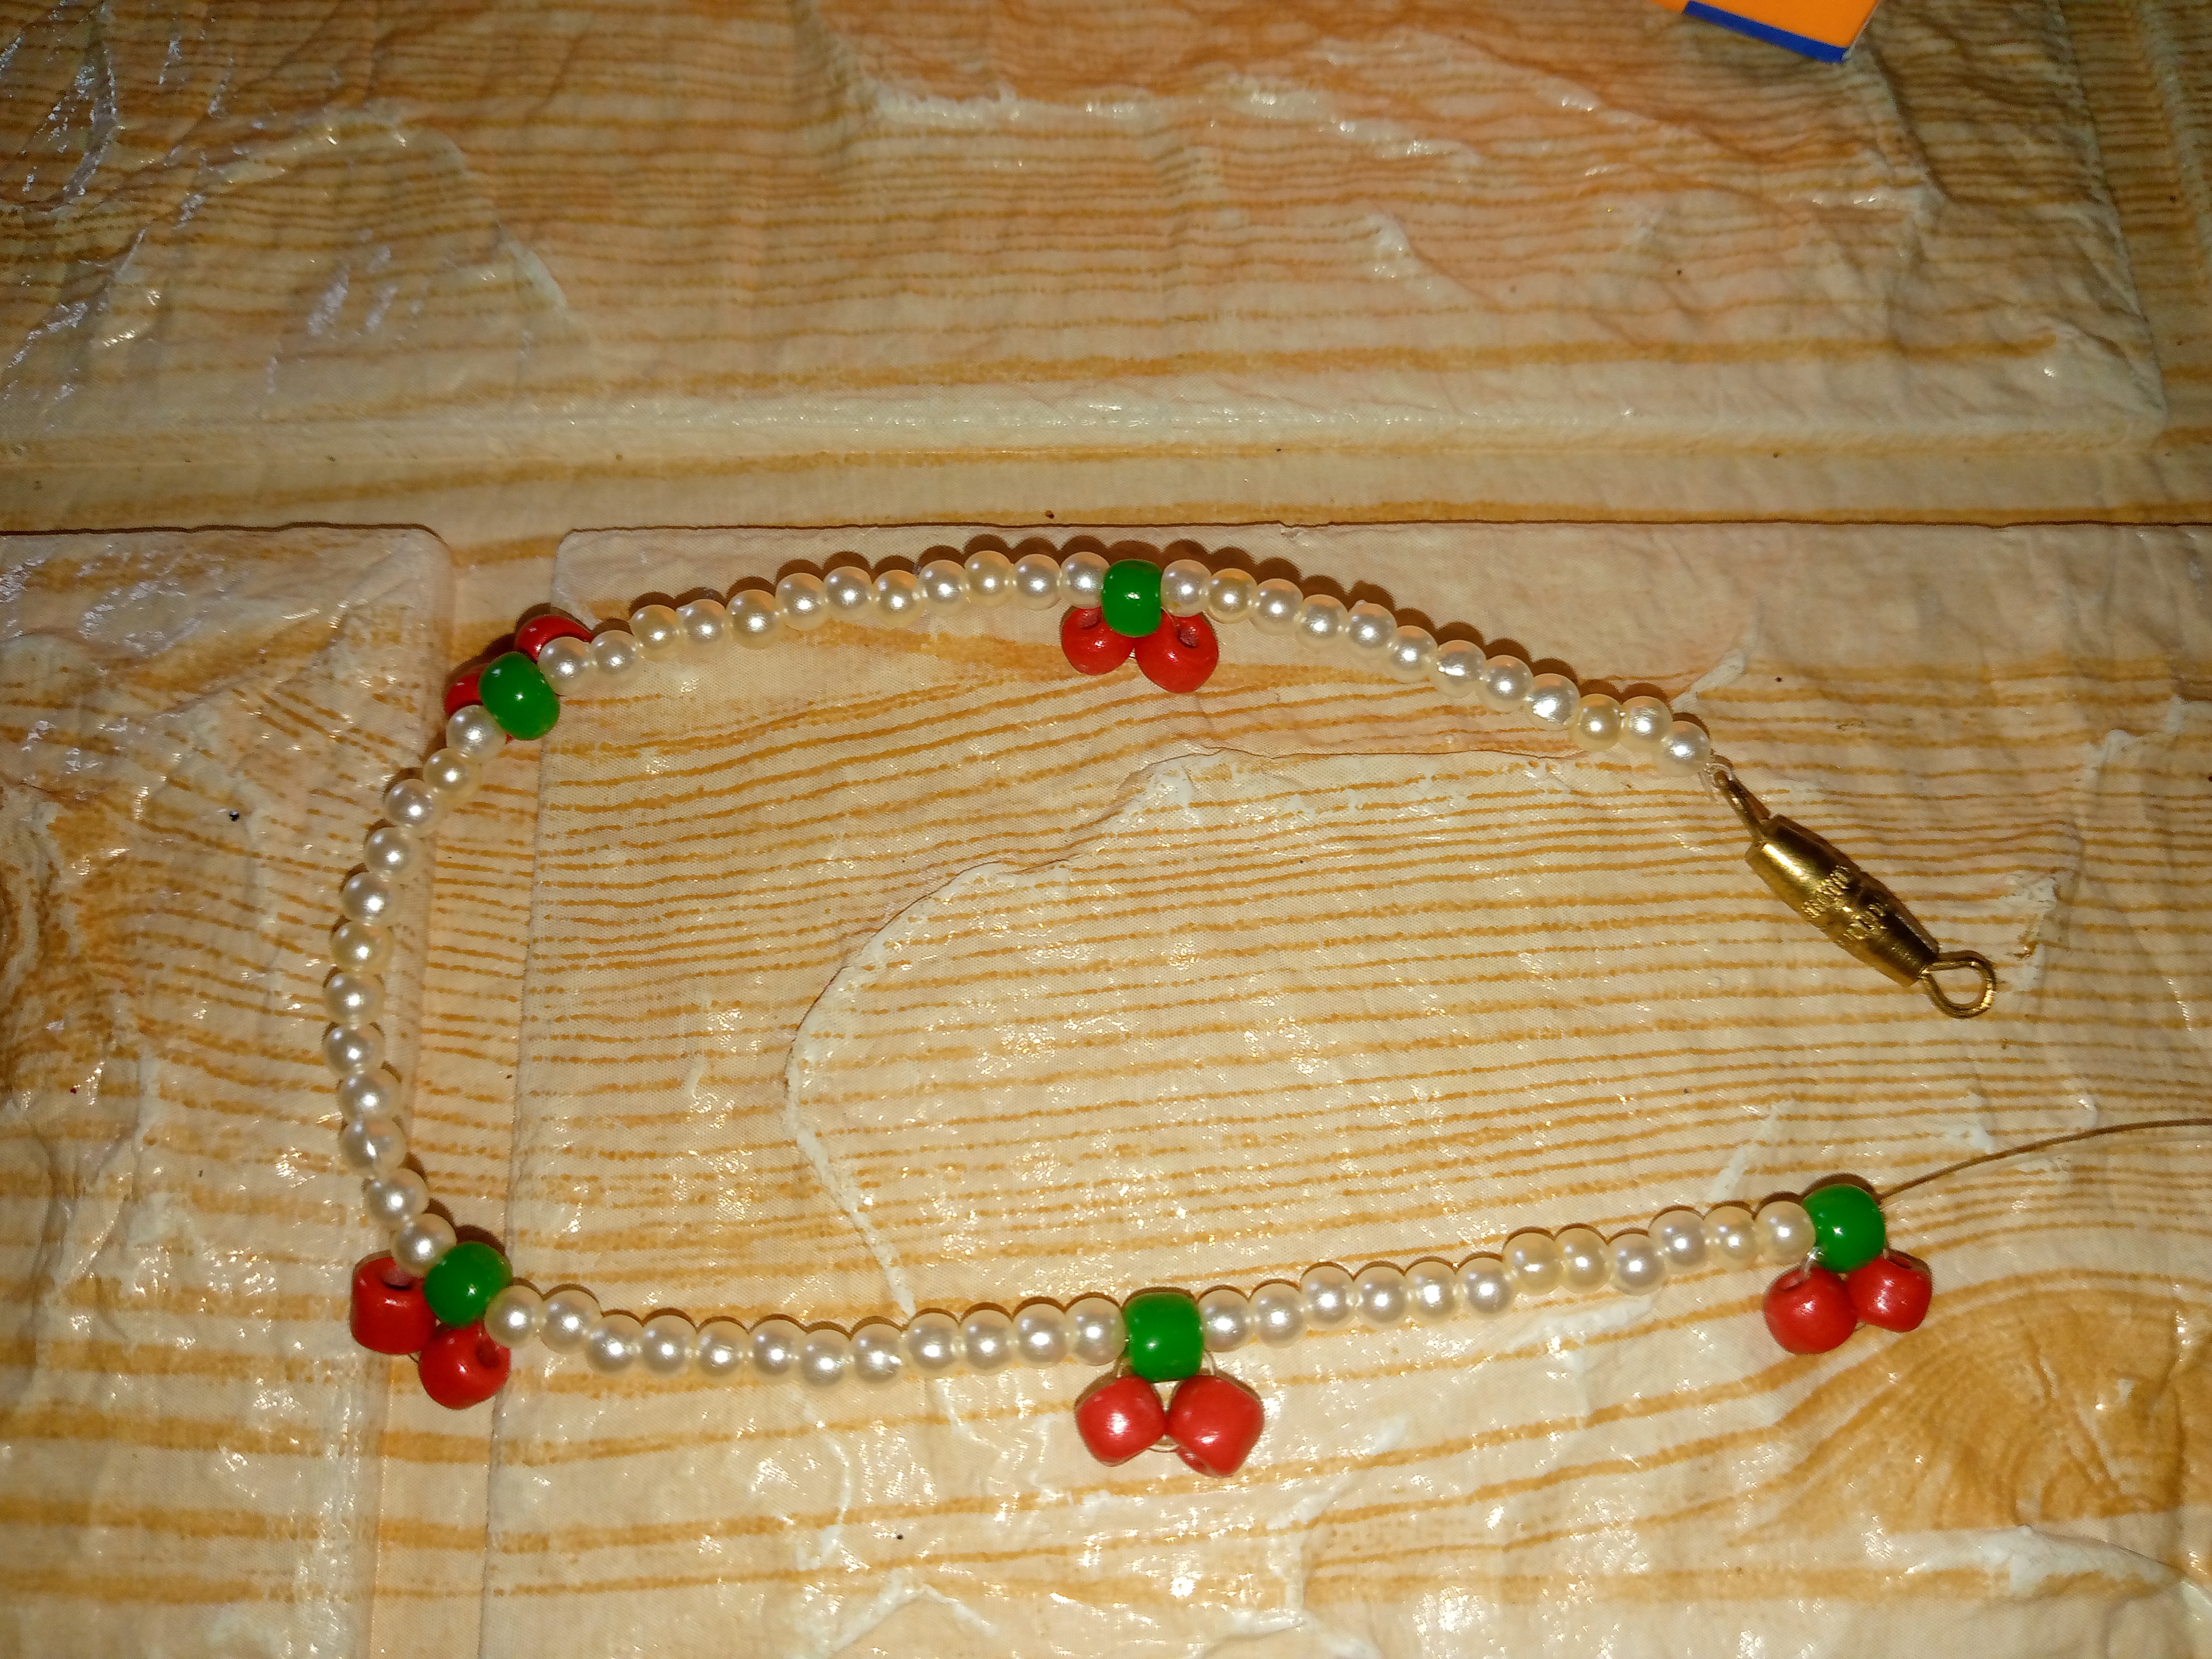
When we have finished the sequence, what we will do is knot the thread at the other end of the hook to seal the choker. With this step, we finish the choker and it is ready to wear.
Resultado:// Result:
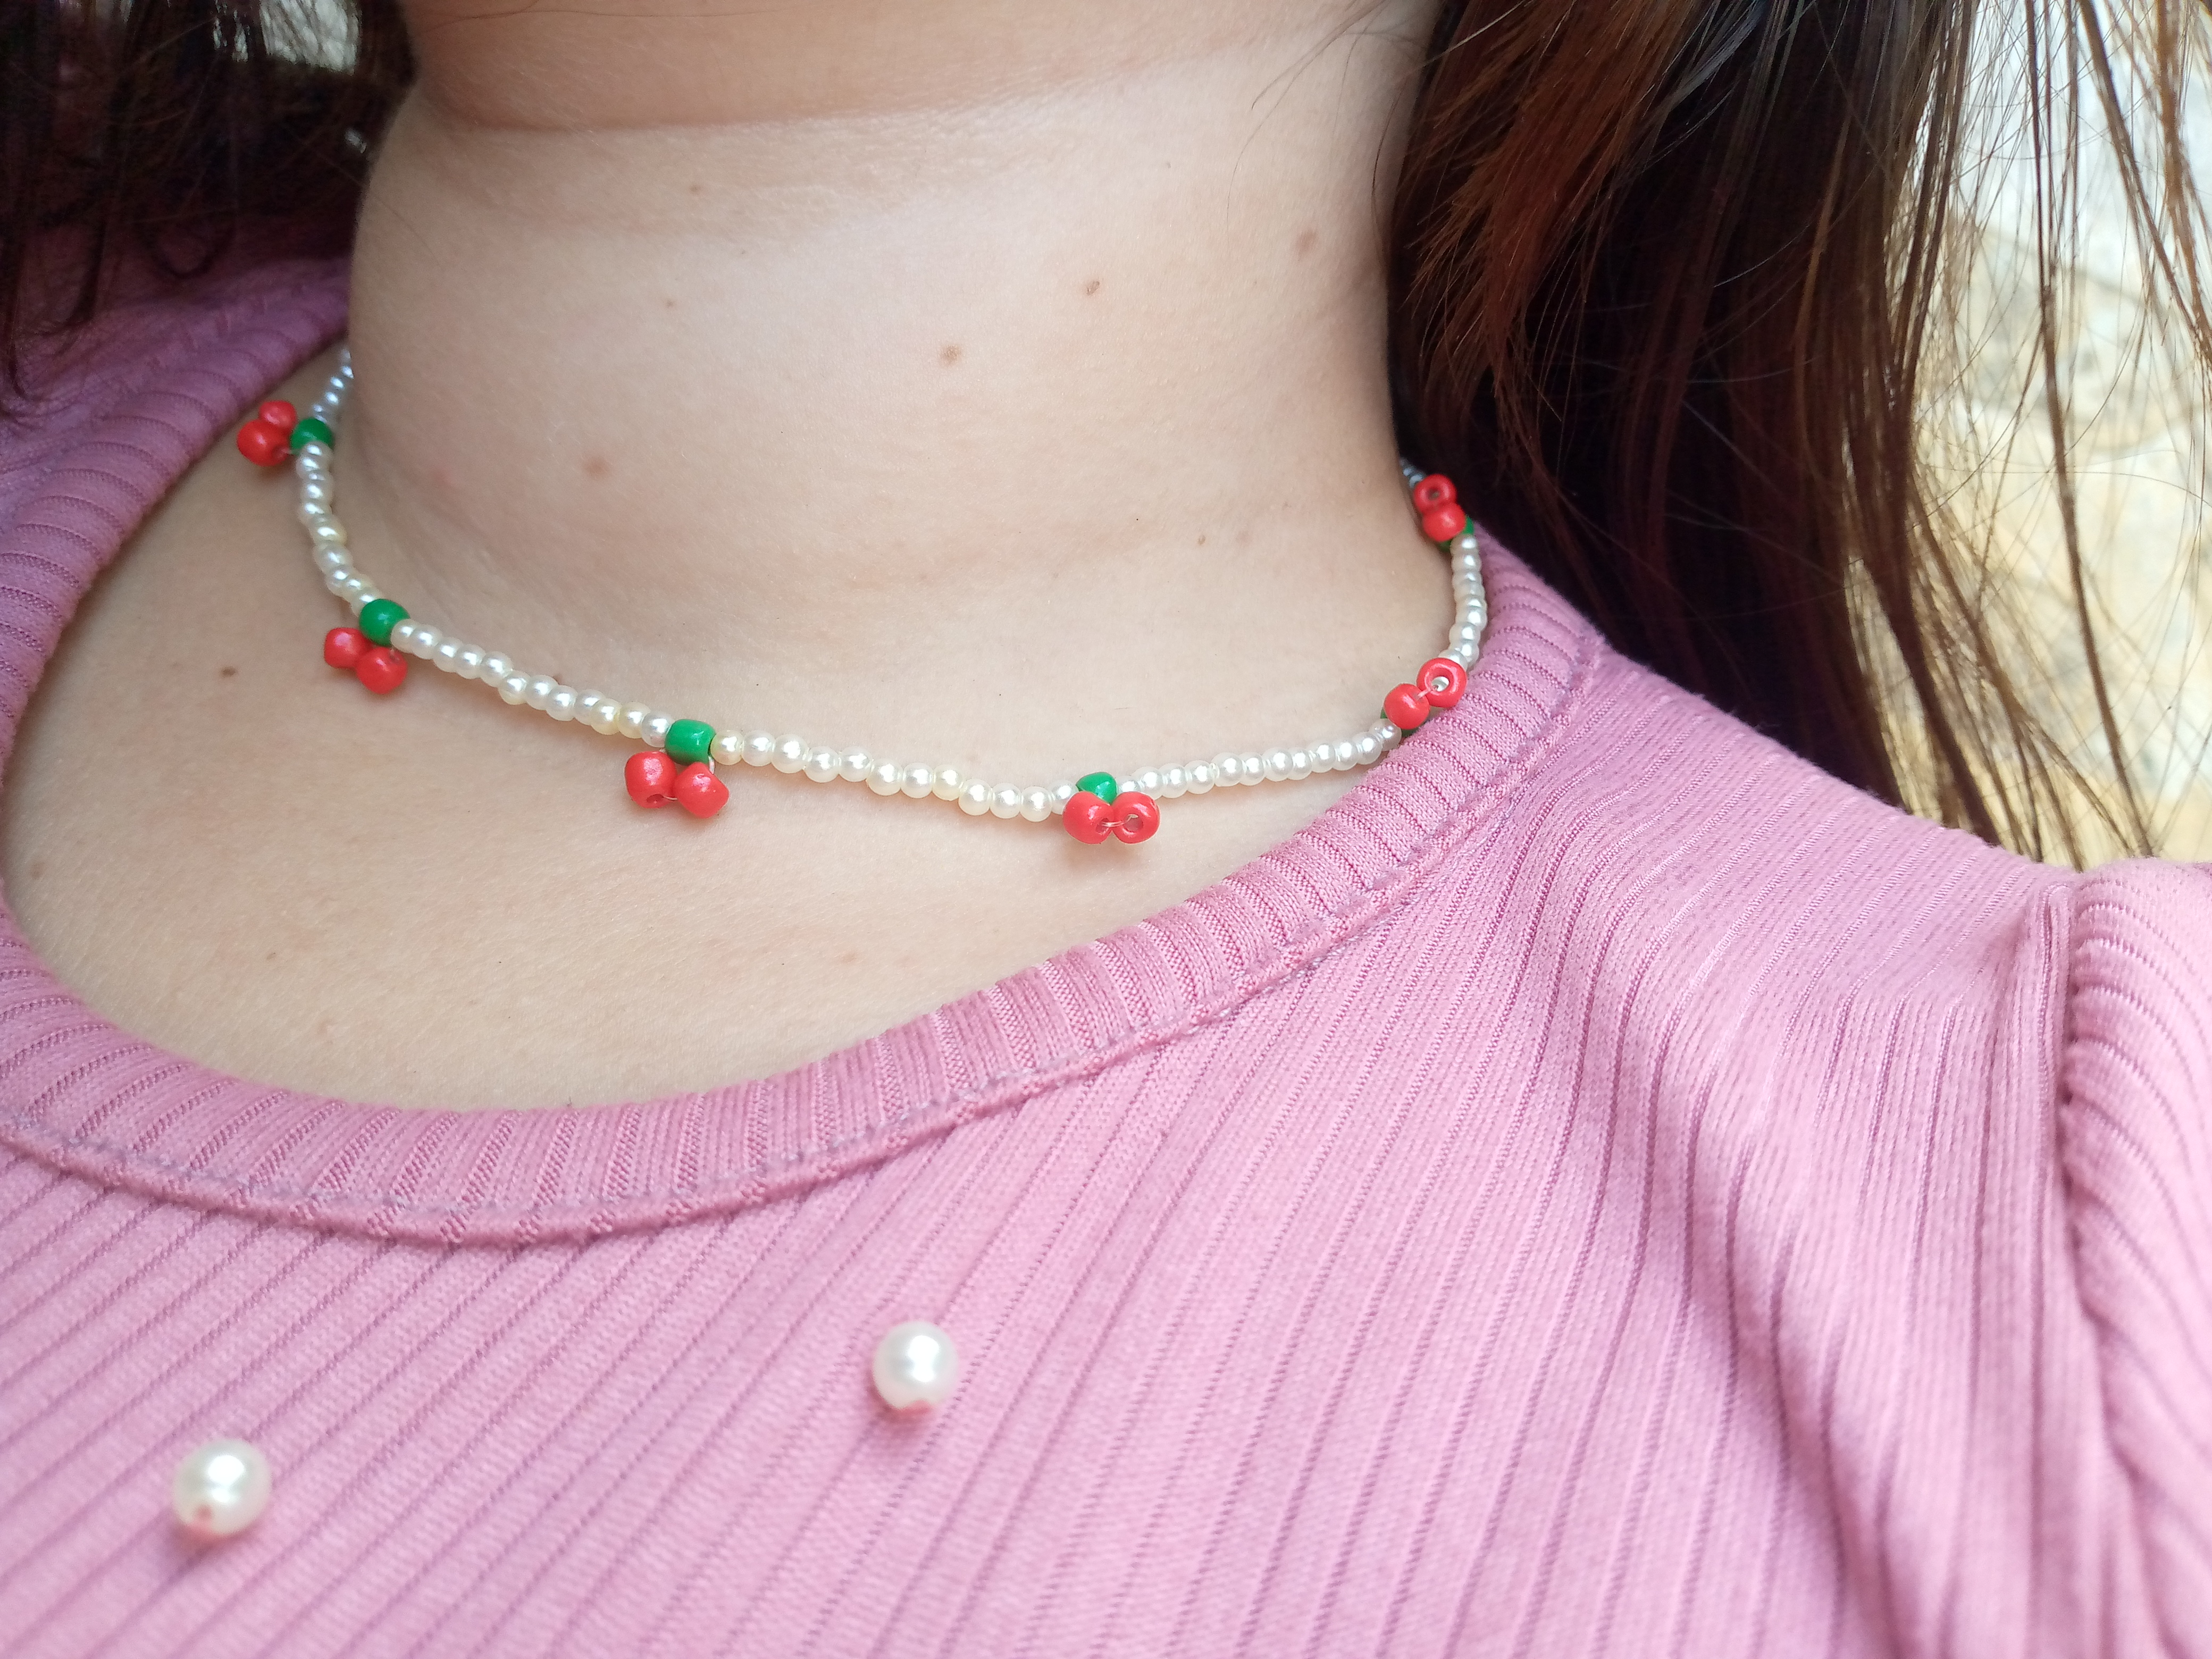
Well my friends of this community, this is how the choker looks once it's on. I like how it turned out and I hope to know that you like it too. It looks very tender and very pretty, you can wear it with any outfit you want. It gives a very flirty, vintage, and soft style. I know you would love to have this choker 🥰.

Remember that if you liked this content, you can save the tutorial or share it with whoever you want. I wish you a happy afternoon on this day ☺️ and many greetings. See you in another blog, thanks for your time. ✨💎
Creating things with love 🌷❤️
🦋✨ All the images in this publication are my author ,📱taken with my TecnoSpark8C cell phone |📸Photos edited in PicsArt and Canva. Text translated in Google Translate.
It is so beautiful, charming, and lovely. It shows your skills. You did a wonderful job! Keep up the good work!
Thanks for comment 👋🏻🥰
Waao thats an amazing idea to make the cherry necklace. It looks very pretty and awesome.
Thanks 🥰
Te quedó muy bonito el collar, me encantó, luce muy bello a la vista y puesto.
Mi linda te sugiero leer las reglas de la comunidad, con respecto a la cantidad de palabras que se pide para poder publicar por acá.
Saluditos...
Saludos... no habían muchas palabras para describir algo sencillo,pero lo tendré en cuenta 🍒🤭
Congratulations @anne002! You have completed the following achievement on the Hive blockchain And have been rewarded with New badge(s)
You can view your badges on your board and compare yourself to others in the Ranking
If you no longer want to receive notifications, reply to this comment with the word
STOP