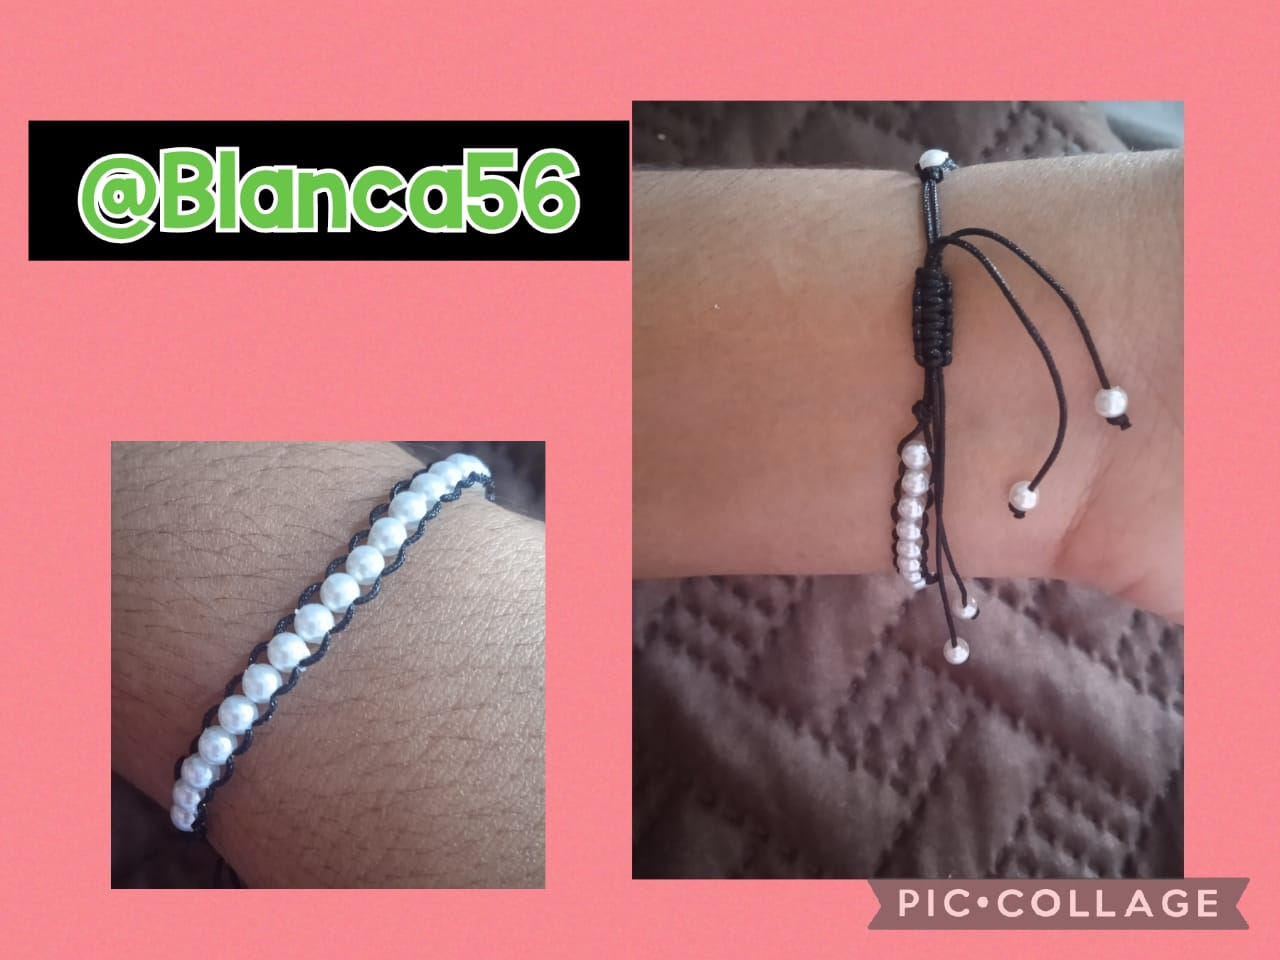
Hello dear #Jewelry community I wish you success. In this opportunity to make a new accessory thinking about the special person who is going to wear it, I tell you how I have enjoyed making a beautiful bracelet in black Chinese thread and pearls, which you can wear on any occasion. The attractiveness of the pearls is what gives the bracelet that touch of distinction, also with the adjustable clasp mode gives the user comfort when wearing the bracelet, because it is only placed on the wrist, pull the threads and ready. It was an easy job I did while there was no electricity, I took advantage of the time to make a beautiful bracelet ideal to combine with any outfit. Without further ado, I invite you to follow me step by step.
Hola querida comunidad #Jewelry les deseo éxito. En esta oportunidad hacer un nuevo accesorio pensando en la persona especial que lo va a usar, les cuento como he disfrutado elaborar una hermosa pulsera en hilo chino de color negro y perlas, que puedes usar en cualquier ocasión. El atractivo de las perlas es lo que le da a la pulsera ese toque de distinción, además con la modalidad del cierre ajustable le brinda al usuario comodidad a la hora de ponerse la pulsera, pues es solo colocar en la muñeca, tirar de los hilos y listo. Fue un trabajo fácil que hice mientras no había electricidad, aproveché el tiempo en hacer una hermosa pulsera ideal para combinar con cualquier outfit. Sin mas nada que agregar los invito a que me acompañen al paso a paso.
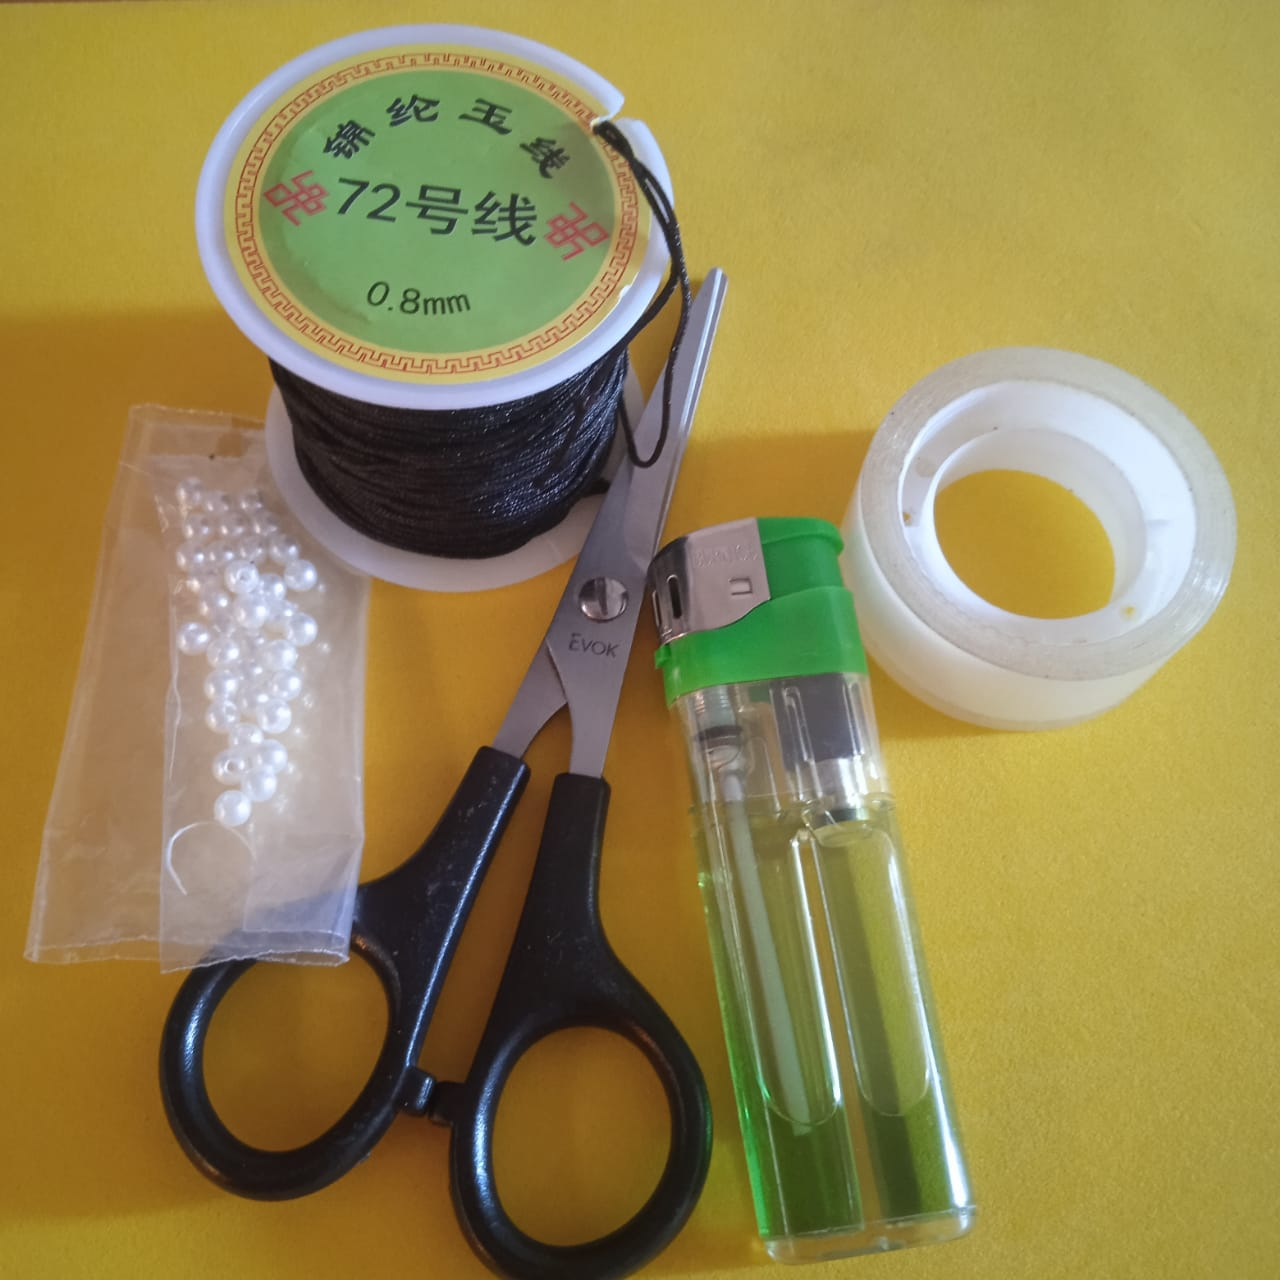
✨MATERIALS//MATERIALES✨
- Pearls.
- Chinese thread black color of 0.8mm.
- Scissors.
- Lighter.
- Adhesive tape.
- Perlas.
- Hilo chino color negro de 0.8mm.
- Tijera.
- Encendedor.
- Cinta adhesiva.
✨STEPS//PASOS✨
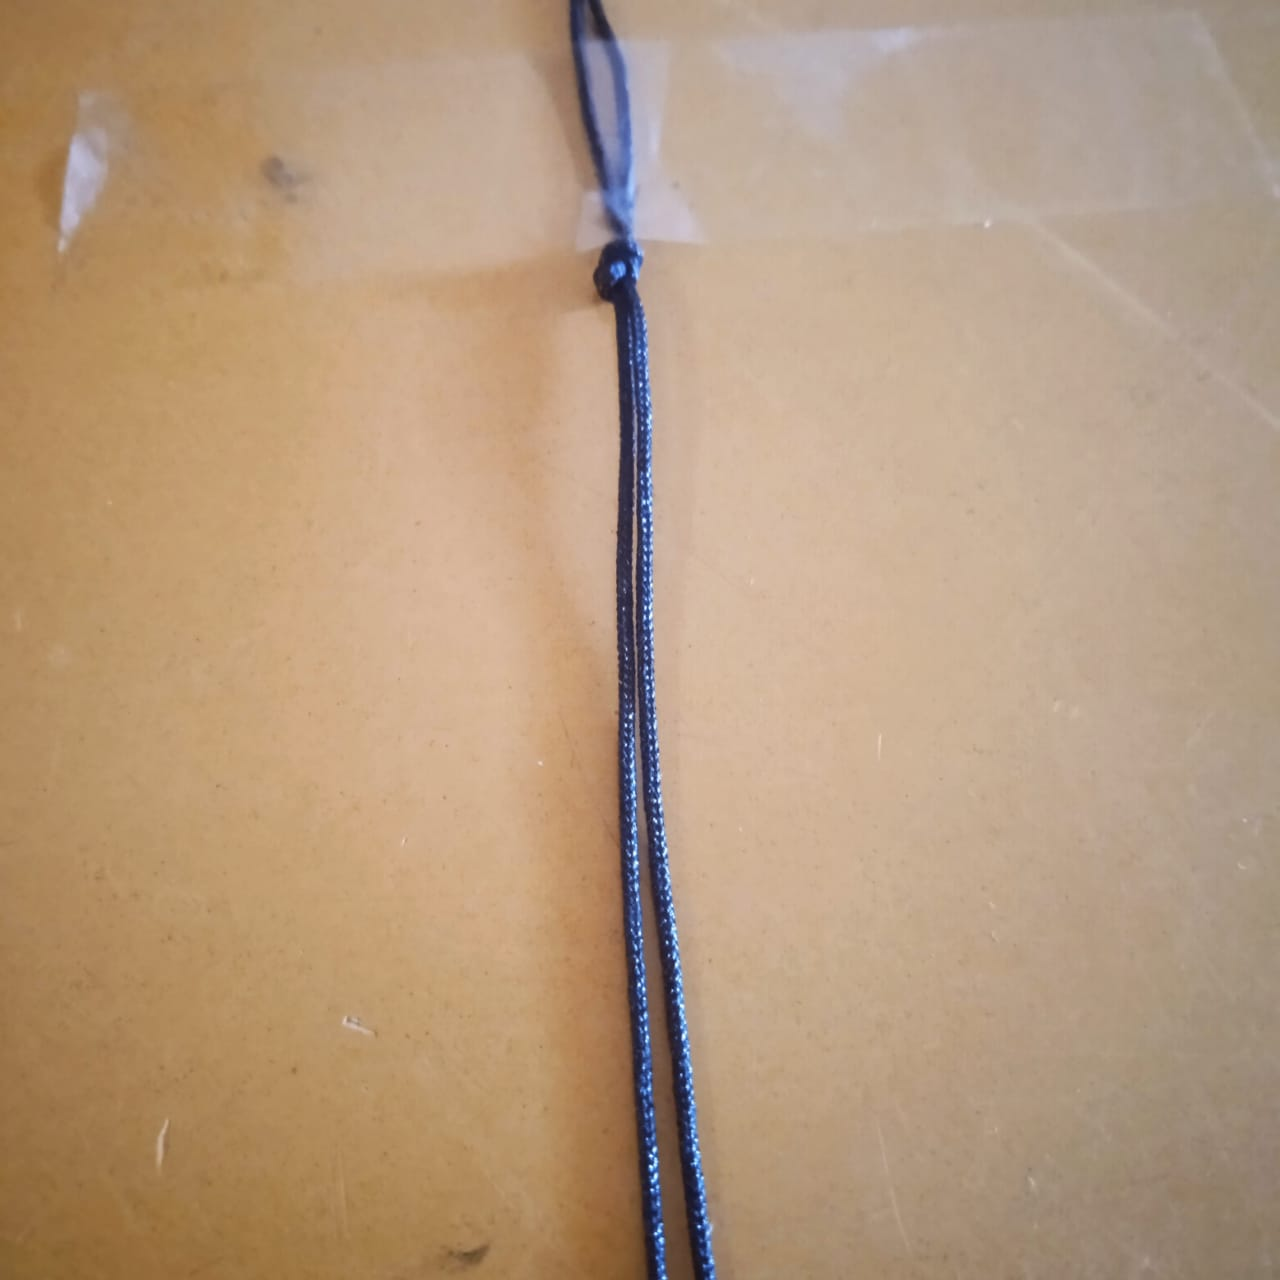
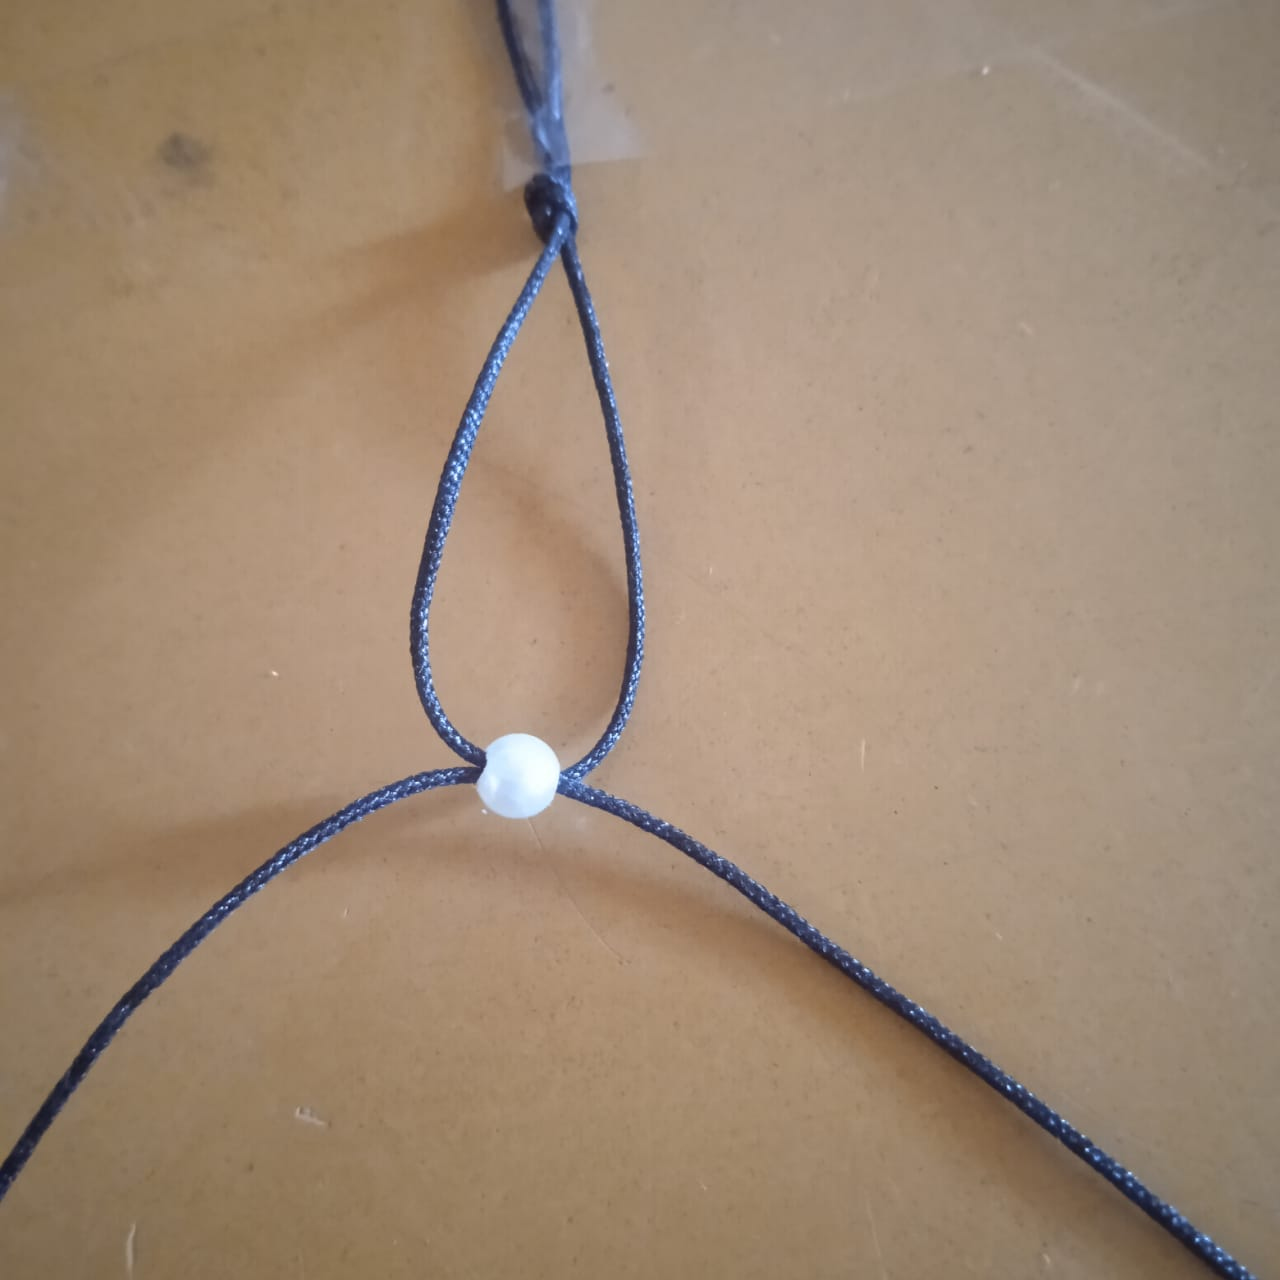
- After cutting 2 black colored Chinese threads of 50 cm each for the base. Leave 10 cm free and make a simple knot, then fasten with tape.
- Después de cortar 2 hilos chino color negro de 50 cm cada uno para la base. Dejar 10 cm libres y hacer un nudo sencillo, luego sujetar con cinta adhesive.
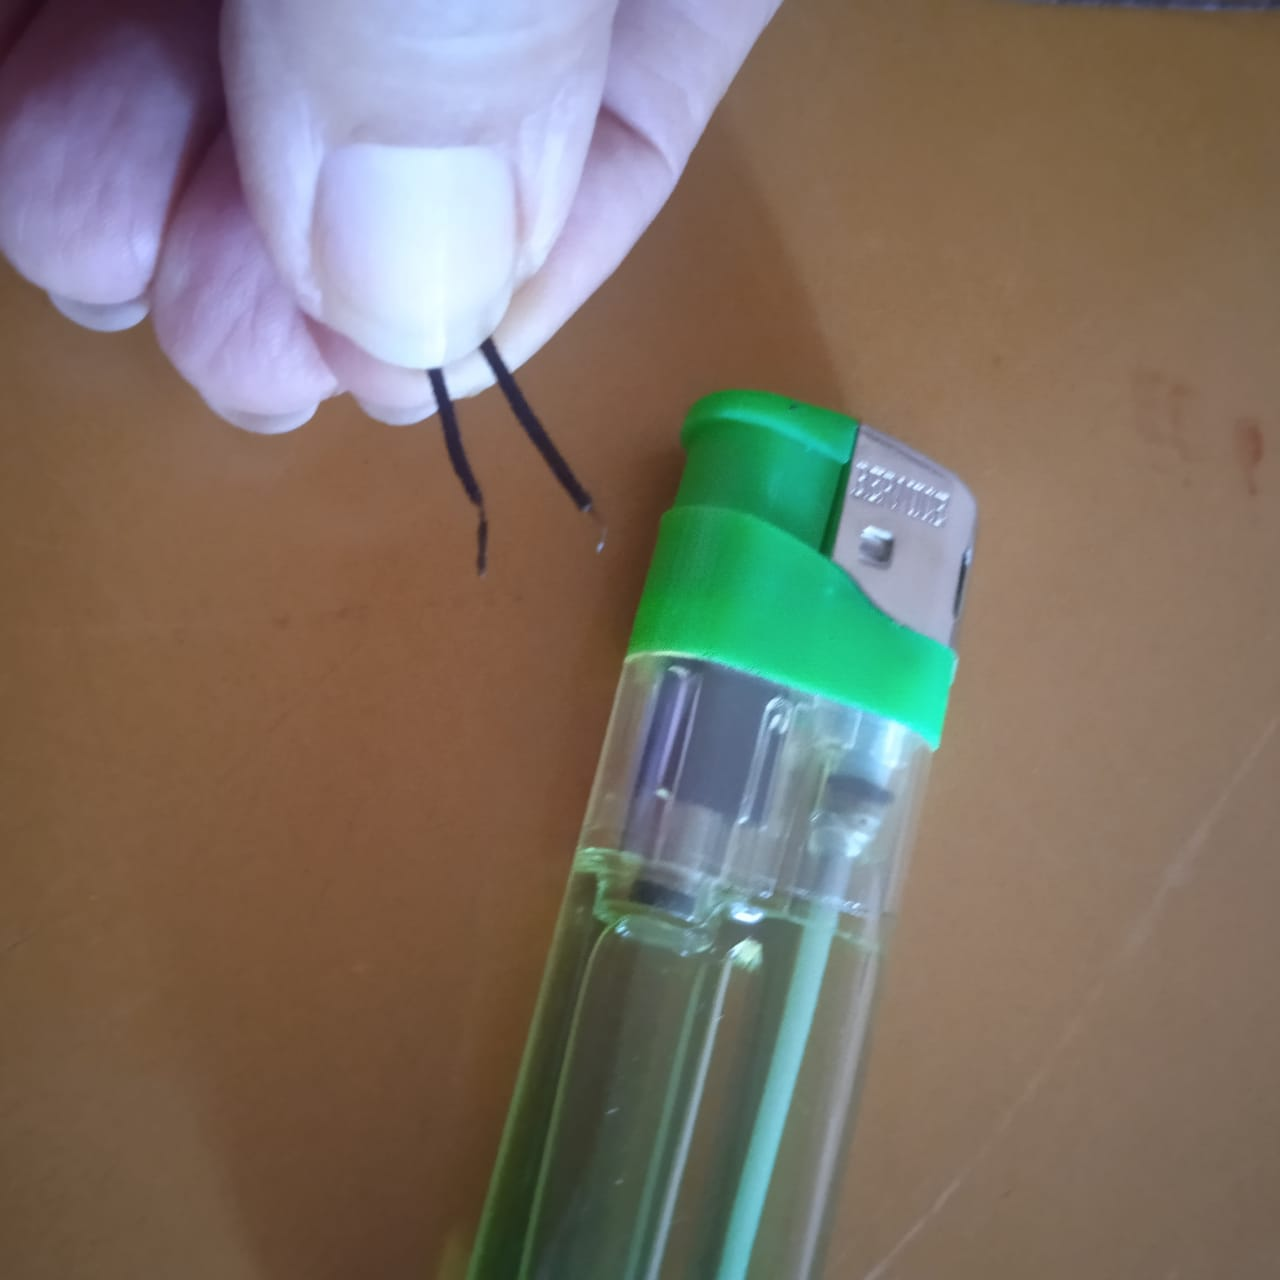
- Separate the threads into right and left, with the lighter thin the ends of the threads so that the beads pass easily.
- Separar lo hilos en derecho e izquierdo, con el encendedor adelgazar las puntas de los hilos para que las perlas pasen con facilidad.
- Introducir una perla por el hilo de la derecha y luego pasar la punta del hilo de la izquierda desde atrás hacia delante, tirar de los hilos y llevar la perla hasta el nudo inicial.
- Introducir una perla por el hilo de la derecha y luego pasar la punta del hilo de la izquierda desde atrás hacia delante, tirar de los hilos y llevar la perla hasta el nudo inicial.
- Continue inserting a bead through the thread on the right and pass through from back to front with the thread on the left.
- Continuar introduciendo una perla por el hilo de la derecha y atravesar de atrás hacia delante con el hilo de la izquierda.

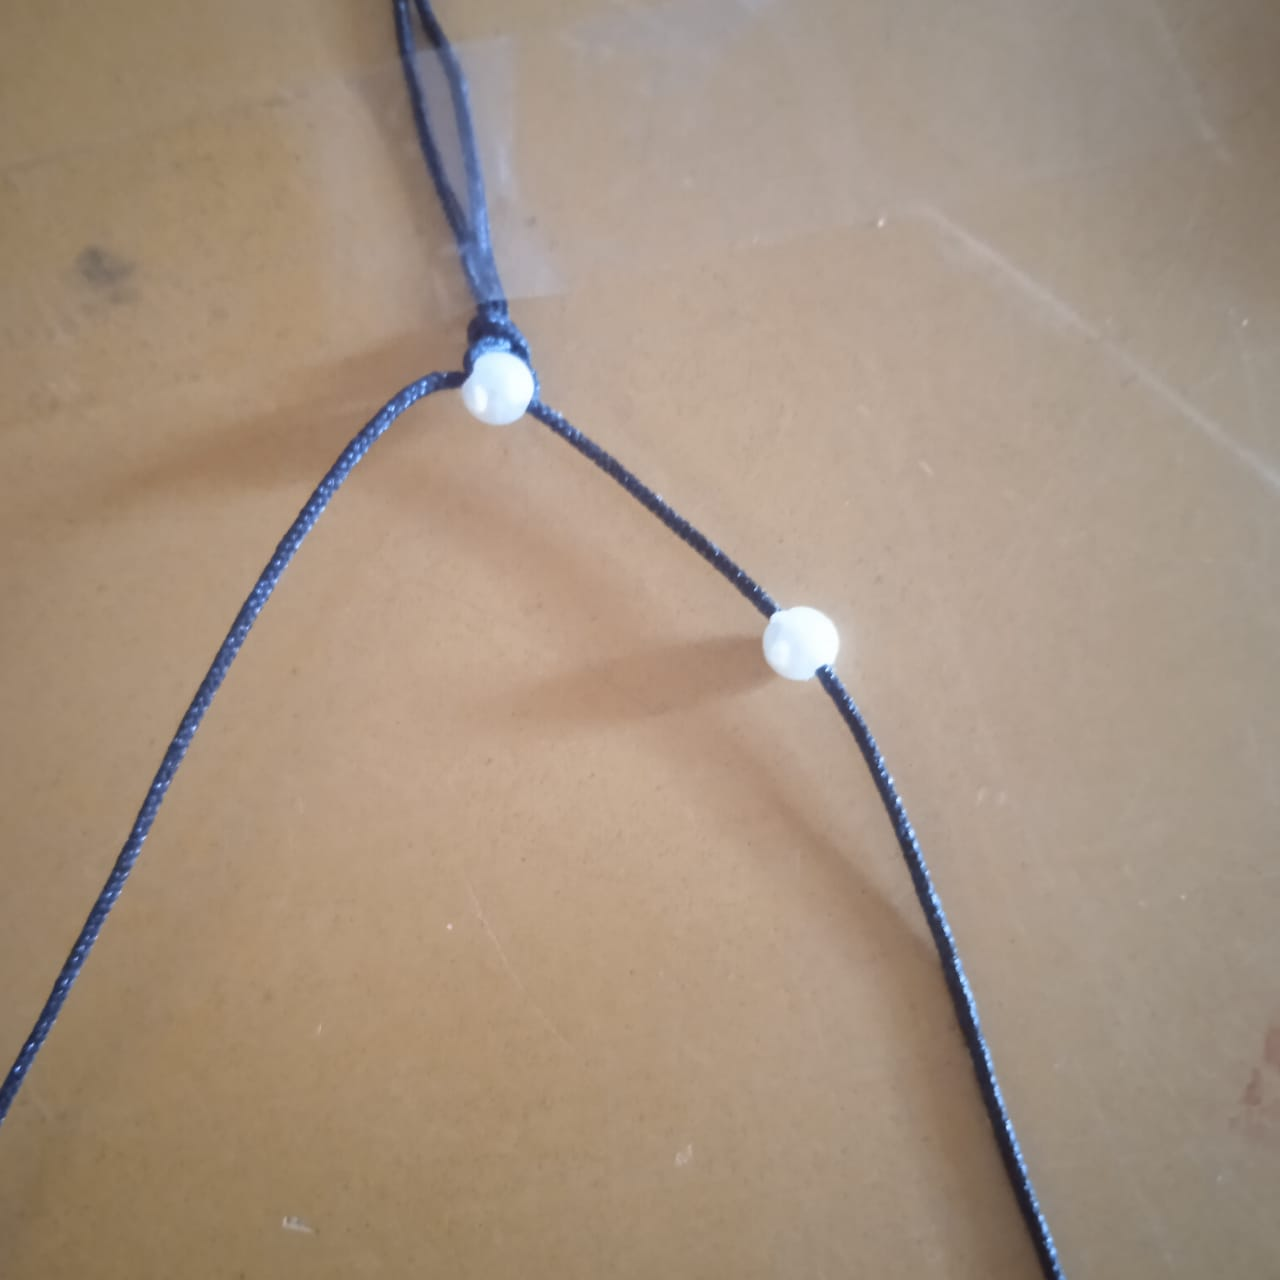
- Repeat the same process.
- Repetir el mismo proceso.
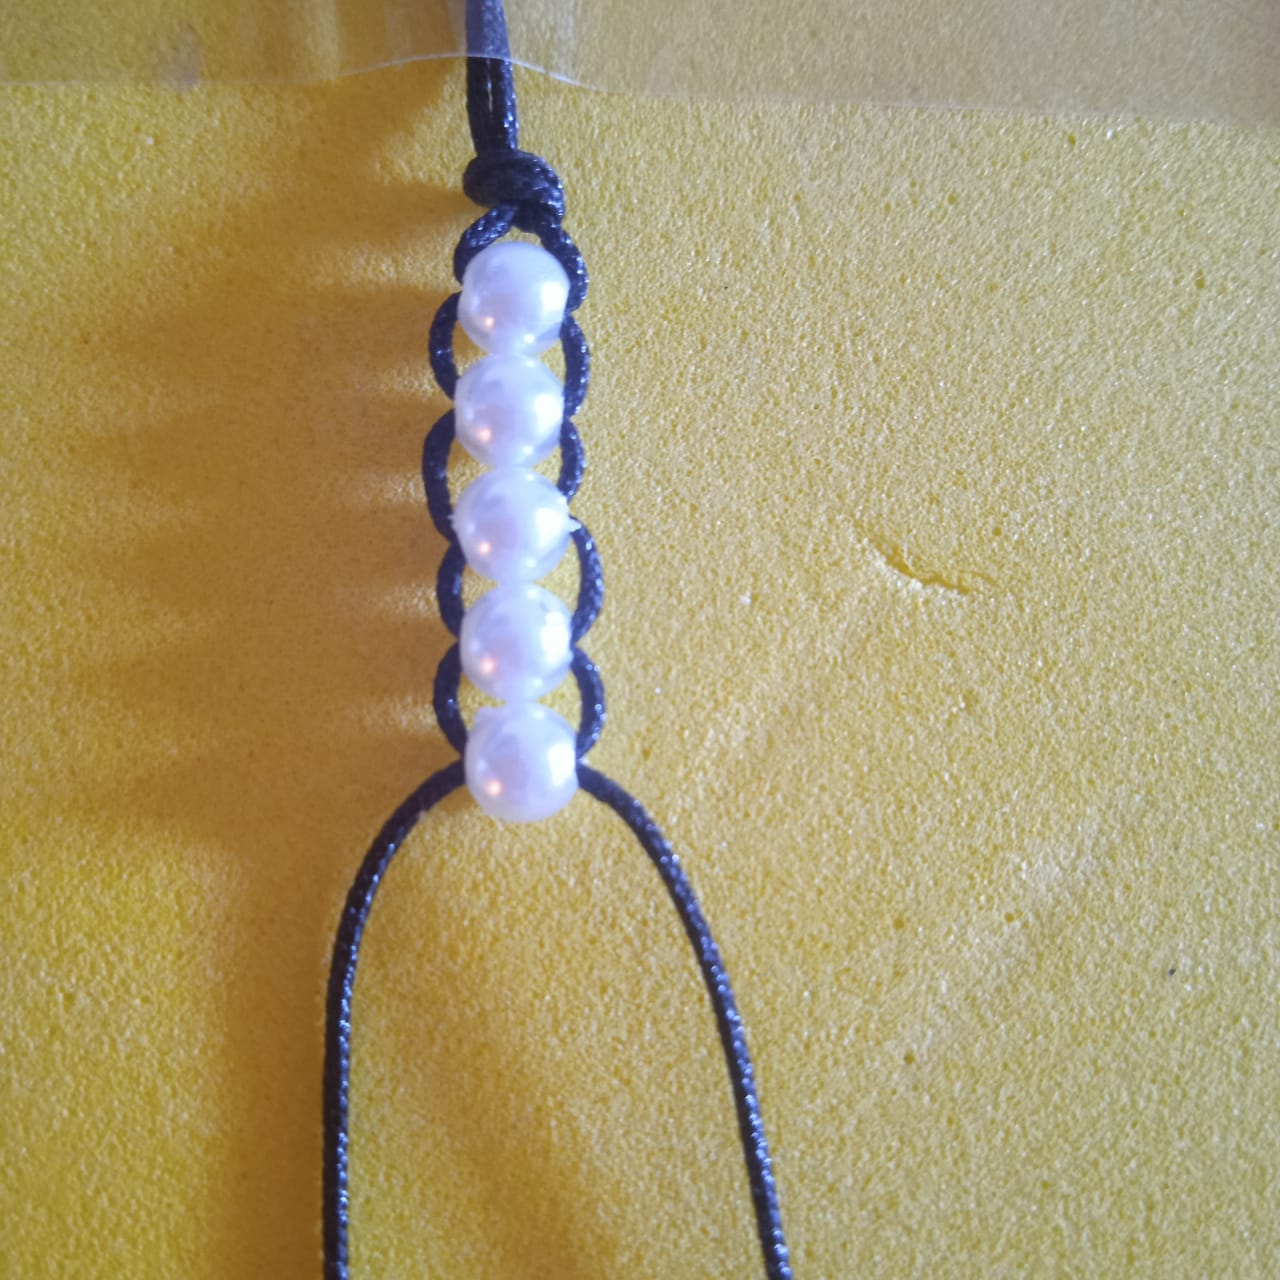
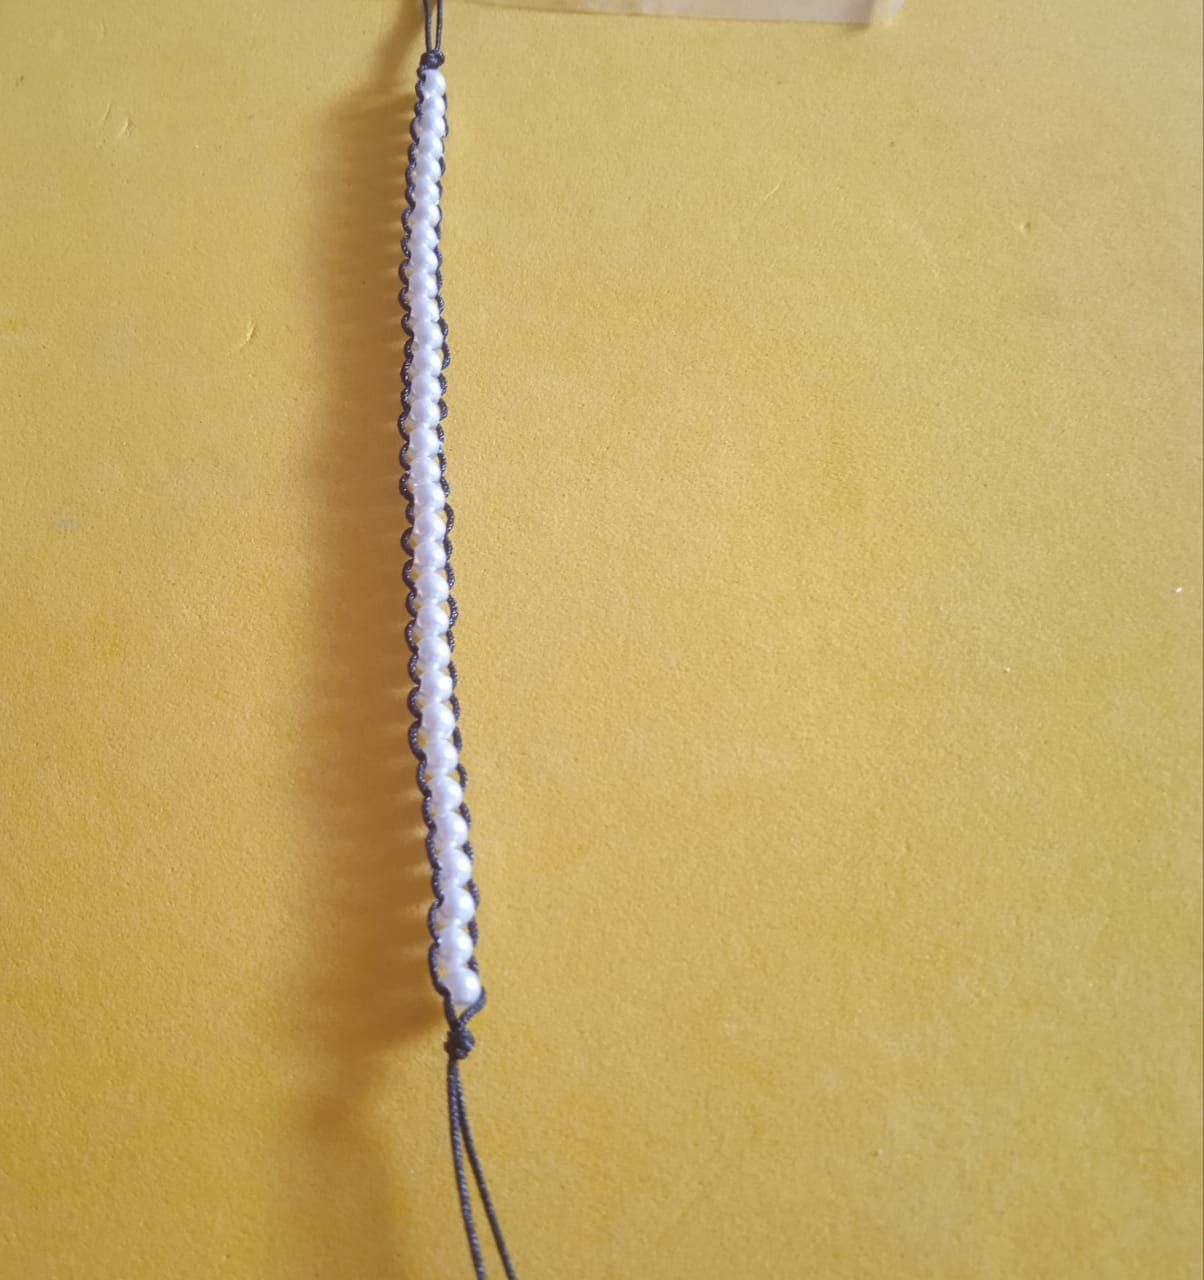
- Development of the bracelet of pearls and Chinese thread of black color.
- Desarrollo de la pulsera de perlas e hilo chino de color negro.
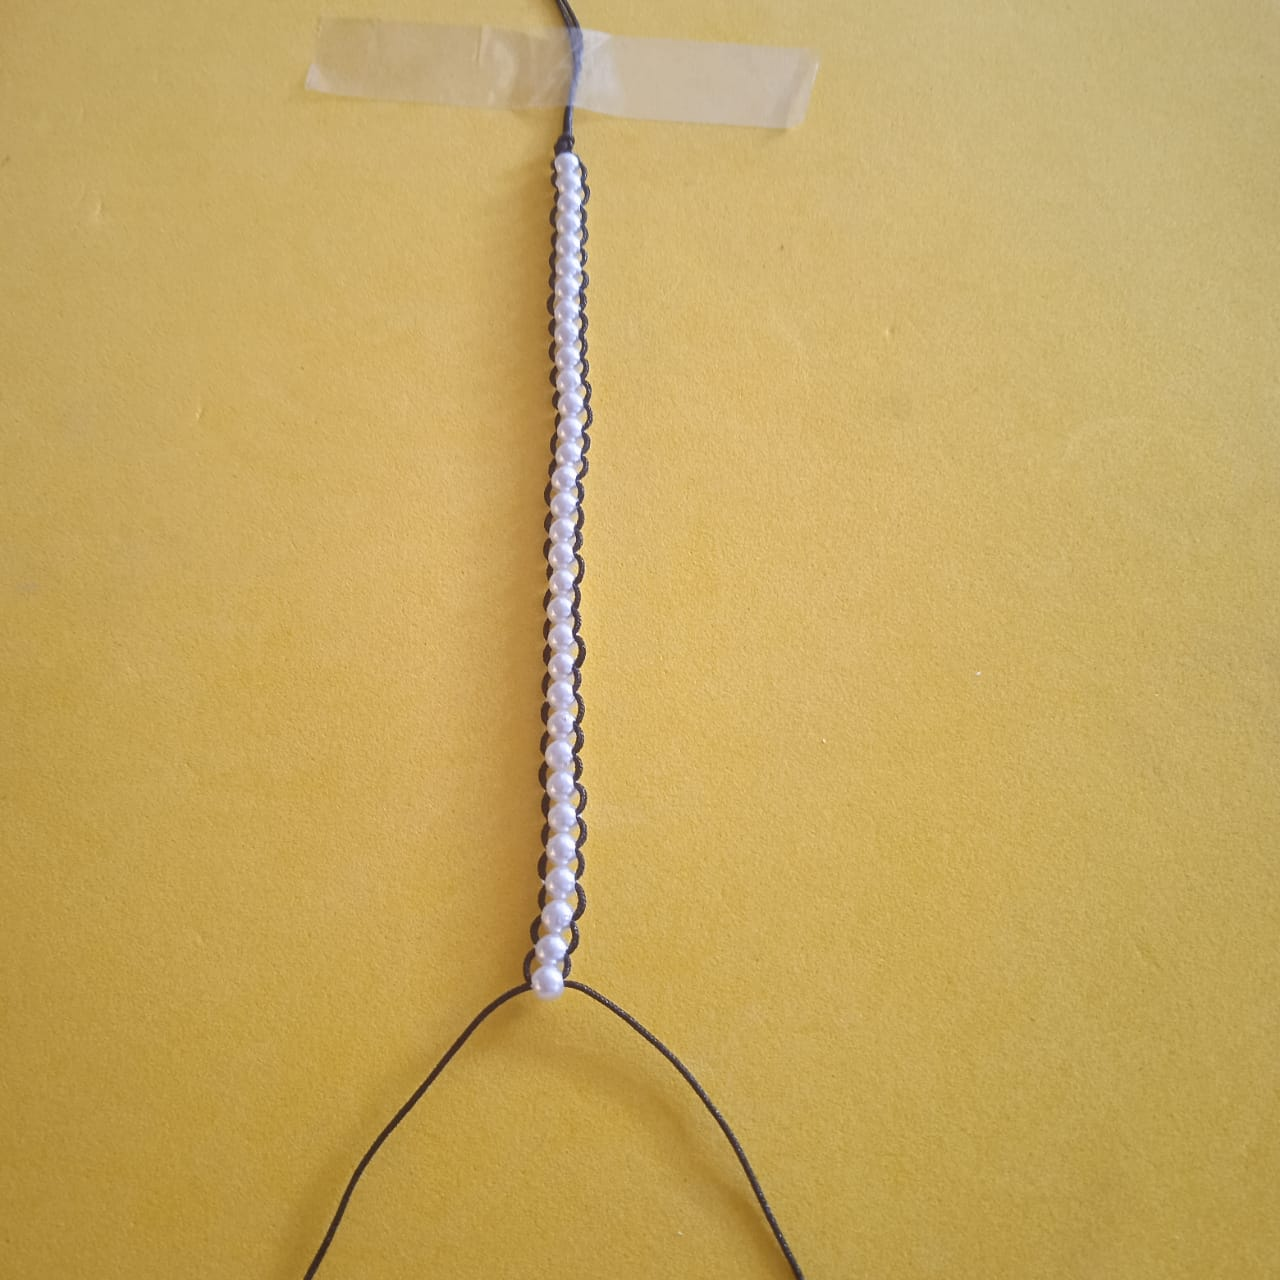
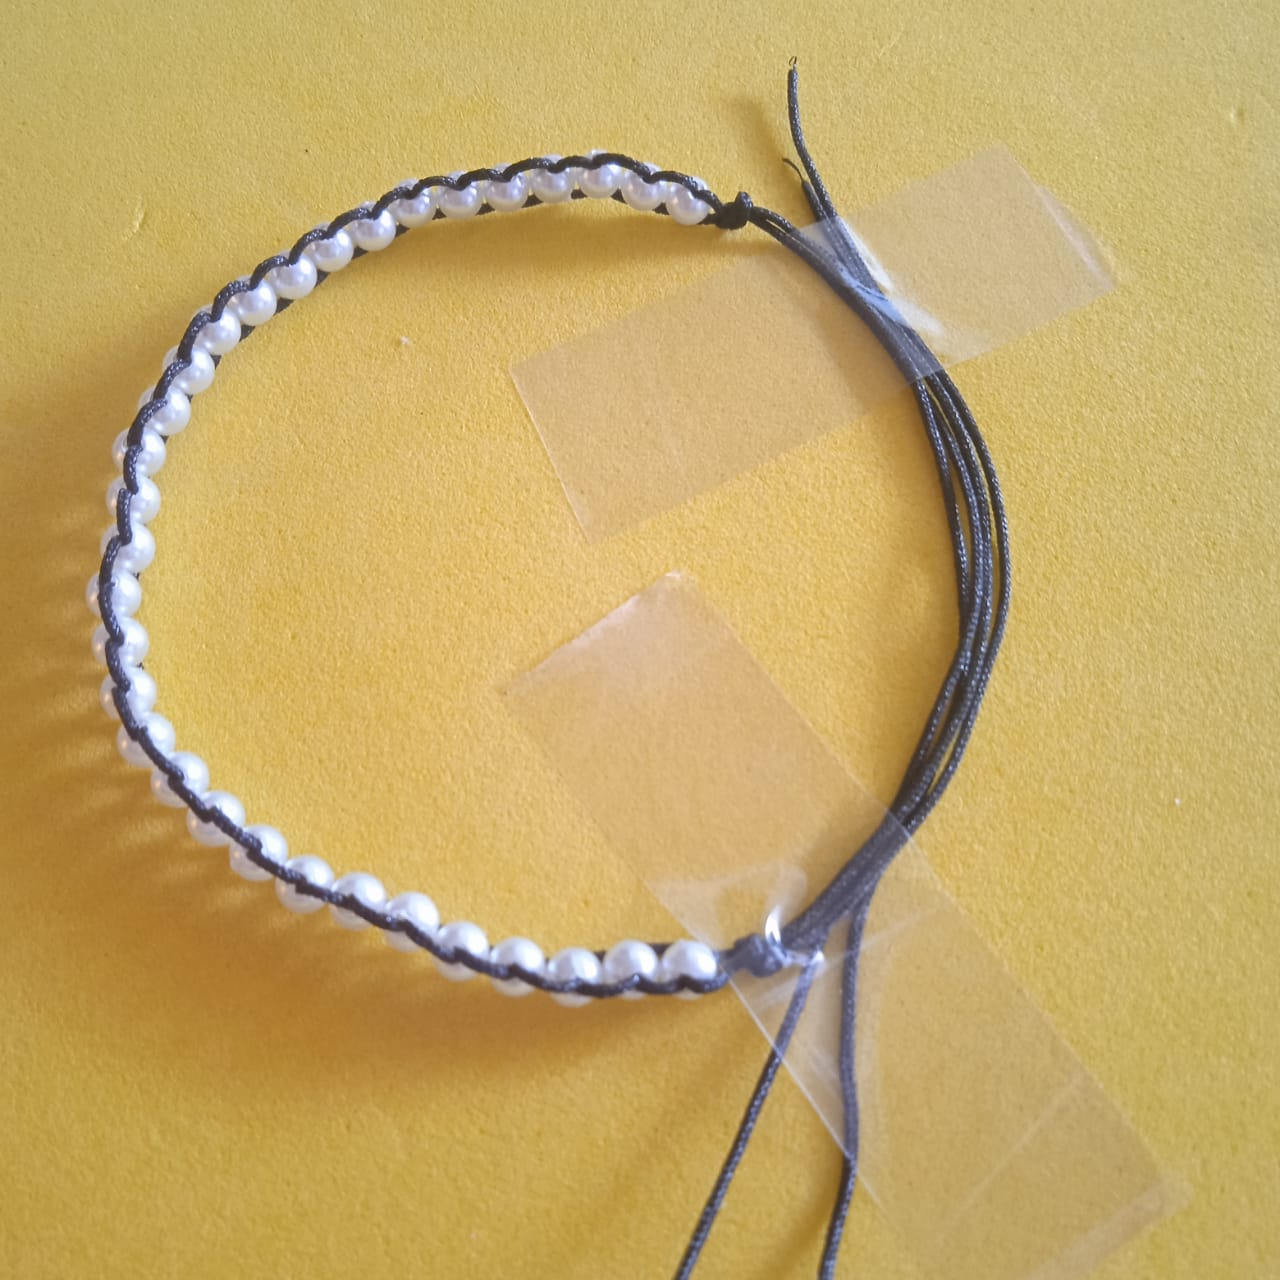
- After reaching the desired length of the bracelet, tie a simple knot.
- Después de alcanzar el largo deseado de la pulsera hacer un nudo sencillo.
- Fasten the threads of the bracelet with adhesive tape.
- Sujetar los hilos de la pulsera con cinta adhesive.
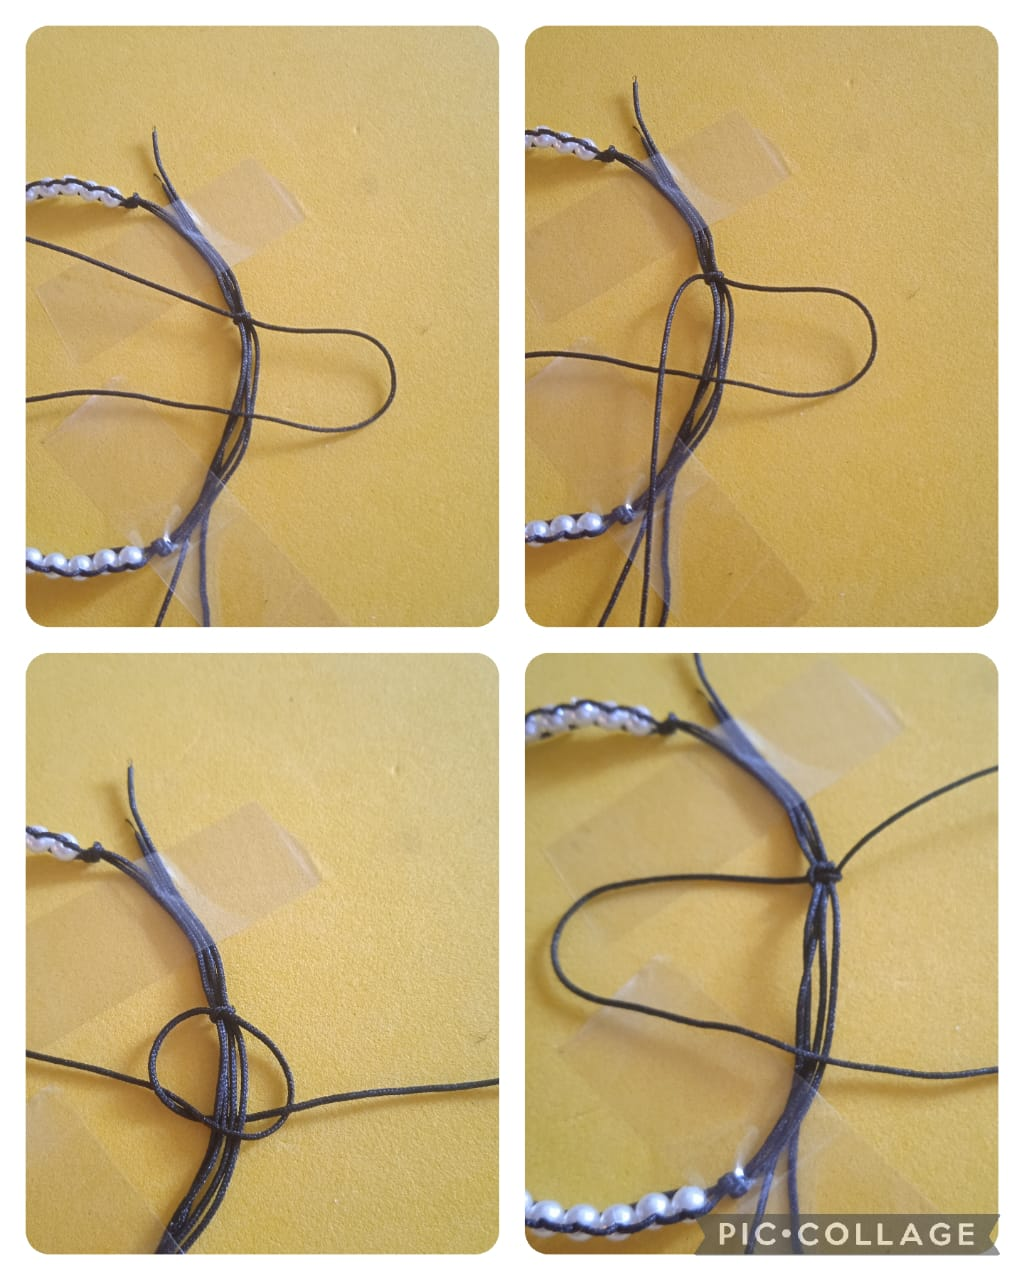
- Cut a Chinese thread of about 25 cm to make the flat slip knot. With the thread on the right make a P passing over the base thread, then the end of the thread on the left pass diagonally through the belly of the P, pull the two threads and tighten the knot, do the same procedure but now with the P inverted. Make 10 slip knots.
- Cortar un hilo chino de unos 25 cm para hacer el nudo plano corredizo. Con el hilo de la derecha hacer una P pasando por encima del hilo base, luego la punta del hilo de la izquierda pasar en diagonal saliendo por la barriga de la P, tirar de los dos hilos y ajustar el nudo, hacer igual procedimiento pero ahora con la P invertida. Hacer 10 nudos plano corredizo.
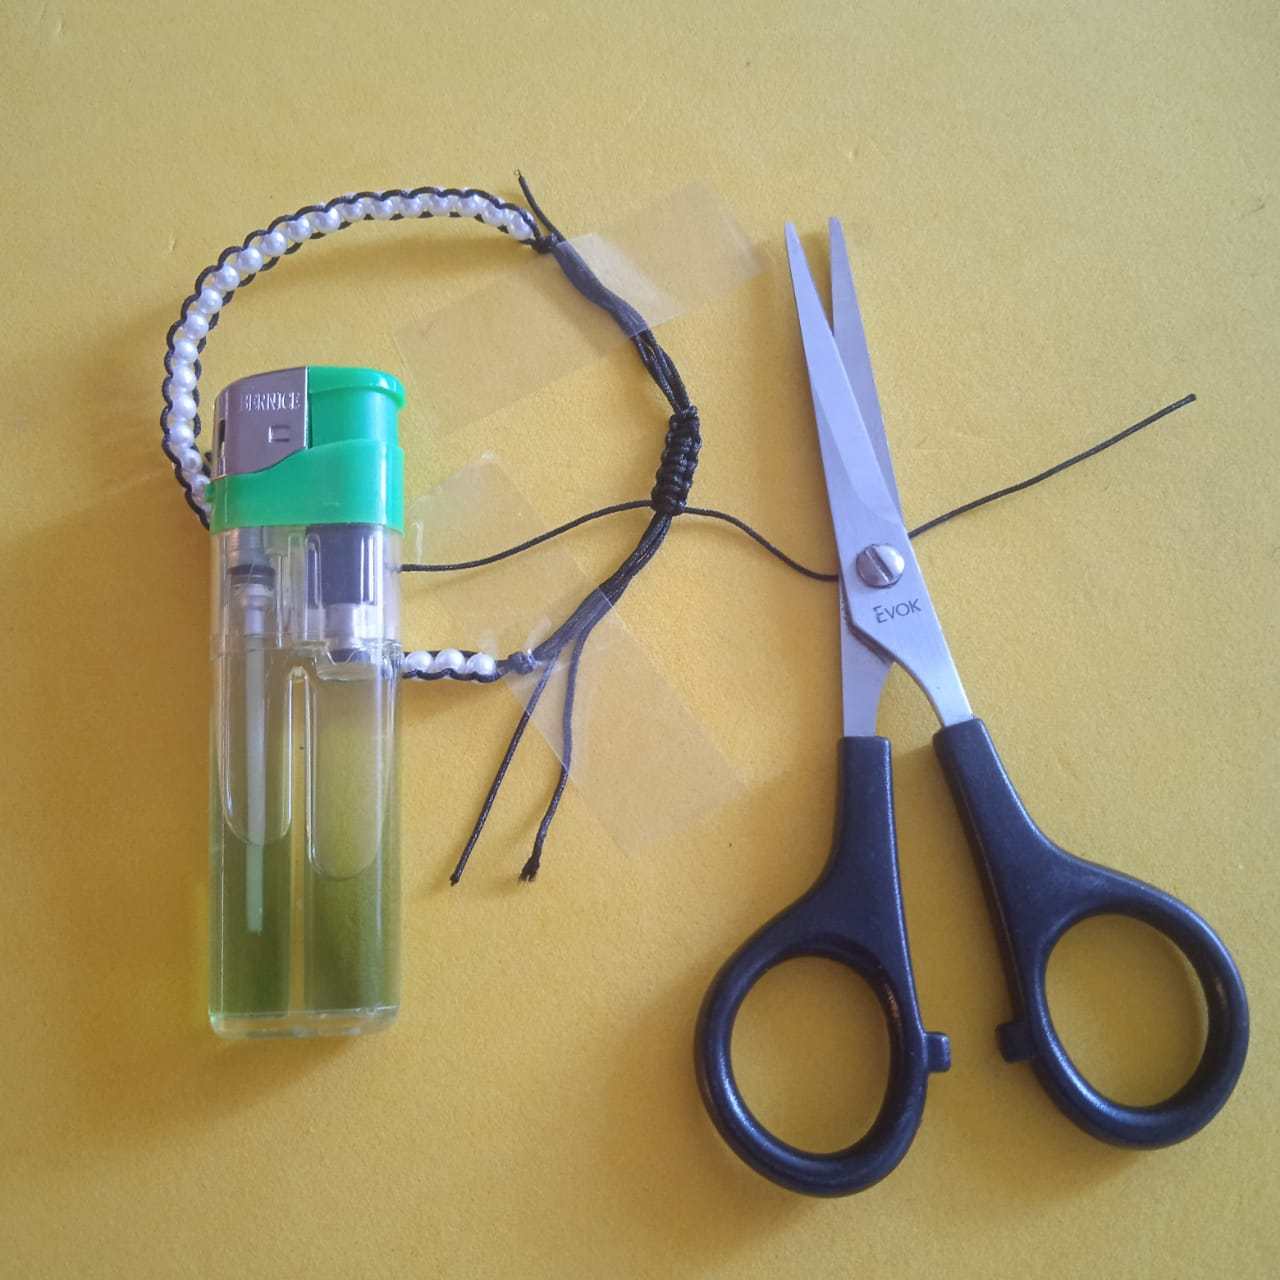
- After making the 10 flat slip knots, cut off the excess material and seal with the lighter. Attach beads to the hanging threads.
- Después de hacer los 10 nudos planos corredizo, cortar el material sobrante y sellar con el encendedor. Colocar perlas a los hilos colgantes.
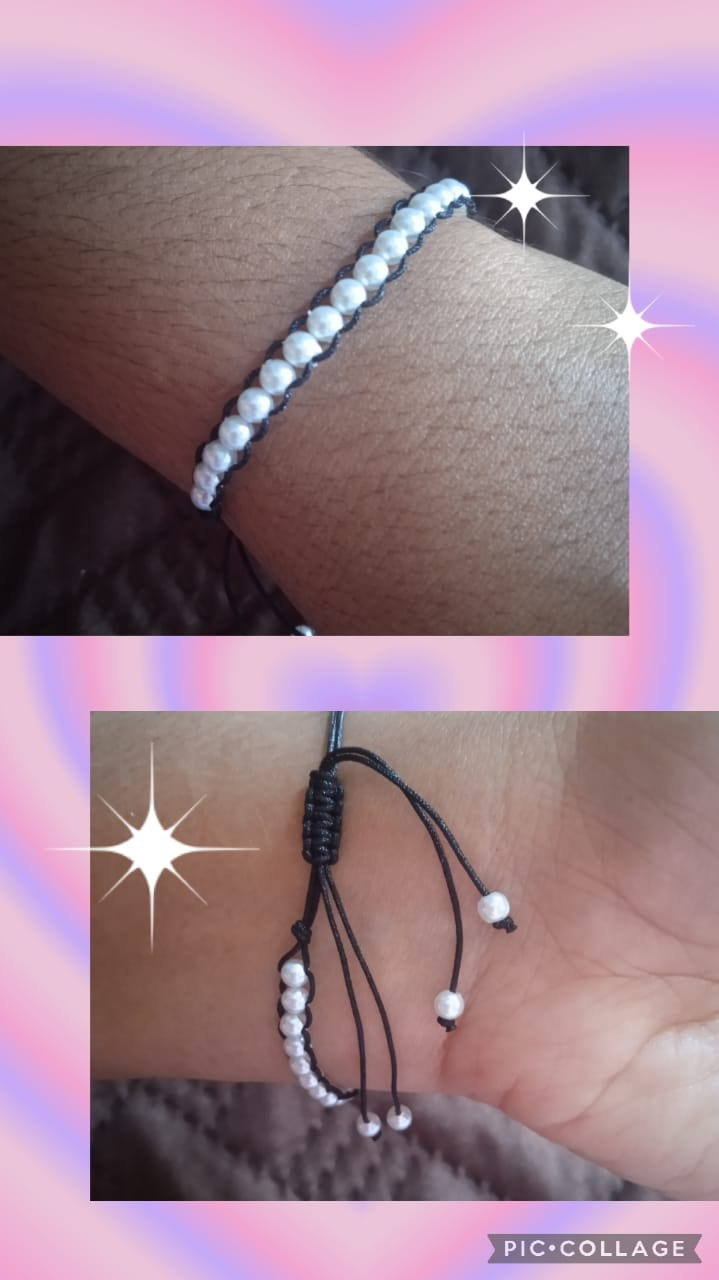
✨FINAL RESULT/ RESULTADO FINAL✨
- I was delighted to leave my contribution to the community of a beautiful bracelet to wear on casual occasions made with easily available materials. I say goodbye 🖐️ thanking you for your visit.
- Me encantó dejar mi aporte a la comunidad de una hermosa pulsera para lucir en ocasiones informales hecha con materiales fáciles de conseguir. Me despido 🖐️ agradeciéndoles su visits.


Wow making this fixable knot is so easy, i always feel so difficult to make this knot, but you have made it so neat and beautiful. I loved your explanation ❤