Tengan mí querida comunidad un bendecido inicio de mes.
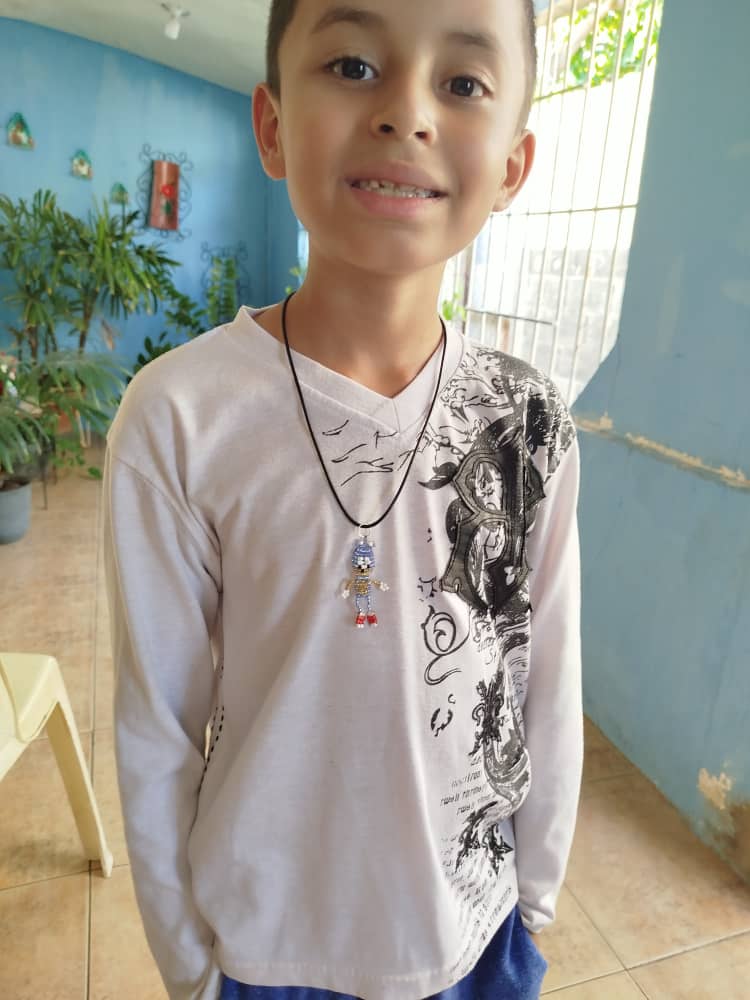
Para comenzar el mes de ❤️ lo hice complaciendo a ese hombre que llegó a vida y al cual amaré por siempre, porque puedo decir como dice una canción: " ese hombre es mío, mío y siempre lo será"... porque él es mi nieto amado😊.
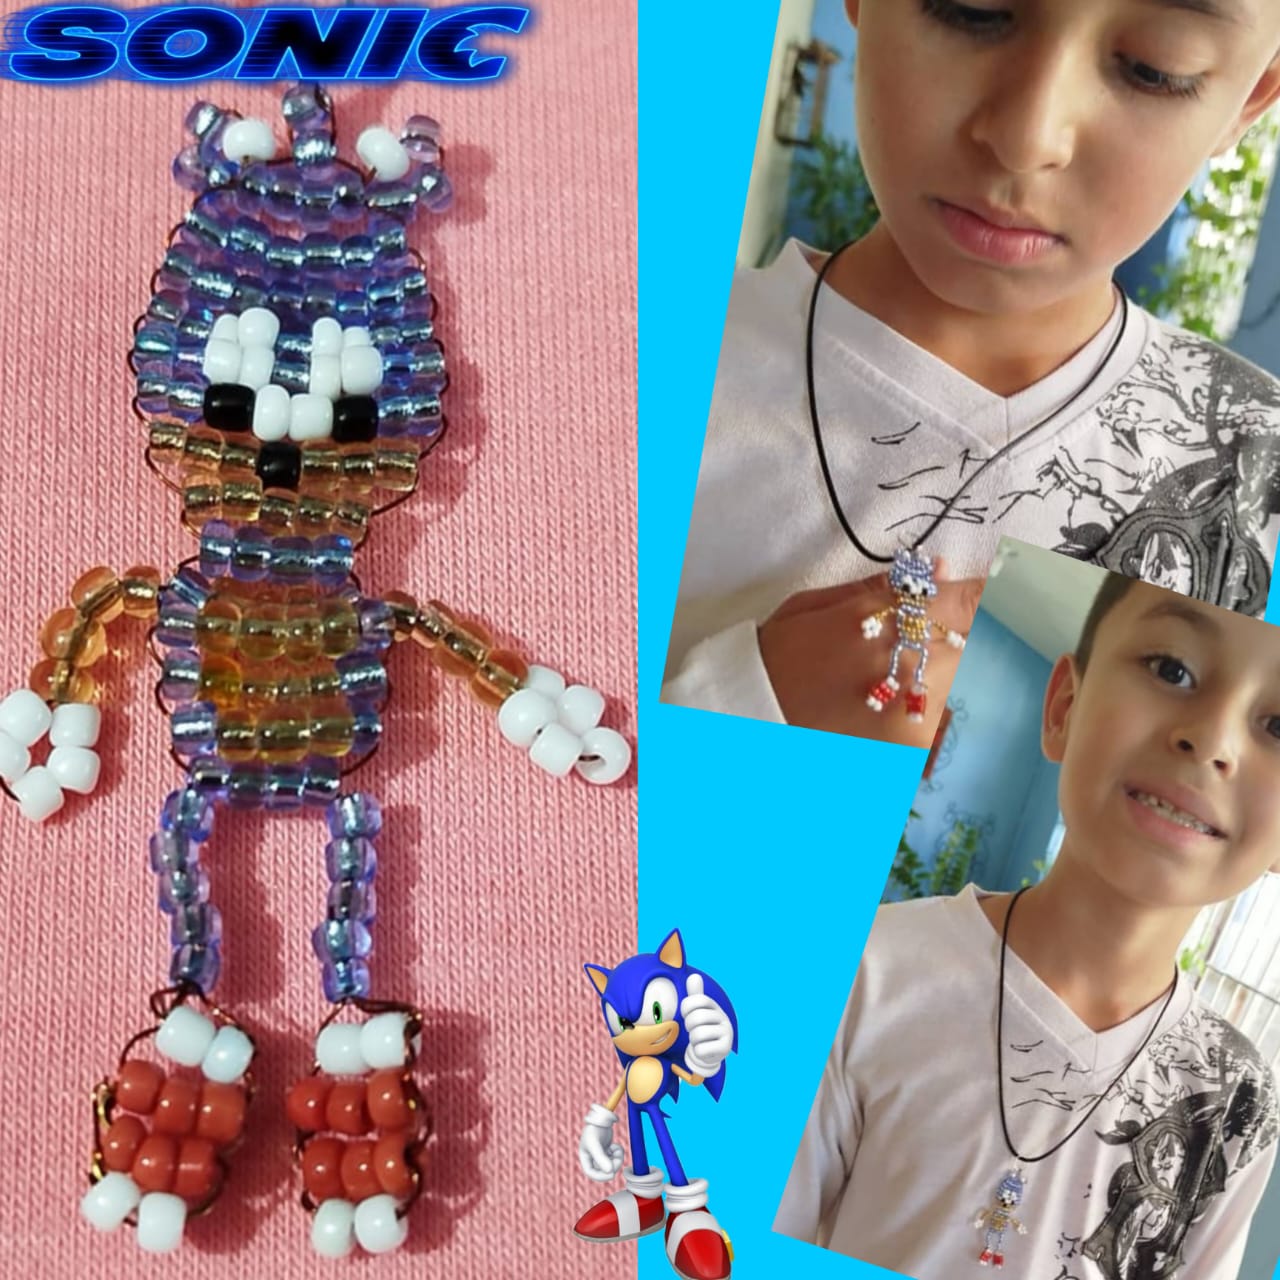
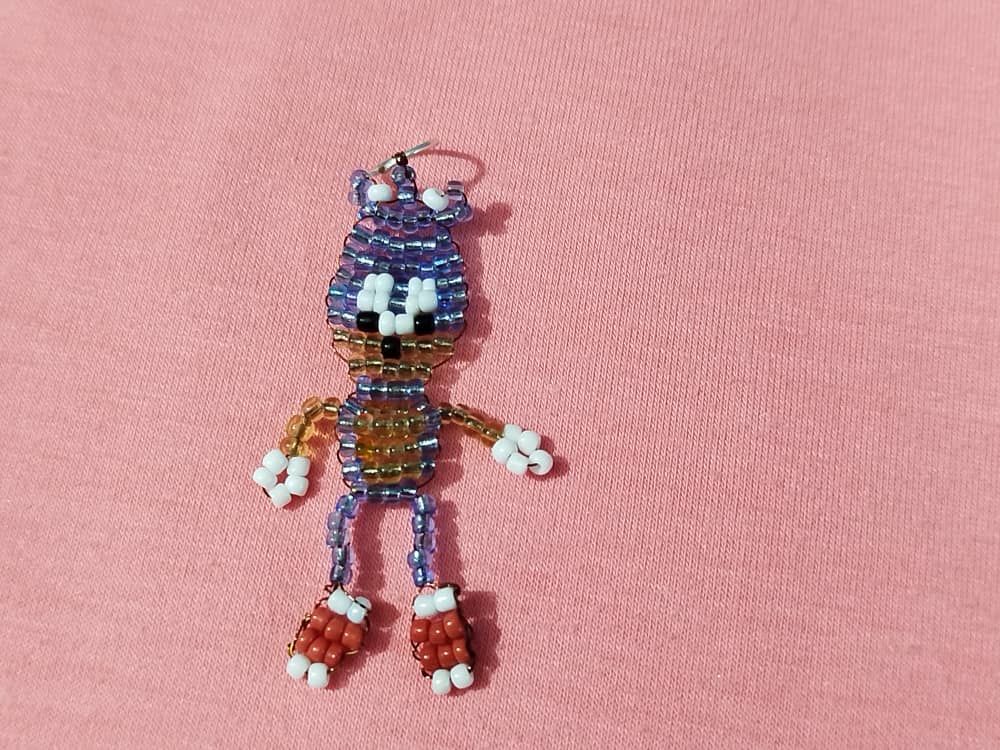
Y aunque el Sonic, a mí parecer no me quedo muy bien, ya que era el primero que hacía y en unos colores más claro y con este material... Pues a él le encantó y lo reconoció de inmediato cuando se lo mostré. le dije: !César mira esto, quién es?.
.- Es Sonic abuelita, que fino me hiciste...y yo bueno si él lo reconoció, entonces es un Sonic, a lo mejor un poco diferente. Pero lo más importante es que a él le encantó y yo feliz de consentir a mi niño.
Have a blessed start to the month, my dear community.
To start the month of ❤️ I did it by pleasing that man who came to life and whom I will love forever, because I can say as a song says: "that man is mine, mine and always will be"... because he is my beloved grandson😊.
And although the Sonic, in my opinion, didn't look very good, since it was the first one I made and in lighter colors and with this material... Well, he loved it and recognized it immediately when I showed it to him. I told him: Caesar, look at this, who is it?
.- It's Sonic grandma, how nice you did me...and I well if he recognized it, then it's a Sonic, maybe a little different. But the most important thing is that he loved it and I was happy to spoil my child.
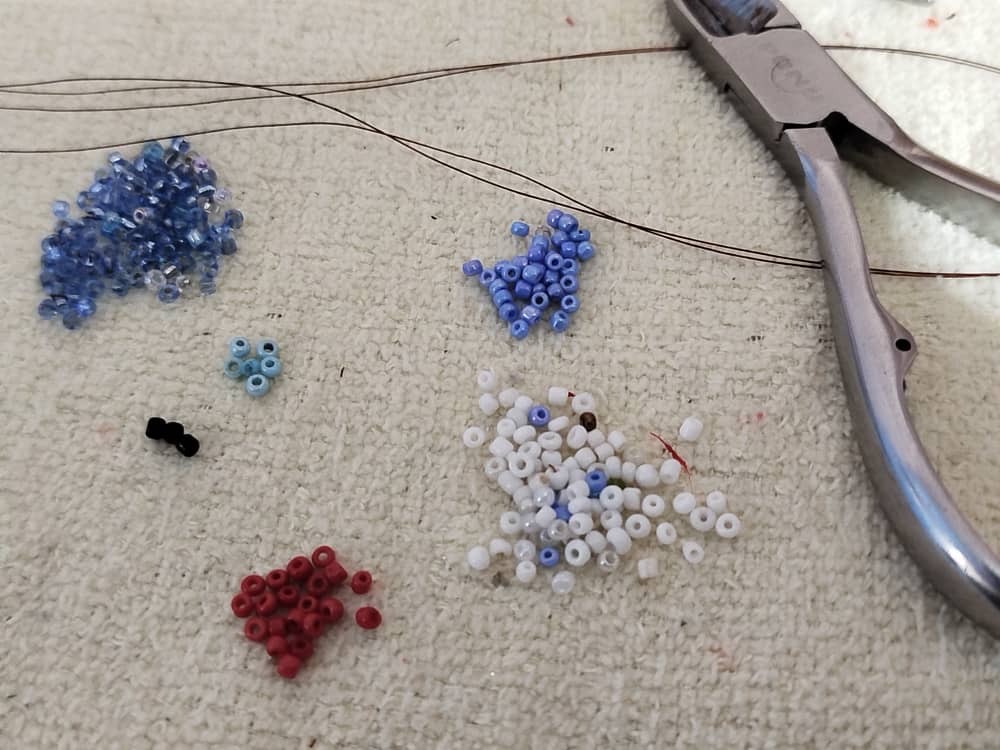
Los materiales que utilice fueron los siguientes:
- Mostacillas en colores azul, blanca, marrón, roja y negra.
- Alambre de cobre.
- Argolla.
- Pinza.
The materials I used were the following:
- Beads in blue, white, brown, red and black.
- Copper wire.
- Ring.
*Clamp.
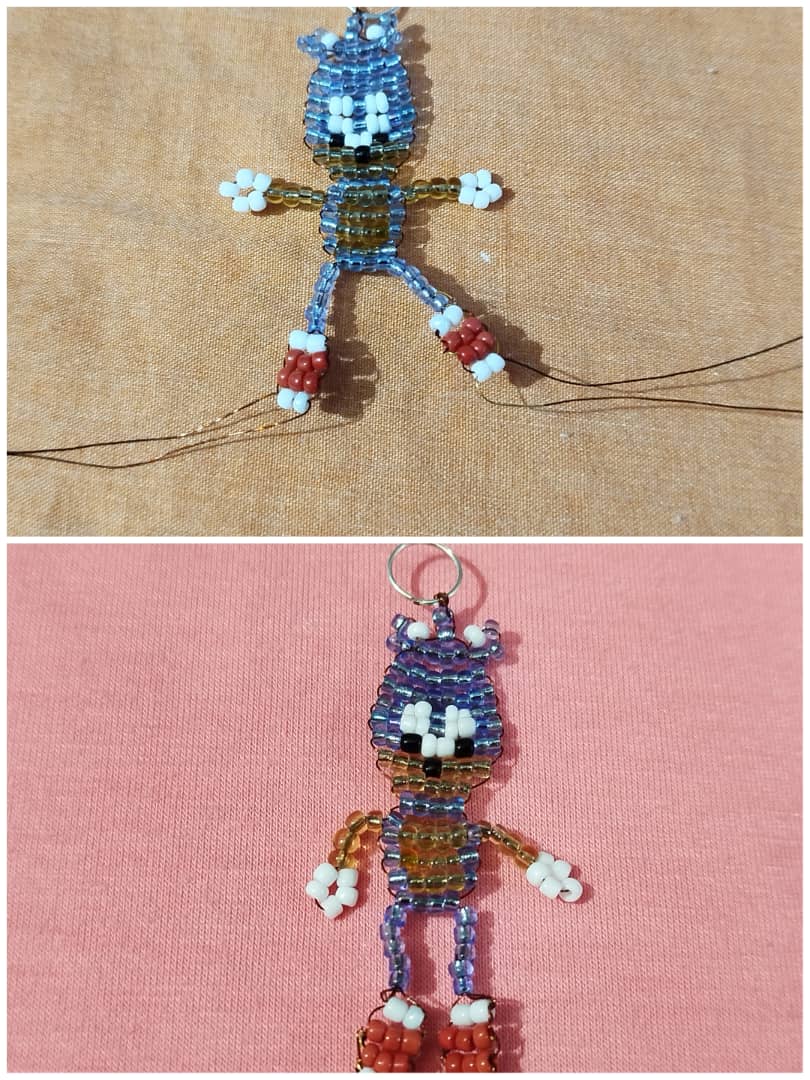
✨. Procedimiento. ✨
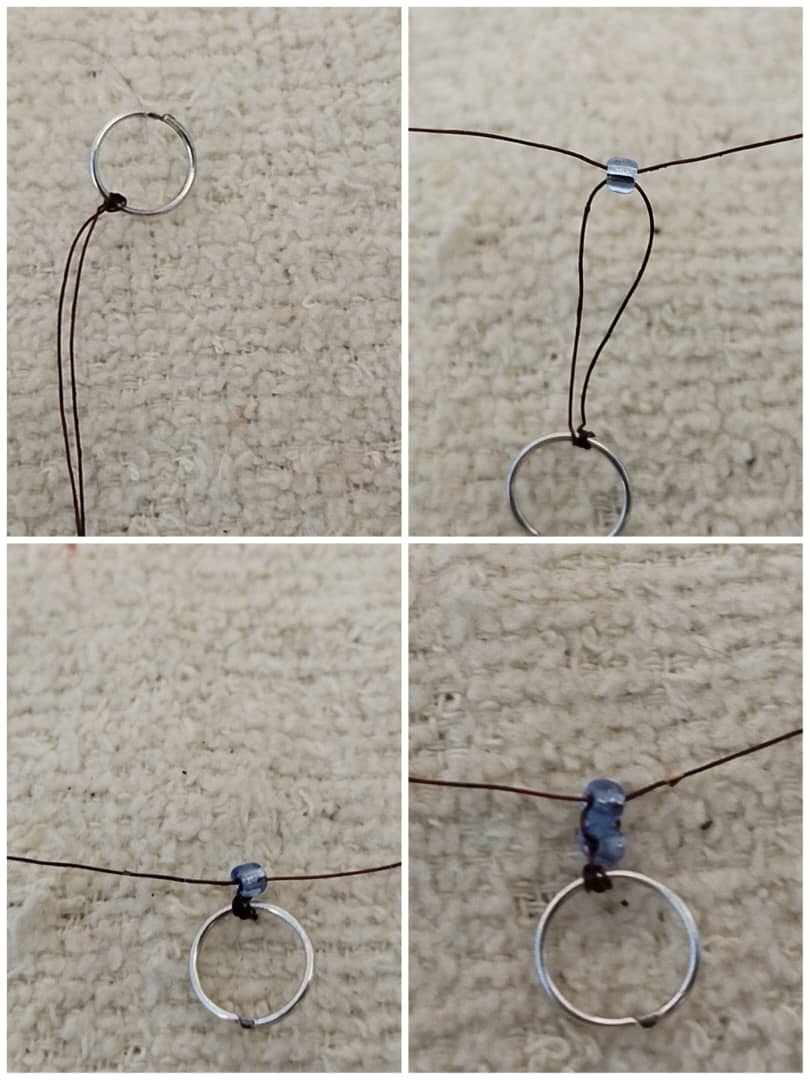
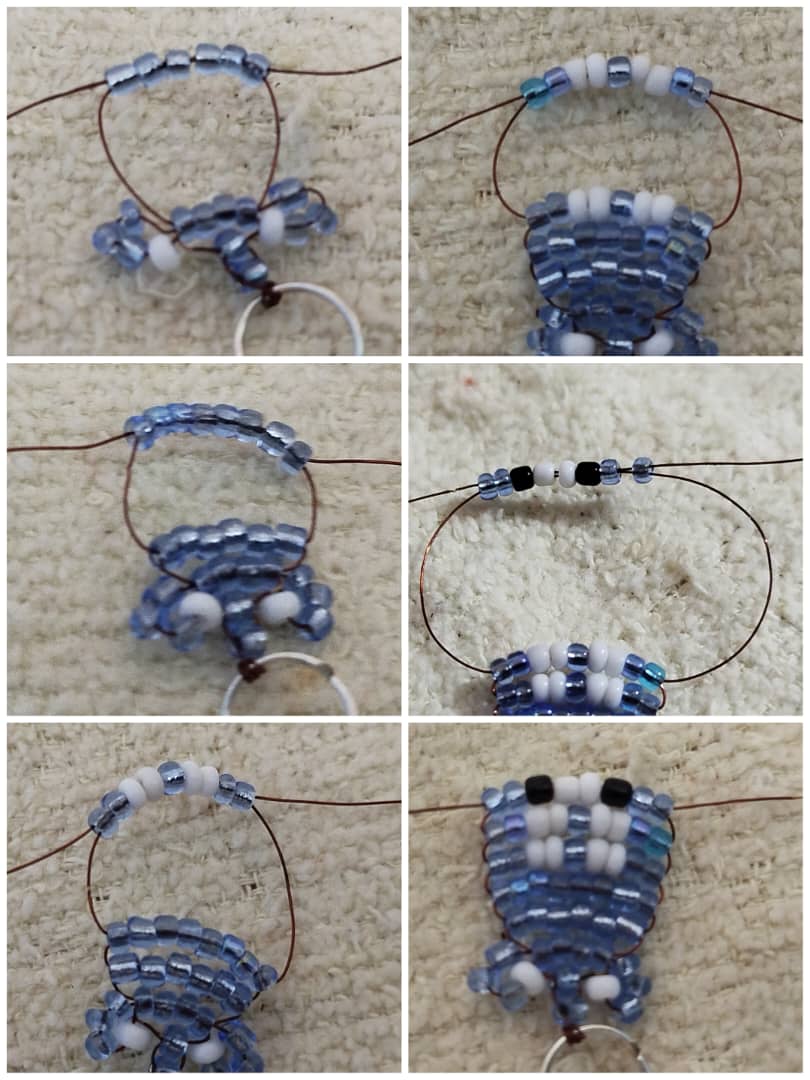
Paso # 01.
Comienzó uniendo el alambre a la argolla y quedara dos hebras iguales. Y empiezo cruzando una mostacilla azul por ambas puntas y llevándola hasta la argolla, después cruzo otra.
Step #01.
He began by attaching the wire to the ring and leaving two equal strands. And I start by crossing a little blue bead at both ends and taking it to the ring, then I cross another.
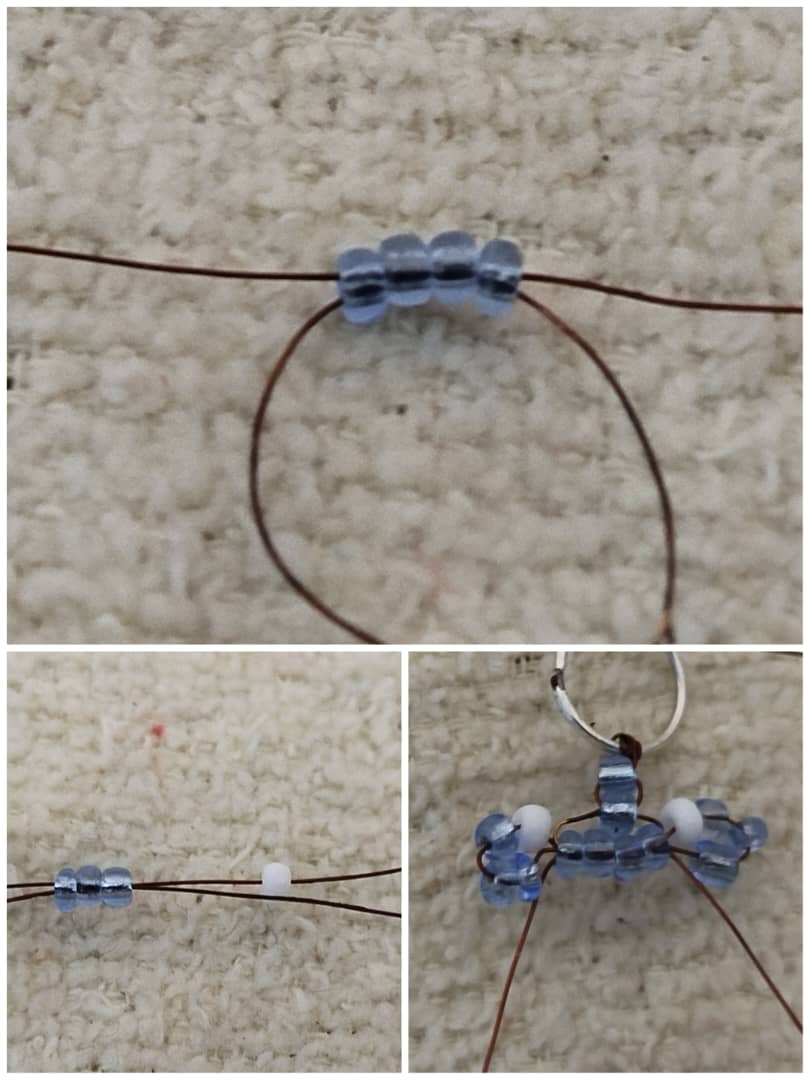
Paso # 02.
En este paso cruzando tres mostacillas azules se empieza a formar la cabeza del muñeco Sonic.
Después en cada extremo para hacerle las orejas coloco tres mostacillas azules y una blanca, pasando el alambre por las tres mostacillas azules, dejando la blanca y luego jalo y ajusto las mostacillas a las tres mostacillas anteriores.
Step #02.
In this step, crossing three blue beads, the head of the Sonic doll begins to form.
Then at each end to make the ears I place three blue beads and one white, passing the wire through the three blue beads, leaving the white one and then I pull and adjust the beads to the three previous beads.
Paso # 03.
Y así como van mostrando las fotos se va formando la cabeza del muñeco, intercalando los colores para hacerle la cara.
Step #03.
And just as the photos show, the head of the doll is formed, interspersing the colors to make the face.
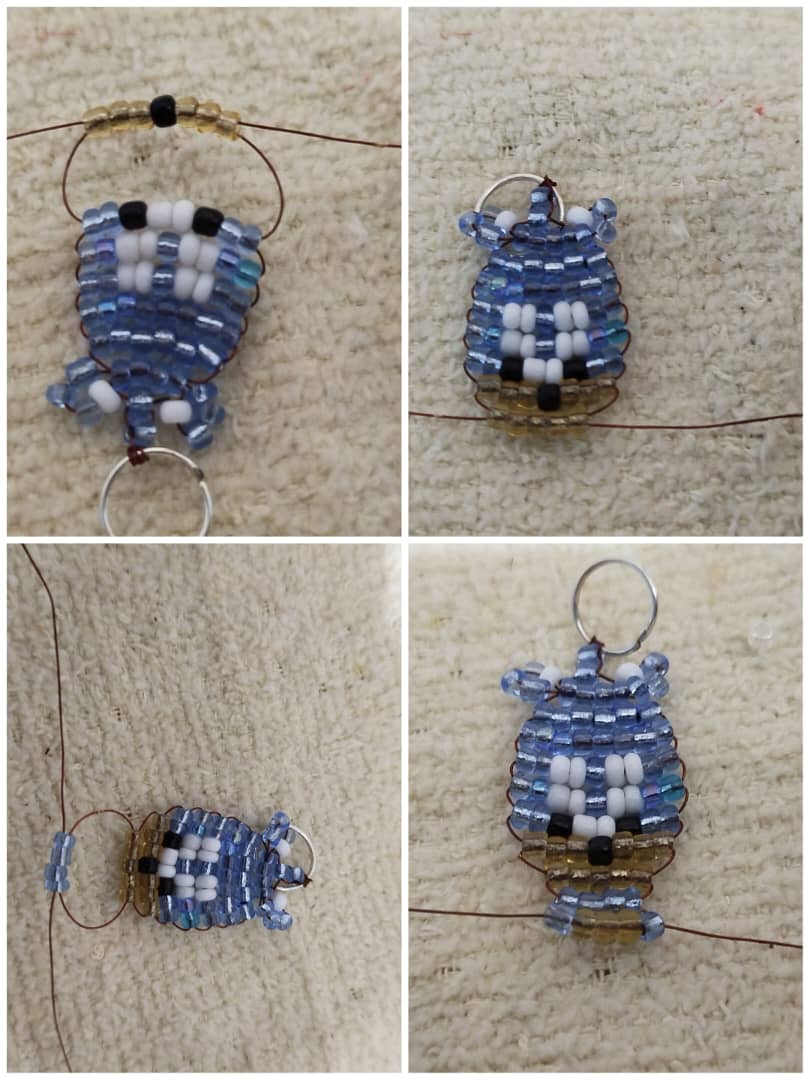
Paso # 04.
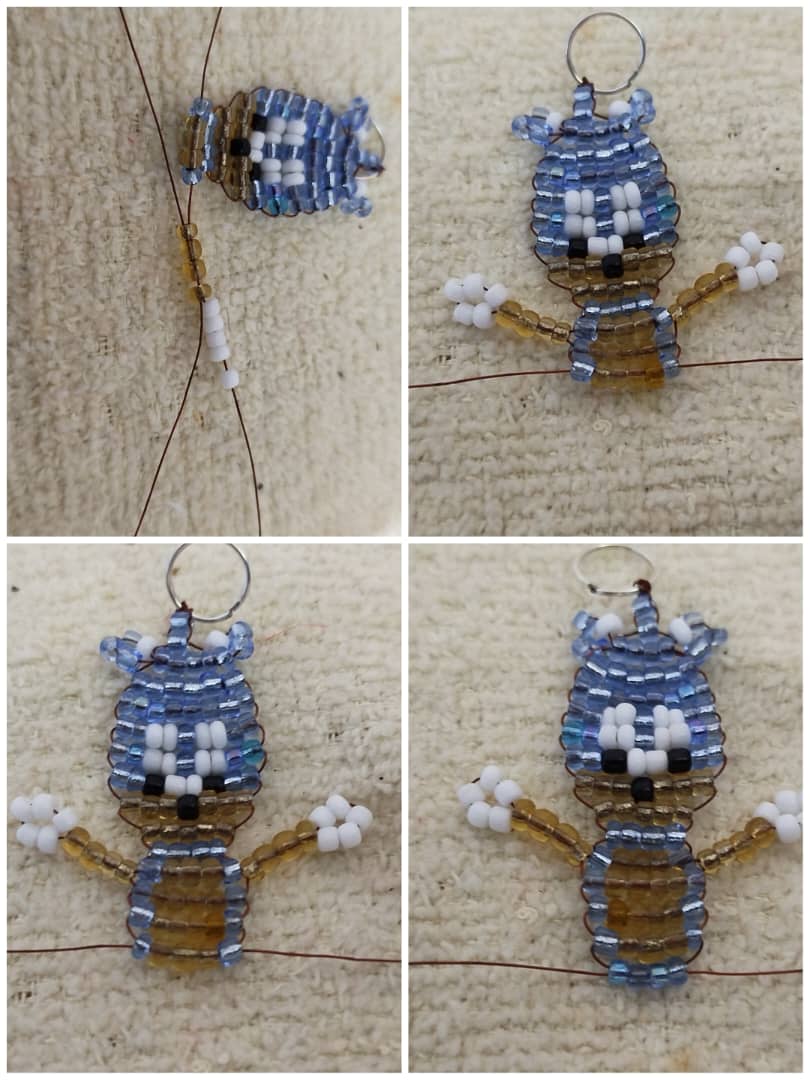
Para los brazos en cada extremo coloque cuatro mostacillas marrón y cinco blancas, pasando el alambre por las mostacillas marron.
Luego el tronco entre mostacillas azul y marrón de varias vueltas hasta tener llegar a cuatro, para formar las piernas y sus botas.
Step #04.
For the arms, at each end place four brown beads and five white beads, passing the wire through the brown beads.
Then the trunk between blue and brown beads of several turns until reaching four, to form the legs and boots.
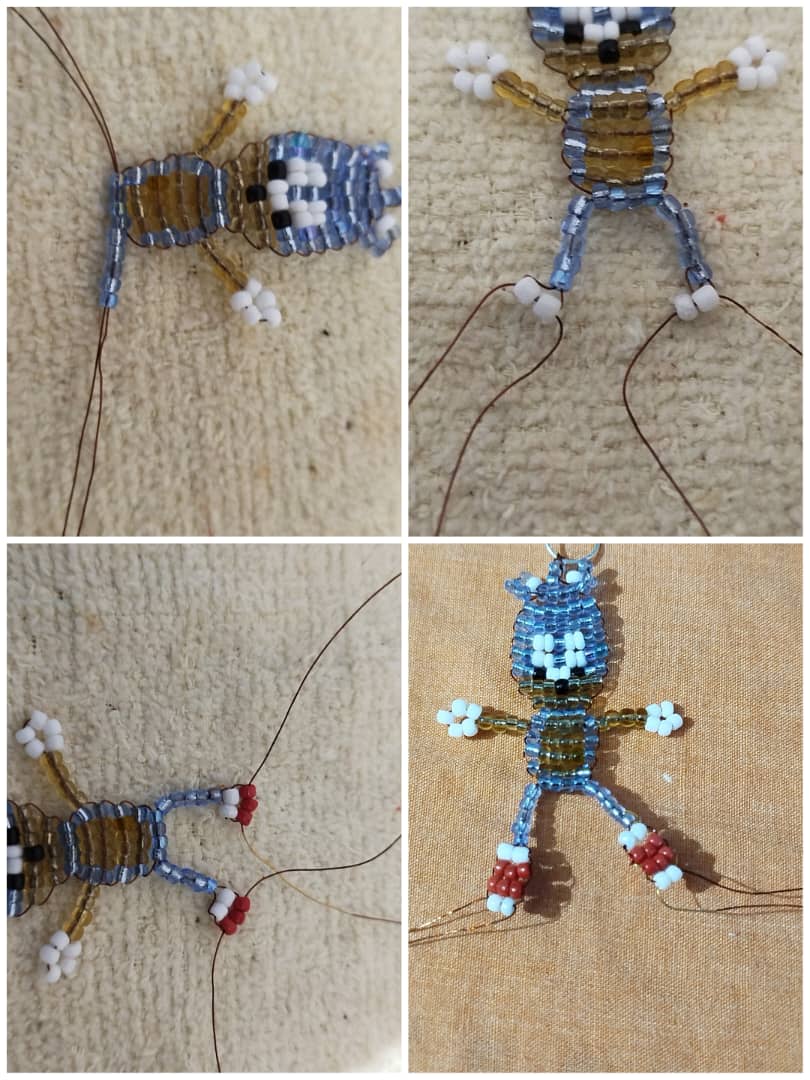
Y de está manera le hice uno de sus muñecos favoritos a mi nieto...y yo feliz de que le haya gustado ☺️.
And this way I made one of my grandson's favorite dolls... and I'm happy that he liked it ☺️.

Gracias por visitar mi publicación!!
Thanks for visiting my post!!
Wow, that was amazing. I really liked it. It was especially beautifully designed.
Gracias 😊 me alegra te haya gustado. Saludos
Gracias 😊 me alegra te haya gustado. Saludos
It looks pretty cool. It is beautiful, and stylish. It is good to see how you made it. Great job! Thanks!
Muchas gracias 😊 bendiciones
Wow it's so creative. You have made such a beautiful pendant for this child. Amazing
Gracias ☺️ saludos