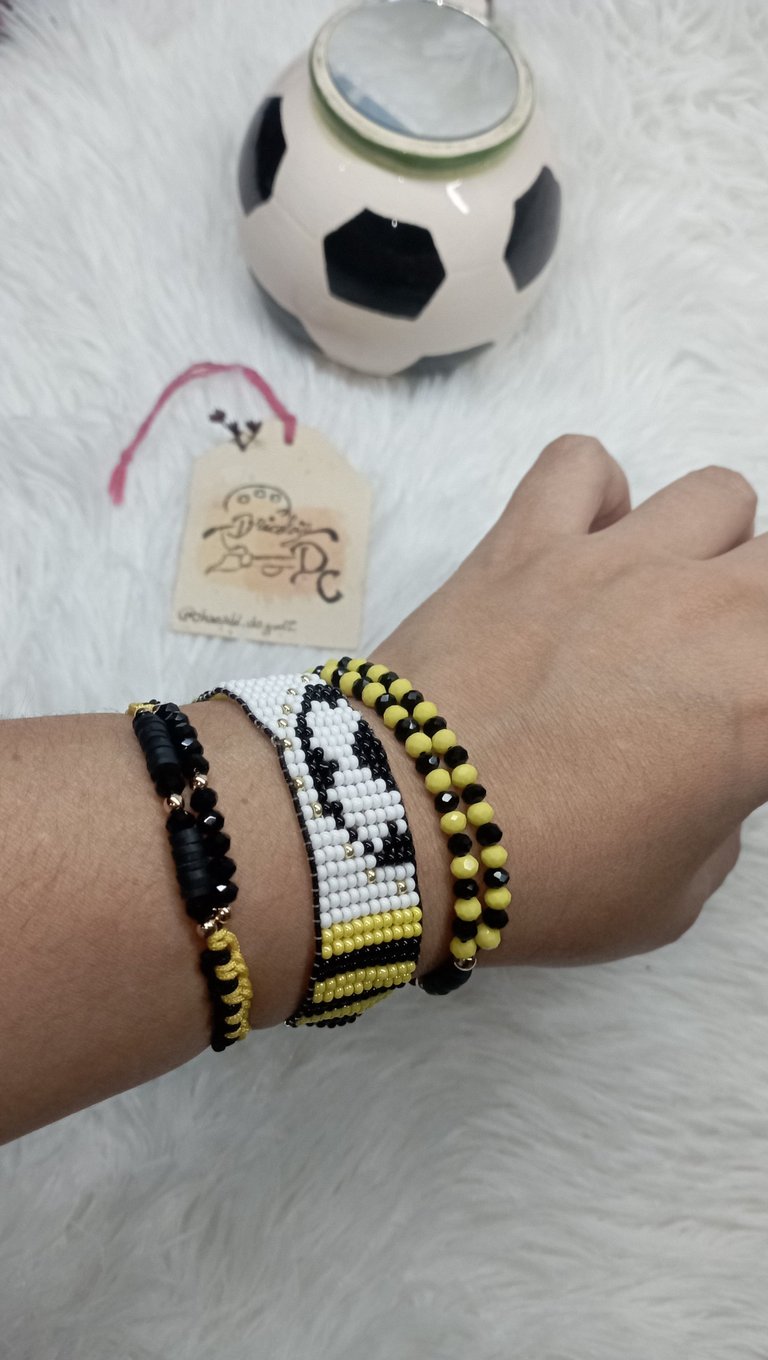
Greetings friends who love handicrafts! Welcome once again to my workshop @bricolajedc. Today I would like to share with you a technique that my DIY jewelry teacher taught me to make tassels in a simple way and be able to decorate an aurinegro bracelet alluding to the Táchira sports team. Join me and I'll show you this creative process.
Saludos amigos amantes de las artes manuales! Sean bienvenidos una vez más a mi taller @bricolajedc. Hoy me gustaría compartir con ustedes una técnica que me enseñó mi profesora de bisutería DIY para hacer borlas de forma sencilla y poder adornar una pulsera aurinegro alusiva al deportivo Táchira. Acompáñenme y les muestro este proceso creativo.
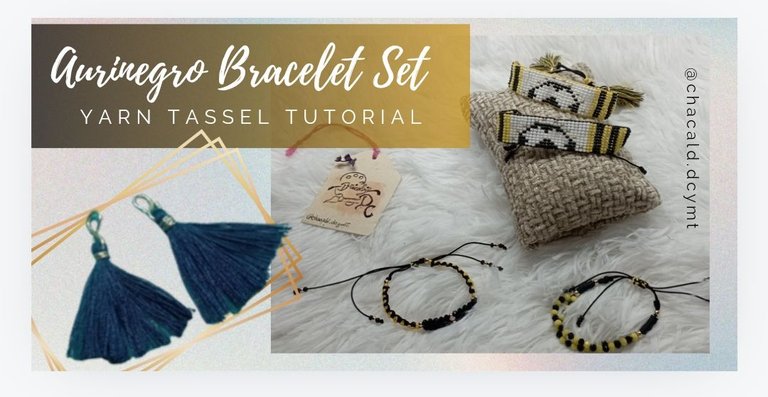
Set de Pulseras aurinegro: Tutorial de borlas de hilo
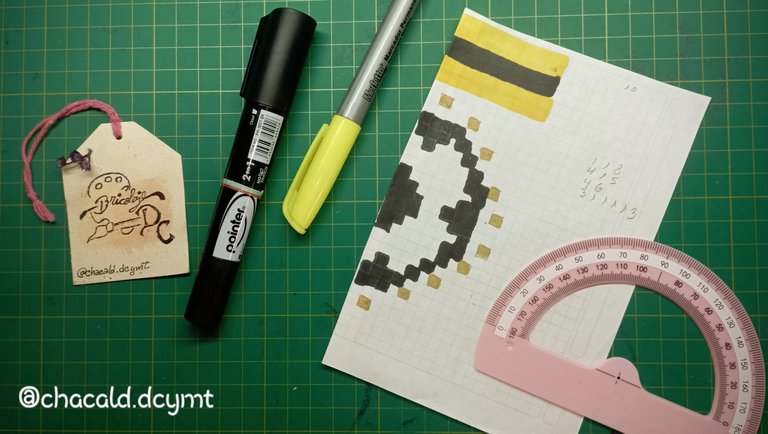
Let's divide the creation of this set of bracelets into processes. Starting with the design.
Bracelet set design
For this we need a sheet of graph paper, markers in the colors of the design, in this case yellow, black and gold.
We will make something that is allusive to the Táchira sports team. I made half a soccer ball and the stars of the titles the team has won around it. And of course the characteristic yellow and black colors in stripes.
Vamos a dividir en procesos la creación de este juego de pulseras. Comenzando por el diseño.
Diseño del set de Pulseras
Para esto necesitamos una hoja de papel cuadriculado, marcadores de los colores del diseño, en este caso amarillo, negro y dorado.
Haremos algo que sea alusivo al equipo del deportivo Táchira. Hice medio balón de fútbol y las estrellas de los títulos que ha ganado el equipo alrededor. Y por supuesto los colores característicos amarillo y negro en franjas.
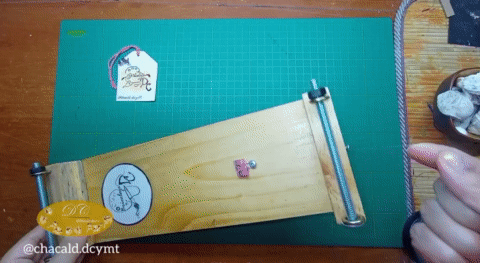
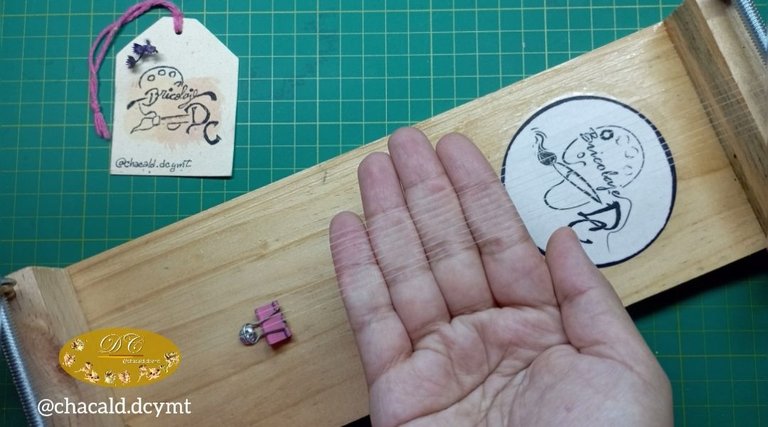
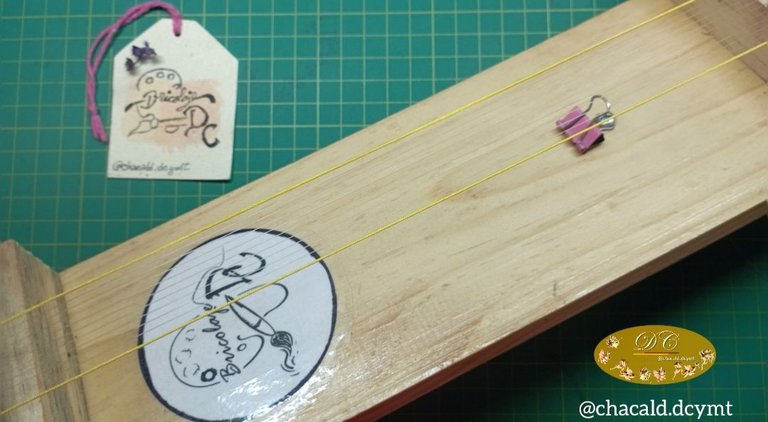
Assembling the loom
We are going to need black or yellow Chinese thread, nylon thread and a mustard needle.
We count the rows of mustard to be able to pull out the strands of yarn. There are 10 for the whole design so we mount 9 strands of nylon thread and 2 strands of Chinese thread at the ends.
Montando del telar
Vamos a necesitar hilo chino de colo negro o amarillo, hilo de nilón y aguja para mostacilla.
Contamos las filas de mostacilla para poder sacar las hebras de hilo. Son 10 para todo el diseño por lo que montamos en el telar 9 hebras de hilo de nilón y 2 de hilo Chino por los extremos.
 |  |
|---|
Knitting the design
As I have explained in the previous tutorials, we are going to knit by counting each row of mustard, pass under the ground yarns and return the needle over the base yarns.
Tejido del diseño
Al igual que he explicado en los tutoriales anteriores, vamos a tejer contando cada fila de mostacilla, pasamos por debajo de los hilos de baje y regresamos la aguja por encima de los hilos de base.
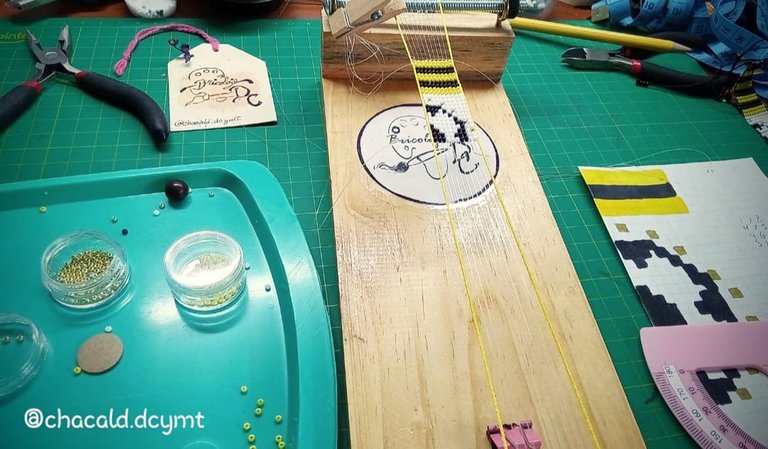
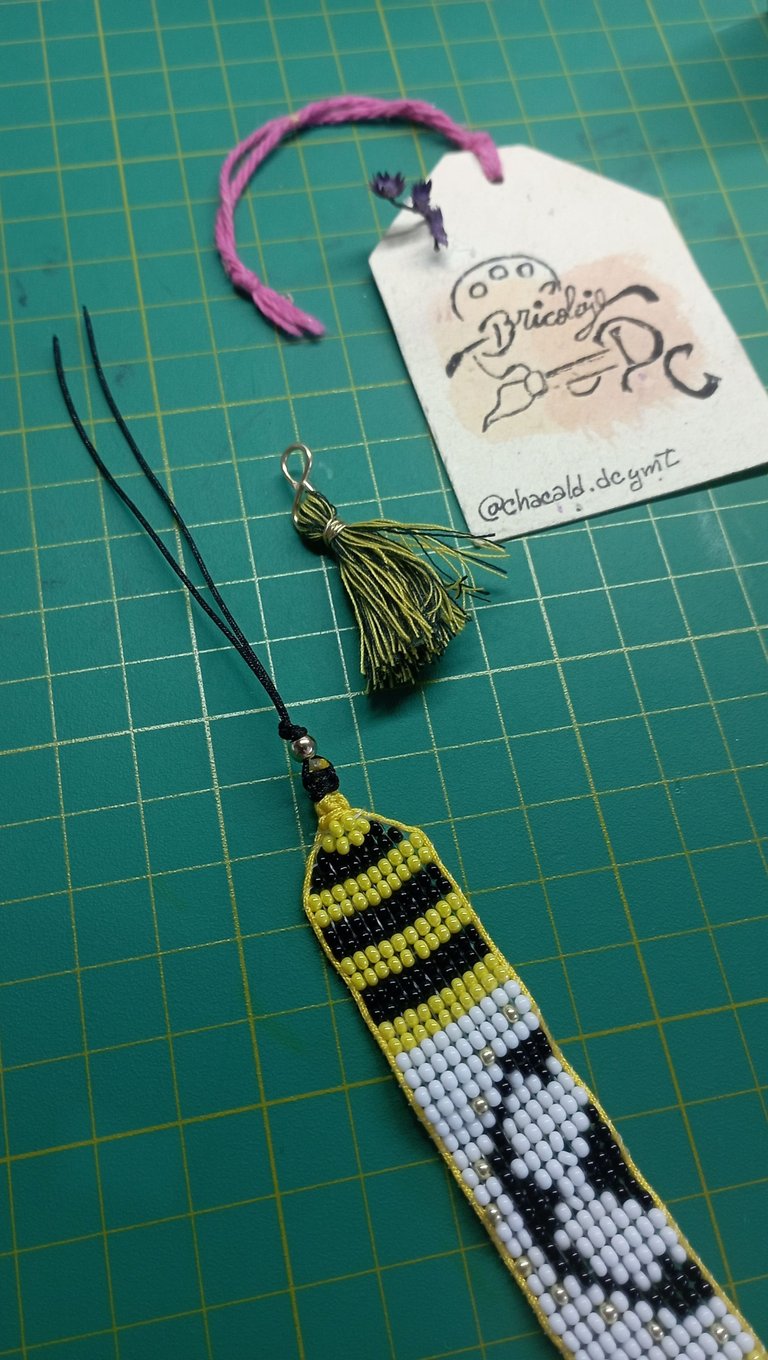
When we have all the design transferred to the beads, we make the necessary reductions to make the corner knots. Then we are ready to make the tassels.
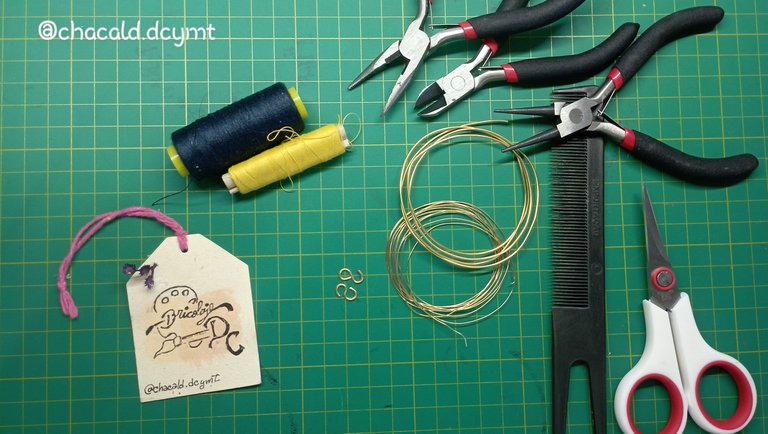
Decorative tassels
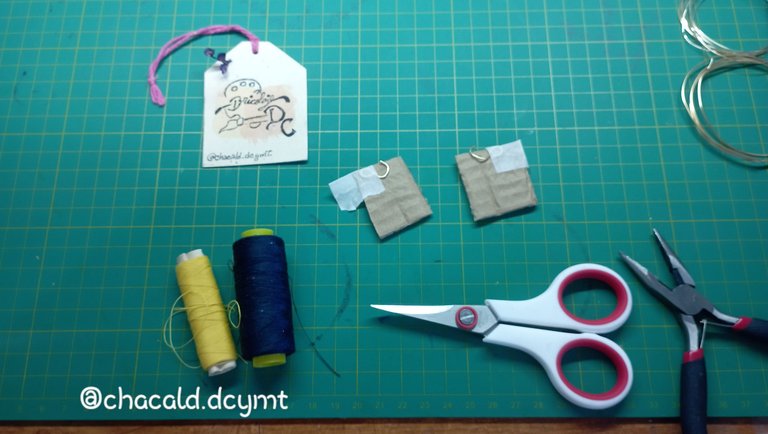
These are my favorite tassels to decorate costume jewelry accessories. For their elaboration we will need: 6 centimeters of #16 costume jewelry wire, 9 centimeters of #26 wire, fine thread or fishing line, costume jewelry pliers, piece of cardboard, scissors, fine comb and paper tape.
Cuando tengamos todo el diseño transferido a la mostacilla, hacemos las reducciones necesarias para hacer los nudos de las esquinas. Entonces estamos listos para hacer las borlas.
Borlas decorativas
Estas son mis favoritas para adornar los accesorios de bisutería. Para su elaboración vamos a necesitar: 6 centímetros de alambre de bisutería #16, 9 centímetros de alambre #26, hilo fino o sedalina, pinzas para bisutería, trozo de cartón, tijera, peine fino y cinta adhesiva de papel.
We start making the brooches. We take the round pliers and with the #16 wire, which is thick, we make a turn on the thickest side of the cone.
Comenzamos haciendo los broches. Tomamos la pinza redonda y con el alambre #16 que es grueso, hacemos una vuelta por el lado más grueso del cono.
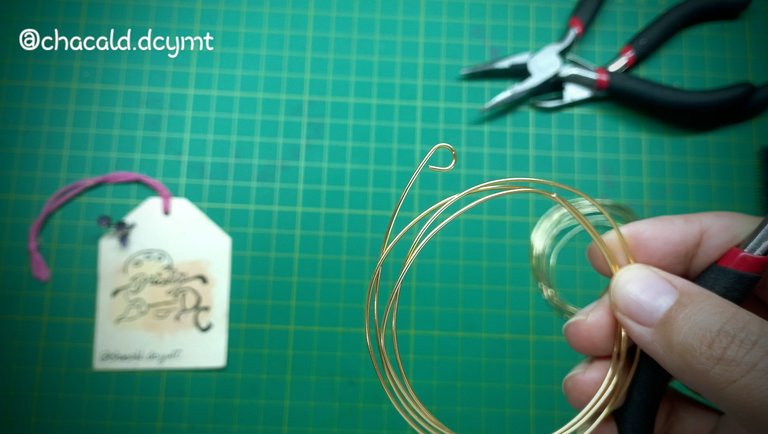
At the base of the round, we are going to take with the round pliers, this time with the middle side of the cone. We make an inverse turn to the previous one to form an 8.
En la base de la vuelta, vamos a tomar con la pinza redonda, esta vez con el lado del medio del cono. Hacemos una vuelta inversa a la anterior para formar un 8.
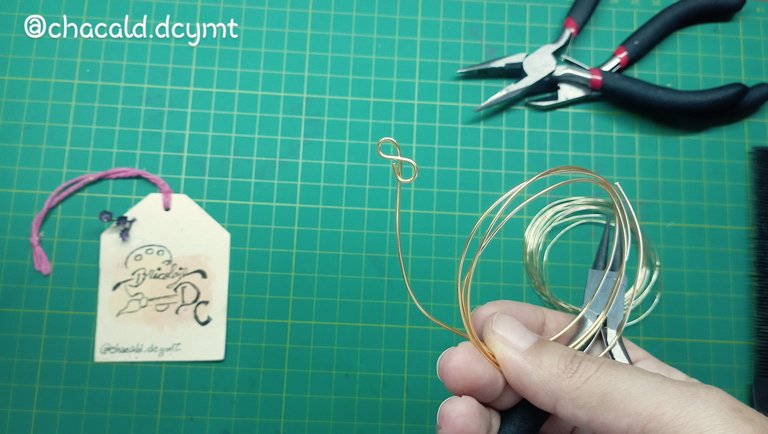
Then with the cutting pliers we are going to cut just where the second loop ends.
Luego con la pinza de corte vamos a cortar justo donde termina la segunda vuelta.
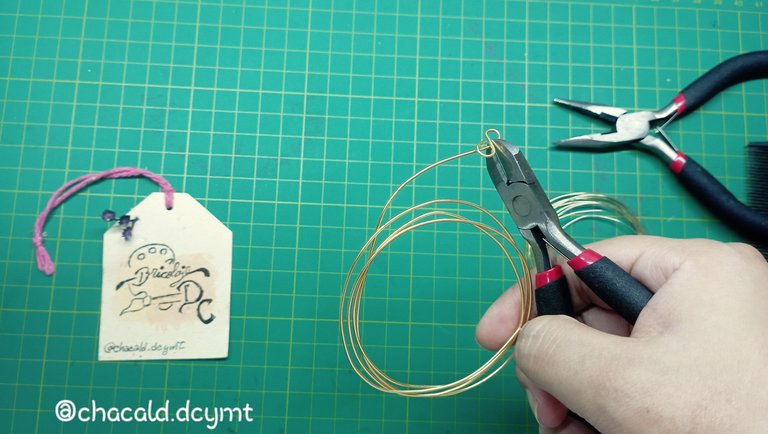
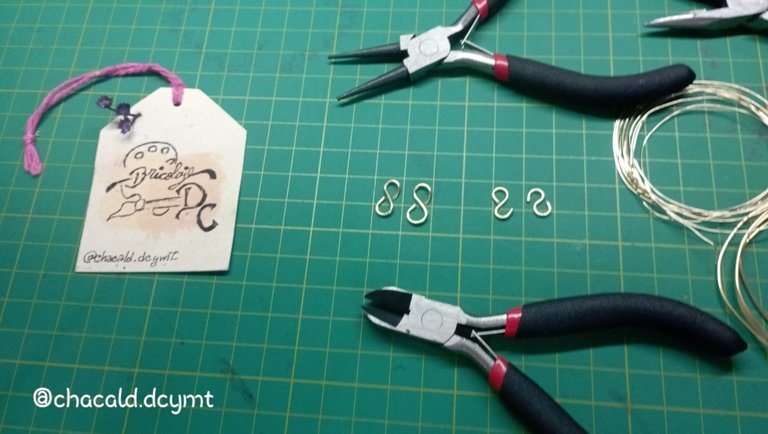
And that's it. We have our brooches.
Y listo. Tenemos nuestros broches.
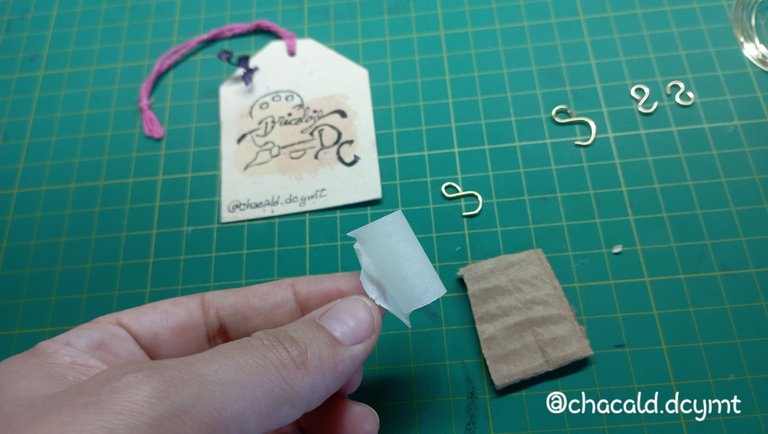
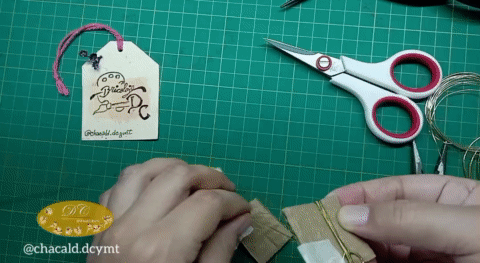
Now cut a piece of cardboard 2 cm high. On the top of the cardboard we are going to tape one of the open brooches on the wider ring.
Ahora cortando un trozo de cartón de 2 centímetros de alto. En la parte superior del cartón vamos a pegar con la cinta adhesiva uno de los broches abiertos en la argolla más ancha.
 |  |
|---|
We take the thread and wind it through the cardboard 100 times. In this case I used the 2 colors of the bracelet and it was much faster. Achieving the aurine-black effect I wanted.
Tomamos el hilo enrollamos hasta pasarlo 100 veces por el cartón. En este caso utilicé los 2 colores de la pulsera y fue mucho más rápido. Logrando el efecto aurinegro que quería.
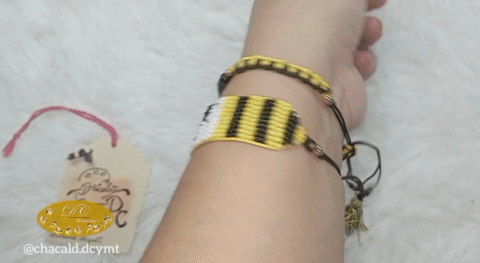
And so are our tassels, ready to place on the ends of bracelets or any other DIY jewelry accessory. We can comb them to make them look better.
Y así quedan nuestras borlas, listas para colocar en los extremos de las pulseras o de cualquier otro accesorio de joyería DIY.podemos peinarlas para que queden mejor.
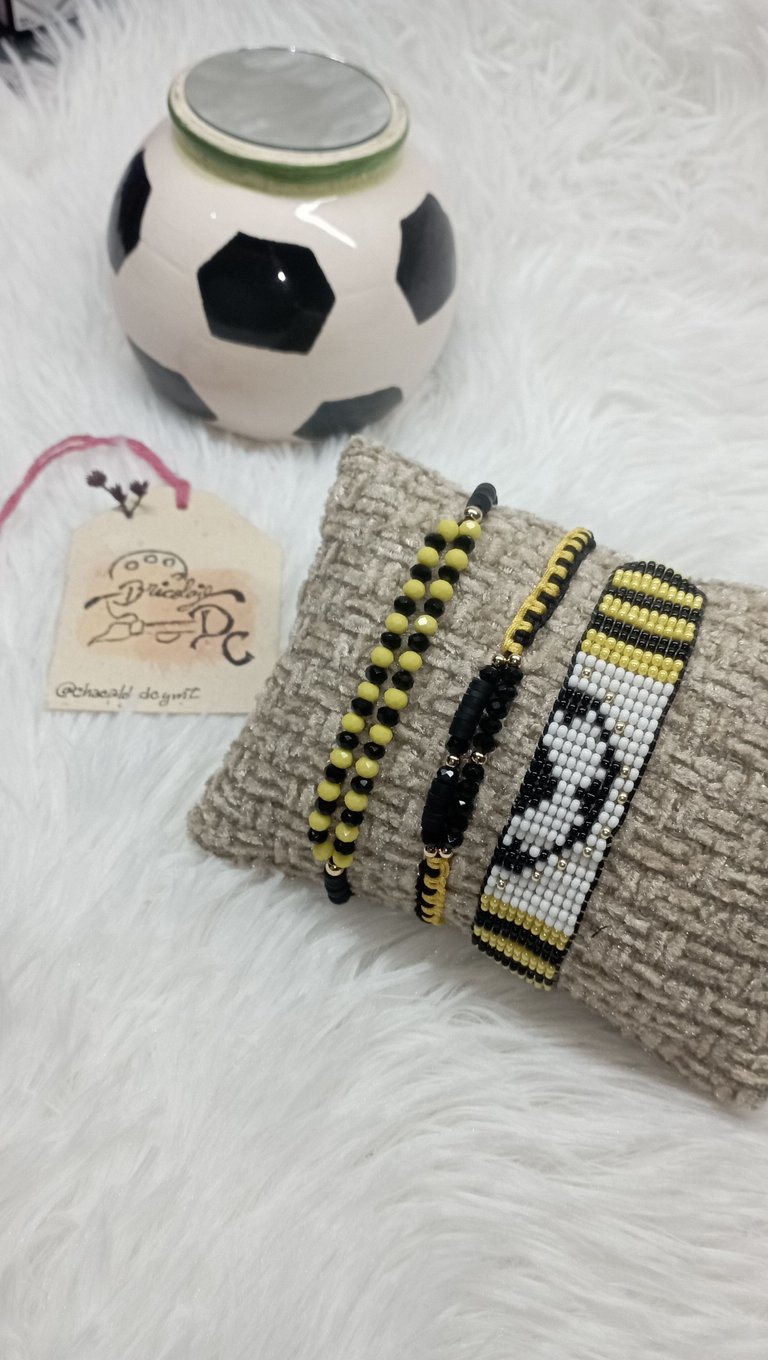
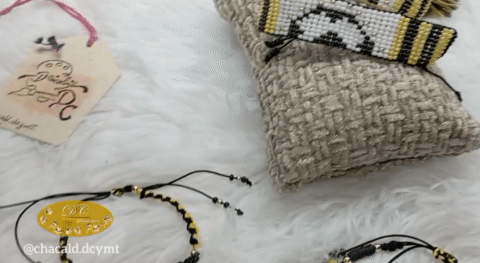
The only thing left to do is to assemble other simple bracelets to go along with the mustard bracelet. For that we will use the loom, yellow and black crystals and golden beads.
And this is how we can give a different touch to our jewelry accessories, with these simple thread tassels.
Solamente nos queda montar otras pulseras sencillas que acompañen al brazalete de mostacilla. Para eso vamos usar el telar, cristales amarillos y negros y balines dorados.
Y así es como podremos darle un toque diferente a nuestro accesorios de joyería, con estas sencillas borlas de hilo.
I hope you like this tutorial for making our own yarn tassels. See you next time. Bye!
Espero les guste este tutorial para hacer nuestras propias borlas de hilo. Nos vemos en una próxima oportunidad. Chao!
Jewelry set available in my virtual store @bricolajedc contact us
_
Juego de joyería disponible en mi tienda virtual @bricolajedc contactanos
Original content by the author.
Resources: App: Canva / Giphy / Inshot
📷 Redmi 10 Smartphone
Translation done with Deepl.com
✿ All Rights Reserved || © @chacald.dcymt 2024✿
💌 Discord: chacald.dcymt#3549
X: @chacald1
Reddit: chacald
_
Contenido original del autor.
Recursos: App: Canva / Giphy / Inshot
📷 Redmi 10 Smartphone
Traducido con Deepl.com
✿ Todos los Derechos Reservados || © @chacald.dcymt 2024✿
💌 Discord: chacald.dcymt#3549
X: @chacald1
Reddit: chacald
@chacald.dcymt que trabajo más fino amiga, que bellas esas pulseras.
Muchas gracias hermosa...me alegra que te gusten 😊
Weldone and thanks for sharing
Thank you ☺️... Thank you for your visit.
The final result is stunning, thanks for teaching us this technique of yours as your tutorial is great. Thanks for sharing and keep up the good work.
I am glad to know that my work is to your liking. I hope to continue sharing this kind of tips for artisans. Thank you very much for your support.
Ohhhhhhh. Que bellezaaaaa ame todo tu trabajo de principio a fin. Cada día me enamoro más de este estilo de pulseras.
Gracias por regalarnos tu bello trabajo 💖😍
!DIY
!LADY
!PIZZA
Gracias hermosa... Me alegra saber que te gustó. Disfruto mucho haciendo cada trabajo. Muchas gracias por el apoyo. Un abrazo infinito 😘💜
!HUG
You can query your personal balance by
!DIYSTATSGracias por el apoyo 😊
Lovely bracelets
@bricolajedc
Hermosa trabajo 💕
Gracias hermosa 😊... Nada como tener al equipo favorito en un brazalete. Gracias por el apoyo 😘💜🫶🏽
Que hermosas pulseras es difícil elegir mi favorita, todas se ven espectaculares, además una gran combinación de colores, excelente trabajo 😍👍
Saludos!