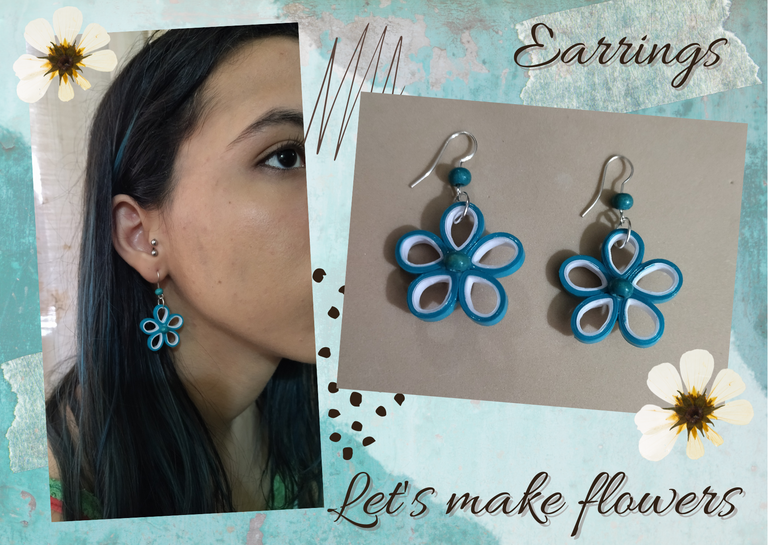
Hello everyone... 🐱🐾💕
Hello to my dear Hiver and the dear community of #Jewelry, first of all a very special greeting full of blessings for the creators, and of course for those who make life in this beautiful community. I am very pleased to be here to show you a new work full of love, and especially for you.
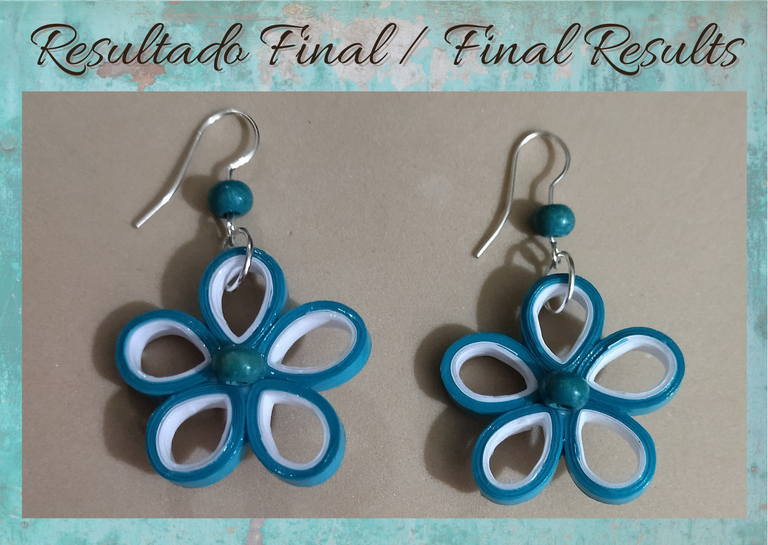
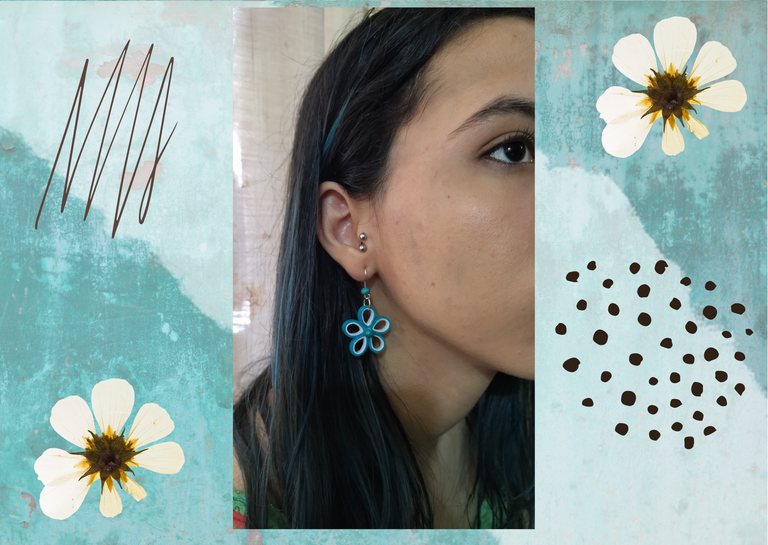
For today I bring you some dangling earrings in the shape of a flower with 5 petals, made with the quilling technique. You can make them in the size and color of your choice to wear with your daily outfit. Hoping that you like them, here is the procedure.
Let's get started:😃

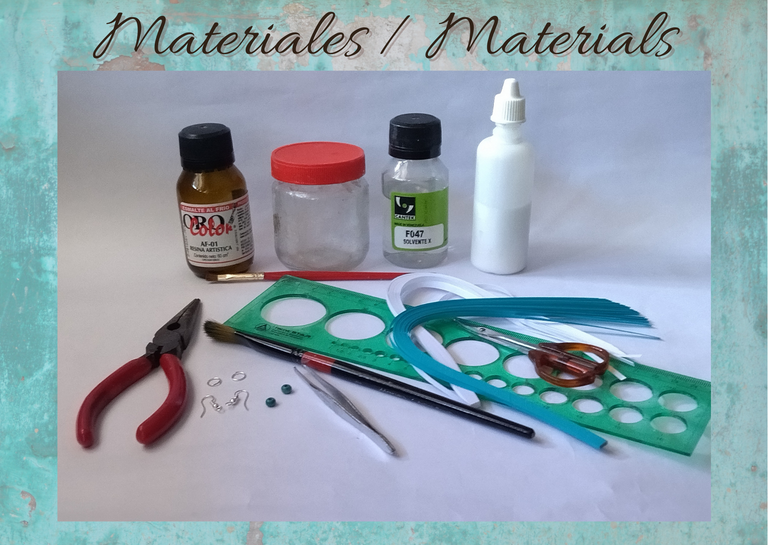
- Quilling ribbons 3mm wide, white and aquamarine, (or the color of your choice).
- Brush with a thickness of 6mm circumference, (or the size you want to make the petals of your flowers).
- Scissors.
- White glue.
- Medium wooden beads, aquamarine color, (or the color of your preference).
- Fine tip tweezers.
- Medium size costume jewelry earrings.
- Base for hanging tendrils (hooks).
- Fine nose pliers.
- Artistic resin.
- Solvent X.
- Glass flask.
- Brush.

Hola a todos... 🐱🐾💕
Hola a mis queridos Hiver y a la querida comunidad de #Jewelry, ante todo un saludo muy especial lleno de bendiciones para los creadores, y por supuesto para los que hacen vida en esta bonita comunidad. Me encuentro muy complacida de encontrarme por acá para mostrarles un nuevo trabajo lleno de amor, y especialmente para ustedes.
Para el día de hoy les traigo unos pendientes colgantes con forma de flor de 5 pétalos, elaborados en la técnica de quilling. Los pueden realizar del tamaño, y color de su preferencia para lucir con su atuendo diario. Esperando que sean de su agrado, por acá les dejo el procedimiento.
Comencemos:😃

• Cintas de quilling de 3mm de ancho, blancas y aguamarina, (o del color de tu preferencia).
• Pincel con un espesor de 6mm de circunferencia, (o del tamaño que desees realizar los pétalos de tus flores)
• Tijera.
• Pega blanca.
• Perlas de madera medianas, color aguamarina, (o del color de tu preferencia).
• Pinza punta fina.
• Argollas medianas de bisutería.
• Base para zarcillos colgante (anzuelos).
• Alicate punta fina.
• Resina artística.
• Solvente X.
• Frasco de vidrio.
• Pincel.

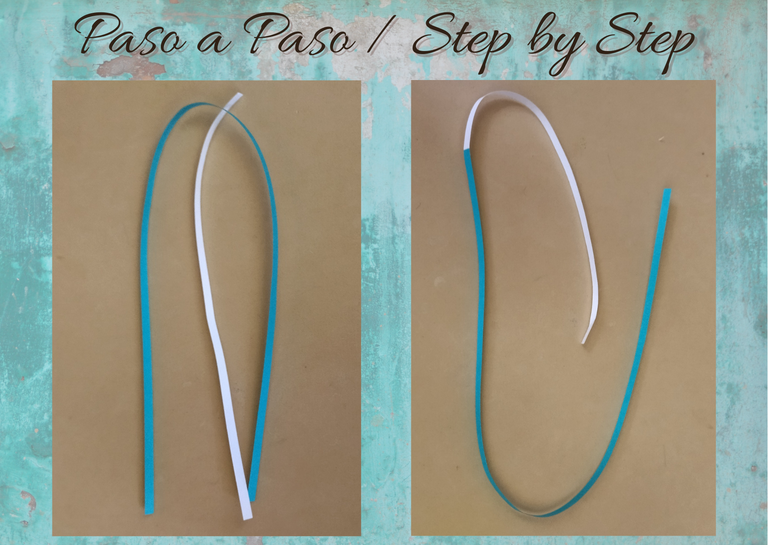
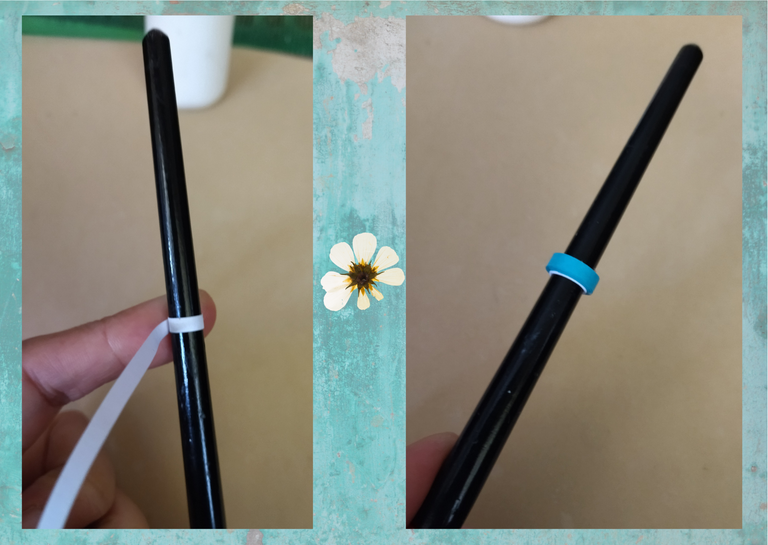
- Making the petals: For each flower we will need 5 petals, since I am going to make a pair of earrings, we will have to double the amount, therefore, we will need to make 10 petals. We take a white quilling ribbon 3mm wide x 14cms long, and an aquamarine quilling ribbon 3mm wide x 28cms long, and we join them both with a touch of glue to form a single ribbon.
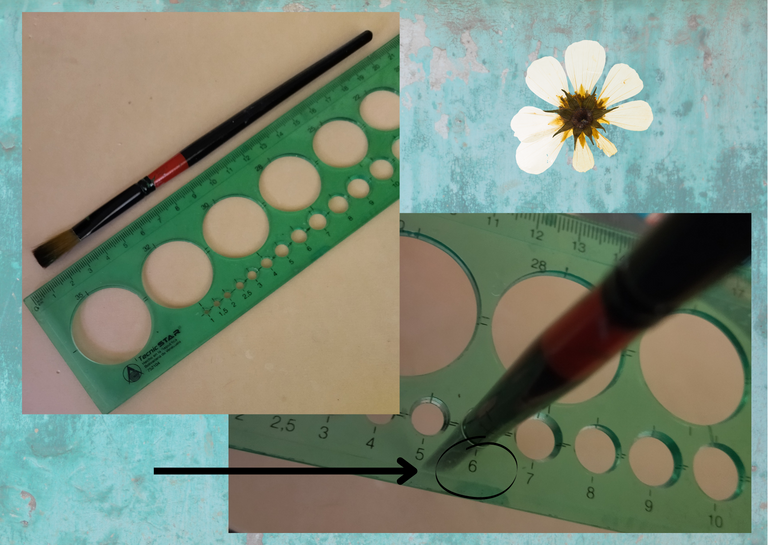
- We are going to take a thick brush, in my case I used one for the part that measures approximately 6mm of circumference, since it is the size I want for my petals, I calculated this with a ruler with circumference measurements, you can decide what size you want your petals, according to this will be the size of your flowers.

• Elaboración de los pétalos: Para cada flor necesitaremos 5 pétalos, ya que voy a realizar un par de pendientes, tendremos que duplicar la cantidad, por ende, necesitaremos hacer 10 pétalos. Tomamos una cinta de quilling color blanca de 3mm de ancho x 14cms de largo, y una cinta de quilling color aguamarina de 3mm de ancho x 28cms de largo, y las unimos ambas con un toque de pega para formar una sola cinta.
• Vamos a tomar un pincel grueso, en mi caso use uno por la parte que mide aproximadamente 6mm de circunferencia, ya que es el tamaño que deseo para mis pétalos, esto lo calcule con una regla con medidas de circunferencia, ustedes pueden decidir de qué tamaño desean sus pétalos, según esto será el tamaño de sus flores.
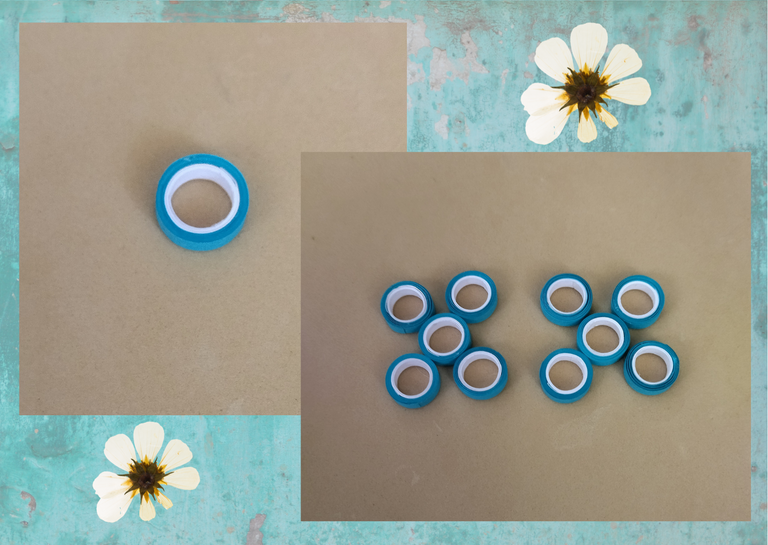
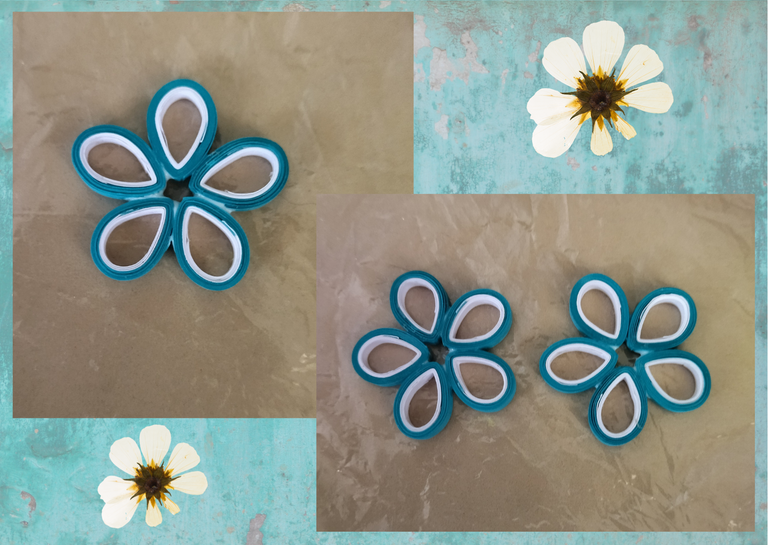
- Now we will take the quilling ribbon that we previously joined, and we will begin to roll around the brush on the white part, we finish rolling on the aquamarine part, we seal with a glue dot, and we take it out of the brush. We will repeat this same process until we have our 10 petals.
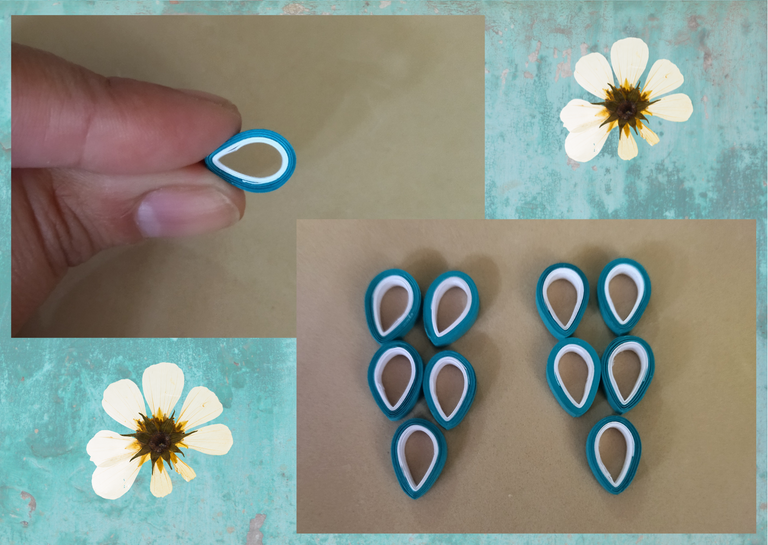
- Now we have the 10 circles ready, we are going to mold them to give them the shape of petals, with our fingers we pinch the tip of the circle, and in this way we will get the desired shape that would be the shape of a drop or tear, we repeat with the remaining circles.

• Ahora tomaremos la cinta de quilling que unimos previamente, y comenzaremos a enrollar alrededor del pincel por la parte blanca, terminamos de enrollar por la parte aguamarina, sellamos con un punto de pega, y sacamos del pincel. Este mismo proceso lo repetiremos hasta tener nuestros 10 pétalos.
• Ya tenemos los 10 círculos listos, vamos a moldear para darles forma de pétalos, con nuestros dedos pellizcamos en la punta del círculo, y de esta manera conseguiremos la forma deseada que vendría siendo la forma de una gota o lagrima, repetimos con los círculos restantes.
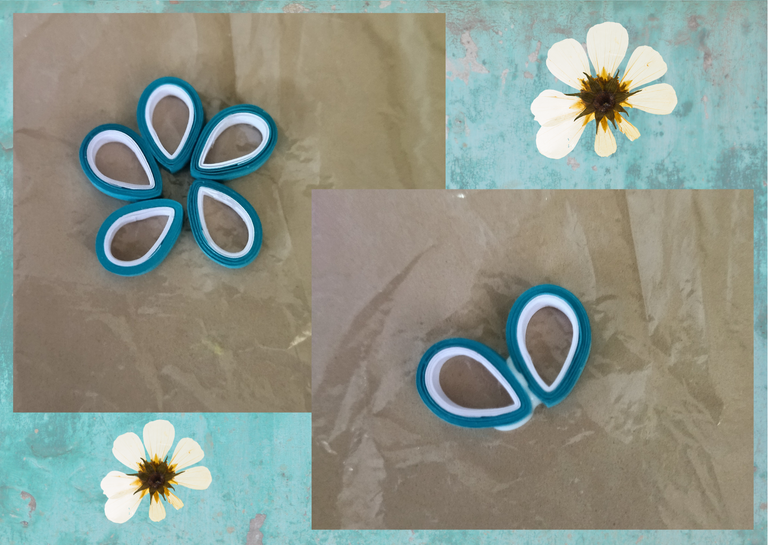
- Now we are going to form the flower, we put glue on the tips of the 5 petals, and we will join them in a harmonious way.
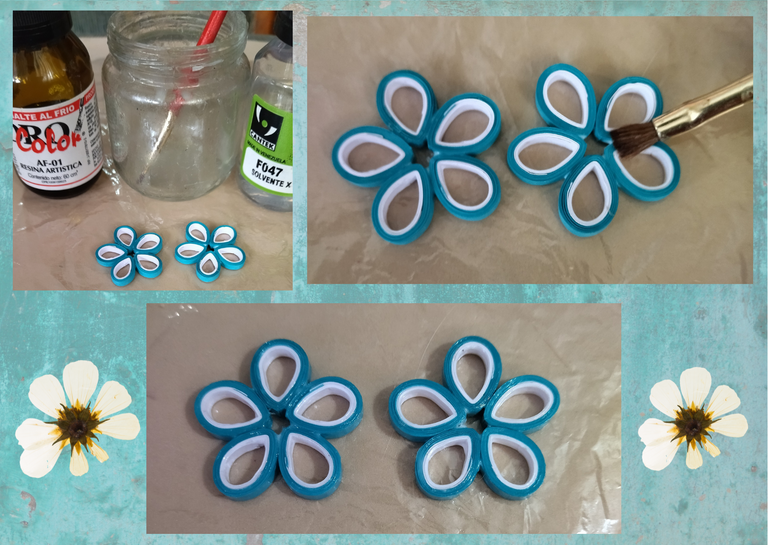
- We will put the pieces together with their liquid protection (plasticized), we take the glass bottle, put a part of artistic resin, solvent x, stir with a brush and apply on all parts of our flower, let it dry.

• Ahora vamos a formar la flor, colocamos pega en las puntas de los 5 pétalos, y uniremos de manera armoniosa.
• Unidas las piezas vamos a colocarle su protección liquida (plastificado), tomamos el frasco de vidrio, colocamos una parte de resina artística, solvente x, revolvemos con un pincel y aplicamos en todas las partes de nuestra flor, dejamos secar.
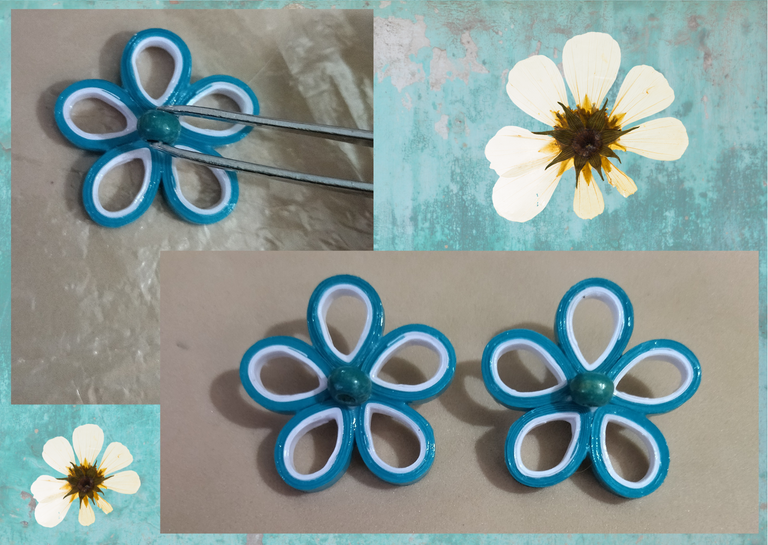
- Now let's place a detail to the flower to make it more showy and cover the detail that has in the middle, we will place an aquamarine wooden bead on both sides with a little glue, let it dry.
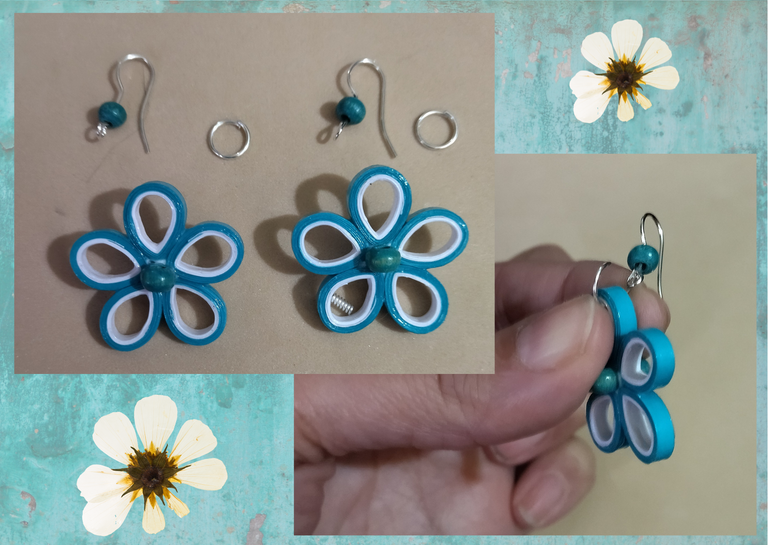
- To finish we will place the ring, and the base for hanging tendrils (hooks), to our flowers, previously I placed a wooden pearl to the hook to give it more colorful and beautiful detail.
This way we will have our earrings ready for use.

• Ahora coloquemos un detalle a la flor para hacerla más vistosa y tapar el detalle que tiene en medio, colocaremos una perla de madera color aguamarina por ambos lados con un poco de pega, dejamos secar.
• Para finalizar colocaremos la argolla, y la base para zarcillos colgante (anzuelos), a nuestras flores, previamente le coloque una perla de madera al anzuelo para darle mayor vistosidad y detalle bonito.
De esta manera tendremos nuestros pendientes listos para su uso.

What did you think, did you like it?
I hope you did, I hope you liked my explanation, procedure and photos, I made them with love for you.
"Let out that muse that inspires you, and let your imagination fly".
Thank you all, see you next time. 🐾🐱💕

¿Que les pareció, les gustó?
Espero que sí, que les haya gustado mi explicación, procedimiento y fotos, los hice con mucho cariño por y para ustedes.
"Deja salir esa musa que te inspira, y deja volar tu imaginación".
Gracias a todos, nos vemos en la próxima. 🐾🐱💕

Todas las fotos usadas en este post son de mi autoría y han sido sacadas en mi celular personal un Redmi 9T y editadas Canva Banner hecho por mí en Paint Tool Sai Traducido con la ayuda de DeepL

Muchas gracias por el apoyo @rutablockchain ✨
Thank you for sharing this amazing post on HIVE!
Your content got selected by our fellow curator @hafizullah & you just received a little thank you via an upvote from our non-profit curation initiative!
You will be featured in one of our recurring curation compilations and on our pinterest boards! Both are aiming to offer you a stage to widen your audience within and outside of the DIY scene of hive.
Join the official DIYHub community on HIVE and show us more of your amazing work and feel free to connect with us and other DIYers via our discord server: https://discord.gg/mY5uCfQ !
If you want to support our goal to motivate other DIY/art/music/homesteading/... creators just delegate to us and earn 100% of your curation rewards!
Stay creative & hive on!
Thanks for the support @diyhub 💫
PIZZA Holders sent $PIZZA tips in this post's comments:
@blitzzzz(7/20) tipped @dayadam (x1)
You can now send $PIZZA tips in Discord via tip.cc!
Thanks @pizzabot 🍕🍕🍕🥰
The rewards earned on this comment will go directly to the people( @dayadam ) sharing the post on Twitter as long as they are registered with @poshtoken. Sign up at https://hiveposh.com.
Thanks @poshtoken ✨
Congratulations @dayadam! You have completed the following achievement on the Hive blockchain and have been rewarded with new badge(s):
Your next target is to reach 2000 replies.
You can view your badges on your board and compare yourself to others in the Ranking
If you no longer want to receive notifications, reply to this comment with the word
STOPSupport the HiveBuzz project. Vote for our proposal!
Thanks @hivebuzz 💫
You're welcome @dayadam. 🌹🌹🌹
BTW, we need your help!
May we ask you to support our proposal so our team can continue its work?
You can do it on Peakd, ecency,
https://peakd.com/me/proposals/199
Your support would be very helpful.
Thank you!
Hey sweetie a nice technique you have made the sweetest quilling earrings...I am surprised at how talented you are....I am also trying to make a bracelet with the threads and soon I will share here.
Hello heart @uop. Thank you very much for your visit and beautiful comment, it is of great value to me. I'm glad you liked my work today.
Wowww how nice that you also make jewelry and thread works, I want to see them. As soon as you do something let me know to see it.
A big HUG for you, and a world of blessings 🍕🌺😘🤗💫✨🌞🌈🌹🐾💐💕❤️🌸😍😻😚
Sure darling ☺️ I'll soon show you 🥰
Hello, they are cute.
I like handmade things and they look great on you.
Thank you very much. I'm so glad you like them. Always at your service. You are cordially invited to visit my humble blog whenever you like, now is that there will be new works that I hope you will like.
Greetings @ipexito 🌈🌺💕🤗😘😻🐱🐾🍕😚✨🌹❤️🥰💗🌸💐💫😍
Los zarcillos quedaron muy lindos. El color que elegiste es uno de mis favoritos 😍
Hola @karlagon gracias por tu comentario. A mí también me encanta ese color y combinación. Me alegra que te haya gustado mi trabajo. Saludos 🤗
Esta técnica es nueva para mí. Quizá hace muchos años realicé algo con cintas, sin embargo reconozco que no ha Sido un material que yo manipule con seguridad.
Según explicas, es un proceso sencillo, podría aprender. Te quedó muy linda tu creación de hoy.
Hola amiga @creacioneslelys. Me encanta mostrar algo nuevo a una gran artista como tú que hace maravillas con sus manos, tiene gran talento y es un honor para mí que tengas interés por mis trabajos de aprender la técnica.
Muchas personas temen trabajar con quilling por ser cintas de papel, pero mientras que protejas tu trabajo no hay ningún problema. En mi caso que dirijo está técnica en muchas ocasiones a la parte de bisutería hace algunos años, utilizo resina, brillo sellador o cualquiera de esos productos que plastifiquen por completo la pieza, al colocarle varias capaz su acabado queda como si manipularas un plastico reluciente, tengo piezas de años y están intactas, al igual que mis clientes, jamás he tenido quejas. Lo que si recalco es que son piezas para lucir, no para mojarlas ni nada por el estilo. Mientras tengas los cuidados necesarios tendrás tus piezas para siempre. Gracias por pasar y comentar. Saludos. 🤗🥰😘💫✨🌺🌈🌞
¡Wow! Son toda una obra de arte, de verdad me encantó tu trabajo, quedó precioso, se ven elegantes.
Graciasssss @bethyjade. Que bonito comentario. Me encanta que te gustarán, siempre serás bienvenida a mi humilde blog y ante cualquier duda aquí estoy para aclarar. Si me visitas puedes ver muchos otros trabajos bajo está técnica. Abrazos y bendiciones. 🌞🌈🌺✨🐱🌹🐾💫😘🥰🤗💐💕❤️🌸
Como siempre un gran paso a paso, esos zarcillos en Flor son hermosos, nos gusta mucho las medidas y como.lo haces, lo que más me gusta es como se ven con la pega parecen como plástico duro y muy elegantes, gracias por compartir tu técnica. Éxitos 🙌
Muchísimas gracias por el comentario @hive-189504, y el apoyo. Que bueno que te haya gustado mi trabajo.
Le aplicó resina artística diluida en solvente, lo que hace que el trabajo quede totalmente plastificado y protegido.
Gracias por sus deseos, igual para ti. Saludos 🌸❤️💕💐🤗🥰😘💫🐾🌹🐱✨🌺🌈🌞
Great to see yet another beautiful piece of handicraft from you again 😊.
!PIZZA
Thank you very much for your comment @blitzzzz. It is very nice for me to see you here. Regards. 🤗🥰😘🌺
Thanks for the 🍕🍕🍕🍕
Wow!
Your ear rings better than the rings we got in the market. You are really good at playing with paper.
Love your work. !LUV
Honey I don't know why I hadn't seen your comment. But I'm here late but sure. How beautiful your words really are for me is very motivating and a great honor to receive comments of this type.
You will always be welcome to my humble blog, you can visit it and see the variety of works of this type that I have and now many more will come.
If you have any questions I am at your service.
Hugs, success, greetings and many blessings to you @th4488 😚✨🌹❤️🥰💗🌸💐💫🌈🌺💕🤗😘😻🐱🐾🍕
Hello dayadam
It was a nice hug though it was not for me. It was for blitzzz😂😂😂.I always visit your post and ofcourse do comments. But recently I was sick and was not able to focus on what people are doing. I am sorry for that.
!LUV
@th4488(1/1) gave you LUV. tools | wallet | discord | community | <><
HiveBuzz.me NFT for Peace
If it was for you, honey @th4488. What played a dirty trick on me was when I was going to mention that I dialed the wrong person. Welcome always here. And I thank you again for your beautiful words. 🌹😻🐱🐾❤️💕🥰😘🌺🤗✨😍💫💐🌸💗😚🍕🌈🌞
¡Que lindos!
Felicidades.
Gracias cariño. Saludos @mariavargas 💗🌸💐💫
Una vez más te la comiste con este hermoso trabajo amoga 😍.
Me encantan estos colores combinan muy bien con cualquiera atuendo. Gracias por compartir este detallado tutorial.
Un abrazo infinito y lleno de bendiciones para ti.
🎆🎇🎉🎊🌧️💐✨🌾🌱🌹🌙🌿🍃🥀⚡🌺☘️🍀🌈🌷⭐🪴🌵🌸🌟💮🌴🌳💫☀️💮☔🌲🌳🌍🌌🌠☄️🏵️🐝🌻🌼🍄🐞🦋💙☕💜🍍🎆🎇🎉🎊
!LADY
View or trade
LOHtokens.@chacald.dcymt, you successfully shared 0.1000 LOH with @dayadam and you earned 0.1000 LOH as tips. (1/2 calls)
Use !LADY command to share LOH! More details available in this post.
Que belleza de trabajo nos dejas aca, me encanta la manera que lo explicas, nunca eh realizado trabajos con esta técnica, siempre tiendo a utilizar hilos! Aunque el acabado que le das con la resina es fabuloso 👏🤗 me gusta muchísimo @dayadam Gracias aprendo de ti cada dia!
Gracias cariño. Que hermoso comentario el que me dejas. De verdad es muy gratificante para mí viniendo de ti. Un gran honor saber que mi trabajo genera conocimientos e interés, a quien lo observa. Ante cualquier duda estoy a la orden cariño.
Un fuerte abrazo. Bendiciones @marleyn 😘🤗💕🌺🌈😚✨🌹❤️🥰💗🌸💐💫
For you !LADY
View or trade
LOHtokens.@brittandjosie, you successfully shared 0.1000 LOH with @dayadam and you earned 0.1000 LOH as tips. (5/10 calls)
Use !LADY command to share LOH! More details available in this post.