Saludos comunidad espero esten muy bien, por aquí me encuentro enseñándoles, a realizar un lindo pez Koi, me gusta todos los elementos que conlleva un mensaje o un símbolo de espiritualidad, este pez, en china y Japón es muy venerado para estas culturas este pez es símbolo de buena suerte, de prosperidad de amor y buena suerte.
Por supuesto, era algo que quería realizar, porque me gusta realizar accesorios de este estilo, que tengan un significado para quien lo use..
Pulsera Pez Koi 🐠
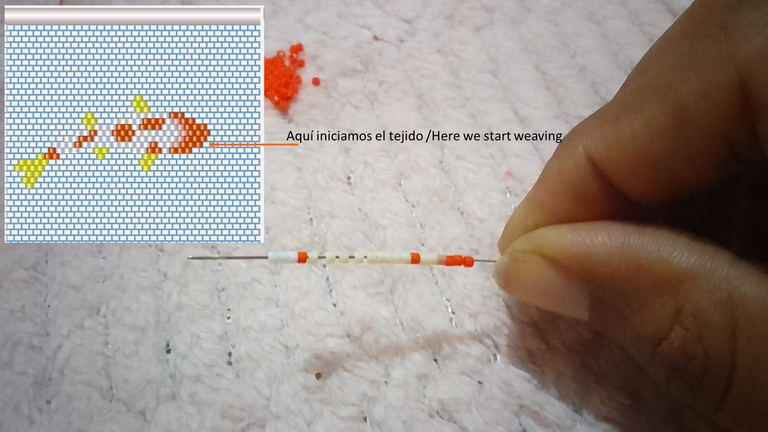
1- Primero, dibuje el patrón para determinar mas o menos los colores que quería para este brazalete.. usando la herramienta, Beadtool4.

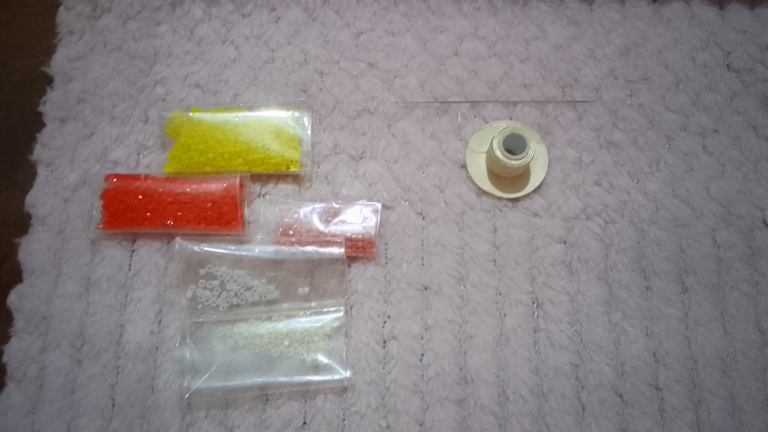
2- los materiales que utilice son delicas Miyuki, aguja big eye, hilo nylon marca nemo para delicas, hilo chino, mostacillon, alambre calibre # 20 para los aros de ensamblaje, y herramientas de bisuteria.
Para este pez utilice los colores de delica :
| Color | Código |
|---|---|
| Op ivory | DB0732 |
| Peach | DB 1363 |
| Op yellow | DB 0721 |
| Orange | DB 0722 |
| White | DB 0200 |
Manos a la obra: elaborando un Pez Koi 🐠
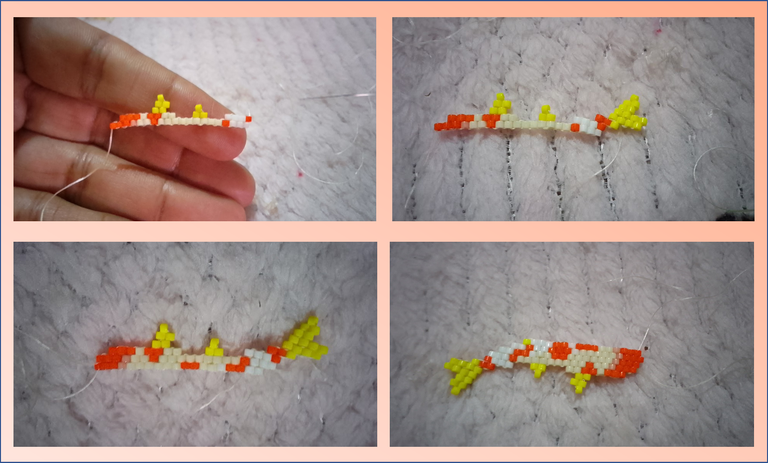
1- Para iniciar, enfile en la aguja 20 delicas, como se indica en la imagen, en ese orden, inicie desde esta fila a tejer para hacer el pez Koi, ustedes pueden iniciar de cualquier parte.
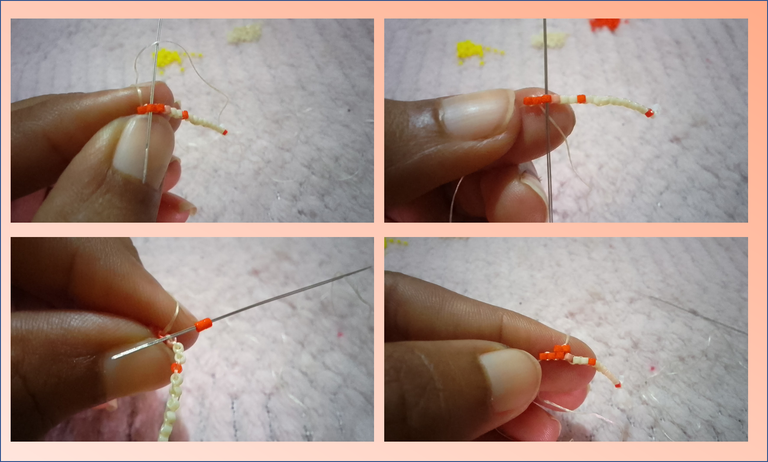
2- Luego, tenia que colocar las 20 delicas juntas una al lado de la otra, con la abertura hacia arriba para poder realizar los aumentos de los bloques, porque la técnica que estamos usando acá, es la brick stitch, lo hacemos de la siguiente manera, dejamos pasar una delica, a la segunda le pasamos la aguja de abajo hacia arriba y de esa forma las estamos juntando, ese proceso se repite con todas hasta tenerlas unidas con la ojo hacia arriba.

3- Al tenerlas así, comenzamos a construir la siguiente hilera de bloques, para ello, hacemos unas reducciones y nos devolvemos entre las delicas, como se ven en las imágenes, y desde allí comenzamos el tejido del siguiente bloque, cuando son figuras irregulares, siempre nos vamos a devolver entre delicas para colocar las piezas, y es allí donde radica la importancia de tener un patrón, así sabemos por donde vamos donde debemos salir para colocar las cuentas.
4- Y así pude realizar la parte de las aletas de uno de los extremos.. para luego devolverme y seguir con el tejido haciendo aumentos y decrementos para completar el pez.
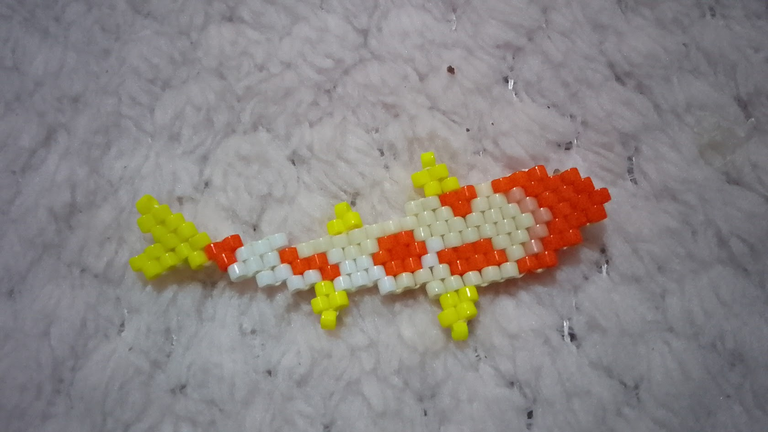
Así quedo el pez.
Elaborando la pulsera de Pez Koi 🐠
Teniendo ya listo la pieza central, tome hilo chino aproximadamente 50 cm, mostacillas amarillas y negras
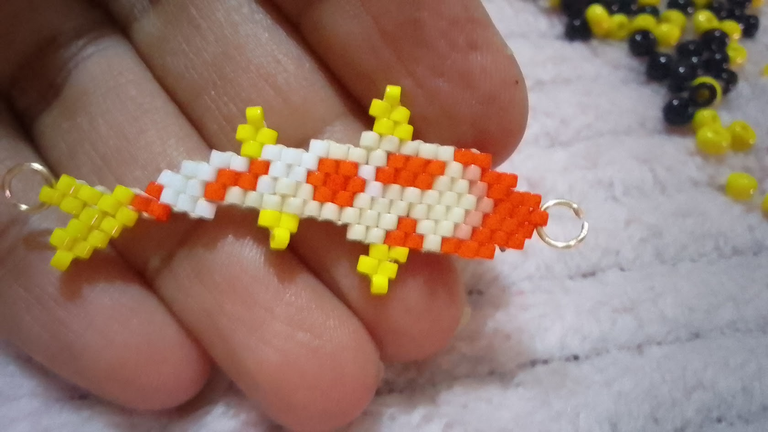
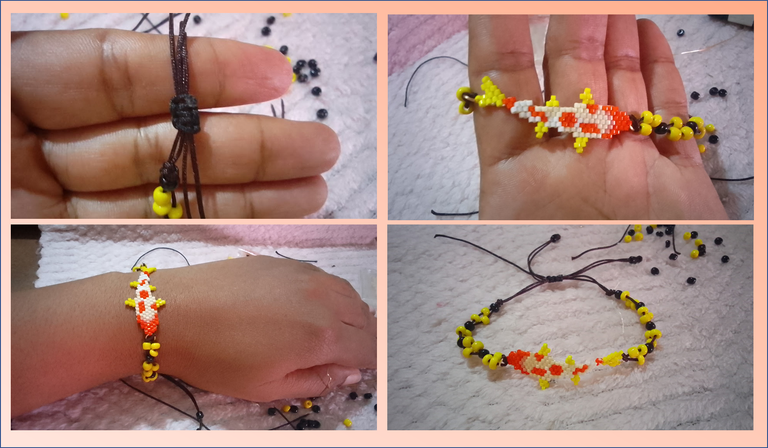
1- Con la herramienta punta redonda, y el alambre calibre #20 realice dos aritos, para ensamblar el pez, se lo coloque uno en cada extremo como se ve en la imagen.
2- luego, le amarre el hilo a los aros, y quedaron dos hilos, en las hebras de los hilos fui colocando dos mostacillas en una hebra y una en la otra hebra y luego sujete con una mostacilla negra y repetí el procedimiento hasta obtener un largo deseado de decorado con las mostacillas.
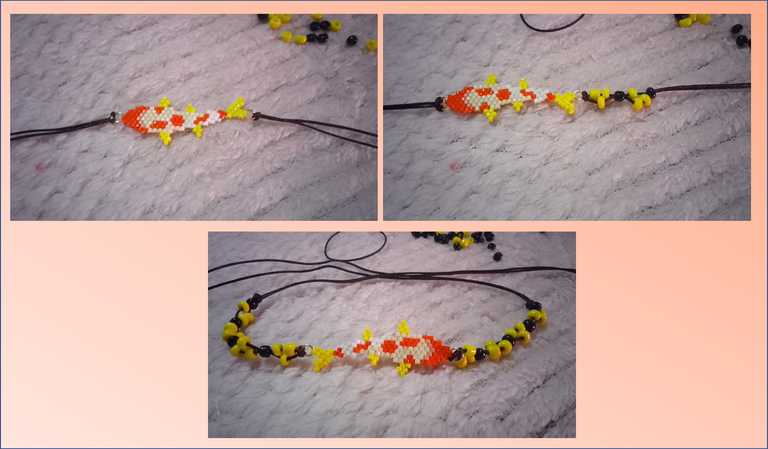
3- Al tener el largo listo, cerré la pulsera con un nudo plano. le coloque mostacillas a los hilos sobrantes, corte los excesos y así quedo la pulsera:
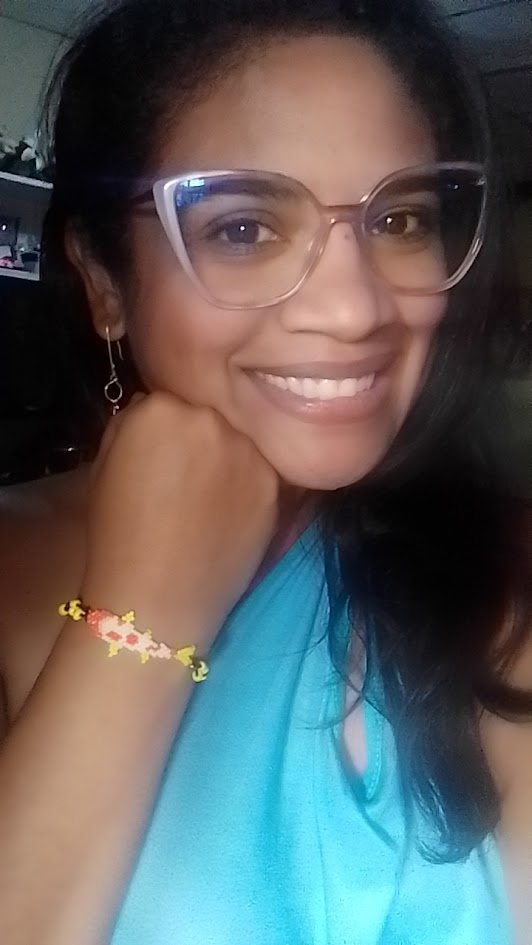
Me encanto.. y a ustedes?
Gracias por ver mi post, y su apoyo. Feliz día para todos..
ENGLISH VERSION (click here!)
Greetings community I hope you are very well, here I am teaching you, to make a nice Koi fish, I like all the elements that carries a message or a symbol of spirituality, this fish, in China and Japan is very revered for these cultures this fish is a symbol of good luck, prosperity, love and good luck.
Of course, it was something I wanted to make, because I like to make accessories of this style, that have a meaning for the wearer....
Koi Fish Bracelet 🐠
1- First, I drew the pattern to determine more or less the colors I wanted for this bracelet.. using the tool, Beadtool4.
2- the materials I used are Miyuki delicas, big eye needle, nemo brand nylon thread for delicas, chinese thread, mostacillon, #20 gauge wire for the assembly rings, and costume jewelry tools.
For this fish use the delica colors:
| Color | Code |
|---|---|
| Op ivory | DB0732 |
| Peach | DB 1363 |
| Op yellow | DB 0721 |
| Orange | DB 0722 |
| White | DB 0200 |
Let's get started: making a Koi Fish 🐠
1- To start, cast on the needle 20 delicas, as indicated in the picture, in that order, start from this row to knit to make the Koi fish, you can start from any part.
2- Then, I had to place the 20 delicas together one next to the other, with the opening upwards to be able to make the increases of the blocks, because the technique we are using here, is the brick stitch, we do it in the following way, we let one delica pass, to the second one we pass the needle from the bottom upwards and that way we are joining them together, this process is repeated with all of them until we have them joined with the eye upwards.
3- When we have them like that, we begin to build the next row of blocks, for this, we make some reductions and we return between the delicas, as seen in the images, and from there we begin the weaving of the next block, when they are irregular figures, we are always going to return between delicas to place the pieces, and that is where lies the importance of having a pattern, so we know where we are going where we should go out to place the beads.
4- And so I was able to make the part of the fins of one of the ends... to then return and continue with the weaving making increases and decreases to complete the fish.
This is how the fish looked like.
Elaborating the Koi Fish bracelet 🐠
Having the central piece ready, take the Chinese thread approximately 50 cm, yellow and black beads.
1- With the round tip tool and #20 gauge wire, make two rings to assemble the fish, place one at each end as shown in the picture.
2- Then, I tied the thread to the hoops, and there were two threads, in the strands of the threads I placed two beads in one strand and one in the other strand and then fastened with a black bead and repeated the procedure until I obtained the desired length of decoration with the beads.
3- When I had the length ready, I closed the bracelet with a flat knot. I put beads on the excess strands, cut the excess and that's how the bracelet looked like:
I loved it... and you?
Thanks for seeing my post, and your support. Happy day to all of you...

Recursos/Resources
| Portada, banner e imagen / Cover, banner and image | canva |
|---|---|
| fotos/ pictures | own photos, realme c11 device |
| Imagen de referencia/Reference image | Splinterlands |

Hola muy curiosa y bonita tu pulsera
Muchas gracias, me alegra le haya causado curiosidad.. saludos..
Una belleza. Quedó perfecto.
Tu técnica es muy prolija. Te felicito.
Muchas gracias, me alegra le haya gustado.. graciaas ❤️
Hacer este estilo de figuras me cuesta ,asi que te felicito por que se no es fácil con pura concentración .
exitos.