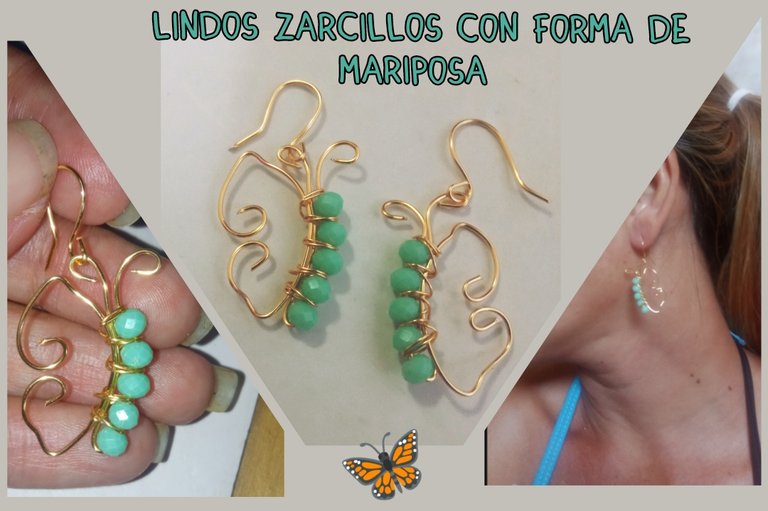
feliz y bendecido día tengan todos ustedes mis queridos y apreciados amigos, es un gran placer para mí es pasar el día de hoy por esta creativa comunidad para compartirles mi más reciente creación unos hermosos zarcillos a los cuales quise darle forma de mariposa. Este es un diseño elaborado con la técnica del alambrico y decorado con hermosa pedrería, es un accesorio muy bonito y fácil de elaborar además su diseño es muy creativo y elegante ideales para lucir en cualquier ocasión que así lo desee y su color y tamaño dependerá de sus gustos.
Have a happy and blessed day to all of you my dear and appreciated friends, it is a great pleasure for me to spend today in this creative community to share with you my most recent creation, some beautiful tendrils to which I wanted to give the shape of a butterfly.
This is a design made with the wire technique and decorated with beautiful rhinestones, it is a very beautiful and easy accessory to make, and its design is very creative and elegant, ideal to wear on any occasion you wish and its color and size will depend on your tastes.
Now I would like to invite you to join me in this simple tutorial so that together we can make and obtain this beautiful design of butterfly tendrils which I hope you will totally like.
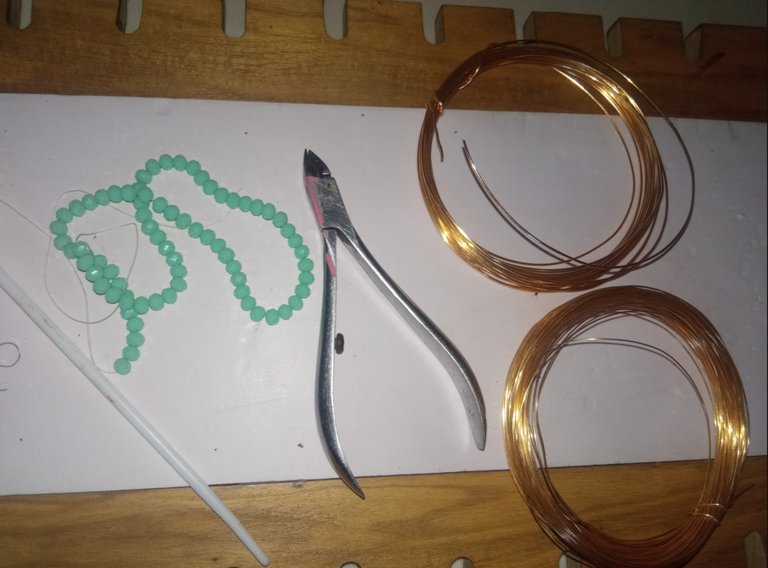
- alambre de bisutería calibre 20.
- alambre de bisutería calibre 26.
- piedras cristales verdes.
- pinza de bisutería.
- 20 gauge jewelry wire.
- 26 gauge jewelry wire.
- green crystal stones.
- jewelry clamp.
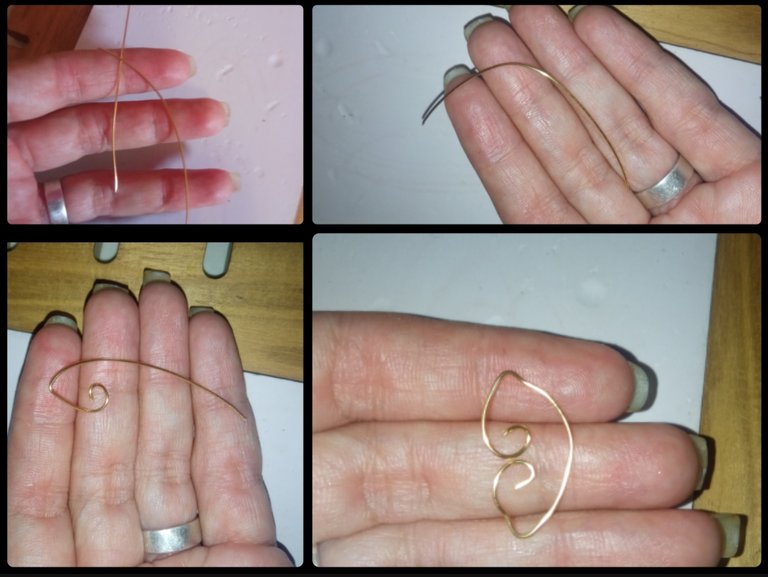
⭐ Paso 1: para iniciar la elaboración de este hermoso diseño lo primero que debemos hacer es tomar el alambre de bisutería calibre 20 y cortaremos dos pedazos de aproximadamente 12 cm y seguidamente tomaremos el primer pedazo en el centro de este realizaremos en forma ondulada o medio círculo y con ayuda de la pinza tomaremos la primera y la doblaremos hacia abajo dando forma a la primera mitad de la pequeña a la de la mariposa, llevando este doblez hasta la mitad el alambre principal y luego tomaremos el extremo de abajo y de igual manera lo moldearemos hacia la parte de arriba para unir ambos formas intentando darle la forma de las alas de la mariposa tal cual pueden observar a continuación las siguientes fotografías.
⭐ Step 1: to start making this beautiful design, the first thing we must do is take the 20 gauge jewelry wire and we will cut two pieces of approximately 12 cm and then we will take the first piece in the center of this we will make in the form wavy or half circle and with the help of the tweezers we will take the first one and bend it downwards, shaping the first half of the small one to that of a butterfly, taking this bend to the middle of the main wire and then we will take the bottom end and In the same way we will shape it towards the top to join both shapes trying to give it the shape of the butterfly wings as you can see in the following photographs.
⭐ Paso 2: para continuar tomaremos nuevamente el alambre de bisutería calibre 20 y picaremos dos pedazos de 10 cm de largo el cual doblaremos a la mitad y por uno de las puntas introduciremos pequeños cristales, yo en total coloqué cinco cristales luego con mis dedos mordí ambas partes del alambre de manera que encajaran exactamente con la forma elaborada en el primer paso. Y tomando un pedazo de alambre bisutería calibre 26 comencé a unir ambas partes en la base principal de las alas de la mariposa y pasándola por en medio de los cristales enrollándolo de cada uno de ellos y así uní ambas formas hasta llegar a la parte superior del último cristal donde corté el exceso de alambre calibre 26.
⭐ Step 2: to continue we will take the 20 gauge jewelry wire again and cut two 10 cm long pieces which we will fold in half and through one of the ends we will introduce small crystals, I placed five crystals in total then with With my fingers I bit both parts of the wire so that they fit exactly with the shape made in the first step. And taking a piece of 26 gauge jewelry wire I began to join both parts at the main base of the butterfly's wings and passing it through the middle of the crystals, rolling it around each one of them and thus I joined both shapes until I reached the top of the last crystal where I cut the excess 26 gauge wire.
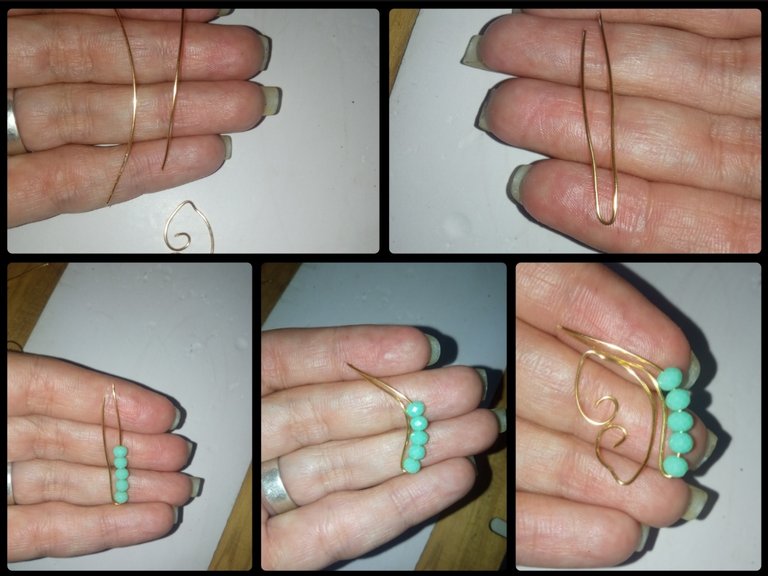
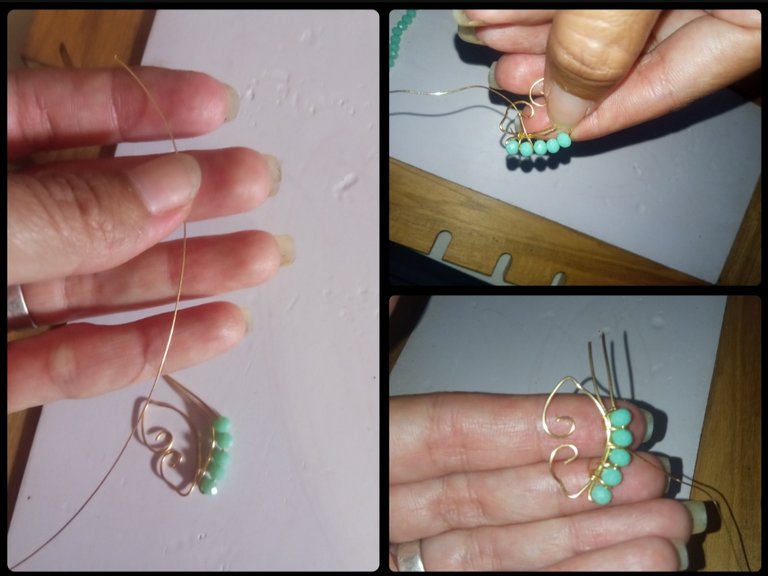
⭐ Paso 3: seguidamente en las dos puntas del alambre que nos quedarán hacia arriba con ayuda de la pinza los doblaremos un poco en forma ondulada dándole forma así a las pequeñas antenas de nuestra mariposa.
⭐ Step 3: then on the two ends of the wire that will be facing up, with the help of the tweezers we will bend them a little in a wavy shape, thus giving shape to the small antennae of our butterfly.
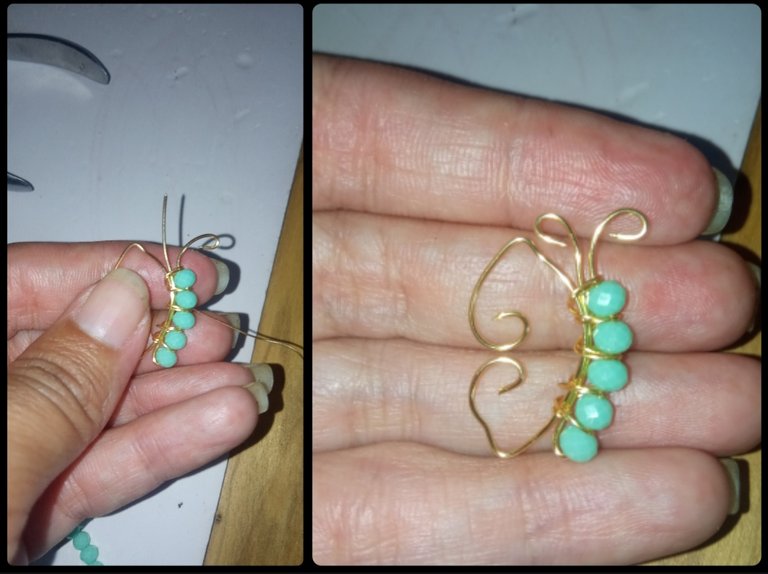
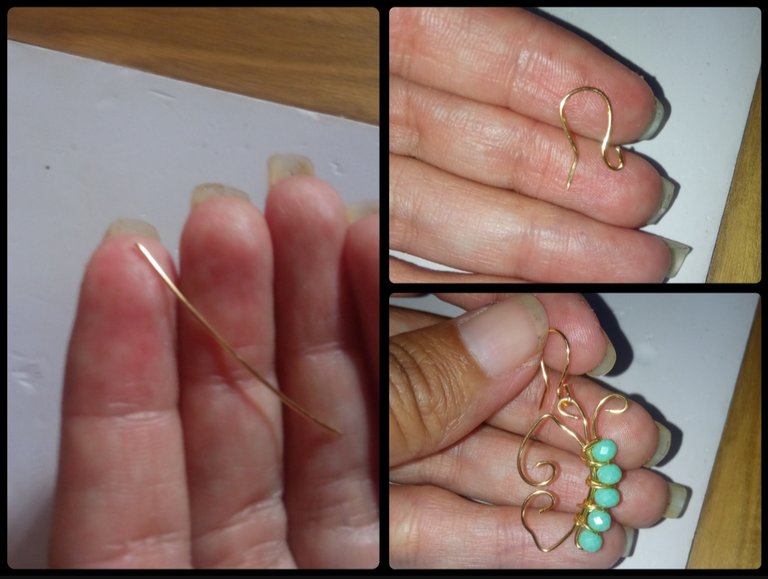
⭐ Paso 4: Y por último tomaremos 5 cm del alambre de bisutería calibre 20 y con este elaboraremos el anzuelo para zarcillo el cual engancharemos uniéndolo a nuestra mariposa sujetándolo en uno de los dobles de la antena de la pequeña mariposa que hemos elaborado y así culminaremos nuestro primera pieza y ya con las piezas de alambre de la siguiente pieza iniciaremos a elaborar El par de nuestros zarcillos.
⭐ Step 4: And finally we will take 5 cm of the 20 gauge jewelry wire and with this we will make the tendril hook which we will hook by attaching it to our butterfly by holding it in one of the doubles of the antenna of the small butterfly that we have made and thus we will complete our first piece and with the wire pieces of the next piece we will begin to make The Pair of Our Tendrils.
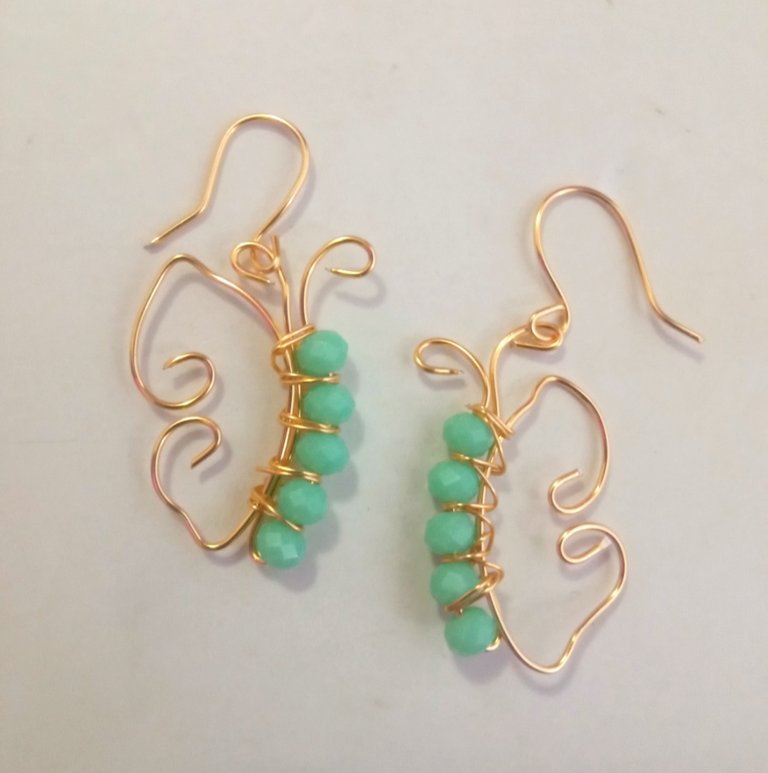
Todas las Fotos son de mi autoría y fueron tomadas con mi Celular Redmi 9.And so, my dear and precious friends, we will be able to create a beautiful design of tendrils in the shape of pretty butterflies, super cute and very creative. My dear and appreciated friends, I hope that this simple tutorial that I share with you today with great affection is to your liking and that it can be useful and beneficial to all of you. I say goodbye for this opportunity, grateful for your visit.
All Photos are my authorship and were taken with my Redmi 9 Cellphone
Posted Using InLeo Alpha
I always love and admire this wire technique, some will decorate with seed beads and some with rhinestones as you did, this so beautiful, I love the design and the color is nice Weldon
Thank you very much, glad you liked it 😊.
I live the outcome of this earrings, it came out so beautiful and nice, I love the color,,good work
Thank you very much, 😊
Bellos, me gustó 😉
WOW! It is so beautiful and charming. Love its design. It looks great. Well done!
Excelente trabajo amiga.Muy bonito quedó tus zarcillos.
Que belleza, es elegante y el color de las cuentas le dan un aire vintage que me gusta mucho.
Saludos.
Me alegra mucho saber que te gustó amiga, muchas gracias por su comentario 😊
You did a great job, beautiful earrings
Te quedaron muy lindos amiga .! Feliz día..!
Muchas gracias amiga 😘
Nice one dear
¡Felicitaciones!
1. Invierte en el PROYECTO ENTROPÍA y recibe ganancias semanalmente. Entra aquí para más información.
3. Suscríbete a nuestra COMUNIDADEntra aquí para más información sobre nuestro trail., apoya al trail de @Entropia y así podrás ganar recompensas de curación de forma automática.
4. Creación de cuentas nuevas de Hive aquí.
5. Visita nuestro canal de Youtube.
Atentamente
El equipo de curación del PROYECTO ENTROPÍA
Great job you have here
Te quedaron realmente hermosos.... 🥰😍💖 Me encantaron y el color me fascina 😍
Felicitaciones por tan lindo trabajo 😊👍
Me enamora muchisimo el color de las piedras que has escogido para este proyecto Emmaris, es uno de mis tonos favoritos de verde y no esta demás felicitarte por el diseño y el resultado, atemporal, elegante y de buen gusto 🌸 💫
Holaa, que bello quedaron sus aretes, el color está muy bonito, saludos... 🤗
Muchas gracias, me alegra que te haya gustado, saludos.
🤗
Son unos hermosos zarcillos, excelente trabajo 👍