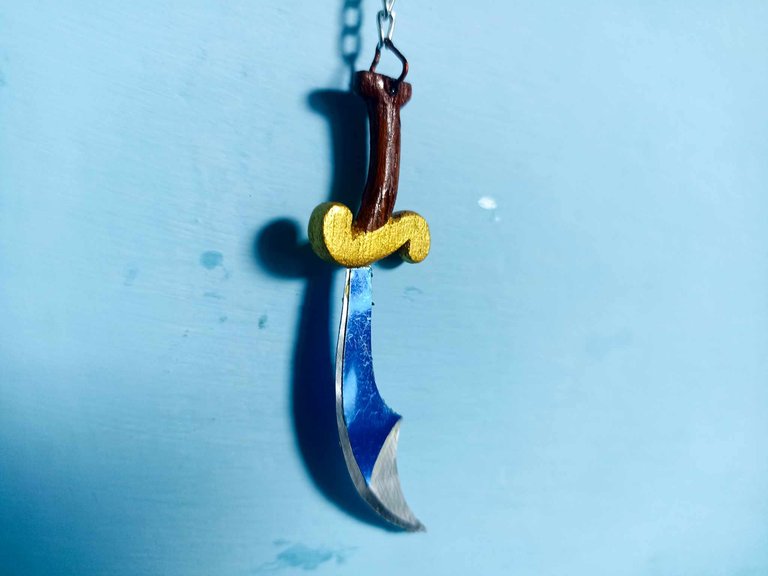
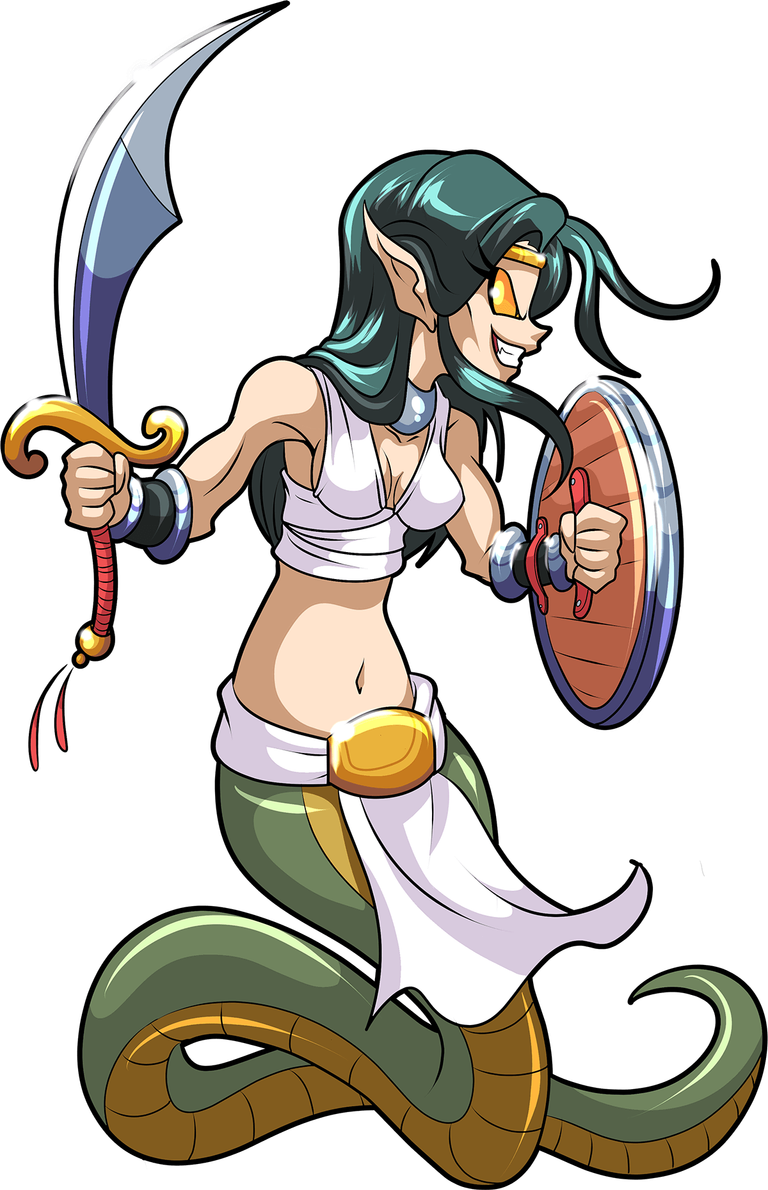
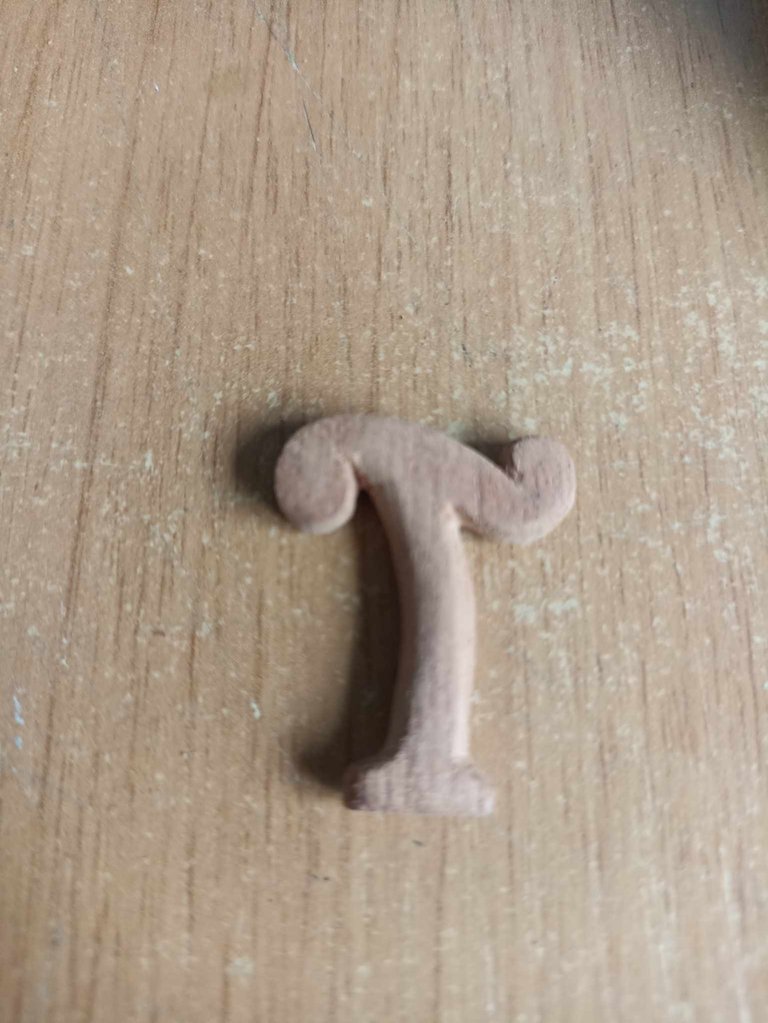
Hello dear friends, how are you? I hope everything is going well and you are in good health. On this occasion I want to share with you my contribution to participate in the weekly art contest of Splinterlands, this time I have made a keychain that is made with various materials. -I have made a keychain in the shape of a sword, and it is not just any sword, it is the Naga Warrior's attack weapon, a sword that has all the influences of ancient Middle Eastern swords. I have made this weapon using wood to carve the hilt as well as using aluminum from beer cans to make the sword's handle, do not miss the step by step that will be briefly explained below.
Hola queridos amigos, que tal? espero que todo vaya muy bien y se encuentren con mucha salud. En esta oportunidad quiero compartir con ustedes mi aporte para participar en el concurso artístico semanal de Splinterlands, en esta oportunidad he realizado un llavero que esta hecho con varios materiales. -he realizado un llavero con la forma de una espada, y no es cualquier espada, se trata del arma de ataque de Naga Warrior, una espada que tiene toda la influencias de las espadas antiguas de medio oriente. He realizado esta arma utilizando madera, para tallar la empuñadura así como también utilicé aluminio de latas de cerveza para hacer la hora de la espada, no se pierdan el paso a paso que estará explicado brevemente a continuación.

 |  | |
|---|---|---|
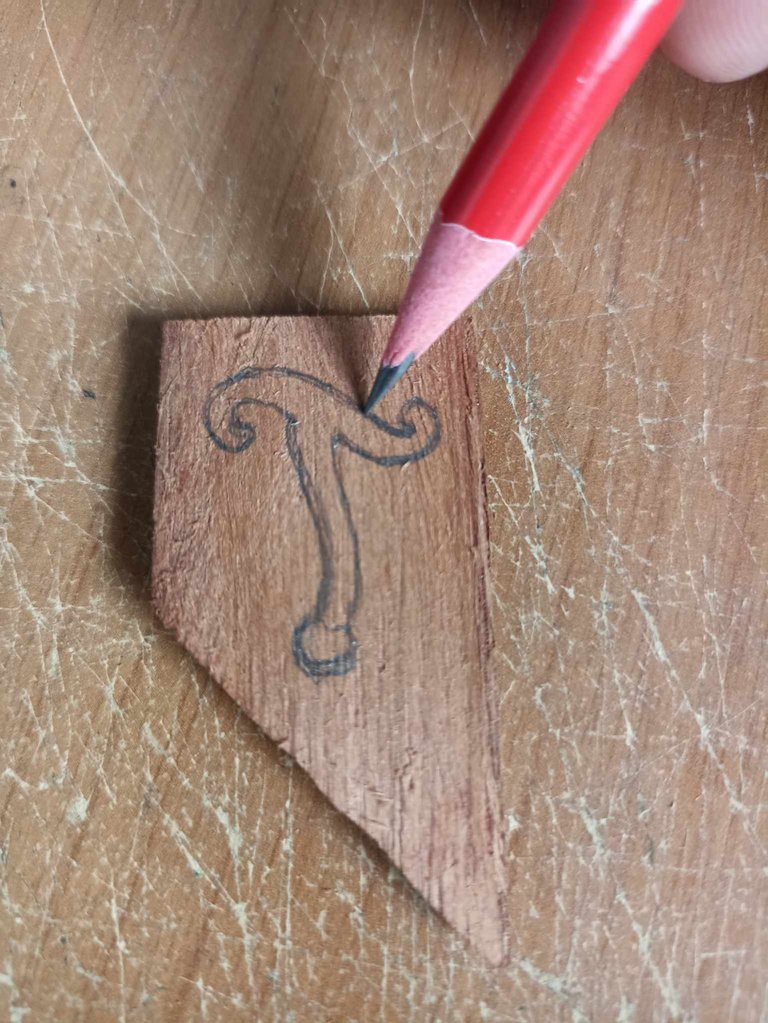 | 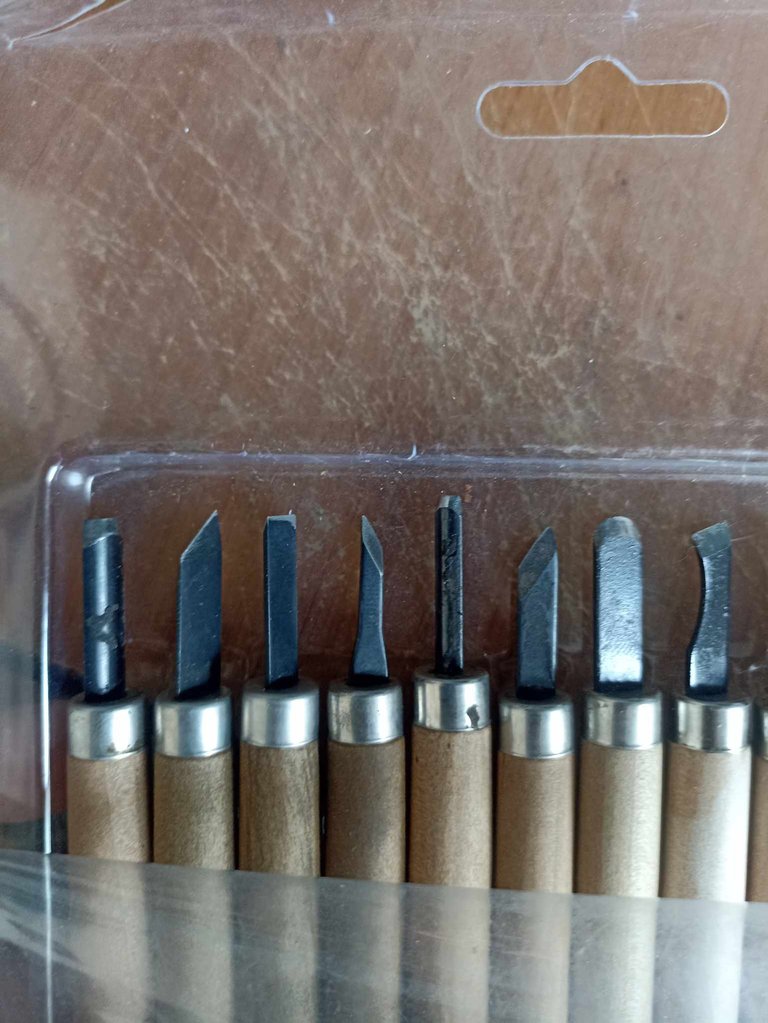 |
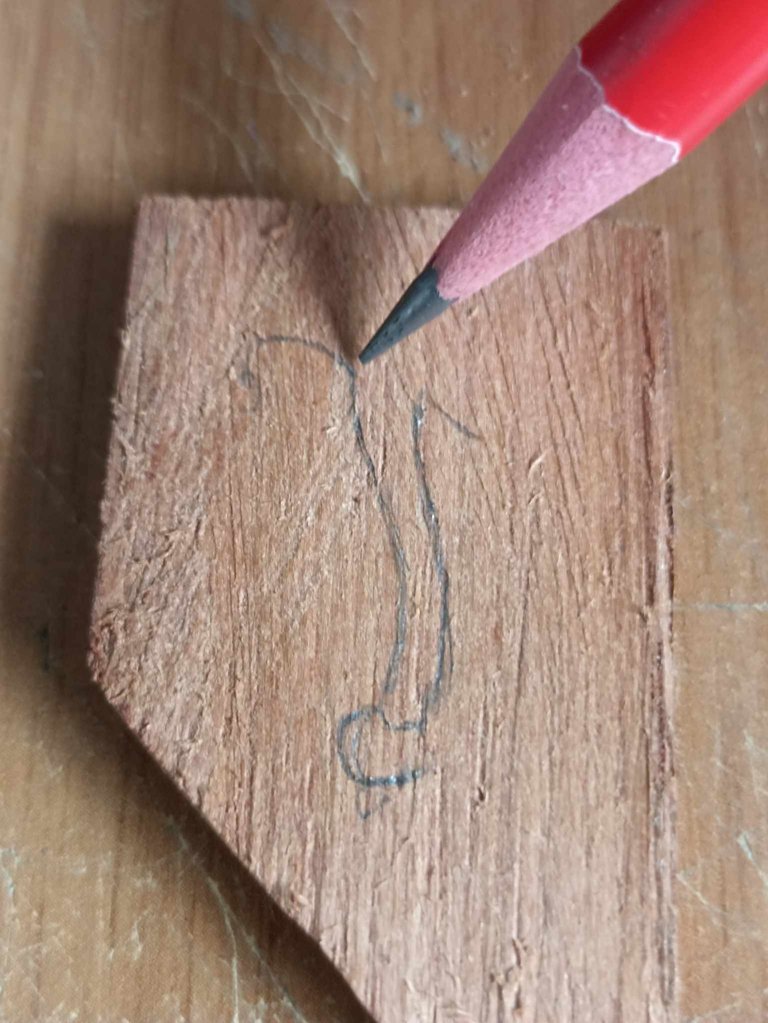
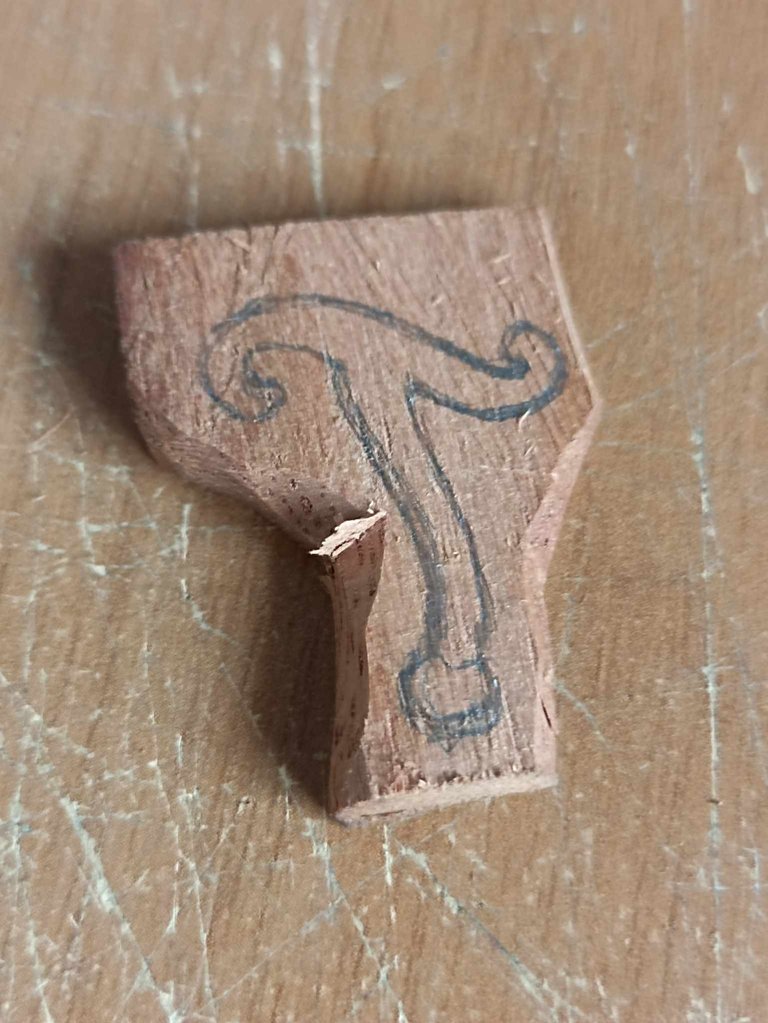
As this piece is made in two parts, I first start making the handle, for this I use the softest wood, and on top of it, using a pencil I begin to draw the silhouette that will later be carved little by little. For this task I will use my small special knives for carving wood.
Como esta pieza esta hecha en dos partes, en primer lugar comienzo haciendo la empuñadura, para eso utilizo madera, de la más suave, y encima de ella, utilizando un lápiz comienzo a dibujar la silueta que posteriormente sera poco a poco tallada. Para esta labor utilizaré mis pequeñas cuchillas especiales para tallar madera.
 |  | |
|---|---|---|
 | 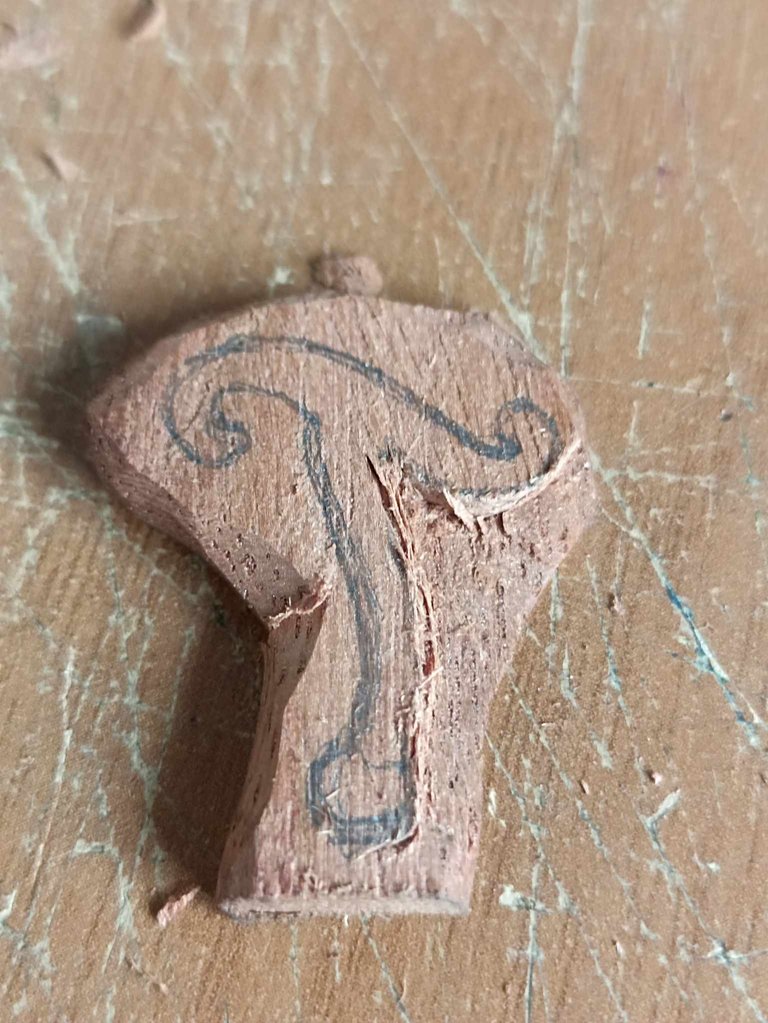 |
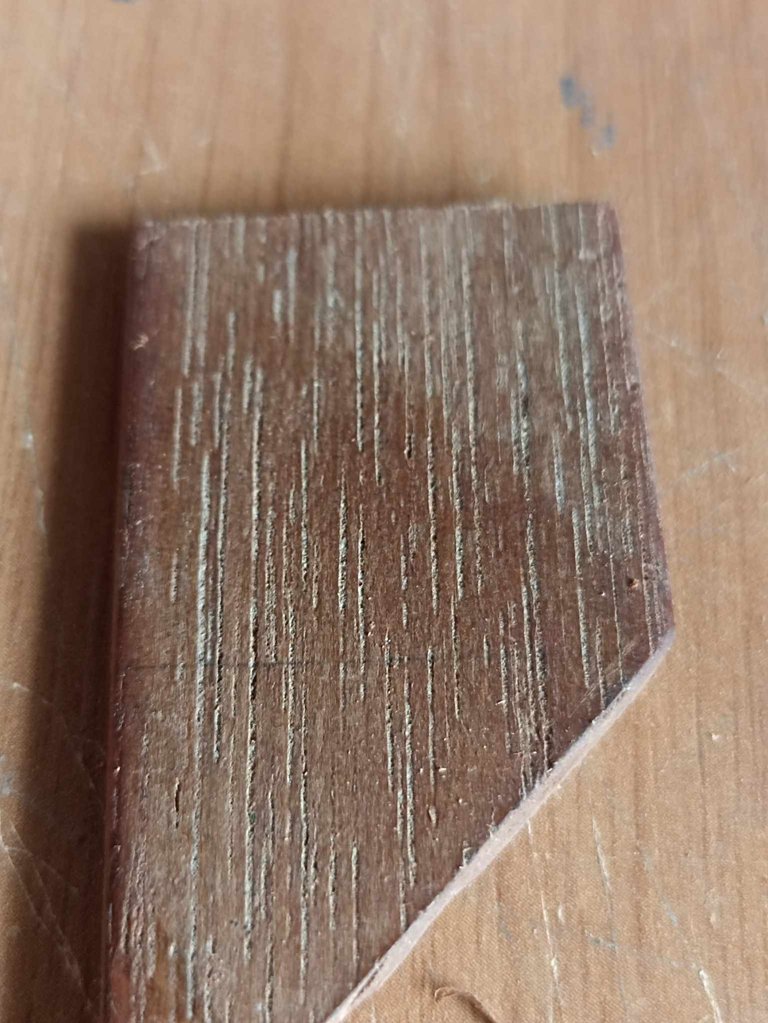
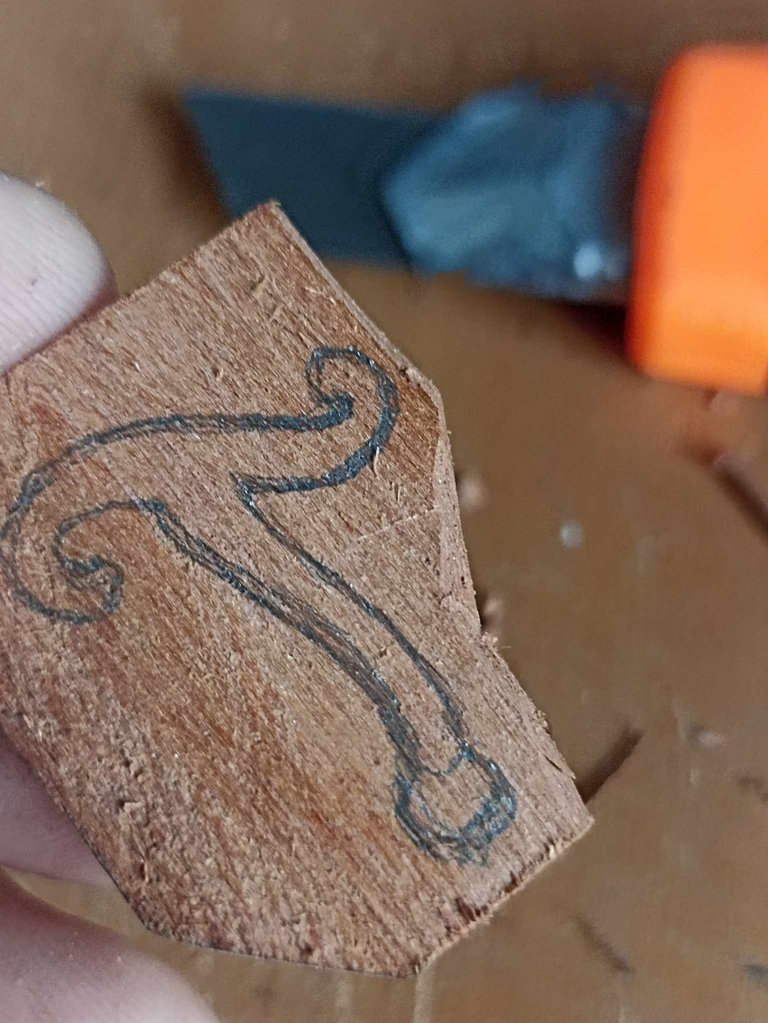
The first step was to remove as much wood as possible from the piece and get closer to the drawn figure. Here I used the box cutter instead of the small blades since they were easier cuts. After making several cuts to the wood, the piece would end up looking like this.
El primer paso fue remover toda la madera posible de la pieza y acercarme a la figura dibujada, aquí utilicé el cúter en lugar de las cuchillas pequeñas ya que eran cortes más sencillos. Después hacer varios cortes a la madera así iba quedando la pieza.
 |  | |
|---|---|---|
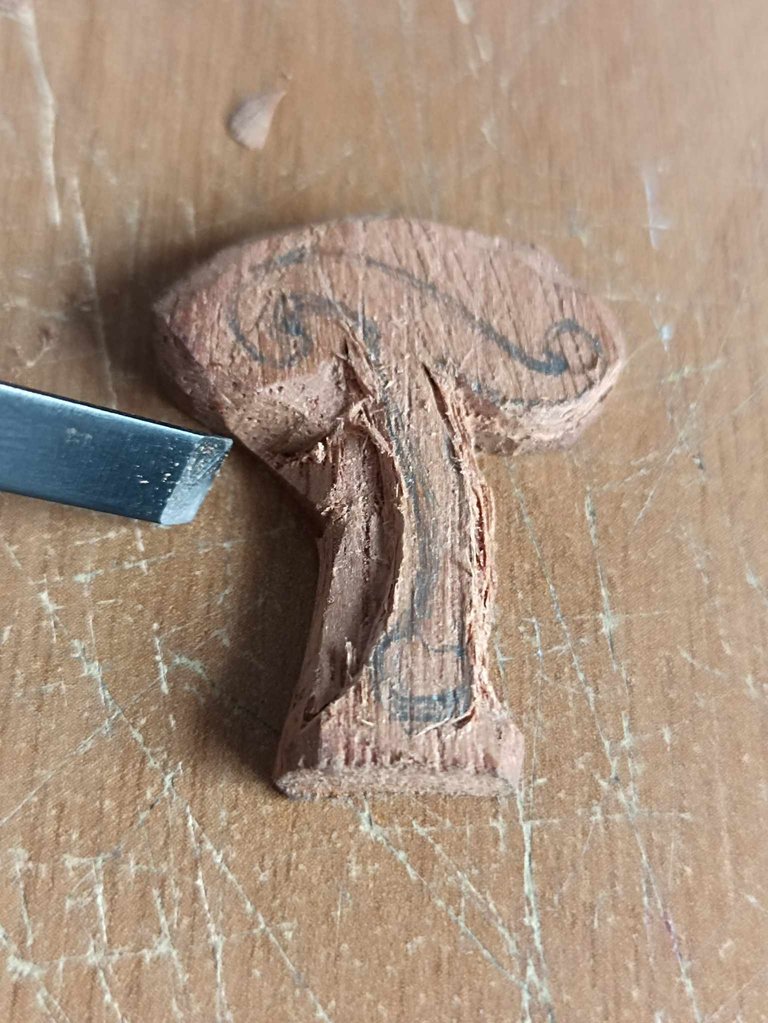 | 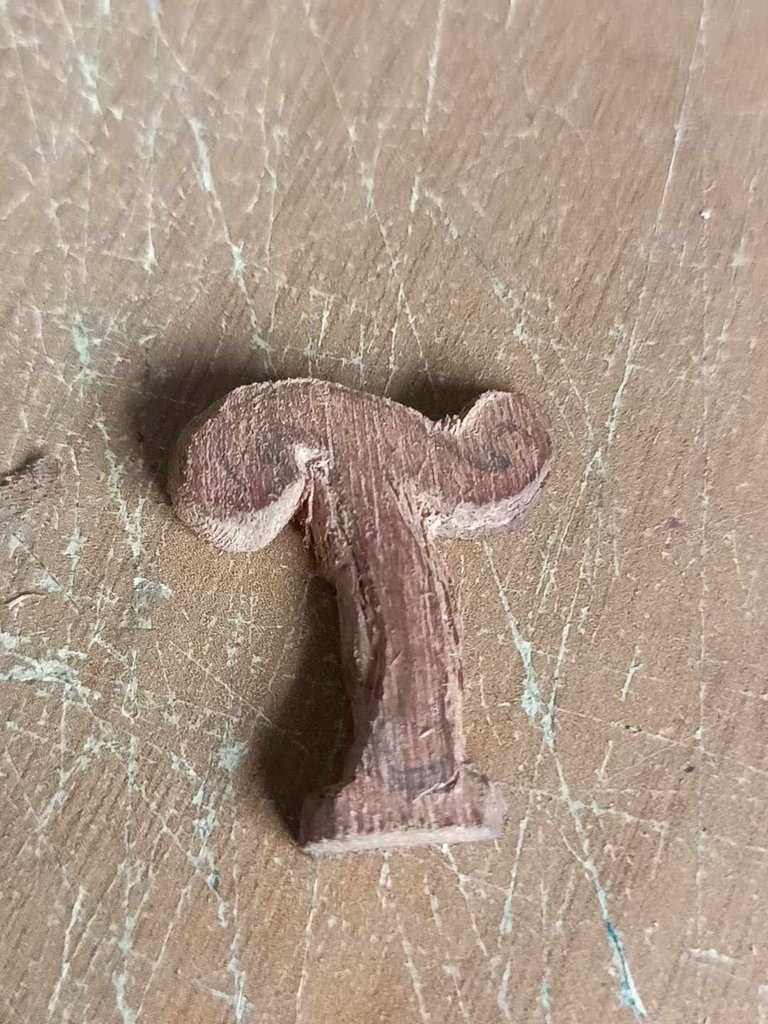 |
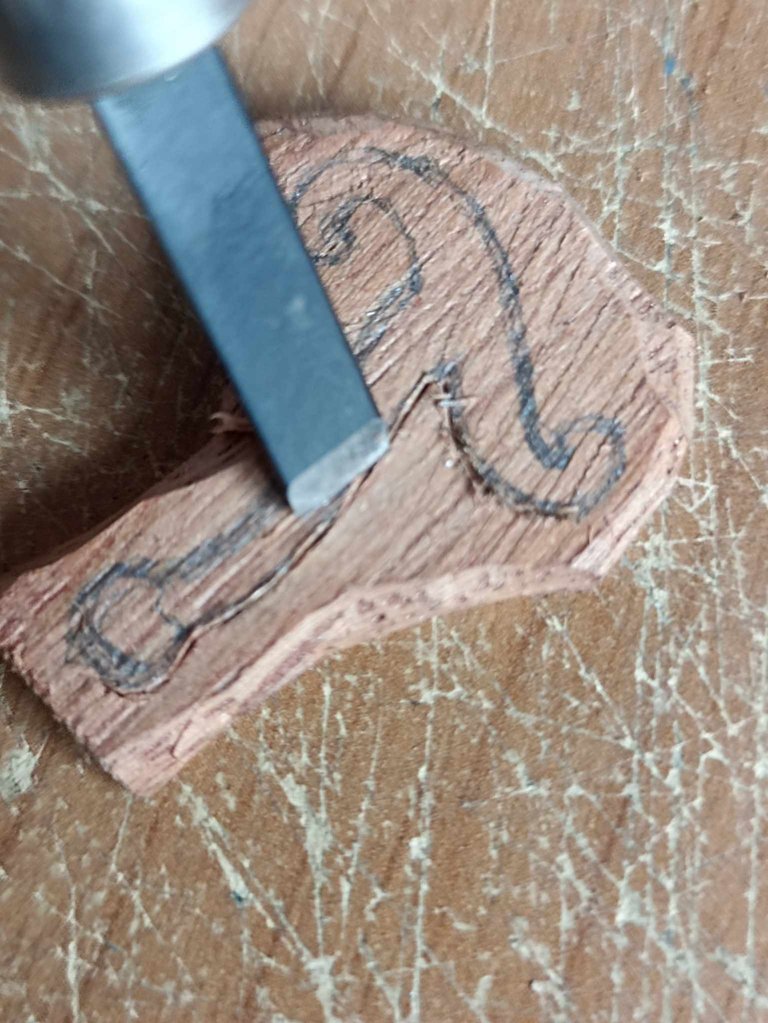
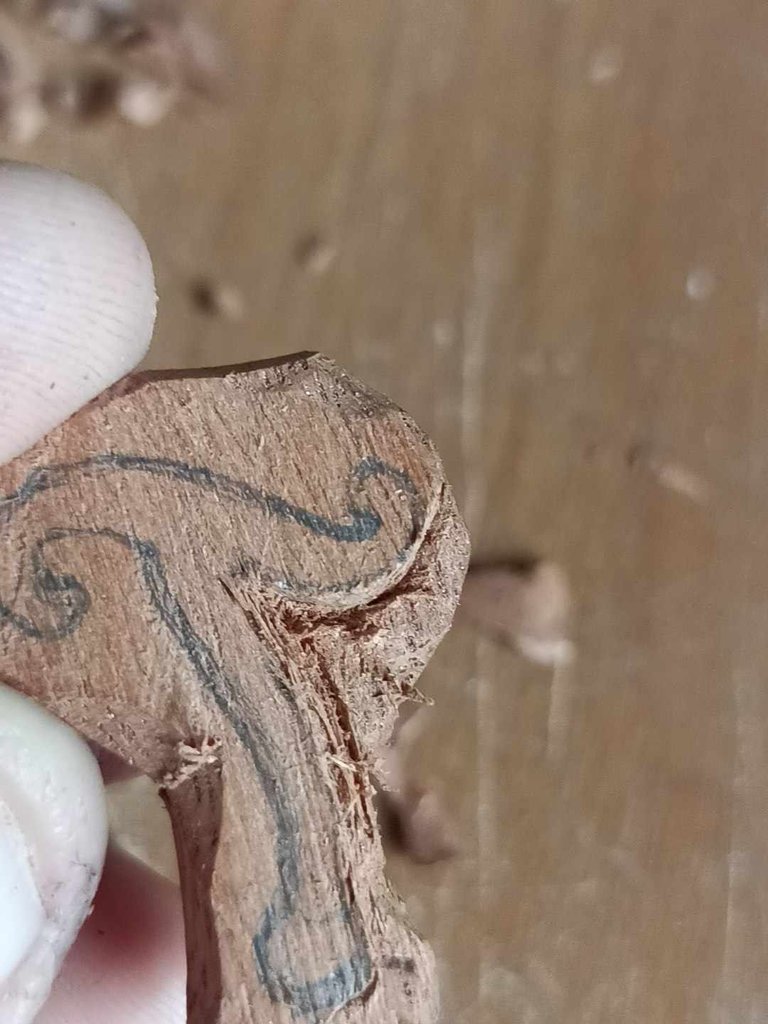
The next step was to shape the handle. Here you can see how I shape it with a thin-bladed knife. First, I split the entire wood into the shape of the drawing and then, little by little, I scrape the surface and thus extract the wood. With the cut made previously, the wood comes out and so the shape I have drawn is in perfect condition.
El siguiente paso fue darle forma a la empuñadura, aquí pueden observar como con una chuchilla de hoja fina le voy dando forma, en primer lugar lo que hago es rajar toda la madera con la forma del dibuje y luego poco a poco voy raspando la superficie y así voy extrayendo a la madera. Con el corte realizado anteriormente, la madera sale y así la forma que he dibujado queda en perfecto estado.
 |  | |
|---|---|---|
 | 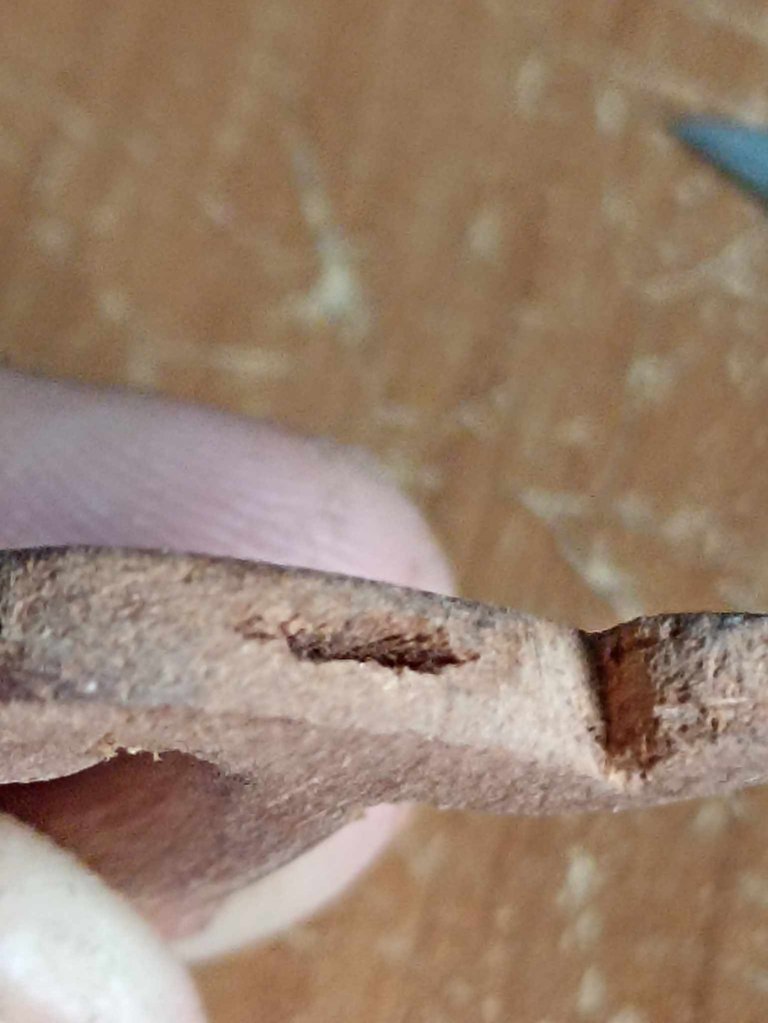 |
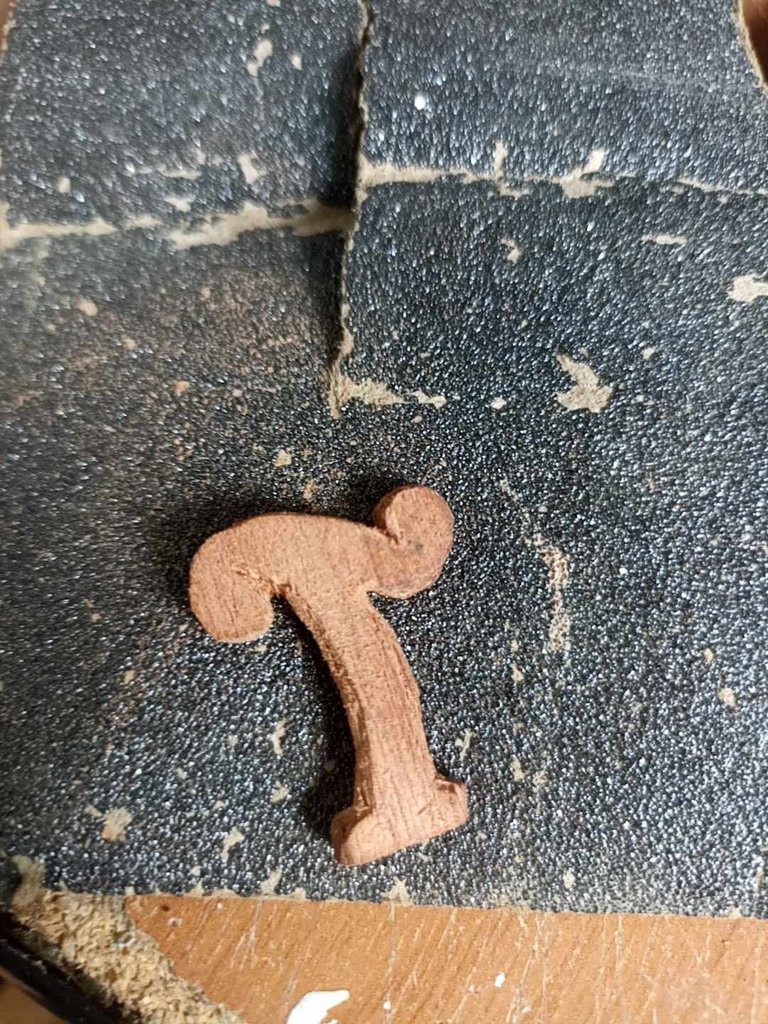
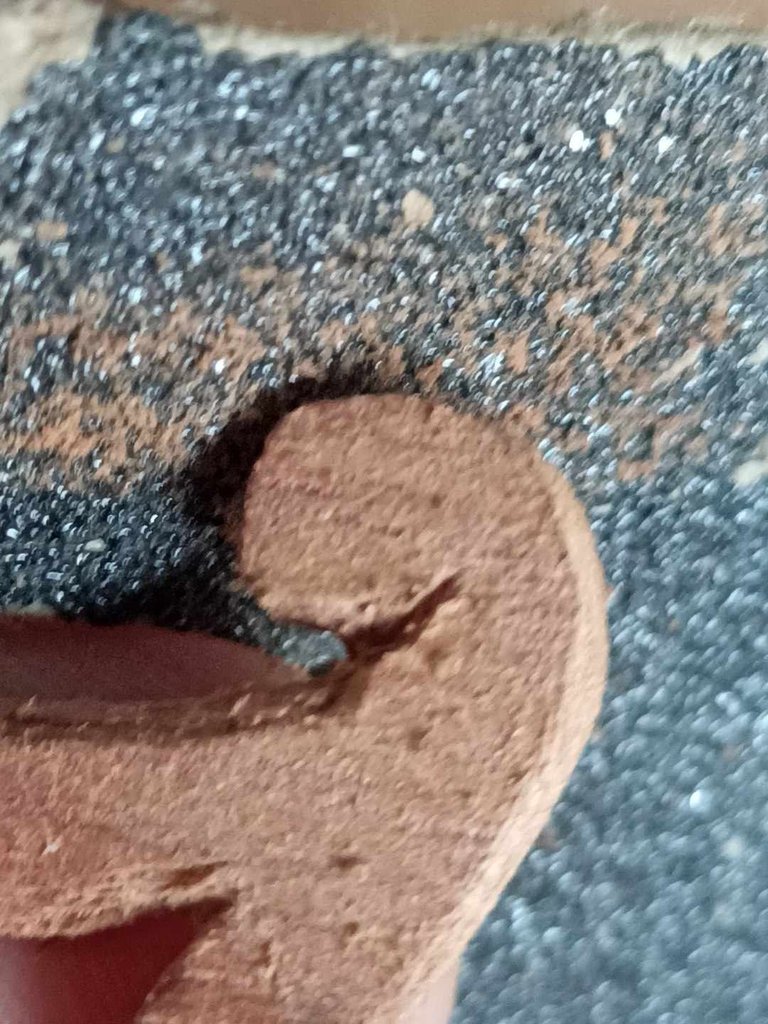
After the shape has been completed, I sand the piece to polish it and remove all impurities so that it is perfect. The last detail regarding the cutter is that with the tip I make a small opening at the top of the handle, this is to later place the sharpened blade of the Naga Warrior sword.
Luego de que la forma haya sido completada lo que hago es lijar la pieza para pulirla y quitarle todas las impurezas y quede perfecta. El úlimo detalle con relacioón al cúter es que con la punta hago una pequeña abertura en la parte superior de la empuñadura, esto es para luego colocar la hoja afilada de la espada de Naga Warrior.
 |  | |
|---|---|---|
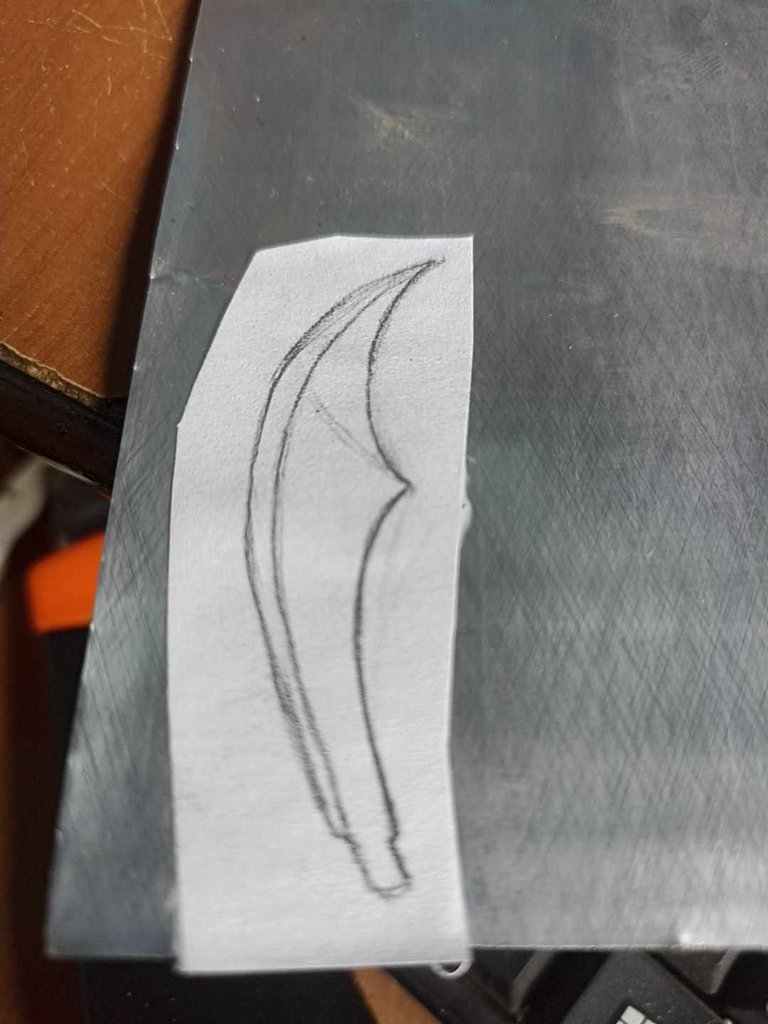 | 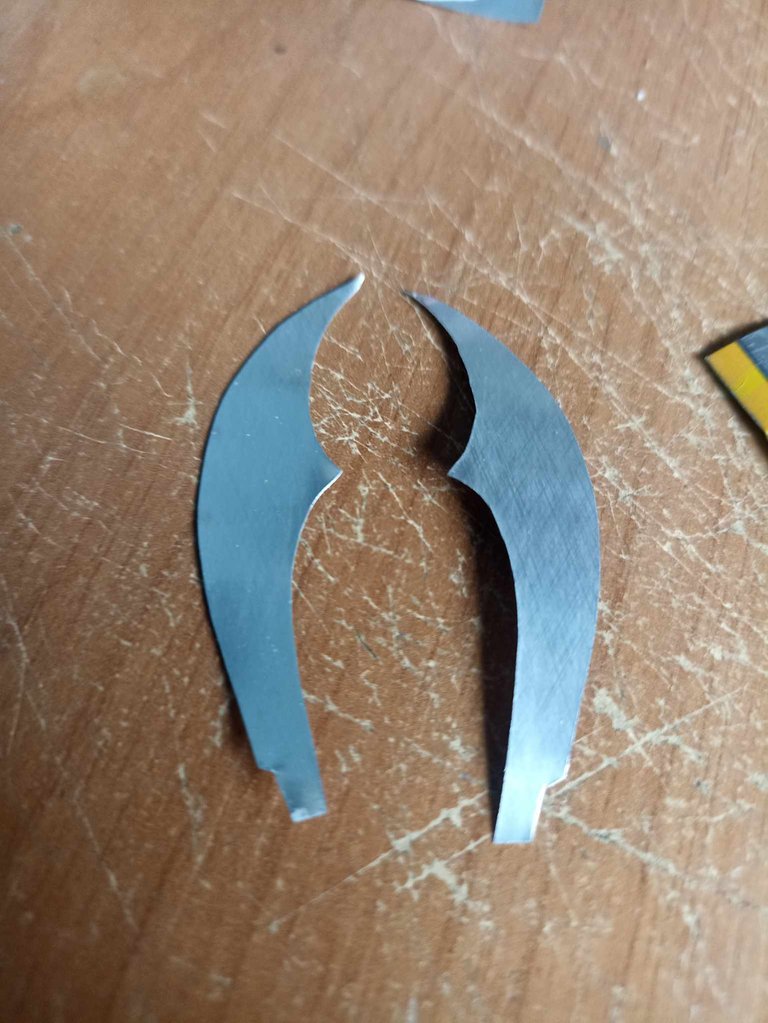 |
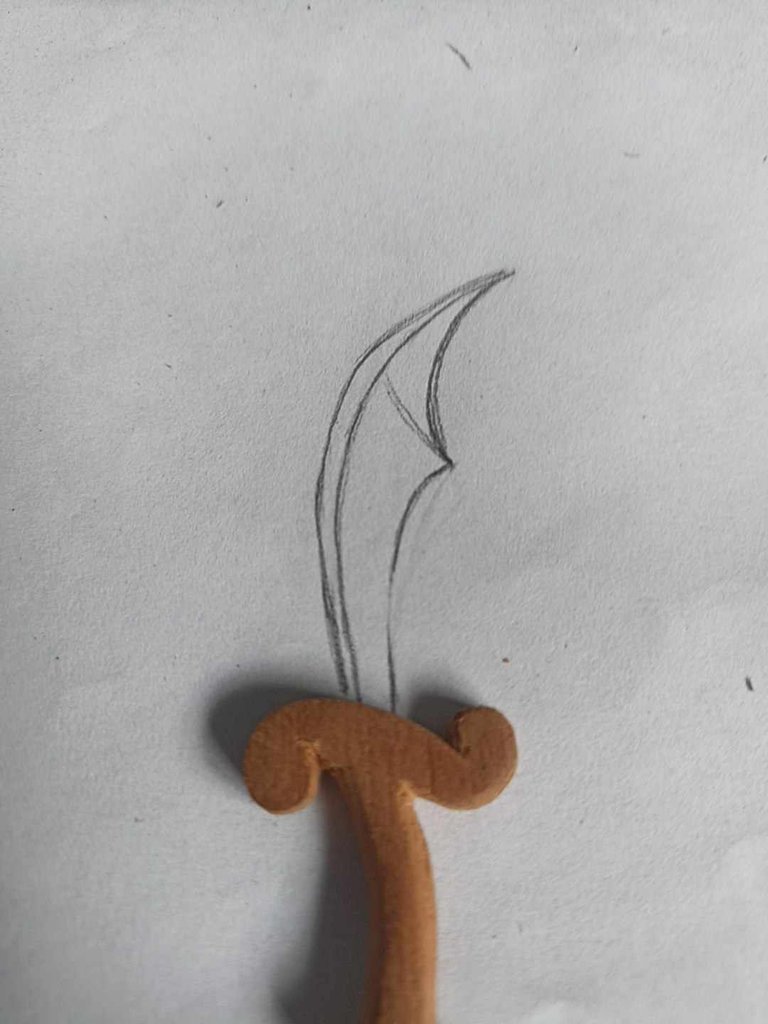
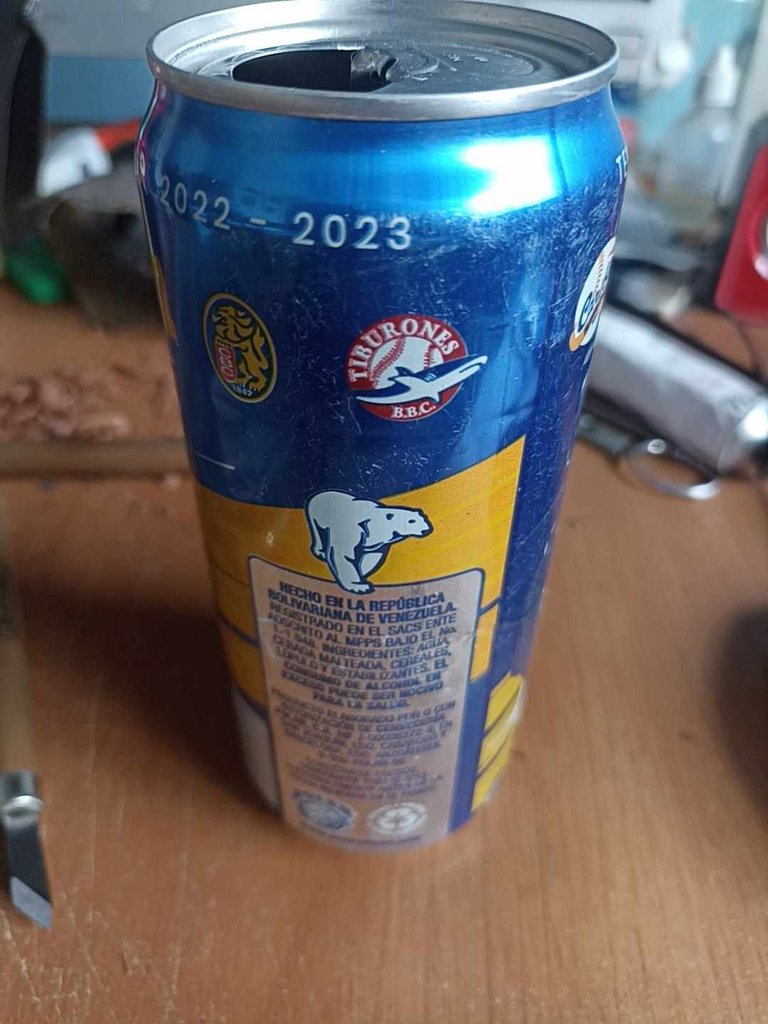
Now we begin the second part, here we will forge the blade of the sword like the ancient blacksmiths hahaha, not so much. Using the hilt of the sword as a reference, I draw the blade of the sword on a sheet of paper, this way I will have the appropriate size as a reference. Then I take a beer can, I used this one in blue since I would use it later for the color, and on it I place the template I made and take out two pieces of aluminum so that I have both sides of the sword blade.
Ahora damos inicio a la segunda parte, aquí forjaremos la hoja de la espada como los antiguos herreros jajaj, ni tanto. Utilizando la empuñadura de la espada como referencia, dibujo la hoja de la espada encima de una hoja de papel, de esta manera tendré como referencia el tamaño adecuado. Luego tomo una lata de cerveza, utilicé esta de color azul ya que la utilizaría luego por el color, y sobre ella coloco la plantilla que hice y saco dos piezas de aluminio para así tener ambas cara de la hoja de la espada.
 |  | |
|---|---|---|
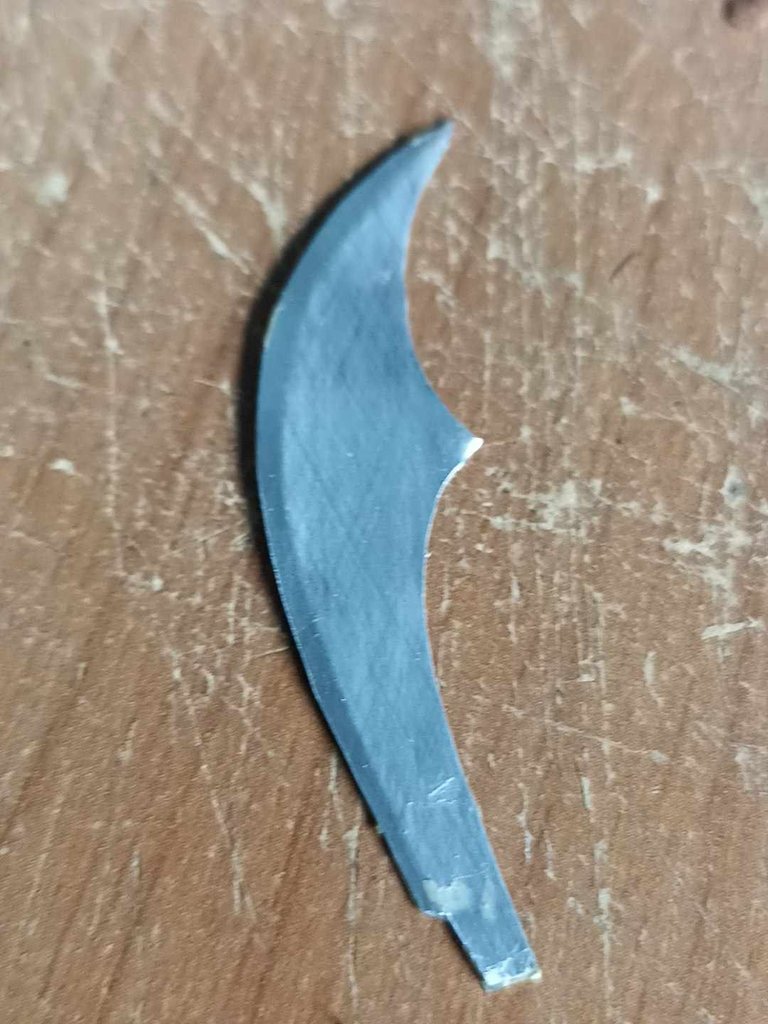 | 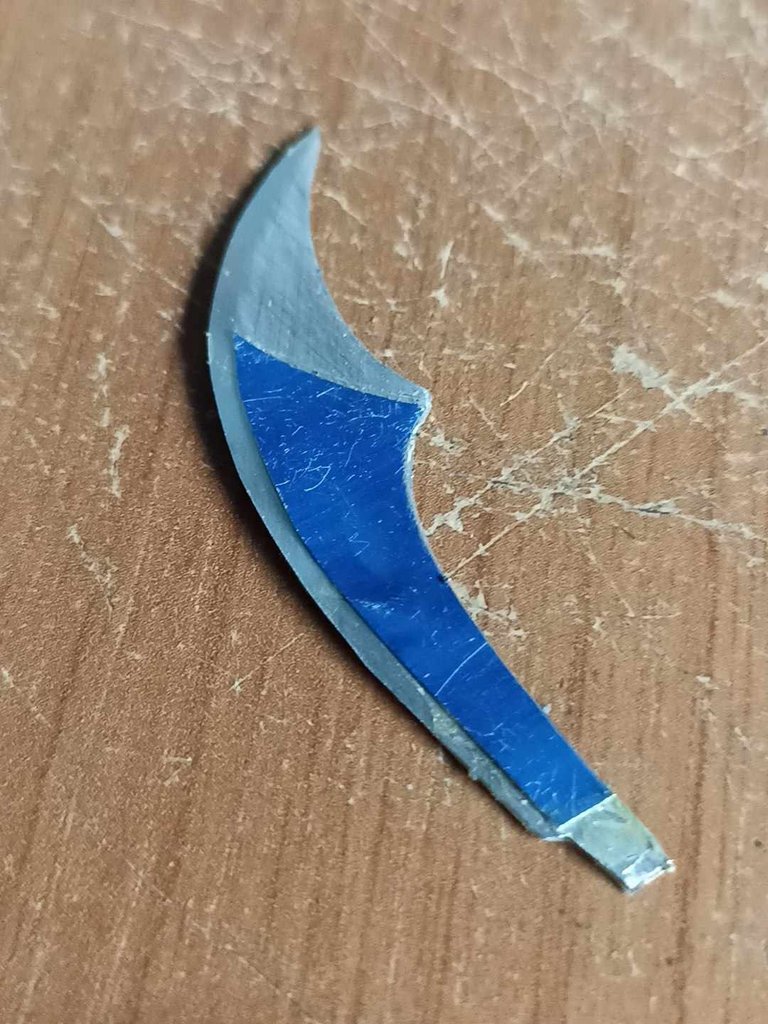 |
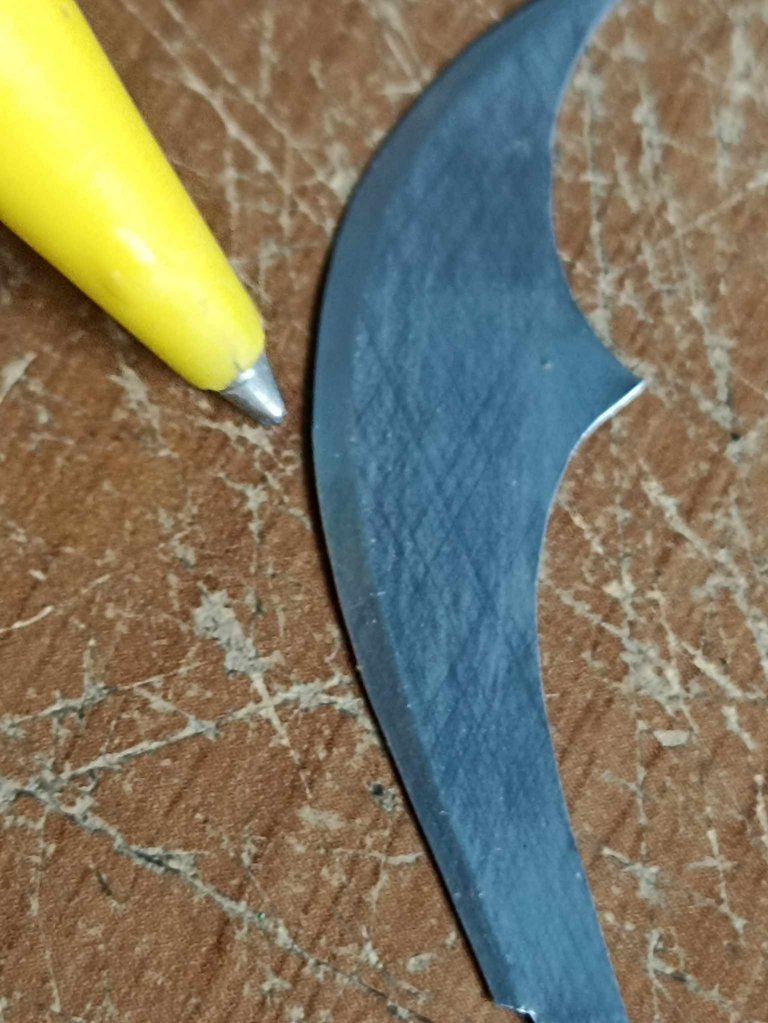
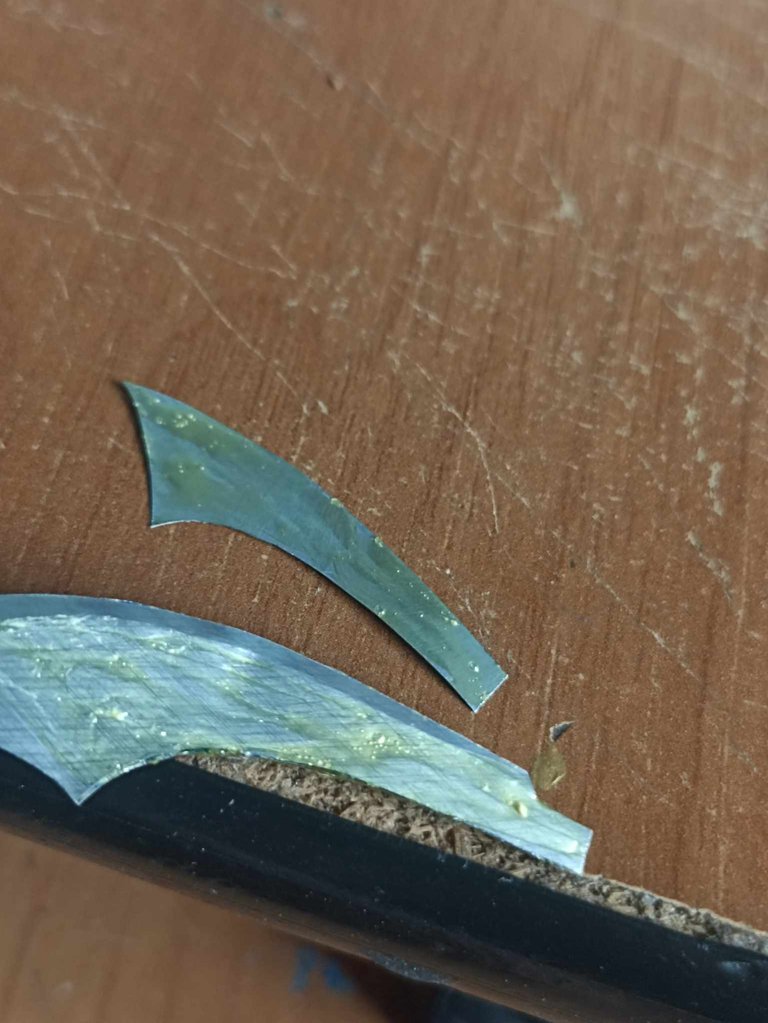
Then, on each sword blade that I cut on the inside, I make a line with a pen, sinking the tip. When I turn it over, you will see how that creates an effect that will be the edge of the sword. Then, I put glue on both sides of the aluminum and I put it between them. To finish the blade, I cut two more pieces of aluminum, but this time I do it on the blue side of the can, in order to use the color and so that it remains above the blade, just like the original design.
Luego a cada hoja de espada que corté por el lado interior hago una línea con un boligrafo hundiendo la punta, al voltearlo, se vera como eso crea un efecto que será el filo de la espada. Después colo pegamento en ambas caras de aluminio y la suno entre ellas, para finalizar la hoja corto dos piezas más de aluminio pero en esta oportunidad lo hago por el lado azul de la lata, para asi utilizar el color y que queda por encima de la hoja tal cual el diseño original.
 |  |  |
|---|---|---|
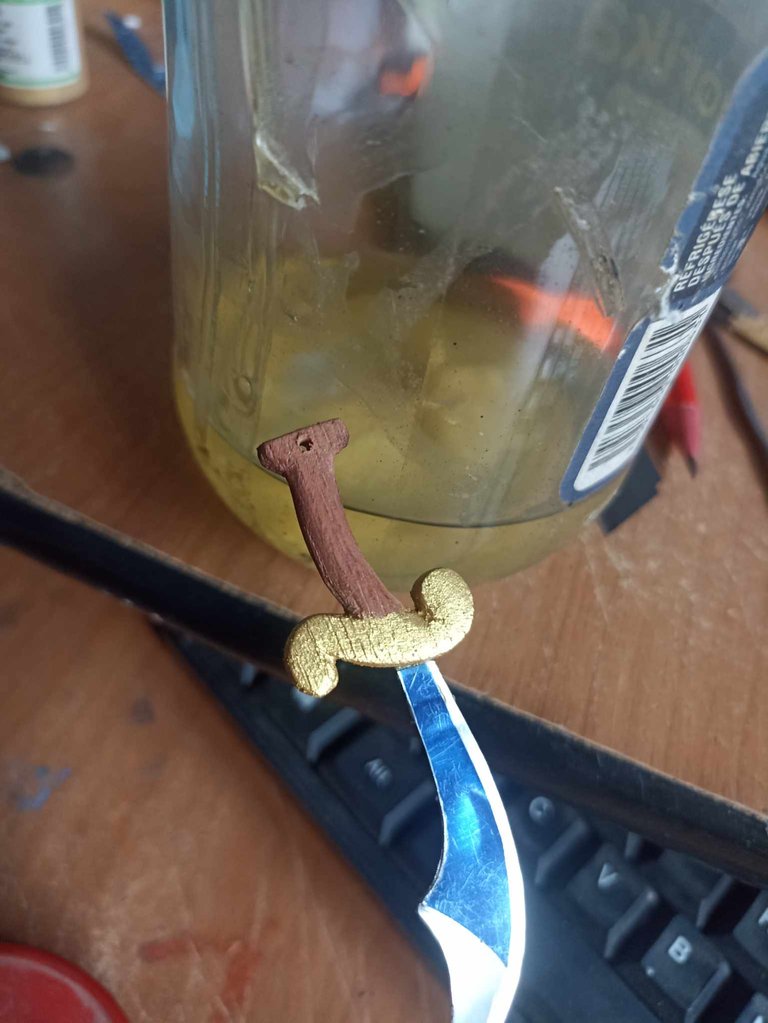 | 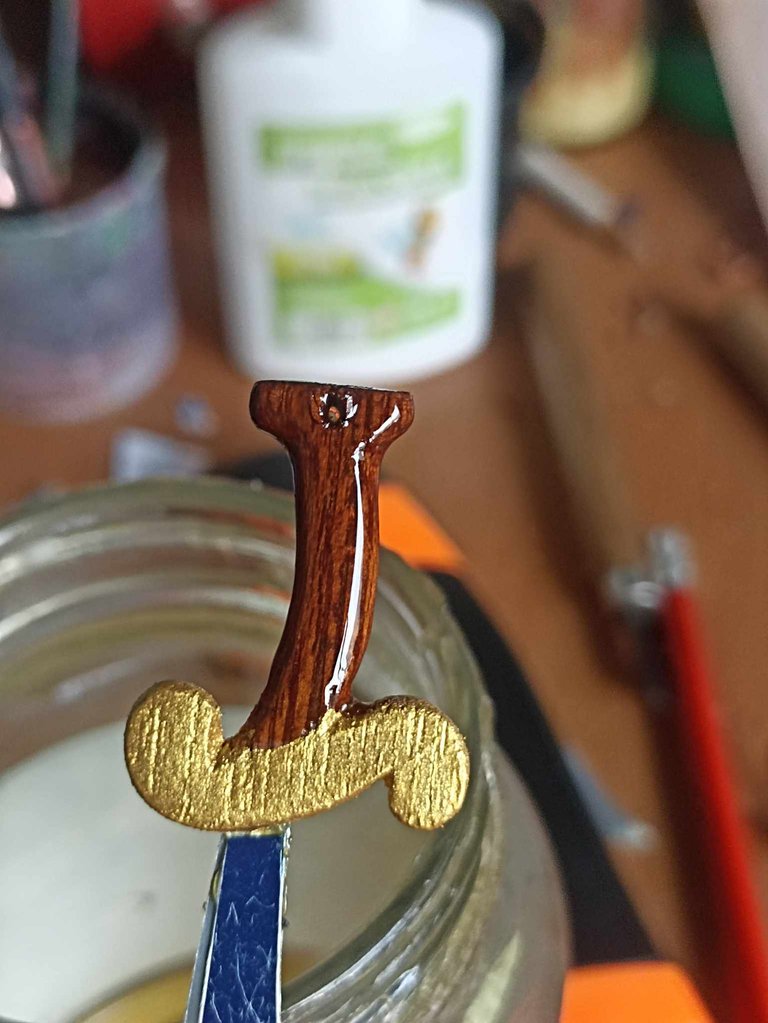 | |
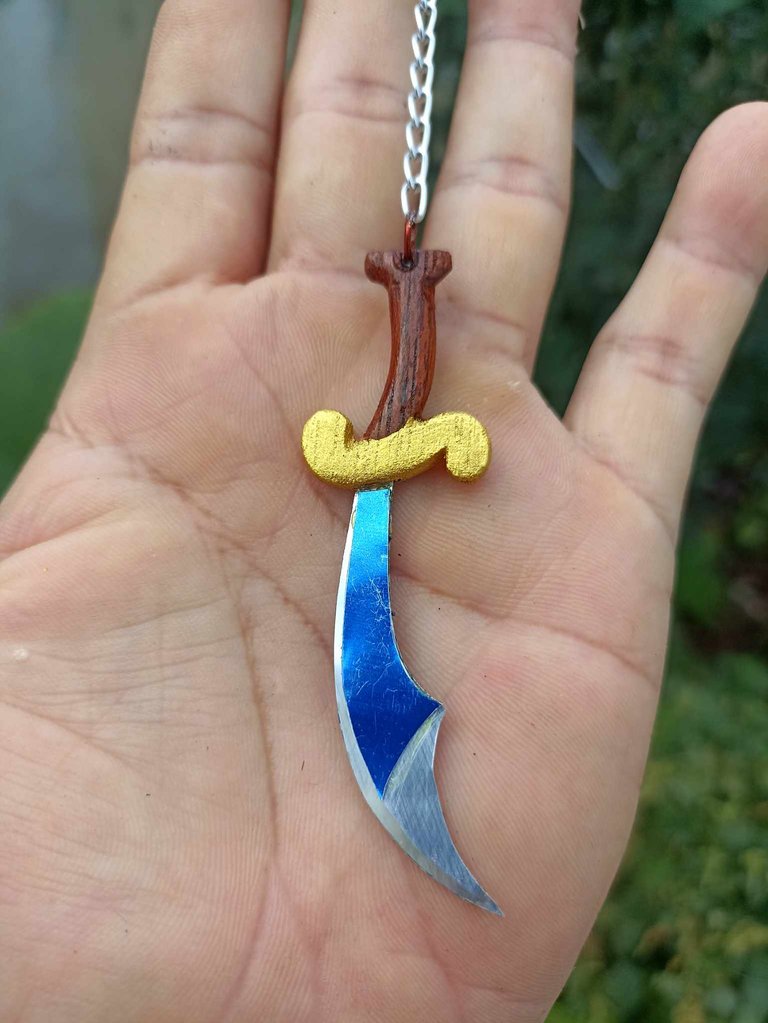
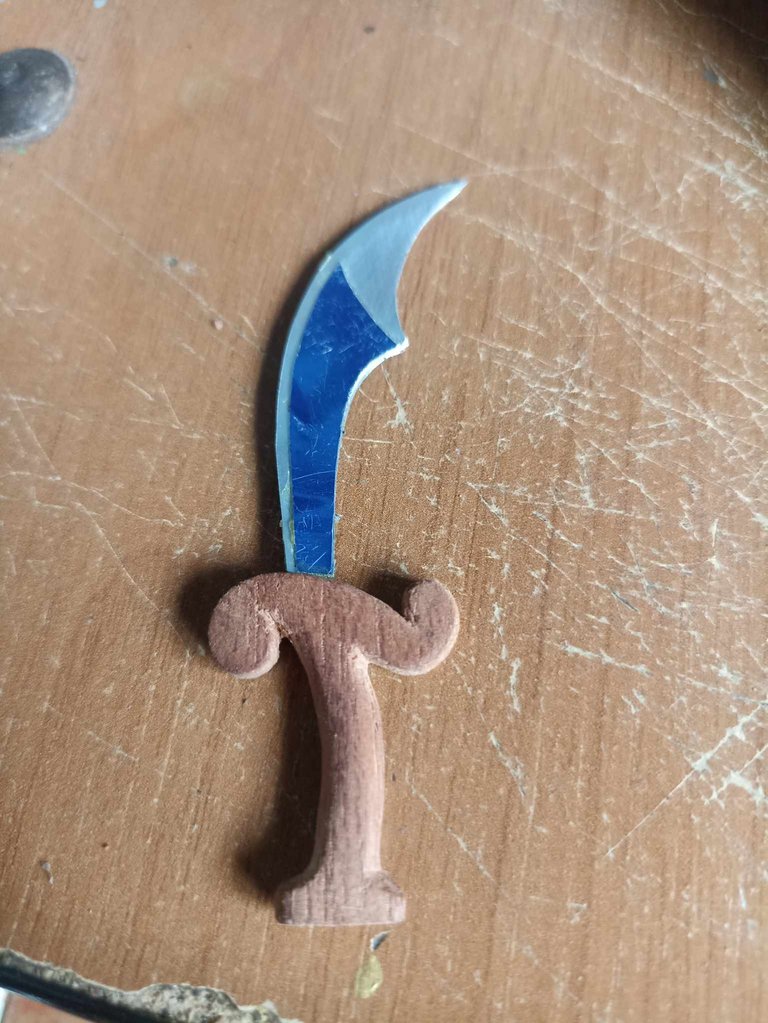
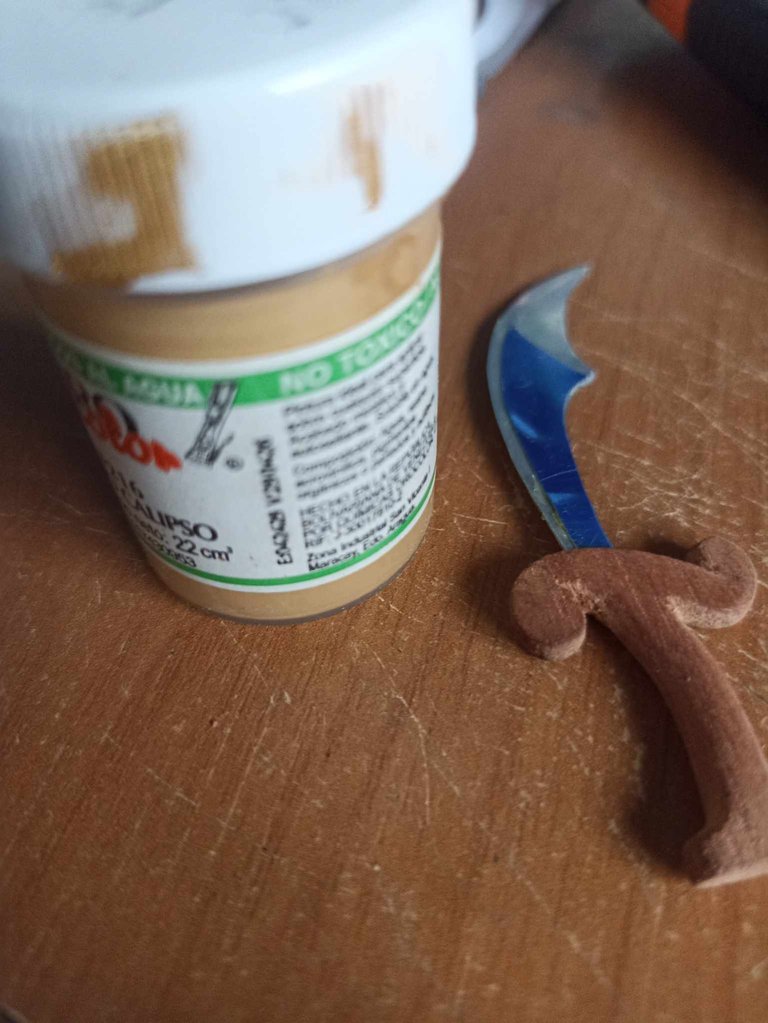
Now it's time to assemble the two pieces. Through the hole I made earlier in the hilt, I insert the smaller part of the sword. I also put glue on it so that it lasts longer. After that, I start painting part of the hilt with gold paint, and I apply a little varnish to the rest of the handle so that the wood gets a more reddish color. Finally, I put a ring where the chain will go and thus become a beautiful keychain.
Ahora es el momento de ensamblar las dos piezas, por el agujero que hice anteriormente en la empuñadura, introduzco la aprte más pequeña de la espada, también el coloco pegamento para que perdure más en el tiempo. Después de eso comienzo a pintar parte de la empuñadura con color dorado, el resto del mango le aplico un maño de barníz para que la amdera obtenga un color más rojizo. Para finalizar le coloco un aro por donde irá la cadena y así convertirse en un hermoso llavero.
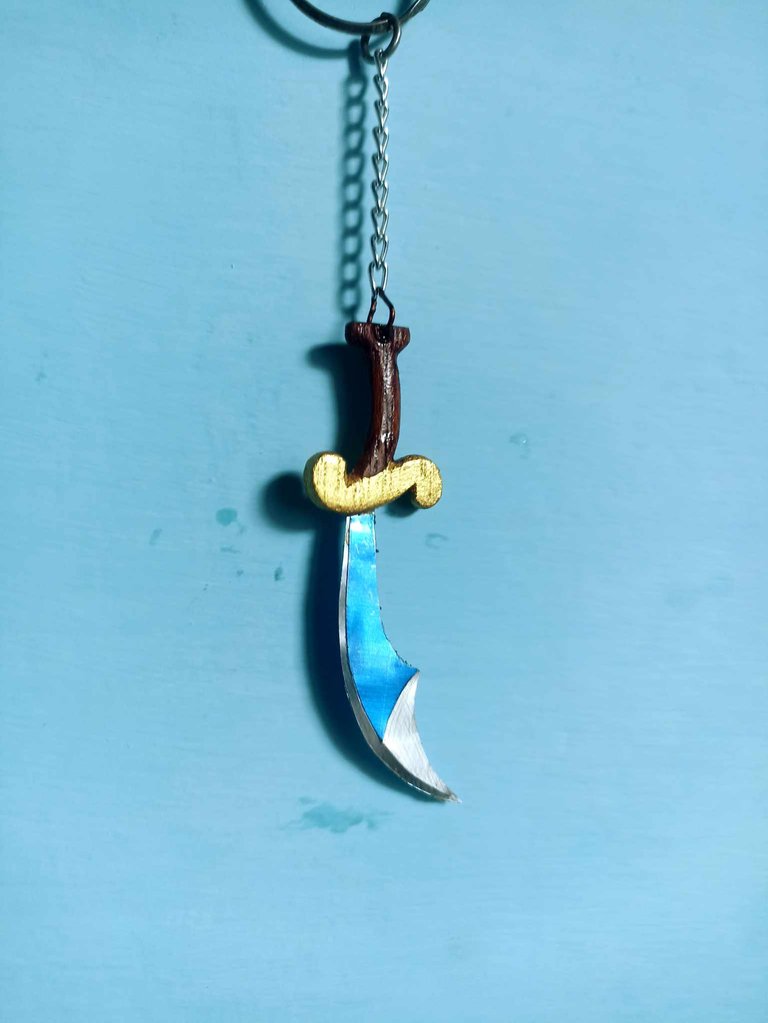
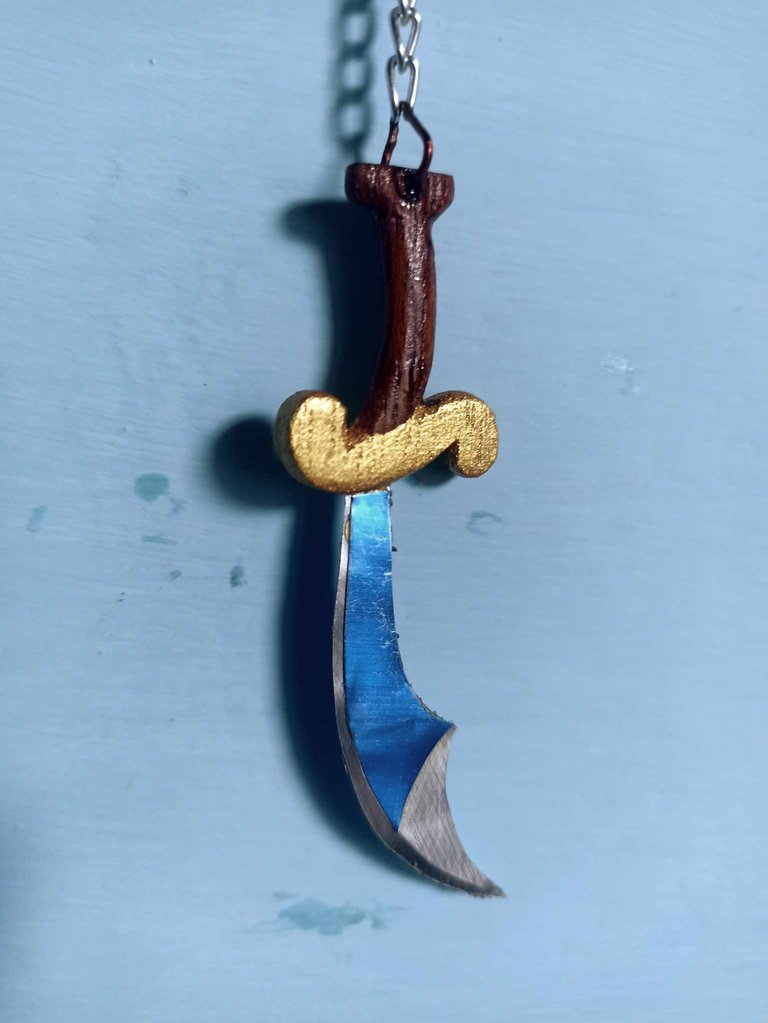
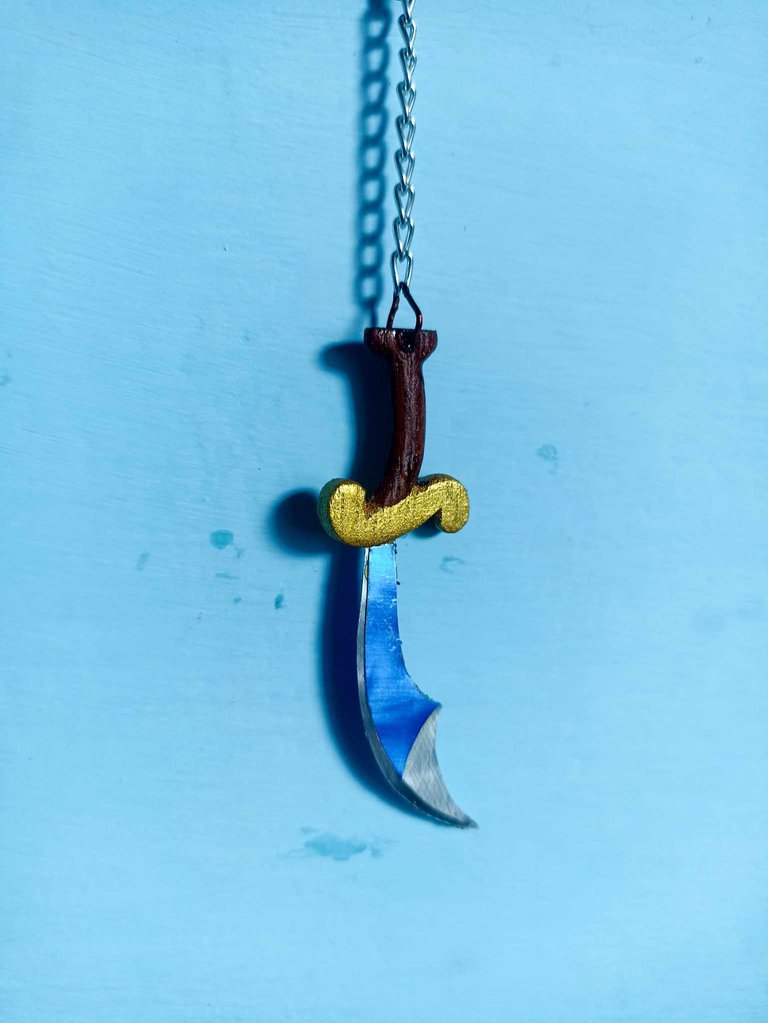
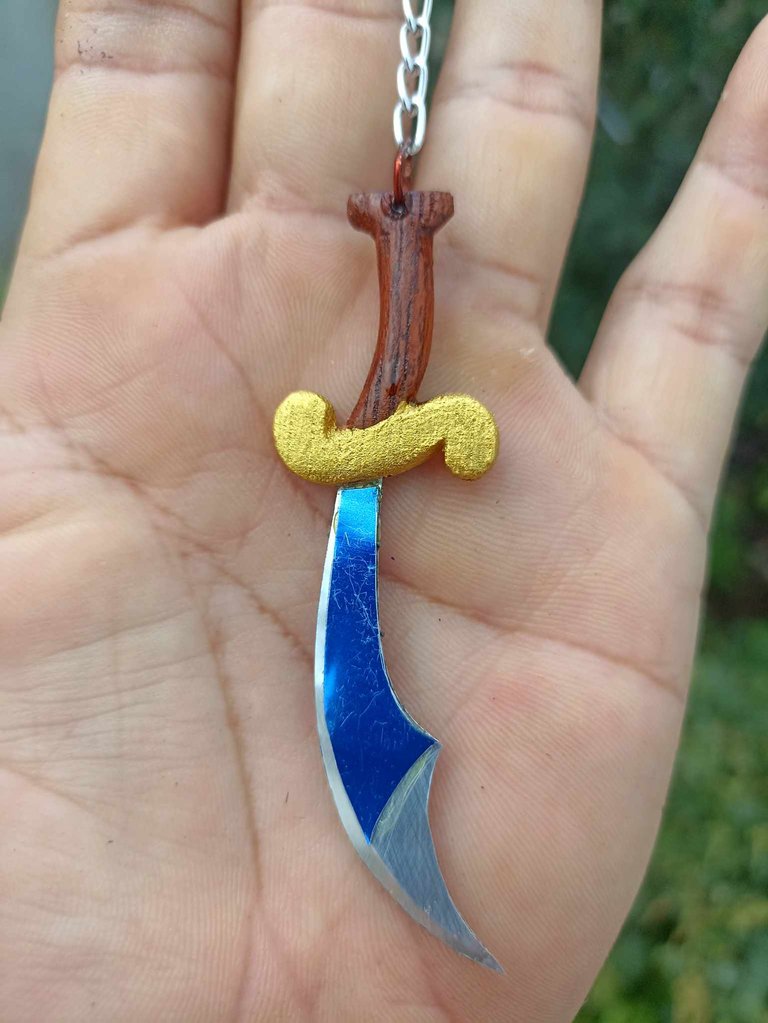
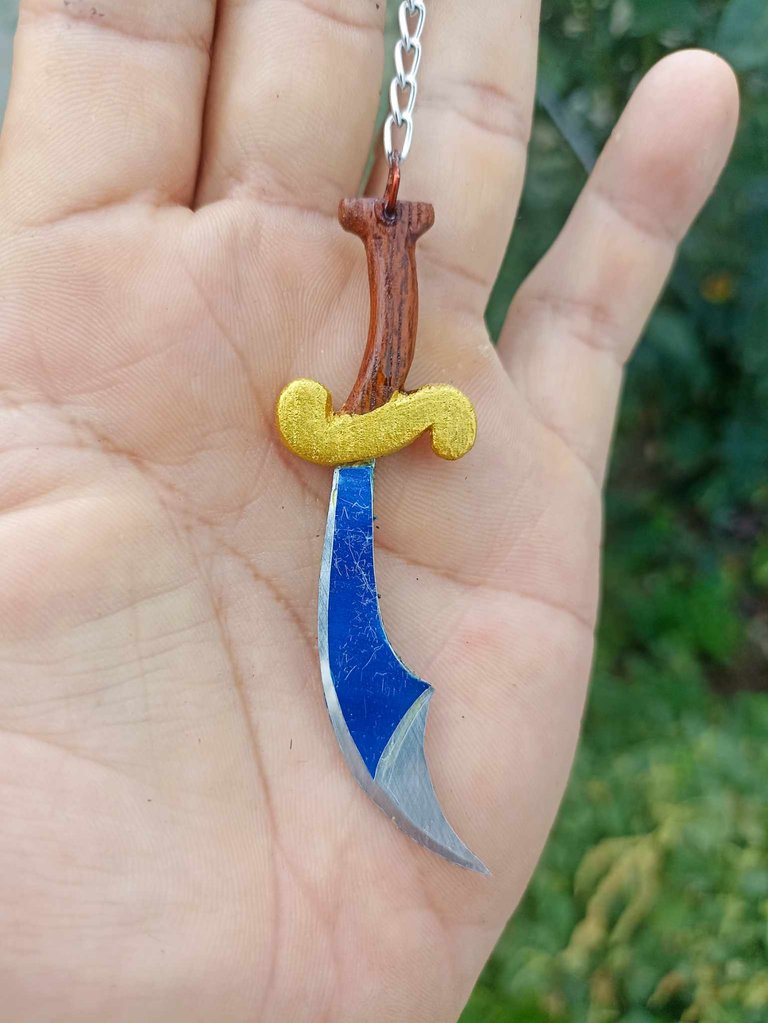
What do you think of the result? Something that I really like and that catches my attention is the contrast between the golden color and the blue color that stands out on the sword's blade, this type of small pieces always have that charm and especially when they are based on the idea of a design as cool as the Naga Warrior sword. This has been my contribution, I hope you liked how it turned out, do not forget to leave your comments with your appreciations, they are always very important to me, for now I say goodbye until very soon.
Qué les ha parecido el resultado? algo que me gusta mucho y me llama la atención es el contraste entre el color dorado y el color azul que sobre sale en la hoja de la espada, este tipo de piezas pequeñas siempre tienen ese encanto y especialmente cuando parten de la idea de un diseño tan genial como la espada de Naga Warrior. Este ha sido mi aporte, espero que les haya gustado como quedó, no olviden dejar sus comentarios con sus apreciaciones, siempre son muy importantes para mi, por ahora me despido hasta muy pronto.
Posted Using INLEO
Eres todo un artesano, ¿Aprendiste solo o alguien te enseño?
No hice algún curso en particular pero tampoco aprendí solo. Vi muchísimos vídeos y el viejo ensayo y error, de esa manera fui aprendiendo. De manera que todos aquellos que se tomaron el tiempo de publicar lo que sabían hacer, por Youtube, fueron mis maestros.
Te quedó genial tal cual como el de la carta, y esa combinación de madera y lata perfecta...
!discovery 35
Gracias amiga mía, primera vez que hago alguna de las armas por separado
This post was shared and voted inside the discord by the curators team of discovery-it
Join our Community and follow our Curation Trail
Discovery-it is also a Witness, vote for us here
Delegate to us for passive income. Check our 80% fee-back Program
Súper
Muchísimas gracias!