Greetings friends. The other day I was walking through a park where there are many trees.
Thinking about these magnificent structures, I thought of immortalizing one of these in a small Dije. I noticed a very curious tree that although it had a big and thick trunk, its leaves were not very big and hardly stood out among the trunk. I found the shape of this tree curious so I decided to take it as a reference.
Español
Saludos amigos. El otro día paseaba por un parque en dónde hay muchos árboles.
Pensando en estás magníficas estructuras, pensé en inmortalizar una de estas en un pequeño Dije. Me fijé en un árbol muy curioso que aunque era de tronco grande y grueso, sus cúmulo de hojas no eran del todo grande y apenas resaltaban entre el tronco. Me pareció curioso la forma de este árbol así que decidí tomarlo como referencia.
Step by step
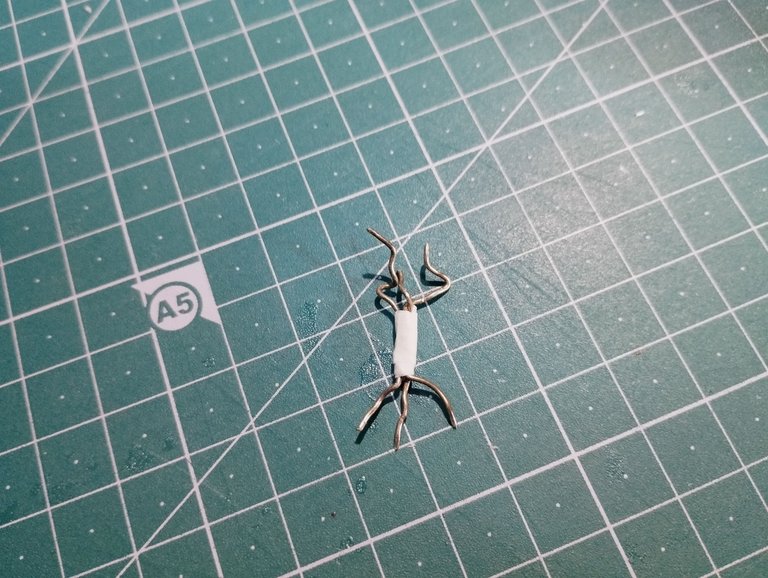
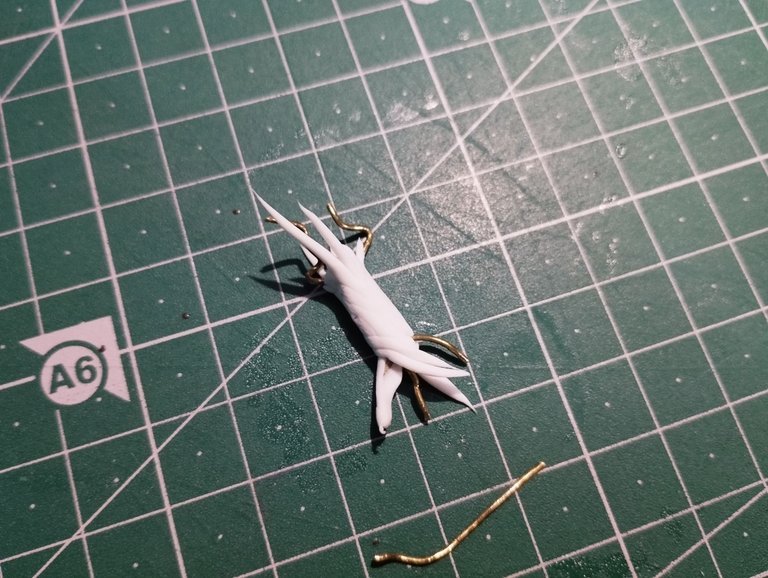
The first thing I started this charm with was a wire base.
The shape I decided to use these wires in is one that looks like a bouquet, only with some wire coming out of the top and bottom. In the middle I put tape, that's why I said it looks like a bouquet.
Paso a paso
Lo primero con lo que empecé este dije fue con una base de alambre.
La forma que decidí utilizar estos alambres es una parecida a un ramo, solo que con algunos alambre saliendo de la parte superior e inferior. En medio le coloqué cinta adhesiva, por eso dije que se parece a un ramo.
One way to make this charm is, first, with a full mass of flexible dough and then shaping lines and covering the wire with the flexible dough; second, is how I did it, with several lines of flexible dough that are then rolled into what we will call the “bouquet”.
Una manera de hacer este dije es, primero, con un masa completa de masa flexible y luego ir moldeando líneas y cubriendo el alambre con la masa flexible; segundo, es como yo lo hice, con varias líneas de masa flexible que luego se enrollan en lo que llamaremos el "ramo".
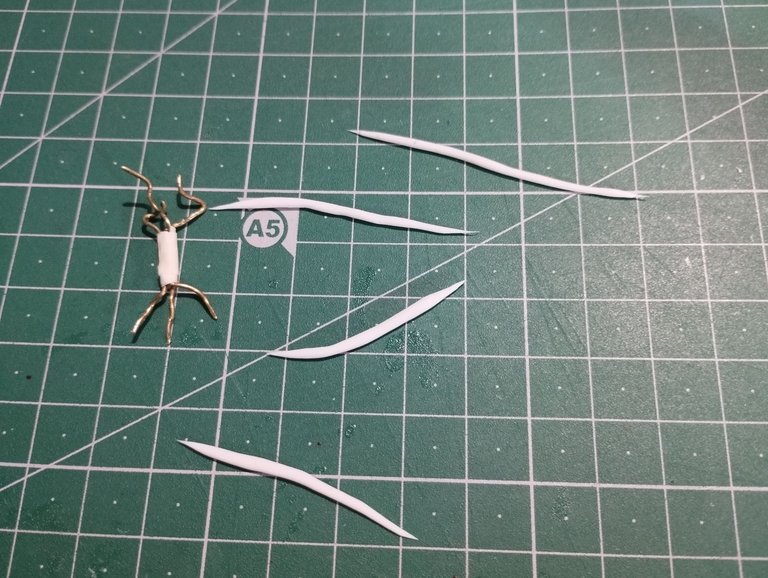
I covered this bouquet with these lines of flexible dough, which I directed in one direction, diagonally and downward.
Then, with the ends of each line I covered the small pieces of wire at the bottom and top of the aforementioned bouquet.
Este ramo lo cubrí con estas líneas de masa flexible, las cuales dirigí en una dirección, en diagonal y hacia abajo.
Luego, con las puntas de cada línea cubrí los trocitos de alambres que había en la parte inferior y superior del ya mencionado ramo.
Finally, when covering the whole piece, it is left with a shape that is not defined at all, so it becomes necessary to use some tools such as wooden sticks or needles to better shape some lines and direct them downwards and upwards, as you can see in the image below.
Finalmente al cubrir toda la pieza, está queda con una forma para nada definida, por lo que se vuelve necesario usar algunas herramientas como palillos de madera o agujas para moldear mejor algunas líneas y dirigirlas bien hacia abajo y hacia arriba, tal cómo pueden ver en la imagen de abajo.
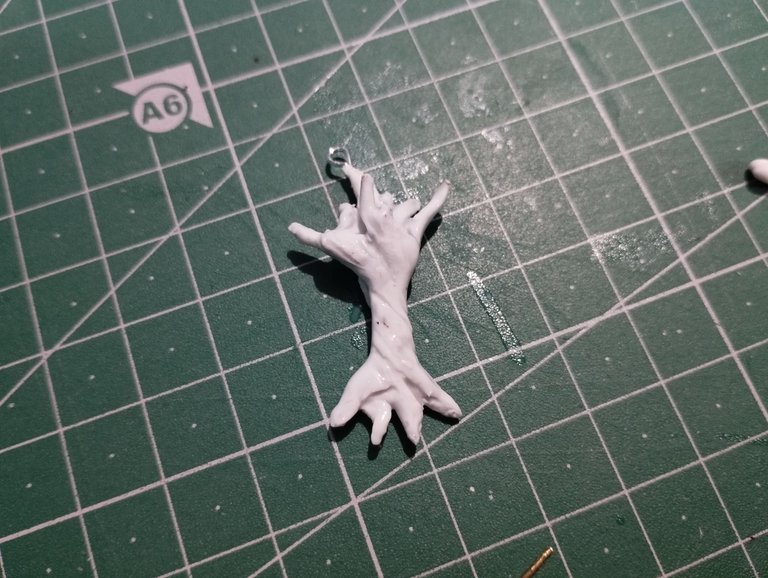
Now it's time to place what would be the leaves of the tree.
To make them I only used small pieces of material and placed them between what would be the branches. These small pieces of flexible dough can be lightly hit with a wooden stick to give it that texture that can be seen in the image below.
In your case you can place as many leaves as you want, filling the piece with as much flexible dough as you like. In my case I didn't put too many because, as I said, I wanted to make something similar to the tree I mentioned at the beginning.
Ahora toca colocar lo que serían las hojas del árbol.
Para hacerlas solo usé pequeños pedacitos de material y los ubiqué entre los que serían las ramas. Estos trocitos de masa flexible se pueden ir golpeando levemente con un palillo de madera para darle esa textura que se puede apreciar en la imagen de abajo.
En su caso pueden colocar tantas hojas como quieran, rellenando la pieza con tanta masa flexible como gusten. En mi caso no coloqué demasiadas pues, como dije, quería hacer algo similar al árbol que les mencioné al comienzo.
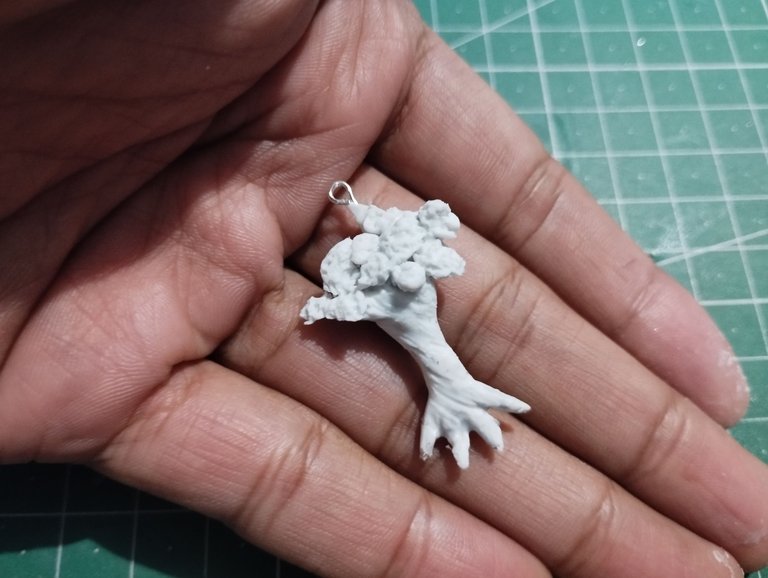
After that, I let the piece dry overnight.
It doesn't need to be that long to dry, but in this case I finished late, so I let it sit overnight. You can. Leave the piece a few hours drying and it will harden.
Only then, when it is dry, you can start painting it. I used black as a good base for painting.
Después de esto, la pieza la dejé secar toda la noche.
No es necesario que esté durante tanto tiempo secando, pero en este caso terminé tarde, así que lo dejé toda la noche en reposo. Ustedes puede. Dejar la pieza unas cuantas horas secando y se endurecerá.
Solo en ese momento, cuando esté seca, podrán comenzar a pintarla. Yo usé el color negro como una buena base para pintar.
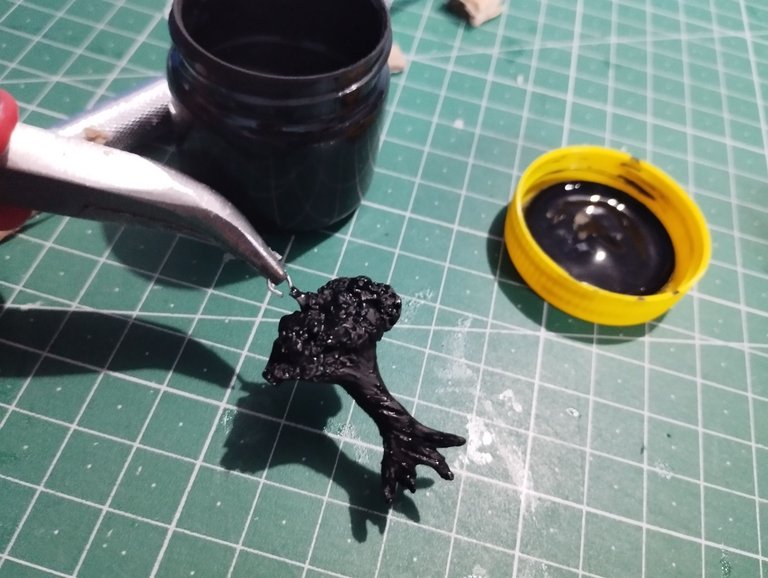
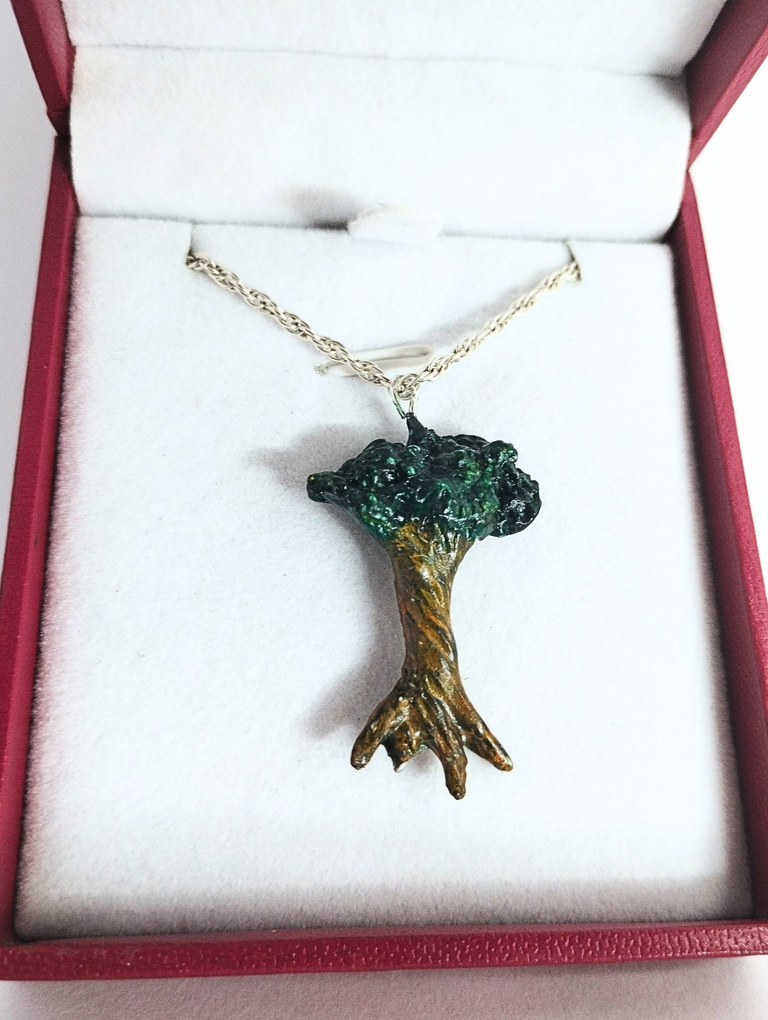
On top of this black color I used the basic colors of a tree, a few shades of brown for the trunk and a few shades of green for the leaves.
There are many techniques for painting, in my case I simply gave a few brushstrokes on the piece without completely covering all the cracks, as I had the black base, so by not covering it this gives depth to the piece.
Encima de este color negro usé los colores básicos de un árbol, unas cuantas tonalidades de marrón para el tronco y unas cuantas tonalidades de verde para las hojas.
Hay muchas técnicas para pintar, en mi caso yo simplemente di unas cuantas pinceladas en la pieza sin cubrir completamente todas las grietas, pues tenía l base negra, así que al no cubrirla esto da profundidad a la pieza.
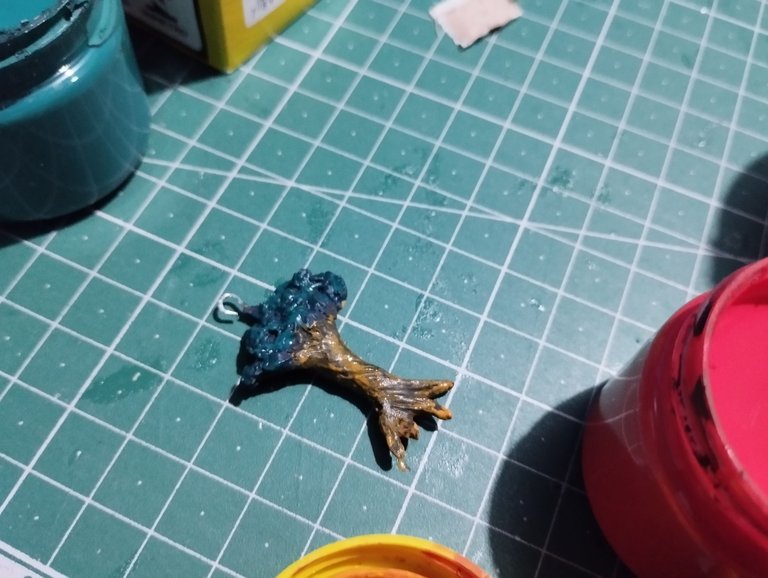
The last thing was to add a couple of layers of glue, enamel or some transparent protector for the pendant. In my case it was glue, you can use the material of your preference.
Lo último fue agregar un par de capas de pegamento, esmalte o algún protector transparente para el dije. En mi caso fue pegamento, ustedes pueden usar el material de su preferencia.
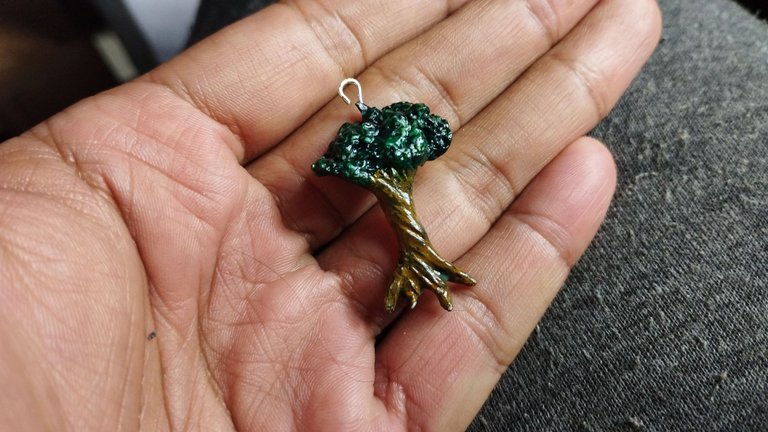
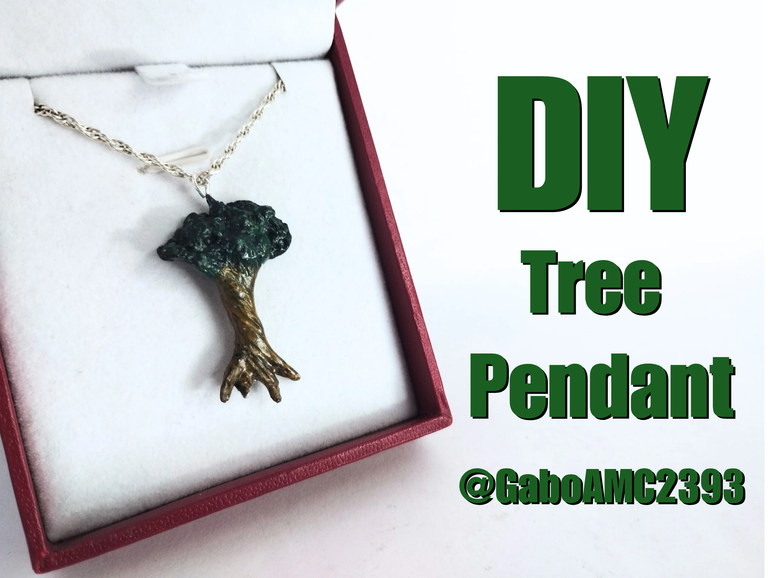
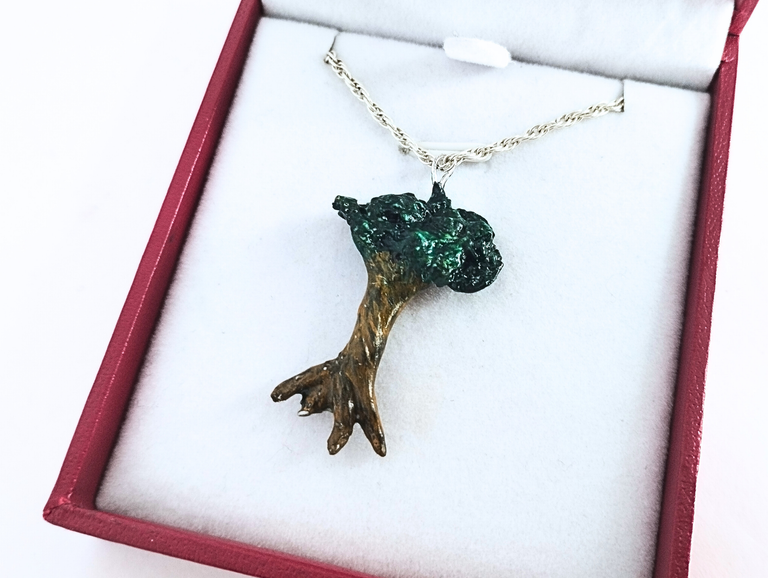
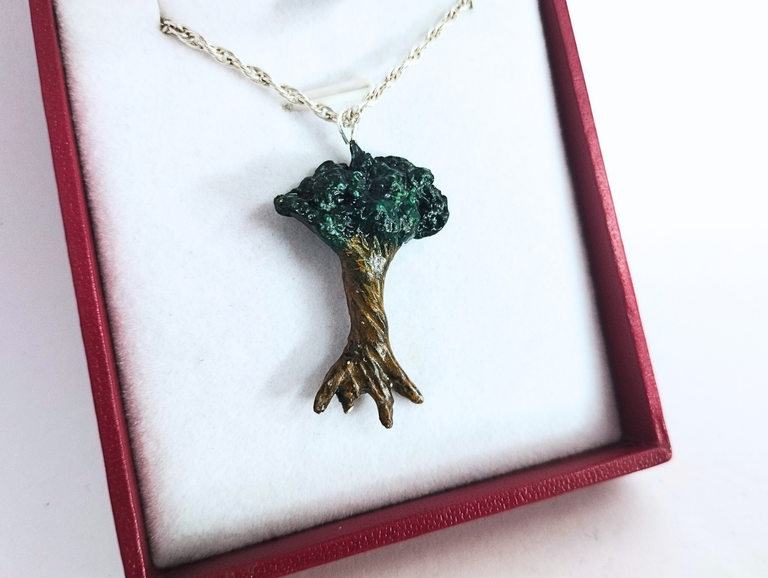
This is how it was finished. Below you can see a series of pictures of the final result.
De esta manera quedó terminado. A continuación pueden ver una series de fotografía del resultado final.

Well friends, that's all for now. I hope you liked what I said. I invite you to leave your opinions below in the comments, as always I will be happy to read them. With nothing more to add I'll say goodbye then...
See you next time!
Bien amigos, esto ha sido todo por ahora. Espero que mi dije les haya gustado. Los invito a dejar sus opiniones abajo en los comentarios, como siempre estaré encantado de leerlos. Sin más que agregar me despido entonces...
¡Hasta la próxima!

Que original, me encantó ese colgante tus manos hacen magia en tus piezas @gaboamc2393 le dan un acabado perfecto a cada detalle, saluditos 🤗
Sending you Ecency curation votes!
