
¡Hola a todos los creativos de Hive y a los amantes de la joyería!
Espero hayan tenido un día maravilloso.
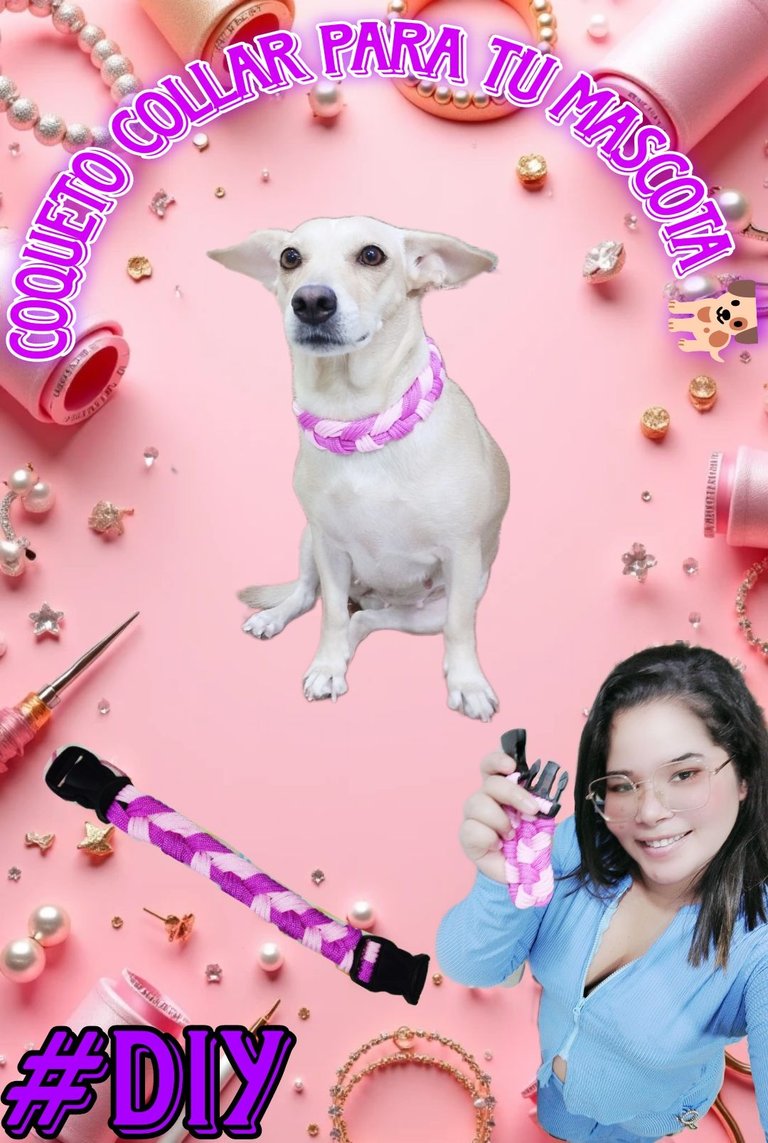
Me emociona compartir con ustedes mi proyecto en la comunidad de Jewelry: un collar especial para mi perrita, elaborado con la técnica de tejido de cuatro cabos. En este post, les mostraré el paso a paso de cómo creé esta pieza única. Acompáñenme en este viaje creativo, donde la pasión por la joyería se une al amor por nuestras mascotas. ¡Espero que disfruten de este tutorial tanto como yo disfruté creándolo!
Hello to all the Hive creatives and jewelry lovers out there!
I hope you had a wonderful day.
I'm excited to share with you my project in the Jewelry community: a special necklace for my little dog, made using the four strand weaving technique. In this post, I'll show you the step-by-step of how I created this unique piece. Join me on this creative journey, where the passion for jewelry meets the love for our pets, I hope you enjoy this tutorial as much as I enjoyed creating it!

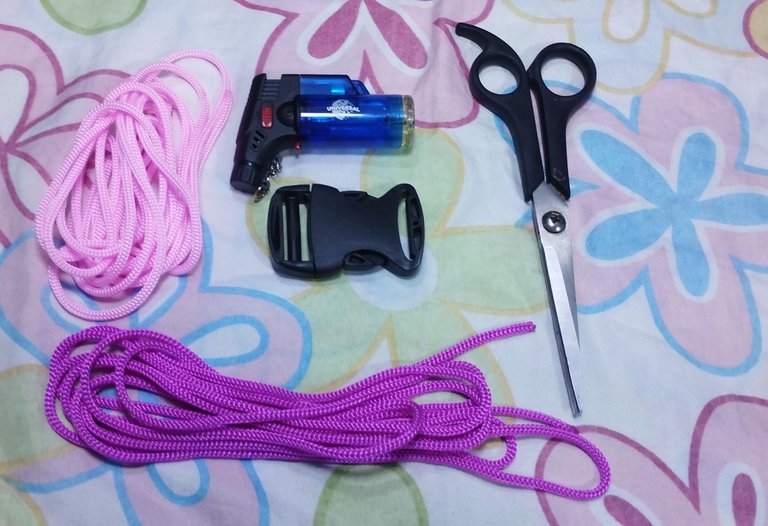
Materiales:
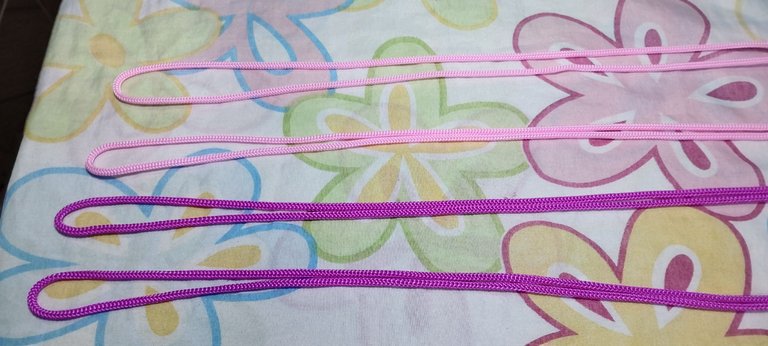
6 metros de cuerda de color rosa.
6 metros de cuerda de color fucsia.
Tijeras.
Encendedor.
Hebilla de plástico.
Materials:
6 meters of pink rope.
6 meters of fuchsia rope.
Scissors.
Lighter.
Plastic buckle.
Pasos a seguir:
Steps to follow:
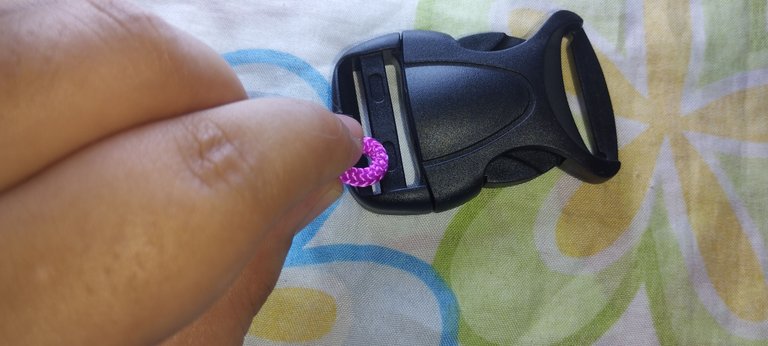
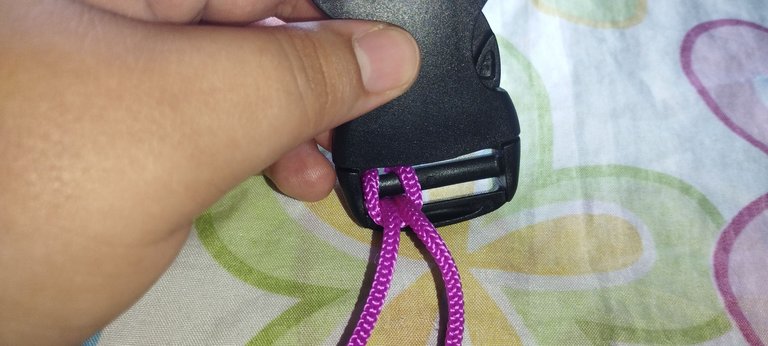
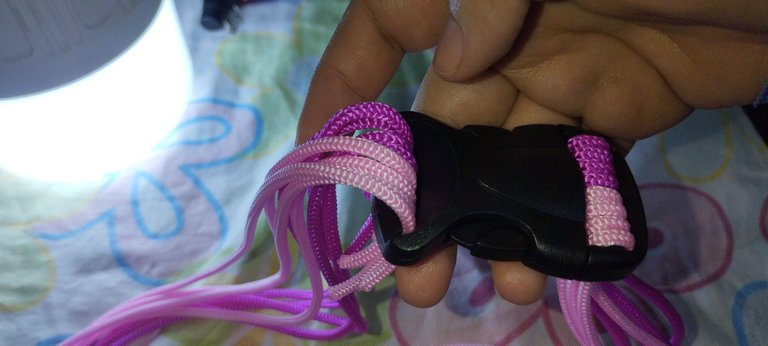
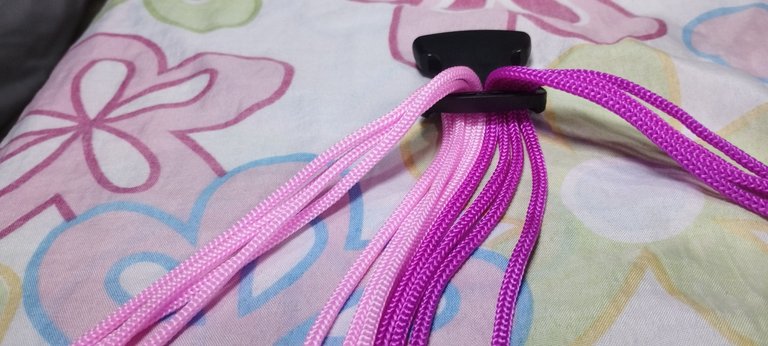
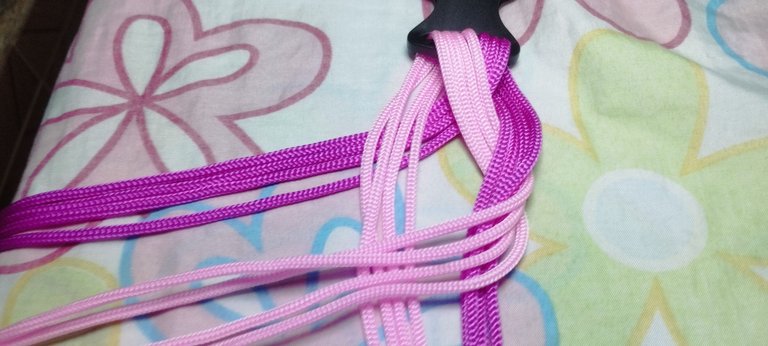
Paso 1: tomamos las cuerdas la doblamos a la mitad, por la parte de la hebilla donde están los dos agujeros metemos la cuerda de abajo hacia arriba y otra vez hacia abajo y en la parte doblada metemos la cuerda sobrante como si fuéramos a hacer un nudo y así hacemos con todas.(esto lo vamos a hacer con la hebilla cerrada)
Step 1: we take the ropes and fold them in half, through the part of the buckle where the two holes are we put the rope from the bottom up and down again and in the folded part we put the excess rope as if we were going to make a knot and so we do with all of them (we are going to do this with the buckle closed).
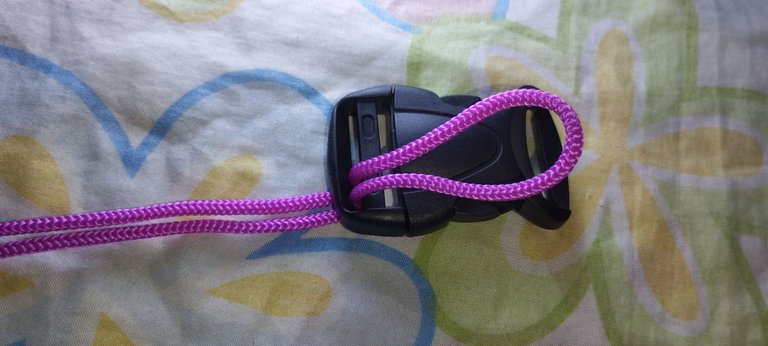
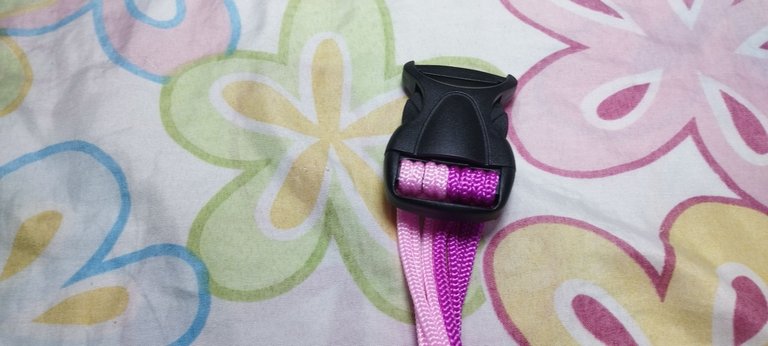
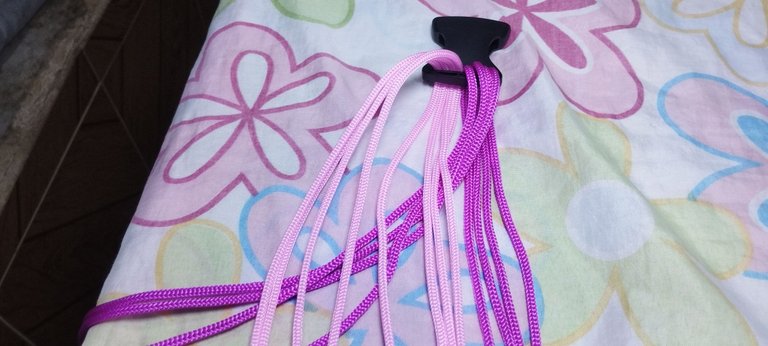
Paso 2: una vez ya las cuerdas bien puestas y en orden, agarramos las puntas y la metemos por la otra parte de la hebilla de arriba hacia abajo y jalamos lo suficiente.
Step 2: once the ropes are well placed and in order, we take the ends and put it through the other part of the buckle from top to bottom and pull it enough.
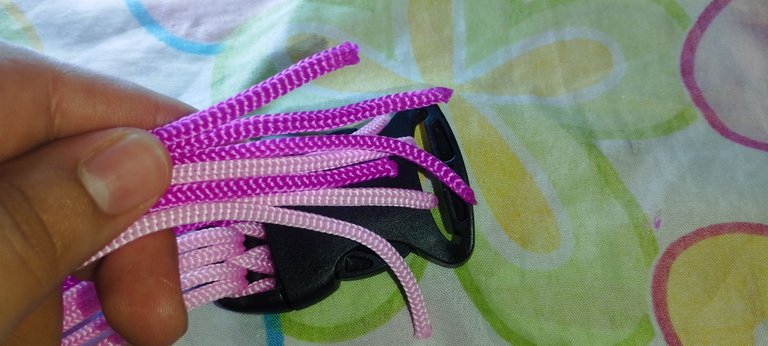
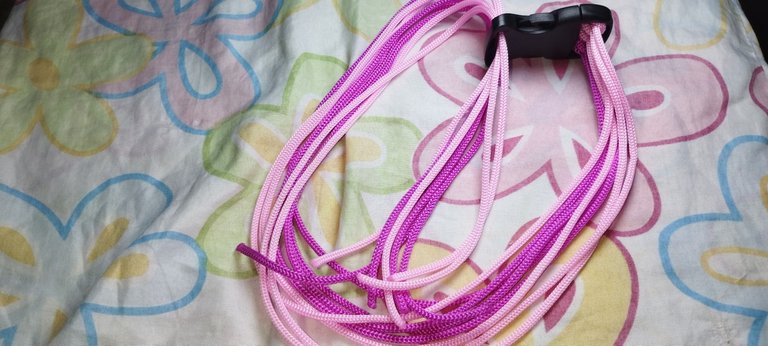
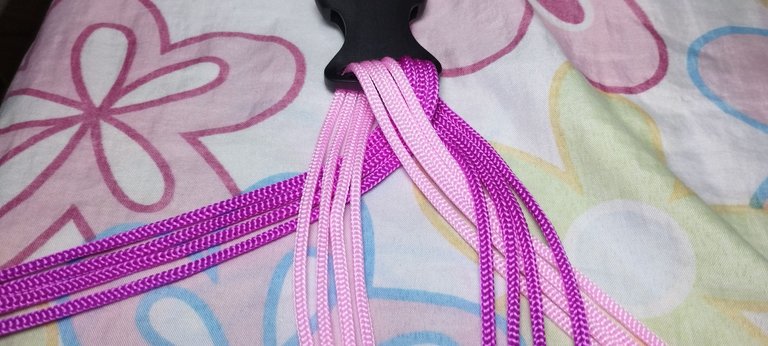
Paso 3: ahora abrimos la hebilla y medimos el cuello de nuestra mascota.el hilo que esta afuera lo estiramos sin apretar el cuello de de nuestra perrit@
Step 3: now we open the buckle and measure the neck of our pet.the thread that is outside we stretch it without squeezing the neck of our dog.
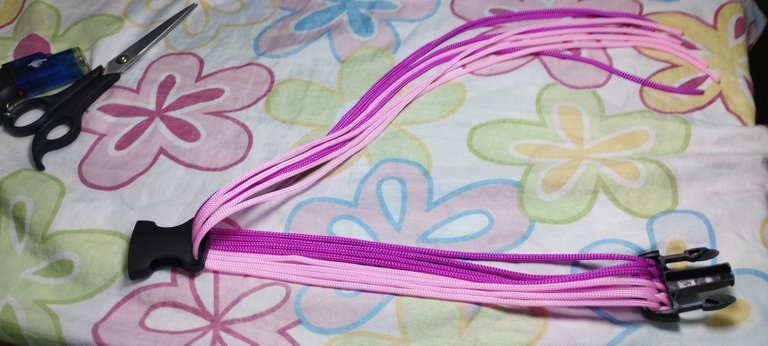
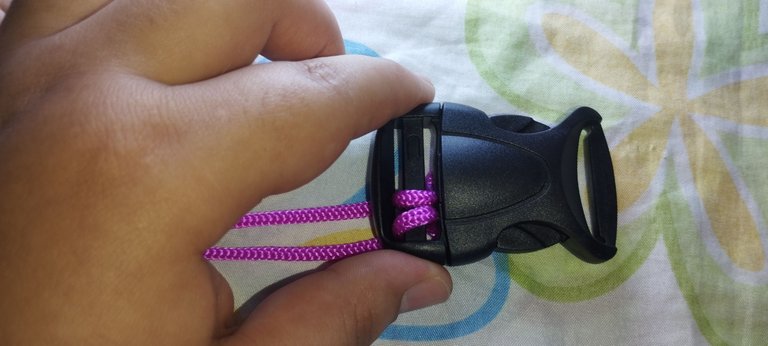
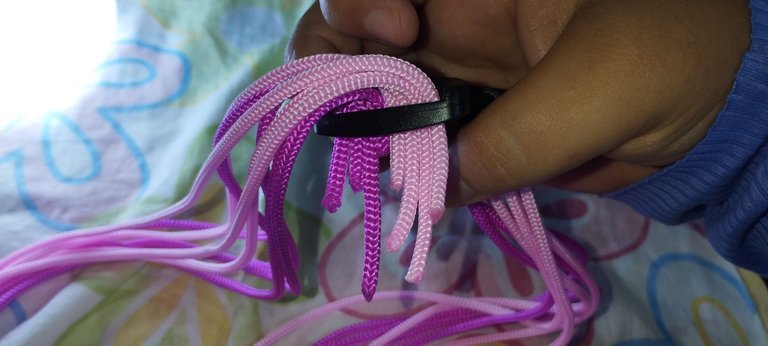
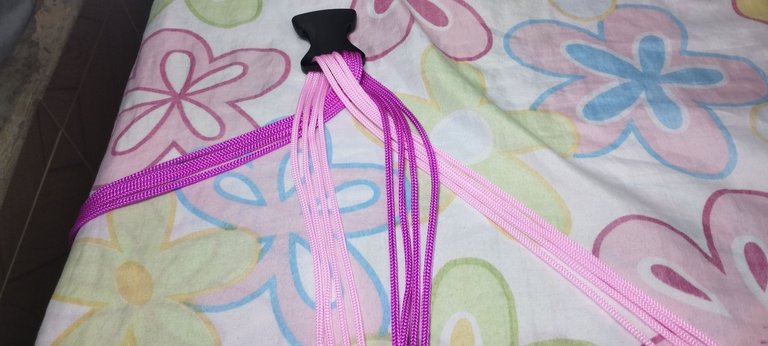
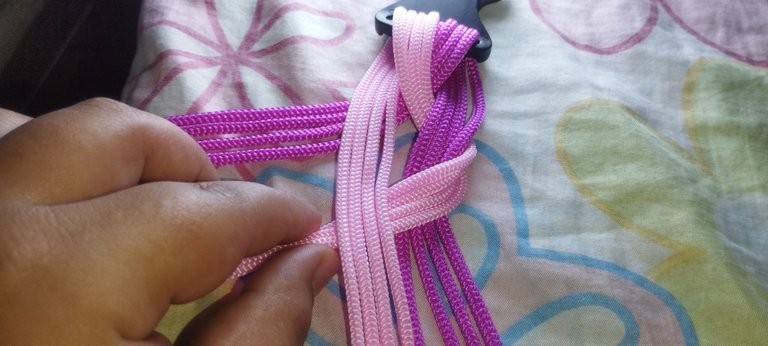
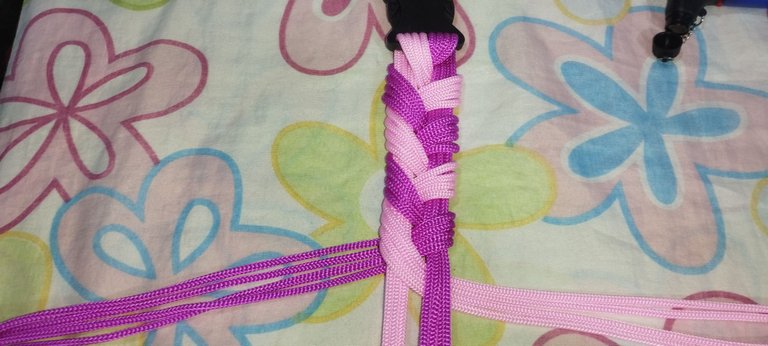
Paso 4: hecho esto colocamos el collar en dónde podamos estar cómodos, ponemos la hebilla de forma vertical, acomodamos las cuerdas para que estén en orden y dividimos en dos, la cuerda de un extremo la pasamos por debajo de la otra cuerda y hacemos lo mismo con el otro extremo y en el medio se va a ver la forma de una "X"
Step 4: Once this is done, we place the necklace where we can be comfortable, we put the buckle vertically, we arrange the ropes so that they are in order and divide in two, the rope at one end we pass it under the other rope and we do the same with the other end and in the middle we will see the shape of an “X”.

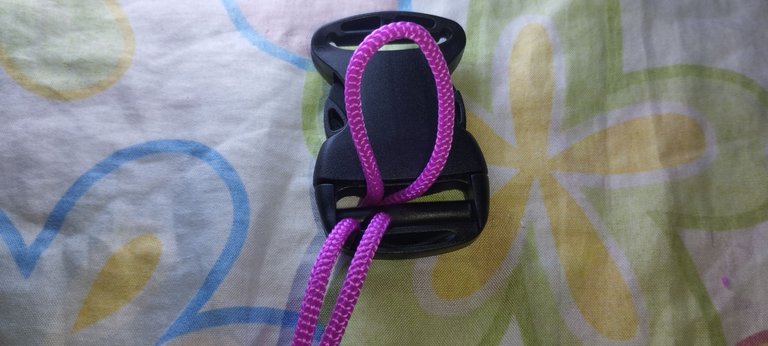
Paso 5: la cuerda rosa la pasamos por arriba de la cuerda fucsia y por debajo de la cuerda rosa y así hacemos con la cuerda fucsia.
Step 5: pass the pink rope over the fuchsia rope and under the pink rope and so on with the fuchsia rope.
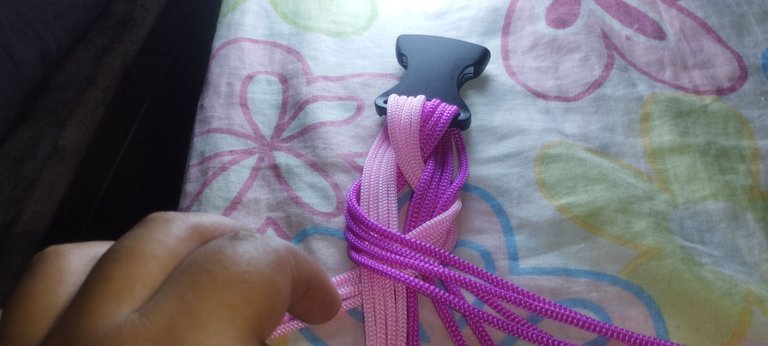
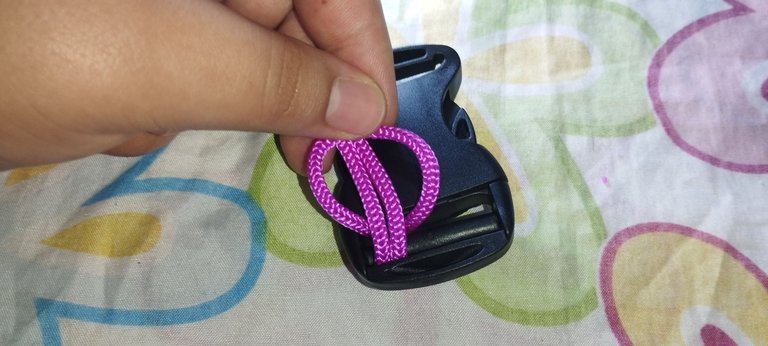
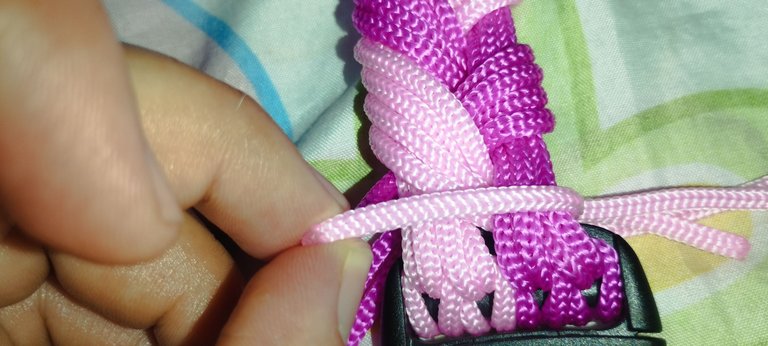
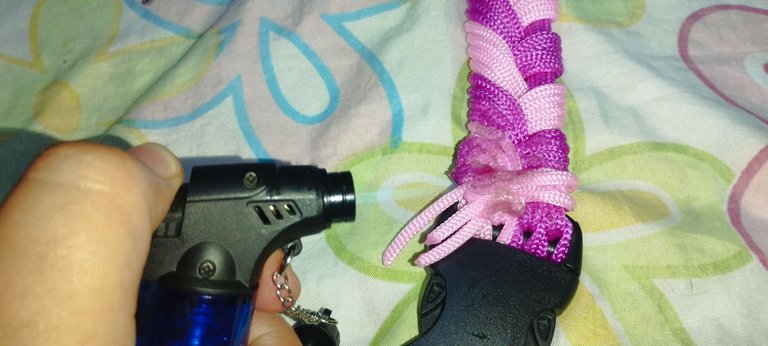
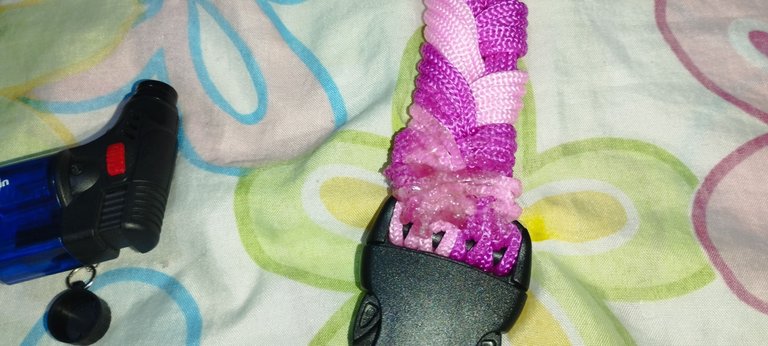
Paso Final: seguimos tejiendo agarrando la cuerda del extremo y pasando por encima del lado izquierdo y por debajo del lado derecho y así hacemos con el otro extremo hasta terminar cuando ya lleguemos a el último tejido con ayuda del encendedor quemamos las puntas de la cuerda sobre el tejido y listo hemos acabado
Final step: we continue weaving grabbing the rope at the end and passing over the left side and under the right side and so we do with the other end until the end when we reach the last weaving with the help of the lighter burn the ends of the rope on the fabric and ready we have finished.

Espero que hayan disfrutado de mi post, este proyecto me permitió combinar mi pasión por la joyería con el amor por mi mascota, creando una pieza funcional y hermosa. A través del paso a paso, compartí con ustedes los materiales y técnicas que utilicé, demostrando que con creatividad y dedicación podemos crear accesorios personalizados para nuestros compañeros peludos.
Espero que este tutorial les haya inspirado a explorar nuevas técnicas y a crear sus propias joyas para mascotas. ¡Gracias por acompañarme en este viaje creativo!
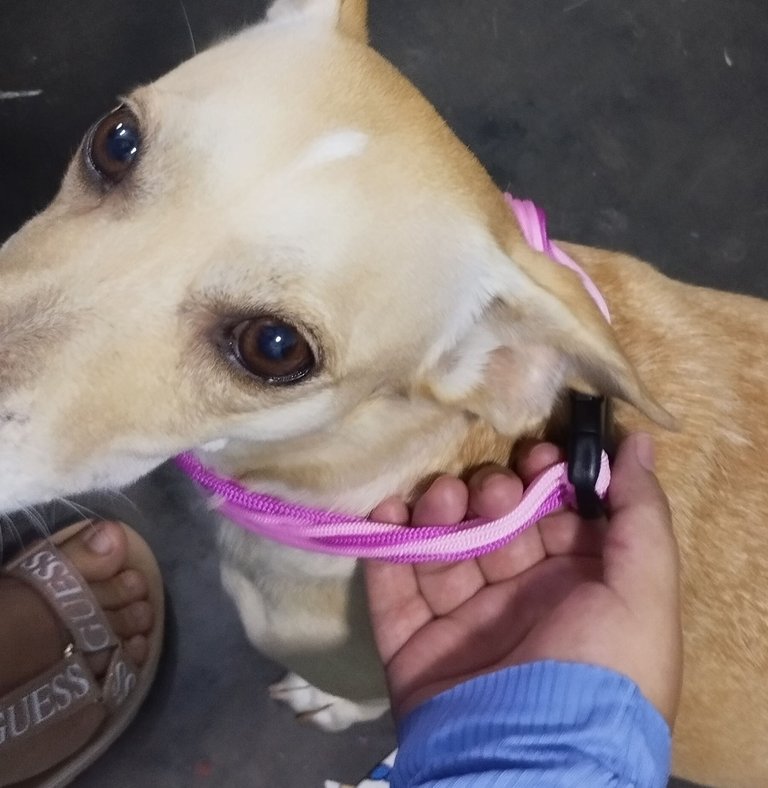
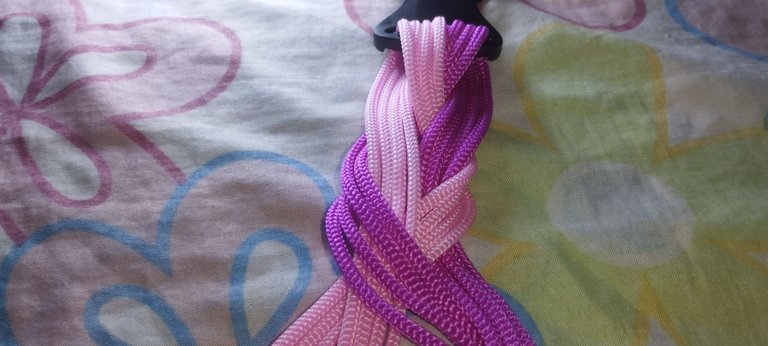
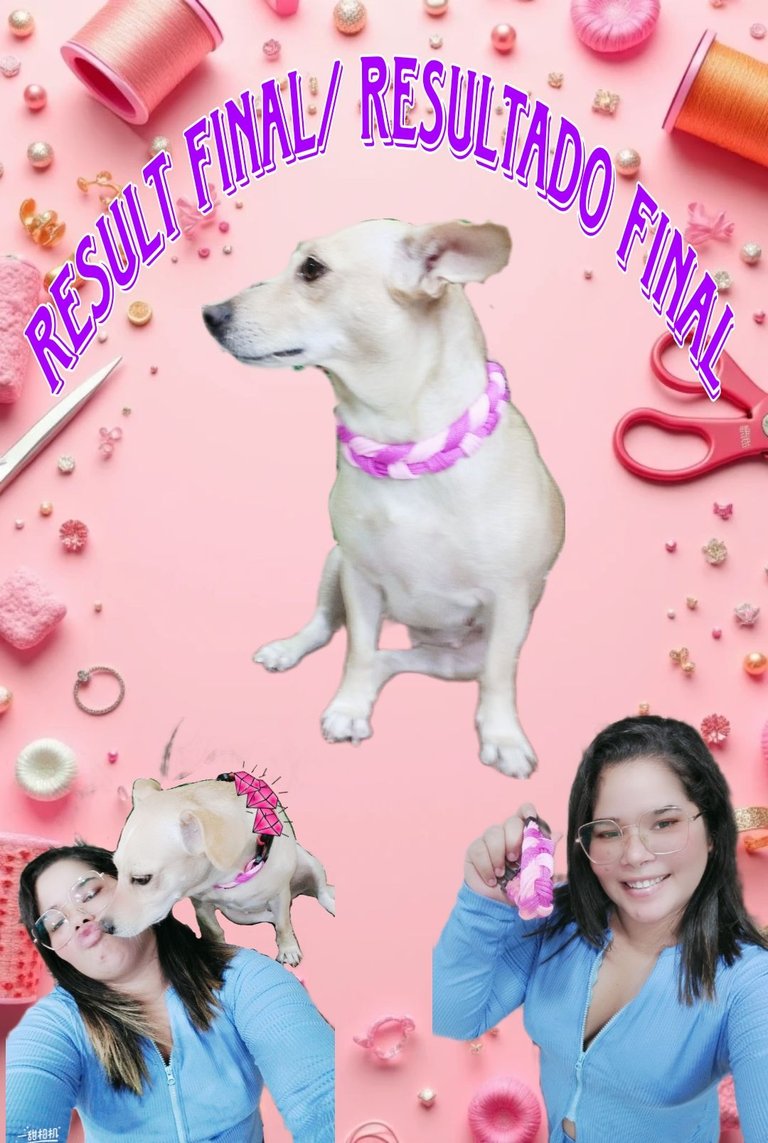
¡Aquí les dejo el resultado Final!
I hope you enjoyed my post, this project allowed me to combine my passion for jewelry with my love for my pet, creating a functional and beautiful piece. Through the step by step, I shared with you the materials and techniques I used, demonstrating that with creativity and dedication we can create personalized accessories for our furry companions.
I hope this tutorial has inspired you to explore new techniques and create your own pet jewelry, and thank you for joining me on this creative journey!
Here is the final result!
Fotos tomadas desde mi celular Redmi note 11 y editadas en la app de PicsArt SALUDOS Y MUCHAS BENDICIONES PARA TODOS
Photos taken from my Redmi note 11 cell phone and edited in the PicsArt app GREETINGS AND MANY BLESSINGS TO YOU ALL
Una creación genial para las mascotas, quedo genial y se ve muy cute puesto, un buen paso a paso.
¡Gracias! Me encanta crear cosas útiles y lindas para mis mascotas, ella quedó muy encantada con su nuevo collar y si es muy coqueta... ¡Me alegra que te haya parecido genial! ¡Y gracias por lo del paso a paso! De verdad me esforcé para que me entendieran y lo puedan hacer para sus mascotas... Nuevamente muchas gracias... Saludos y bendiciones
Hasta las queridas mascotas tienen sus coquetos accesorios. Quedó lindo y a ella le luce muy bien.
Así es amiga @karen.art nuestras mascotas tienen derecho de lucir sus accesorios y estar a la moda😄😄 y a mi pequeña princesa todo le queda muy bien😁😁
This is so heart warming to see your love for your pet, i wish i also had a pet like this but I'm very scared of dogs😭,
Your creation is so lovely it is looking so good on your pet😍😁
Que preciosa se ve con su collar, me encantó 😍