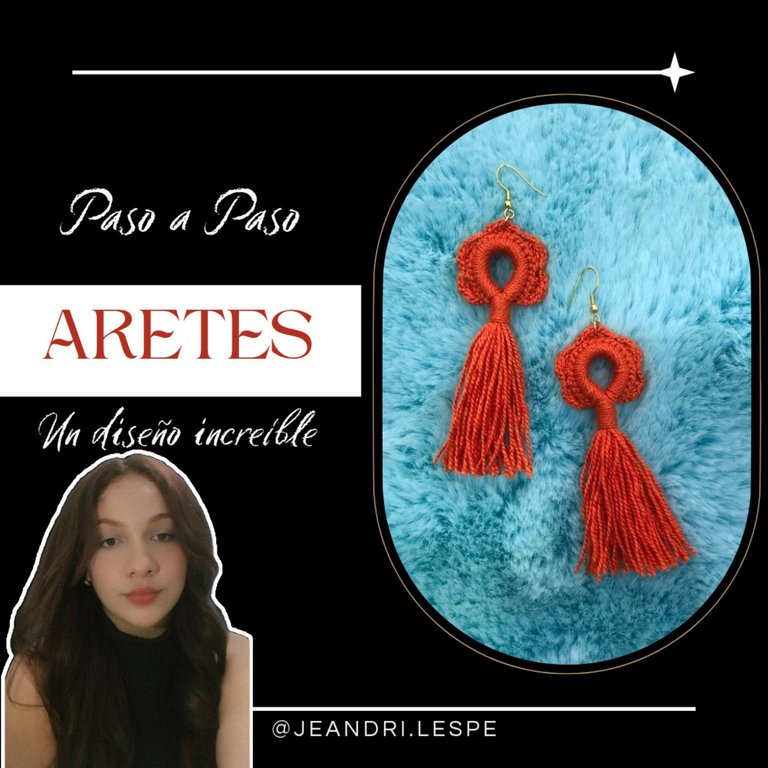
Hola linda comunidad ¡Volvimos! Un diseño más, una nueva creación y por supuesto una nueva oportunidad para compartirles este bello arte en el mundo del crochet ❤️
Lo que amo hacer diseños lindos, fáciles, atractivos a simple vista y compartirlo con ustedes, no sé imaginan, así que, el día de hoy traemos un diseño que tiene todo lo anterior mencionado, se lo mucho que les gustará, así que, ¡Vamos con los materiales y el paso a paso!
Hello lovely community We're back! One more design, a new creation and of course a new opportunity to share this beautiful art in the world of crochet ❤️
I love making cute, easy, attractive designs and sharing them with you, you can't imagine, so today we bring you a design that has all of the above mentioned, I know how much you will like it, so, let's go with the materials and the step by step!
Materiales / Materials ✨💕
- Aguja (número 3) / Needle (number 3) ✨
- Hilo coral / Coral thread ✨
- Argollas / Rings ✨
- Anzuelos / Hooks ✨
- Tarjeta / Card ✨
- Aguja para esconder hebra / Needle to hide thread ✨
Paso 1️⃣ / Step 1️⃣
Lo primero que haremos será ubicar el hilo en la tarjeta y daremos 25 vueltas, luego cortamos y vamos a ubicar la mitad de nuestras vueltas y haremos un nudo para asegurar todas las hebras.
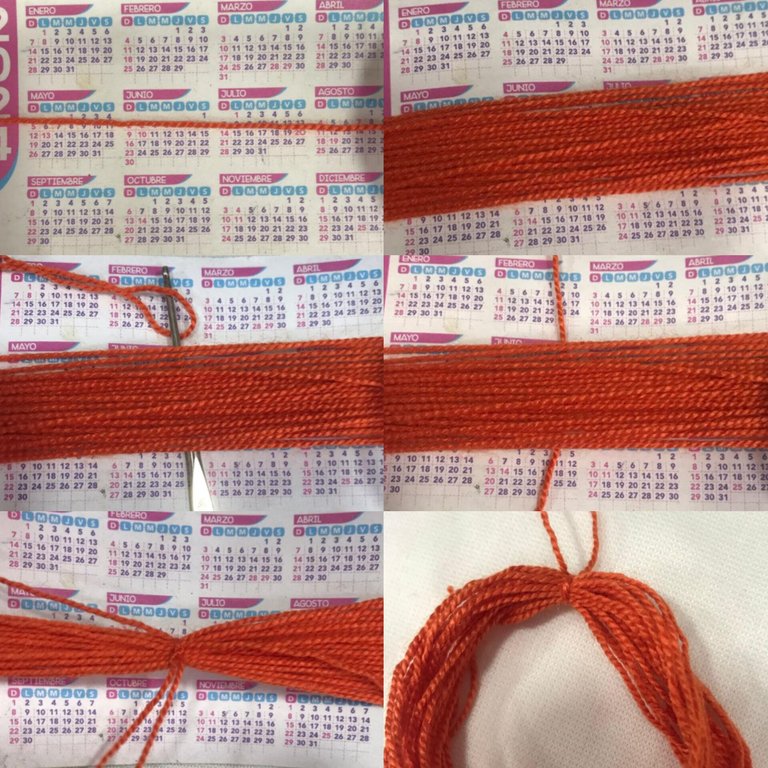
The first thing we will do is place the thread on the card and we will make 25 turns, then we cut and we will place half of our turns and we will make a knot to secure all the strands.
Paso 2️⃣ / Step 2️⃣
Después de amarrar, vamos a continuar haciendo una cadena y vamos a hacer 25 puntos bajos pasando dentro del círculo que hicimos con las hebras, cerramos con una cadena y volteamos el tejido.
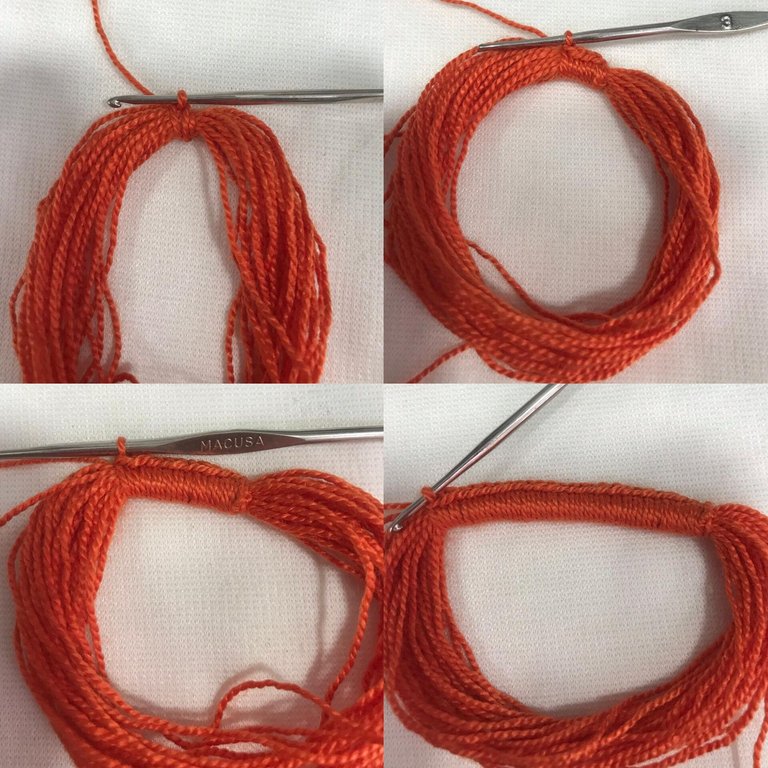
After tying, we will continue making a chain and we will make 25 low points passing inside the circle that we made with the strands, we close with a chain and turn the fabric.
Paso 3️⃣ / Step 3️⃣
Subimos 3 cadenas y vamos a enlazar el hilo vamos a pasar por el primer punto bajo, tomamos nuevamente la hebra y vamos a pasar por un aro, volvemos a enlazar y pasamos por el otro, no terminamos de cerrar el punto, porque haremos lo mismo dos veces más y luego vamos a cerrar todos los puntos juntos, serían tres varetas cerradas juntas, procedemos a subir 3 cadenas, nos vamos a saltar un punto y en el siguiente cerramos con un punto bajo, ahí ya nos quedaría nuestro primer pétalo, vamos a repetir esto mismo 4 veces más, para dar un total de 5 pétalos, al final cerramos con una cadena, y sacamos el hilo con el cual amarraremos nuestro arete, unos 20 centímetros aproximadamente y cortamos.
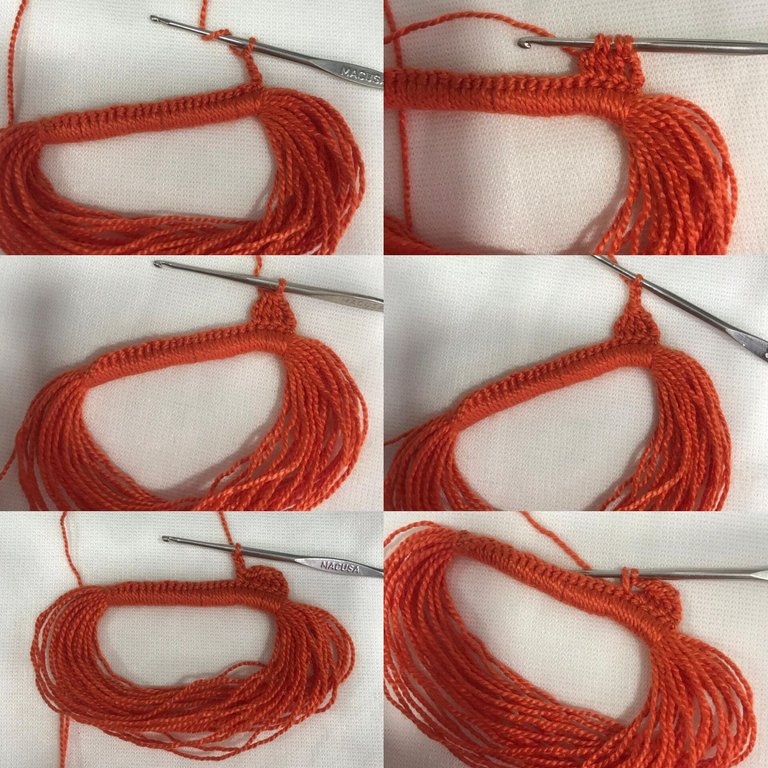
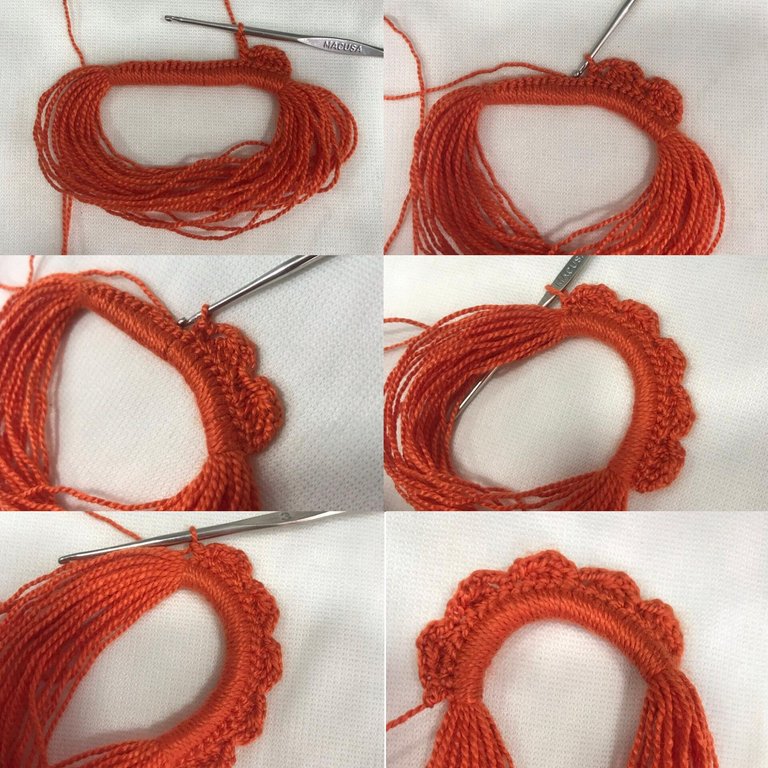
We go up 3 chains and we are going to link the thread, we are going to go through the first low point, we take the thread again and we are going to go through a ring, we link again and go through the other one, we do not finish closing the point, because we will do the same thing two more times and then we are going to close all the points together, it would be three closed double crochets together, we proceed to go up 3 chains, we are going to skip a point and in the next one we close with a low point, there we would have our first petal, we are going to repeat this 4 more times, to give a total of 5 petals, at the end we close with a chain, and we take out the thread with which we will tie our earring, approximately 20 centimeters and we cut.
Paso 4️⃣ / Step 4️⃣
Ahora vamos a tomar el hilo y pasándolo por la parte de atrás del tejido, vamos a hacer un nudo para asegurar el tejido y luego vamos a proceder a hacer 10 vueltas, una debajo de la otra, no encima, ahora vamos a agarrar la aguja y vamos a introducir la hebra, luego vamos a pasar el hilo de afuera hacia adentro tal cual se ve en la fotografía y vamos a repetir esto mismo pero devolviendo la hebra, por último, vamos a medir que las hebras colgantes sean del mismo tamaño, cortamos y listo, procedemos a poner las argollas y anzuelos y ya queda listo nuestro arete.

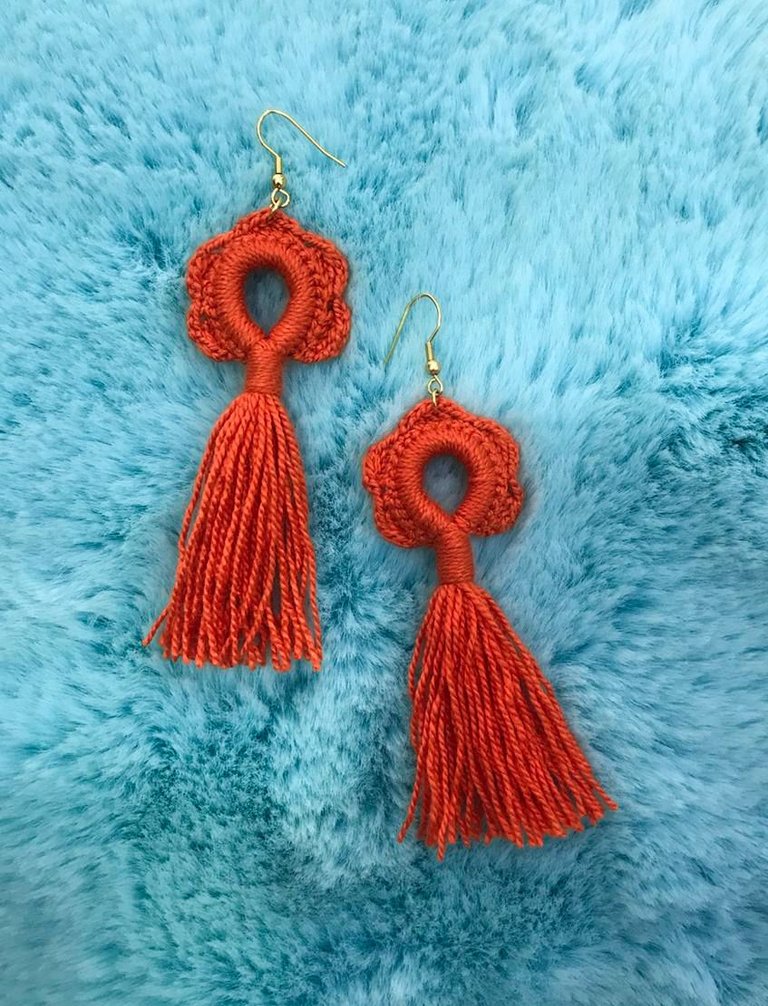
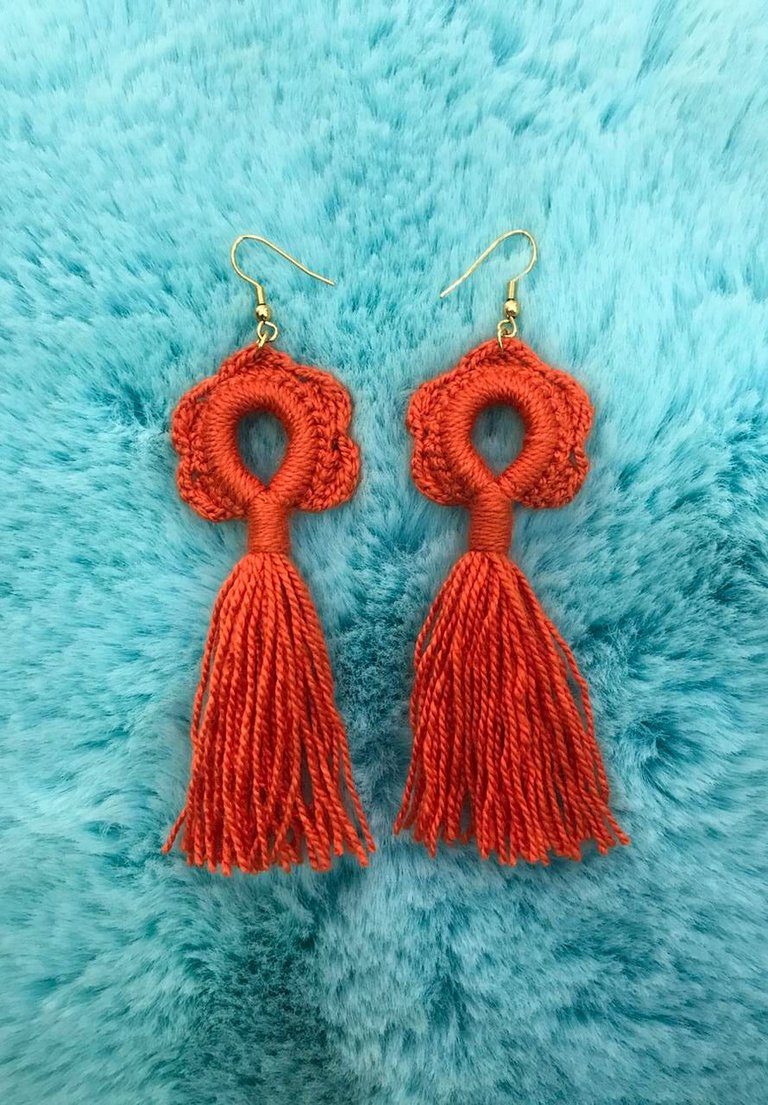
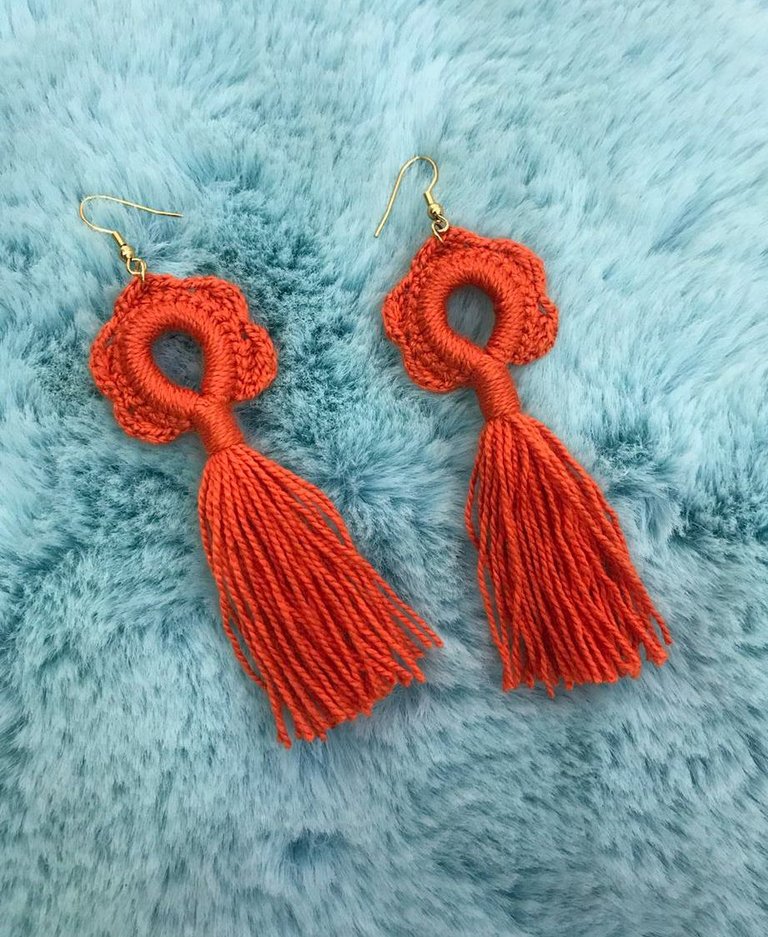
Now we are going to take the thread and passing it through the back of the fabric, we are going to make a knot to secure the fabric and then we are going to proceed to make 10 turns, one under the other, not on top, now we are going to grab the needle and we are going to insert the thread, then we are going to pass the thread from the outside to the inside as seen in the photograph and we are going to repeat this but returning the thread, finally, we are going to measure that the hanging strands are the same size, we cut and that's it, we proceed to put the rings and hooks and our earring is ready.
Créanme que son super fáciles de hacer, muy rápido además y ustedes mismos pueden apreciar el gran acabado que deja, sin duda alguna de mis favoritos hasta ahora, porque me parece que las ultimas 10 vueltas que usamos para unir todo, le dan un toque especial, espero les haya gustado tanto como a mí, les mando un fuerte abrazo y muchas Gracias por su lindo apoyo siempre ✨💕
Believe me, they are super easy to make, very fast too and you can appreciate the great finish it leaves, without a doubt one of my favorites so far, because it seems to me that the last 10 turns that we used to join everything, give it a special touch, I hope you liked it as much as I did, I send you a big hug and thank you very much for your kind support always ✨💕
Buenas tardes, muy bonitos los aretes me han encantado!
Your earrings look pretty and unique. Lovely work friend and thanks for leaving a detailed tutorial on how you made it. Well done, and thanks for sharing.
They are beautiful, the woven design is lovely, very well made and look great, plus the color is very striking.
These earing looks Amazing and unique. Hats off to your hardwork and determinantion.