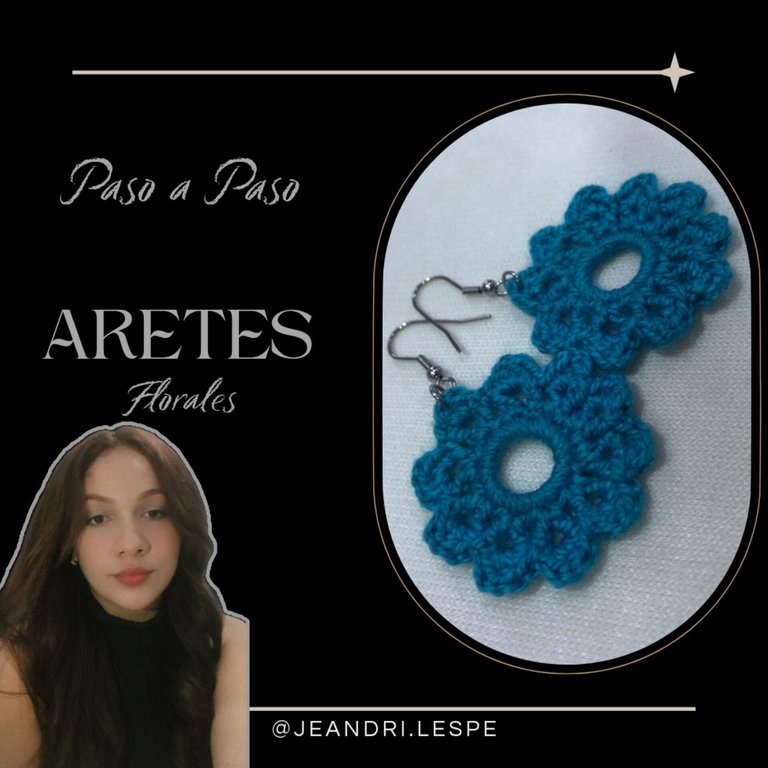
Hola mi gente linda, nuevamente estoy por acá, para traerles un diseño que realice el día de hoy, no se si a ustedes les pasa, pero a mi hoy al terminar el diseño me paso algo muy gracioso y es que sentí que lo termine extremadamente rápido, de hecho pensé ¿será que me salte algún paso? jajaja pero no, sinceramente si es un diseño que fácilmente puedes terminar en 15 minutos o hasta menos, depende de tu agilidad a la hora te tejer, así que, si tienes poco tiempo y quieres hacer un diseño que se acople a esa cantidad de tiempo, estos son los aretes perfectos que tienes que hacer y te aseguro que te van a encantar, asi que, vamos con los materiales y el paso a paso de este lindo diseño.
Hello my lovely people, I am here again to bring you a design that I made today. I don't know if it happens to you, but today when I finished the design something very funny happened to me and it is that I felt that I finished it extremely fast, in fact I thought, did I skip a step? LOL but no, honestly it is a design that you can easily finish in 15 minutes or even less, it depends on your agility when it comes to knitting, so, if you have little time and want to make a design that fits that amount of time, these are the perfect earrings that you have to make and I assure you that you will love them, so, let's go with the materials and the step by step of this cute design.
Materiales / Materials ✨💓
- Hilo coral / Coral thread
- Aguja (numero 3) / Needle (number 3)
- Argollas y anzuelos / Rings and hooks
Paso 1️⃣ / Step 1️⃣
lo primero que haremos, será un punto deslizado y luego subimos 13 cadenas, cerramos el circulo en la primera cadena con un punto deslizado, subimos una cadena y procedemos a hacer 20 puntos, esto completaría nuestra primera vuelta, la cual cerramos con un punto deslizado en la primera cadena del otro extremo.
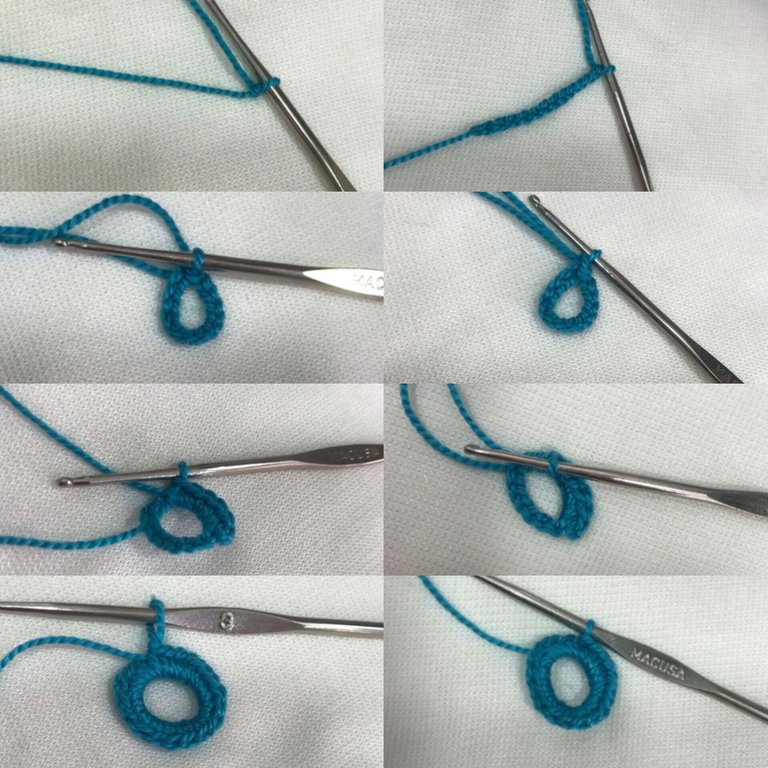
The first thing we will do is a slip stitch and then we go up 13 chains, we close the circle in the first chain with a slip stitch, we go up a chain and we proceed to make 20 stitches, this would complete our first round, which we close with a slip stitch in the first chain at the other end.
Paso 2️⃣ / Paso 2️⃣
Comenzamos con la segunda vuelta y levantamos 3 cadenas las cuales contaran como un punto alto, hacemos 2 cadenas de separación y en el siguiente punto bajo de la vuelta anterior, hacemos el segundo punto alto y nos queda nuestro primer aro, ahora vamos a saltar un punto y en el segundo levantamos nuevamente un punto alto, hacemos 2 cadenas de separación y en el mismo espacio, realizamos otro punto alto, este paso lo vamos a repetir hasta llegar al otro extremo del tejido, siempre dejando un punto libre antes de cada aro, cuando llegamos al final, hacemos un punto deslizado en la tercera cadena que hicimos al comienzo de la vuelta.
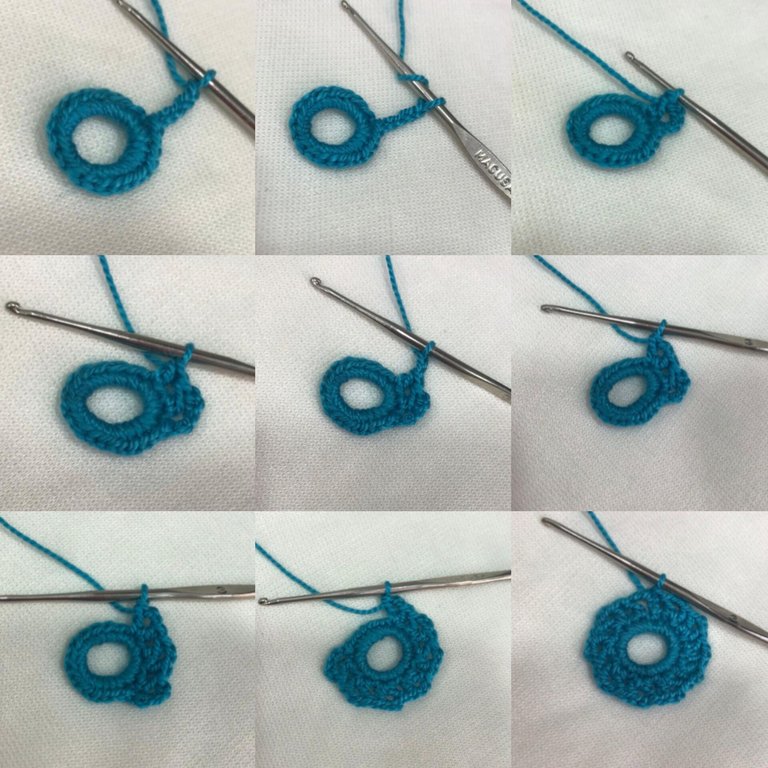
We start with the second round and we pick up 3 chains which will count as a double crochet, we make 2 chains of separation and in the next single crochet of the previous round, we make the second double crochet and we have our first ring, now we are going to skip a stitch and in the second we pick up a double crochet again, we make 2 chains of separation and in the same space, we make another double crochet, we are going to repeat this step until we reach the other end of the fabric, always leaving a free stitch before each ring, when we get to the end, we make a slip stitch in the third chain that we made at the beginning of the round.
Paso 3️⃣
Para la tercera y última vuelta, ubicamos el primer aro de la vuelta anterior y hacemos un punto bajo, en el mismo espacio hacemos un punto alto, separamos con una cadena, hacemos otro punto alto y cerramos el diseño con otro punto bajo, pasamos al siguiente espacio y hacemos un punto deslizado, seguimos con el siguiente espacio y repetimos exactamente lo mismo, un punto bajo, un punto alto, una cadena de separación, otro punto alto y un punto bajo para cerrar, saltamos al siguiente espacio con un punto deslizado y así en cada uno de los espacios hasta completar los 10 pétalos, siendo el último paso un punto deslizado, sacamos suficiente hilo, cortamos, ponemos la argolla, el anzuelo y ya queda listo nuestro arete.
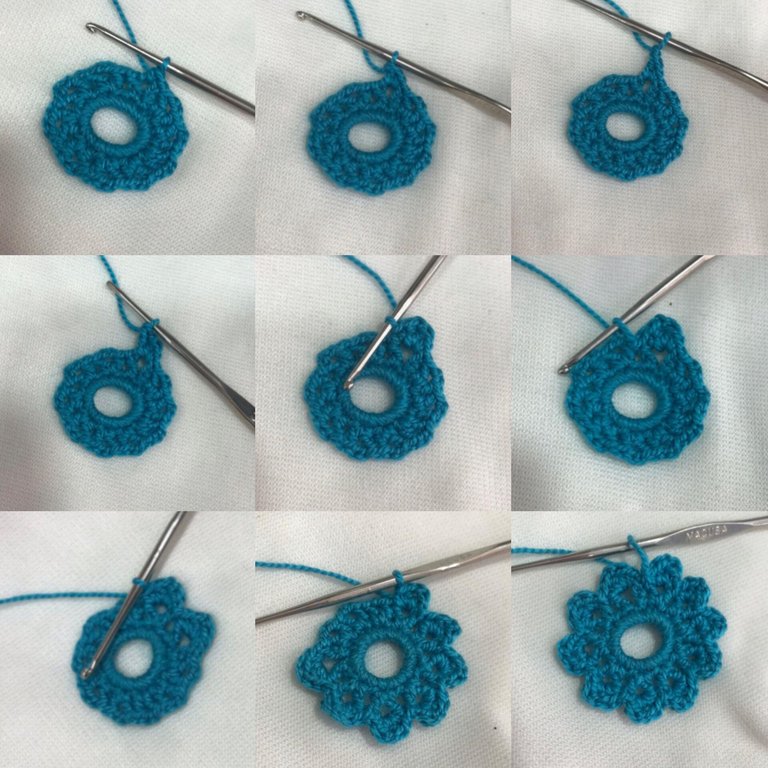
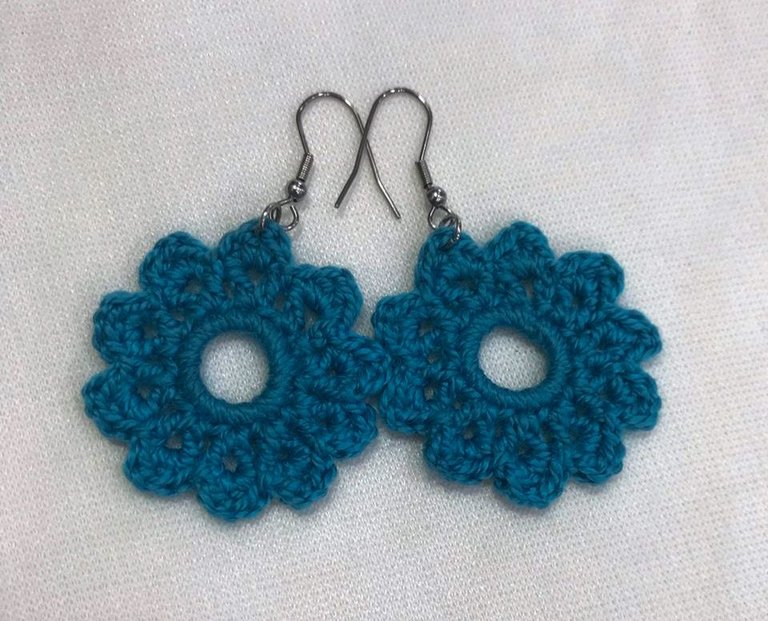
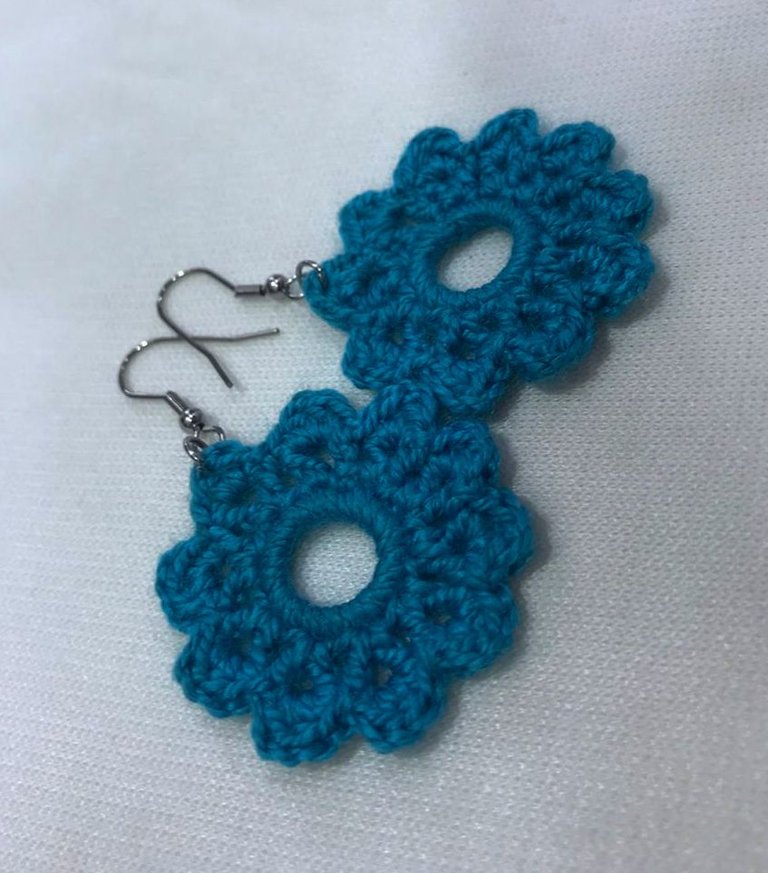
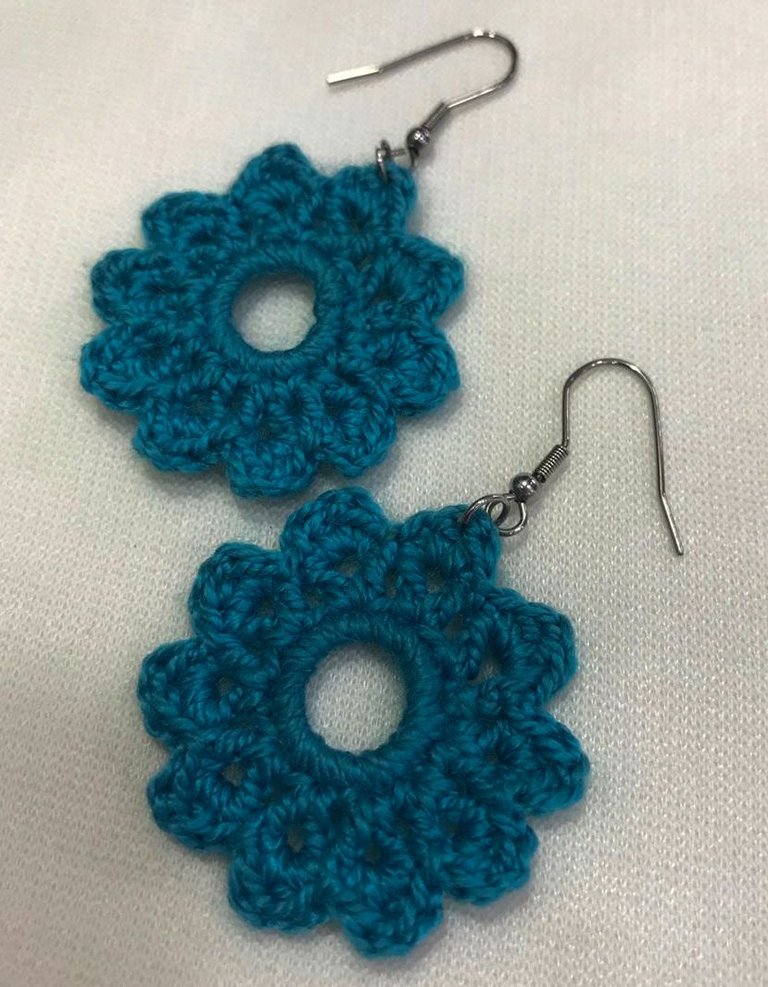
For the third and final round, we place the first ring from the previous round and make a single crochet, in the same space we make a double crochet, we separate with a chain, we make another double crochet and we close the design with another single crochet, we go to the next space and make a slip stitch, we continue with the next space and we repeat exactly the same, a single crochet, a double crochet, a separation chain, another double crochet and a single crochet to close, we jump to the next space with a slip stitch and so on in each of the spaces until we complete the 10 petals, the last step being a slip stitch, we take out enough thread, we cut, we put the ring, the hook and our earring is ready.
Espero les haya gustado y les haya parecido útil mi diseño en esta oportunidad, muchísimas Gracias por su apoyo siempre y por todo lo bonito que me inspiran siempre a hacer, les mando un fuerte abrazo ❤️
I hope you liked it and that you found my design useful on this occasion, thank you very much for your support always and for all the beautiful things that you always inspire me to do, I send you a big hug ❤️
Me gustan, se ven preciosos.
Gracias por compartir ☺️
Amiga que lindos quedaron ✨
Wow this is beautiful
A lovely piece of earing with a fine yarn color choice. Would also be easy on the ears. Bravo.
Este diseño está muy bonito y ese color azul es precioso! Muchas gracias por compartir el paso a paso✨
It's Soo beautiful I love it it's looking pretty 🤩😍
Amiga, tienes un don muy bonito, eres buena para enseñar, a través de tu post explicas y animas a otros a realizar este tipo de prendas que son muy bonitas. Dios bendiga tus manos y te siga animando a publicar esas cositas tan lindas que haces. de seguro te seguirá yendo muy bien en la comunidad. tambien hay una comunidad para las tejedoras, se llama needleworkmonday en mi blog puedes ver un poco mas sobre ella y si ya estas allá voy a prestar mas atención para ver tus creaciones. que tengas un excelente día. y nuevamente muchas felicidades por tan hermosa publicación.
¡Que hermosas palabras! 🥹 me llenan de mil formas el corazón, sinceramente tejer para mí es maravilloso y más en esta comunidad que me ha brindado tanto y me sigue dando la dicha de conectar con personas lindas como tú, por supuesto que se de esa linda comunidad también, pronto la vuelvo a visitar con algo lindo, muchísimas Gracias nuevamente por tantas cosas lindas y deseo que tú también sigas creando cosas maravillosas ✨ Te mando un fuerte abrazo 💓