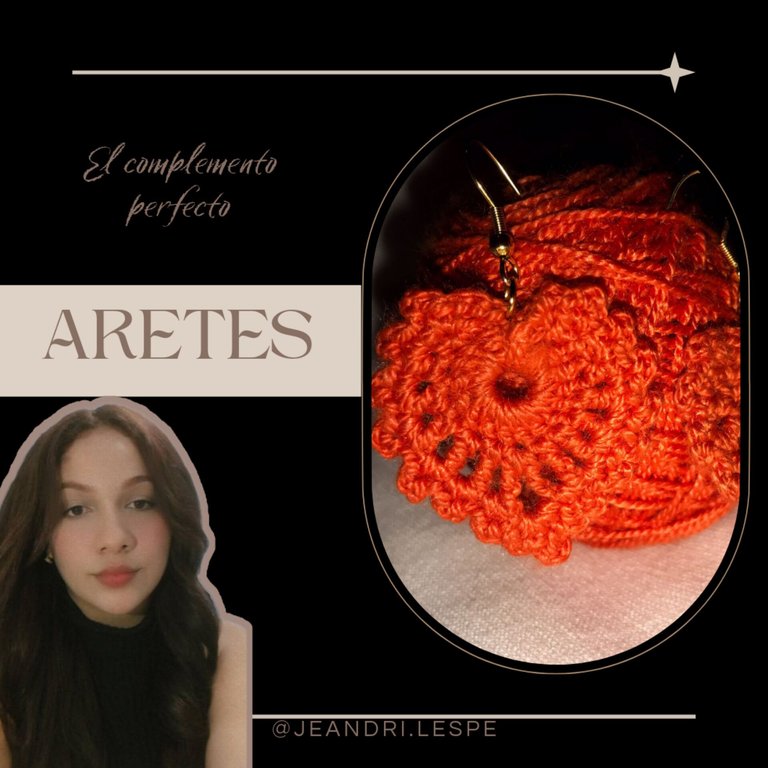
Hola mi gente linda, extrañaba pasar por acá y compartir con ustedes parte de mi arte en el mundo del crochet, en esta ocasión les traigo unos aretes muy sencillos pero que hasta ahora, han sido de mis favoritos, porque entre su sencillez tienen un diseño muy lindo y que sin duda alguna usaría para complementar uno de mis outfits, espero les gusten tanto como a mí y los hagan para ustedes también ❤️✨
Hello my beautiful people, I missed coming here and sharing with you part of my art in the world of crochet, this time I bring you some very simple earrings but that until now, have been my favorites, because between their simplicity they have a very nice design and that without a doubt I would use to complement one of my outfits, I hope you like them as much as I do and make them for yourselves too ❤️✨
Materiales / Materials ✨
Hilo coral / Coral thread ✨
Aguja (número 3) / Needle (number 3) ✨
Argollas y anzuelos / Rings and hooks ✨
Paso 1️⃣ / Step 1️⃣
Lo primero que haremos será un nudo deslizado y de ahí partimos a hacer 6 cadenas, para luego cerrarlas con un punto deslizado en la primera cadena que hicimos, teniendo ya el circulo cerrado, vamos a subir con 2 cadenas y haremos 15 puntos altos pasando dentro del círculo, al terminarlos, cerramos esta primera vuelta haciendo dos cadenas y por último un punto deslizado pasando por el círculo, como se aprecia en las fotos.
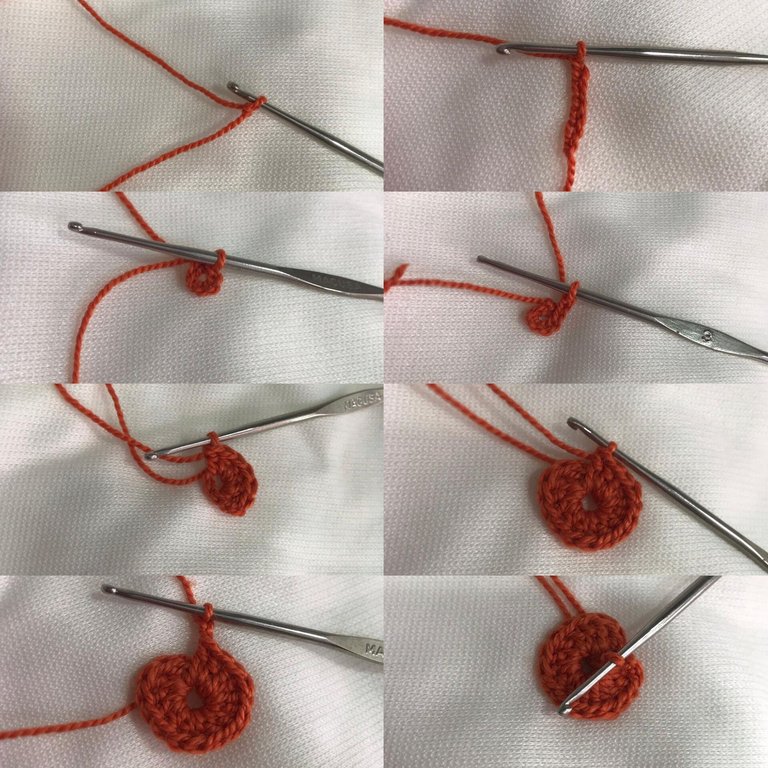
The first thing we will do is a slip knot and from there we start to make 6 chains, then close them with a slip stitch in the first chain that we made, having the circle already closed, we will go up with 2 c nohains and we will make 15 high points passing inside the circle, when we finish them, we close this first round making two chains and finally a slip stitch passing through the circle, as you can see in the photos.
Paso 2️⃣ Step 2️⃣
Para la segunda vuelta, vamos a subir con 3 cadenas, para después hacer un punto medio en el primer punto alto que ubicamos en el tejido, la división entre cada punto se hará con una cadena, los primeros dos puntos serán puntos medios, dividido cada uno por una cadena, en el siguiente punto será un punto medio alto, hacemos nuevamente una cadena y en los próximos dos puntos haremos dos puntos altos, de igual forma divididos por una cadena, los últimos dos puntos antes de llegar al centro de la vuelta, serán dos puntos altos dobles, cuando ya llegamos a la mitad, nuevamente hacemos un punto alto doble, subimos 3 cadenas y en el mismo punto hacemos nuevamente un punto alto doble, en la otra mitad del tejido haríamos lo que serían las puntadas espejo, es decir, repetir los mismos puntos que hicimos en la vuelta anterior, que serían 7 puntos en total, al quedar listo, cerramos con 3 cadenas y nuevamente un punto deslizado pasando por el círculo.
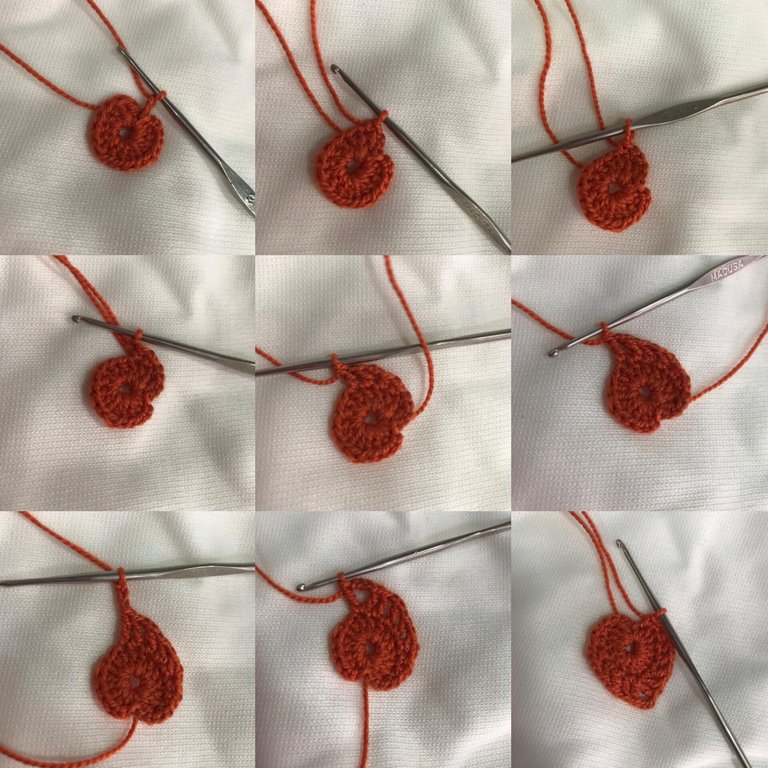
For the second round, we are going to go up with 3 chains, then make a half stitch in the first high stitch that we placed in the fabric, the division between each stitch will be made with a chain, the first two stitches will be half stitches, each divided by a chain, in the next stitch it will be a half high stitch, we make a chain again and in the next two stitches we will make two high stitches, in the same way divided by a chain, the last two stitches before reaching the center of the round, will be two double high stitches, when we reach the middle, we again make a double high stitch, we go up 3 chains and in the same stitch we make a double high stitch again, in the other half of the fabric we would do what would be the mirror stitches, that is, repeat the same stitches that we made in the previous round, which would be 7 stitches in total, when it is ready, we close with 3 chains and again a slip stitch passing through the circle.
Paso 3️⃣ / Step 3️⃣
Siguiendo con la tercera y última vuelta, vamos a subir 4 cadenas y nos vamos a ubicar en los espacios que dejamos en la vuelta anterior que dividimos con una cadena, hacemos un punto medio en la primera cadena y subimos 3 cadenas, en ese mismo espacio cerraremos con un punto medio lo cual nos quedará como una especie de "piquito" en cada espacio, vamos a repetir este paso en cada uno de los espacios, hasta llegar al centro de la vuelta, ya que, en este haremos 3 "piquitos" para que le dé un efecto más bonito, será el mismo procedimiento solo que, entramos al punto con un punto medio, subimos 3 cadenas y cerramos con un punto medio, volvemos a subir esta vez con 5 cadenas en el mismo espacio y cerramos con un punto medio, por último en este mismo punto levantamos 3 cadenas y cerramos con un punto medio, así nos quedarán un total de 3 piquitos en el centro y en el otro extremo repetimos lo mismo de la primera parte, hasta completar todos los piquitos, son 7 de cada extremo y 3 en la mitad, por último subimos 4 cadenas y cerramos con un punto deslizado para posteriormente hacer una cadena y cortar el hilo, ya solo nos quedaría esconder las hebras y poner las argollas y anzuelos, quedando de esta manera.
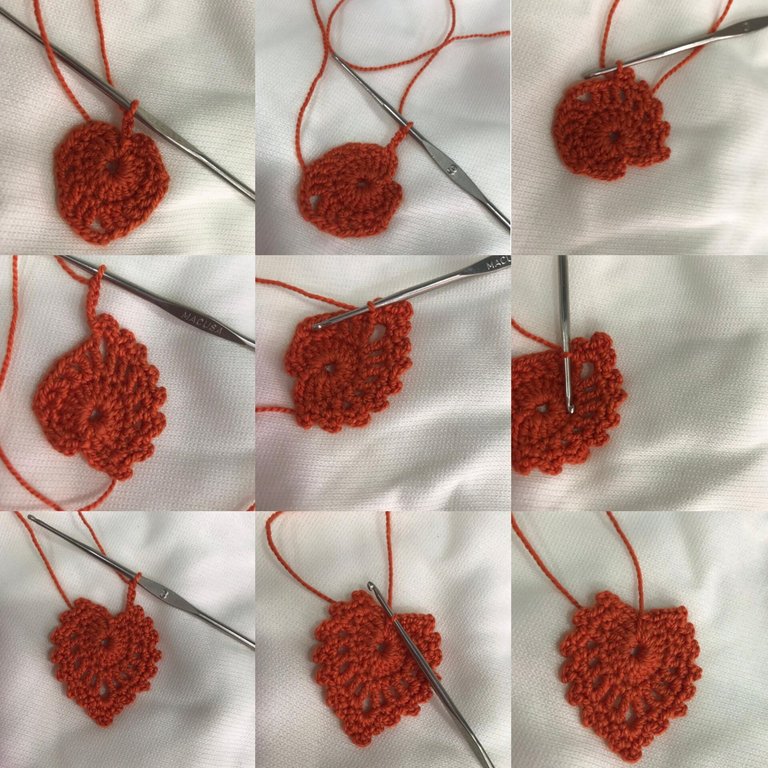
Continuing with the third and final round, we are going to go up 4 chains and we are going to place ourselves in the spaces that we left in the previous round that we divided with a chain, we make a half stitch in the first chain and go up 3 chains, in that same space we will close with a half stitch which will leave us like a kind of "peak" in each space, we are going to repeat this step in each of the spaces, until we reach the center of the round, since, in this one we will make 3 "peaks" to give it a nicer effect, it will be the same procedure only that, we enter the point with a half stitch, we go up 3 chains and close with a half stitch, we go up again this time with 5 chains in the same space and close with a half stitch, finally in this same point we raise 3 chains and close with a half stitch, so we will have a total of 3 peaks in the center and at the other end we repeat the same thing from the first part, until all the spikes are complete, there are 7 at each end and 3 in the middle, finally we go up 4 chains and close with a slip stitch to later make a chain and cut the thread, we would only have to hide the strands and put the rings and hooks, leaving it like this.
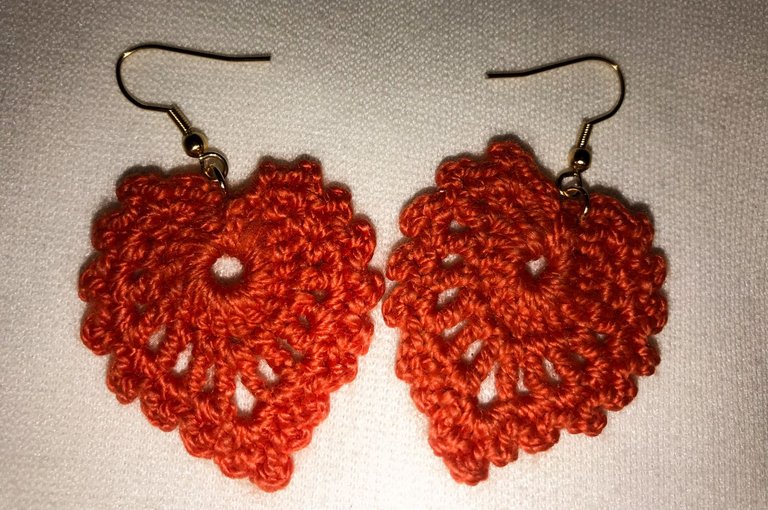
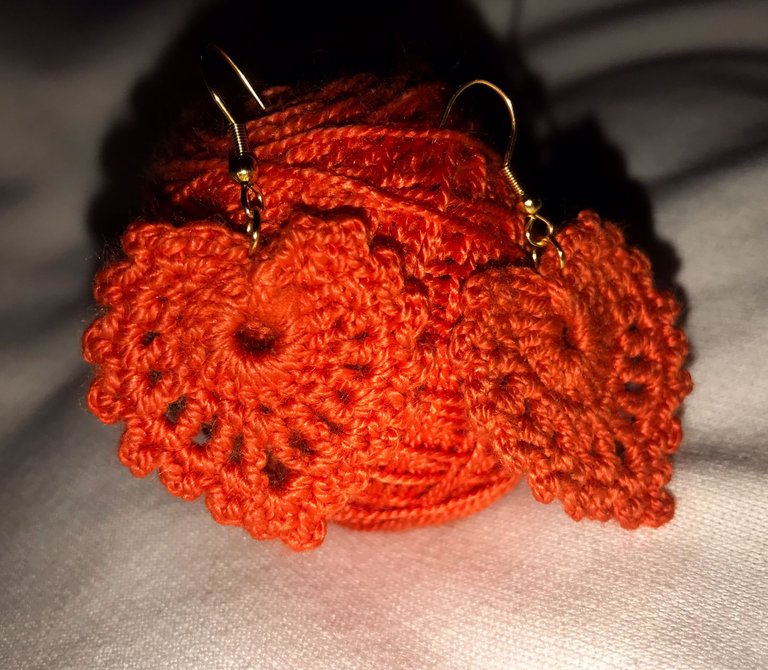
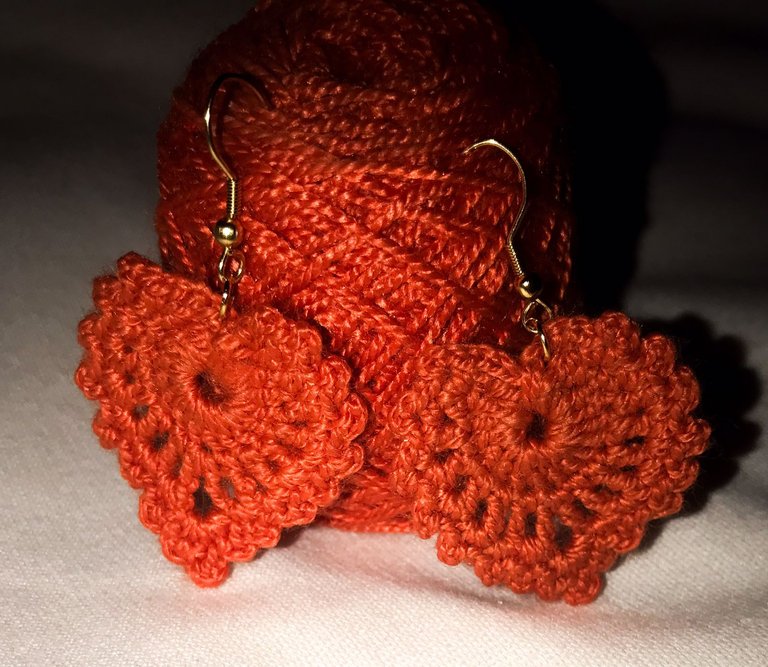
Espero les hayan gustado tanto como a mí y muchísimas Gracias por llegar hasta acá, les mando un fuerte abrazo ✨
I hope you liked them as much as I did and thank you very much for getting here, I send you a big hug ✨
It is so beautiful, lovely, and charming. Love its design. You did a great job! It looks great. Thank you for sharing this. Keep it up!
Me gusta la perfecta simetría que lograste en ambos aretes, es es fantástico porque hay que ser muy precisos a la hora de contar los puntos y así queden las dos piezas exactas. Bien logrado. Felicidades.
Waao this so amazing.