(ENG)
Hello beautiful and creative people, which inspires day by day, in this community @jewelry. Today I am pleased to be, with you, on this occasion, I will show you, a very simple step by step, how to make an ideal accessories, for a great night and romance night, since because of its color, it will make you look very Beautiful and elegant, with the appropriate costume. To do this, use the crochet and jewelry techniques. I invite you to follow my step by step, the result is very satisfactory.

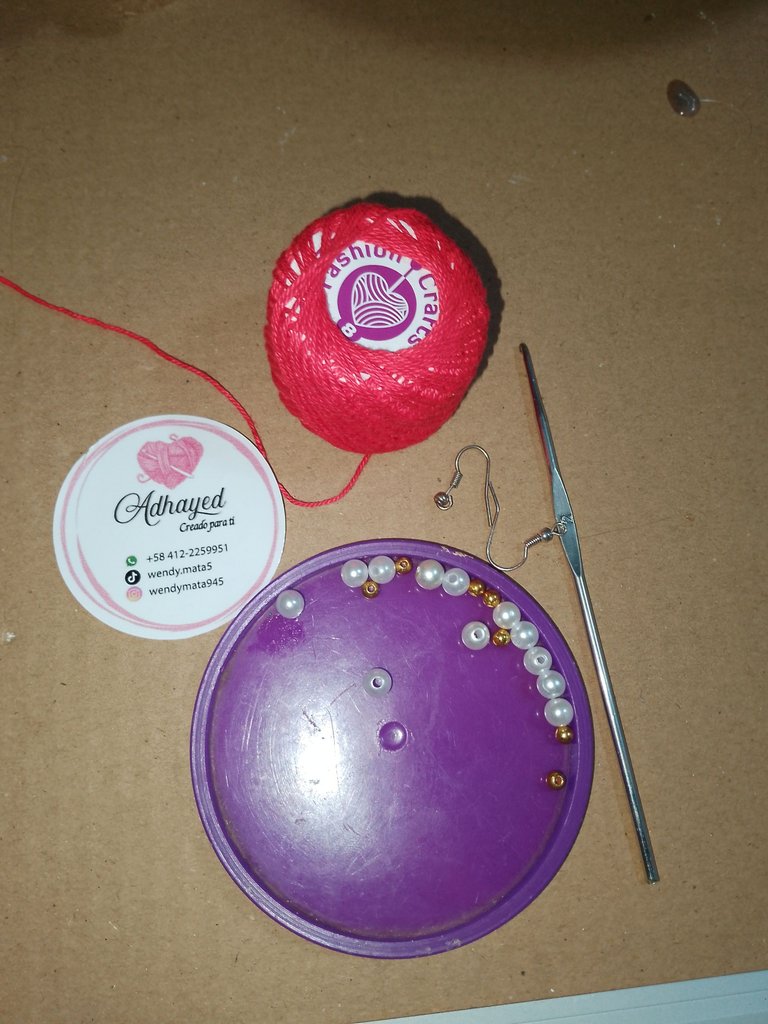
Materials:
. Knitting thread, red.
. Knit needle.
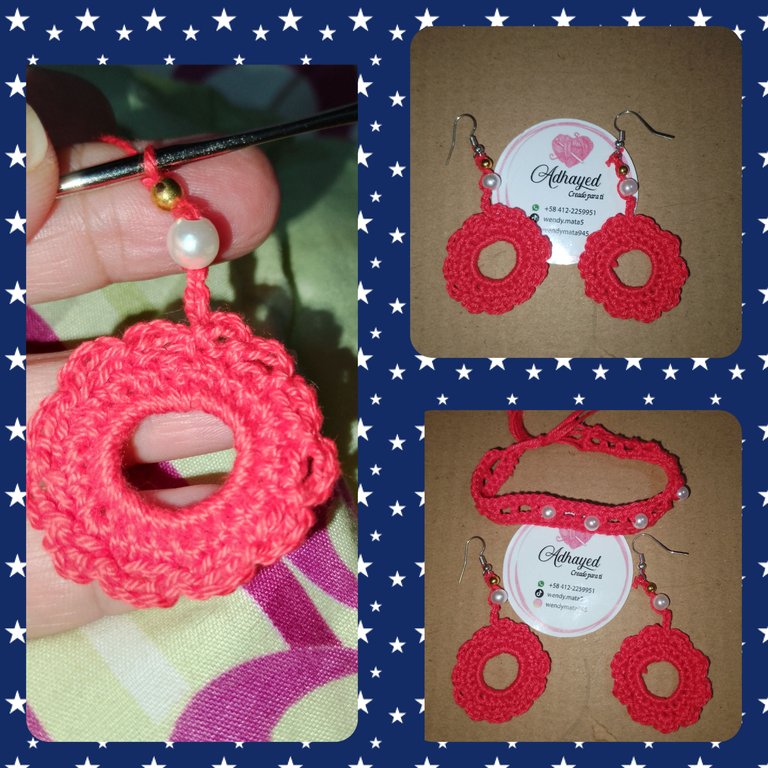
. Pearls N6, color.
. Golden pearls.
. Scissors.
. Anzuelo hook.
Steps to follow.
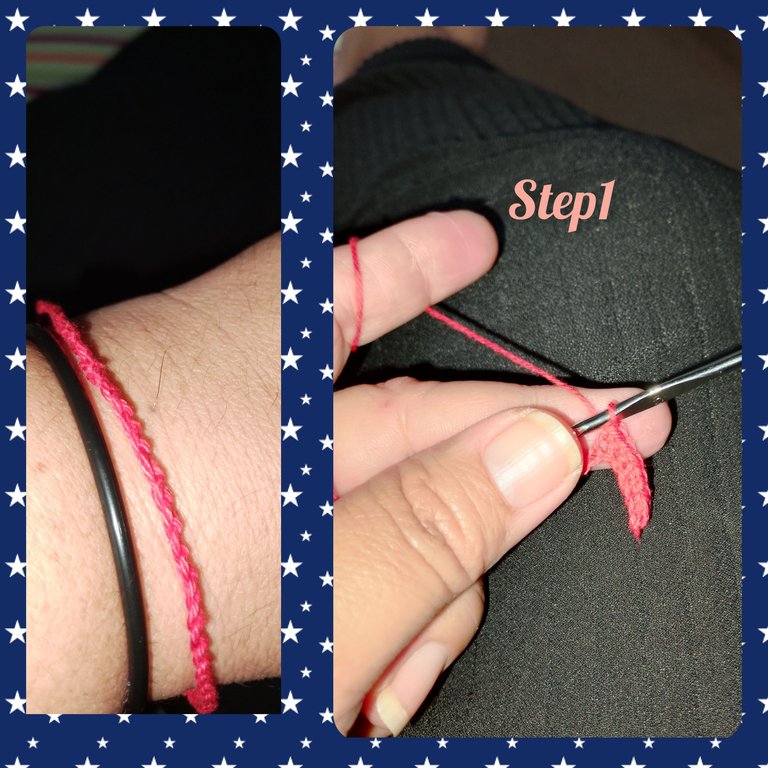
1.) Start, weaving fifty points chains, you are almost fully reaches the doll by my hand. I get up, a chain point and in the chain number, fifty cloth half a point and in this way, continue the route, in the following points chains.
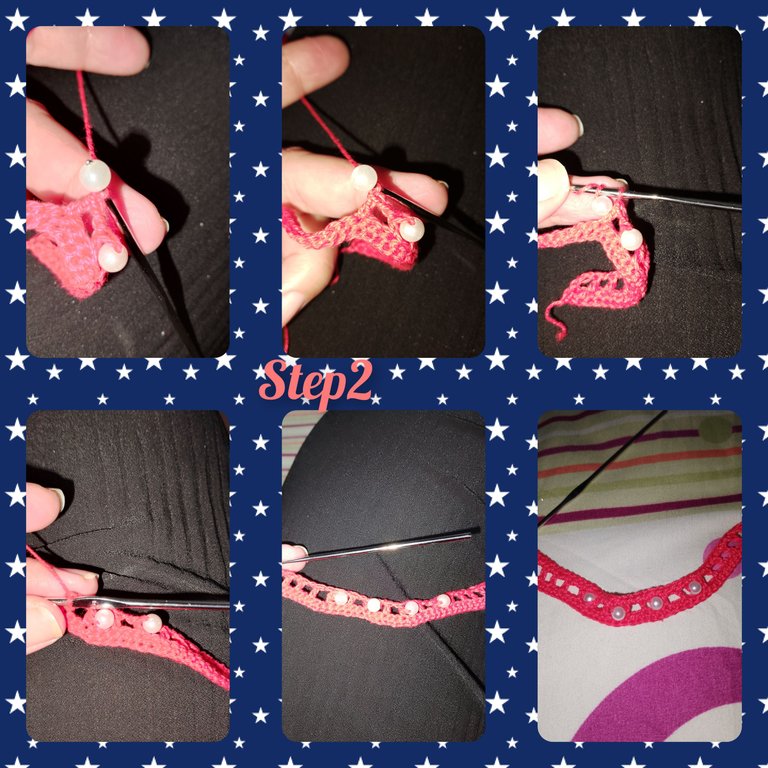
2.) I turn to the fabric, and I take a new tour, but this time I lift two points chains I leave two spaces, in this way, weigh six equal spaces, and for the following, space, I start introducing the pearls. Tejo four spaces with pearls. And the following space, of six spaces. I turn to the fabric, continuous, weaving half points.
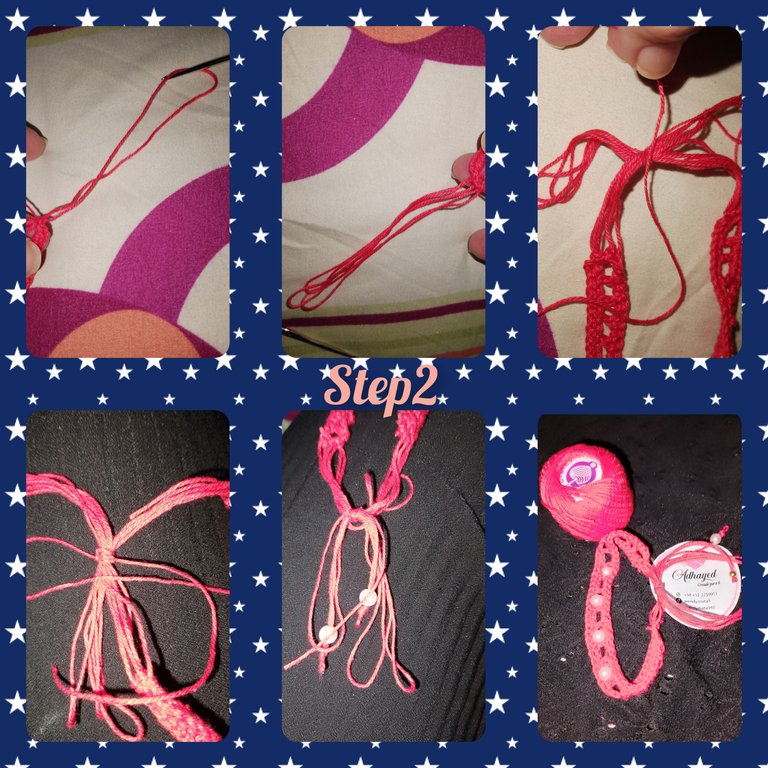
3.) The following will be, weave a half -point, Tomalus Lada and take out a considerable length. Under again with the knitting needle, and I repeat. Until you have three parts of threads on both sides. Continuous, placing in each group white and golden pearls.
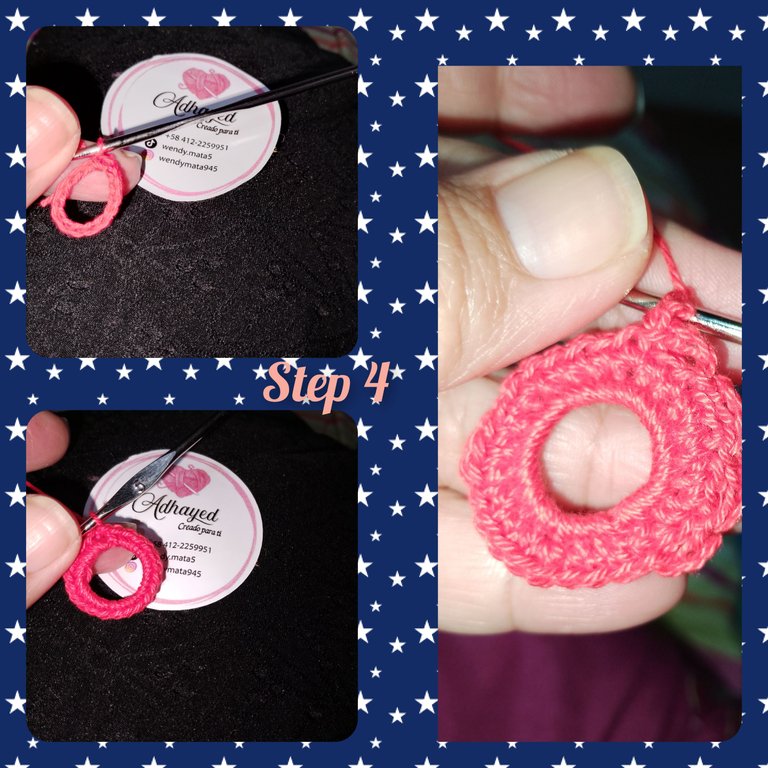
4.) For earrings, weed fourteen chains points and one with a sliding point, to form a hoop, inside it, twenty -four low points. Weigh a new round and after three low points, we have an increase. For the next pass, I raise, three points chains, I leave two spaces of media points and we have a sliding point. In this way, complete, the fabric of earrings.
5.) Without cutting the thread, I lift three points chains, I introduce using the needle a white pearl, followed by a gold, and then, attempted to the hook for earrings, I refer and short the thread.
. All the photos are of me property, taken with my smartphone.
. Use colorless to show step by step.
. Use language translator.
Grateful, for her company, during the process of preparing the project of today. I hope you are always well, it will be up to an upcoming opportunity.
( Esp)
Hola gente hermosa y creativa, que inspira día a día, en esta Comunidad @jewelry. Hoy me complace estar, con ustedes, en esta oportunidad, les mostraré, un muy sencillo paso a paso, de como realizar un ser de accesorios ideal, para una gran noche de encuentro y romance, ya que por su color, te hará lucir muy hermosa y elegante, con el vestuario apropiado. Para ello use las técnica de crochet y bisutería. Te invito a seguir mi paso a paso, el resultado es muy satisfactorio.
Materiales:
. Hilo de tejer, color rojo.
. Aguja de tejer.
. Perlas n6, de color.
. Perlas doradas.
. Tijeras.
. Anzuelo para aretes.
Pasos a Seguir.
1.) Inicio, tejiendo cincuenta puntos cadenas, estás alcanza casi en su totalidad la muñeca de mí mano. Levanto, un punto cadena y en el número de cadena, cincuenta tejo medio punto y de esta manera, continuo el recorrido, en las siguientes puntos cadenas.
2.) doy vuelta a el tejido, y doy un nuevo recorrido, Pero en esta oportunidad levanto dos puntos cadenas dejo dos espacios, de esta manera, tejo seis espacios iguales, y para las siguientes, espacio, comienzo a introducir las perlas. Tejo cuatro espacios con perlas. Y las siguientes espacio, de seis espacios. Doy vuelta a el tejido, continuo, tejiendo medios puntos.
3.) lo siguiente será, tejer un medio punto, tómalo lazada y saco un largo considerable. Bajo nuevamente con la aguja de tejer, y repito. Hasta tener en ambos lados tres partes de hebras de hilo. Continuo, colocando en cada grupo perlas de color blanca y doradas.
4.) Para los Aretes, tejo catorce puntos cadenas y uno con un punto deslizado, para formar un aro, dentro de el, tejo, veinticuatro puntos bajos. Tejo una nueva vuelta y luego de tres puntos bajos, tejo un aumento. Para la siguiente pasada, levanto, tres puntos cadenas, dejo dos espacios de medios puntos y tejo un punto deslizado. De esta manera, completo, el tejido de los aretes.
5.) sin cortar un el hilo, levanto tres puntos cadenas, introduzco usando la aguja una perla de color blanco, seguido de una dorada, y seguidamente, ato a el anzuelo para aretes, remato y corto el hilo.
. Todas las fotos, son de mí propiedad, tomadas con mí teléfono inteligente.
. Use incollage para mostrar el paso a paso.
. Use traductor lenguaje.
Agradecida, por su compañía, durante el proceso de elaboración de el proyecto de el día de hoy. Espero se encuentren siempre bien, será hasta una próxima oportunidad.
That's a really beautiful and attractive little bracelet. It fits so nicely.
Gracias por siempre apoyarme.
Te quedó precioso. Me gusta combinar el crochet con pedrerías porque se ve muy bonito. El color es perfecto.
Gracias cariño, es bueno saber tu comentario
This is so beautiful
Congratulations @katiuskamata! You have completed the following achievement on the Hive blockchain And have been rewarded with New badge(s)
Your next target is to reach 3500 replies.
You can view your badges on your board and compare yourself to others in the Ranking
If you no longer want to receive notifications, reply to this comment with the word
STOPCheck out our last posts:
You have nice skills that you share with us!
This is really a beautiful piece of bracelet that you made and you steps detail is also very informative!
Bonito trabajo amiga @katiuskamata , la pulsera quedó muy bonita , te felicito .
Gracias... Abrazos