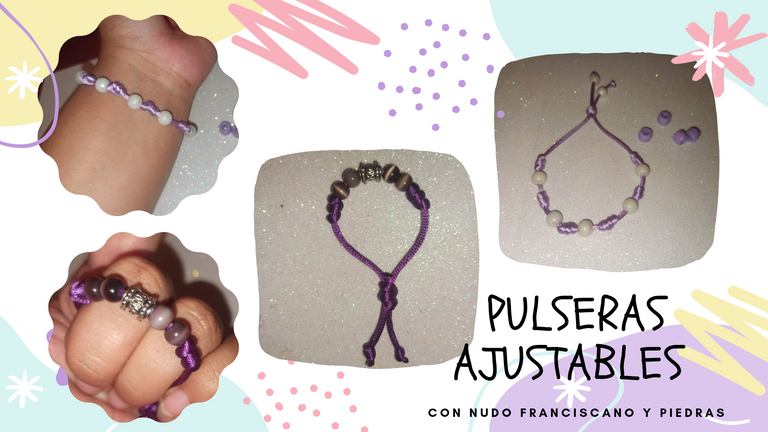
Hola gente guapa, que placer estar aquí de nuevo y compartir otra creación con vosotros. Hoy vengo a mostrarles unas pulseras con un nuevo nudo que aprendí, el nudo franciscano. Con este nudo también se hacen las pulseras del hilo rojo de los siete nudos de la suerte.
Son muy fáciles de hacer, lo único que tienes que hacer es aprender a hacer el nudo y el resto depende de tu creatividad.
Hello beautiful people, what a pleasure to be here again and share another creation with you. Today I come to show you some bracelets with a new knot that I learned, the Franciscan knot. With this knot also makes the bracelets of the red thread of the seven knots of luck.
They are very easy to make, all you have to do is learn how to tie the knot and the rest is up to your creativity.


✓ Cinta cola de ratón color lila
✓ Cinta cola de rato color morado
✓ 5 piedras blancas
✓ 5 piedras al gusto
✓ Encendedor
✓ Tijera
✓ Lilac colored mouse tail ribbon.
✓ Mouse tail ribbon purple color.
✓ 5 white stones
✓ 5 stones to taste
✓ Lighter
✓ Scissors


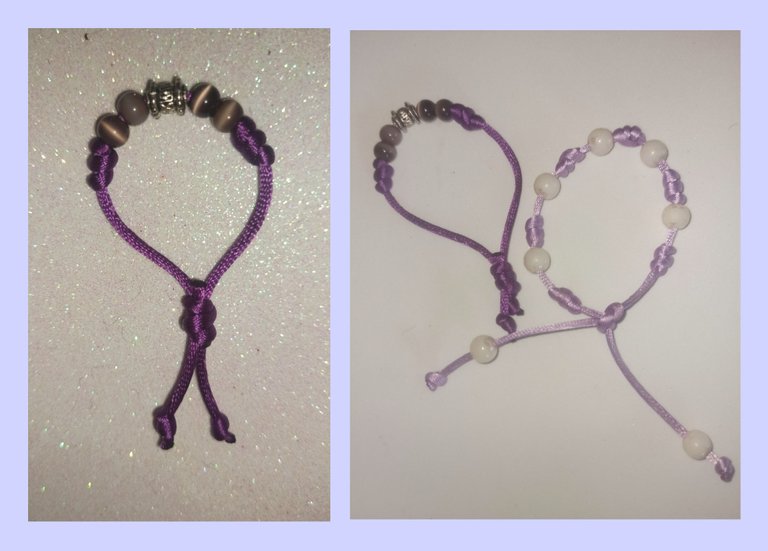
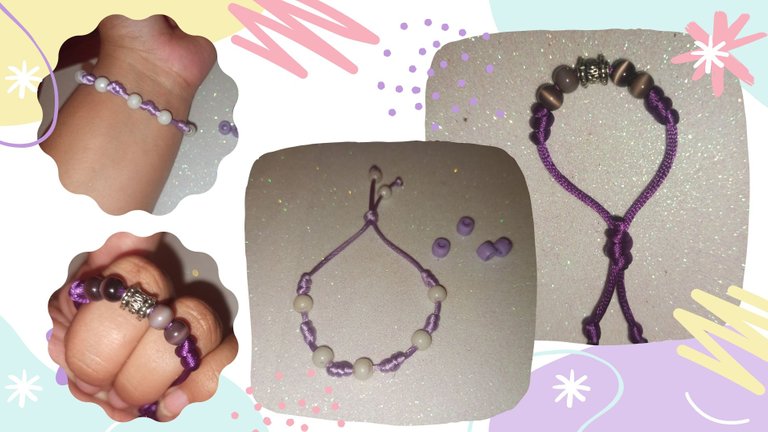
Estos son dos diseños que he realizado con el mismo nudo. Puedes ver el primer modelo en formato de vídeo. Espero que lo disfrutes y aprendas a hacer esta bonita pulsera.
These are two designs that I have made with the same knot. You can see the first model in video format. I hope you enjoy it and learn how to make this beautiful bracelet.
✅ Para la segunda pulsera cortaremos una tira de 50 cm.
El nudo franciscano se puede hacer de varias maneras, la más fácil para mí es utilizar un tubo pequeño. El tubo puede ser cualquier cosa que sea cilíndrica, tenga un agujero y no sea tan gruesa, un trozo de pitillo (sorbete, popote...) sería una buena opción.
✅ For the second bracelet we will cut a 50 cm strip.
The Franciscan knot can be made in several ways, the easiest for me is to use a small tube. The tube can be anything that is cylindrical, has a hole and is not so thick, a piece of straw (straw, straw...) would be a good choice.
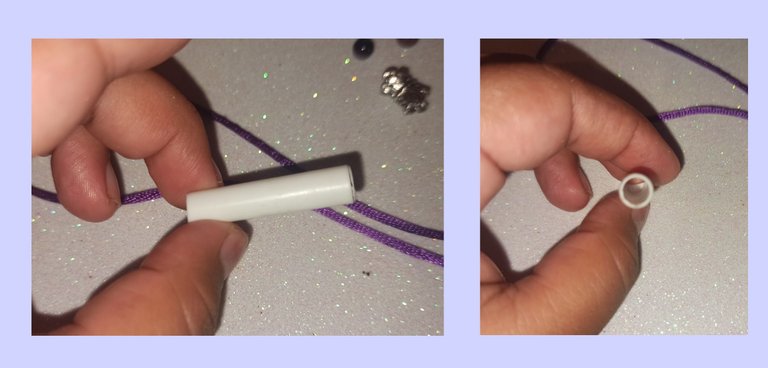
✅ Mide desde un extremo 11 cm para empezar a hacer el primer nudo, coloca la cinta en el tubo y da 3 vueltas, estas vueltas deben quedar encima del cordón.
✅ Measure from one end 11 cm to start making the first knot, place the ribbon on the tube and make 3 turns, these turns should be on top of the cord.
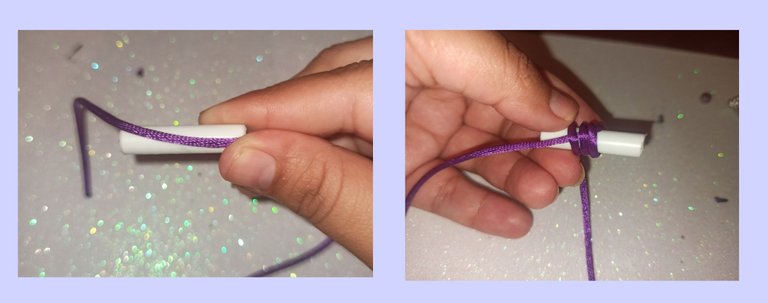
✅ Pasa el cordón por el agujero del tubo. Retira el tubo y aprieta el nudo.
✅ Pass the cord through the hole in the tube. Remove the tube and tighten the knot.

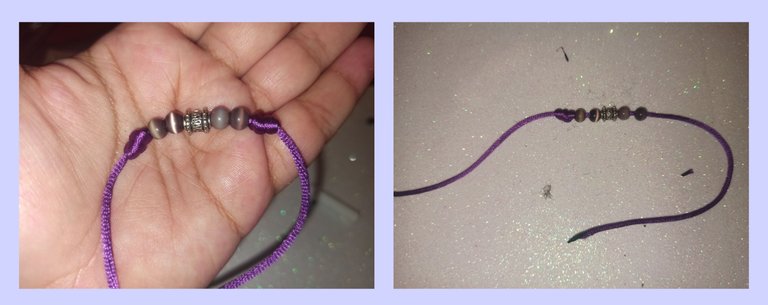
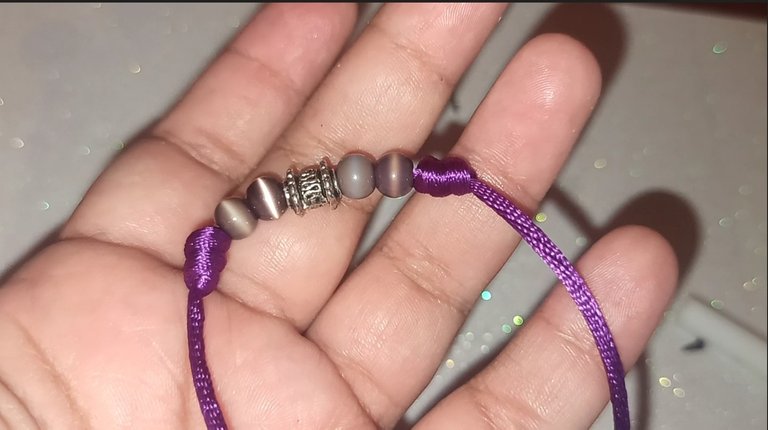
✅ Ya aprendimos a realizar el nudo, ahora vamos a insertar las piedras. Inserte dos piedras, un separador y dos piedras más.
✅ We have already learned how to tie the knot, now let's insert the stones. Insert two stones, one spacer and two more stones.
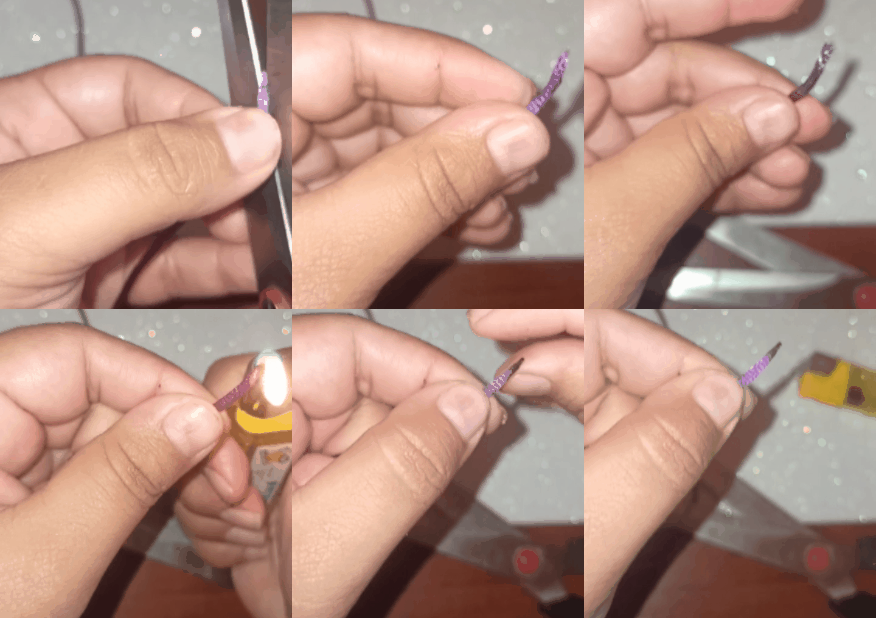
TIP: Hay piedras que los agujeros son pequeños y al introducir las piedras o cristales no entran, para ello, cortamos el extremo por donde pasaremos las piedras, haciendo un piquete en diagonal, luego quemamos con el mechero, contamos 3 segundos (para no quemarnos) y tiramos de la punta para que quede más fina.
TIP: There are stones that the holes are small and when introducing the stones or crystals do not enter, for that, we cut the end where we will pass the stones, making a picket diagonally, then we burn with the lighter, we count 3 seconds (not to burn ourselves) and pull the tip so that it is thinner.
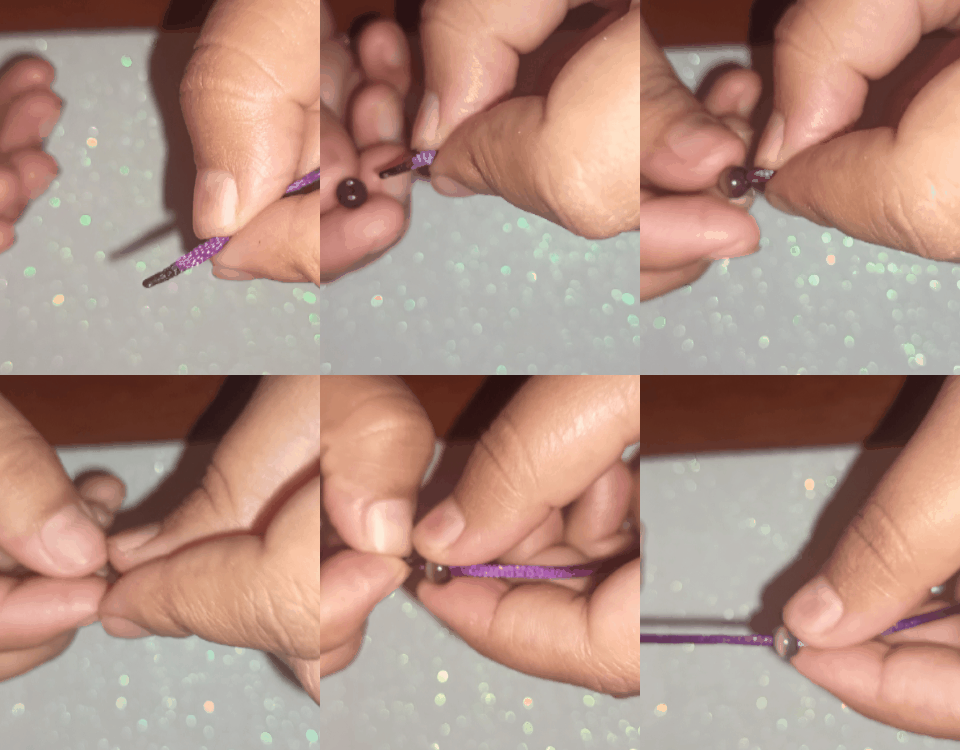
✅ Para sujetar la pedrería, haremos otro nudo franciscano.
✅ To attach the rhinestones, we will tie another Franciscan knot.

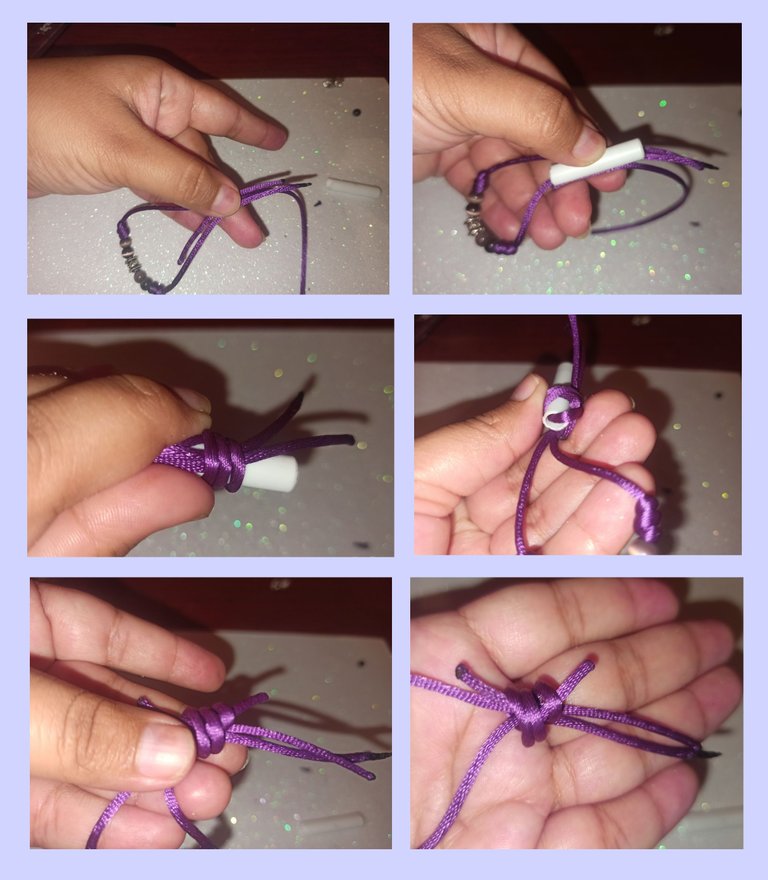
✅ Para el nudo ajustable, que es para ajustar la pulsera a nuestra muñeca. Haremos otros nudos franciscanos. Se necesita un tercer cordón de cola de ratón de 11 cm, colocamos el tercer cordón junto a los otros y empezamos a hacer los nudos: las tres cintas encima del tubito, con el otro extremo del tercer cordón empezamos a hacer las vueltas, 3 vueltas, introducimos el cordón por el agujero del tubito y apretamos el nudo. Cortamos el sobrante y quemamos los extremos para que el nudo no se deshaga.
✅ For the adjustable knot, which is to adjust the bracelet to our wrist. We will make other Franciscan knots. A third 11 cm mouse tail cord is needed, we place the third cord next to the others and start tying the knots: the three ribbons on top of the little tube, with the other end of the third cord we start making the turns, 3 turns, we introduce the cord through the hole of the little tube and tighten the knot. Cut the excess and burn the ends so that the knot does not come undone.
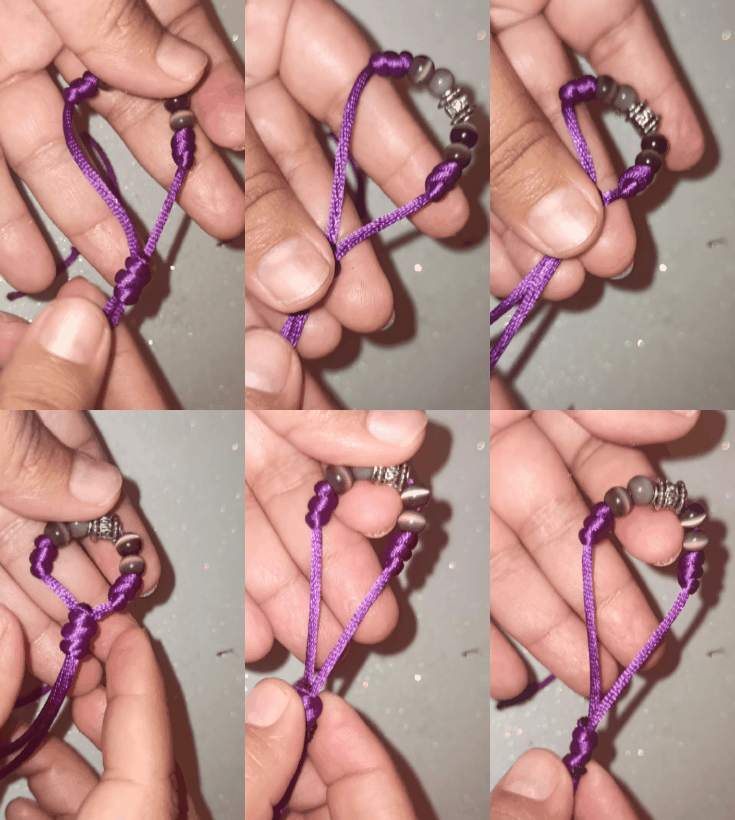
✅ Para terminar, hacemos un nudo en cada extremo, podemos colocar piedras como en el otro modelo.
✅ To finish, we tie a knot at each end, we can place stones as in the other model.
Estaré encantada de leer y responder a sus comentarios. Gracias totales a todos los que aprecian mi contenido, y que se toman el tiempo de leer y dejar un comentario, gracias, muchas gracias. Les deseo lo mejor.
Hasta pronto.
I will be happy to read and respond to your comments. Total thanks to all of you who appreciate my content, and who take the time to read and leave a comment, thank you, thank you very much. I wish you all the best.
See you soon.

Fotografías de mi propiedad tomadas con el celular Redmi note 8 pro, editadas en canva
Traducción realizada con la versión gratuita del
traductor DeepL
Todos los diseños fueron creados en canva
Video editado desde mi teléfono en la App Inshop y CapCut
Música: Pepper Candy
Músico: EnjoyMusic
URL: https://enjoymusic.ai
Photographs of my property taken with the Redmi note 8 pro cell phone, edited in canva
Translation made with the free version of
translator DeepL
All designs were created in canva
Video edited from my phone in the Inshop App and CapCut
Música: Pepper Candy
Músico: EnjoyMusic
URL: https://enjoymusic.ai
▶️ 3Speak
Excelente video amiga @kellyrsa el nudo franciscano es sencillo y queda muy bonito en los accesorios, ambas pulseras muy hermosas, felicidades 👏
Gracias 😊💗 es un honor saber que le ha gustado. Muchas gracias por el apoyo
Debo decir que me ha gustado mucho como has llevado a cabo el contenido en general, puedo notar el gran trabajo que hay detrás del tiempo que le dedicas, las imágenes y todo el procedimiento estan muy bien hecho.
El vídeo me gusto mucho, la melodía de fondo va muy bien con todo el paso a paso que muestras =) Las pulseras han quedado muy bonitas, bueno en realidad todo lo que abarca tu contenido en si a quedado genial.
Gracias por compartirlo, saludos! 😙