¡Hola, hola! Hivers y hermosa comunidad de Jewelry , espero todos se encuentren súper bien, animados e inspirados 💟
El día de hoy les quiero mostrar un nuevo diseño de aretes tejidos a crochet, este diseño lo vi hace un par de meses mientras paseaba por mis redes sociales y me enamoró por completo y hace unos días decidí hacerlos, y como no tenia un patrón pues me dedique a hacer mi propio patrón mientras lo iba tejiendo, la verdad fue bastante fácil tejerlos y estoy realmente feliz con el resultado y por esa razón estoy aquí compartiendo con ustedes mi proceso creativo de este hermoso par de Aretes tejidos a crochet con forma de una margarita deshojada.
Hello, hello! Hivers and beautiful Jewelry community , I hope you all are super well, encouraged and inspired 💟.
Today I want to show you a new design of crocheted earrings, I saw this design a couple of months ago while walking through my social networks and I fell in love with it completely and a few days ago I decided to make them, and as I didn't have a pattern as I dedicated myself to make my own pattern while I was knitting it, the truth was quite easy to knit them and I am really happy with the result and for that reason I am here sharing with you my creative process of this beautiful pair of Crocheted earrings shaped like a daisy leafless.
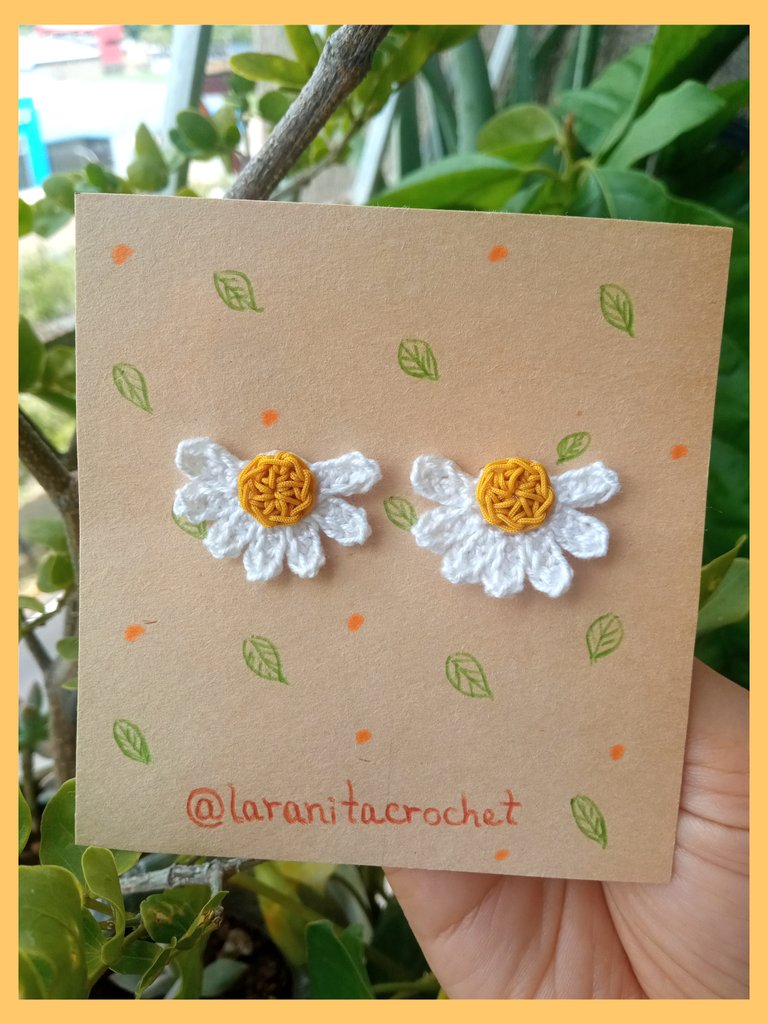
A continuación les contare sobre los materiales que use para realizar los aretes y sobre el proceso de tejido.
MATERIALES:
- Hilo blanco de algodón (use el de la marca Carmencita, que es súper delgado).
- Hilo chino color mostaza.
- Ganchillo #4.
- Aguja lanera.
- Tijeras.
- Un par de aretes tipo clavito.
- Pegamento universal.
Next I will tell you about the materials I used to make the earrings and about the weaving process.
MATERIALS:
- White cotton thread (use the Carmencita brand, which is super thin).
- Mustard-colored Chinese yarn.
- Crochet hook #4.
- Wool needle.
- Scissors.
- A pair of stud earrings.
- Universal glue.

PROCESO DE TEJIDO:
Como les dije anteriormente los aretes los tejí sin tener un patrón previo, pero fueron bastante sencillos de hacer, el mayor inconveniente que tuve fue definir los puntos que usaría para darle a la flor y a los pétalos el tamaño deseado.
Así que primero tejí solo con puntos altos ya que el hilo blanco es tan delgado y los puntos quedaban bastante pequeños, pero el tamaño de la flor resulto muy grande para mi gusto, así que destejí todo y en mi segundo intento use solo medio punto alto en todo el tejido, pero lo quería los aretes un poquito mas pequeños así que al final use puntos bajos y medios puntos altos combinados.
Y ya definido mi patrón realice un diagrama de lo que tejí para ya tenerlo guardado en mi cuaderno de patrones y se me hiciera súper rápido tejerlos en otra ocasión.
WEAVING PROCESS:
As I told you before, I knitted the earrings without a previous pattern, but they were quite simple to make, the biggest problem I had was to define the stitches I would use to give the flower and the petals the desired size.
So first I knitted only with high stitches since the white yarn is so thin and the stitches were quite small, but the size of the flower turned out to be too big for my taste, so I unknitted everything and in my second attempt I used only half high stitches in all the fabric, but I wanted the earrings a little bit smaller so in the end I used low stitches and half high stitches combined.
And once my pattern was defined, I made a diagram of what I knitted so I could keep it in my pattern notebook and I could knit it super fast another time.
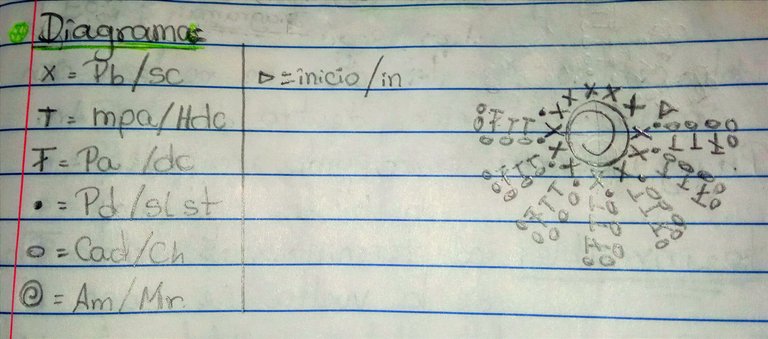
Igual por si aun no entienden los diagramas para tejer, o por si prefieren los patrones escritos, a continuación les describo lo que refleja el diagrama:
- Iniciar tejiendo la base de la flor con hilo blanco.
V1: dentro de un anillo mágico tejer 12 puntos bajos y cerrar con punto deslizado la vuelta.
V2: acá tejeremos los pétalos. Seguido del punto deslizado de cierre de la vuelta anterior, (tejer una cadeneta de 5 puntos y en el 3er punto contando desde la aguja tejer 1Pa, en los siguientes 2 puntos tejer 1mpa en cada uno, y en el siguiente punto bajo realizar un punto deslizado)X7 veces.
However, in case you still do not understand the knitting diagrams, or if you prefer the written patterns, here is what the diagram shows:
- Start by knitting the base of the flower with white yarn.
R1: inside a magic ring knit 12 single crochet stitches and close the row with slip stitch.
R2: Here we will knit the petals. Following the slip stitch of the previous row, (knit a chain of 5 stitches and in the 3rd stitch counting from the needle knit 1dc, in the next 2 stitches knit 1hdc in each stitch, and in the next single crochet knit a slip stitch)X7 times.
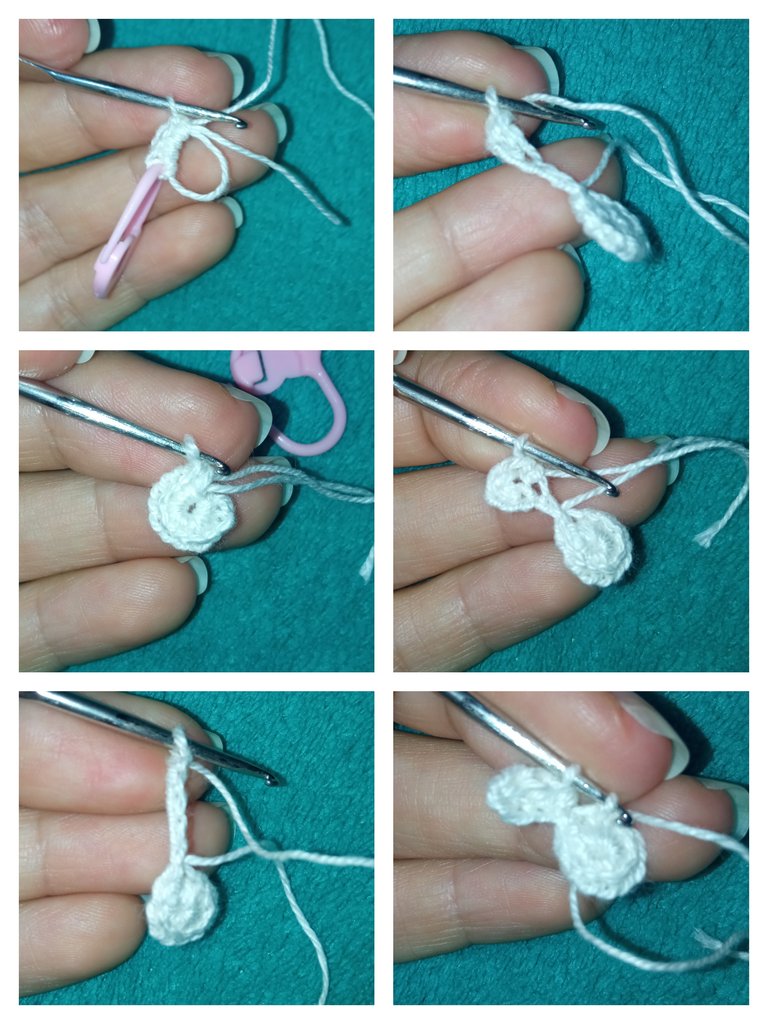

Lo siguiente que hice fue tejer el centro de la flor, este lo teji con hilo chino, que es con el que normalmente tejen pulseras en macramé, tenia este y se me ocurrió probar como se vería tejido y me gusto mucho el resultado, ya que pare plástico por lo firme que queda el tejido.
El centro de la flor lo hice simplemente tejiendo dentro de un anillo mágico 1cad, 7mpa, y cerré con un Pd invisible. cortar y asegurar la hebra.
The next thing I did was to weave the center of the flower, I wove it with Chinese thread, which is normally used to weave macramé bracelets, I had this one and I thought of trying how it would look woven and I really liked the result, since it looks plastic because of how tight the weave is.
I made the center of the flower by simply weaving inside a magic ring 1ch, 7hdc, and closed with an invisible slipped stitch. cut and secure the loop.

Ya para finalizar, pegue bien las dos piezas y luego les pegue el zarcillo tipo clavito por detrás y están listos mis hermosos Aretes de Margarita Deshojada.
Finally, I glued the two pieces together and then I glued the nail type tendril on the back and my beautiful Detached Daisy Earrings are ready.

Realmente deseo les haya gustado tanto como a mí el resultado final de estos hermosos Aretes en forma de Margaritas Deshojadas, y se animen a realizarlos.
I really hope you liked as much as I did the final result of these beautiful Earrings in the shape of Detached Daisies, and I encourage you to make them.
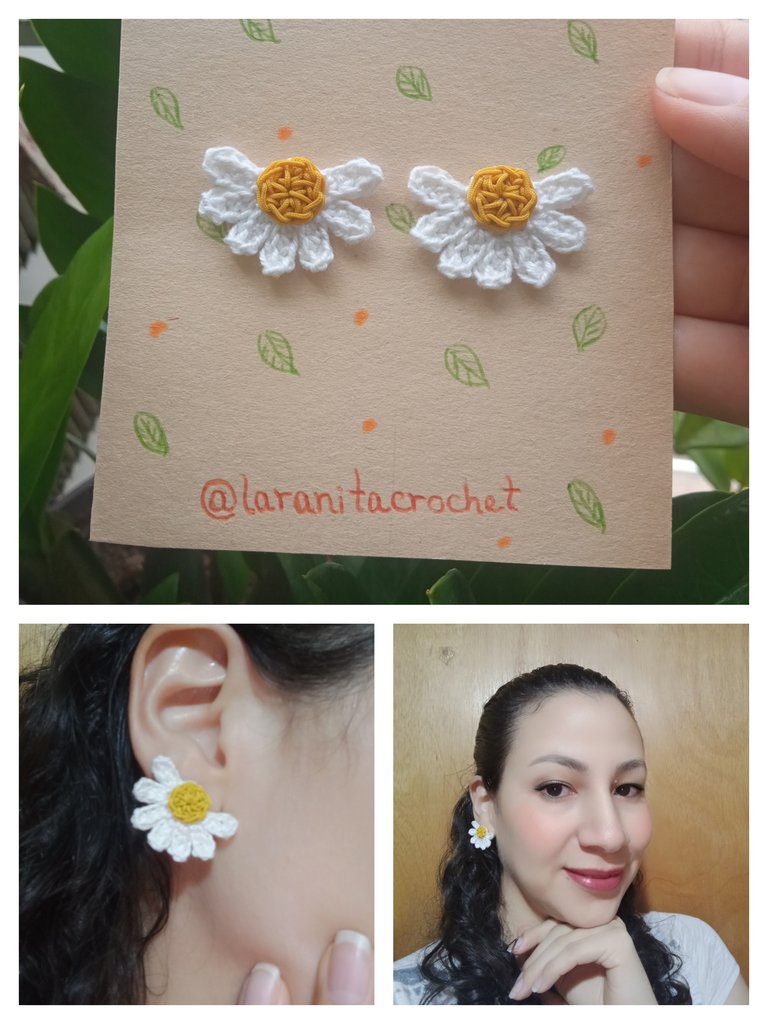
Resultado Final / Final Result
ESPERO SUS BONITOS COMENTARIOS Y/O VOTOS, ASÍ ME MOTIVAN PARA SEGUIR COMPARTIENDO MIS CREACIONES CON USTEDES, YO ESTARÉ FELIZ DE RESPONDER TODOS SUS COMENTARIOS, ¡SEAN FELICES Y QUE LA MUSA DE LA CREATIVIDAD NUNCA LOS ABANDONE!
¡GRACIAS POR VISITAR MI BLOG!
Se despide de ustedes con mucho cariño su amiga Nathalie @laranitacrochet
I HOPE YOUR NICE COMMENTS AND/OR VOTES MOTIVATE ME TO CONTINUE SHARING MY CREATIONS WITH YOU, I WILL BE HAPPY TO ANSWER ALL YOUR COMMENTS, BE HAPPY AND MAY THE MUSE OF CREATIVITY NEVER LEAVE YOU!
THANK YOU FOR VISITING MY BLOG!
Your friend Nathalie @laranitacrochet bids you a fond farewell.
*Todas las fotografías utilizadas en la publicación son propiedad de la autora.
*Las fotografías fueron tomadas y editadas con mi REDMI 9 y con la App FotoRoom.
*La traducción la hice en https://www.deepl.com/es/translator
*All photographs used in this publication are property of the author.
*The pictures were taken and edited with my REDMI 9 and the FotoRoom App.
*The translation was done at https://www.deepl.com/es/translator
¡Hermosos! Me encantan. Saludos, amiga.
Gracias amiga! ☺️
Amiga que hermosos quedaron, me encanta 😍
Me alegra que te gustaran amiga 😊 muchas gracias por tu comentario y por leer mi post.
Que pases un bonito día!
Super coquetos, con una flor encantadora y muy decorativa, te quedaron muy lindos 😊 lucen muy bien puestos ✨
Muchas gracias ☺️ y la verdad me sentí muy linda con ellos puesto 😁
Super lovely earings. The daisy design is so pretty. Nicely done
Muchas gracias 😊
Gracias 😊
Discord Felicitaciones, su publicación ha sido votada por @ dsc-r2cornell. Puedes usar el tag #R2cornell. También, nos puedes encontrar en
Really looks amazing...
Handmade works takes dedication and Love 💖
So beautiful
Thank you ☺️
Welcome
Un par de aretes definitivamente hermosos y delicados.
Gracias por traernos tan bella creación a la comunidad.
Abrazos...
Muchas gracias por tu comentario 😊🤗🌼
Congratulations @laranitacrochet! You received a personal badge!
You can view your badges on your board and compare yourself to others in the Ranking